climate control MERCEDES-BENZ V-CLASS MPV 2021 User Guide
[x] Cancel search | Manufacturer: MERCEDES-BENZ, Model Year: 2021, Model line: V-CLASS MPV, Model: MERCEDES-BENZ V-CLASS MPV 2021Pages: 337, PDF Size: 9.88 MB
Page 131 of 337

ru
nfo r appro ximately five more minutes. It will
th en switch off automaticall y.
When the auxiliary heating is heating and the
engine is star ted, the heater boos ter function of
th e auxiliary heating will be activated.
When the auxiliary heating is ventilating and the
engine is star ted, the auxiliary heating will be
automatically switched off.
Switching the hot- water auxiliary hea ter
on/off with the but ton
Requ irements
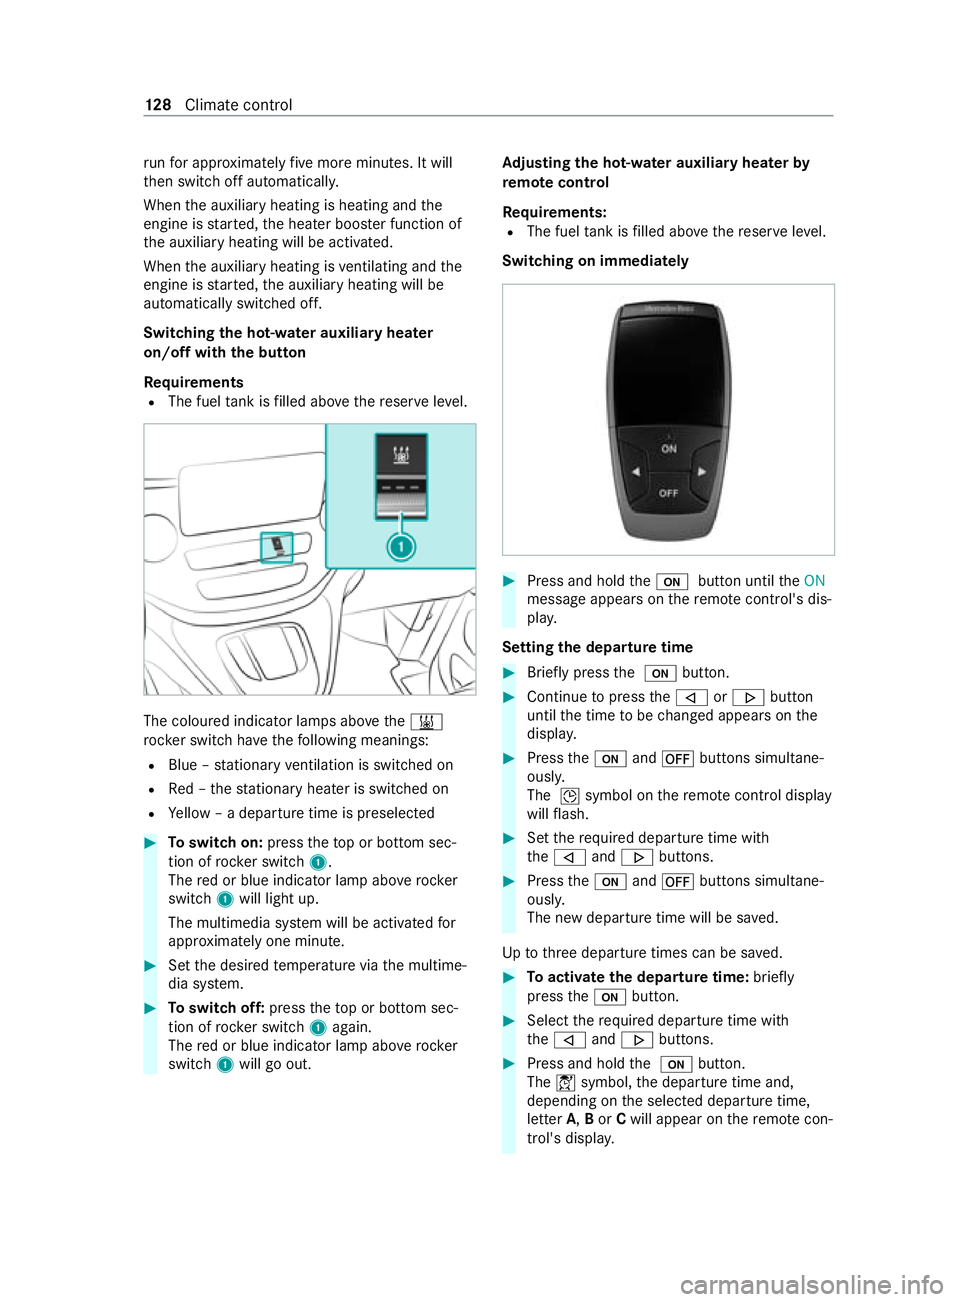
R The fuel tank is filled abo vethere ser veleve l. The coloured indicator lamps abo
vethe003B
rock er switch ha vethefo llowing meanings:
R Blue – stationary ventilation is switched on
R Red – thest ationary heater is swit ched on
R Yellow – a departure time is preselec ted#
Toswitch on: presstheto p or bottom sec‐
tion of rocker switch 1.
The red or blue indicator lamp abo verock er
switch 1will light up.
The multimedia sy stem will be activated for
appr oximately one minute. #
Set the desired temp erature via the multime‐
dia sy stem. #
Toswitch off: presstheto p or bottom sec‐
tion of rocker switch 1again.
The red or blue indicator lamp abo verock er
switch 1will go out. Ad
justing the hot-water auxiliary hea terby
re mo tecontrol
Re quirements:
R The fuel tank is filled abo vethere ser veleve l.
Switching on immediately #
Press and hold the008B button until theON
message appears on there mo tecontrol's dis‐
pla y.
Setting the departu retime #
Brie fly press the 008B button. #
Continue topress the006A or0066 button
until the time tobe changed appears on the
displa y. #
Press the008B and0078 buttons simultane‐
ously.
The 004Dsymbol on there mo tecontrol display
will flash. #
Set therequ ired departure time with
th e006A and0066 buttons. #
Press the008B and0078 buttons simultane‐
ously.
The new departure time will be sa ved.
Up tothre e departure times can be sa ved. #
Toactivate the departu retime: briefly
press the008B button. #
Select there qu ired departure time with
th e006A and0066 buttons. #
Press and hold the 008B button.
The 004Csymbol, the departure time and,
depending on the selected departure time,
letter A,Bor Cwill appear on there mo tecon‐
trol's displa y. 12 8
Climate cont rol
Page 132 of 337

#
Todeactivate the departure time: select
th ere qu ired departure time and press and
hold the0078 button.
OFF will appear on the displa y. #
Tocheck thest atus of the active station‐
ary heater: briefly press the008B button.
Switching off immediately #
Press and hold the 0078 button.
Overview of remo tecontrol displa ys(station‐
ary heating/ventilation) 1
Stationary ventilation switched on
2 Stationary heating swit ched on
3 Selected departure time
4 Remaining stationary heating or ventilation
time (in minu tes)
5 Stationary heating or ventilation acti ve
6 Departure time acti vated
7 Signal stre ngth
Fu rther display options:
R Time: the selected departure time.
R 0 minutes: theru nning time of thest ationary
heating extends as the engine has not yet
re ached the operating temp erature.
R OFF: stationary heating or ventilation has
been switched off.
Changing the remo tecontrol's bat tery (sta‐
tiona ryheater) &
DANG ER Risk of fata l injuries due to
swallowing batteries
Batteries contain toxic and cor rosive subs tan‐
ces. Swallowing batteries may cause se vere
internal burns within two hours.
There is a risk of fata l injuries. #
Keep batteries out of there ach of chil‐
dren. #
Ifth e battery co ver does not close
securely, do not continue touse the
re mo tecontrol, and keep it out of the
re ach of children. #
If batteries are swallo wed, seek medical
attention immediately. +
ENVIRONMEN
TALNO TEEnvironmental
damage due toimproper disposal of bat‐
te ries Batteries contain
toxic and cor ro‐
sive subs tances. #
Ta
ke dischar ged batteries to
a qu alified specialist workshop or to a
collection point for used batteries. Re
quirements
R A CR2450 lithium battery is available.
Mercedes-Benz recommends that you ha vethe
battery replaced byaqu alified specialist work‐
shop. #
Push a pointed object into recess 1. #
Slide battery co ver2 backwards in the
direction of the ar row. #
Insert new battery 3with the lettering
fa cing up wards. #
Slide battery co ver2 onto there mo tecon‐
trol in the opposite direction tothe ar row
until the battery co ver engages. Climate control
12 9
Page 133 of 337

Re
ctifying problems with the hot- water auxili‐
ary hea ter
FA IL00A3 00A3 appea rson there mo tecontrol dis‐
play
Po ssible cause:
R Signal transmission between transmitter and
receiver is malfunctioning. #
Change your position in relation totheve hi‐
cle, moving closer if necessar y.
FA IL appea rson there mo tecontrol display
Po ssible cause:
R The star ter battery is not suf ficiently charge d. #
Charge thest ar ter batter y.
Po ssible cause:
R The fuel tank is not filled up tothere ser ve
le ve l. #
Refuel at the nearest filling station.
FA IL appea rson there mo tecontrol dis‐
play 0099 0099
Po ssible cause:
R The auxiliary heating has malfunctioned. #
Have the auxiliary heating checked at a quali‐
fi ed specialist workshop. Au
xiliary warm-air heater Fu
nction of the auxiliary warm-air heater
Obse rveth e no tes on auxiliary heating
(/ page 126).
The air-intake opening forth e auxiliary warm-air
hea ter is located on the inner side of the left
front seat base. The warm-air outlet is on there ar
side of the left front seat.
The auxiliary warm-air hea ter supplements the
climate control sy stem of your vehicle and has an
auxiliary heating function.
The stationary heater will swit choff automatically
when the engine is switched off or when the set
heating duration has elapsed.
The immediate heating mode of the auxiliary
heating supports the climate cont rol sy stem
when the engine is running and the outside tem‐
perature is lo w. Yo
u ha vethefo llowing options for operating the
auxiliary heating:
R The swit chclock in thestow age compartment
below the cent reconsole
R The switch clock on the lo wer centre console
R Remo tecontrol
Yo u can use the switch clock toset up tothree
departure times for pre-entry clima tecontrol.
Au xiliary warm-air heater switch clo ckove r‐
vi ew
Use the switch clock toconfigu rethefo llowing
settings:
R Swit ching immediate heating mode on/off
R Setting up tothre e preselection times
R Setting the operating duration within a range
of 10 to120 minutes or tocontinuous ope ra‐
tion
R Adjusting the heating le vel (preselec tedte m‐
perature). 1
Program column on the display
0059 Selects preselection memory number
1–3
Mon–Sun, sets da ys
2 Menu bar on the display
0084 Switches immediate heating mode
on/o ff
0045 Setsthe preselection periods
0045 Setsthe da y,time and operating du ra‐
tion
00D1 Setsthe heating le vel
3 Displ aysection for time, heating le vel and
operating duration on the display
00D5 Continuous operation on 13 0
Climate cont rol
Page 135 of 337

Preselecte
d heating mode
Preselected heating mode is available only for
ve hicles that are not equipped totranspo rthaz‐
ardous goods.
Yo u can set thre e preselection periods using the
switch cloc k.
When setting the preselection period, make sure
th at it cor responds not tothe switch-on time but
to the switch-off or departure time. The auxiliary
heating will start up automatically prior todepar‐
ture and runfo rth e set operating duration.
If identical preselection periods (time and day)
are set in the preselection memor y,only the last
preselection period set will be sa ved.
When switching on the auxiliary heating forthe
fi rs t time following a malfunction or voltage sup‐
ply inter ruption, you will need toset the preselec‐
tion periods again. #
Toset the switch-on time: activatethe
switch cloc k. #
Press the00CF or00DB button until the0045
symbol flashes on menu bar 2. #
Press the0076 button.
The preselection memory numbers 0059will
be shown in program column 1. The selec‐
te d preselection memory number will flash. #
Press the00CF or00DB button toselect the
desired preselection memory number. #
Press the0076 button.
The preselection memory number will be
selected. The da yswill be displa yed. #
Set the day and time as described in the "Set‐
ting the da y,time and operating du ration"
section.
The preselection pe riod will be stored. Pro‐
gram column 1will be hidden. The message
on and symbol 0084will appear on display
section 3. #
Press the0076 button.
The operating duration will flash on display
section 3. #
Set the operating duration.
The operating duration forth e preselection
period will be stored. The time and the num‐
ber of the set preselection memory will be
shown.
% An underscore deno
testh e preselection
memory that will be next tobe activated in
chro nological orde r.The selected day will
also be shown. #
Todeactivate the switch-on time: complete
th esteps as described in the "Setting the
switch-on time" section. #
Ifth e0084 symbol is shown on display sec‐
tion 3: press the00CF or00DB button until
off appears. #
Press the0076 button.
The preselection period will be deactivated
and the time will be shown on display section
3.
Operating the auxiliary heating byremo te
control (auxilia rywa rm-air heater)
Yo u can swit chthe auxiliary heating on and off as
we ll as set the operating duration with a remo te
control. The remo tecontrol must be synchron‐
ised wi th the auxiliary heating sy stem receiver.
Fo r more information, please contact a qualified
specialist workshop.
St ore there mo tecontrol forth e auxiliary heating
such that the auxiliary heating function cann otbe
switched on unintentionally. In particular, ensure
th at there mo tecontrol is kept out of there ach of
ch ildren.
The remo tecontrol has a range of appr oximately
300 m. The range is reduced bysources of radio
inter fere nce or solid objects, forex ample. 1
Indicator lamps
2 Confirms settings
3 Swit ches there mo tecontrol on/off
Changing the operating duration or cancel‐
ling or term inating settings
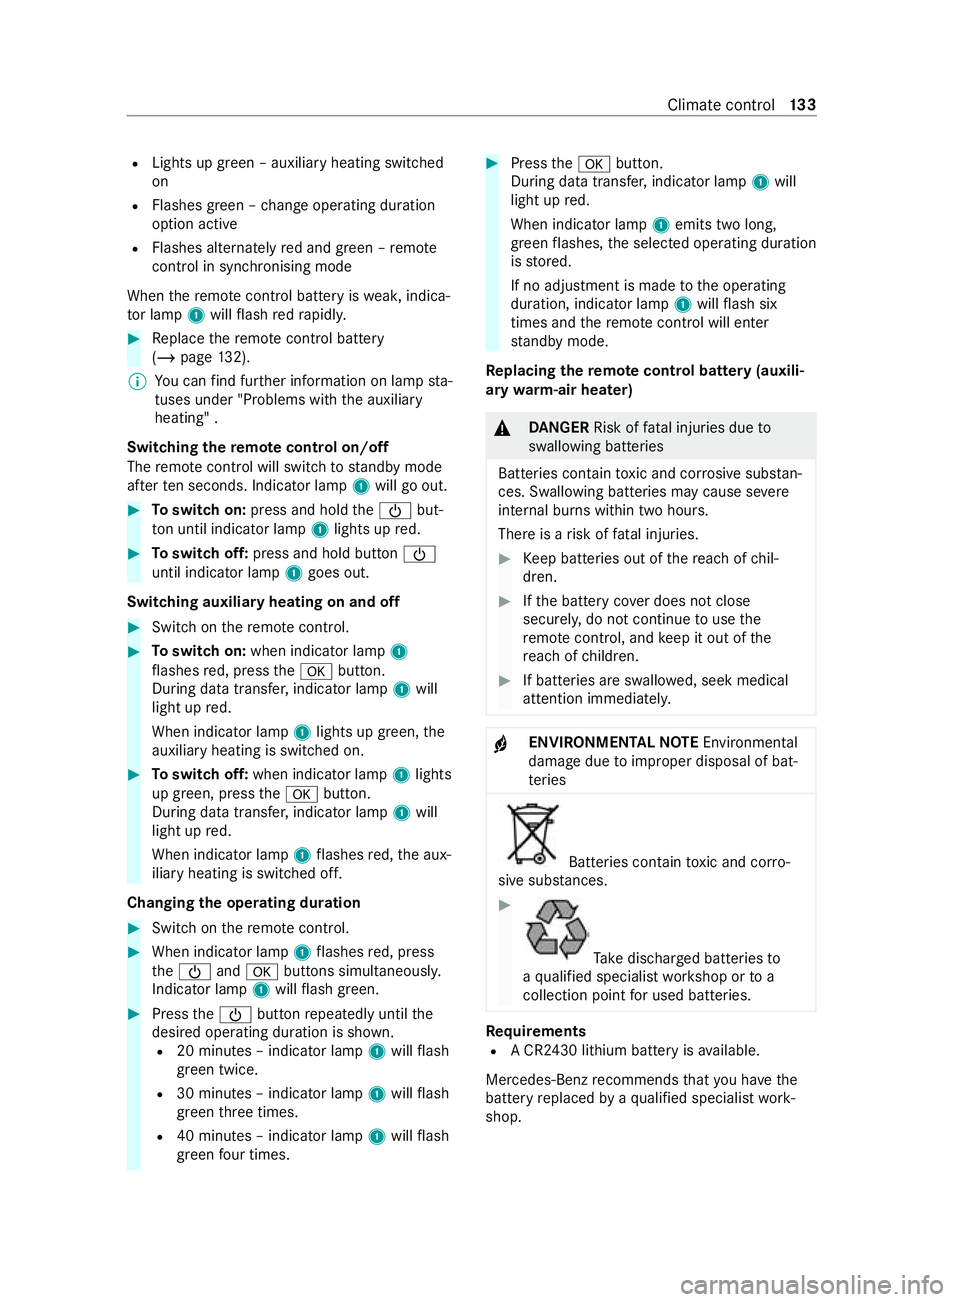
Indicator lamp 1lights up in various ways to
show dif fere nt ope rating modes:
R Lights up red – remo tecontrol switched on
R Flashes red – auxiliary heating switched off 13 2
Climate cont rol
Page 136 of 337

R
Lights up green – auxiliary heating switched
on
R Flashes green – change operating duration
option active
R Flashes alternately red and green – remo te
control in synchronising mode
When there mo tecontrol battery is weak, indica‐
to r lamp 1will flash redra pidl y. #
Replace there mo tecontrol battery
(/ page 132).
% Yo
u can find fur ther information on lamp sta‐
tuses under "Problems with the auxiliary
heating" .
Switching there mo tecontrol on/off
The remo tecontrol will switch tostandby mode
af te rte n seconds. Indicator lamp 1will go out. #
Toswitch on: press and hold the00D0 but‐
to n until indica tor lamp 1lights up red. #
Toswitch off: press and hold button 00D0
until indicator lamp 1goes out.
Switching auxiliary heating on and off #
Switch on there mo tecontrol. #
Toswitch on: when indicator lamp 1
fl ashes red, press the0076 button.
During data transfer, indicator lamp 1will
light up red.
When indicator lamp 1lights up green, the
auxiliary heating is swit ched on. #
Toswitch off: when indicator lamp 1lights
up green, press the0076 button.
During data transfer, indicator lamp 1will
light up red.
When indicator lamp 1flashes red, the aux‐
iliary heating is switched off.
Changing the operating du ration #
Switch on there mo tecontrol. #
When indicator la mp1flashes red, press
th e00D0 and0076 buttons simultaneousl y.
Indicator lamp 1will flash green. #
Press the00D0 button repeatedly until the
desired operating duration is shown. R 20 minutes – indicator lamp 1will flash
green tw ice.
R 30 minutes – indicator lamp 1will flash
green thre e times.
R 40 minutes – indicator lamp 1will flash
green four times. #
Press the0076 button.
During data transfer, indicator lamp 1will
light up red.
When indicator lamp 1emits two long,
green flashes, the selected operating duration
is stored.
If no adjustment is made tothe operating
duration, indicator lamp 1will flash six
times and there mo tecontrol will enter
st andby mode.
Re placing the remo tecontrol bat tery (auxili‐
ary warm-air heater) &
DANG ER Risk of fata l injuries due to
swallowing batteries
Batteries contain toxic and cor rosive subs tan‐
ces. Swallowing batteries may cause se vere
internal burns within two hours.
There is a risk of fata l injuries. #
Keep batteries out of there ach of chil‐
dren. #
Ifth e battery co ver does not close
securely, do not continue touse the
re mo tecontrol, and keep it out of the
re ach of children. #
If batteries are swallo wed, seek medical
attention immediately. +
ENVIRONMEN
TALNO TEEnvironmental
damage due toimproper disposal of bat‐
te ries Batteries contain
toxic and cor ro‐
sive subs tances. #
Ta
ke dischar ged batteries to
a qu alified specialist workshop or to a
collection point for used batteries. Re
quirements
R A CR2430 lithium battery is available.
Mercedes-Benz recommends that you ha vethe
battery replaced byaqu alified specialist work‐
shop. Climate
control 13 3
Page 137 of 337

#
Turn battery co ver2 anticlockwise using a
suita ble object, e.g. a coin, and remo veit. #
Check the seal on battery co ver2 for dam‐
age and replace it if necessar y. #
Remo vebattery 3. #
Insert a new battery 3into the battery com‐
partment with the positive term inal facing
up wa rds.
Use a lint-free clo thtodo so. #
Position battery co ver2 sothat mark 1on
th era ised area points between two recesses
4. #
Turn the battery co ver clockwise as far as it
will go. #
Check all the functions of there mo tecontrol.
Re ctifying problems with the auxiliary warm-
air heater
The display section of the switch clock sho ws
th e message Err.
Po ssible cause:
R The fuel le vel in the fuel tank is too lo w.
The auxiliary heating switches off automati‐
call y. #
Refuel theve hicle. #
Start the auxiliary heating se veral times until
th e fuel lines are full.
Po ssible cause:
R A malfunction has occur red.
The auxiliary heating switches off automati‐
call y. #
Have the auxiliary heating checked at a quali‐
fi ed specialist workshop. The message
iniappears on the display sec‐
tion of the switch clock or the clock is flash‐
ing.
Po ssible cause:
R The on-board electrical sy stem voltage has
been inter rupte d. All sa ved settings ha ve
been dele ted.
Au tomatic hardware de tection is cur rently
acti ve. #
When automatic hardware de tection is com‐
ple te, set the da y,time, operating du ration
and preselection pe riod (/ page131).
The indicator lamp on the remo tecontrol
flashes redra pidl y.
Po ssible cause:
R The remo tecontrol battery is dis charge d.
Data transmission is not possible. #
Replace there mo tecontrol battery
(/ page 133).
The indicator lamp on there mo tecontrol
flashes red and green in rapid succession.
Po ssible cause:
R There is no connection between there mo te
control and there ceiver in theve hicle. #
Change your position in relation totheve hi‐
cle, e.g. hold there mo tecontrol higher or
mo veitto the side. #
Movecloser.
If yo u cannot make a connection and the auxiliary
heating is switched on, you can swit choff the
auxiliary heating only via the switch clock in the
ve hicle.
Po ssible cause:
R The remo tecontrol is not synchronised. #
Have there mo tecontrol synchronised at a
qu alified specialist workshop.
The indicator lamp on there mo tecontrol
slo wly flashes red and green alternatel y.
Po ssible cause:
R The remo tecontrol is not synchronised. #
Have there mo tecontrol synchronised at a
qu alified specialist workshop. 134
Climate cont rol
Page 138 of 337

The auxiliary heating will not switch on or
switches off automatical
ly.
Po ssible cause:
R The air ducts are clogged. #
Ensure that theflow of hot air is not bloc ked. #
Have the auxiliary heating checked at a quali‐
fi ed specialist workshop. Climate
control 13 5
Page 272 of 337

Operating fluids and capacities
Note
s on operating fluids &
WARNING Risk of injury from operating
fl uids harmful to your health
Operating fluids may be poisonous and harm‐
ful to yo ur health. #
Obse rveth ete xt on the original contain‐
ers when using, storing or disposing of
operating fluids. #
Alwaysst ore operating fluids sealed in
th eir original containers. #
Alwayske ep children away from operat‐
ing fluids. +
ENVIRONMEN
TALNO TEEnvironmental
pollution due todisposing of operating
fl uids in a non-environmen tally responsi‐
ble manner Incor
rect disposal of opera tingfluids can
cause considerable damage tothe environ‐
ment. #
Dispose of operating fluids in an envi‐
ro nmentally responsible manner. Operating
fluids include thefo llowing:
R fuels
R exhaust gas af tertre atment additives, e.g.
Ad Blue ®
R lubricants
R coolant
R brake fluid
R windsc reen washer fluid
R climate control sy stem refrigerants
Only use products whi chhave been appr ovedfor
yo ur vehicle byMercedes-Benz. Damage caused
by the use of products that ha venot been
appr oved is not co veredby the Mercedes-Benz
guarantee or goodwill gestures.
Yo u can identify operating fluids appr ovedby
Mercedes-Benz bythefo llowing insc ript ions on
th e container:
R MB-F reigabe (e.g. MB- Freigabe 229. 51 )
R MB-Appr oval (e.g. MB-App rova l 229.51) Fu
rther information on appr oved operating fluids
is available at thefo llowing locations:
R inthe Mercedes-Benz Specifications for Oper‐
ating Fluids at https://be vo.mercedes-
benz.co m (by en tering the designation)
R at a qualified specialist workshop
Ad ditives (special additives) for appro ved operat‐
ing fluids are nei ther requ ired nor permitte d.
Appr oved fuel additives are theex ception. Addi‐
tives can cause engine damage and must there‐
fo re not be added tothe operating fluids.
The use of additives is alw aysth ere sponsibility
of theve hicle operator. The use of additives may
re sult in there striction or loss of your wa rranty
claims. &
WARNING Risk offire or explosion from
fuel
Fu els are highly flammable. #
Fire, naked flames, smoking and crea‐
tion of spar ksmust be avoided. #
Swit choff the ignition and, if available,
th est ationary heater, before and while
re fuelling theve hicle. &
WARNING Risk of injury from fuels
Fu els are poisonous and hazardous to your
health. #
Do not swallow fuel or let it come into
contact with skin,eyes or clo thing. #
Do not inhale fuel vapour. #
Keep children away from fuel. #
Keep doors and windo wsclosed du ring
th ere fuelling process.
If yo u or other people come into contact with
fuel, obser vethefo llowing: #
Immediately rinse fuel off your skin with
soap and water. #
If fuel comes into contact with your
ey es, immediately rinse them thor‐
oughly with clean water.Seek medical
attention immediately. #
Ifyo u swallow fuel, seek medical atten‐
tion immediatel y.Do not induce vomit‐
ing. #
Change immediately out of clo thing that
has come into con tact with fuel. Te
ch nical da ta269
Page 317 of 337

Seat belt............................................. 230
Seat co
ver.......................................... 230
Senso rs.............................................. 229
Ta ilpipes............................................ .229
Tr ailer hit ch........................................ 229
Wa shing byhand................................ 228
Wheels/rims......................................2 29
Wi ndo ws............................................ 229
Wi per blades...................................... 229
Carpet (care)........................................... 230
Car rier sy stems
No tes.................................................. 219
Centre console Between the seats (o verview).............. .12
Lo we r section (o verview)..................... .11
Middle section (o verview).................... .10
St ow age compartment......................... 96
To p (o verview)....................................... .9
Changing a bulb see Changing bulbs
Changing a wheel Lowe ring theve hicle........................... 261
Preparing...........................................2 59
Ra ising theve hicle.............................2 59
Re moving a wheel. ............................. 260
Changing bulbs Light bulb types haloge n headlamps...11 2
No tes.................................................. 111
Changing lamps see Changing bulbs
Cha rging
Bat tery ............................................... 237
Child saf ety lock
Hinged windo ws................................... 48
Child saf ety lock (doors) .......................... 47
Child seat App rova l categories.............................. 40
At tach ing (no tes)..................................40
Basic instructions................................. 37
Fr ont passenger seat (no tes)................46
Fr ont passenger seat (without
automatic airbag shutoff)..................... 45
ISOFIX (fitting)...................................... 42
No tes on risks and dangers.................. 37
Re commended child restra int sys‐
te ms..................................................... 39
Seats suita blefor belt-secu red
ch ild restra int sy stems......................... 44
Seats suitable for ISOFIX child
re stra int sy stems.................................. 41
Secu ring on the co-driver seat.............46
Secu ring on there ar seat.................... .45To
pTe ther............................................ 43
Children Avoiding dangers in theve hicle............ 37
Basic instructions................................. 37
Cigar ette lighter
Fr ont centre console.......................... 102
Cleaning see Care
Climate control Activating/deactivating...................... 12 2
Ac tivating/deactivating ai r-re circu‐
lation mode........................................ 124
Ad justing the air vents........................ 12 6
Air di stribution settings......................1 23
Au xilia ryheating................................. 12 6
Au xilia rywa rm-air hea ter.................... 13 0
Demi sting the windscreen.................. 124
Demi sting windo ws............................. 124
Hot-water auxiliary hea ter.................. 127
Re frigerant......................................... 275
Setting auto matic mode.................... .123
Setting the air distribution.................. 12 3
Setting the air flow .............................. 12 3
Setting thete mp eratur e..................... 124
Switching residual heat utilisation
on/off................................................1 25
Switching the A/C function on/of f.... 12 2
Switching there ar wind owheater
on/off................................................1 25
Switching there set function
on/off (control panel)......................... 124
TEMPMATIC contro l panel.................. 12 0
THERMOTRONIC contro l panel...........121
Ve ntilating theve hicle (con veni‐
ence opening)...................................... 62
Co-driver airbag shutoff see Automatic co-driver airbag shutoff
Cockpit (o verview) .................................... .6
Combination switch see Headlamp flasher
see High beam
see Indicator
Comfort rear ben chseat
Ad justing the seat backres t.................. 79
Constant headlamp mode see Daytime running lights
Co nvenience closing ................................ 63
Con venience opening .............................. 62
Con venience opening/closing ..............12 5
Con versions .............................................. 17314
Index