Clock Mercury Grand Marquis 2000 Owner's Manuals
[x] Cancel search | Manufacturer: MERCURY, Model Year: 2000, Model line: Grand Marquis, Model: Mercury Grand Marquis 2000Pages: 224, PDF Size: 1.61 MB
Page 7 of 224
SCAN
BASS TREB BAL FADE
SIDE
EJ
REW FF1 - 2TAPE
AMSVOL - PUSH ON
SEEK
TUNE
AM
FMCLK
12 3456
FM1ST
L
NORM A/CVENT FLOORFLR • DEFDEF
HI
LO
MAX A/C
OUTSIDE TEMPAUTOMATICOFFFAUTO
HM
OILH
L
RSM
SET
ACC
COAST
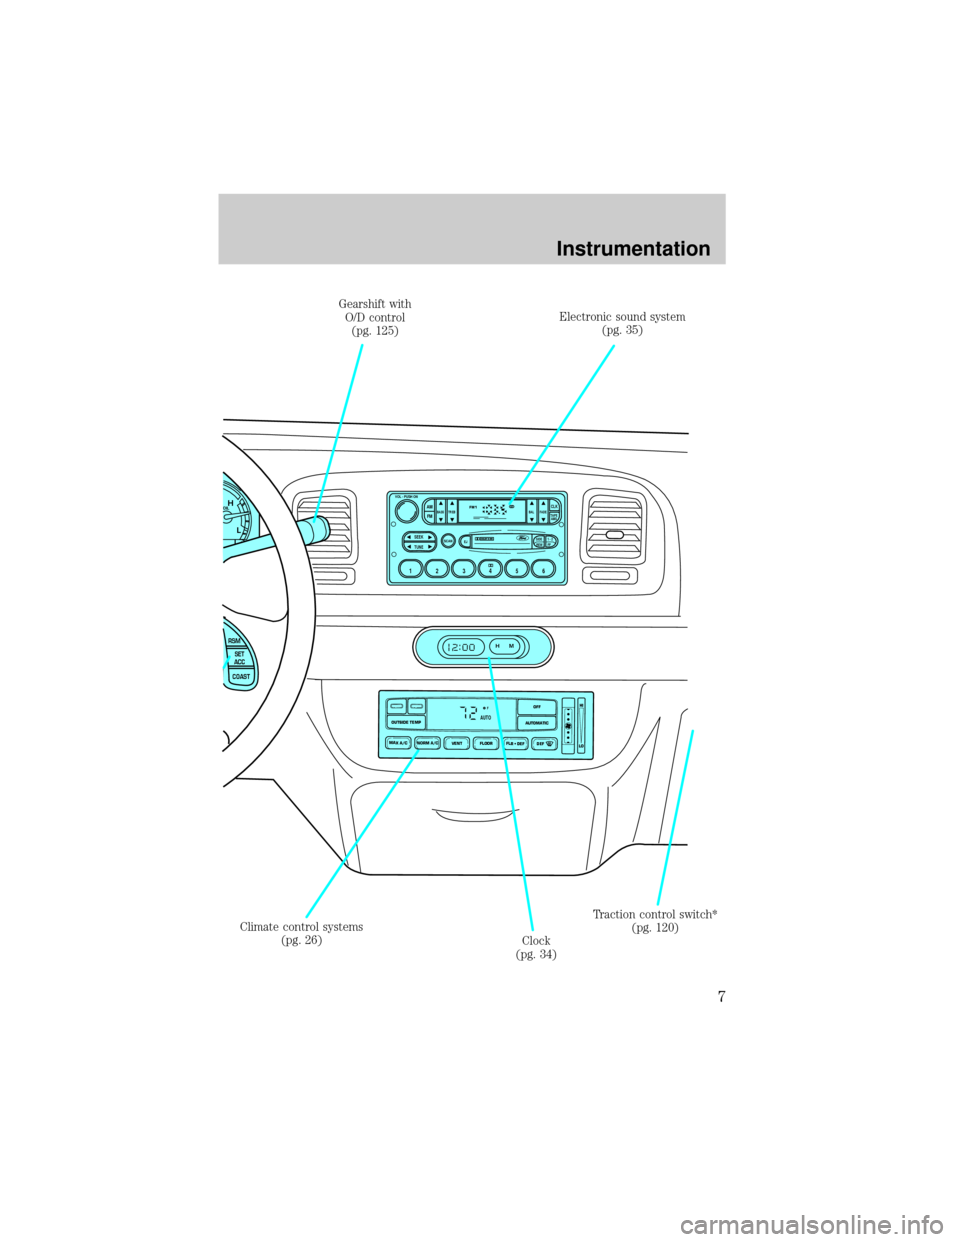
Electronic sound system
(pg. 35)
Climate control systems
(pg. 26)
Clock
(pg. 34)Traction control switch*
(pg. 120) Gearshift with
O/D control
(pg. 125)
Instrumentation
7
Page 25 of 224
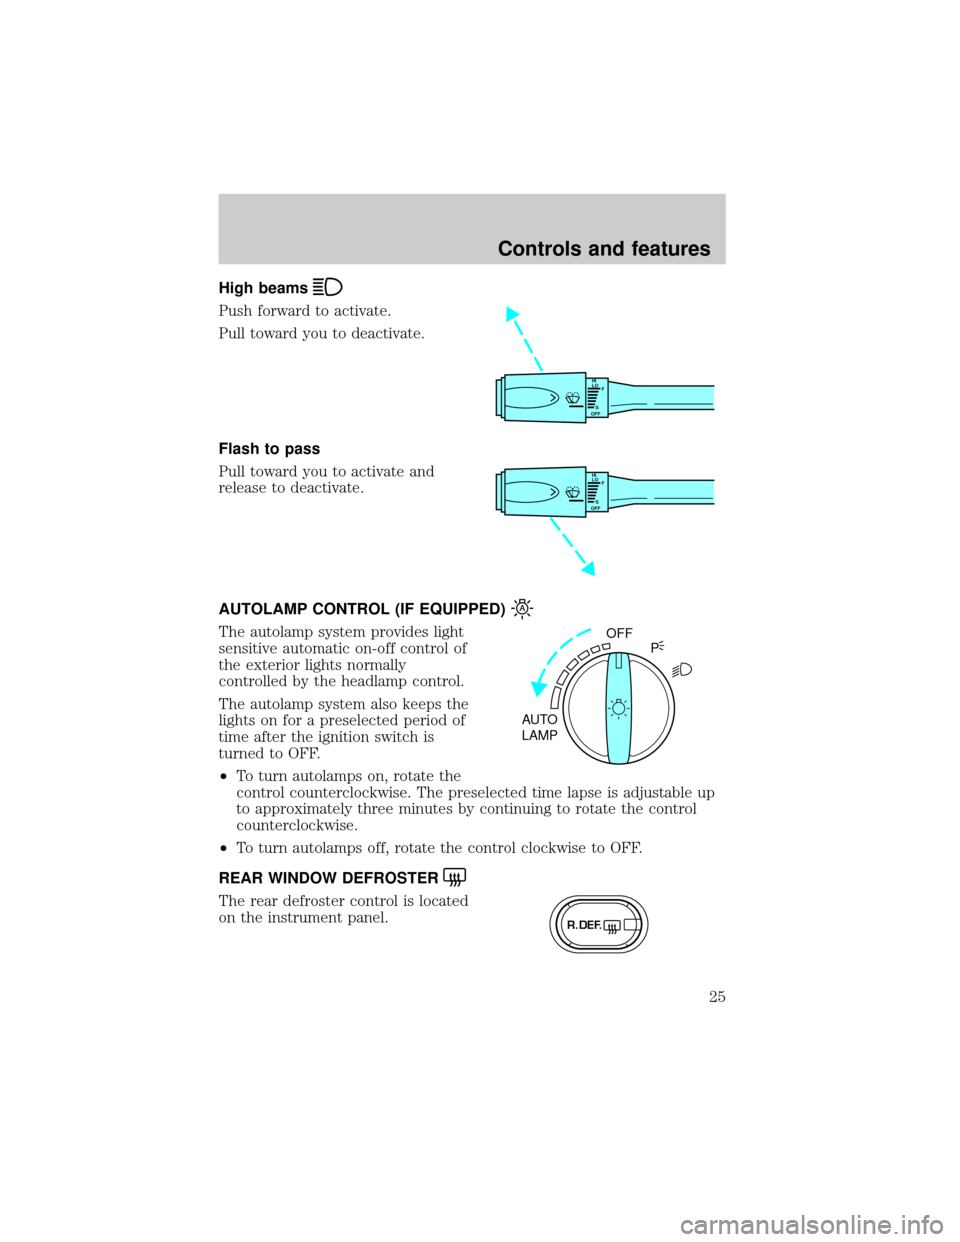
High beams
Push forward to activate.
Pull toward you to deactivate.
Flash to pass
Pull toward you to activate and
release to deactivate.
AUTOLAMP CONTROL (IF EQUIPPED)
The autolamp system provides light
sensitive automatic on-off control of
the exterior lights normally
controlled by the headlamp control.
The autolamp system also keeps the
lights on for a preselected period of
time after the ignition switch is
turned to OFF.
²To turn autolamps on, rotate the
control counterclockwise. The preselected time lapse is adjustable up
to approximately three minutes by continuing to rotate the control
counterclockwise.
²To turn autolamps off, rotate the control clockwise to OFF.
REAR WINDOW DEFROSTER
The rear defroster control is located
on the instrument panel.
HI
LO
F
S
OFF
HI
LO
F
S
OFF
OFF
AUTO
LAMPP
R.DEF.
Controls and features
25
Page 34 of 224
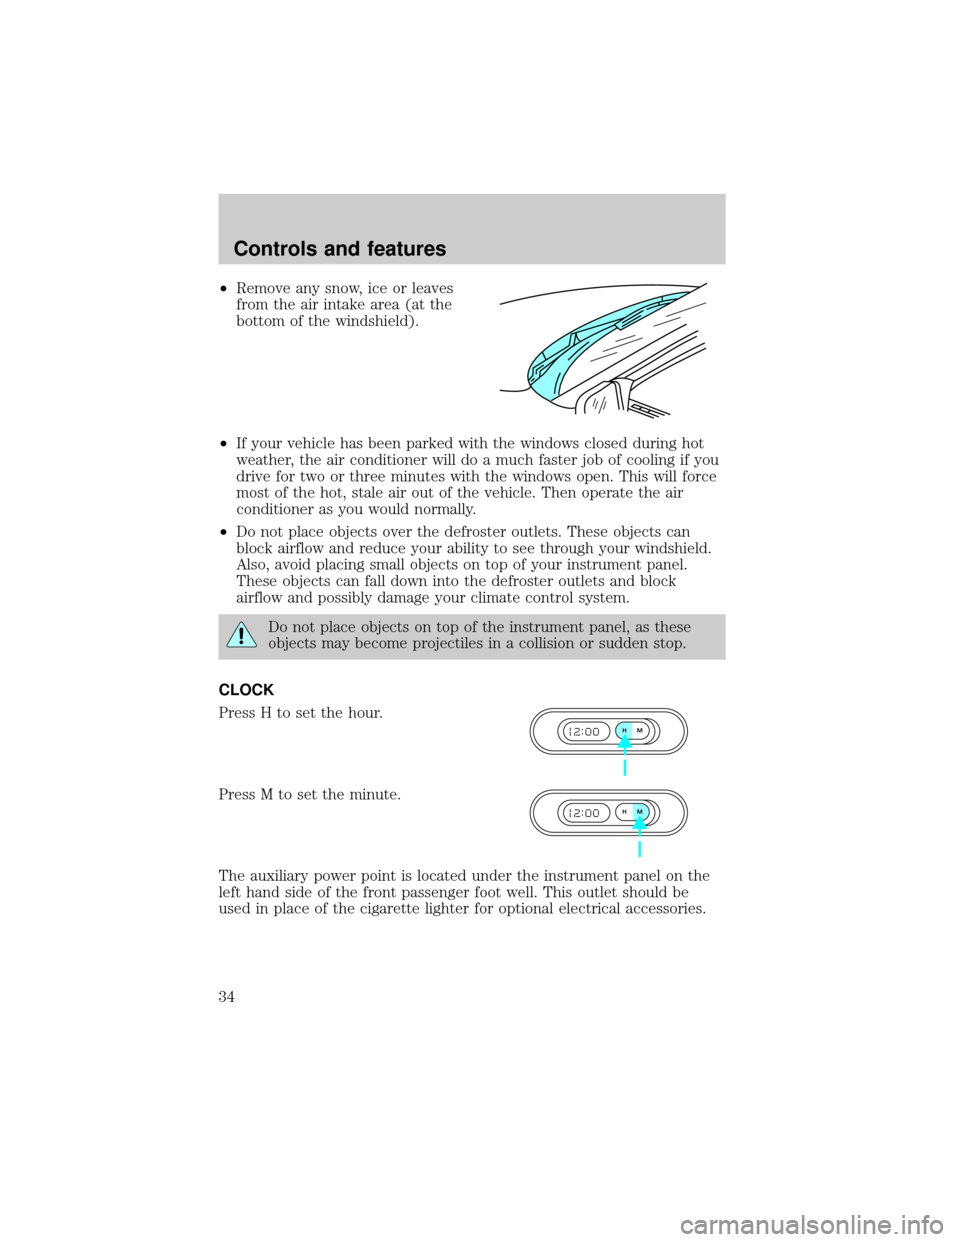
²Remove any snow, ice or leaves
from the air intake area (at the
bottom of the windshield).
²If your vehicle has been parked with the windows closed during hot
weather, the air conditioner will do a much faster job of cooling if you
drive for two or three minutes with the windows open. This will force
most of the hot, stale air out of the vehicle. Then operate the air
conditioner as you would normally.
²Do not place objects over the defroster outlets. These objects can
block airflow and reduce your ability to see through your windshield.
Also, avoid placing small objects on top of your instrument panel.
These objects can fall down into the defroster outlets and block
airflow and possibly damage your climate control system.
Do not place objects on top of the instrument panel, as these
objects may become projectiles in a collision or sudden stop.
CLOCK
Press H to set the hour.
Press M to set the minute.
The auxiliary power point is located under the instrument panel on the
left hand side of the front passenger foot well. This outlet should be
used in place of the cigarette lighter for optional electrical accessories.
HM
HM
Controls and features
34
Page 40 of 224
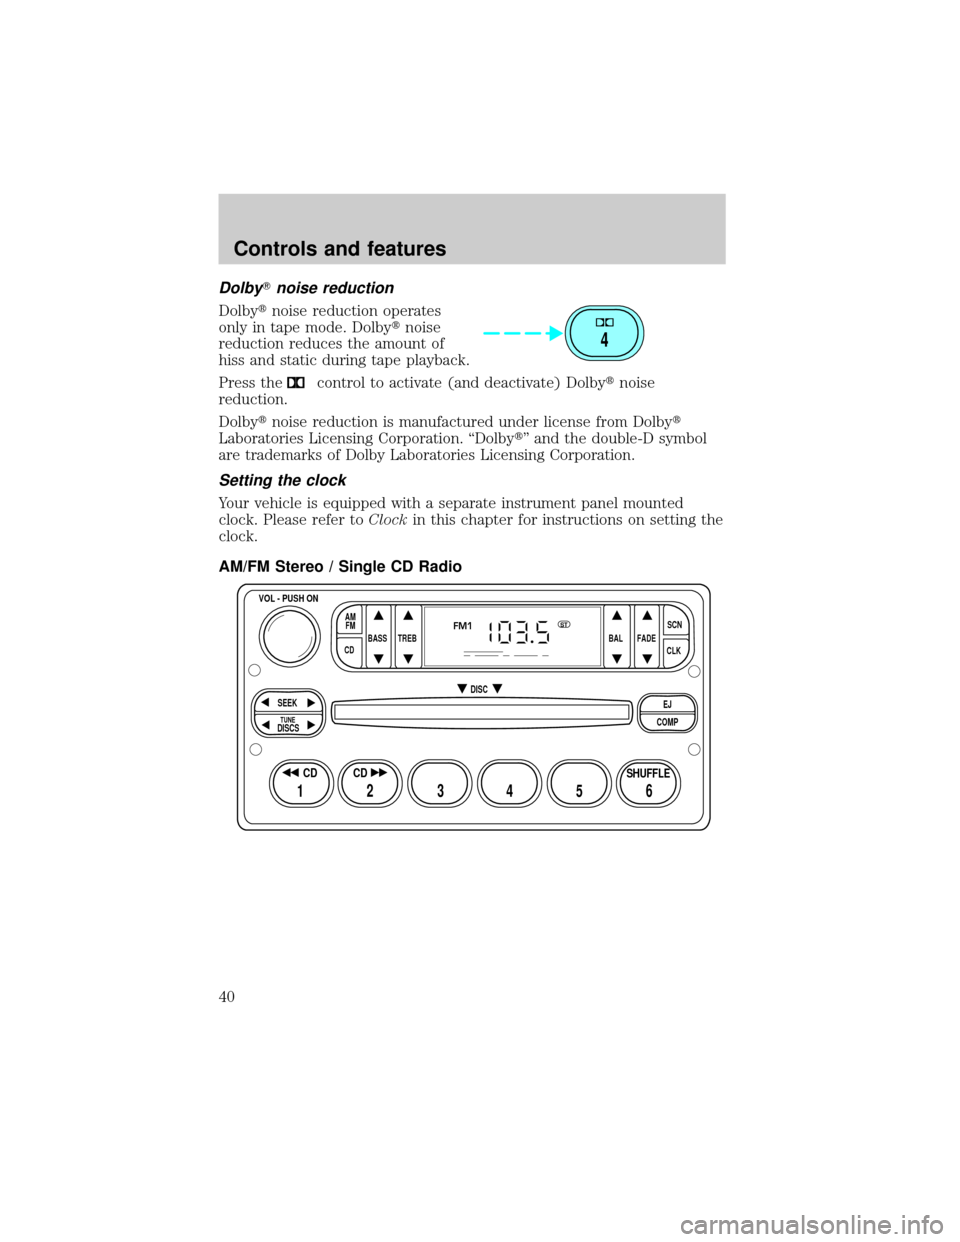
DolbyTnoise reduction
Dolbytnoise reduction operates
only in tape mode. Dolbytnoise
reduction reduces the amount of
hiss and static during tape playback.
Press the
control to activate (and deactivate) Dolbytnoise
reduction.
Dolbytnoise reduction is manufactured under license from Dolbyt
Laboratories Licensing Corporation. ªDolbytº and the double-D symbol
are trademarks of Dolby Laboratories Licensing Corporation.
Setting the clock
Your vehicle is equipped with a separate instrument panel mounted
clock. Please refer toClockin this chapter for instructions on setting the
clock.
AM/FM Stereo / Single CD Radio
4
BASS
CDTREB BAL FADESCN
CLK AM
FM
VOL - PUSH ON
SEEK
EJ
COMP DISC
DISCS
TUNE
12 3456
FM1ST
SHUFFLE CD CD
Controls and features
40
Page 54 of 224
Program type
²Press the RDS control until the
FIND program type is displayed.
²Use the SEL control to select the
program type. With the feature
on, use the SEEK or SCAN
control to find the desired
program type from the following
selections:
²Classic
²Country
²Info
²Jazz
²Oldies
²R&B
²Religious
²Rock
²Soft
²To p 4 0
Show
²With RDS activated, press the
RDS control until SHOW is
displayed.
²Use the SEL control to select
TYPE (the display shows the
program type), NAME (the
display shows the call letters of
the station) or NONE.
RDS clock feature
Refer toSetting the clockfor information.
RDS
SEL
RDS
SEL
Controls and features
54
Page 55 of 224
Setting the clock
Your vehicle is equipped with a separate instrument panel mounted clock.
Please refer toClockin this chapter for instructions on setting the clock.
CD changer (if equipped)
The CD changer is located in one of the following locations:
²in the trunk
²in the center console
²under the driver's seat
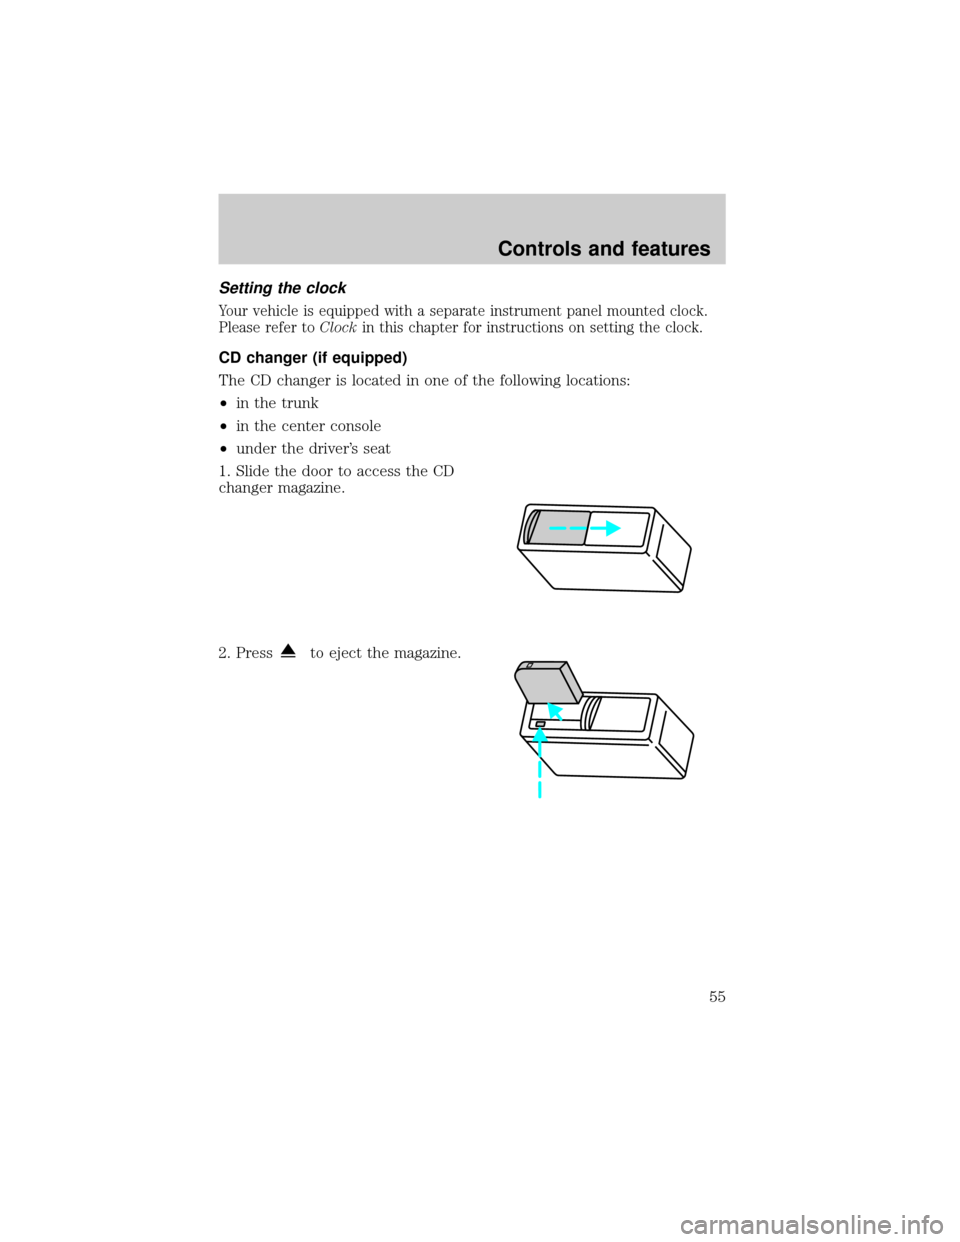
1. Slide the door to access the CD
changer magazine.
2. Press
to eject the magazine.
Controls and features
55
Page 137 of 224
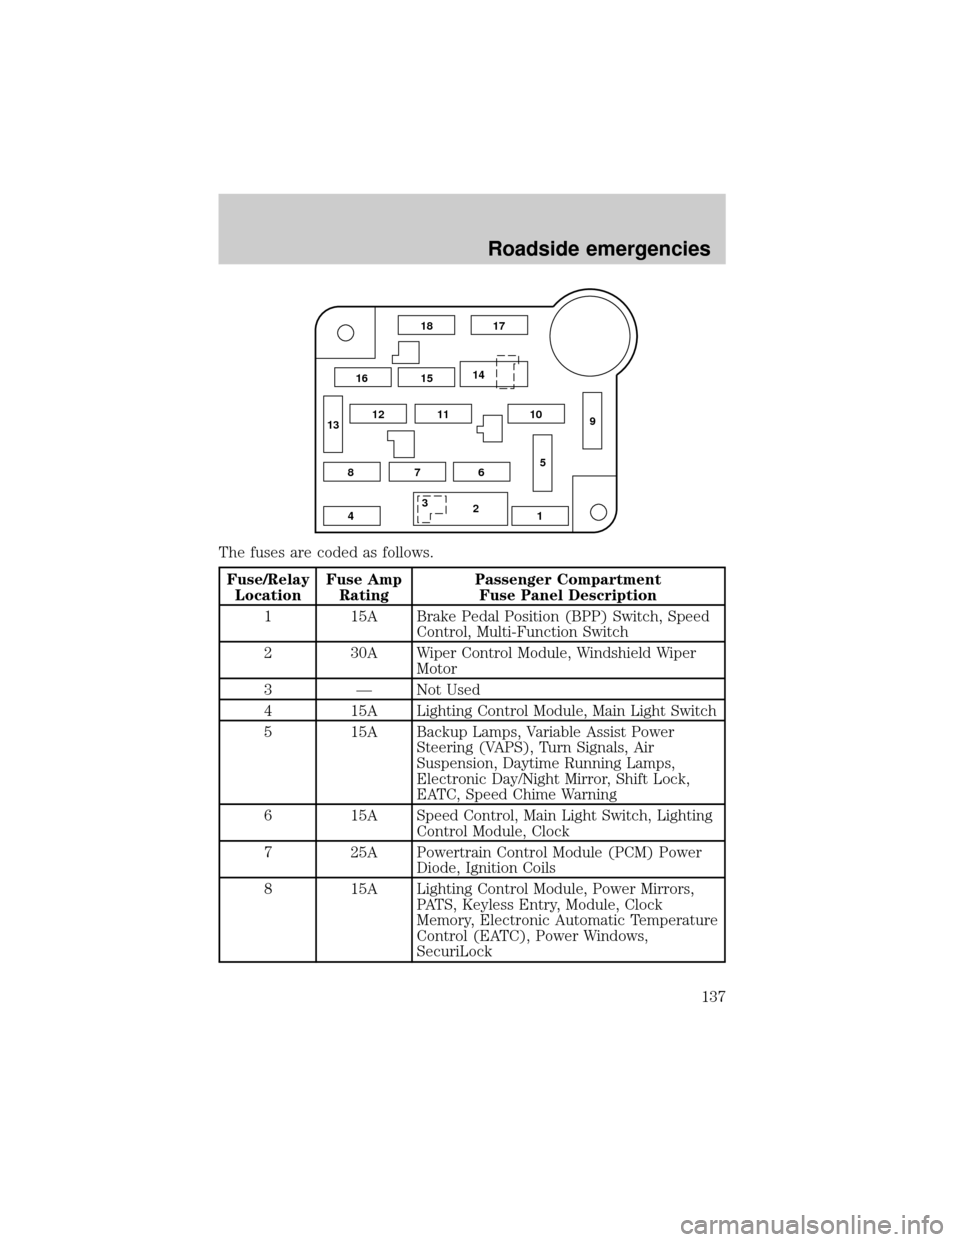
The fuses are coded as follows.
Fuse/Relay
LocationFuse Amp
RatingPassenger Compartment
Fuse Panel Description
1 15A Brake Pedal Position (BPP) Switch, Speed
Control, Multi-Function Switch
2 30A Wiper Control Module, Windshield Wiper
Motor
3 Ð Not Used
4 15A Lighting Control Module, Main Light Switch
5 15A Backup Lamps, Variable Assist Power
Steering (VAPS), Turn Signals, Air
Suspension, Daytime Running Lamps,
Electronic Day/Night Mirror, Shift Lock,
EATC, Speed Chime Warning
6 15A Speed Control, Main Light Switch, Lighting
Control Module, Clock
7 25A Powertrain Control Module (PCM) Power
Diode, Ignition Coils
8 15A Lighting Control Module, Power Mirrors,
PATS, Keyless Entry, Module, Clock
Memory, Electronic Automatic Temperature
Control (EATC), Power Windows,
SecuriLock
18 17
15 16
8
412 7659 12 101114
13
3
Roadside emergencies
137
Page 142 of 224
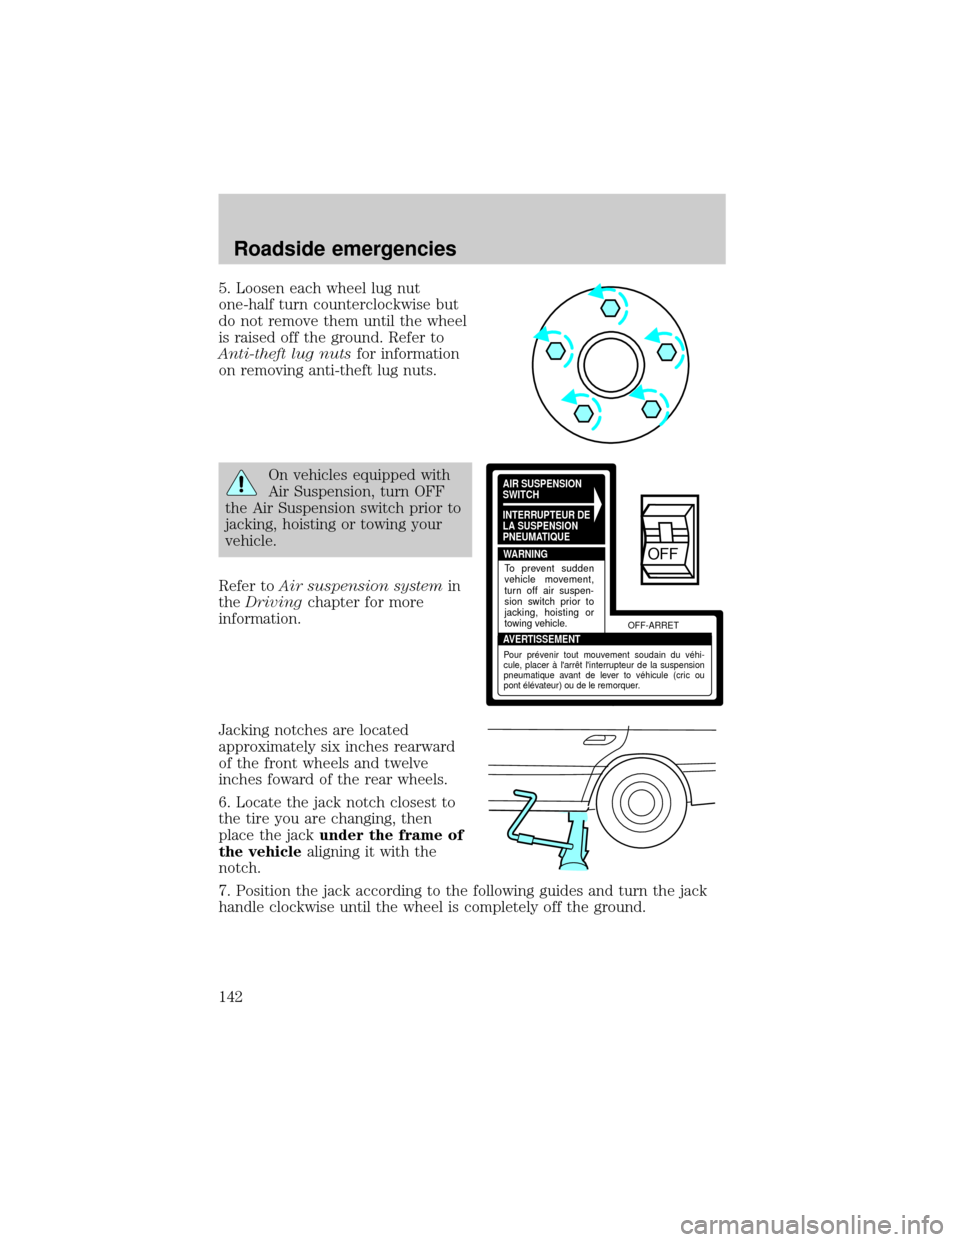
5. Loosen each wheel lug nut
one-half turn counterclockwise but
do not remove them until the wheel
is raised off the ground. Refer to
Anti-theft lug nutsfor information
on removing anti-theft lug nuts.
On vehicles equipped with
Air Suspension, turn OFF
the Air Suspension switch prior to
jacking, hoisting or towing your
vehicle.
Refer toAir suspension systemin
theDrivingchapter for more
information.
Jacking notches are located
approximately six inches rearward
of the front wheels and twelve
inches foward of the rear wheels.
6. Locate the jack notch closest to
the tire you are changing, then
place the jackunder the frame of
the vehiclealigning it with the
notch.
7. Position the jack according to the following guides and turn the jack
handle clockwise until the wheel is completely off the ground.AIR SUSPENSION
SWITCH
INTERRUPTEUR DE
LA SUSPENSION
PNEUMATIQUE
WARNING
AVERTISSEMENTOFF-ARRET
To prevent sudden
vehicle movement,
turn off air suspen-
sion switch prior to
jacking, hoisting or
towing vehicle.
Pour prévenir tout mouvement soudain du véhi-
cule, placer à l'arrêt l'interrupteur de la suspension
pneumatique avant de lever to véhicule (cric ou
pont élévateur) ou de le remorquer.
OFF
Roadside emergencies
142
Page 143 of 224
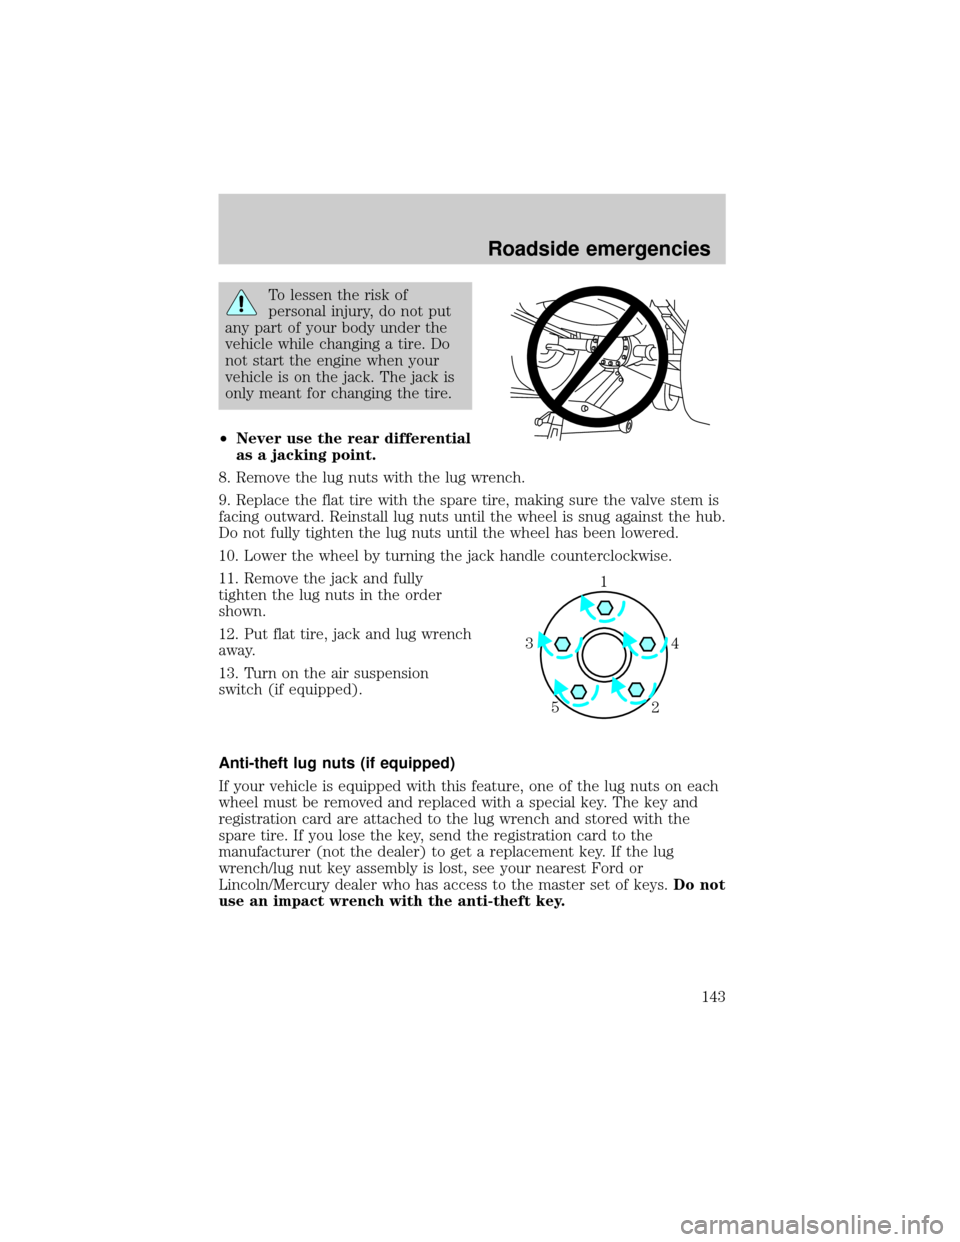
To lessen the risk of
personal injury, do not put
any part of your body under the
vehicle while changing a tire. Do
not start the engine when your
vehicle is on the jack. The jack is
only meant for changing the tire.
²Never use the rear differential
as a jacking point.
8. Remove the lug nuts with the lug wrench.
9. Replace the flat tire with the spare tire, making sure the valve stem is
facing outward. Reinstall lug nuts until the wheel is snug against the hub.
Do not fully tighten the lug nuts until the wheel has been lowered.
10. Lower the wheel by turning the jack handle counterclockwise.
11. Remove the jack and fully
tighten the lug nuts in the order
shown.
12. Put flat tire, jack and lug wrench
away.
13. Turn on the air suspension
switch (if equipped).
Anti-theft lug nuts (if equipped)
If your vehicle is equipped with this feature, one of the lug nuts on each
wheel must be removed and replaced with a special key. The key and
registration card are attached to the lug wrench and stored with the
spare tire. If you lose the key, send the registration card to the
manufacturer (not the dealer) to get a replacement key. If the lug
wrench/lug nut key assembly is lost, see your nearest Ford or
Lincoln/Mercury dealer who has access to the master set of keys.Do not
use an impact wrench with the anti-theft key.
1
4 3
2 5
Roadside emergencies
143
Page 144 of 224
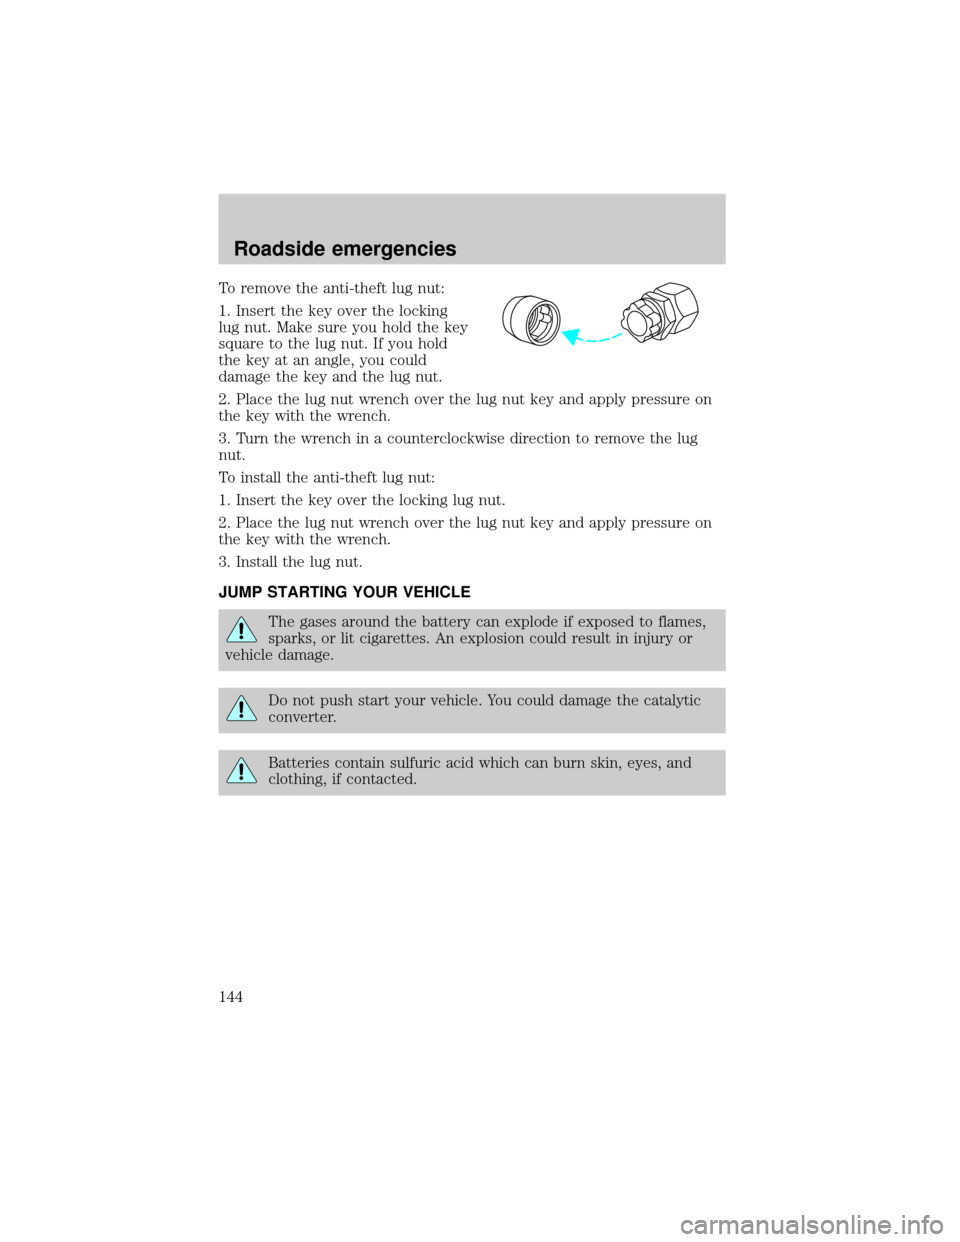
To remove the anti-theft lug nut:
1. Insert the key over the locking
lug nut. Make sure you hold the key
square to the lug nut. If you hold
the key at an angle, you could
damage the key and the lug nut.
2. Place the lug nut wrench over the lug nut key and apply pressure on
the key with the wrench.
3. Turn the wrench in a counterclockwise direction to remove the lug
nut.
To install the anti-theft lug nut:
1. Insert the key over the locking lug nut.
2. Place the lug nut wrench over the lug nut key and apply pressure on
the key with the wrench.
3. Install the lug nut.
JUMP STARTING YOUR VEHICLE
The gases around the battery can explode if exposed to flames,
sparks, or lit cigarettes. An explosion could result in injury or
vehicle damage.
Do not push start your vehicle. You could damage the catalytic
converter.
Batteries contain sulfuric acid which can burn skin, eyes, and
clothing, if contacted.
Roadside emergencies
144