keyless Mercury Grand Marquis 2000 Owner's Manuals
[x] Cancel search | Manufacturer: MERCURY, Model Year: 2000, Model line: Grand Marquis, Model: Mercury Grand Marquis 2000Pages: 224, PDF Size: 1.61 MB
Page 75 of 224
REMOTE ENTRY SYSTEM (IF EQUIPPED)
The remote entry system allows you to lock or unlock all vehicle doors
without a key.
The remote entry features only operate with the ignition in the OFF
position.
If there is any potential remote keyless entry problem with your vehicle,
ensureALL key fobs(remote entry transmitters) are brought to the
dealership, to aid in troubleshooting.
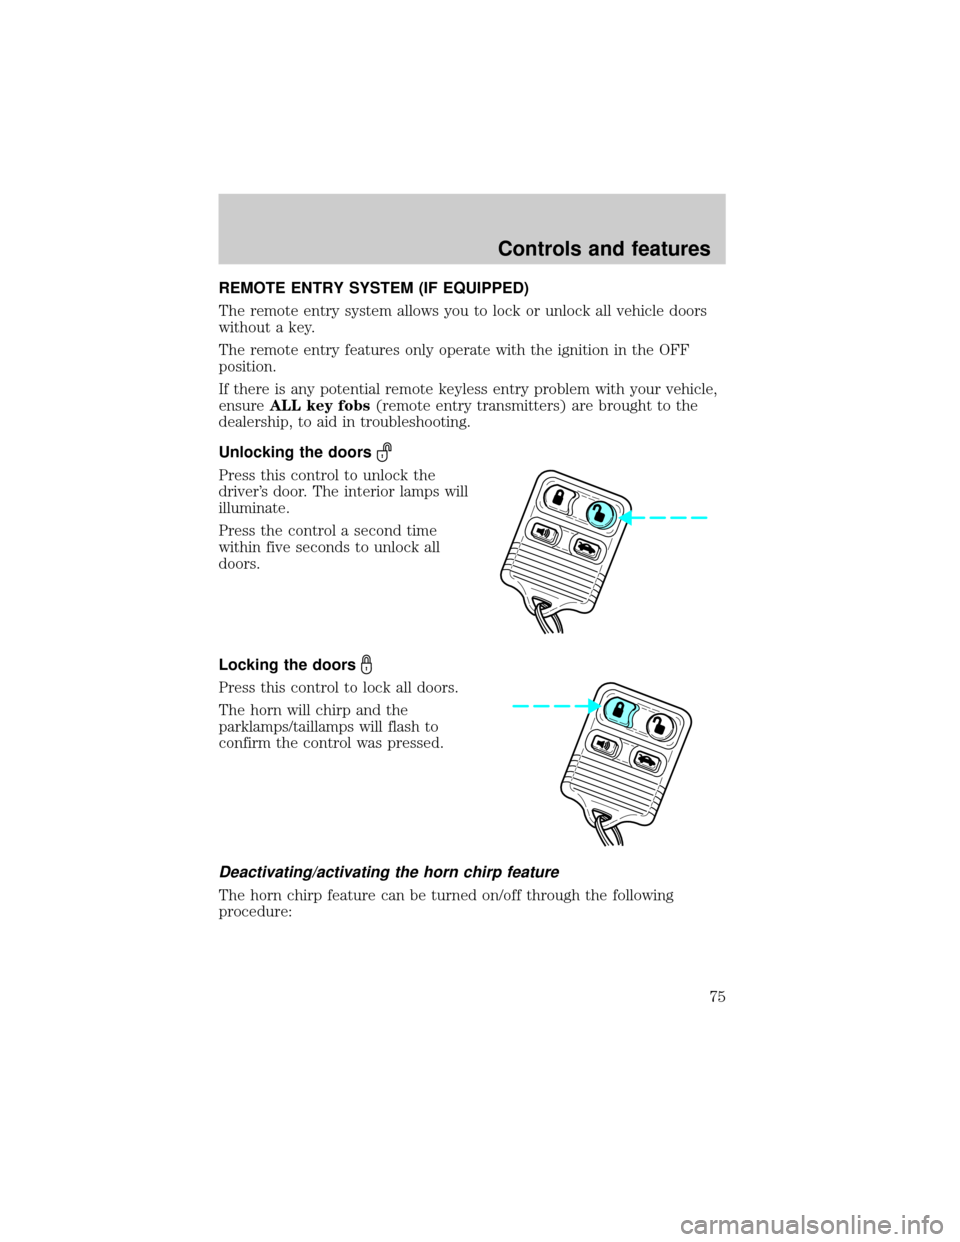
Unlocking the doors
Press this control to unlock the
driver's door. The interior lamps will
illuminate.
Press the control a second time
within five seconds to unlock all
doors.
Locking the doors
Press this control to lock all doors.
The horn will chirp and the
parklamps/taillamps will flash to
confirm the control was pressed.
Deactivating/activating the horn chirp feature
The horn chirp feature can be turned on/off through the following
procedure:
Controls and features
75
Page 76 of 224
You must complete steps 1-7 within 30 seconds or the procedure will
have to be repeated. If the procedure needs to be repeated, you must
wait 30 seconds.
1. Turn the ignition key to ON.
2. Press the power door unlock control on the door panel three times.
3. Turn the ignition key from ON to OFF.
4. Press the power door unlock control three times.
5. Turn the ignition back to ON. The door locks will cycle lock/unlock.
6. Press the unlock control twice.
7. After a five to ten second delay, the door locks will cycle lock/unlock
to confirm successful programming.
8. Turn the ignition to OFF.
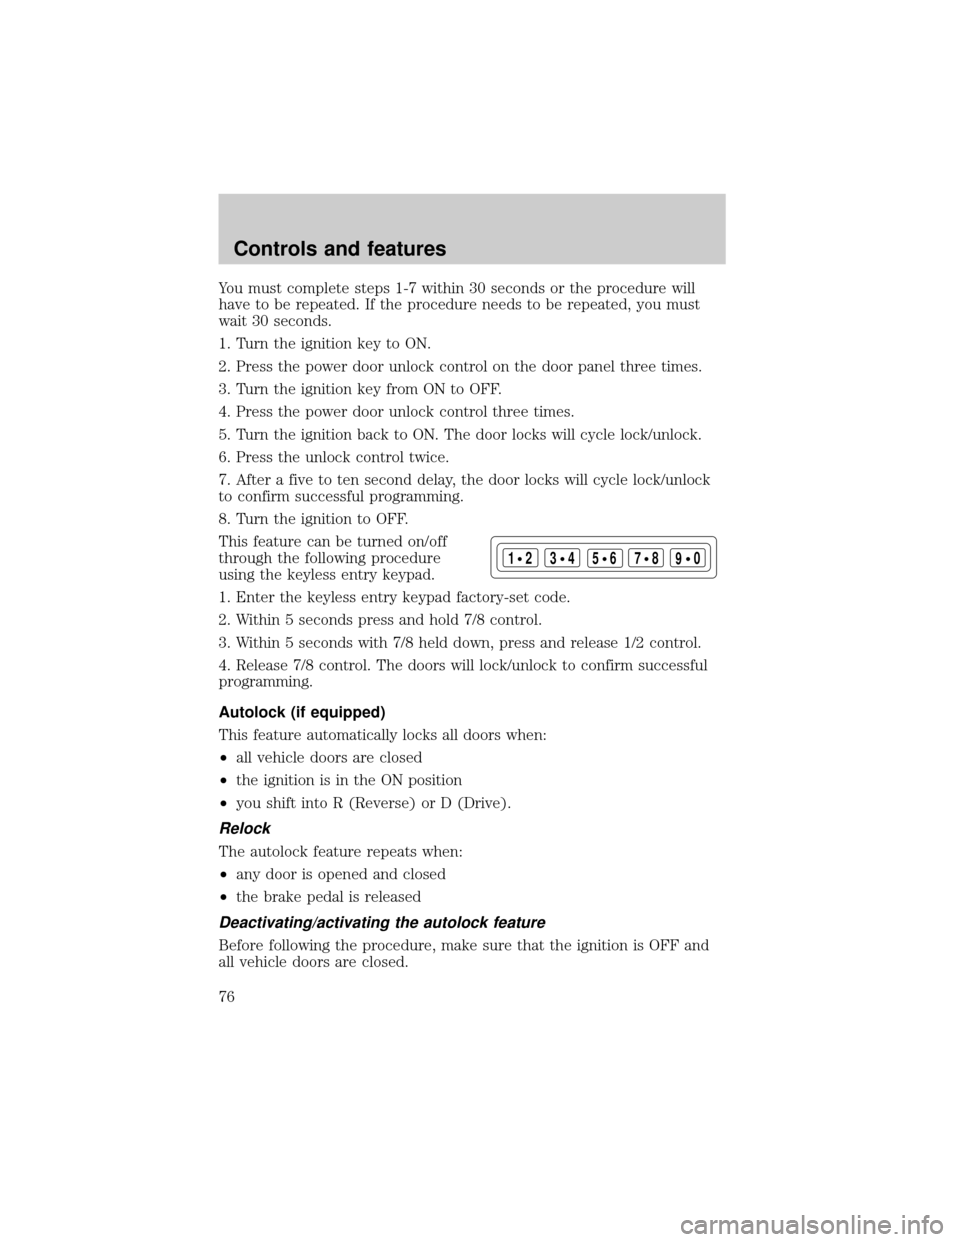
This feature can be turned on/off
through the following procedure
using the keyless entry keypad.
1. Enter the keyless entry keypad factory-set code.
2. Within 5 seconds press and hold 7/8 control.
3. Within 5 seconds with 7/8 held down, press and release 1/2 control.
4. Release 7/8 control. The doors will lock/unlock to confirm successful
programming.
Autolock (if equipped)
This feature automatically locks all doors when:
²all vehicle doors are closed
²the ignition is in the ON position
²you shift into R (Reverse) or D (Drive).
Relock
The autolock feature repeats when:
²any door is opened and closed
²the brake pedal is released
Deactivating/activating the autolock feature
Before following the procedure, make sure that the ignition is OFF and
all vehicle doors are closed.
123
45678
90
Controls and features
76
Page 77 of 224

Automatic door locks can be turned on/off with the keyless entry keypad
through the following procedure:
You must complete steps 1-5 within 30 seconds or the procedure will
have to be repeated. If the procedure needs to be repeated, you must
wait 30 seconds.
1. Enter the keyless entry keypad factory code.
2. Within 5 seconds, press and hold control 7/8.
3. Within 5 seconds (while holding down control 7/8), press and release
control 3/4.
4. Release control 7/8.
The door will lock/unlock to confirm the feature has been disabled. Once
disabled, the feature can be enabled by repeating the same sequence.
Automatic door locks can also be turned on/off through the following
procedure:
You must complete steps 1-7 within 30 seconds or the procedure will
have to be repeated. If the procedure needs to be repeated, you must
wait 30 seconds.
1. Turn the ignition key to ON.
2. Press the power door unlock control on the door panel three times.
3. Turn the ignition key from ON to OFF.
4. Press the power door unlock control three times.
5. Turn the ignition back to ON.
6. Press the unlock control once. After a five to ten second delay, the
door will lock/unlock to confirm successful programming.
7. Turn the ignition to OFF.
Controls and features
77
Page 82 of 224

You will need to have two previously programmed coded keys and the
new unprogrammed SecuriLockykey readily accessible for timely
implementation of each step in the procedure. Please read and
understand the entire procedure before you begin.
1. Insert the first previously programmed coded key into the ignition and
turn the ignition from OFF to ON (maintain ignition in ON for at least
one second).
2. Turn ignition to OFF and remove the first coded key from the ignition.
3. Within five seconds of turning the ignition to OFF, insert the second
previously programmed coded key into the ignition and turn the ignition
from OFF to ON (maintain ignition in ON for at least one second but no
more than five seconds).
4. Turn the ignition to OFF and remove the second coded key from the
ignition.
5. Within 10 seconds of turning the ignition to OFF, insert the new
unprogrammed key (new key/valet key) into the ignition and turn the
ignition from OFF to ON (maintain ignition in ON for at least one
second). This step will program your new key to a coded key.
6. To program additional new unprogrammed key(s), repeat this
procedure from step 1.
If the programming procedure was successful, the new coded key(s) will
start the vehicle's engine. The theft indicator (located on the instrument
panel) will light for three seconds and then go out.
If the programming procedure was not successful, the new coded key(s)
will not operate the vehicle's engine. The theft indicator will flash on and
off. Wait at least one minute and then repeat the procedure from step 1.
If failure repeats, bring your vehicle to your dealership to have the new
spare key(s) programmed.
KEYLESS ENTRY SYSTEM
With the keyless entry keypad, you
can:
²lock or unlock the vehicle doors
without using the key.
²open trunk
²disable/enable horn chirp.
²disable/enable autolock
123
45678
90
Controls and features
82
Page 83 of 224
See alsoRemote entry systemin this chapter for more information.
Your vehicle has a factory-set 5±digit code that operates the keyless
entry system. You can also program your own 5±digit personal entry
code.
The factory-set code is located:
²on the owner's wallet card in the glove compartment
²taped to the computer module
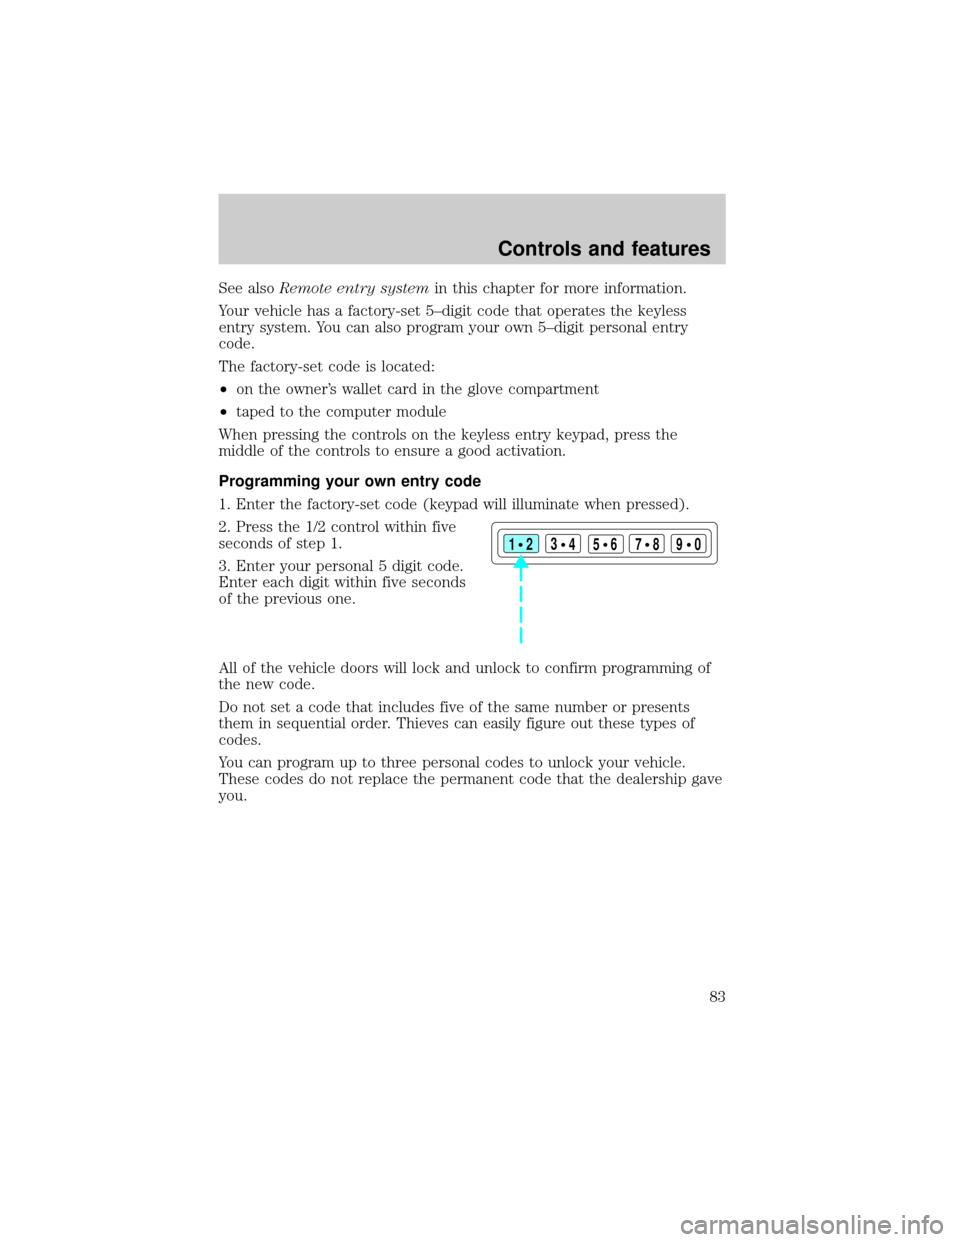
When pressing the controls on the keyless entry keypad, press the
middle of the controls to ensure a good activation.
Programming your own entry code
1. Enter the factory-set code (keypad will illuminate when pressed).
2. Press the 1/2 control within five
seconds of step 1.
3. Enter your personal 5 digit code.
Enter each digit within five seconds
of the previous one.
All of the vehicle doors will lock and unlock to confirm programming of
the new code.
Do not set a code that includes five of the same number or presents
them in sequential order. Thieves can easily figure out these types of
codes.
You can program up to three personal codes to unlock your vehicle.
These codes do not replace the permanent code that the dealership gave
you.
123
45678
90
Controls and features
83
Page 84 of 224
Erasing personal code
To erase all of the personal entry codes programmed to a vehicle:
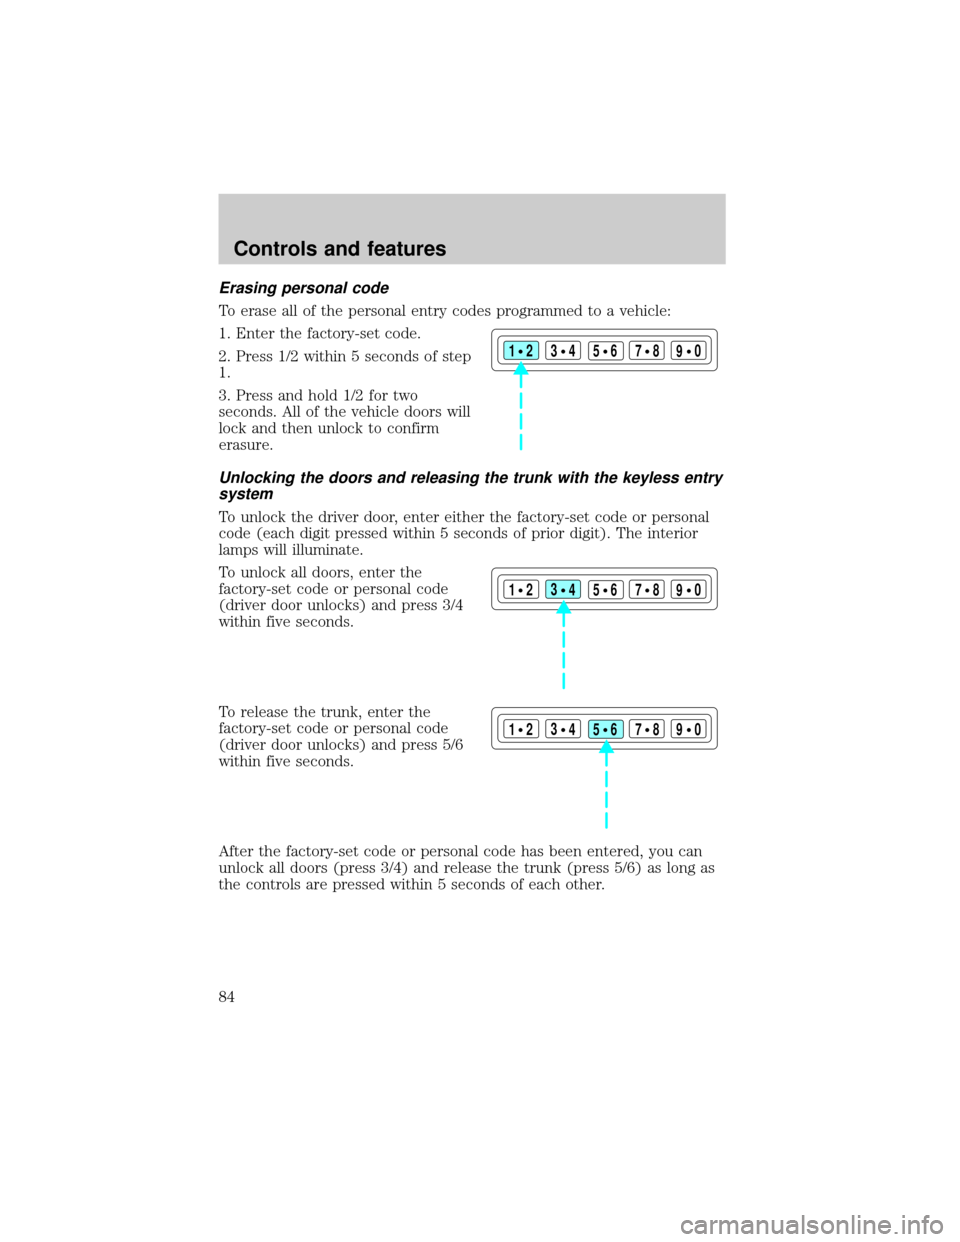
1. Enter the factory-set code.
2. Press 1/2 within 5 seconds of step
1.
3. Press and hold 1/2 for two
seconds. All of the vehicle doors will
lock and then unlock to confirm
erasure.
Unlocking the doors and releasing the trunk with the keyless entry
system
To unlock the driver door, enter either the factory-set code or personal
code (each digit pressed within 5 seconds of prior digit). The interior
lamps will illuminate.
To unlock all doors, enter the
factory-set code or personal code
(driver door unlocks) and press 3/4
within five seconds.
To release the trunk, enter the
factory-set code or personal code
(driver door unlocks) and press 5/6
within five seconds.
After the factory-set code or personal code has been entered, you can
unlock all doors (press 3/4) and release the trunk (press 5/6) as long as
the controls are pressed within 5 seconds of each other.
123
45678
90
123
45678
90
123
45678
90
Controls and features
84
Page 85 of 224
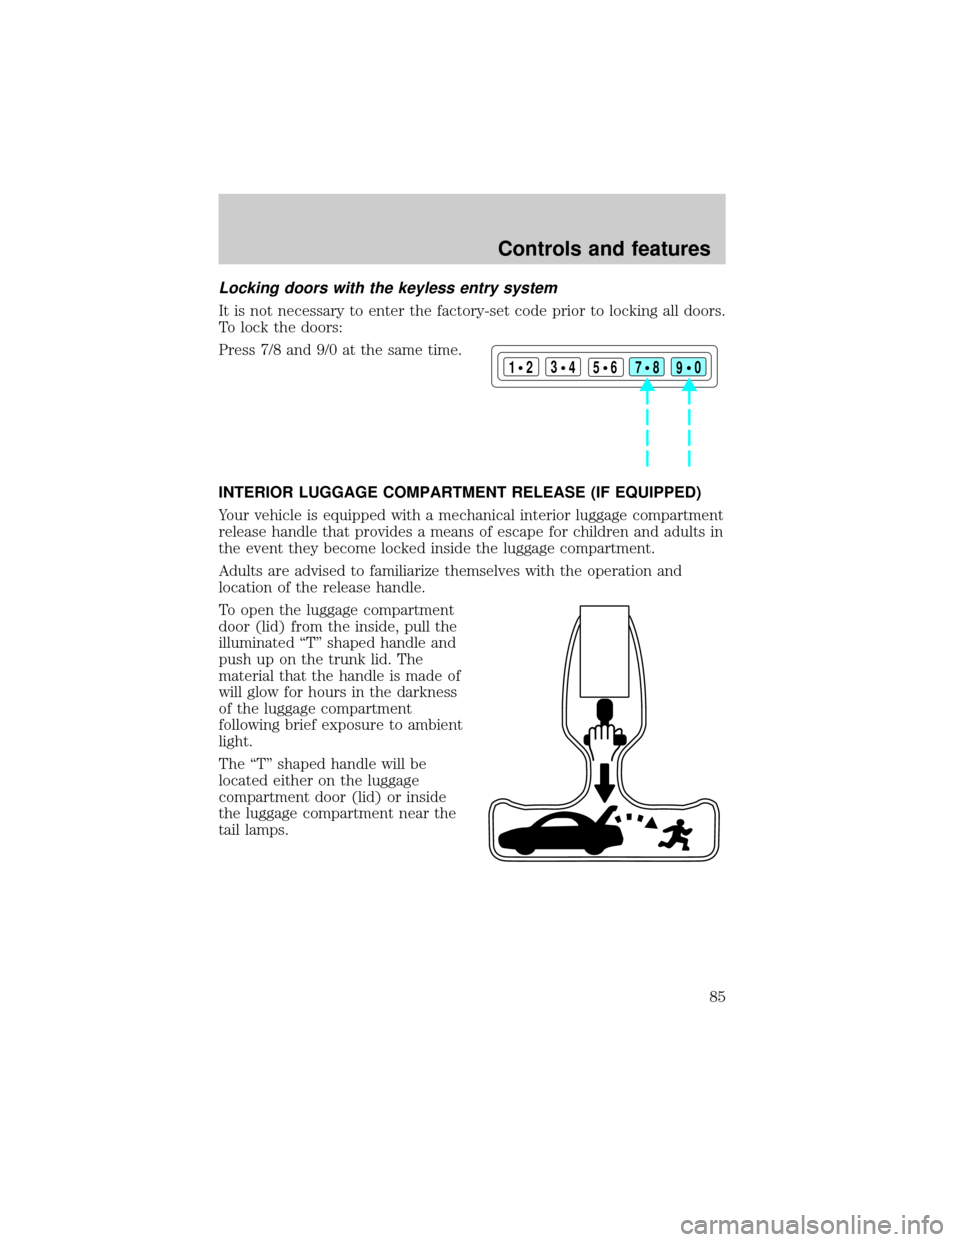
Locking doors with the keyless entry system
It is not necessary to enter the factory-set code prior to locking all doors.
To lock the doors:
Press 7/8 and 9/0 at the same time.
INTERIOR LUGGAGE COMPARTMENT RELEASE (IF EQUIPPED)
Your vehicle is equipped with a mechanical interior luggage compartment
release handle that provides a means of escape for children and adults in
the event they become locked inside the luggage compartment.
Adults are advised to familiarize themselves with the operation and
location of the release handle.
To open the luggage compartment
door (lid) from the inside, pull the
illuminated ªTº shaped handle and
push up on the trunk lid. The
material that the handle is made of
will glow for hours in the darkness
of the luggage compartment
following brief exposure to ambient
light.
The ªTº shaped handle will be
located either on the luggage
compartment door (lid) or inside
the luggage compartment near the
tail lamps.
123
45678
90
Controls and features
85
Page 137 of 224
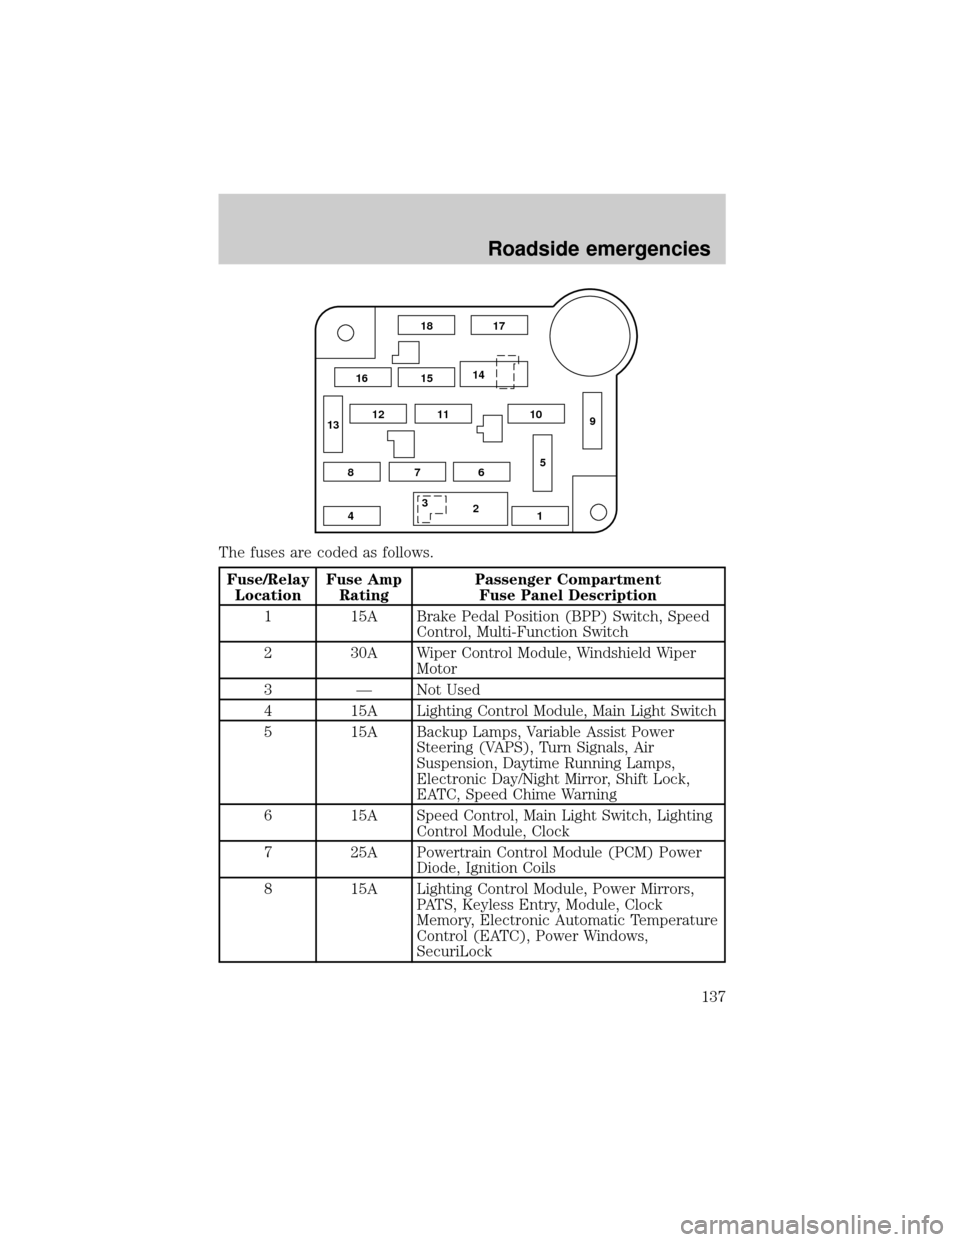
The fuses are coded as follows.
Fuse/Relay
LocationFuse Amp
RatingPassenger Compartment
Fuse Panel Description
1 15A Brake Pedal Position (BPP) Switch, Speed
Control, Multi-Function Switch
2 30A Wiper Control Module, Windshield Wiper
Motor
3 Ð Not Used
4 15A Lighting Control Module, Main Light Switch
5 15A Backup Lamps, Variable Assist Power
Steering (VAPS), Turn Signals, Air
Suspension, Daytime Running Lamps,
Electronic Day/Night Mirror, Shift Lock,
EATC, Speed Chime Warning
6 15A Speed Control, Main Light Switch, Lighting
Control Module, Clock
7 25A Powertrain Control Module (PCM) Power
Diode, Ignition Coils
8 15A Lighting Control Module, Power Mirrors,
PATS, Keyless Entry, Module, Clock
Memory, Electronic Automatic Temperature
Control (EATC), Power Windows,
SecuriLock
18 17
15 16
8
412 7659 12 101114
13
3
Roadside emergencies
137
Page 211 of 224

Ford Deluxe Leather and Vinyl Cleaner (not available in Canada)
Motorcraft Vinyl Cleaner (Canada only)
Ford Extra Strength Tar and Road Oil Remover* (not available in
Canada)
Ford Extra Strength Upholstery Cleaner (Canada only)
Ford Extra Strength Upholstery Cleaner (not available in Canada)
Ford Metal Surface Cleaner
Ford Multi-Purpose Cleaner*
Motorcraft Car Wash Concentrate
Motorcraft Carlite Glass Cleaner
Ford Spot and Stain Remover*
Ford Super Premium Tire and Trim Dressing
Ford Triple Clean
Ford Ultra-Clear Spray Glass Cleaner (not available in Canada)
* May be sold with the Motorcraft name
FORD ACCESSORIES FOR YOUR VEHICLE
A wide selection of Ford accessories are available for your vehicle
through your local authorized Ford, Lincoln Mercury or Ford of Canada
dealer. These quality accessories have been specifically engineered to
fulfill your automotive needs; they are custom designed to complement
the style and aerodynamic appearance of your vehicle. In addition, each
accessory is made from high quality materials and meets or exceeds
Ford's rigid engineering and safety specifications. Ford accessories are
warranted for up to 12 months or 20 000 km (12 000 miles) on all cars
and light trucks and 12 months with unlimited distance on medium/heavy
duty trucks unless the accessory is installed on a new vehicle, then the
warranty becomes the balance of the new vehicle's warranty or the
accessories warranty, whichever is greater. See your dealer for complete
warranty information and availability.
Not all accessories are available for all models.
Vehicle Security
Remote keyless entry
Styled wheel protector locks
Vehicle security systems
Customer assistance
211
Page 217 of 224

quality ......................................179
running out of fuel .................179
safety information relating
to automotive fuels ................175
Fuses ...................................135,136
Garage door opener ....................65
Gas cap (see Fuel cap) ............177
Gas mileage
(see Fuel economy) .................180
Gauges .........................................15
battery voltage gauge ...............19
engine coolant
temperature gauge ...................18
engine oil pressure gauge ........19
fuel gauge ..................................15
odometer ...................................17
speedometer .............................16
trip odometer ............................18
GAWR
(Gross Axle Weight Rating) .....127
definition .................................127
driving with a heavy load ......127
location ....................................127
GVWR (Gross
Vehicle Weight Rating) .............127
calculating ...............................127
definition .................................127
driving with a heavy load ......127
location ....................................127
Hazard flashers .........................134
Head restraints ...........................87
Headlamps ...................................24
aiming ......................................190
autolamp system .......................25
bulb specifications ..................189
daytime running lights .............24
flash to pass ..............................25
high beam ............................11,25
replacing bulbs .......................185
turning on and off ....................24
warning chime ..........................15
Heating ........................................26heating and air conditioning
system .......................................26
HomeLink universal
transceiver (see Garage
door opener) ................65,66,67,68
Hood ..........................................151
Ignition .......................................200
positions of the ignition ...........60
Infant seats
(see Safety seats) .....................107
Inspection/
maintenance (I/M) testing .......184
Instrument panel
cleaning ...................................194
cluster ...................................8,194
lighting up
panel and interior .....................24
location of components ..............8
Jump-starting your vehicle ......144
Keyless entry system .................82
autolock .....................................76
keypad .......................................82
programming entry code .........83
Keys
key in ignition chime ...............14
positions of the ignition ...........60
Lamps
autolamp system .......................25
bulb replacement
specifications chart ................189
cargo lamps ...............................24
daytime running light ...............24
headlamps .................................24
headlamps, flash to pass ..........25
instrument panel, dimming .....24
interior lamps ....................24,189
replacing bulbs .........185,187,189
Lane change indicator
(see Turn signal) ........................59
Lights, warning and indicator ......8
air bag ........................................10
air suspension ...........................12
Index
217