Mercury Grand Marquis 2001 s Manual Online
Manufacturer: MERCURY, Model Year: 2001, Model line: Grand Marquis, Model: Mercury Grand Marquis 2001Pages: 240, PDF Size: 1.86 MB
Page 81 of 240
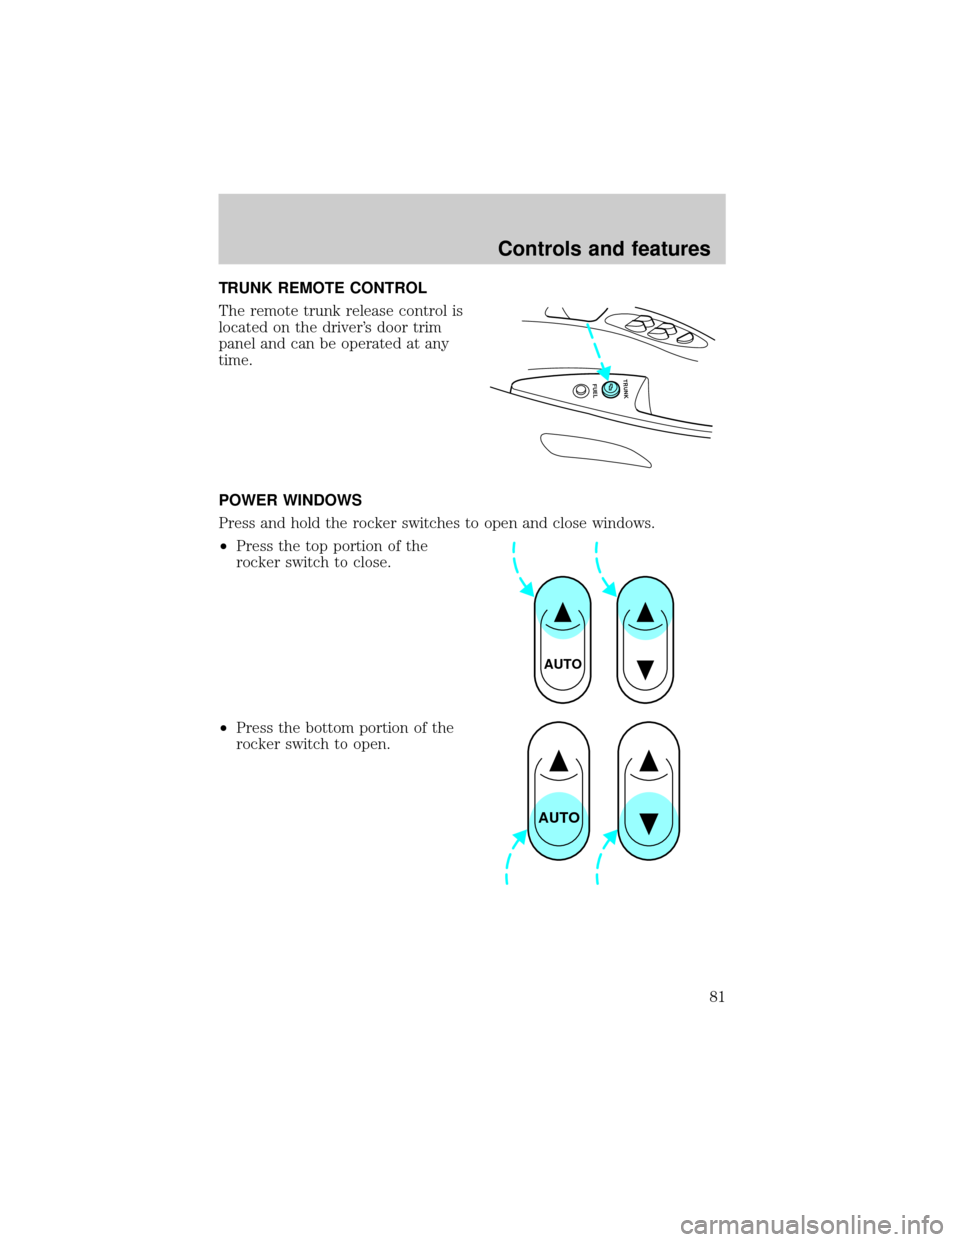
TRUNK REMOTE CONTROL
The remote trunk release control is
located on the driver's door trim
panel and can be operated at any
time.
POWER WINDOWS
Press and hold the rocker switches to open and close windows.
²Press the top portion of the
rocker switch to close.
²Press the bottom portion of the
rocker switch to open.
FUEL TRUNK
AUTO
AUTO
Controls and features
81
Page 82 of 240
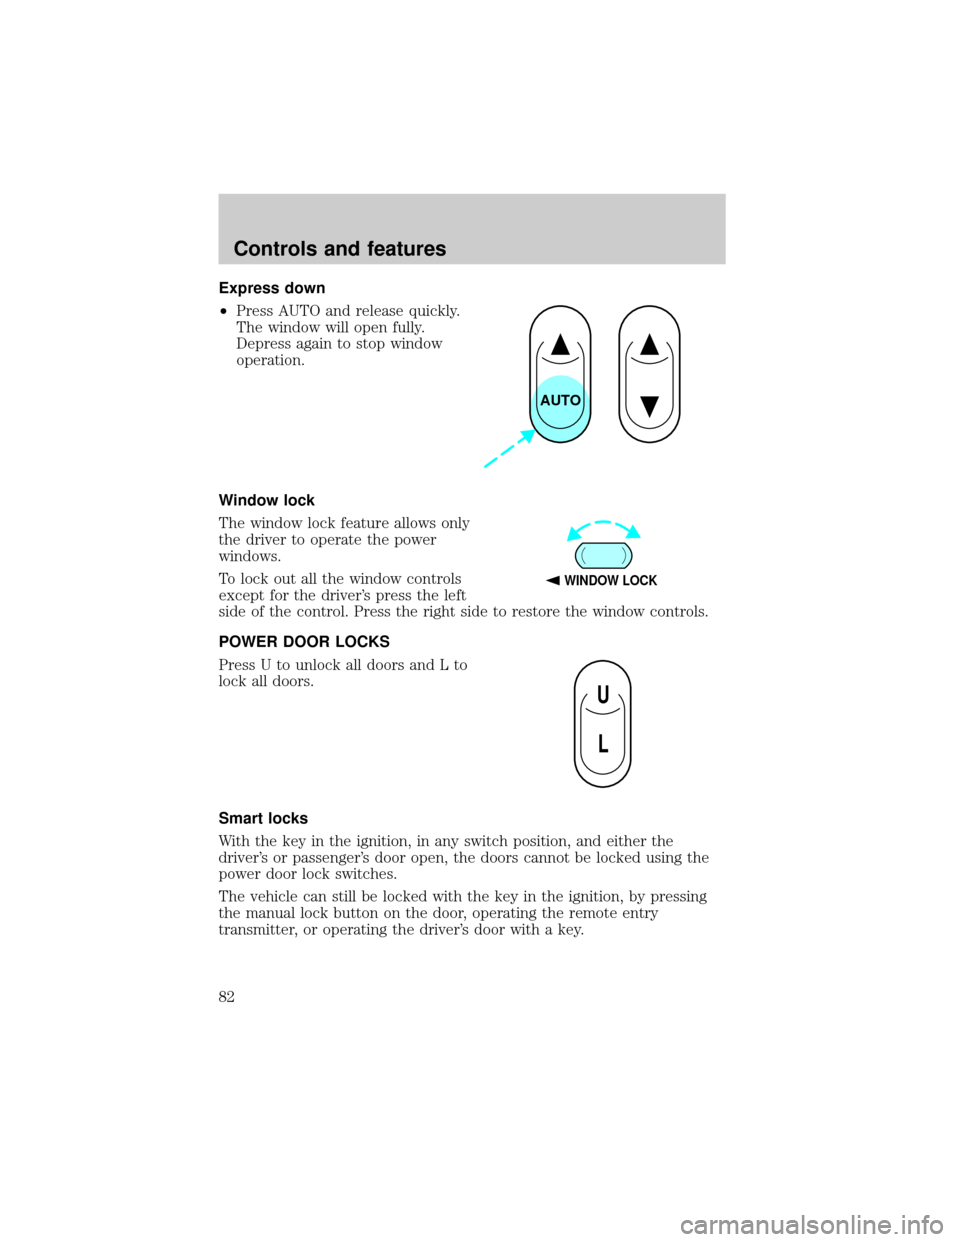
Express down
²Press AUTO and release quickly.
The window will open fully.
Depress again to stop window
operation.
Window lock
The window lock feature allows only
the driver to operate the power
windows.
To lock out all the window controls
except for the driver's press the left
side of the control. Press the right side to restore the window controls.
POWER DOOR LOCKS
Press U to unlock all doors and L to
lock all doors.
Smart locks
With the key in the ignition, in any switch position, and either the
driver's or passenger's door open, the doors cannot be locked using the
power door lock switches.
The vehicle can still be locked with the key in the ignition, by pressing
the manual lock button on the door, operating the remote entry
transmitter, or operating the driver's door with a key.
AUTO
WINDOW LOCK
U
L
Controls and features
82
Page 83 of 240
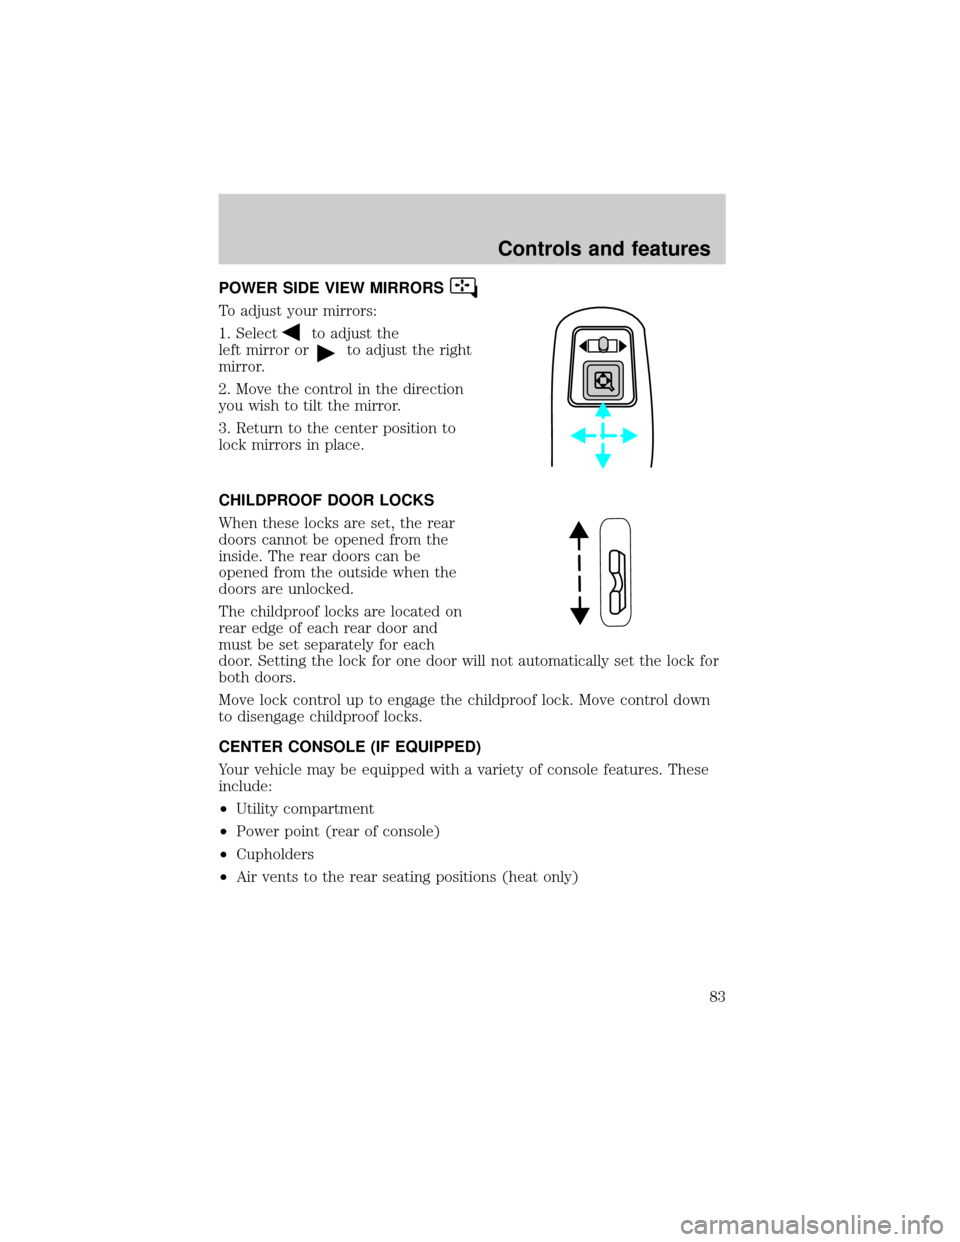
POWER SIDE VIEW MIRRORS
To adjust your mirrors:
1. Select
to adjust the
left mirror or
to adjust the right
mirror.
2. Move the control in the direction
you wish to tilt the mirror.
3. Return to the center position to
lock mirrors in place.
CHILDPROOF DOOR LOCKS
When these locks are set, the rear
doors cannot be opened from the
inside. The rear doors can be
opened from the outside when the
doors are unlocked.
The childproof locks are located on
rear edge of each rear door and
must be set separately for each
door. Setting the lock for one door will not automatically set the lock for
both doors.
Move lock control up to engage the childproof lock. Move control down
to disengage childproof locks.
CENTER CONSOLE (IF EQUIPPED)
Your vehicle may be equipped with a variety of console features. These
include:
²Utility compartment
²Power point (rear of console)
²Cupholders
²Air vents to the rear seating positions (heat only)
Controls and features
83
Page 84 of 240
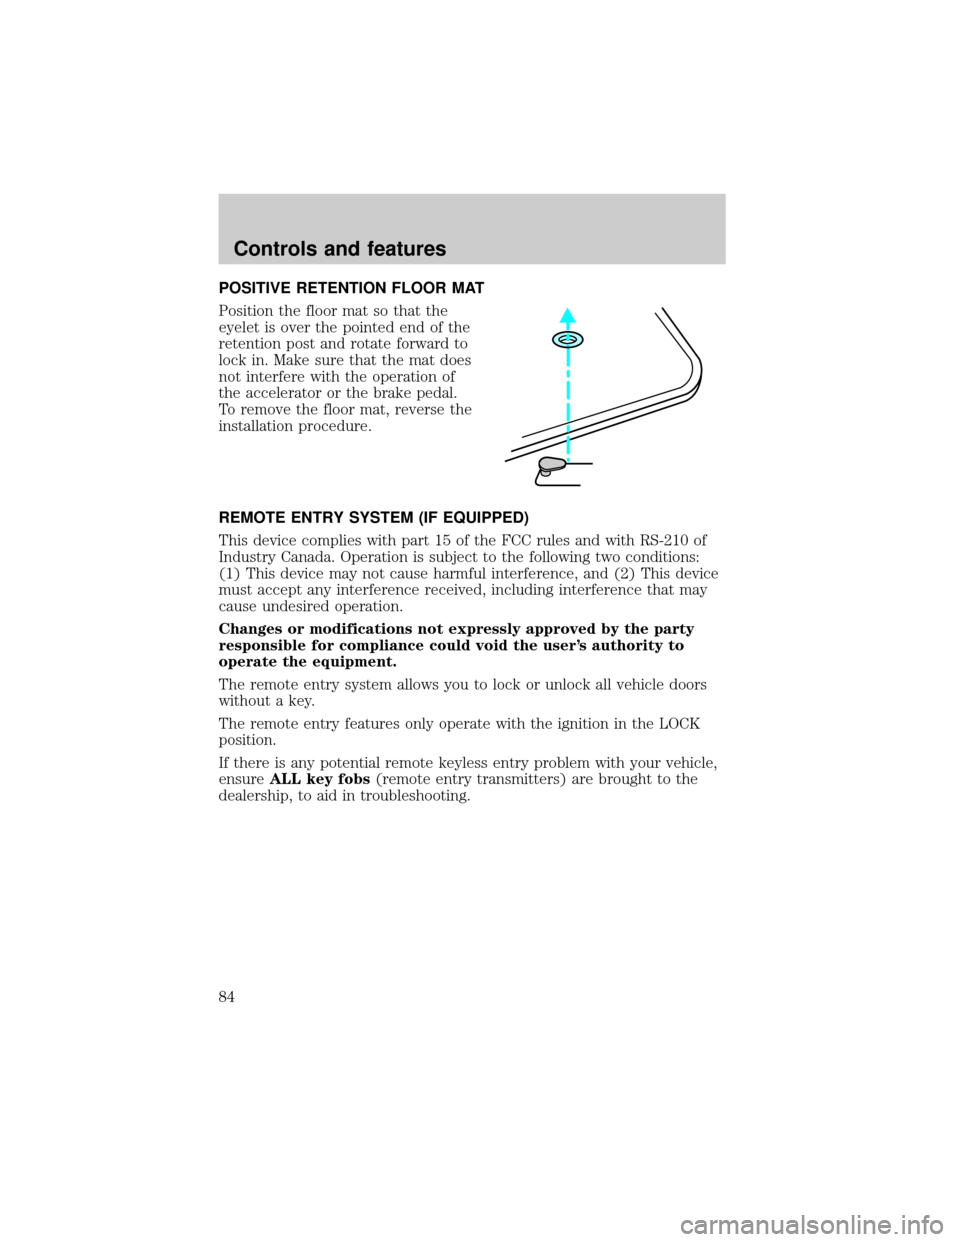
POSITIVE RETENTION FLOOR MAT
Position the floor mat so that the
eyelet is over the pointed end of the
retention post and rotate forward to
lock in. Make sure that the mat does
not interfere with the operation of
the accelerator or the brake pedal.
To remove the floor mat, reverse the
installation procedure.
REMOTE ENTRY SYSTEM (IF EQUIPPED)
This device complies with part 15 of the FCC rules and with RS-210 of
Industry Canada. Operation is subject to the following two conditions:
(1) This device may not cause harmful interference, and (2) This device
must accept any interference received, including interference that may
cause undesired operation.
Changes or modifications not expressly approved by the party
responsible for compliance could void the user's authority to
operate the equipment.
The remote entry system allows you to lock or unlock all vehicle doors
without a key.
The remote entry features only operate with the ignition in the LOCK
position.
If there is any potential remote keyless entry problem with your vehicle,
ensureALL key fobs(remote entry transmitters) are brought to the
dealership, to aid in troubleshooting.
Controls and features
84
Page 85 of 240
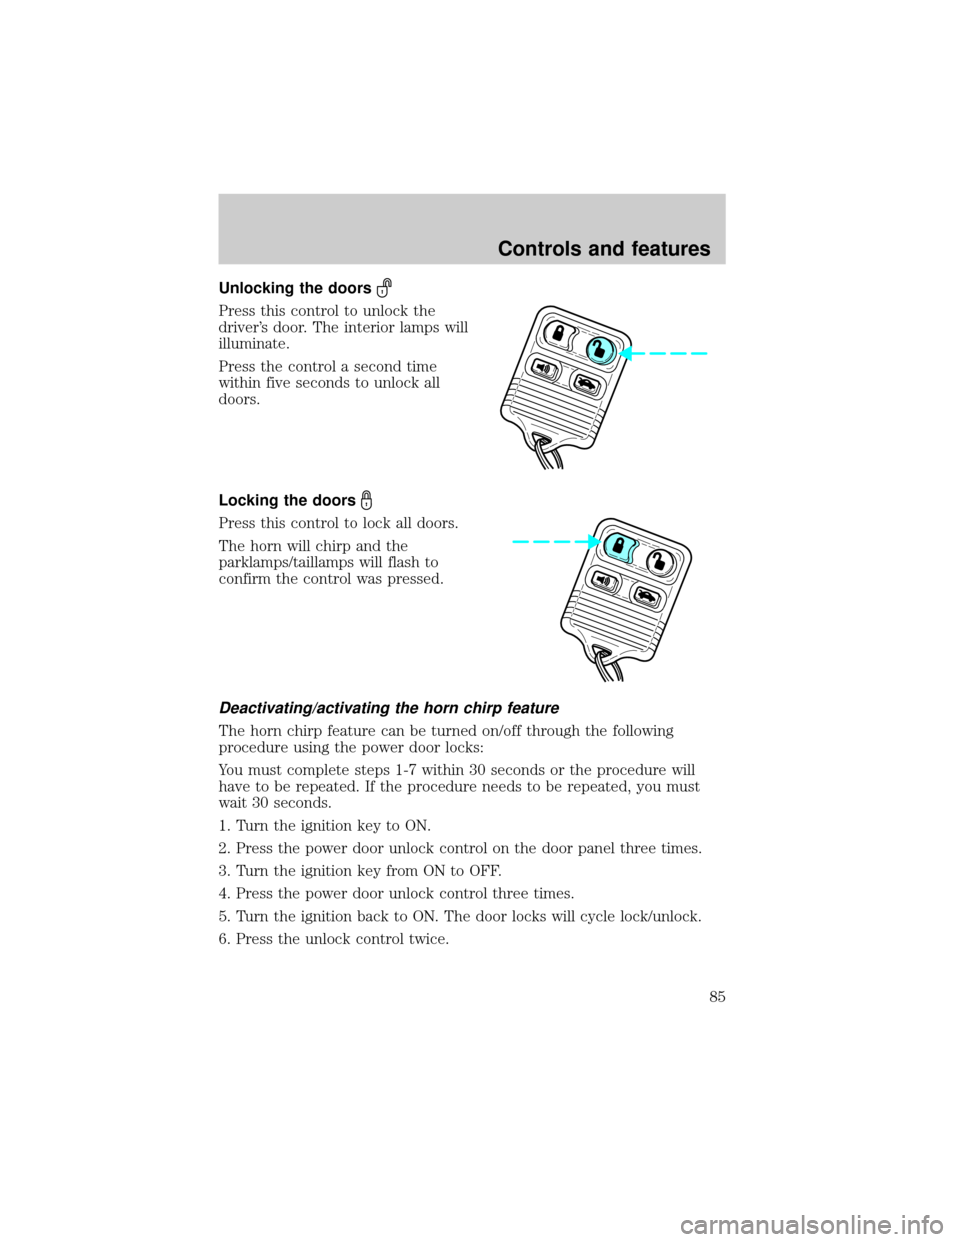
Unlocking the doors
Press this control to unlock the
driver's door. The interior lamps will
illuminate.
Press the control a second time
within five seconds to unlock all
doors.
Locking the doors
Press this control to lock all doors.
The horn will chirp and the
parklamps/taillamps will flash to
confirm the control was pressed.
Deactivating/activating the horn chirp feature
The horn chirp feature can be turned on/off through the following
procedure using the power door locks:
You must complete steps 1-7 within 30 seconds or the procedure will
have to be repeated. If the procedure needs to be repeated, you must
wait 30 seconds.
1. Turn the ignition key to ON.
2. Press the power door unlock control on the door panel three times.
3. Turn the ignition key from ON to OFF.
4. Press the power door unlock control three times.
5. Turn the ignition back to ON. The door locks will cycle lock/unlock.
6. Press the unlock control twice.
Controls and features
85
Page 86 of 240

7. After a five to ten second delay, the door locks will cycle lock/unlock
to confirm successful programming.
8. Turn the ignition to OFF.
This feature can also be turned
on/off through the following
procedure using the keyless entry
keypad.
1. Enter the keyless entry keypad factory-set code.
2. Within 5 seconds press and hold 7/8 control.
3. Within 5 seconds with 7/8 held down, press and release 1/2 control.
4. Release 7/8 control. The doors will lock/unlock to confirm successful
programming.
Autolock (if equipped)
This feature automatically locks all vehicle doors when:
²all doors are closed
²the ignition is in the ON position and
²you shift into any gear.
Relock
The autolock feature repeats when:
²any door, except the drivers, is opened then closed while the engine is
running and
²you put the vehicle in motion.
Deactivating/activating the autolock feature
Before following the procedure, make sure that the ignition is OFF and
all vehicle doors are closed.
Automatic door locks can be turned on/off with the keyless entry keypad
through the following procedure:
You must complete steps 1-5 within 30 seconds or the procedure will
have to be repeated. If the procedure needs to be repeated, you must
wait 30 seconds.
1. Enter the keyless entry keypad factory code.
2. Within 5 seconds, press and hold control 7/8.
123
45678
90
Controls and features
86
Page 87 of 240
3. Within 5 seconds (while holding down control 7/8), press and release
control 3/4.
4. Release control 7/8.
The door will lock/unlock to confirm the feature has been disabled. Once
disabled, the feature can be enabled by repeating the same sequence.
Automatic door locks can also be turned on/off through the following
procedure:
You must complete steps 1-7 within 30 seconds or the procedure will
have to be repeated. If the procedure needs to be repeated, you must
wait 30 seconds.
1. Turn the ignition key to ON.
2. Press the power door unlock control on the door panel three times.
3. Turn the ignition key from ON to OFF.
4. Press the power door unlock control three times.
5. Turn the ignition back to ON.
6. Press the unlock control once. After a five to ten second delay, the
door will lock/unlock to confirm successful programming.
7. Turn the ignition to OFF.
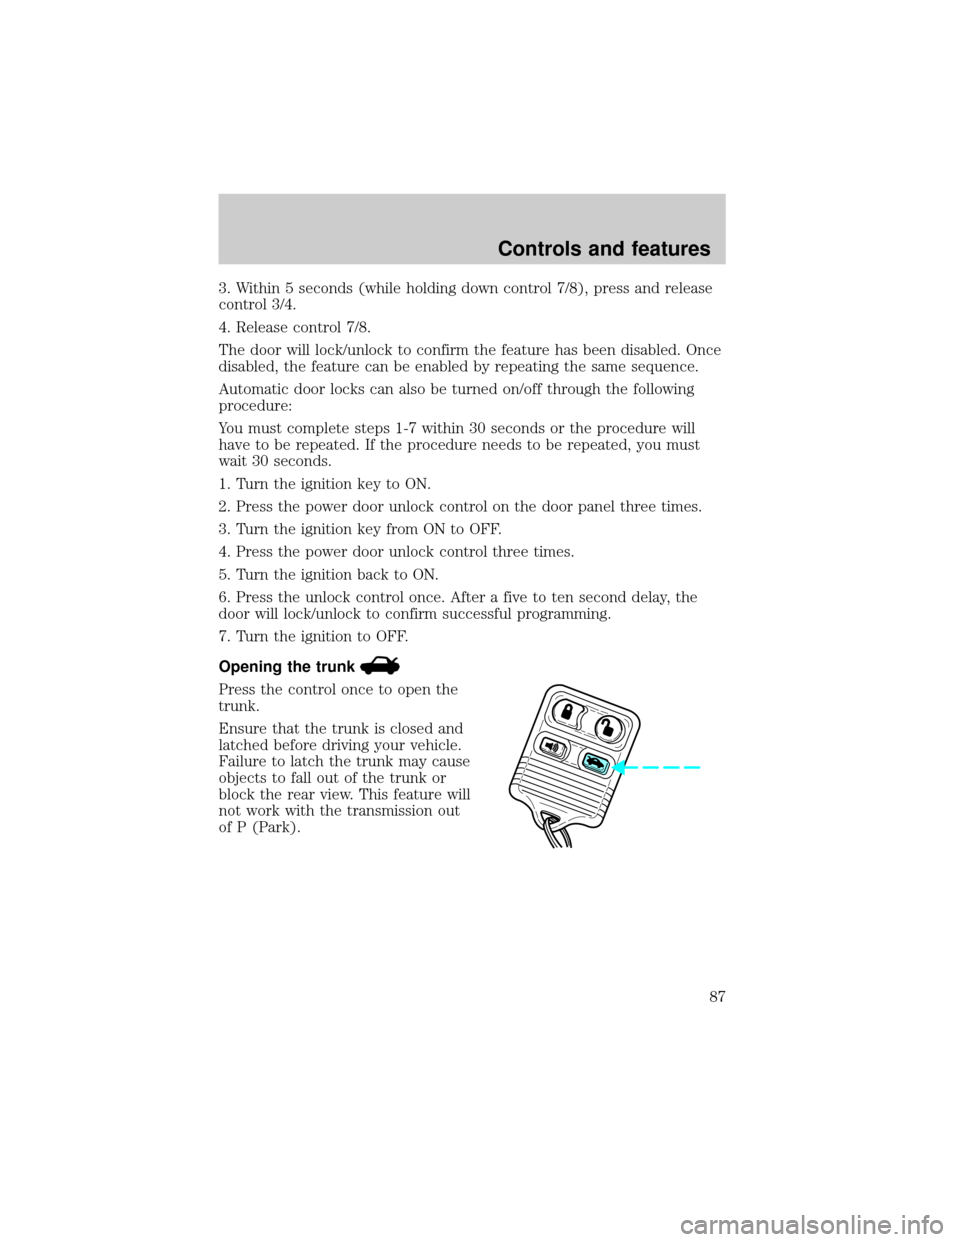
Opening the trunk
Press the control once to open the
trunk.
Ensure that the trunk is closed and
latched before driving your vehicle.
Failure to latch the trunk may cause
objects to fall out of the trunk or
block the rear view. This feature will
not work with the transmission out
of P (Park).
Controls and features
87
Page 88 of 240
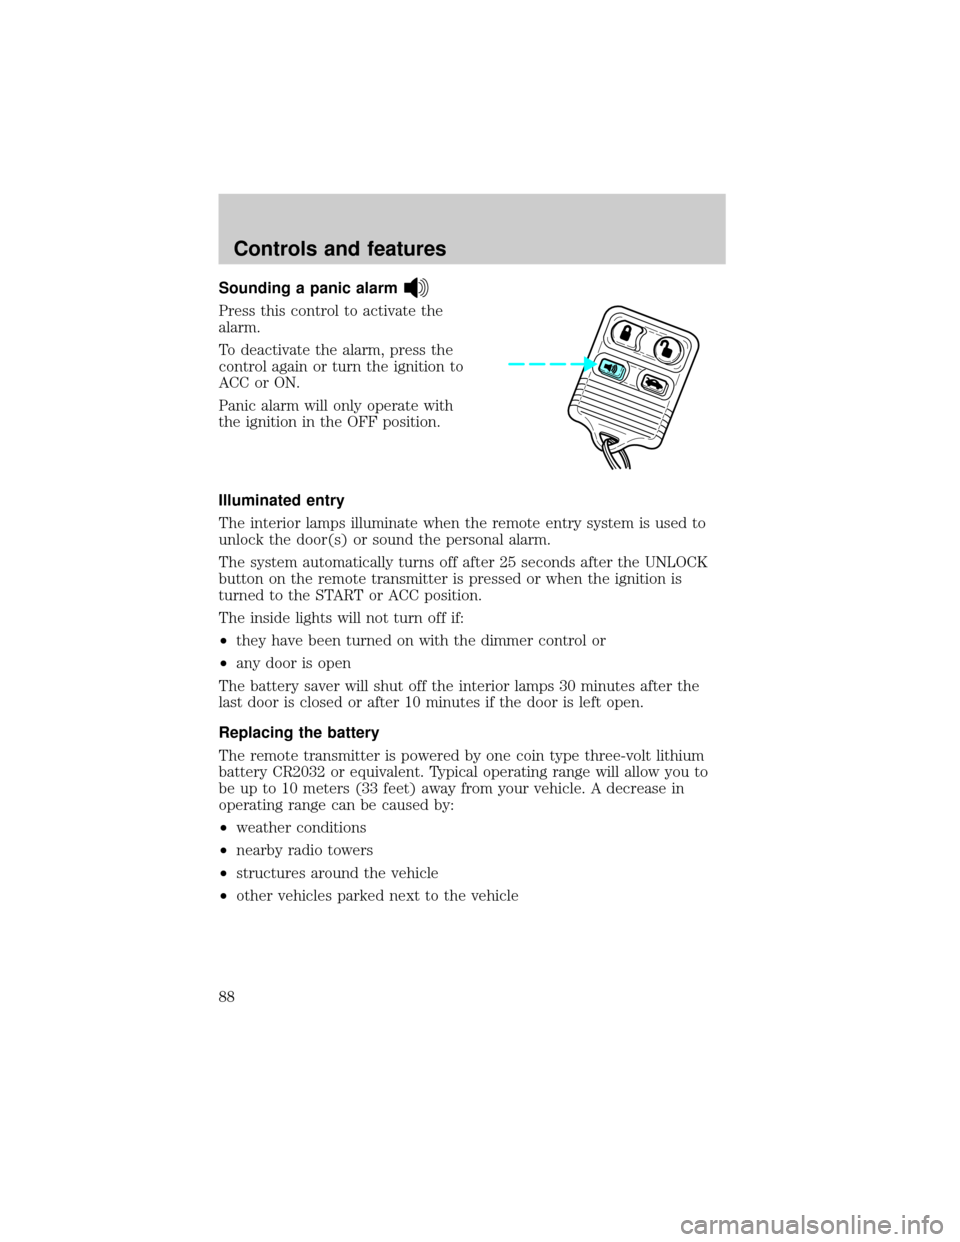
Sounding a panic alarm
Press this control to activate the
alarm.
To deactivate the alarm, press the
control again or turn the ignition to
ACC or ON.
Panic alarm will only operate with
the ignition in the OFF position.
Illuminated entry
The interior lamps illuminate when the remote entry system is used to
unlock the door(s) or sound the personal alarm.
The system automatically turns off after 25 seconds after the UNLOCK
button on the remote transmitter is pressed or when the ignition is
turned to the START or ACC position.
The inside lights will not turn off if:
²they have been turned on with the dimmer control or
²any door is open
The battery saver will shut off the interior lamps 30 minutes after the
last door is closed or after 10 minutes if the door is left open.
Replacing the battery
The remote transmitter is powered by one coin type three-volt lithium
battery CR2032 or equivalent. Typical operating range will allow you to
be up to 10 meters (33 feet) away from your vehicle. A decrease in
operating range can be caused by:
²weather conditions
²nearby radio towers
²structures around the vehicle
²other vehicles parked next to the vehicle
Controls and features
88
Page 89 of 240
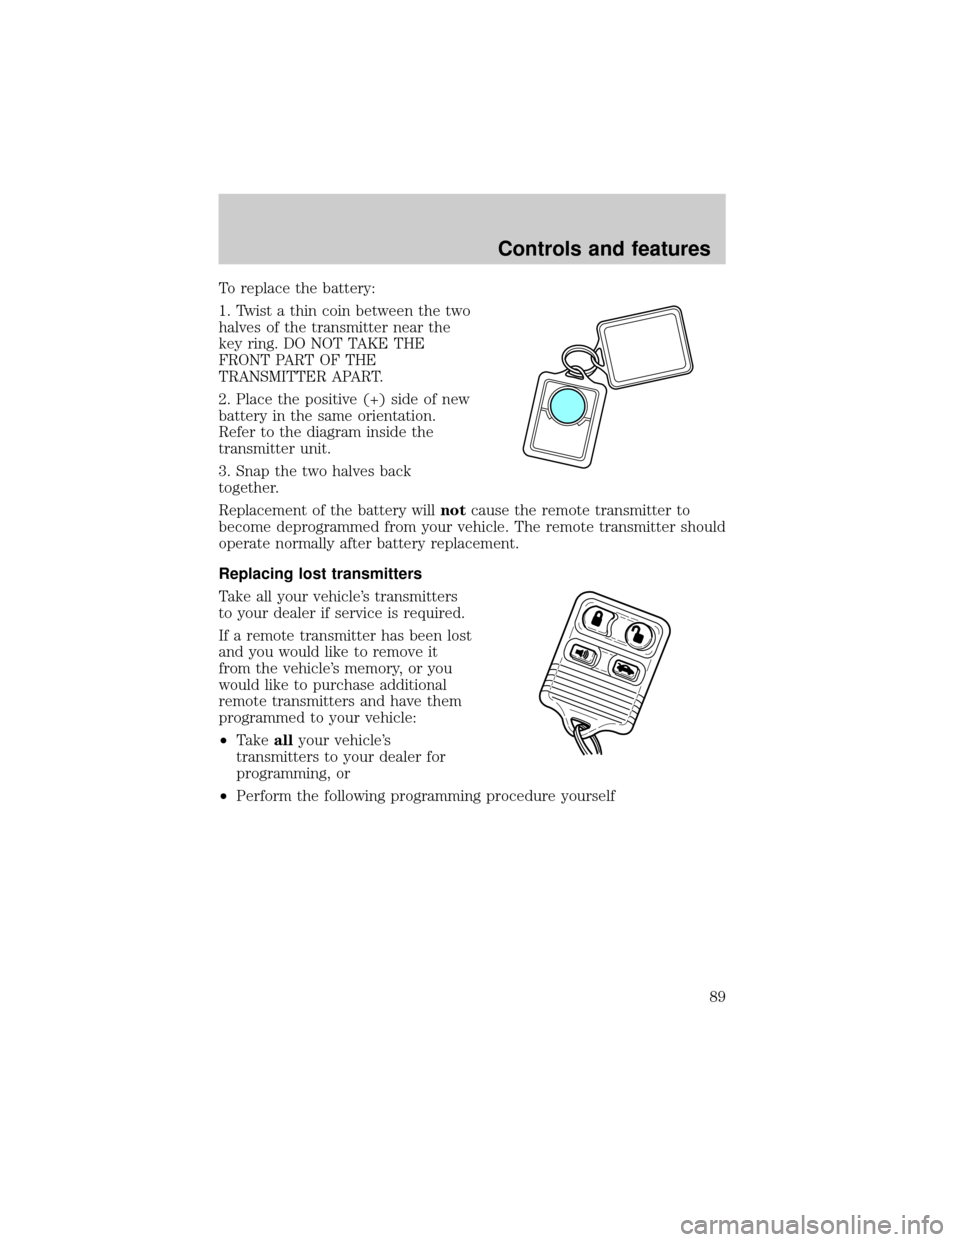
To replace the battery:
1. Twist a thin coin between the two
halves of the transmitter near the
key ring. DO NOT TAKE THE
FRONT PART OF THE
TRANSMITTER APART.
2. Place the positive (+) side of new
battery in the same orientation.
Refer to the diagram inside the
transmitter unit.
3. Snap the two halves back
together.
Replacement of the battery willnotcause the remote transmitter to
become deprogrammed from your vehicle. The remote transmitter should
operate normally after battery replacement.
Replacing lost transmitters
Take all your vehicle's transmitters
to your dealer if service is required.
If a remote transmitter has been lost
and you would like to remove it
from the vehicle's memory, or you
would like to purchase additional
remote transmitters and have them
programmed to your vehicle:
²Takeallyour vehicle's
transmitters to your dealer for
programming, or
²Perform the following programming procedure yourself
Controls and features
89
Page 90 of 240
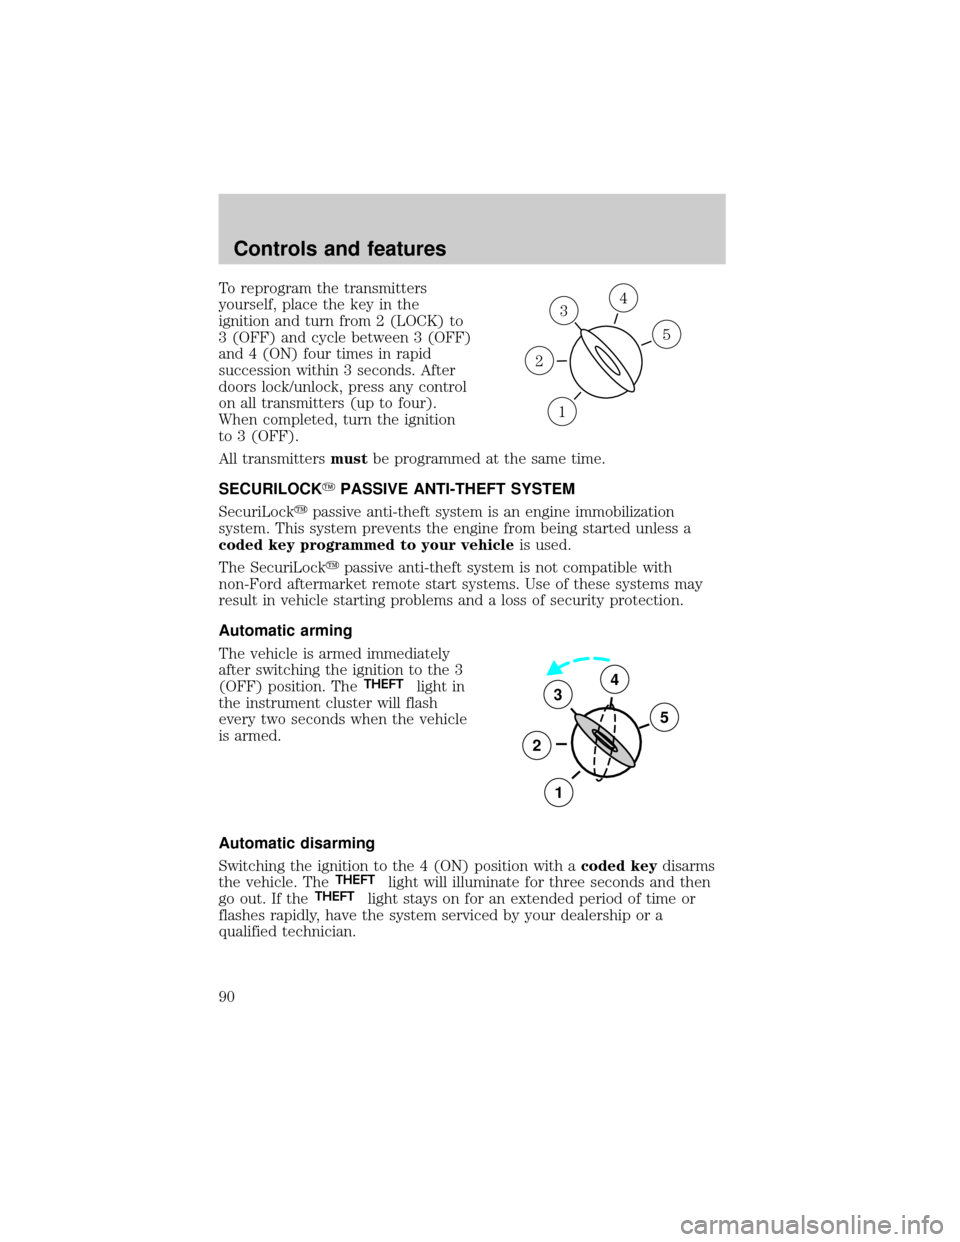
To reprogram the transmitters
yourself, place the key in the
ignition and turn from 2 (LOCK) to
3 (OFF) and cycle between 3 (OFF)
and 4 (ON) four times in rapid
succession within 3 seconds. After
doors lock/unlock, press any control
on all transmitters (up to four).
When completed, turn the ignition
to 3 (OFF).
All transmittersmustbe programmed at the same time.
SECURILOCKYPASSIVE ANTI-THEFT SYSTEM
SecuriLockypassive anti-theft system is an engine immobilization
system. This system prevents the engine from being started unless a
coded key programmed to your vehicleis used.
The SecuriLockypassive anti-theft system is not compatible with
non-Ford aftermarket remote start systems. Use of these systems may
result in vehicle starting problems and a loss of security protection.
Automatic arming
The vehicle is armed immediately
after switching the ignition to the 3
(OFF) position. The
THEFTlight in
the instrument cluster will flash
every two seconds when the vehicle
is armed.
Automatic disarming
Switching the ignition to the 4 (ON) position with acoded keydisarms
the vehicle. The
THEFTlight will illuminate for three seconds and then
go out. If theTHEFTlight stays on for an extended period of time or
flashes rapidly, have the system serviced by your dealership or a
qualified technician.
3
1
2
5
4
3
2
1
5
4
Controls and features
90