Light switch Mercury Grand Marquis 2004 s User Guide
[x] Cancel search | Manufacturer: MERCURY, Model Year: 2004, Model line: Grand Marquis, Model: Mercury Grand Marquis 2004Pages: 240, PDF Size: 1.92 MB
Page 100 of 240
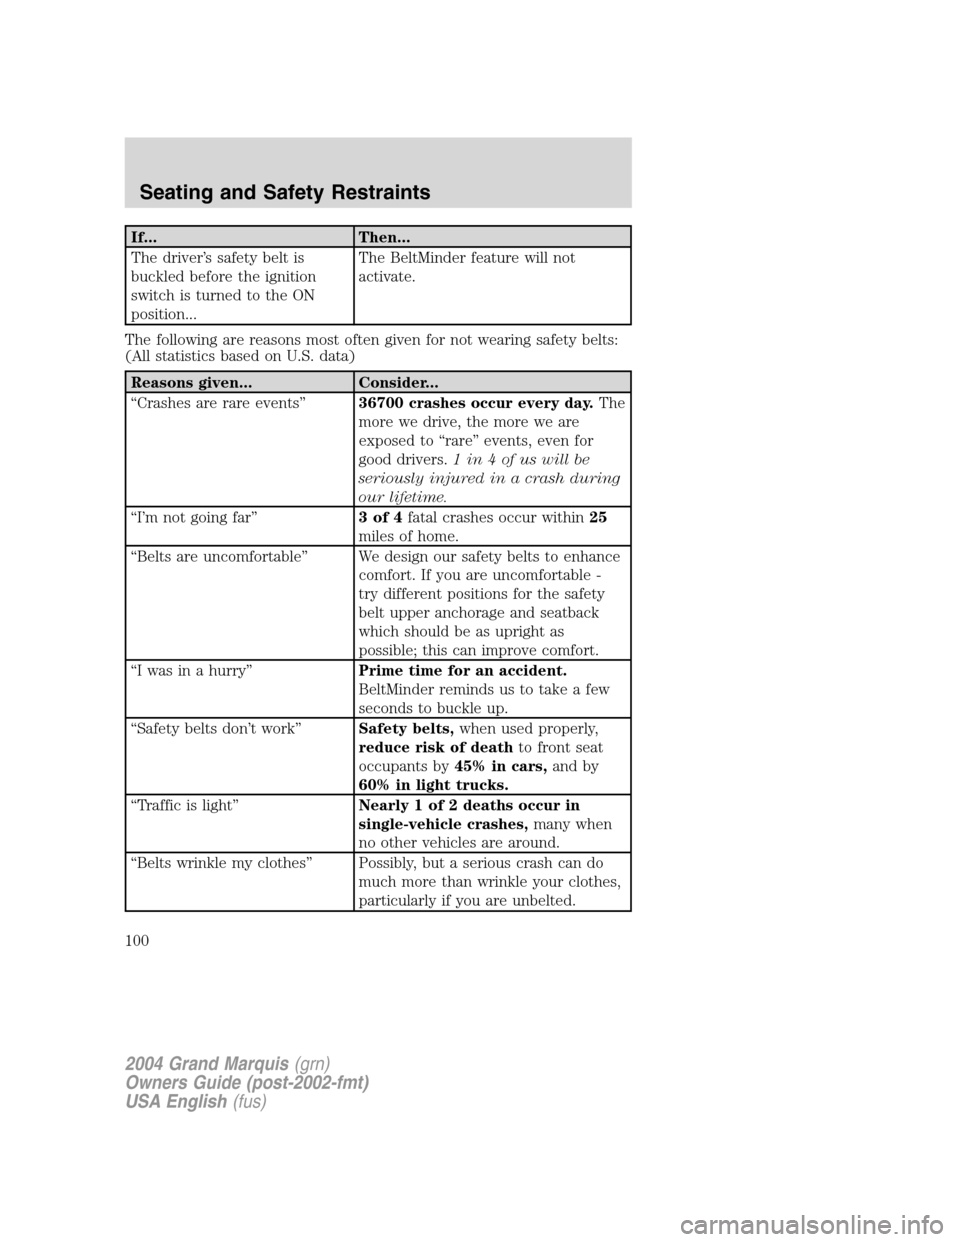
If... Then...
The driver’s safety belt is
buckled before the ignition
switch is turned to the ON
position...The BeltMinder feature will not
activate.
The following are reasons most often given for not wearing safety belts:
(All statistics based on U.S. data)
Reasons given... Consider...
“Crashes are rare events”36700 crashes occur every day.The
more we drive, the more we are
exposed to“rare”events, even for
good drivers.1 in 4 of us will be
seriously injured in a crash during
our lifetime.
“I’m not going far”3of4fatal crashes occur within25
miles of home.
“Belts are uncomfortable”We design our safety belts to enhance
comfort. If you are uncomfortable -
try different positions for the safety
belt upper anchorage and seatback
which should be as upright as
possible; this can improve comfort.
“I was in a hurry”Prime time for an accident.
BeltMinder reminds us to take a few
seconds to buckle up.
“Safety belts don’t work”Safety belts,when used properly,
reduce risk of deathto front seat
occupants by45% in cars,and by
60% in light trucks.
“Traffic is light”Nearly 1 of 2 deaths occur in
single-vehicle crashes,many when
no other vehicles are around.
“Belts wrinkle my clothes”Possibly, but a serious crash can do
much more than wrinkle your clothes,
particularly if you are unbelted.
2004 Grand Marquis(grn)
Owners Guide (post-2002-fmt)
USA English(fus)
Seating and Safety Restraints
100
Page 102 of 240

•The parklamps/headlamps are in OFF position (If vehicle is equipped
with Autolamps, this will not affect the procedure.)
To reduce the risk of injury, do not deactivate/activate the Belt
Minder feature while driving the vehicle.
1. Turn the ignition switch to the RUN (or ON) position. (DO NOT
START THE ENGINE)
2. Wait until the safety belt warning light turns off. (Approximately 1–2
minutes)
•Steps 3–5 must be completed within 60 seconds or the procedure will
have to be repeated.
3. Buckle then unbuckle the safety belt three times, ending with the
safety belt unbuckled. This can be done before or during BeltMinder
warning activation.
4. Turn on the parklamps/headlamps, turn off the parklamps/headlamps.
5. Buckle then unbuckle the safety belt three times, ending with the
safety belt unbuckled.
•After step 5 the safety belt warning light will be turned on for three
seconds.
6. Within seven seconds of the safety belt warning light turning off,
buckle then unbuckle the safety belt.
•This will disable BeltMinder if it is currently enabled, or enable
BeltMinder if it is currently disabled.
7. Confirmation of disabling BeltMinder is provided by flashing the safety
belt warning light four times per second for three seconds.
8. Confirmation of enabling BeltMinder is provided by flashing the safety
belt warning light four times per second for three seconds, followed by
three seconds with the safety belt warning light off, then followed by
flashing the safety belt warning light four times per second for three
seconds again.
9. After receiving confirmation, the deactivation/activation procedure is
complete.
2004 Grand Marquis(grn)
Owners Guide (post-2002-fmt)
USA English(fus)
Seating and Safety Restraints
102
Page 135 of 240
With the gearshift lever in R (Reverse), the vehicle will move backward.
Always come to a complete stop before shifting into and out of R
(Reverse).
N (Neutral)
With the gearshift lever in N (Neutral), the vehicle can be started and is
free to roll. Hold the brake pedal down while in this position.
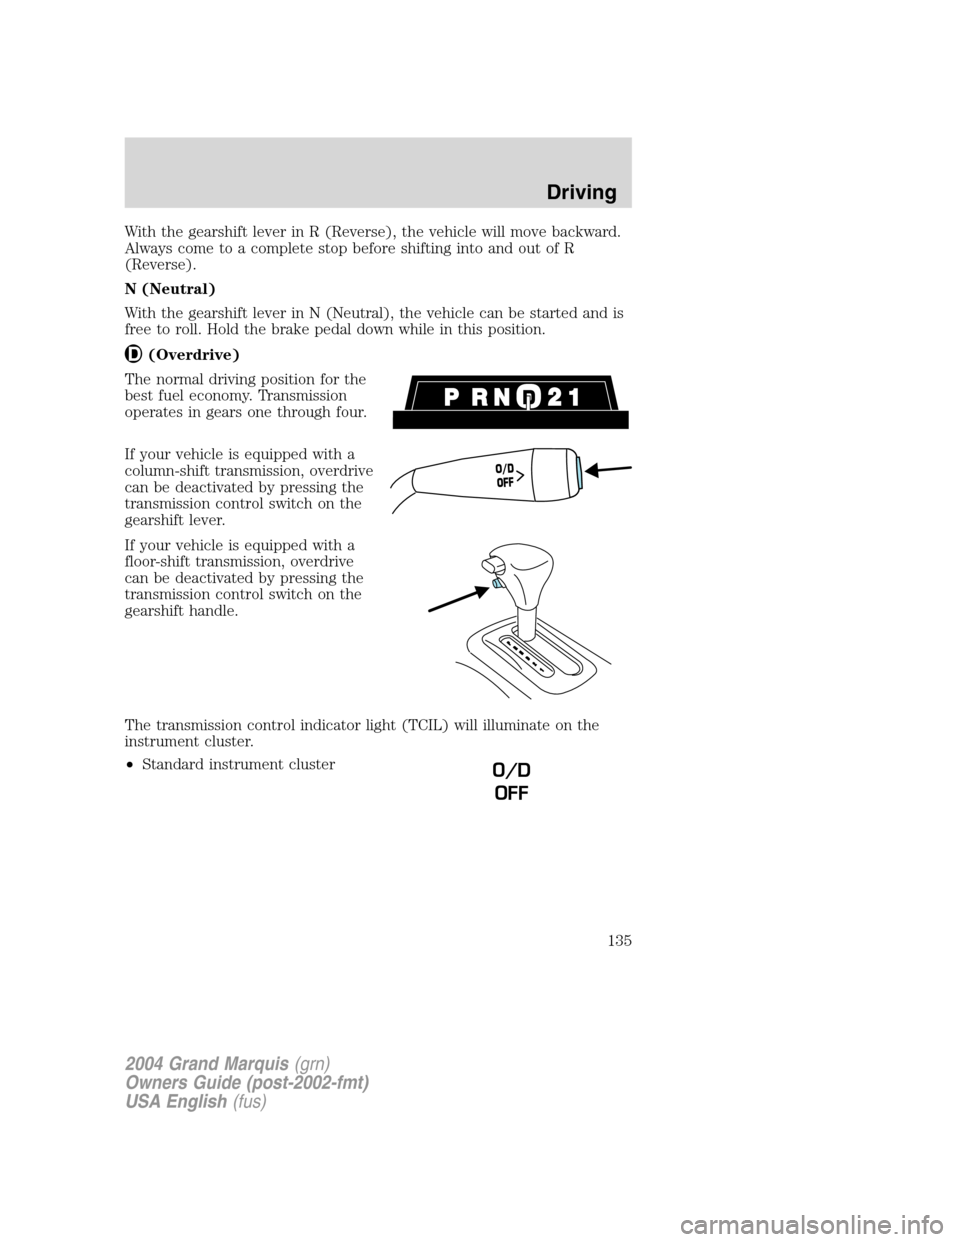
(Overdrive)
The normal driving position for the
best fuel economy. Transmission
operates in gears one through four.
If your vehicle is equipped with a
column-shift transmission, overdrive
can be deactivated by pressing the
transmission control switch on the
gearshift lever.
If your vehicle is equipped with a
floor-shift transmission, overdrive
can be deactivated by pressing the
transmission control switch on the
gearshift handle.
The transmission control indicator light (TCIL) will illuminate on the
instrument cluster.
•Standard instrument cluster
O/D
OFF
O/D
OFF
2004 Grand Marquis(grn)
Owners Guide (post-2002-fmt)
USA English(fus)
Driving
135
Page 145 of 240
Canadian customers who require roadside assistance, call
1–800–665–2006.
If you need to arrange roadside assistance for yourself, Ford Motor
Company will reimburse a reasonable amount. To obtain reimbursement
information, U.S. Ford or Mercury vehicles customers call
1-800-241-3673; Lincoln vehicle customers call 1–800–521–4140.
Canadian customers who need to obtain reimbursement information, call
1–800–665–2006.
ROADSIDE COVERAGE BEYOND BASIC WARRANTY
In the United States, you may purchase additional roadside assistance
coverage beyond this period through the Ford Auto Club by contacting
your Ford or Lincoln Mercury dealer.
Similarly in Canada, for uninterrupted Roadside Assistance coverage, you
may purchase extended coverage prior to your Basic Warranty’s Roadside
Assistance expiring. For more information and enrollment, contact
1–877–294–2582 or visit our website at www.ford.ca.
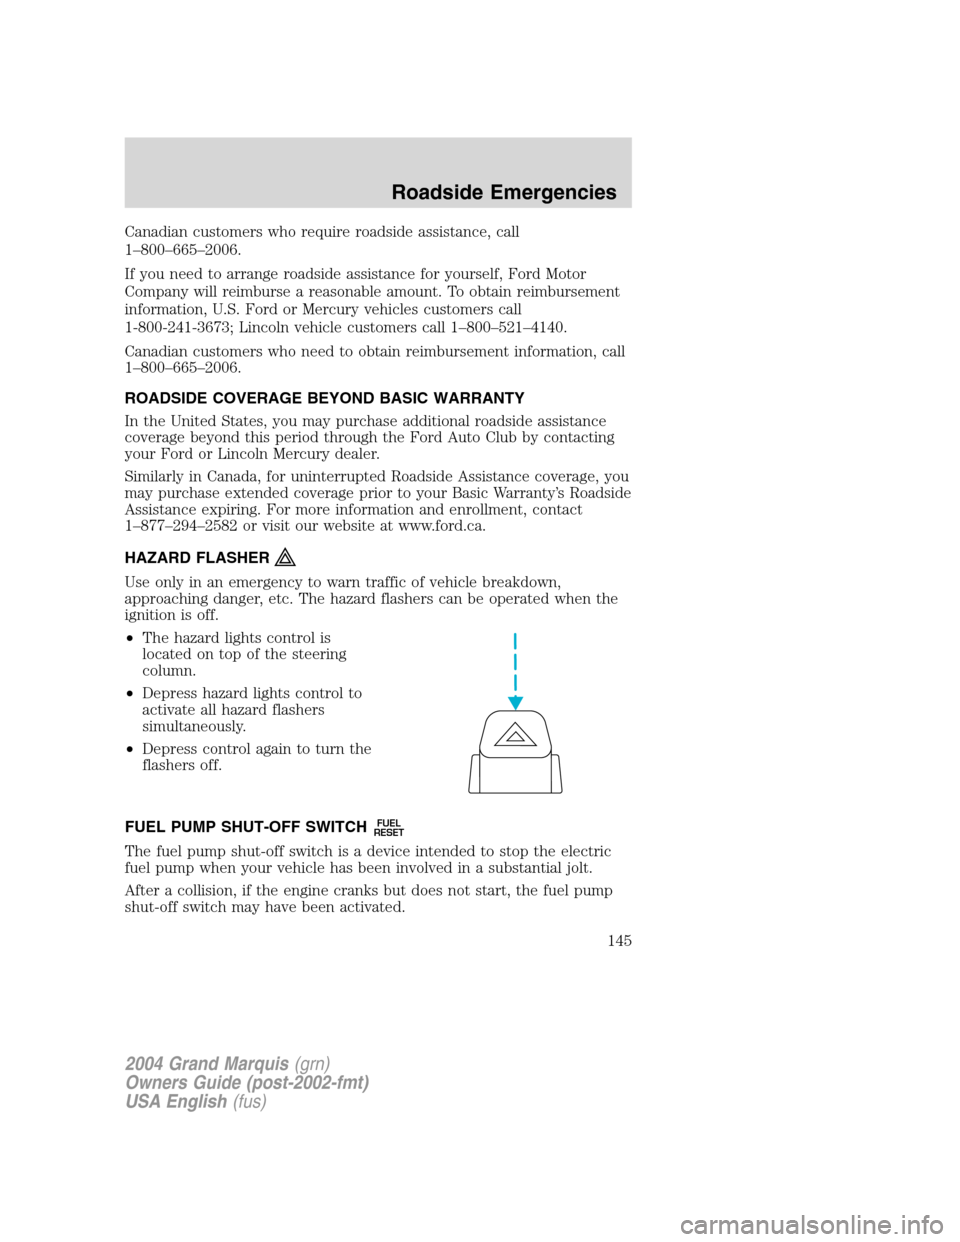
HAZARD FLASHER
Use only in an emergency to warn traffic of vehicle breakdown,
approaching danger, etc. The hazard flashers can be operated when the
ignition is off.
•The hazard lights control is
located on top of the steering
column.
•Depress hazard lights control to
activate all hazard flashers
simultaneously.
•Depress control again to turn the
flashers off.
FUEL PUMP SHUT-OFF SWITCH
FUEL
RESET
The fuel pump shut-off switch is a device intended to stop the electric
fuel pump when your vehicle has been involved in a substantial jolt.
After a collision, if the engine cranks but does not start, the fuel pump
shut-off switch may have been activated.
2004 Grand Marquis(grn)
Owners Guide (post-2002-fmt)
USA English(fus)
Roadside Emergencies
145
Page 146 of 240
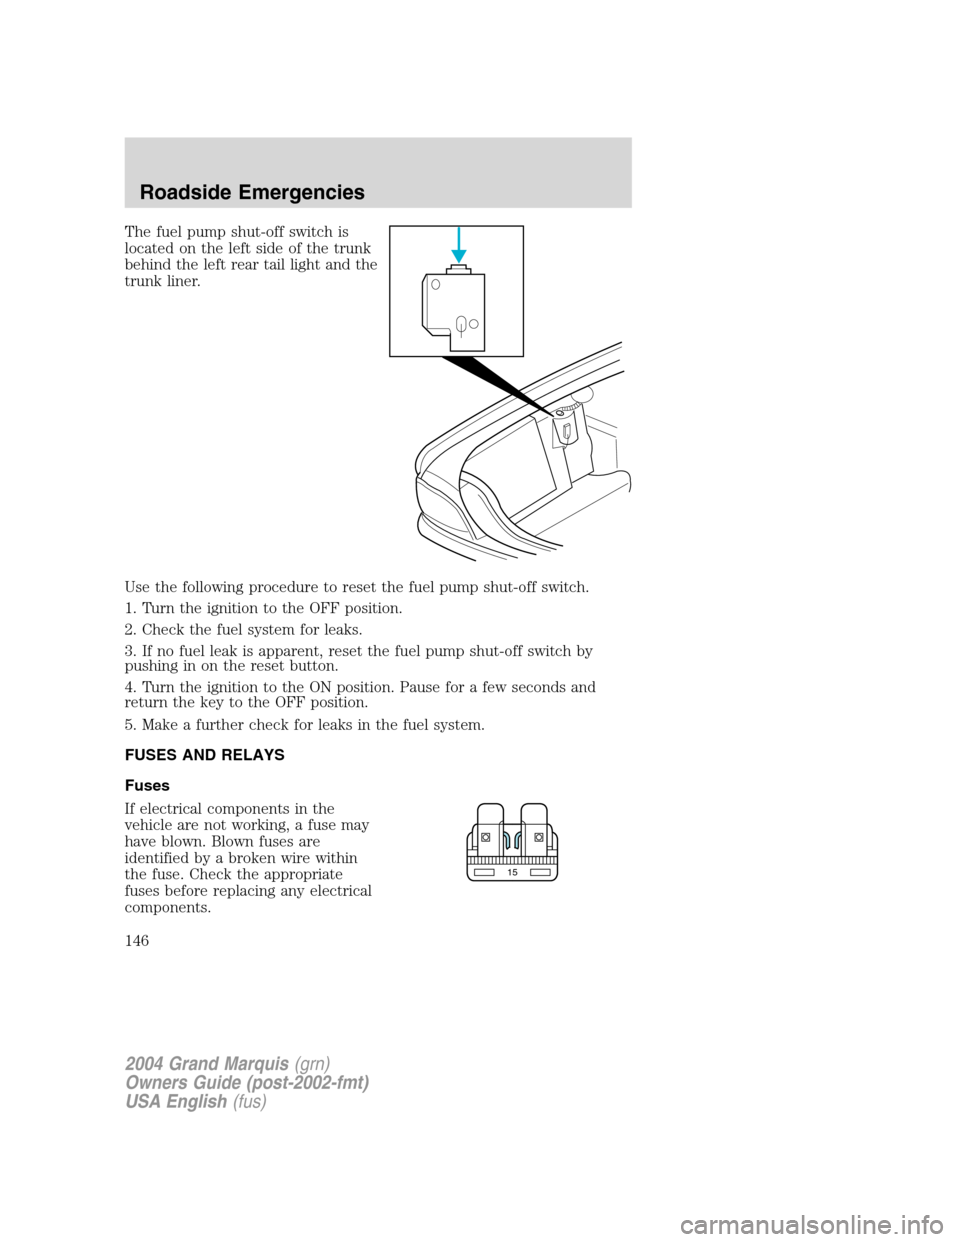
The fuel pump shut-off switch is
located on the left side of the trunk
behind the left rear tail light and the
trunk liner.
Use the following procedure to reset the fuel pump shut-off switch.
1. Turn the ignition to the OFF position.
2. Check the fuel system for leaks.
3. If no fuel leak is apparent, reset the fuel pump shut-off switch by
pushing in on the reset button.
4. Turn the ignition to the ON position. Pause for a few seconds and
return the key to the OFF position.
5. Make a further check for leaks in the fuel system.
FUSES AND RELAYS
Fuses
If electrical components in the
vehicle are not working, a fuse may
have blown. Blown fuses are
identified by a broken wire within
the fuse. Check the appropriate
fuses before replacing any electrical
components.
15
2004 Grand Marquis(grn)
Owners Guide (post-2002-fmt)
USA English(fus)
Roadside Emergencies
146
Page 148 of 240
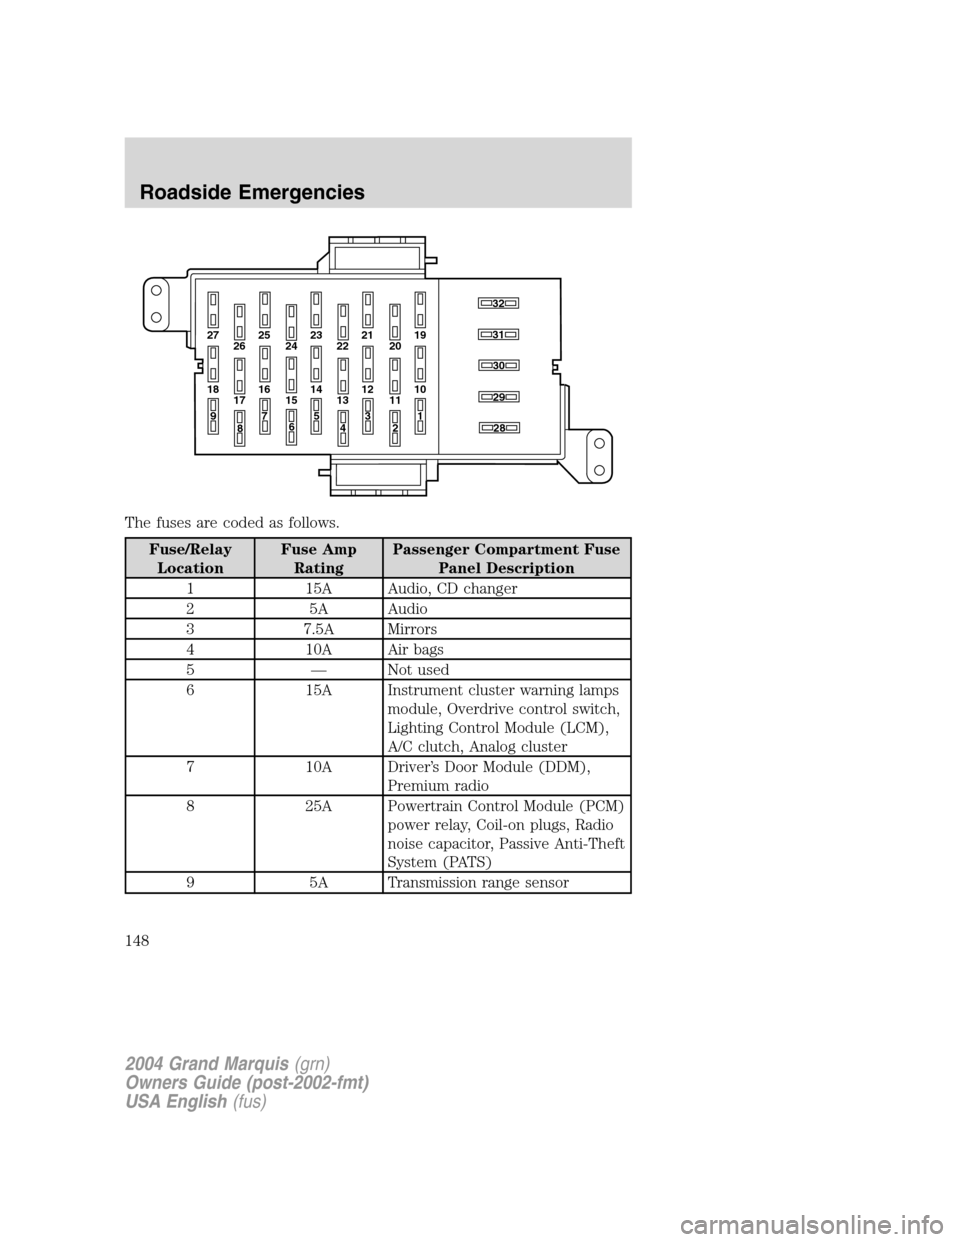
The fuses are coded as follows.
Fuse/Relay
LocationFuse Amp
RatingPassenger Compartment Fuse
Panel Description
1 15A Audio, CD changer
2 5A Audio
3 7.5A Mirrors
4 10A Air bags
5—Not used
6 15A Instrument cluster warning lamps
module, Overdrive control switch,
Lighting Control Module (LCM),
A/C clutch, Analog cluster
7 10A Driver’s Door Module (DDM),
Premium radio
8 25A Powertrain Control Module (PCM)
power relay, Coil-on plugs, Radio
noise capacitor, Passive Anti-Theft
System (PATS)
9 5A Transmission range sensor
27 25
26 2423 21
2219
20
18 16
17 1514 12
131030
32
31
28
29
11
97
8653
41
2
2004 Grand Marquis(grn)
Owners Guide (post-2002-fmt)
USA English(fus)
Roadside Emergencies
148
Page 150 of 240
Fuse/Relay
LocationFuse Amp
RatingPassenger Compartment Fuse
Panel Description
23 15A EATC module, Instrument cluster,
LCM, Interior lamps, Door lock
switches
24 10A Left-hand low beam
25 20A Cigar lighter
26 10A Right-hand low beam
27 25A LCM for cornering lamps and high
beam headlamps
28 20A* Power windows
29—Not used
30—Not used
31—Not used
32—Not used
* Circuit breaker
Power distribution box
The power distribution box is located in the engine compartment. The
power distribution box contains high-current fuses that protect your
vehicle’s main electrical systems from overloads.
Always disconnect the battery before servicing high current
fuses.
Always replace the cover to the power distribution box before
reconnecting the battery or refilling fluid reservoirs
If the battery has been disconnected and reconnected, refer to the
Batterysection of theMaintenance and Specificationschapter.
2004 Grand Marquis(grn)
Owners Guide (post-2002-fmt)
USA English(fus)
Roadside Emergencies
150
Page 152 of 240
Fuse/Relay
LocationFuse Amp
RatingPower Distribution Box
Description
16—Not used
17—Not used
18—Not used
19 15A* Powertrain Control Module
(PCM), Fuel injectors
20 15A* PCM, HEGOs
21—Not used
22—Not used
23—Not used
24—Not used
101 30A** Ignition switch, Starter motor
solenoid via starter relay, IP fuses
7, 9, 12 and 14
102 50A** Cooling fan (engine)
103 40A** Blower motor
104 40A** Heated backlight relay
105 30A** PCM power relay, Diagnostic
connector, PDB fuses 19 and 20,
A/C clutch relay, Fuel pump
module relay
106 40A** Anti-lock Brake System (ABS)
107—Not used
108—Not used
109–Not used
110–Not used
111–Not used
112 50A** Ignition switch feed to IP fuses 4,
6, 8, 11, 13, 15, 17, 20, 22 and 28
113 50A** Feeds IP fuses 3, 5, 21, 23, 25, 27
114 30A** VAP Steering, Air suspension
compressor, Instrument cluster
2004 Grand Marquis(grn)
Owners Guide (post-2002-fmt)
USA English(fus)
Roadside Emergencies
152
Page 153 of 240
Fuse/Relay
LocationFuse Amp
RatingPower Distribution Box
Description
115 50A** Ignition switch feed to IP fuses 16
and 18
116 30A** Wipers
117–Not used
118 20A** ABS
201 1/2 ISO Horn relay
202 1/2 ISO PCM relay
203 1/2 ISO Fuel pump relay
204 1/2 ISO A/C clutch relay
205 1/2 ISO Traction control switch relay
206—Not used
207—Not used
208 1/2 ISO Moonroof relay
209—Not used
301 Full ISO Blower motor relay
302 Full ISO Starter solenoid relay
303 Full ISO Air suspension relay
304 Full ISO Heated backlight relay
401—Not used
501 Diode PCM
502 Diode A/C clutch
503—Not used
601—Not used
602 20A** Adjustable pedals, Power seat,
Locks, Decklid, Lumbar
* Mini fuse ** Circuit breaker/Maxi fuse
Relays
Relays are located in the power distribution box and should be replaced
by qualified technicians.
CHANGING THE TIRES
If you get a flat tire while driving, do not apply the brake heavily.
Instead, gradually decrease your speed. Hold the steering wheel firmly
and slowly move to a safe place on the side of the road.
2004 Grand Marquis(grn)
Owners Guide (post-2002-fmt)
USA English(fus)
Roadside Emergencies
153
Page 195 of 240
What you should know about fail-safe cooling
If the engine coolant supply is depleted, this feature allows the vehicle to
be driven temporarily before incremental component damage is incurred.
The“fail-safe”distance depends on ambient temperatures, vehicle load
and terrain.
How fail-safe cooling works
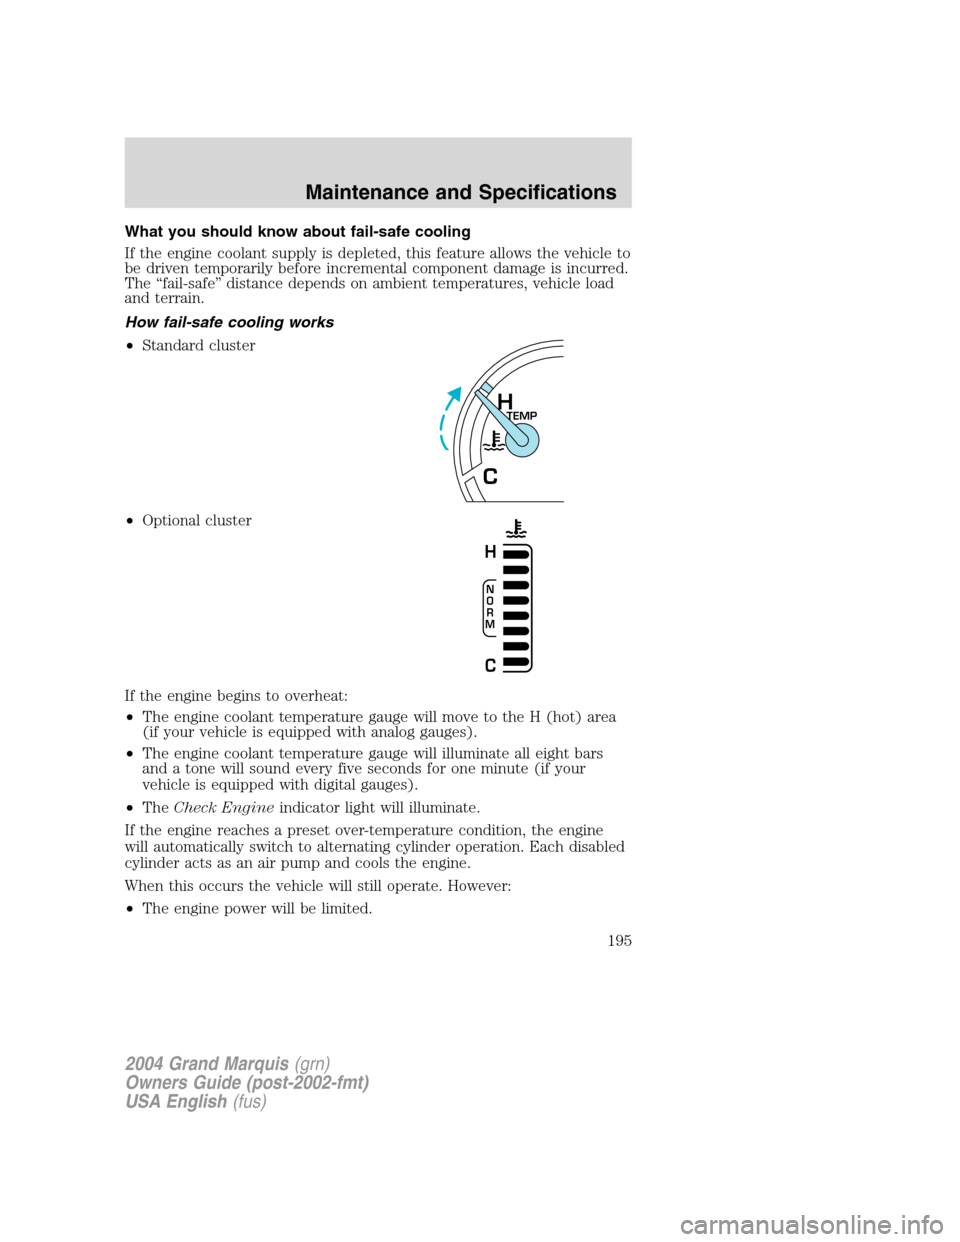
•Standard cluster
•Optional cluster
If the engine begins to overheat:
•The engine coolant temperature gauge will move to the H (hot) area
(if your vehicle is equipped with analog gauges).
•The engine coolant temperature gauge will illuminate all eight bars
and a tone will sound every five seconds for one minute (if your
vehicle is equipped with digital gauges).
•TheCheck Engineindicator light will illuminate.
If the engine reaches a preset over-temperature condition, the engine
will automatically switch to alternating cylinder operation. Each disabled
cylinder acts as an air pump and cools the engine.
When this occurs the vehicle will still operate. However:
•The engine power will be limited.
TEMPH
C
N
O
R
M
H
C
2004 Grand Marquis(grn)
Owners Guide (post-2002-fmt)
USA English(fus)
Maintenance and Specifications
195