Lights Mercury Grand Marquis 2004 s User Guide
[x] Cancel search | Manufacturer: MERCURY, Model Year: 2004, Model line: Grand Marquis, Model: Mercury Grand Marquis 2004Pages: 240, PDF Size: 1.92 MB
Page 41 of 240
Function Trade Number
Tail, stop, turn and sidemarker lamp (rear) 3157K
Backup lamp 3156K
License plate lamp 168
High-mount brakelamp 912
Luggage compartment lamp 212-2
Dome lamp 906
Rear reading lamp 211-2
Map lamp 168
Illuminated visor mirror 7065
Dual floorwell lamp 906
Glove compartment 168
All replacement bulbs are clear in color except where noted.
To replace all instrument panel lights - see your dealer.
Replacing the interior bulbs
Check the operation of all bulbs frequently.
Replacing headlamp bulbs
To remove the headlamp bulb:
1. Make sure the headlamp control is in the OFF position, then open the
hood
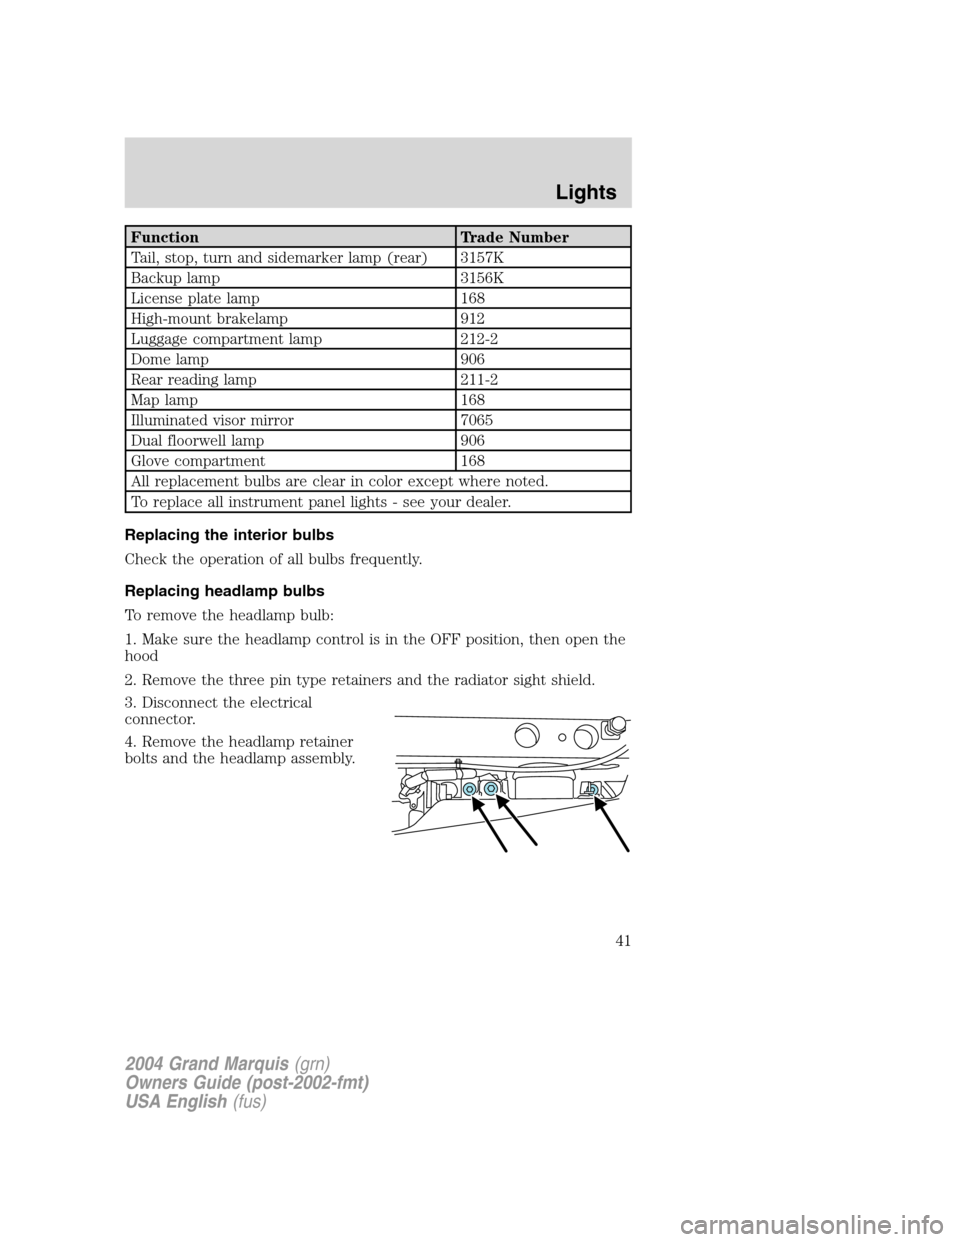
2. Remove the three pin type retainers and the radiator sight shield.
3. Disconnect the electrical
connector.
4. Remove the headlamp retainer
bolts and the headlamp assembly.
2004 Grand Marquis(grn)
Owners Guide (post-2002-fmt)
USA English(fus)
Lights
41
Page 42 of 240
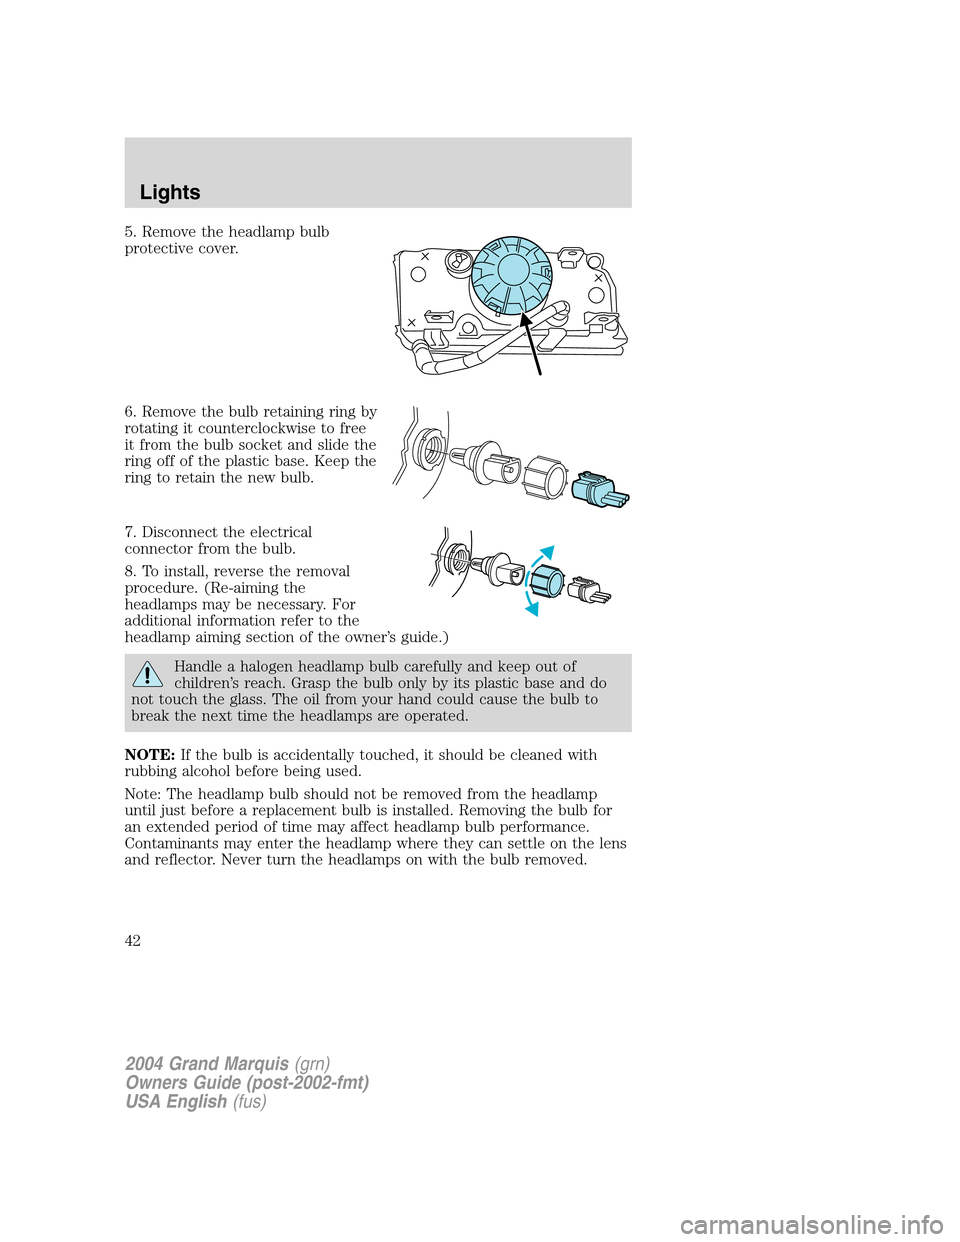
5. Remove the headlamp bulb
protective cover.
6. Remove the bulb retaining ring by
rotating it counterclockwise to free
it from the bulb socket and slide the
ring off of the plastic base. Keep the
ring to retain the new bulb.
7. Disconnect the electrical
connector from the bulb.
8. To install, reverse the removal
procedure. (Re-aiming the
headlamps may be necessary. For
additional information refer to the
headlamp aiming section of the owner’s guide.)
Handle a halogen headlamp bulb carefully and keep out of
children’s reach. Grasp the bulb only by its plastic base and do
not touch the glass. The oil from your hand could cause the bulb to
break the next time the headlamps are operated.
NOTE:If the bulb is accidentally touched, it should be cleaned with
rubbing alcohol before being used.
Note: The headlamp bulb should not be removed from the headlamp
until just before a replacement bulb is installed. Removing the bulb for
an extended period of time may affect headlamp bulb performance.
Contaminants may enter the headlamp where they can settle on the lens
and reflector. Never turn the headlamps on with the bulb removed.
2004 Grand Marquis(grn)
Owners Guide (post-2002-fmt)
USA English(fus)
Lights
42
Page 43 of 240
Replacing front parking/cornering/turn signal lamp bulbs
The park/turn/cornering lamp bulbs can be replaced with out removing
the headlamp assembly.
1. Make sure headlamp switch is in OFF position, then open the hood.
2. Remove the three pin type retainers and the radiator shield.
3. Loosen the parking lamp attachments, on the back side of the lamp,
and pull the lamp assembly forward.
4. Remove the bulb from the side turn lamp assembly.
5. Disconnect the electrical connector from the bulb and replace the
bulb.
Note: The parking lamp/turn signal bulbs should not be removed from
the lamp until just before a replacement bulb is installed. Removing the
bulb for an extended period of time may affect headlamp bulb
performance. Contaminants may enter the headlamp where they can
settle on the lens and reflector. Never turn the lamps on with the bulb
removed.
6. To install, reverse the order of the removal procedure.
Replacing tail lamp/brake/turn lamp bulbs
The tail lamp, the brake lamp and the turn signal lamp bulbs are located
in the tail lamp assembly. Follow the same steps to replace either bulb.
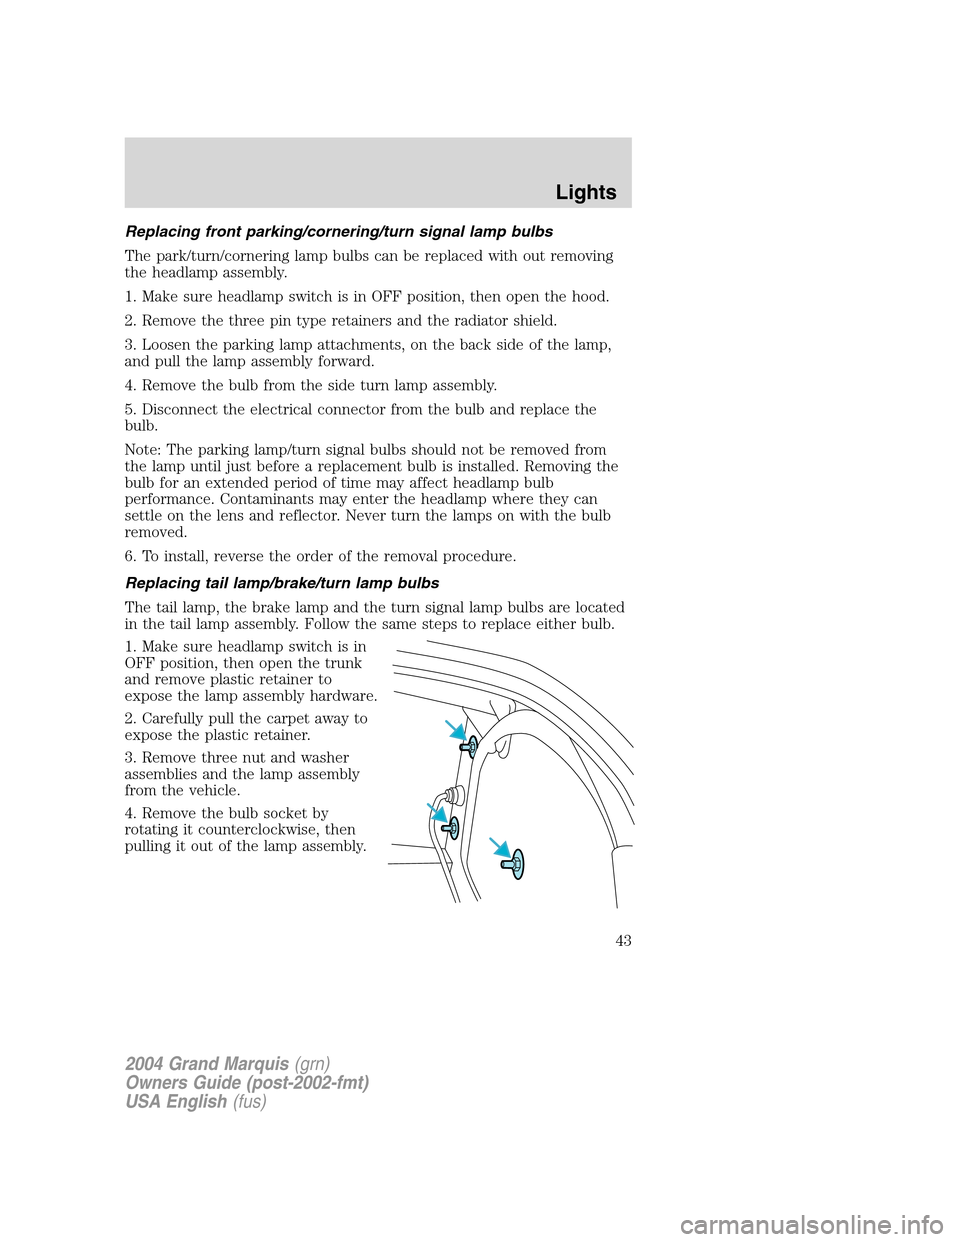
1. Make sure headlamp switch is in
OFF position, then open the trunk
and remove plastic retainer to
expose the lamp assembly hardware.
2. Carefully pull the carpet away to
expose the plastic retainer.
3. Remove three nut and washer
assemblies and the lamp assembly
from the vehicle.
4. Remove the bulb socket by
rotating it counterclockwise, then
pulling it out of the lamp assembly.
2004 Grand Marquis(grn)
Owners Guide (post-2002-fmt)
USA English(fus)
Lights
43
Page 44 of 240
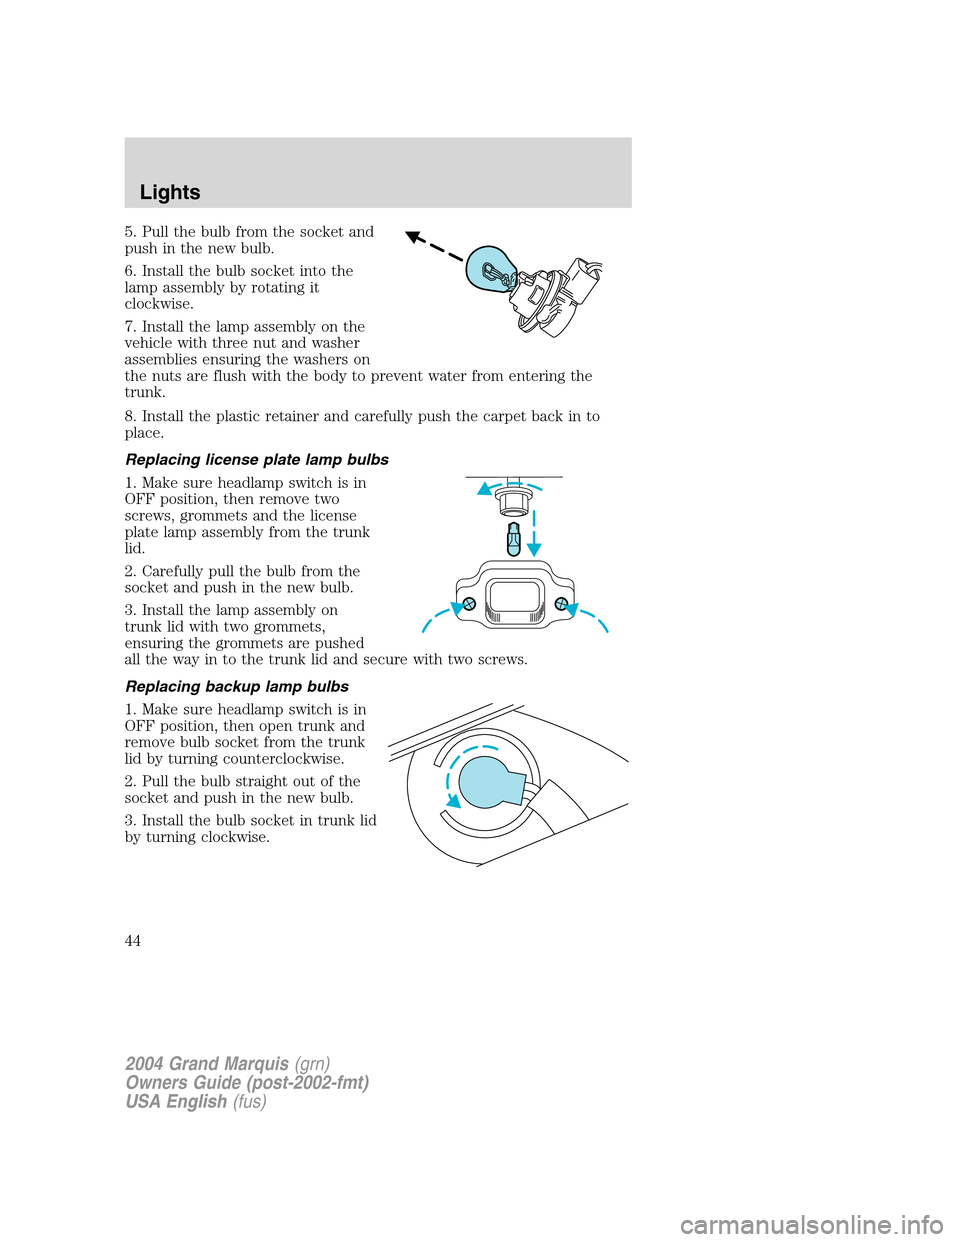
5. Pull the bulb from the socket and
push in the new bulb.
6. Install the bulb socket into the
lamp assembly by rotating it
clockwise.
7. Install the lamp assembly on the
vehicle with three nut and washer
assemblies ensuring the washers on
the nuts are flush with the body to prevent water from entering the
trunk.
8. Install the plastic retainer and carefully push the carpet back in to
place.
Replacing license plate lamp bulbs
1. Make sure headlamp switch is in
OFF position, then remove two
screws, grommets and the license
plate lamp assembly from the trunk
lid.
2. Carefully pull the bulb from the
socket and push in the new bulb.
3. Install the lamp assembly on
trunk lid with two grommets,
ensuring the grommets are pushed
all the way in to the trunk lid and secure with two screws.
Replacing backup lamp bulbs
1. Make sure headlamp switch is in
OFF position, then open trunk and
remove bulb socket from the trunk
lid by turning counterclockwise.
2. Pull the bulb straight out of the
socket and push in the new bulb.
3. Install the bulb socket in trunk lid
by turning clockwise.
2004 Grand Marquis(grn)
Owners Guide (post-2002-fmt)
USA English(fus)
Lights
44
Page 45 of 240
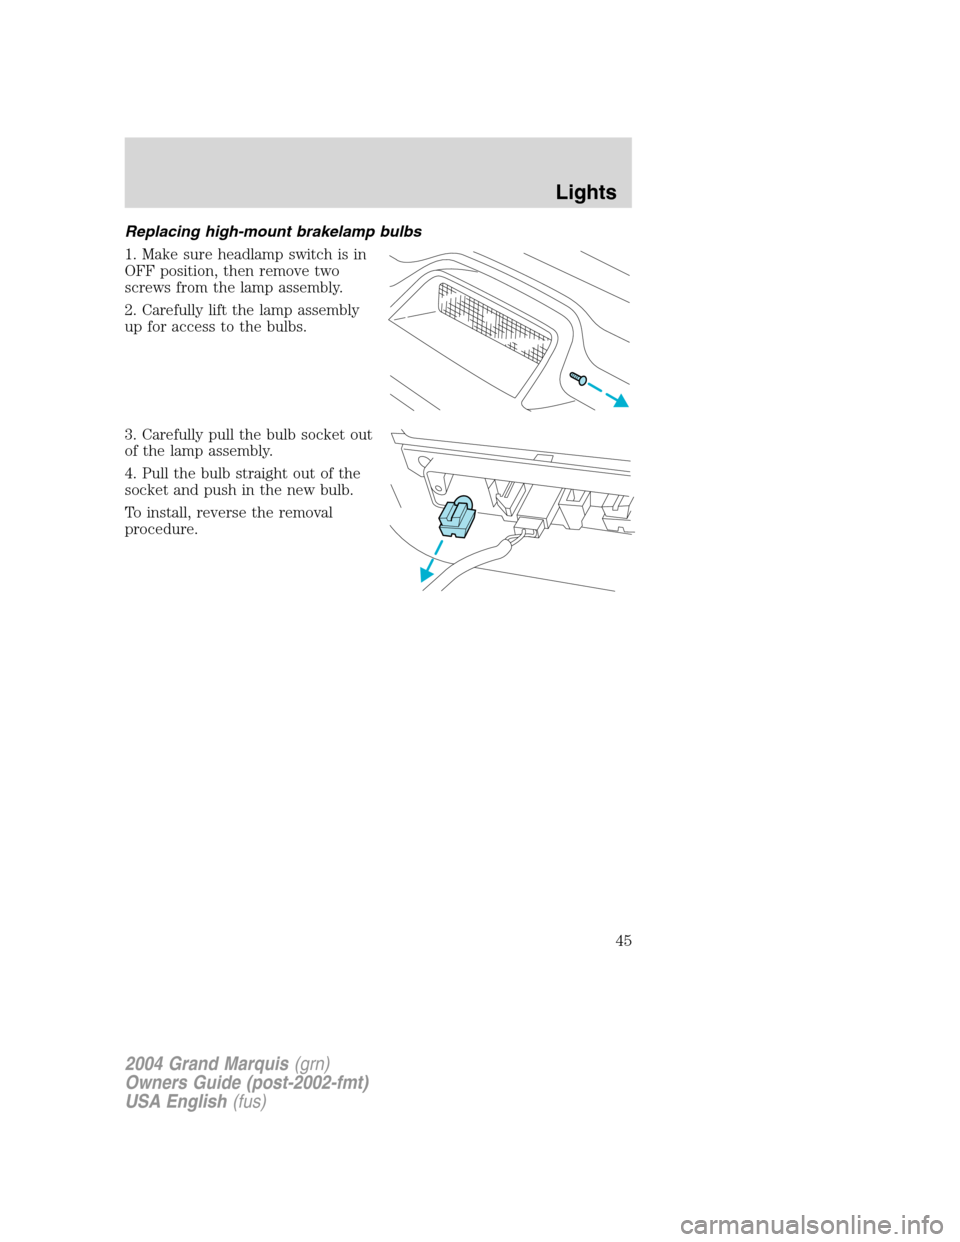
Replacing high-mount brakelamp bulbs
1. Make sure headlamp switch is in
OFF position, then remove two
screws from the lamp assembly.
2. Carefully lift the lamp assembly
up for access to the bulbs.
3. Carefully pull the bulb socket out
of the lamp assembly.
4. Pull the bulb straight out of the
socket and push in the new bulb.
To install, reverse the removal
procedure.
2004 Grand Marquis(grn)
Owners Guide (post-2002-fmt)
USA English(fus)
Lights
45
Page 46 of 240
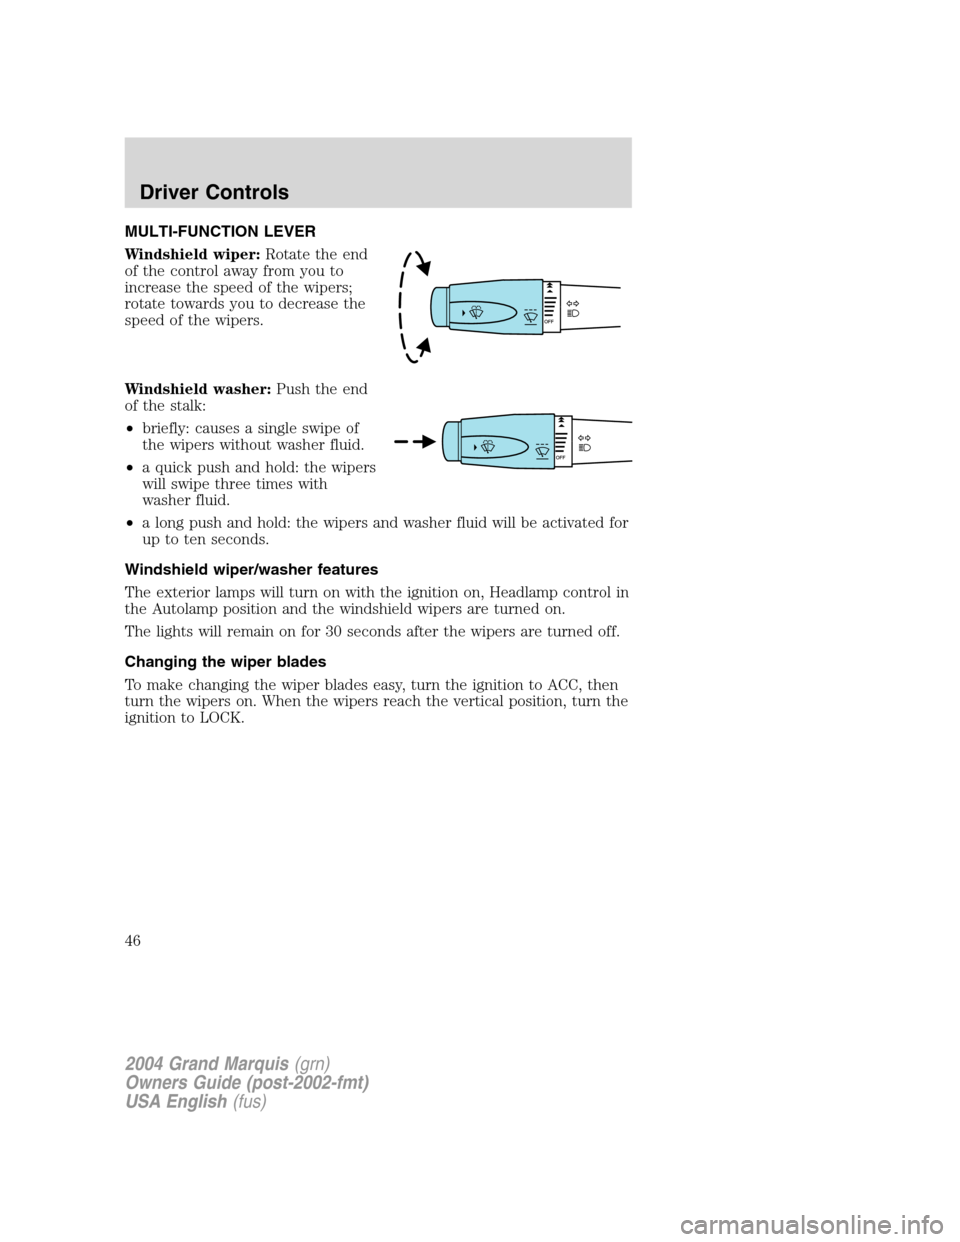
MULTI-FUNCTION LEVER
Windshield wiper:Rotate the end
of the control away from you to
increase the speed of the wipers;
rotate towards you to decrease the
speed of the wipers.
Windshield washer:Push the end
of the stalk:
•briefly: causes a single swipe of
the wipers without washer fluid.
•a quick push and hold: the wipers
will swipe three times with
washer fluid.
•a long push and hold: the wipers and washer fluid will be activated for
up to ten seconds.
Windshield wiper/washer features
The exterior lamps will turn on with the ignition on, Headlamp control in
the Autolamp position and the windshield wipers are turned on.
The lights will remain on for 30 seconds after the wipers are turned off.
Changing the wiper blades
To make changing the wiper blades easy, turn the ignition to ACC, then
turn the wipers on. When the wipers reach the vertical position, turn the
ignition to LOCK.
2004 Grand Marquis(grn)
Owners Guide (post-2002-fmt)
USA English(fus)
Driver Controls
Driver Controls
46
Page 58 of 240
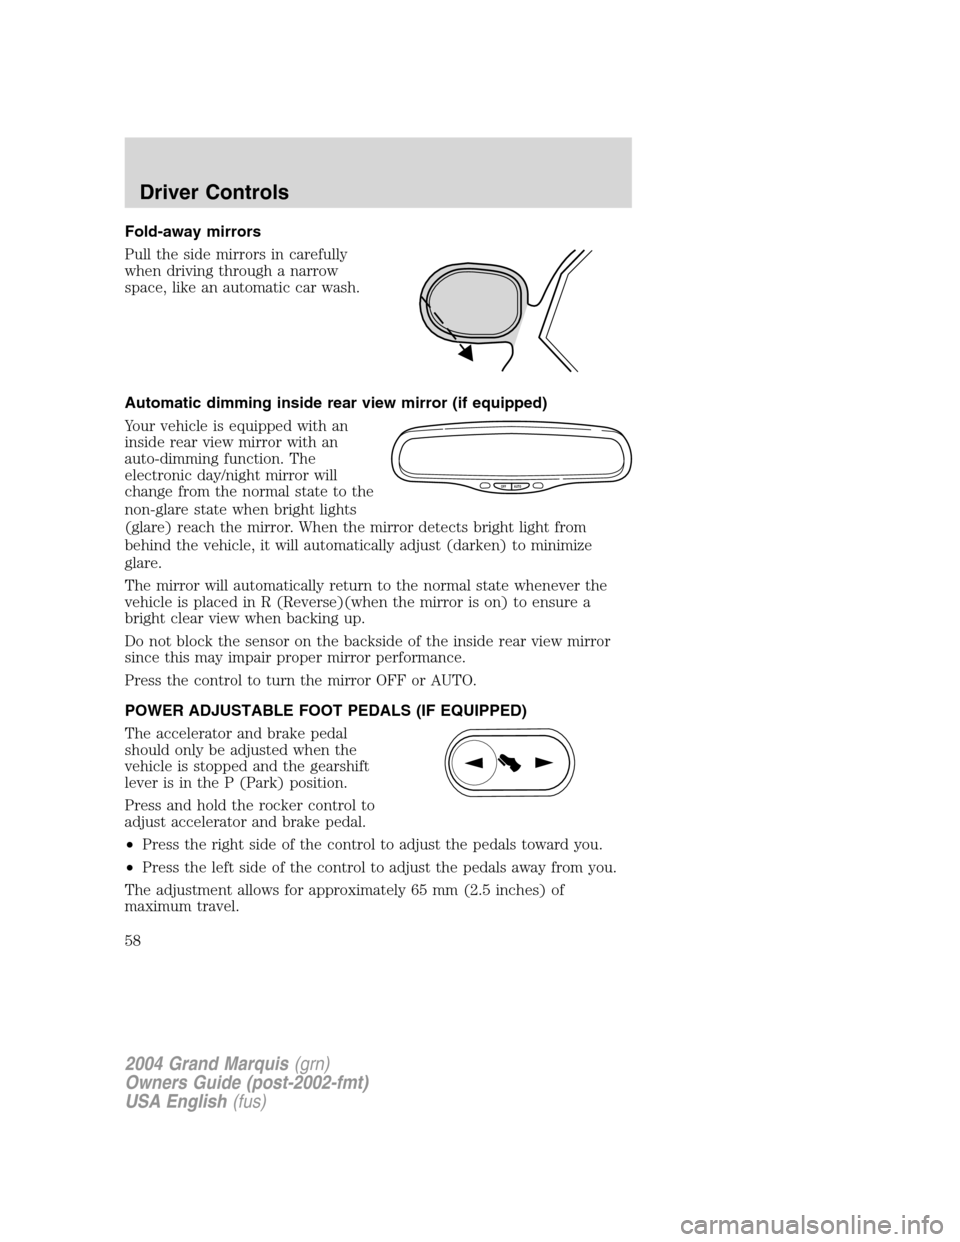
Fold-away mirrors
Pull the side mirrors in carefully
when driving through a narrow
space, like an automatic car wash.
Automatic dimming inside rear view mirror (if equipped)
Your vehicle is equipped with an
inside rear view mirror with an
auto-dimming function. The
electronic day/night mirror will
change from the normal state to the
non-glare state when bright lights
(glare) reach the mirror. When the mirror detects bright light from
behind the vehicle, it will automatically adjust (darken) to minimize
glare.
The mirror will automatically return to the normal state whenever the
vehicle is placed in R (Reverse)(when the mirror is on) to ensure a
bright clear view when backing up.
Do not block the sensor on the backside of the inside rear view mirror
since this may impair proper mirror performance.
Press the control to turn the mirror OFF or AUTO.
POWER ADJUSTABLE FOOT PEDALS (IF EQUIPPED)
The accelerator and brake pedal
should only be adjusted when the
vehicle is stopped and the gearshift
lever is in the P (Park) position.
Press and hold the rocker control to
adjust accelerator and brake pedal.
•Press the right side of the control to adjust the pedals toward you.
•Press the left side of the control to adjust the pedals away from you.
The adjustment allows for approximately 65 mm (2.5 inches) of
maximum travel.
OFF AUTO
2004 Grand Marquis(grn)
Owners Guide (post-2002-fmt)
USA English(fus)
Driver Controls
58
Page 79 of 240
The system automatically turns off after 25 seconds after the UNLOCK
button on the remote transmitter is pressed or when the ignition is
turned to the START or ACC position.
The inside lights will not turn off if:
•they have been turned on with the dimmer control, or
•any door is open.
The battery saver will shut off the interior lamps 30 minutes after the
last door is closed or after 10 minutes if the door is left open.
Autolock (if equipped)
This feature automatically locks all vehicle doors when:
•all doors are closed,
•the ignition is in the ON position,
•the brake pedal is depressed,
•you shift into any gear.
Relock
The autolock feature repeats when:
•ignition is in RUN
•a door is opened and closed
•the transmission is placed in reverse (R) or any drive gear, and then
•the brake pedal is depressed and then released
Deactivating/activating the autolock feature
Before following the procedure, make sure that the ignition is OFF and
all vehicle doors are closed.
Automatic door locks can also be turned on/off through the following
procedure:
You must complete steps 1-7 within 30 seconds or the procedure will
have to be repeated. If the procedure needs to be repeated, you must
wait 30 seconds.
1. Turn the ignition key to ON.
2. Press the power door unlock control on the door panel three times.
3. Turn the ignition key from ON to OFF.
4. Press the power door unlock control three times.
5. Turn the ignition back to ON.
2004 Grand Marquis(grn)
Owners Guide (post-2002-fmt)
USA English(fus)
Locks and Security
79
Page 91 of 240
Your vehicle’s Personal Safety System consists of the following items:
•Driver and passenger dual-stage air bag supplemental restraints
•Driver and front passenger side air bags (if equipped)
•Front safety belts with pretensioners, energy management retractors,
and safety belt usage sensors
•Driver’s seat position sensor
•Front crash severity sensor
•Restraints Control Module (RCM) with impact and safing sensors
•Restraint system warning light and back-up tone
•The electrical wiring for the air bags, crash sensor(s), safety belt
pretensioners, front safety belt usage sensors, driver seat position
sensor, and indicator lights
How does the Personal Safety System work?
The Personal Safety System can adapt the deployment strategy of your
vehicle’s safety devices according to crash severity and occupant
conditions. A collection of crash and occupant sensors provides
information to the Restraints control module (RCM). During a crash, the
RCM activates the safety belt pretensioners and/or either one or both
stages of the dual-stage air bag supplemental restraints based on crash
severity and occupant conditions.
The fact that the pretensioners or air bags did not activate for both front
seat occupants in a collision does not mean that something is wrong with
the system. Rather, it means the Personal Safety System determined the
accident conditions (crash severity, belt usage, etc.) were not
appropriate to activate these safety devices. Front air bags and
pretensioners are designed to activate only in frontal and near-frontal
collisions, not rollovers, side-impacts, or rear-impacts unless the collision
causes sufficient longitudinal deceleration.
Driver and passenger dual-stage air bag supplemental restraints
The dual-stage air bags offer the capability to tailor the level of air bag
inflation energy. A lower, less forceful energy level is provided for more
common, moderate-severity impacts. A higher energy level is used for
the most severe impacts. Refer toAir bag supplemental restraints
section in this chapter.
Front crash severity sensor
The front crash severity sensor enhances the ability to detect the
severity of an impact. Positioned up front, it provides valuable
2004 Grand Marquis(grn)
Owners Guide (post-2002-fmt)
USA English(fus)
Seating and Safety Restraints
91
Page 92 of 240
information early in the crash event on the severity of the impact. This
allows your Personal Safety System to distinguish between different
levels of crash severity and modify the deployment strategy of the
dual-stage air bags and safety belt pretensioners.
Driver’s seat position sensor
The driver’s seat position sensor allows your Personal Safety System to
tailor the deployment level of the driver dual-stage air bag based on seat
position. The system is designed to help protect smaller drivers sitting
close to the driver air bag by providing a lower air bag output level.
Front safety belt usage sensors
The front safety belt usage sensors detect whether or not the driver and
front outboard passenger safety belts are fastened. This information
allows your Personal Safety System to tailor the air bag deployment and
safety belt pretensioner activation depending upon safety belt usage.
Refer toSafety beltsection in this chapter.
Front safety belt pretensioners
The safety belt pretensioners at the front outboard seating positions are
designed to tighten the safety belts firmly against the occupant’s body
during a frontal or near-frontal collision. This maximizes the effectiveness
of the safety belts and helps properly position the occupant relative to
the air bag to improve protection. The safety belt pretensioners can be
either activated alone or, if the collision is of sufficient severity, together
with the air bags.
Front safety belt energy management retractors
The front outboard safety belt energy management retractors allow
webbing to be pulled out of the retractor in a gradual and controlled
manner in response to the occupant’s forward momentum. This helps
reduce the risk of force-related injuries to the occupant’s chest by
limiting the load on the occupant. Refer toEnergy management feature
section in this chapter.
Determining if the Personal Safety System is operational
The Personal Safety System uses a warning light in the instrument
cluster or a back-up tone to indicate the condition of the system. Refer
to theWarning lightsection in theInstrument clusterchapter. Routine
maintenance of the Personal Safety System is not required.
The Restraints control module (RCM) monitors its own internal circuits
and the circuits for the air bag supplemental restraints, crash sensor(s),
2004 Grand Marquis(grn)
Owners Guide (post-2002-fmt)
USA English(fus)
Seating and Safety Restraints
92