wheel Mercury Grand Marquis 2005 Owner's Manuals
[x] Cancel search | Manufacturer: MERCURY, Model Year: 2005, Model line: Grand Marquis, Model: Mercury Grand Marquis 2005Pages: 256, PDF Size: 2.26 MB
Page 1 of 256
Introduction 4
Instrument Cluster 10
Warning and control lights 10
Gauges 15
Entertainment Systems 20
AM/FM stereo with CD 20
AM/FM stereo cassette with CD 23
AM/FM stereo with cassette and in-dash six CD 28
Climate Controls 34
Manual heating and air conditioning 34
Automatic temperature control 35
Rear window defroster 37
Lights 38
Headlamps 38
Turn signal control 41
Bulb replacement 43
Driver Controls 49
Windshield wiper/washer control 49
Steering wheel adjustment 50
Power windows 61
Mirrors 62
Speed control 63
Message center 72
Locks and Security 78
Keys 78
Locks 78
Anti-theft system 86
Table of Contents
1
2005 Grand Marquis(grn)
Owners Guide (post-2002-fmt)
USA(fus)
Page 2 of 256
Seating and Safety Restraints 91
Seating 91
Safety restraints 96
Airbags 110
Child restraints 121
Tires, Wheels and Loading 132
Tire Information 132
Changing tires 137
Lug Nut Torque 143
Vehicle loading 153
Trailer towing 159
Recreational towing 162
Driving 163
Starting 163
Brakes 167
Traction control 170
Air suspension 172
Transmission operation 173
Roadside Emergencies 180
Getting roadside assistance 180
Hazard flasher switch 181
Fuel pump shut-off switch 181
Fuses and relays 182
Jump starting 190
Wrecker towing 195
Customer Assistance 196
Reporting safety defects (U.S. only) 204
Cleaning 205
Table of Contents
2
2005 Grand Marquis(grn)
Owners Guide (post-2002-fmt)
USA(fus)
Page 6 of 256
SPECIAL NOTICES
Emission warranty
The New Vehicle Limited Warranty includes Bumper-to-Bumper
Coverage, Safety Restraint Coverage, Corrosion Coverage, and 6.0L
Power Stroke Diesel Engine Coverage. In addition, your vehicle is eligible
for Emissions Defect and Emissions Performance Warranties. For a
detailed description of what is covered and what is not covered, refer to
theWarranty Guidethat is provided to you along with yourOwner’s
Guide.
Service Data Recording
Service data recorders in your vehicle are capable of collecting and
storing diagnostic information about your vehicle. This potentially
includes information about the performance or status of various systems
and modules in the vehicle, such as engine, throttle, steering or brake
systems. In order to properly diagnose and service your vehicle, Ford
Motor Company, Ford of Canada, and service and repair facilities may
access vehicle diagnostic information through a direct connection to your
vehicle when diagnosing or servicing your vehicle.
Event Data Recording
Other modules in your vehicle — event data recorders — are capable of
collecting and storing data during a crash or near crash event. The
recorded information may assist in the investigation of such an event.
The modules may record information about both the vehicle and the
occupants, potentially including information such as:
•how various systems in your vehicle were operating;
•whether or not the driver and passenger seatbelts were buckled;
•how far (if at all) the driver was depressing the accelerator and/or the
brake pedal;
•how fast the vehicle was traveling; and
•where the driver was positioning the steering wheel.
To access this information, special equipment must be directly connected
to the recording modules. Ford Motor Company and Ford of Canada do
not access event data recorder information without obtaining consent,
unless pursuant to court order or where required by law enforcement,
other government authorities or other third parties acting with lawful
authority. Other parties may seek to access the information
independently of Ford Motor Company and Ford of Canada.
2005 Grand Marquis(grn)
Owners Guide (post-2002-fmt)
USA(fus)
Introduction
6
Page 35 of 256
To aid in side window defogging/demisting in cold weather:
1. Select NORM A/C.
2. Adjust the temperature control to maintain comfort.
3. Set the fan speed to HI.
4. Direct the outer instrument panel vents towards the side windows.
To increase airflow to the outer instrument panel vents, close the vents
located in the middle of the instrument panel.
Do not place objects on top of the instrument panel as these
objects may become projectiles in a collision or sudden stop.
ELECTRONIC AUTOMATIC TEMPERATURE CONTROL (EATC)
SYSTEM (IF EQUIPPED)
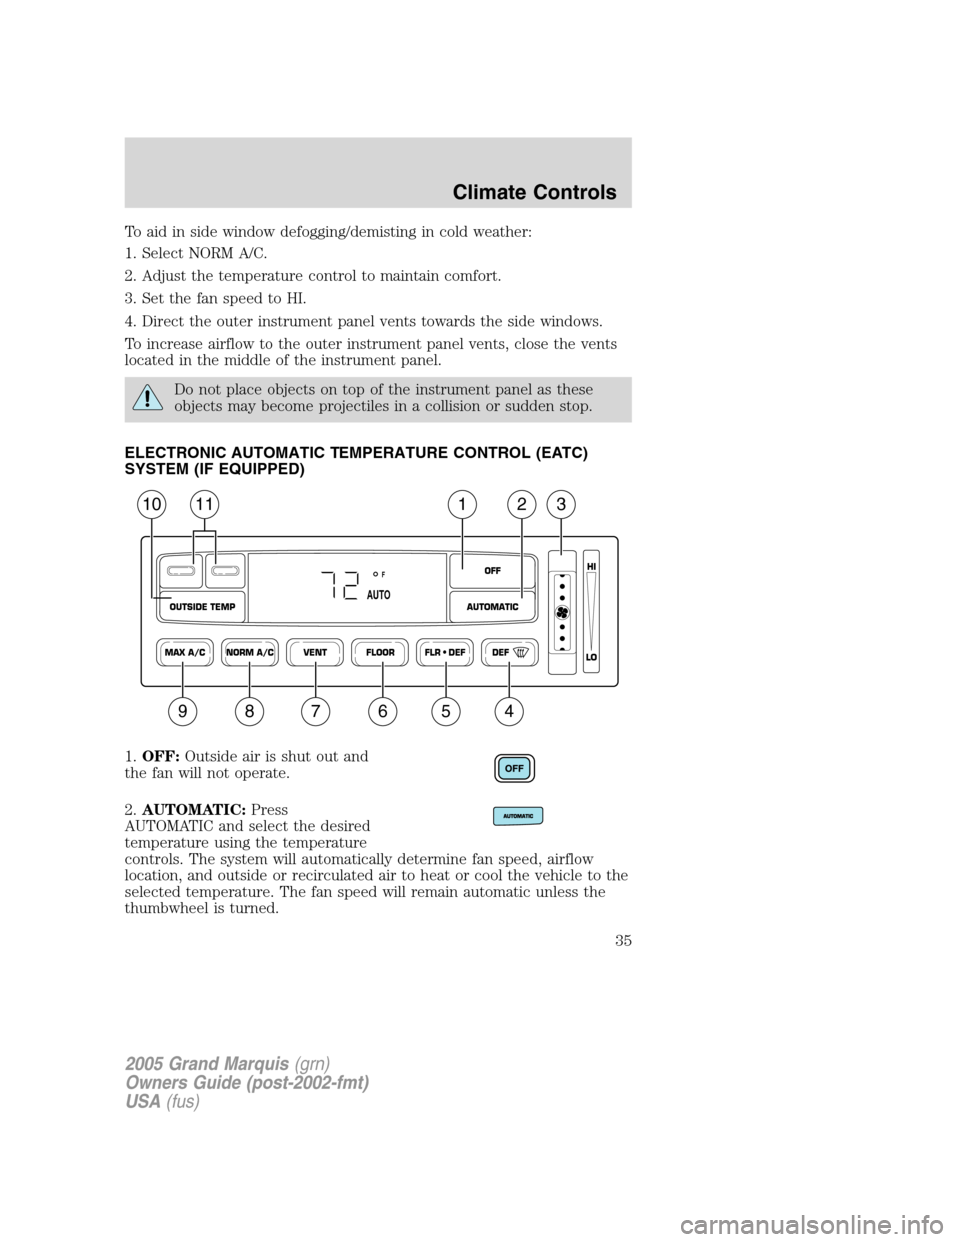
1.OFF:Outside air is shut out and
the fan will not operate.
2.AUTOMATIC:Press
AUTOMATIC and select the desired
temperature using the temperature
controls. The system will automatically determine fan speed, airflow
location, and outside or recirculated air to heat or cool the vehicle to the
selected temperature. The fan speed will remain automatic unless the
thumbwheel is turned.
NORM A/CVENT FLOOR FLR • DEF DEF
HI
LO
MAX A/C
OUTSIDE TEMP AUTOMATICOFF
F
AUTO
1112310
987654
2005 Grand Marquis(grn)
Owners Guide (post-2002-fmt)
USA(fus)
Climate Controls
35
Page 39 of 256
Always remember to turn on your headlamps at dusk or during
inclement weather. The Daytime Running Light (DRL) System
does not activate your tail lamps and generally may not provide
adequate lighting during these conditions. Failure to activate your
headlamps under these conditions may result in a collision.
High beams
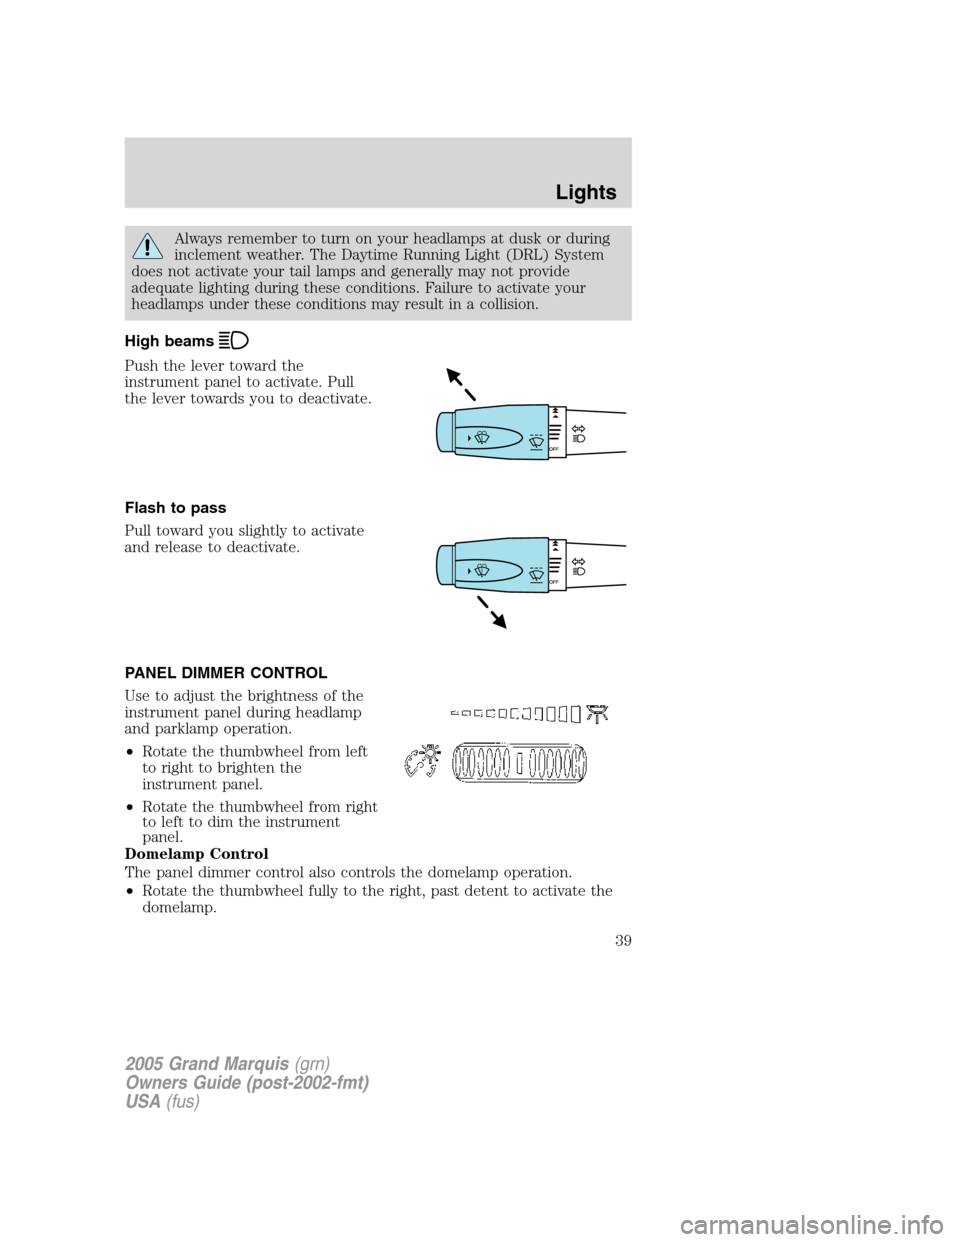
Push the lever toward the
instrument panel to activate. Pull
the lever towards you to deactivate.
Flash to pass
Pull toward you slightly to activate
and release to deactivate.
PANEL DIMMER CONTROL
Use to adjust the brightness of the
instrument panel during headlamp
and parklamp operation.
•Rotate the thumbwheel from left
to right to brighten the
instrument panel.
•Rotate the thumbwheel from right
to left to dim the instrument
panel.
Domelamp Control
The panel dimmer control also controls the domelamp operation.
•Rotate the thumbwheel fully to the right, past detent to activate the
domelamp.
2005 Grand Marquis(grn)
Owners Guide (post-2002-fmt)
USA(fus)
Lights
39
Page 40 of 256
•In order to turn off the domelamp, rotate the thumbwheel to the left.
AIMING THE HEADLAMPS
The headlamps on your vehicle are properly aimed at the assembly plant.
If your vehicle has been in an accident the alignment of your headlamps
should be checked by a qualified service technician.
Vertical aim adjustment
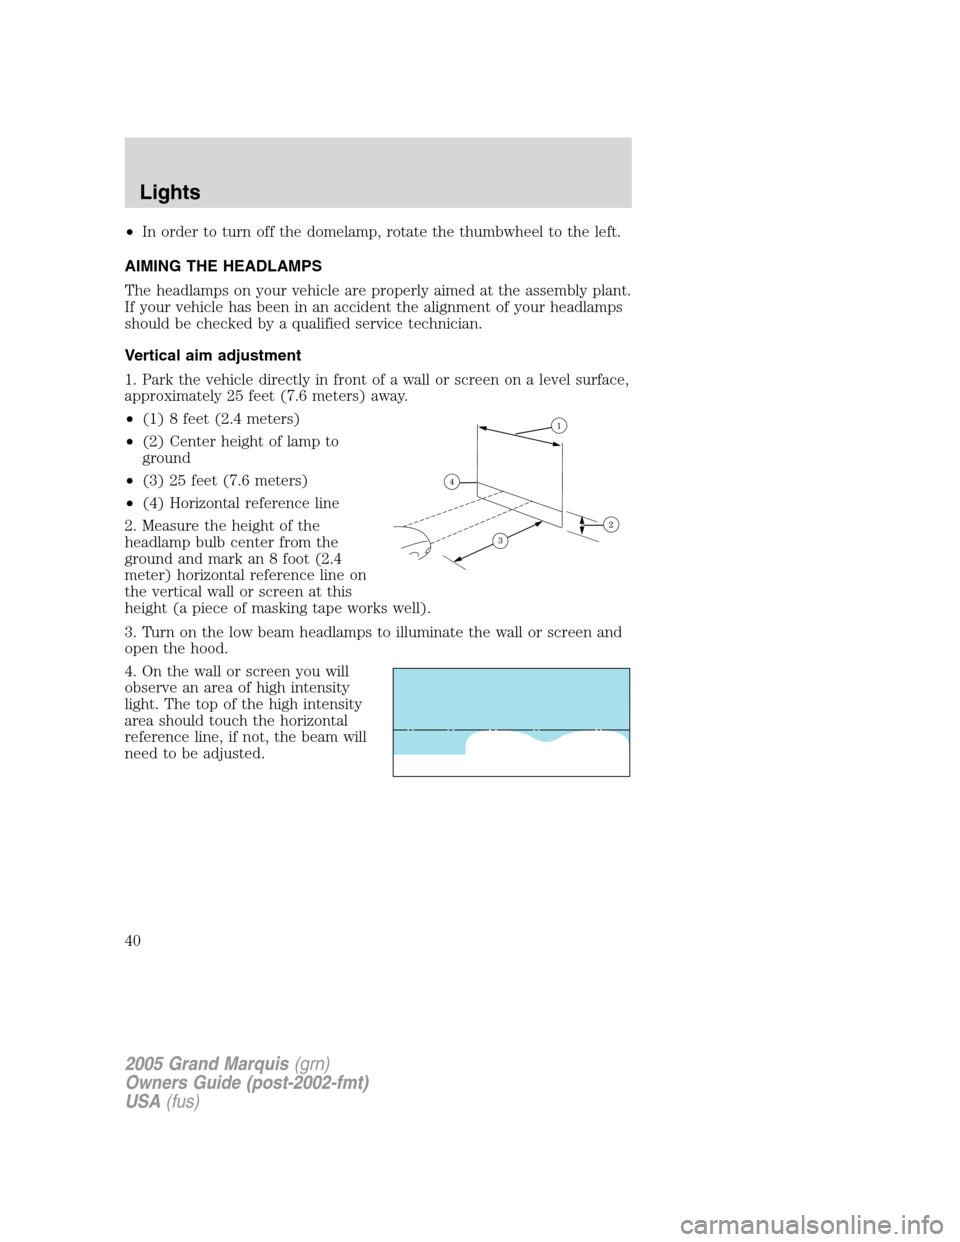
1. Park the vehicle directly in front of a wall or screen on a level surface,
approximately 25 feet (7.6 meters) away.
•(1) 8 feet (2.4 meters)
•(2) Center height of lamp to
ground
•(3) 25 feet (7.6 meters)
•(4) Horizontal reference line
2. Measure the height of the
headlamp bulb center from the
ground and mark an 8 foot (2.4
meter) horizontal reference line on
the vertical wall or screen at this
height (a piece of masking tape works well).
3. Turn on the low beam headlamps to illuminate the wall or screen and
open the hood.
4. On the wall or screen you will
observe an area of high intensity
light. The top of the high intensity
area should touch the horizontal
reference line, if not, the beam will
need to be adjusted.
2005 Grand Marquis(grn)
Owners Guide (post-2002-fmt)
USA(fus)
Lights
40
Page 43 of 256
REAR COURTESY/READING LAMPS
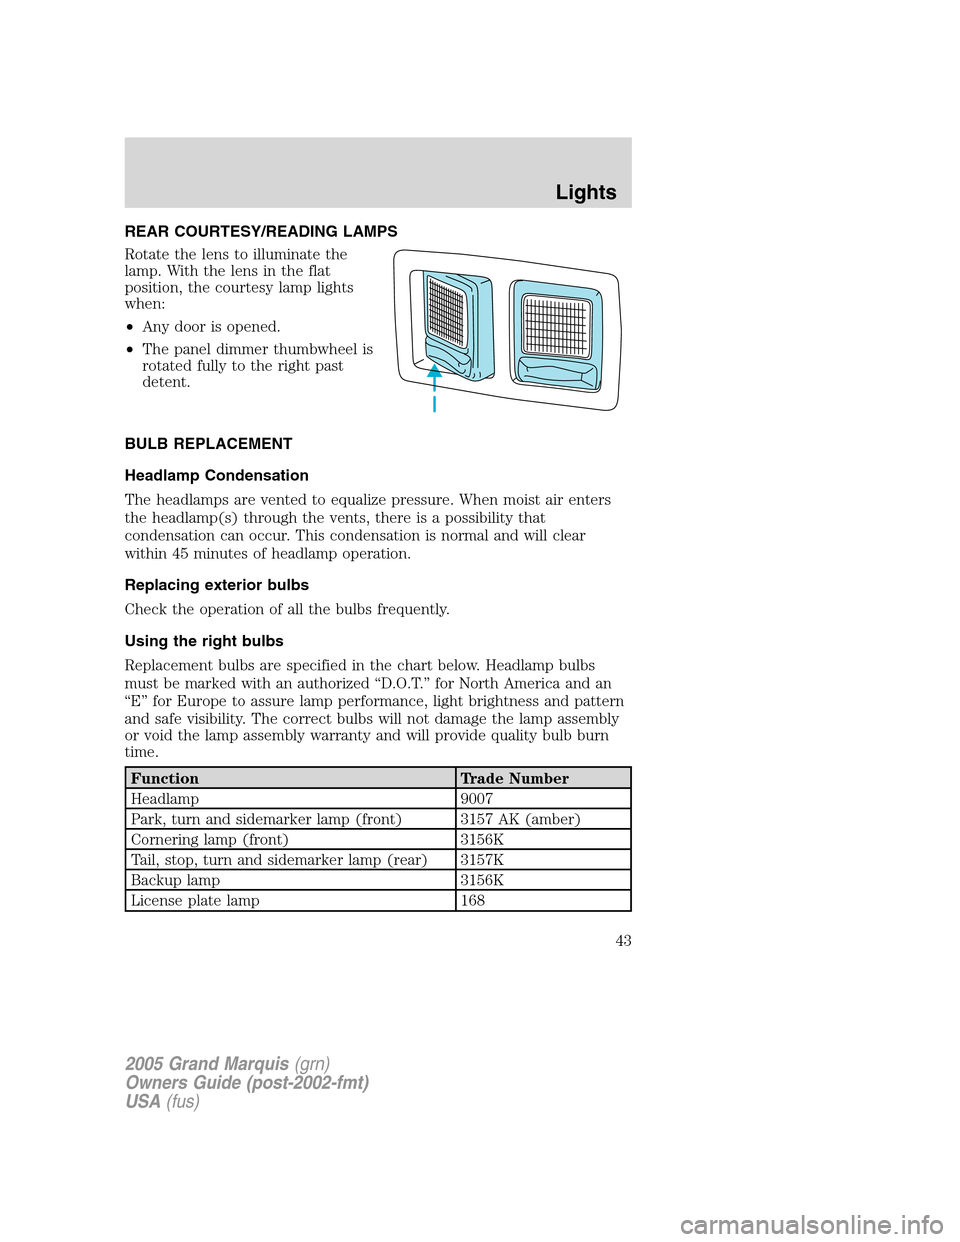
Rotate the lens to illuminate the
lamp. With the lens in the flat
position, the courtesy lamp lights
when:
•Any door is opened.
•The panel dimmer thumbwheel is
rotated fully to the right past
detent.
BULB REPLACEMENT
Headlamp Condensation
The headlamps are vented to equalize pressure. When moist air enters
the headlamp(s) through the vents, there is a possibility that
condensation can occur. This condensation is normal and will clear
within 45 minutes of headlamp operation.
Replacing exterior bulbs
Check the operation of all the bulbs frequently.
Using the right bulbs
Replacement bulbs are specified in the chart below. Headlamp bulbs
must be marked with an authorized “D.O.T.” for North America and an
“E” for Europe to assure lamp performance, light brightness and pattern
and safe visibility. The correct bulbs will not damage the lamp assembly
or void the lamp assembly warranty and will provide quality bulb burn
time.
Function Trade Number
Headlamp 9007
Park, turn and sidemarker lamp (front) 3157 AK (amber)
Cornering lamp (front) 3156K
Tail, stop, turn and sidemarker lamp (rear) 3157K
Backup lamp 3156K
License plate lamp 168
2005 Grand Marquis(grn)
Owners Guide (post-2002-fmt)
USA(fus)
Lights
43
Page 50 of 256
Poor wiper quality can sometimes be improved by cleaning the wiper
blades, refer toWindows and wiper bladesin theCleaningchapter.
To prolong the life of the wiper blades, it is highly recommended to
scrape off the ice on the windshield before turning on the wipers. The
layer of ice has many sharp edges and can damage the micro edge of the
wiper rubber element.
TILT STEERING WHEEL
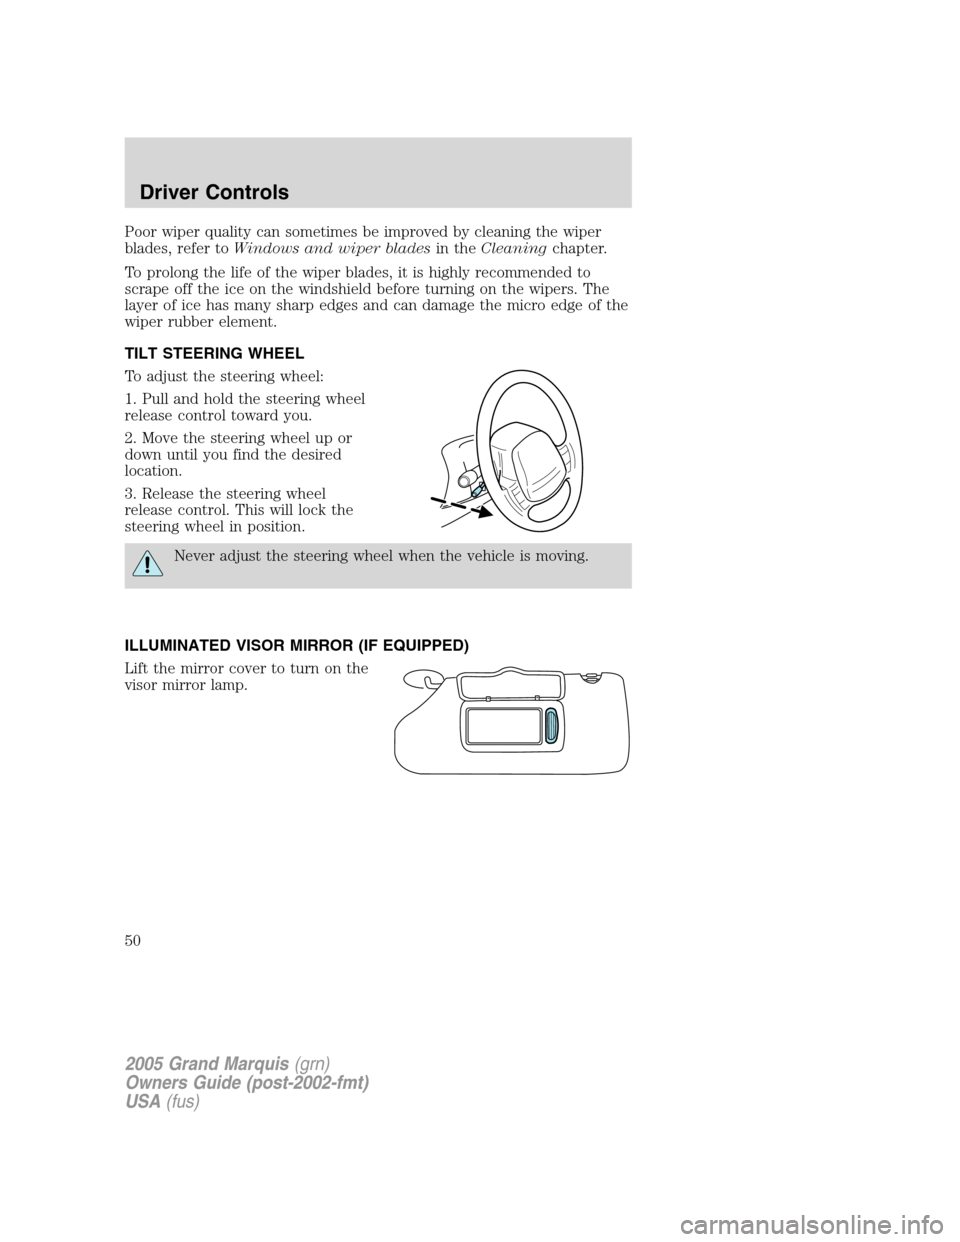
To adjust the steering wheel:
1. Pull and hold the steering wheel
release control toward you.
2. Move the steering wheel up or
down until you find the desired
location.
3. Release the steering wheel
release control. This will lock the
steering wheel in position.
Never adjust the steering wheel when the vehicle is moving.
ILLUMINATED VISOR MIRROR (IF EQUIPPED)
Lift the mirror cover to turn on the
visor mirror lamp.
2005 Grand Marquis(grn)
Owners Guide (post-2002-fmt)
USA(fus)
Driver Controls
50
Page 64 of 256
Setting speed control
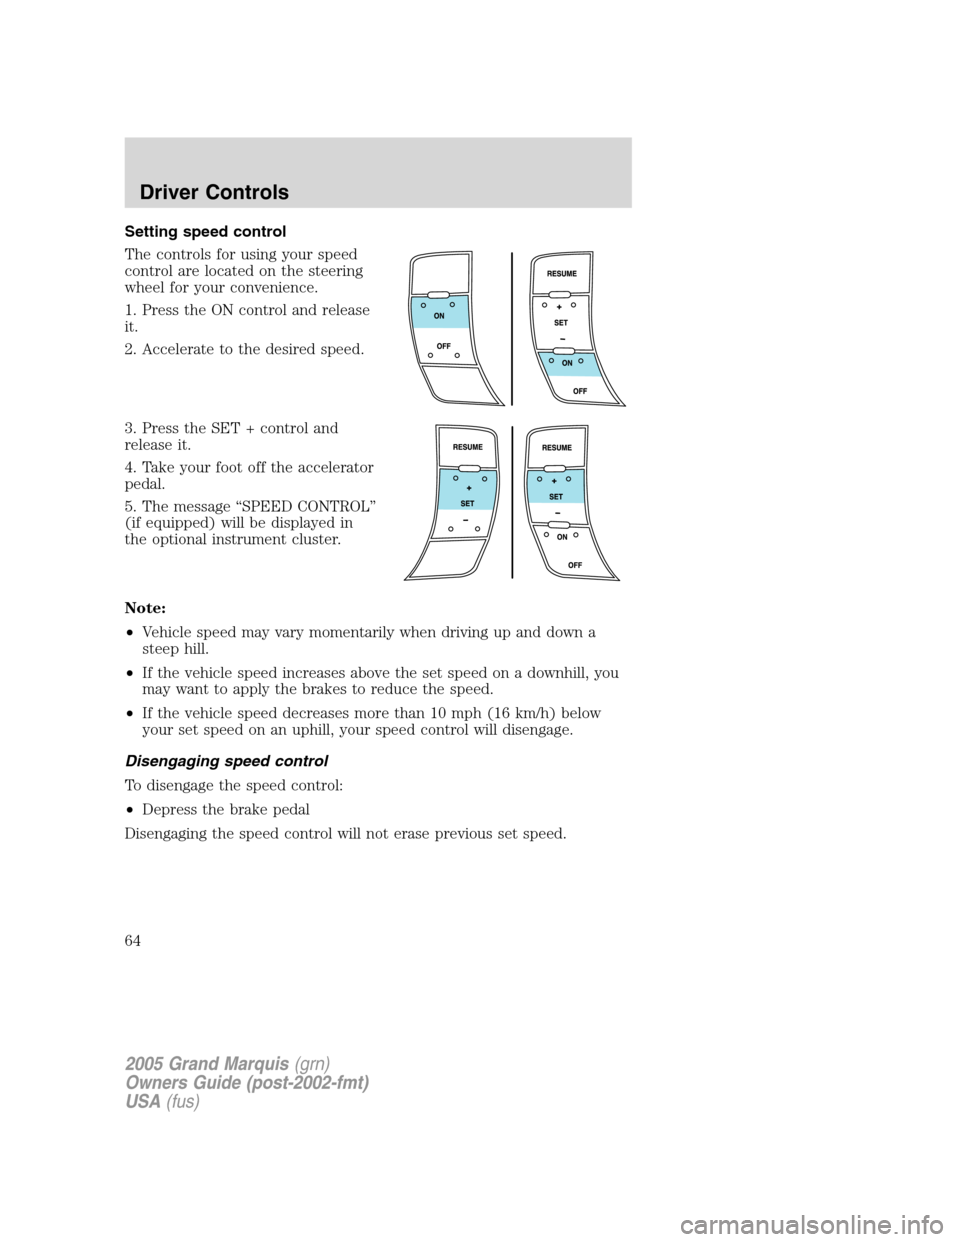
The controls for using your speed
control are located on the steering
wheel for your convenience.
1. Press the ON control and release
it.
2. Accelerate to the desired speed.
3. Press the SET + control and
release it.
4. Take your foot off the accelerator
pedal.
5. The message “SPEED CONTROL”
(if equipped) will be displayed in
the optional instrument cluster.
Note:
•Vehicle speed may vary momentarily when driving up and down a
steep hill.
•If the vehicle speed increases above the set speed on a downhill, you
may want to apply the brakes to reduce the speed.
•If the vehicle speed decreases more than 10 mph (16 km/h) below
your set speed on an uphill, your speed control will disengage.
Disengaging speed control
To disengage the speed control:
•Depress the brake pedal
Disengaging the speed control will not erase previous set speed.
2005 Grand Marquis(grn)
Owners Guide (post-2002-fmt)
USA(fus)
Driver Controls
64
Page 66 of 256
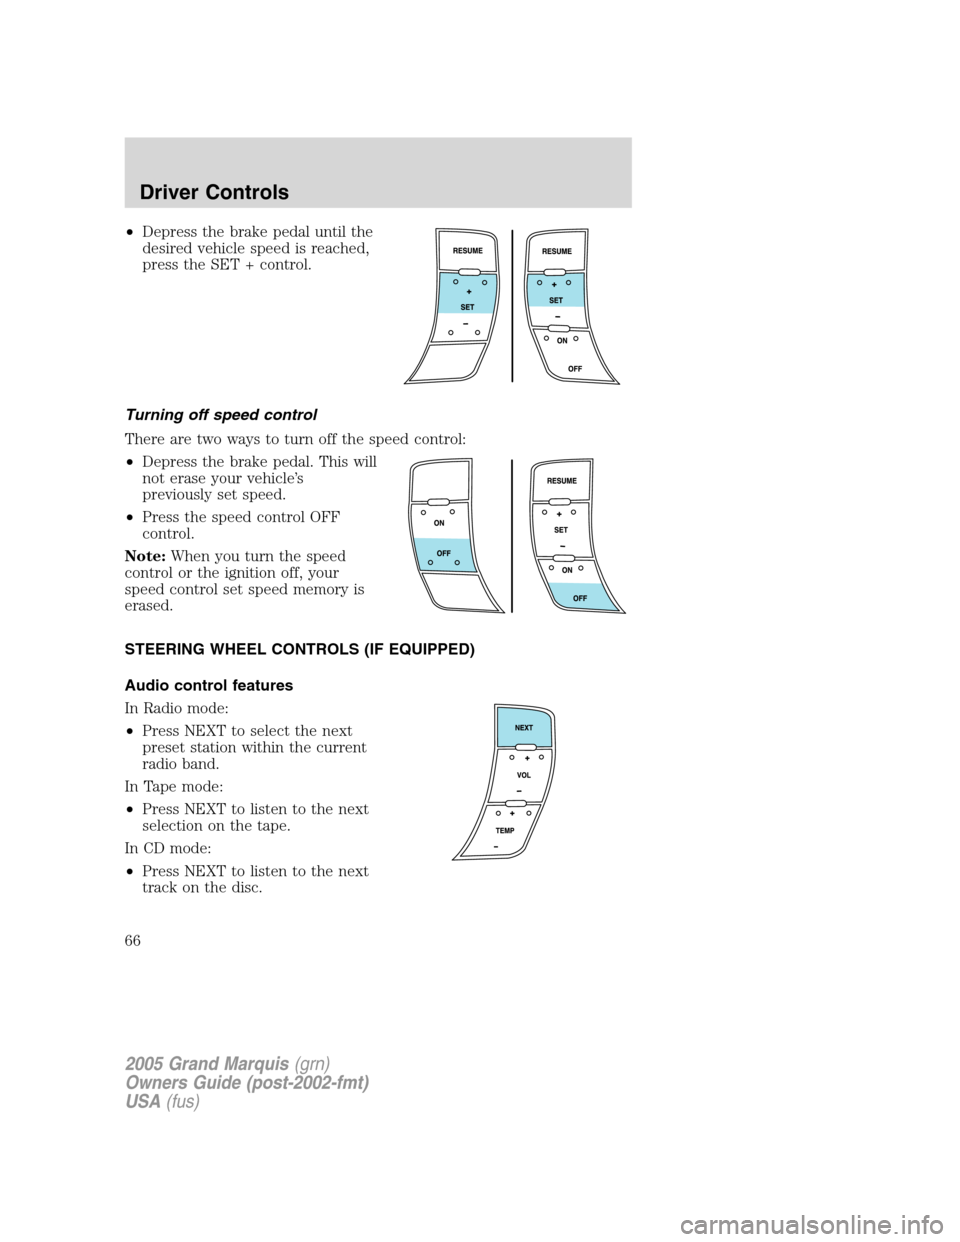
•Depress the brake pedal until the
desired vehicle speed is reached,
press the SET + control.
Turning off speed control
There are two ways to turn off the speed control:
•Depress the brake pedal. This will
not erase your vehicle’s
previously set speed.
•Press the speed control OFF
control.
Note:When you turn the speed
control or the ignition off, your
speed control set speed memory is
erased.
STEERING WHEEL CONTROLS (IF EQUIPPED)
Audio control features
In Radio mode:
•Press NEXT to select the next
preset station within the current
radio band.
In Tape mode:
•Press NEXT to listen to the next
selection on the tape.
In CD mode:
•Press NEXT to listen to the next
track on the disc.
2005 Grand Marquis(grn)
Owners Guide (post-2002-fmt)
USA(fus)
Driver Controls
66