service Mercury Grand Marquis 2008 s Owner's Guide
[x] Cancel search | Manufacturer: MERCURY, Model Year: 2008, Model line: Grand Marquis, Model: Mercury Grand Marquis 2008Pages: 280, PDF Size: 2.4 MB
Page 145 of 280
Increasing the inflation pressure beyond this pressure will not increase
the tire’s load carrying capability.
•kPa:Kilopascal, a metric unit of air pressure.
•PSI:Pounds per square inch, a standard unit of air pressure.
•Cold inflation pressure:The tire pressure when the vehicle has
been stationary and out of direct sunlight for an hour or more and
prior to the vehicle being driven for 1 mile (1.6 km).
•Recommended inflation pressure:The cold inflation pressure found
on the Safety Compliance Certification Label or Tire Label located on
the B-Pillar or the edge of the driver’s door.
•B-pillar:The structural member at the side of the vehicle behind the
front door.
•Bead area of the tire:Area of the tire next to the rim.
•Sidewall of the tire:Area between the bead area and the tread.
•Tread area of the tire:Area of the perimeter of the tire that
contacts the road when mounted on the vehicle.
•Rim:The metal support (wheel) for a tire or a tire and tube assembly
upon which the tire beads are seated.
INFLATING YOUR TIRES
Safe operation of your vehicle requires that your tires are properly
inflated. Remember that a tire can lose up to half of its air pressure
without appearing flat.
Every day before you drive, check your tires. If one looks lower than the
others, use a tire gauge to check pressure of all tires and adjust if
required.
At least once a month and before long trips, inspect each tire and check
the tire pressure with a tire gauge (including spare, if equipped). Inflate
all tires to the inflation pressure recommended by Ford Motor Company.
Use a tire gauge to check the tire inflation pressure, including the spare
(if equipped), at least monthly and before long trips. You are strongly
urged to buy a reliable tire pressure gauge, as automatic service station
gauges may be inaccurate. Ford recommends the use of a digital or
dial-type tire pressure gauge rather than a stick-type tire pressure gauge.
Use the recommended cold inflation pressure for optimum tire
performance and wear. Under-inflation or over-inflation may cause
uneven treadwear patterns.
2008 Grand Marquis(grn)
Owners Guide (post-2002-fmt)
USA(fus)
Tires, Wheels and Loading
145
Page 150 of 280
When mounting replacement tires and wheels, you should not
exceed the maximum pressure indicated on the sidewall of the
tire to set the beads without additional precautions listed below. If the
beads do not seat at the maximum pressure indicated, re-lubricate and
try again.
When inflating the tire for mounting pressures up to 20 psi greater
than the maximum pressure on the tire sidewall, the following
precautions must be taken to protect the person mounting the tire:
1. Make sure that you have the correct tire and wheel size.
2. Lubricate the tire bead and wheel bead seat area again.
3. Stand at a minimum of 12 feet away from the tire wheel assembly.
4. Use both eye and ear protection.
For a mounting pressure more than 20 psi greater than the maximum
pressure, a Ford Dealer or other tire service professional should do the
mounting.
Always inflate steel carcass tires with a remote air fill with the person
inflating standing at a minimum of 12 ft. away from the tire wheel
assembly.
Important:Remember to replace the wheel valve stems when the road
tires are replaced on your vehicle.
It is recommended that the two front tires or two rear tires generally be
replaced as a pair.
The tire pressure sensors mounted in the wheels (originally installed on
your vehicle) are not designed to be used in aftermarket wheels.
The use of wheels or tires not recommended by Ford Motor Company
may affect the operation of your Tire Pressure Monitoring System.
If the TPMS indicator is flashing, your TPMS is malfunctioning. Your
replacement tire might be incompatible with your TPMS, or some
component of the TPMS may be damaged.
Safety practices
Driving habits have a great deal to do with your tire mileage and safety.
•Observe posted speed limits
•Avoid fast starts, stops and turns
•Avoid potholes and objects on the road
•Do not run over curbs or hit the tire against a curb when parking
2008 Grand Marquis(grn)
Owners Guide (post-2002-fmt)
USA(fus)
Tires, Wheels and Loading
150
Page 153 of 280
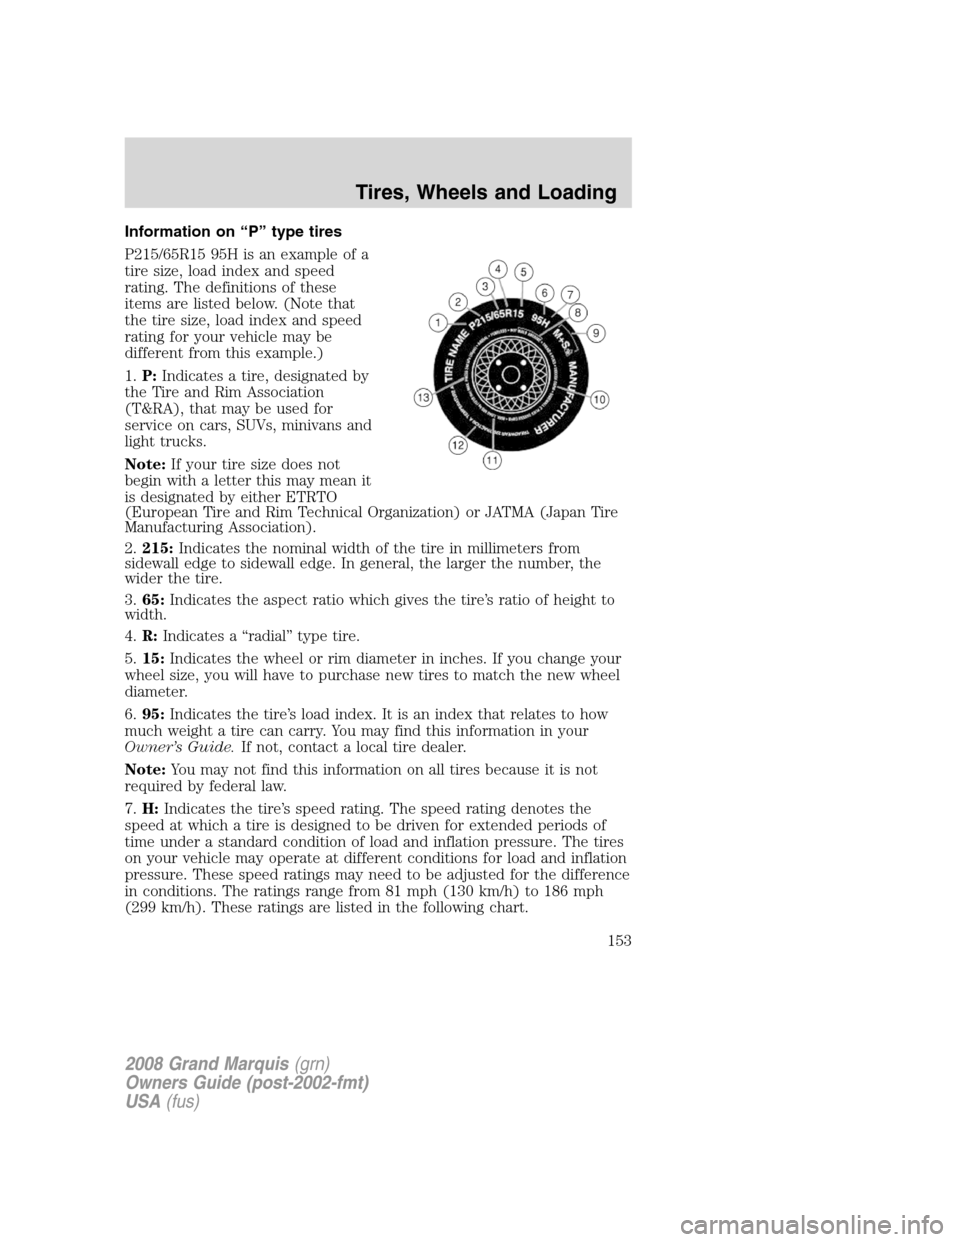
Information on “P” type tires
P215/65R15 95H is an example of a
tire size, load index and speed
rating. The definitions of these
items are listed below. (Note that
the tire size, load index and speed
rating for your vehicle may be
different from this example.)
1.P:Indicates a tire, designated by
the Tire and Rim Association
(T&RA), that may be used for
service on cars, SUVs, minivans and
light trucks.
Note:If your tire size does not
begin with a letter this may mean it
is designated by either ETRTO
(European Tire and Rim Technical Organization) or JATMA (Japan Tire
Manufacturing Association).
2.215:Indicates the nominal width of the tire in millimeters from
sidewall edge to sidewall edge. In general, the larger the number, the
wider the tire.
3.65:Indicates the aspect ratio which gives the tire’s ratio of height to
width.
4.R:Indicates a “radial” type tire.
5.15:Indicates the wheel or rim diameter in inches. If you change your
wheel size, you will have to purchase new tires to match the new wheel
diameter.
6.95:Indicates the tire’s load index. It is an index that relates to how
much weight a tire can carry. You may find this information in your
Owner’s Guide.If not, contact a local tire dealer.
Note:You may not find this information on all tires because it is not
required by federal law.
7.H:Indicates the tire’s speed rating. The speed rating denotes the
speed at which a tire is designed to be driven for extended periods of
time under a standard condition of load and inflation pressure. The tires
on your vehicle may operate at different conditions for load and inflation
pressure. These speed ratings may need to be adjusted for the difference
in conditions. The ratings range from 81 mph (130 km/h) to 186 mph
(299 km/h). These ratings are listed in the following chart.
2008 Grand Marquis(grn)
Owners Guide (post-2002-fmt)
USA(fus)
Tires, Wheels and Loading
153
Page 156 of 280
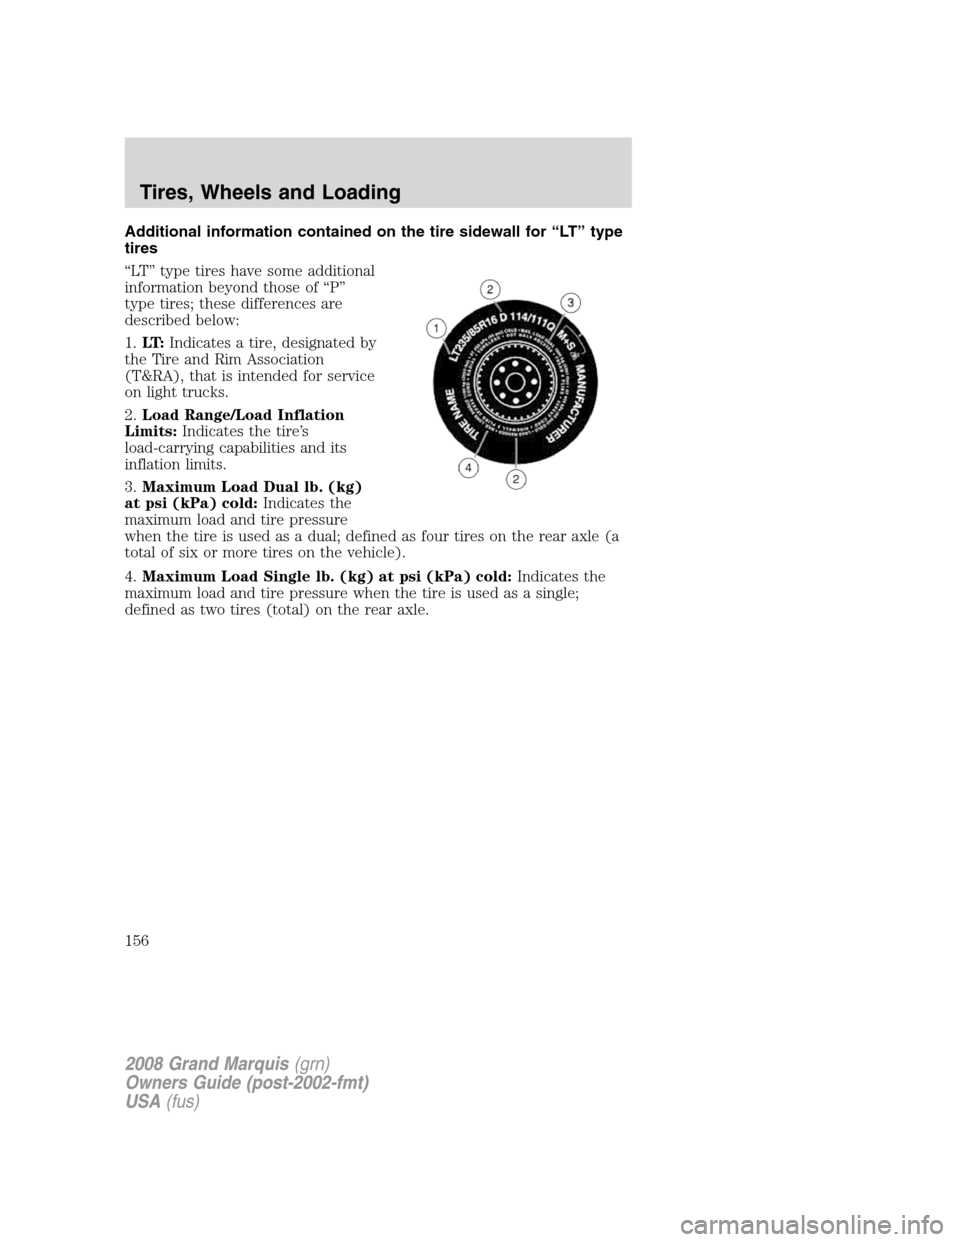
Additional information contained on the tire sidewall for “LT” type
tires
“LT” type tires have some additional
information beyond those of “P”
type tires; these differences are
described below:
1.LT:Indicates a tire, designated by
the Tire and Rim Association
(T&RA), that is intended for service
on light trucks.
2.Load Range/Load Inflation
Limits:Indicates the tire’s
load-carrying capabilities and its
inflation limits.
3.Maximum Load Dual lb. (kg)
at psi (kPa) cold:Indicates the
maximum load and tire pressure
when the tire is used as a dual; defined as four tires on the rear axle (a
total of six or more tires on the vehicle).
4.Maximum Load Single lb. (kg) at psi (kPa) cold:Indicates the
maximum load and tire pressure when the tire is used as a single;
defined as two tires (total) on the rear axle.
2008 Grand Marquis(grn)
Owners Guide (post-2002-fmt)
USA(fus)
Tires, Wheels and Loading
156
Page 157 of 280
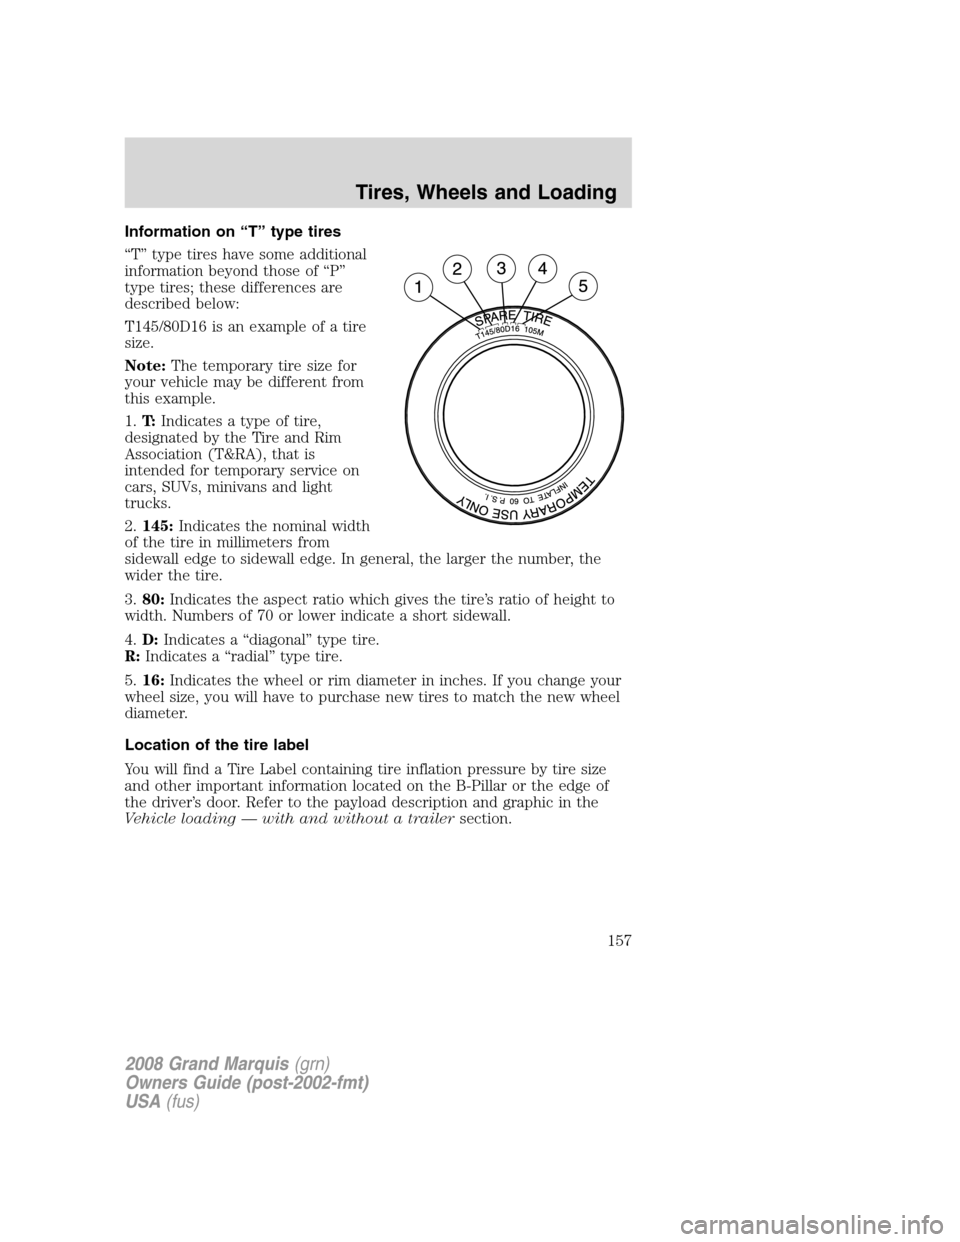
Information on “T” type tires
“T” type tires have some additional
information beyond those of “P”
type tires; these differences are
described below:
T145/80D16 is an example of a tire
size.
Note:The temporary tire size for
your vehicle may be different from
this example.
1.T:Indicates a type of tire,
designated by the Tire and Rim
Association (T&RA), that is
intended for temporary service on
cars, SUVs, minivans and light
trucks.
2.145:Indicates the nominal width
of the tire in millimeters from
sidewall edge to sidewall edge. In general, the larger the number, the
wider the tire.
3.80:Indicates the aspect ratio which gives the tire’s ratio of height to
width. Numbers of 70 or lower indicate a short sidewall.
4.D:Indicates a “diagonal” type tire.
R:Indicates a “radial” type tire.
5.16:Indicates the wheel or rim diameter in inches. If you change your
wheel size, you will have to purchase new tires to match the new wheel
diameter.
Location of the tire label
You will find a Tire Label containing tire inflation pressure by tire size
and other important information located on the B-Pillar or the edge of
the driver’s door. Refer to the payload description and graphic in the
Vehicle loading — with and without a trailersection.
2008 Grand Marquis(grn)
Owners Guide (post-2002-fmt)
USA(fus)
Tires, Wheels and Loading
157
Page 159 of 280
The Tire Pressure Monitoring System complies with part 15 of the FCC
rules and with RSS-210 of Industry Canada. Operation is subject to the
following two conditions: (1) This device may not cause harmful
interference, and (2) This device must accept any interference received,
including interference that may cause undesired operation.
The Tire Pressure Monitoring System is NOT a substitute for
manually checking tire pressure. The tire pressure should be
checked periodically (at least monthly) using a tire gauge, see
Inflating your tiresin this chapter. Failure to properly maintain your
tire pressure could increase the risk of tire failure, loss of control,
vehicle rollover and personal injury.
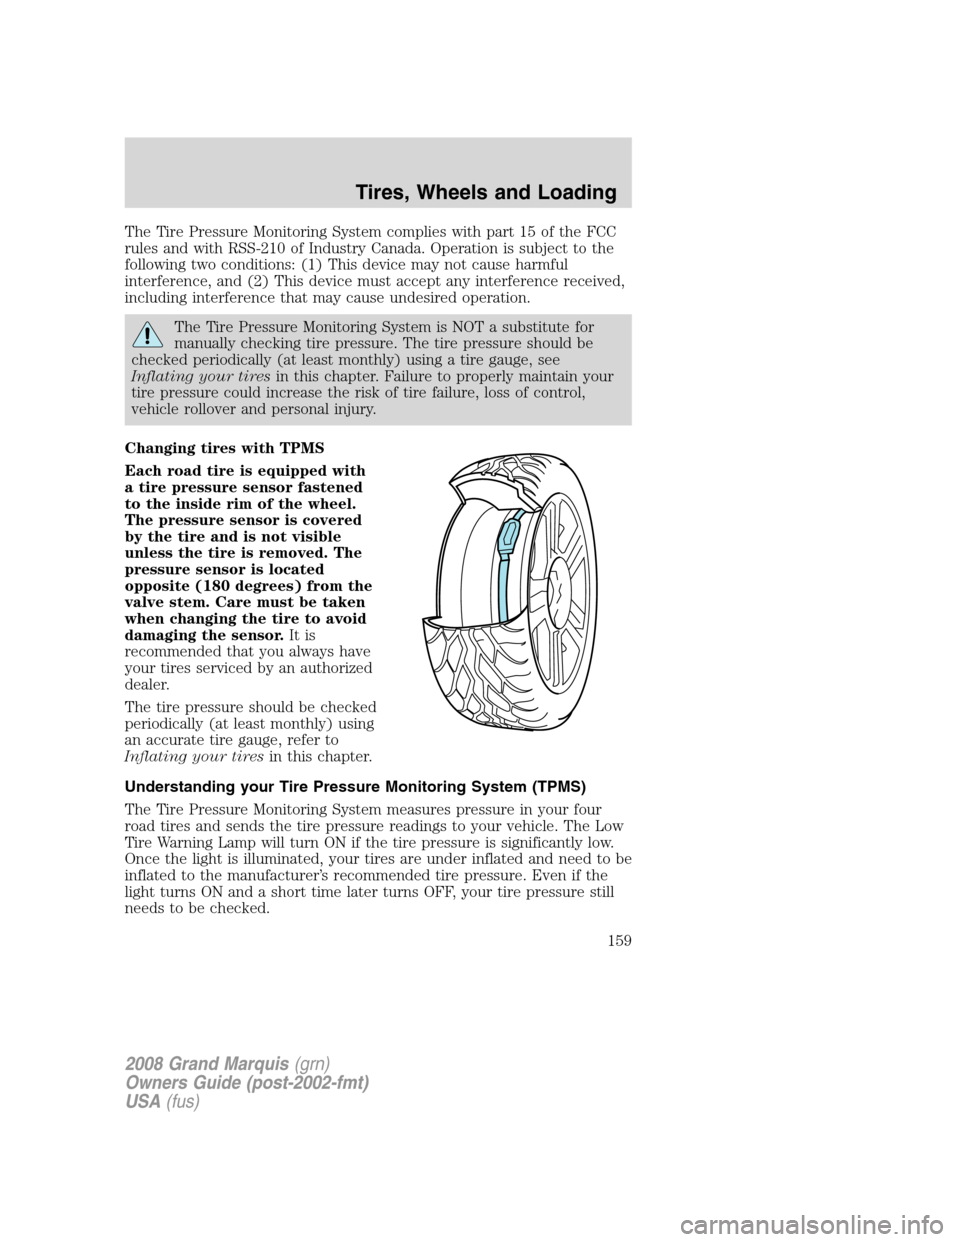
Changing tires with TPMS
Each road tire is equipped with
a tire pressure sensor fastened
to the inside rim of the wheel.
The pressure sensor is covered
by the tire and is not visible
unless the tire is removed. The
pressure sensor is located
opposite (180 degrees) from the
valve stem. Care must be taken
when changing the tire to avoid
damaging the sensor.It is
recommended that you always have
your tires serviced by an authorized
dealer.
The tire pressure should be checked
periodically (at least monthly) using
an accurate tire gauge, refer to
Inflating your tiresin this chapter.
Understanding your Tire Pressure Monitoring System (TPMS)
The Tire Pressure Monitoring System measures pressure in your four
road tires and sends the tire pressure readings to your vehicle. The Low
Tire Warning Lamp will turn ON if the tire pressure is significantly low.
Once the light is illuminated, your tires are under inflated and need to be
inflated to the manufacturer’s recommended tire pressure. Even if the
light turns ON and a short time later turns OFF, your tire pressure still
needs to be checked.
2008 Grand Marquis(grn)
Owners Guide (post-2002-fmt)
USA(fus)
Tires, Wheels and Loading
159
Page 170 of 280

If you use a rental trailer, follow the instructions that the rental agency
gives to you.
Do not attach safety chains to the bumper.
Trailer brakes
Electric brakes and manual, automatic or surge-type trailer brakes are
safe if installed properly and adjusted to the manufacturer’s
specifications. The trailer brakes must meet local and Federal
regulations.
Do not connect a trailer’s hydraulic brake system directly to your
vehicle’s brake system. Your vehicle may not have enough
braking power and your chances of having a collision greatly increase.
The braking system of the tow vehicle is rated for operation at the
GVWR not GCWR.
Trailer lamps
Trailer lamps are required on most towed vehicles. Make sure all running
lights, brake lights, turn signals and hazard lights are working. See your
authorized dealer or trailer rental agency for proper instructions and
equipment for hooking up trailer lamps.
Driving while you tow
When towing a trailer:
•Keep your speed no faster than 70 mph (112 km/h) during the first
500 miles (800 km) of towing a trailer, and don’t make full throttle
starts.
•Turn off the speed control. The speed control may shut off
automatically when you are towing on long, steep grades.
•Consult your local motor vehicle speed regulations for towing a trailer.
•To eliminate excessive shifting, use a lower gear. This will also assist
in transmission cooling. (For additional information, refer to
Understanding the gearshift positions of the 4–speed automatic
transmissionin theDriving chapter.
•Anticipate stops and brake gradually.
•Do not exceed the GCWR rating or transmission damage may occur.
Servicing after towing
If you tow a trailer for long distances, your vehicle will require more
frequent service intervals. Refer to yourscheduled maintenance
informationfor more information.
2008 Grand Marquis(grn)
Owners Guide (post-2002-fmt)
USA(fus)
Tires, Wheels and Loading
170
Page 178 of 280
•Be sure that areas where the vehicle is parked are clean and clear of
all combustibles such as petroleum products, dust, rags, paper and
similar items.
•Be sure that the engine block heater, heater cord and extension cord
are solidly connected. A poor connection can cause the cord to
become very hot and may result in an electrical shock or fire. Be sure
to check for heat anywhere in the electrical hookup once the system
has been operating for approximately a half hour.
•Finally, have the engine block heater system checked during your fall
tune-up to be sure it’s in good working order.
How to use the engine block heater
Ensure the receptacle terminals are clean and dry prior to use. To clean
them, use a dry cloth.
Depending on the type of factory installed equipment, your engine block
heater system may consume anywhere between 400 watts or 1000 watts
of energy per hour. Your factory installed block heater system does not
have a thermostat; however, maximum temperature is attained after
approximately 3 hours of operation. Block heater operation longer than 3
hours will not improve system performance and will unnecessarily use
additional electricity.
Make sure system is unplugged and properly stowed before driving the
vehicle. While not in use, make sure the protective cover seals the
prongs of the engine block heater cord plug.
BRAKES
Your service brakes are self-adjusting. Refer to thescheduled
maintenance informationfor scheduled maintenance.
Occasional brake noise is normal and often does not indicate a
performance concern with the vehicle’s brake system. In normal
operation, automotive brake systems may emit occasional or intermittent
squeal or groan noises when the brakes are applied. Such noises are
usually heard during the first few brake applications in the morning;
however, they may be heard at any time while braking and can be
aggravated by environmental conditions such as cold, heat, moisture,
road dust, salt or mud. If a “metal-to-metal,” “continuous grinding” or
“continuous squeal” sound is present while braking, the brake linings
may be worn-out and should be inspected by an authorized dealer.
2008 Grand Marquis(grn)
Owners Guide (post-2002-fmt)
USA(fus)
Driving
178
Page 180 of 280
Using ABS
•In an emergency or when maximum efficiency from the four-wheel
ABS is required, apply continuous force on the brake. The four wheel
ABS will be activated immediately, thus allowing you to retain steering
control of your vehicle and, providing there is sufficient space, will
enable you to avoid obstacles and bring the vehicle to a controlled
stop.
•The anti-lock system does not reduce stopping distance. Always leave
enough room between your vehicle and the vehicle in front of you to
stop.
•We recommend that you familiarize yourself with this braking
technique. However, avoid taking any unnecessary risks.
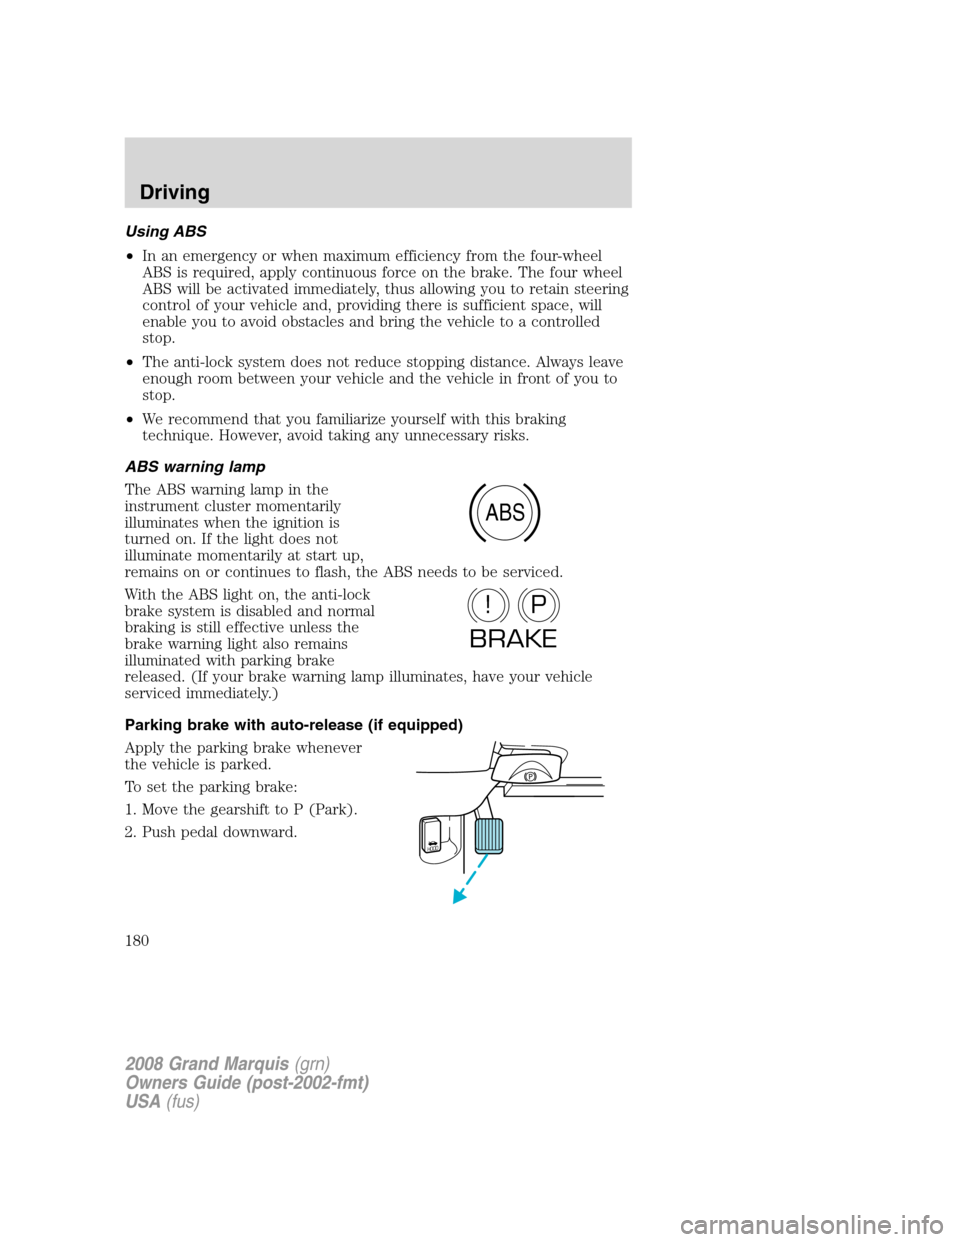
ABS warning lamp
The ABS warning lamp in the
instrument cluster momentarily
illuminates when the ignition is
turned on. If the light does not
illuminate momentarily at start up,
remains on or continues to flash, the ABS needs to be serviced.
With the ABS light on, the anti-lock
brake system is disabled and normal
braking is still effective unless the
brake warning light also remains
illuminated with parking brake
released. (If your brake warning lamp illuminates, have your vehicle
serviced immediately.)
Parking brake with auto-release (if equipped)
Apply the parking brake whenever
the vehicle is parked.
To set the parking brake:
1. Move the gearshift to P (Park).
2. Push pedal downward.
ABS
P!
BRAKE
HOOD
2008 Grand Marquis(grn)
Owners Guide (post-2002-fmt)
USA(fus)
Driving
180
Page 182 of 280
Wheel-speed sensors allow excess rear wheel spin to be detected by the
Traction Control™ portion of the ABS computer. Any excessive wheel
spin is controlled by automatically applying and releasing the rear brakes
in conjunction with engine torque reductions. Engine torque reduction is
realized via the fully electronic spark and fuel injection systems. This
process is very sensitive to driving conditions and very fast acting. The
rear wheels “search” for optimum traction several times a second and
adjustments are made accordingly.
Aggressive driving in any road conditions can cause you to lose
control of your vehicle increasing the risk of severe personal
injury or property damage. The occurrence of an Traction Control™
event is an indication that at least some of the tires have exceeded
their ability to grip the road; this may lead to an increased risk of loss
of vehicle control, vehicle rollover, personal injury and death. If you
experience a severe road event, SLOW DOWN.
The Traction Control™ system will allow your vehicle to make better use
of available traction on slippery surfaces while you are trying to
accelerate or while your foot is on the accelerator pedal. The system is a
driver aid which makes your vehicle easier to handle primarily on snow
and ice covered roads.
During Traction Control™ operation you may hear an electric motor type
of sound coming from the engine compartment and the engine will not
“rev-up” when you push further on the accelerator. This is normal
system behavior.
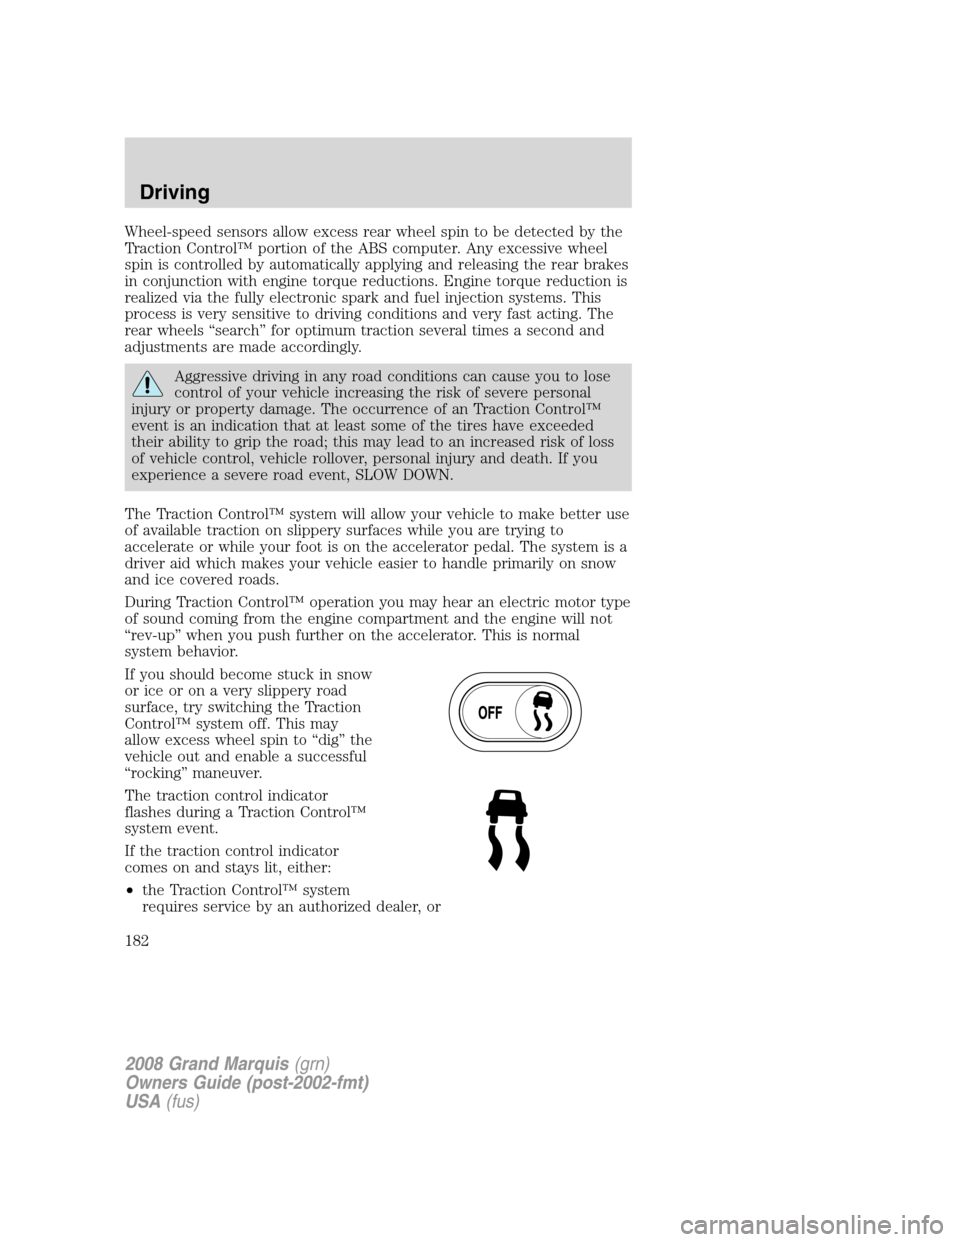
If you should become stuck in snow
or ice or on a very slippery road
surface, try switching the Traction
Control™ system off. This may
allow excess wheel spin to “dig” the
vehicle out and enable a successful
“rocking” maneuver.
The traction control indicator
flashes during a Traction Control™
system event.
If the traction control indicator
comes on and stays lit, either:
•the Traction Control™ system
requires service by an authorized dealer, or
2008 Grand Marquis(grn)
Owners Guide (post-2002-fmt)
USA(fus)
Driving
182