ECU Mercury Grand Marquis 2009 s Owner's Guide
[x] Cancel search | Manufacturer: MERCURY, Model Year: 2009, Model line: Grand Marquis, Model: Mercury Grand Marquis 2009Pages: 270, PDF Size: 1.95 MB
Page 120 of 270
•A series of five beeps will be heard. The tone pattern will repeat
periodically until the problem and/or light are repaired.
If any of these things happen, even intermittently, have the SRS serviced
at your authorized dealer immediately. Unless serviced, the system may
not function properly in the event of a collision.
Disposal of airbags and airbag equipped vehicles
(including pretensioners)
Contact your authorized dealer as soon as possible. Airbags MUST BE
disposed of by qualified personnel.
SAFETY RESTRAINTS FOR CHILDREN
See the following sections for directions on how to properly use safety
restraints for children. Also seeAirbag supplemental restraint system
(SRS)in this chapter for special instructions about using airbags.
Important child restraint precautions
WARNING:Always make sure your child is secured properly in
a device that is appropriate for their height, age and weight.
Child safety restraints must be purchased separately from the vehicle.
Failure to follow these instructions and guidelines may result in an
increased risk of serious injury or death to your child.
WARNING:All children are shaped differently. The
Recommendations for Safety Restraints are based on probable
child height, age and weight thresholds from NHTSA and other safety
organizations or are the minimum requirements of law. Ford
recommends checking with a NHTSA Certified Child Passenger Safety
Technician (CPST) and your pediatrician to make sure your child seat
is appropriate for your child, and is compatible with and properly
installed in the vehicle. To locate a child seat fitting station and CPST
contact the NHTSA toll free at 1-888-327-4236 or on the internet at
http://www.nhtsa.dot.gov. Failure to properly restrain children in safety
seats made especially for their height, age, and weight may result in an
increased risk of serious injury or death to your child.
2009 Grand Marquis(grn)
Owners Guide(own2002), 2nd Printing
USA(fus)
Seating and Safety Restraints
120
Page 124 of 270
Transporting children
Always make sure your child is secured properly in a device that is
appropriate for their age, height and weight. All children are shaped
differently. The child height, age and weight thresholds provided are
recommendations or the minimum requirements of law. The National
Highway Traffic Safety Administration (NHTSA) provides education and
training to ensure that all children ages 0 to 16 are properly restrained in
the correct restraint system. Ford recommends checking with a NHTSA
Certified Child Passenger Safety Technician (CPST) and your
pediatrician to make sure your seat is appropriate for your child and
properly installed in the vehicle. To locate a child seat fitting station and
CPST contact the NHTSA toll free at1-888-327-4236or on the internet
at http://www.nhtsa.dot.gov.
Follow all the safety restraint and airbag precautions that apply to adult
passengers in your vehicle.
If the child is the proper height, age, and weight (as specified by your
child safety seat or booster manufacturer), fits the restraint and can be
restrained properly, then restrain the child in the child safety seat or
with the belt-positioning booster. Remember that child seats and
belt-positioning boosters vary and may be designed to fit children of
different heights, ages and weights. Children who are too large for child
safety seats or belt-positioning boosters (as specified by your child safety
seat manufacturer) should always properly wear safety belts.
SAFETY SEATS FOR CHILDREN
Infant and/or toddler seats
Use a safety seat that is recommended for the size and weight of the
child.
When installing a child safety seat:
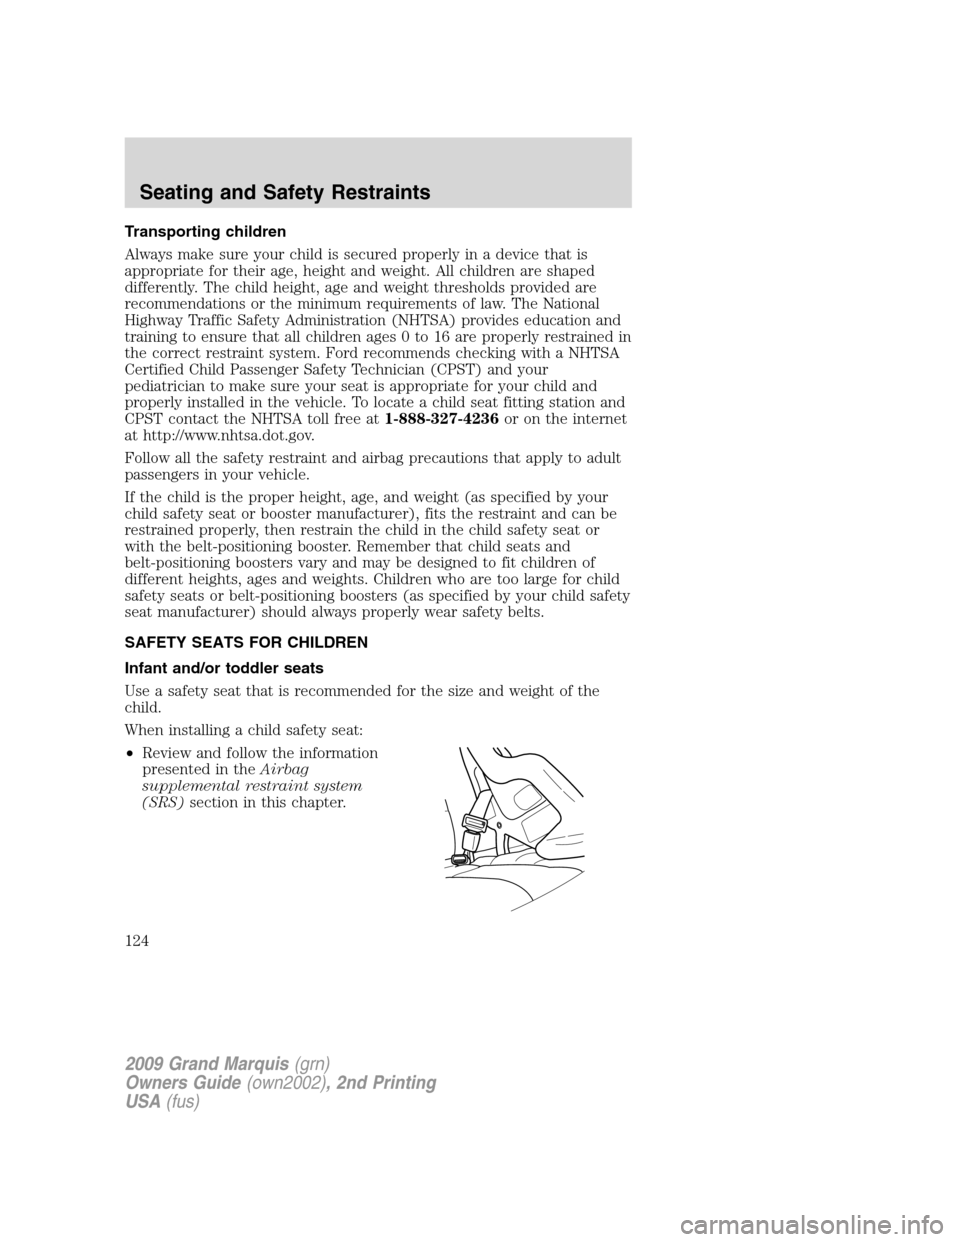
•Review and follow the information
presented in theAirbag
supplemental restraint system
(SRS)section in this chapter.
2009 Grand Marquis(grn)
Owners Guide(own2002), 2nd Printing
USA(fus)
Seating and Safety Restraints
124
Page 125 of 270
•Carefully follow all of the manufacturer’s instructions included with
the safety seat you put in your vehicle. If you do not install and use
the safety seat properly, the child may be injured in a sudden stop or
collision.
Airbags can kill or injure a child in a child seat. NEVER place a
rear-facing child seat in front of an active airbag. If you must use a
forward-facing child seat in the front seat, move the vehicle seat all the
way back.
Children 12 and under should be properly restrained in a rear seating
position whenever possible. If all children cannot be seated and
restrained properly in a rear seating position, properly restrain the
largest child in the front seat.
Installing child safety seats with combination lap and shoulder
belts
Check to make sure the child seat is properly secured before each use.
Children 12 and under should be properly restrained in a rear seating
position whenever possible. If all children cannot be seated and
restrained properly in a rear seating position, properly restrain the
largest child in the front seat.
When installing a child safety seat with combination lap/shoulder belts:
•Use the correct safety belt buckle for that seating position.
•Insert the belt tongue into the proper buckle until you hear a snap
and feel it latch. Make sure the tongue is securely fastened in the
buckle.
•Keep the buckle release button pointing up and away from the safety
seat, with the tongue between the child seat and the release button,
to help prevent accidental unbuckling.
•Place vehicle seat back in upright position.
•Put the safety belt in the automatic locking mode. Refer to step 5
below.
WARNING:Depending on where you secure a child restraint,
and depending on the child restraint design, you may block
access to certain safety belt buckle assemblies and/or LATCH lower
anchors, rendering those features potentially unusable. To avoid risk of
injury, occupants should only use seating positions where they are able
to be properly restrained.
2009 Grand Marquis(grn)
Owners Guide(own2002), 2nd Printing
USA(fus)
Seating and Safety Restraints
125
Page 127 of 270
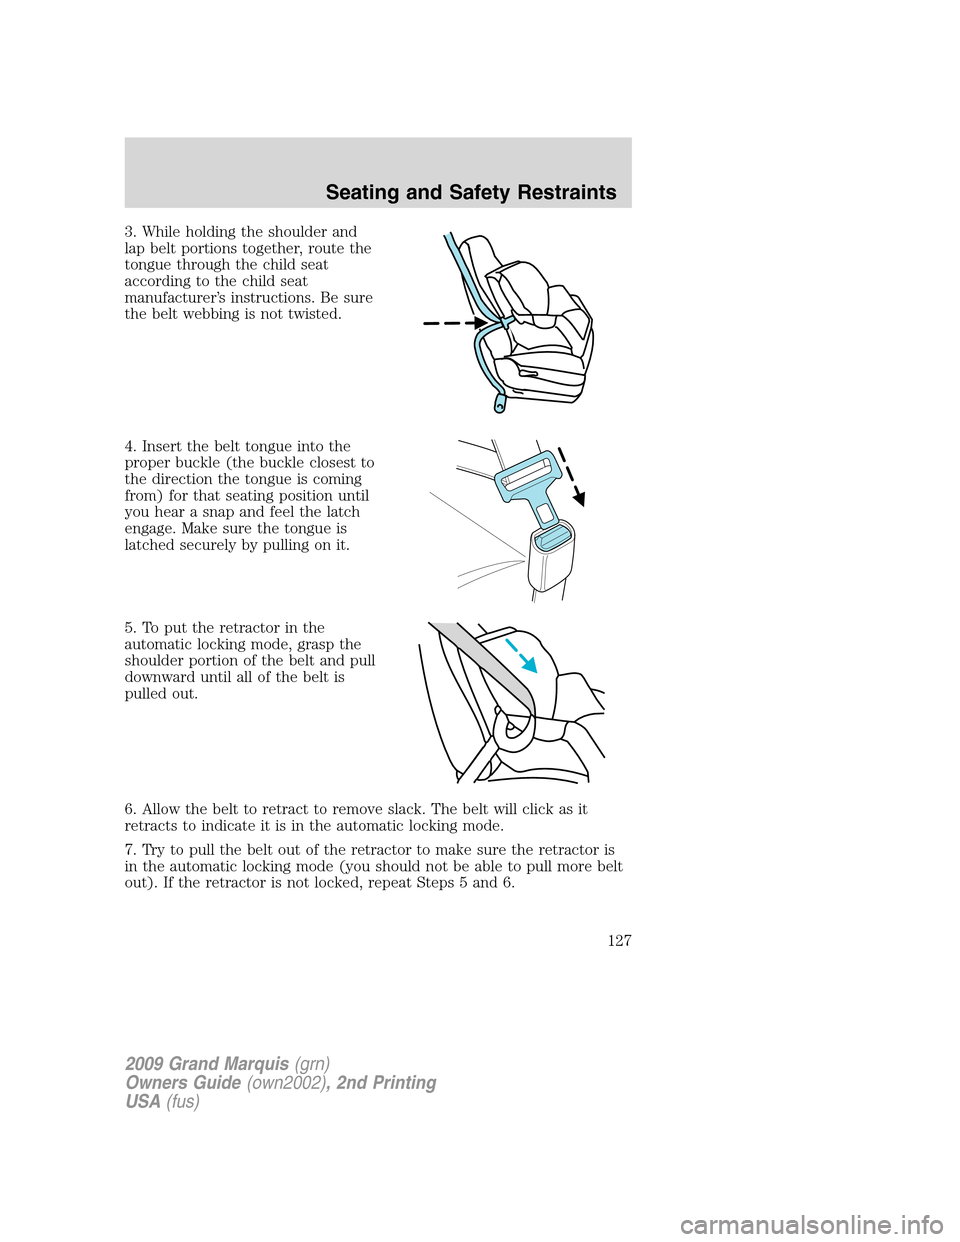
3. While holding the shoulder and
lap belt portions together, route the
tongue through the child seat
according to the child seat
manufacturer’s instructions. Be sure
the belt webbing is not twisted.
4. Insert the belt tongue into the
proper buckle (the buckle closest to
the direction the tongue is coming
from) for that seating position until
you hear a snap and feel the latch
engage. Make sure the tongue is
latched securely by pulling on it.
5. To put the retractor in the
automatic locking mode, grasp the
shoulder portion of the belt and pull
downward until all of the belt is
pulled out.
6. Allow the belt to retract to remove slack. The belt will click as it
retracts to indicate it is in the automatic locking mode.
7. Try to pull the belt out of the retractor to make sure the retractor is
in the automatic locking mode (you should not be able to pull more belt
out). If the retractor is not locked, repeat Steps 5 and 6.
2009 Grand Marquis(grn)
Owners Guide(own2002), 2nd Printing
USA(fus)
Seating and Safety Restraints
127
Page 128 of 270
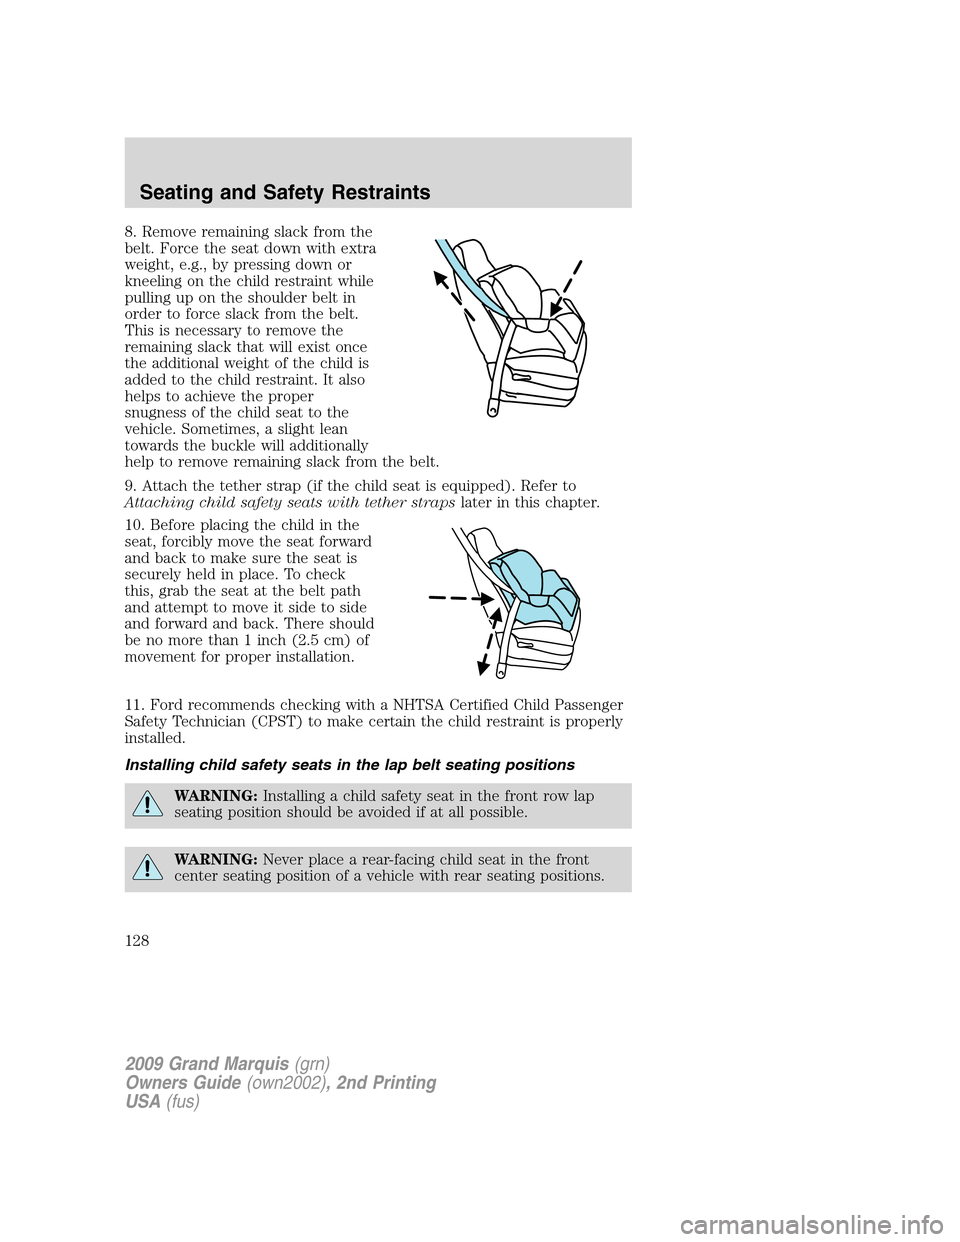
8. Remove remaining slack from the
belt. Force the seat down with extra
weight, e.g., by pressing down or
kneeling on the child restraint while
pulling up on the shoulder belt in
order to force slack from the belt.
This is necessary to remove the
remaining slack that will exist once
the additional weight of the child is
added to the child restraint. It also
helps to achieve the proper
snugness of the child seat to the
vehicle. Sometimes, a slight lean
towards the buckle will additionally
help to remove remaining slack from the belt.
9. Attach the tether strap (if the child seat is equipped). Refer to
Attaching child safety seats with tether strapslater in this chapter.
10. Before placing the child in the
seat, forcibly move the seat forward
and back to make sure the seat is
securely held in place. To check
this, grab the seat at the belt path
and attempt to move it side to side
and forward and back. There should
be no more than 1 inch (2.5 cm) of
movement for proper installation.
11. Ford recommends checking with a NHTSA Certified Child Passenger
Safety Technician (CPST) to make certain the child restraint is properly
installed.
Installing child safety seats in the lap belt seating positions
WARNING:Installing a child safety seat in the front row lap
seating position should be avoided if at all possible.
WARNING:Never place a rear-facing child seat in the front
center seating position of a vehicle with rear seating positions.
2009 Grand Marquis(grn)
Owners Guide(own2002), 2nd Printing
USA(fus)
Seating and Safety Restraints
128
Page 129 of 270
WARNING:Front seating positions only: If seating two adults
and a child, Ford recommends properly restraining the child in
the center front seating position, but only if doing so will not interfere
with driving the vehicle. This arrangement provides lap and shoulder
belt and airbag protection for adult occupants and an attachment
method for a child restraint. If the child seat interferes with driving the
vehicle and the child restraint is forward-facing, the child may be
restrained in the passenger seat. Move the seat as far rearward as
possible to minimize the likelihood of interaction with the front
passenger airbag. Never place a rear-facing child seat in front of an
active airbag. All occupants of the vehicle should always properly wear
their safety belts. Ensure the child is properly restrained in an
appropriate child seat or with the use of a booster.
1. Lengthen the lap belt. To lengthen the belt, hold the tongue so that its
bottom is perpendicular to the direction of webbing while sliding the
tongue up the webbing.
2. Place the child safety seat in the center seating position.
3. Route the tongue and webbing through the child seat according to the
child seat manufacturer’s instructions.
4. Insert the belt tongue into the proper buckle for the center seating
position until you hear a snap and feel it latch. Make sure the tongue is
securely fastened to the buckle by pulling on the tongue.
5. Push down on the child seat while pulling on the loose end of the lap
belt webbing to tighten the belt.
6. Before placing the child into the child seat, forcibly tilt the child seat
from side to side and in forward direction to make sure that the seat is
securely held in place. To check this, grab the seat at the belt path and
attempt to move it side to side and forward and back. There should be
no more than one inch (2.5 cm) of movement for proper installation.
7. Ford recommends checking with a NHTSA Certified Child Passenger
Safety Technician (CPST) to make certain the child restraint is properly
installed.
Note:There is no top tether anchor for the front center seating position.
SeeAttaching child safety seats with tether strapslater in this chapter.
Attaching child safety seats with LATCH
(Lower Anchors and Tethers for CHildren) attachments
The LATCH system is composed of three vehicle anchor points: two (2)
lower anchors located where the vehicle seat back and seat cushion meet
(called the “seat bight”) and one (1) top tether anchor located behind
that seating position.
2009 Grand Marquis(grn)
Owners Guide(own2002), 2nd Printing
USA(fus)
Seating and Safety Restraints
129
Page 131 of 270
WARNING:Depending on where you secure a child restraint,
and depending on the child restraint design, you may block
access to certain safety belt buckle assemblies and/or LATCH lower
anchors, rendering those features potentially unusable. To avoid risk of
injury, occupants should only use seating positions where they are able
to be properly restrained.
Use of inboard lower anchors from the outboard seating positions
(center seating use)
The lower anchors at the center of the second row rear seat are spaced
578 mm (23 inches) apart. The standardized spacing for LATCH lower
anchors is 280 mm (11 inches) center to center. A child seat with rigid
LATCH attachments cannot be installed at the center seating position.
LATCH compatible child seats (with attachments on belt webbing) can
only be used at this seating position provided that the child seat
manufacturer’s instructions permit use with the anchor spacing stated.
Do not attach a child seat to any lower anchor if an adjacent child seat is
attached to that anchor.
WARNING:The standardized spacing for LATCH lower anchors
is 280 mm (11 inches) center to center. Do not use LATCH
lower anchors for the center seating position unless the child seat
manufacturer’s instructions permit and specify using anchors spaced at
least as far apart as those in this vehicle.
If you install a child seat with rigid LATCH attachments, and have
attached the top tether strap to the proper top tether anchor, do not
tighten the tether strap enough to lift the child seat off the vehicle seat
cushion when the child is seated in it. Keep the tether strap just snug
without lifting the front of the child seat. Keeping the child seat just
touching the vehicle seat gives the best protection in a severe crash.
Each time you use the safety seat, check that the seat is properly
attached to the lower anchors and tether anchor, if applicable. Tug the
child seat from side to side and forward and back where it is secured to
the vehicle. The seat should move less than one inch when you do this
for a proper installation.
If the safety seat is not anchored properly, the risk of a child being
injured in a crash greatly increases.
2009 Grand Marquis(grn)
Owners Guide(own2002), 2nd Printing
USA(fus)
Seating and Safety Restraints
131
Page 133 of 270
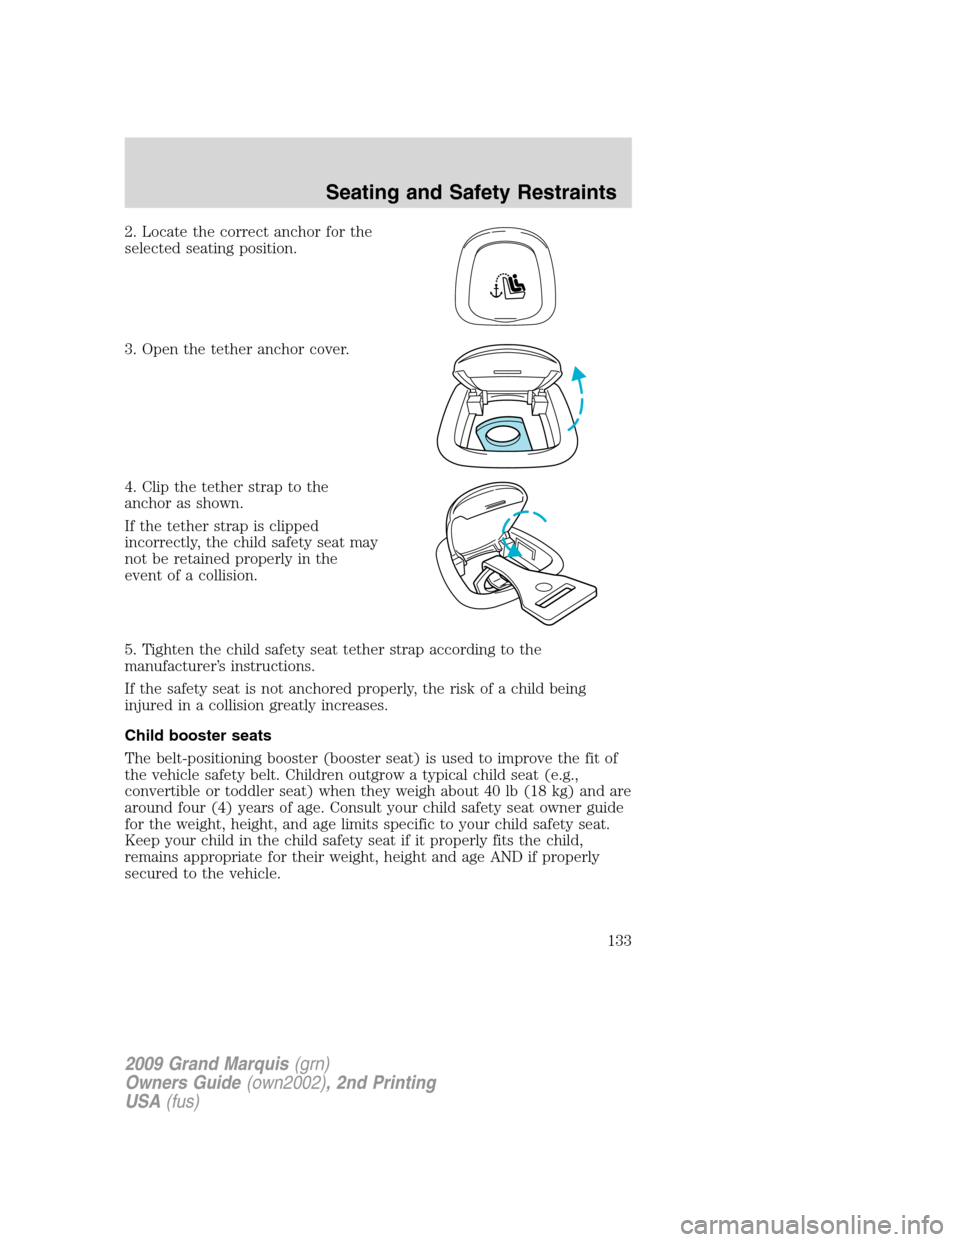
2. Locate the correct anchor for the
selected seating position.
3. Open the tether anchor cover.
4. Clip the tether strap to the
anchor as shown.
If the tether strap is clipped
incorrectly, the child safety seat may
not be retained properly in the
event of a collision.
5. Tighten the child safety seat tether strap according to the
manufacturer’s instructions.
If the safety seat is not anchored properly, the risk of a child being
injured in a collision greatly increases.
Child booster seats
The belt-positioning booster (booster seat) is used to improve the fit of
the vehicle safety belt. Children outgrow a typical child seat (e.g.,
convertible or toddler seat) when they weigh about 40 lb (18 kg) and are
around four (4) years of age. Consult your child safety seat owner guide
for the weight, height, and age limits specific to your child safety seat.
Keep your child in the child safety seat if it properly fits the child,
remains appropriate for their weight, height and age AND if properly
secured to the vehicle.
2009 Grand Marquis(grn)
Owners Guide(own2002), 2nd Printing
USA(fus)
Seating and Safety Restraints
133
Page 158 of 270
any tire is under-inflated, carefully drive the vehicle to the nearest
location where air can be added to the tires. Inflate all the tires to the
recommended inflation pressure.
SNOW TIRES AND CHAINS
WARNING:Snow tires must be the same size, load index, speed
rating as those originally provided by Ford. Use of any tire or
wheel not recommended by Ford can affect the safety and
performance of your vehicle, which could result in an increased risk of
loss of vehicle control, vehicle rollover, personal injury and death.
Additionally, the use of non-recommended tires and wheels could
cause steering, suspension, axle or transfer case/power transfer unit
failure.
The tires on your vehicle have all weather treads to provide traction in
rain and snow. However, in some climates, you may need to use snow
tires and chains. If you need to use chains, it is recommended that steel
wheels (of the same size and specifications) be used, as chains may chip
aluminum wheels.
Follow these guidelines when using snow tires and chains:
•Use only cable type chains offered by Ford Motor Company as an
accessory or equivalent. Using SAE class S or other conventional link
type chains may cause damage to the vehicle’s wheel house and/or
body.
•Install chains securely, verifying that the chains do not touch any
wiring, brake lines or fuel lines.
•Drive cautiously. If you hear the chains rub or bang against your
vehicle, stop and re-tighten the chains. If this does not work, remove
the chains to prevent damage to your vehicle.
•If possible, avoid fully loading your vehicle.
•Remove the tire chains when they are no longer needed. Do not use
tire chains on dry roads.
•The suspension insulation and bumpers will help prevent vehicle
damage. Do not remove these components from your vehicle when
using snow tires and chains.
•Do not exceed 30 mph (48 km/h) with tire cables on your vehicle.
VEHICLE LOADING – WITH AND WITHOUT A TRAILER
This section will guide you in the proper loading of your vehicle and/or
trailer, to keep your loaded vehicle weight within its design rating
2009 Grand Marquis(grn)
Owners Guide(own2002), 2nd Printing
USA(fus)
Tires, Wheels and Loading
158
Page 181 of 270
To put your vehicle in P (Park):
•Come to a complete stop
•Move the gearshift lever and securely latch it in P (Park)
WARNING:Always set the parking brake fully and make sure
the gearshift is latched in P (Park). Turn the ignition to the off
position and remove the key whenever you leave your vehicle.
R (Reverse)
With the gearshift lever in R (Reverse), the vehicle will move backward.
Always come to a complete stop before shifting into and out of R
(Reverse).
N (Neutral)
With the gearshift lever in N (Neutral), the vehicle can be started and is
free to roll. Hold the brake pedal down while in this position.
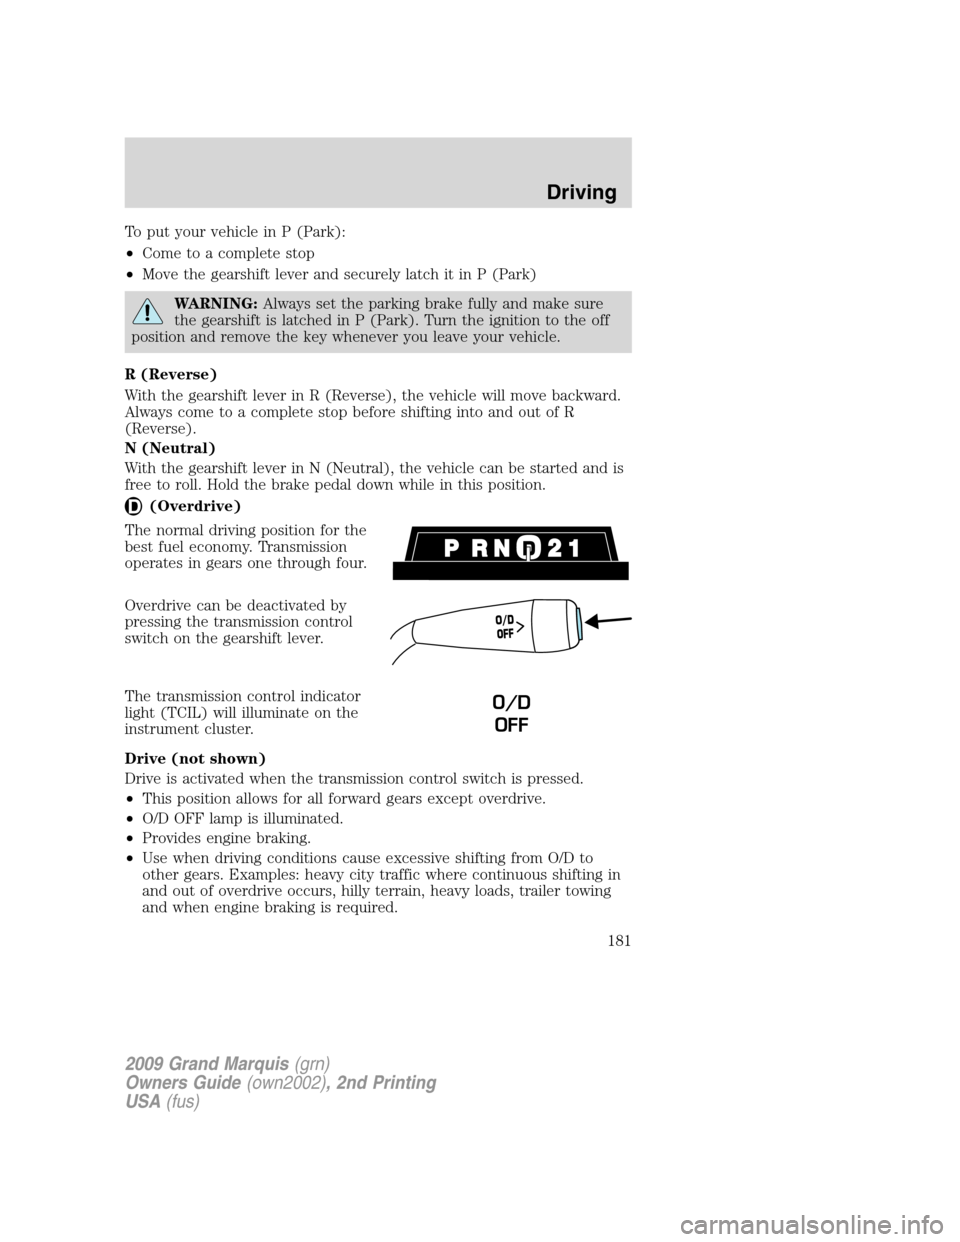
(Overdrive)
The normal driving position for the
best fuel economy. Transmission
operates in gears one through four.
Overdrive can be deactivated by
pressing the transmission control
switch on the gearshift lever.
The transmission control indicator
light (TCIL) will illuminate on the
instrument cluster.
Drive (not shown)
Drive is activated when the transmission control switch is pressed.
•This position allows for all forward gears except overdrive.
•O/D OFF lamp is illuminated.
•Provides engine braking.
•Use when driving conditions cause excessive shifting from O/D to
other gears. Examples: heavy city traffic where continuous shifting in
and out of overdrive occurs, hilly terrain, heavy loads, trailer towing
and when engine braking is required.
O
/
D
O
F
F
O/D
OFF
2009 Grand Marquis(grn)
Owners Guide(own2002), 2nd Printing
USA(fus)
Driving
181