lights Mercury Marauder 2003 s User Guide
[x] Cancel search | Manufacturer: MERCURY, Model Year: 2003, Model line: Marauder, Model: Mercury Marauder 2003Pages: 232, PDF Size: 2.29 MB
Page 44 of 232
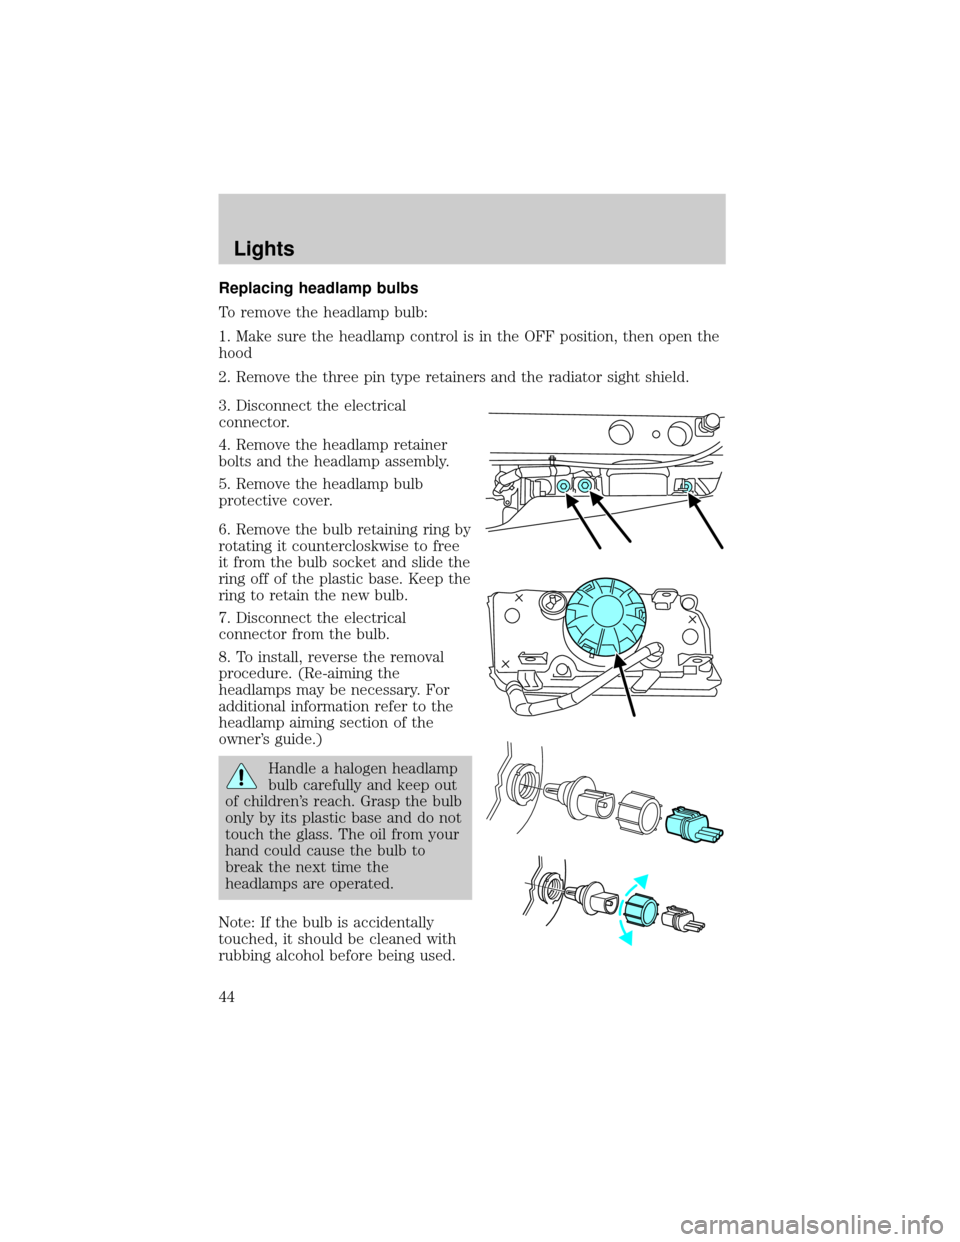
Replacing headlamp bulbs
To remove the headlamp bulb:
1. Make sure the headlamp control is in the OFF position, then open the
hood
2. Remove the three pin type retainers and the radiator sight shield.
3. Disconnect the electrical
connector.
4. Remove the headlamp retainer
bolts and the headlamp assembly.
5. Remove the headlamp bulb
protective cover.
6. Remove the bulb retaining ring by
rotating it countercloskwise to free
it from the bulb socket and slide the
ring off of the plastic base. Keep the
ring to retain the new bulb.
7. Disconnect the electrical
connector from the bulb.
8. To install, reverse the removal
procedure. (Re-aiming the
headlamps may be necessary. For
additional information refer to the
headlamp aiming section of the
owner's guide.)
Handle a halogen headlamp
bulb carefully and keep out
of children's reach. Grasp the bulb
only by its plastic base and do not
touch the glass. The oil from your
hand could cause the bulb to
break the next time the
headlamps are operated.
Note: If the bulb is accidentally
touched, it should be cleaned with
rubbing alcohol before being used.
Lights
44
Page 45 of 232

The headlamp bulb should not be removed from the headlamp until just
before a replacement bulb is installed. Removing the bulb for an
extended period of time may affect headlamp bulb performance.
Contaminants may enter the headlamp where they can settle on the lens
and reflector. Never turn the headlamps on with the bulb removed.
Replacing front parking lamp/turn signal bulbs
The park/turn lamp bulbs can be replaced with out removing the
headlamp assembly.
1. Make sure headlamp switch is in OFF position, then open the hood.
2. Remove the three pin type retainers and the radiator shield.
3. Remove the headlamp assembly retaining nuts, the side turn signal
lamp retaining nuts and the side turn signal assembly.
4. Remove the bulb from the side turn lamp assembly.
5. Disconnect the electrical connector from the bulb and replace the
bulb.
Note: The parking lamp/turn signal bulbs should not be removed from
the lamp until just before a replacement bulb is installed. Removing the
bulb for an extended period of time may affect headlamp bulb
performance. Contaminants may enter the headlamp where they can
settle on the lens and reflector. Never turn the lamps on with the bulb
removed.
6. To install, reverse the order of the removal procedure.
Replacing tail lamp/brake/turn lamp bulbs
The tail lamp, the brake lamp and the turn signal lamp bulbs are located
in the tail lamp assembly. Follow the same steps to replace either bulb.
Lights
45
Page 46 of 232
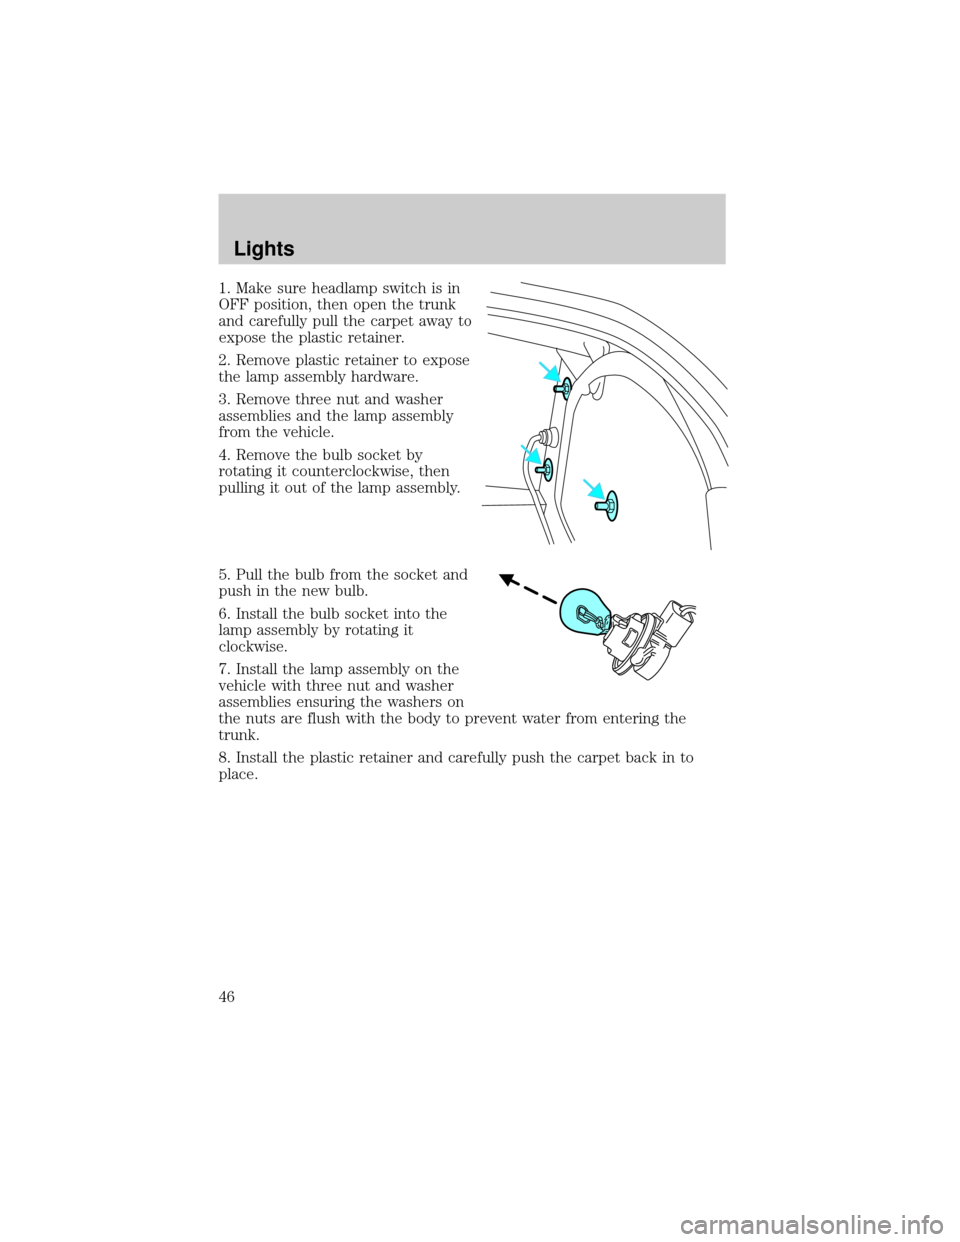
1. Make sure headlamp switch is in
OFF position, then open the trunk
and carefully pull the carpet away to
expose the plastic retainer.
2. Remove plastic retainer to expose
the lamp assembly hardware.
3. Remove three nut and washer
assemblies and the lamp assembly
from the vehicle.
4. Remove the bulb socket by
rotating it counterclockwise, then
pulling it out of the lamp assembly.
5. Pull the bulb from the socket and
push in the new bulb.
6. Install the bulb socket into the
lamp assembly by rotating it
clockwise.
7. Install the lamp assembly on the
vehicle with three nut and washer
assemblies ensuring the washers on
the nuts are flush with the body to prevent water from entering the
trunk.
8. Install the plastic retainer and carefully push the carpet back in to
place.
Lights
46
Page 47 of 232
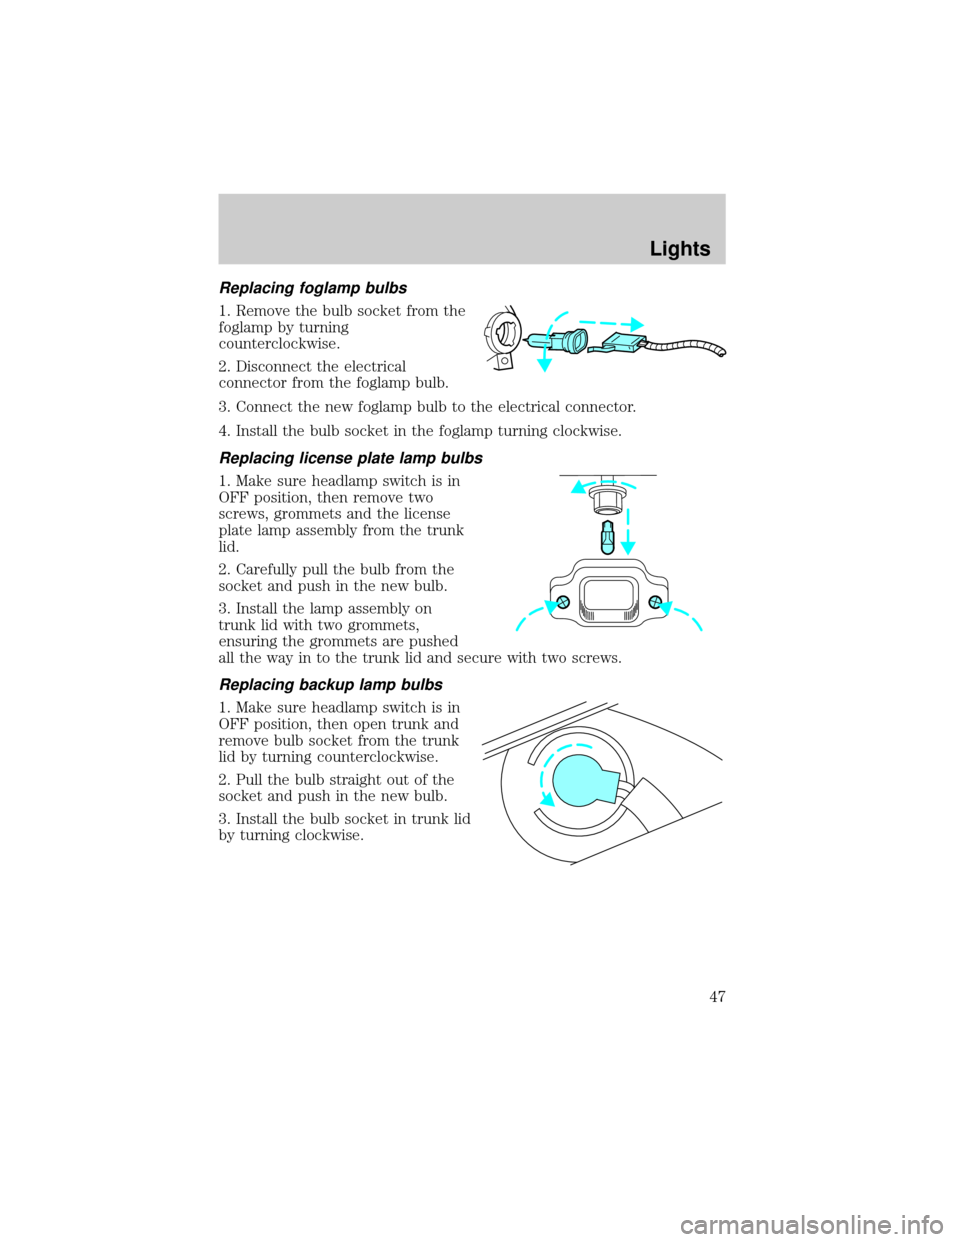
Replacing foglamp bulbs
1. Remove the bulb socket from the
foglamp by turning
counterclockwise.
2. Disconnect the electrical
connector from the foglamp bulb.
3. Connect the new foglamp bulb to the electrical connector.
4. Install the bulb socket in the foglamp turning clockwise.
Replacing license plate lamp bulbs
1. Make sure headlamp switch is in
OFF position, then remove two
screws, grommets and the license
plate lamp assembly from the trunk
lid.
2. Carefully pull the bulb from the
socket and push in the new bulb.
3. Install the lamp assembly on
trunk lid with two grommets,
ensuring the grommets are pushed
all the way in to the trunk lid and secure with two screws.
Replacing backup lamp bulbs
1. Make sure headlamp switch is in
OFF position, then open trunk and
remove bulb socket from the trunk
lid by turning counterclockwise.
2. Pull the bulb straight out of the
socket and push in the new bulb.
3. Install the bulb socket in trunk lid
by turning clockwise.
Lights
47
Page 48 of 232
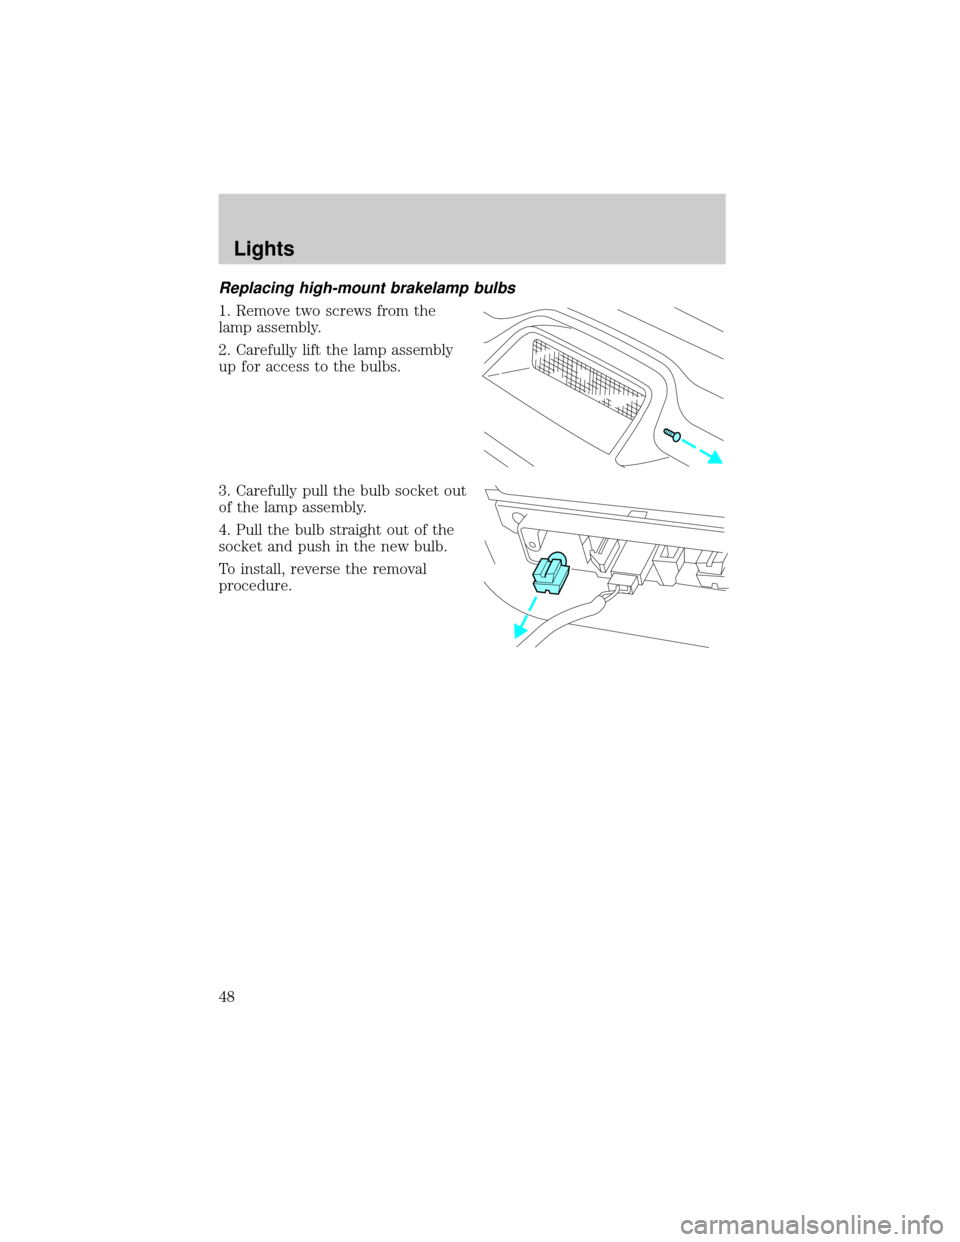
Replacing high-mount brakelamp bulbs
1. Remove two screws from the
lamp assembly.
2. Carefully lift the lamp assembly
up for access to the bulbs.
3. Carefully pull the bulb socket out
of the lamp assembly.
4. Pull the bulb straight out of the
socket and push in the new bulb.
To install, reverse the removal
procedure.
Lights
48
Page 49 of 232
WINDSHIELD WIPER/WASHER CONTROLS
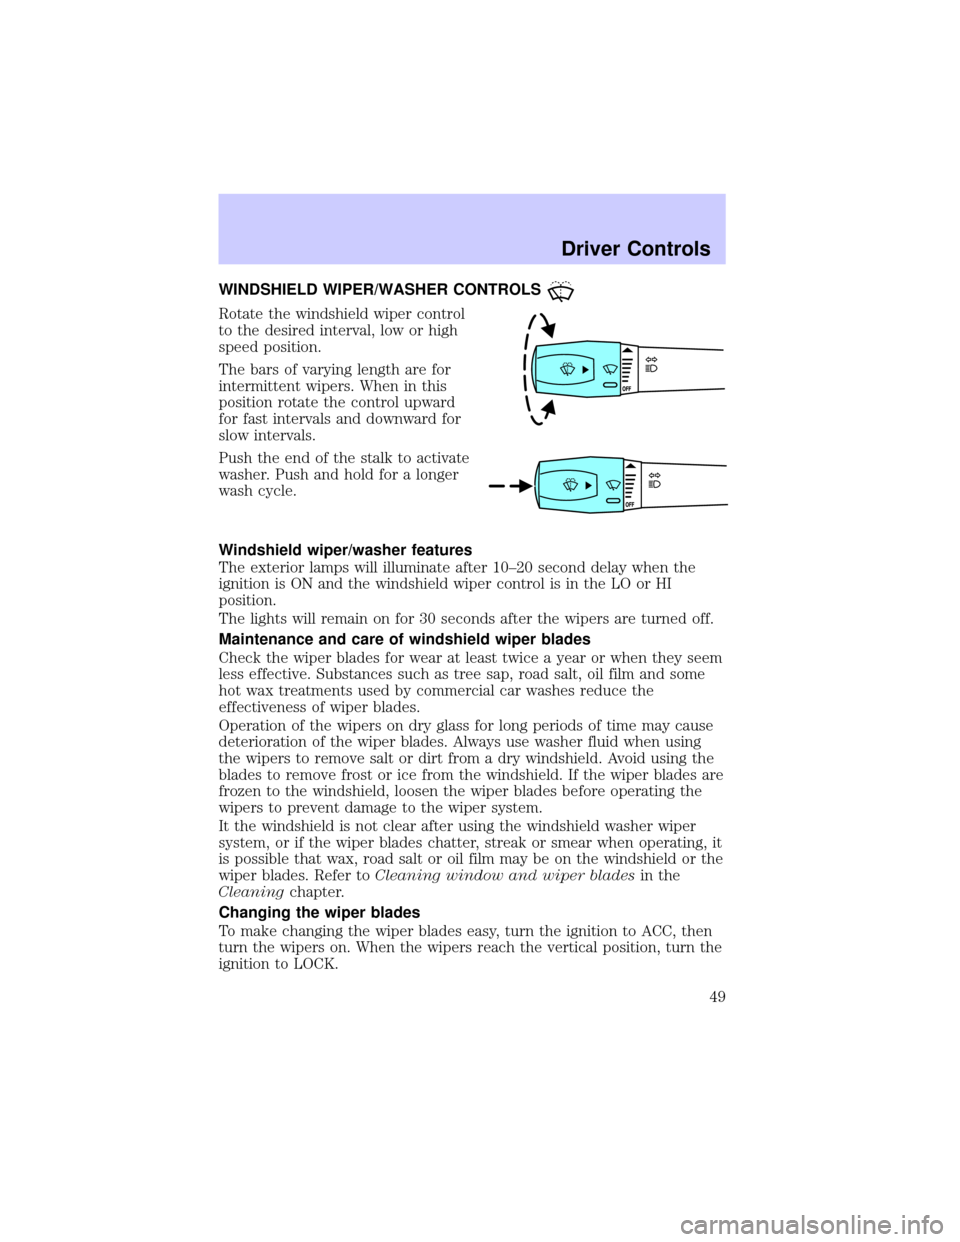
Rotate the windshield wiper control
to the desired interval, low or high
speed position.
The bars of varying length are for
intermittent wipers. When in this
position rotate the control upward
for fast intervals and downward for
slow intervals.
Push the end of the stalk to activate
washer. Push and hold for a longer
wash cycle.
Windshield wiper/washer features
The exterior lamps will illuminate after 10±20 second delay when the
ignition is ON and the windshield wiper control is in the LO or HI
position.
The lights will remain on for 30 seconds after the wipers are turned off.
Maintenance and care of windshield wiper blades
Check the wiper blades for wear at least twice a year or when they seem
less effective. Substances such as tree sap, road salt, oil film and some
hot wax treatments used by commercial car washes reduce the
effectiveness of wiper blades.
Operation of the wipers on dry glass for long periods of time may cause
deterioration of the wiper blades. Always use washer fluid when using
the wipers to remove salt or dirt from a dry windshield. Avoid using the
blades to remove frost or ice from the windshield. If the wiper blades are
frozen to the windshield, loosen the wiper blades before operating the
wipers to prevent damage to the wiper system.
It the windshield is not clear after using the windshield washer wiper
system, or if the wiper blades chatter, streak or smear when operating, it
is possible that wax, road salt or oil film may be on the windshield or the
wiper blades. Refer toCleaning window and wiper bladesin the
Cleaningchapter.
Changing the wiper blades
To make changing the wiper blades easy, turn the ignition to ACC, then
turn the wipers on. When the wipers reach the vertical position, turn the
ignition to LOCK.
Driver Controls
49
Page 62 of 232
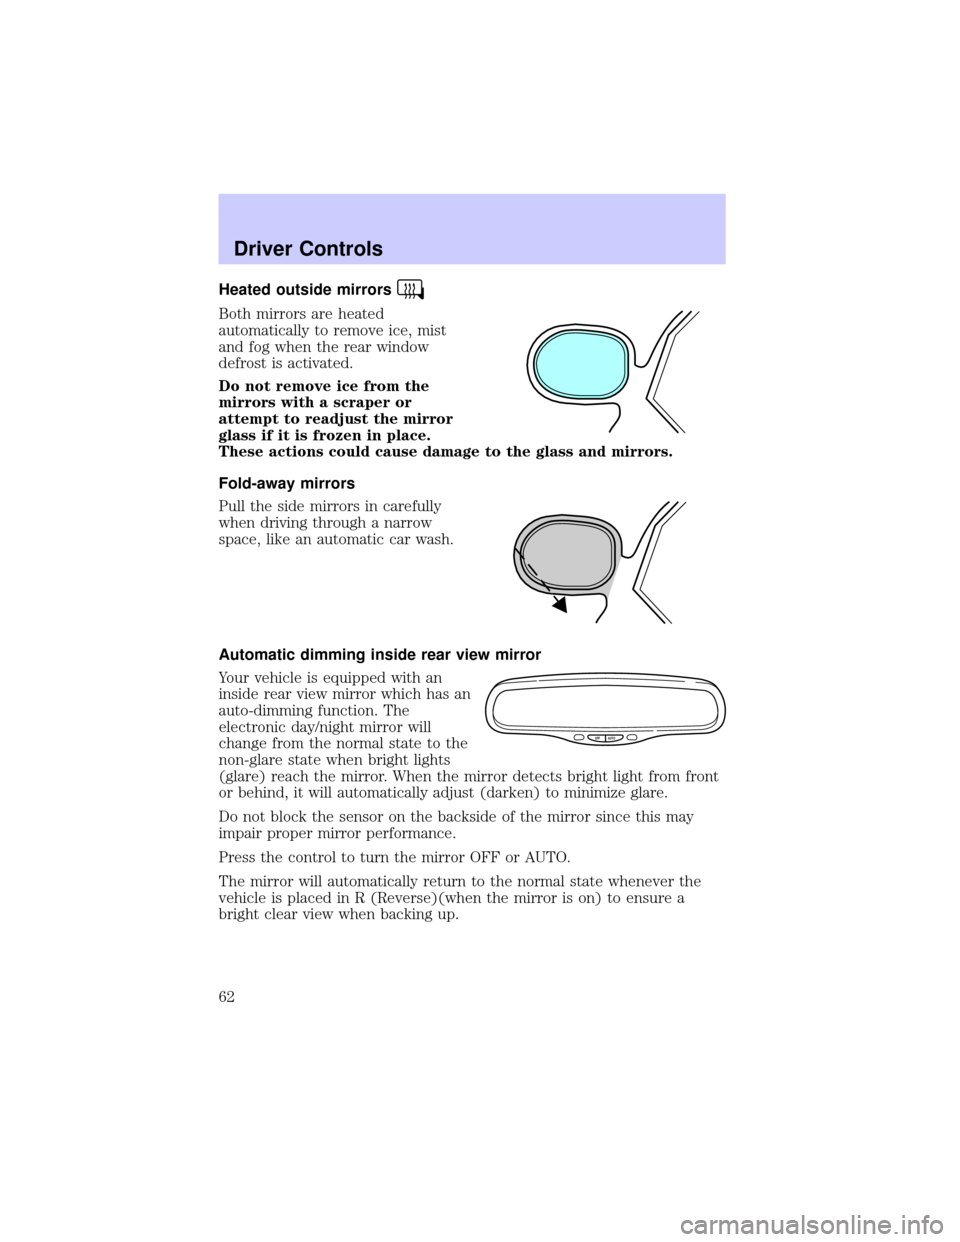
Heated outside mirrors
Both mirrors are heated
automatically to remove ice, mist
and fog when the rear window
defrost is activated.
Do not remove ice from the
mirrors with a scraper or
attempt to readjust the mirror
glass if it is frozen in place.
These actions could cause damage to the glass and mirrors.
Fold-away mirrors
Pull the side mirrors in carefully
when driving through a narrow
space, like an automatic car wash.
Automatic dimming inside rear view mirror
Your vehicle is equipped with an
inside rear view mirror which has an
auto-dimming function. The
electronic day/night mirror will
change from the normal state to the
non-glare state when bright lights
(glare) reach the mirror. When the mirror detects bright light from front
or behind, it will automatically adjust (darken) to minimize glare.
Do not block the sensor on the backside of the mirror since this may
impair proper mirror performance.
Press the control to turn the mirror OFF or AUTO.
The mirror will automatically return to the normal state whenever the
vehicle is placed in R (Reverse)(when the mirror is on) to ensure a
bright clear view when backing up.
OFF AUTO
Driver Controls
62
Page 81 of 232

Illuminated entry
The interior lamps illuminate:
²when the remote entry system is used to unlock the door(s) or sound
the panic alarm, or
²when the driver door is unlocked using the key in the driver door key
cylinder.
The system automatically turns off after 25 seconds after the UNLOCK
button on the RUN or ACC position.
The inside lights will not turn off if:
²they have been turned on with the dimmer control, or
²any door is open.
The battery saver will shut off the interior lamps 10 minutes after the
ignition is turned off. Demand lighting will turn off after 30 minutes.
Autolock
This feature automatically locks all vehicle doors when:
²all doors are closed,
²the ignition is in the ON position,
²the brake pedal is depressed and
²you shift into any gear.
Relock
The autolock feature repeats when:
²the ignition is in the ON position,
²a door is open and then closed,
²the transmission is placed in Reverse or any Drive gear, and then
²the brake pedal is depressed and then released.
Deactivating/activating the autolock feature
Before following the procedure, make sure that the ignition is OFF and
all vehicle doors are closed.
Automatic door locks can be turned on/off with the keyless entry keypad
through the following procedure:
You must complete steps 1-5 within 30 seconds or the procedure will
have to be repeated. If the procedure needs to be repeated, you must
wait 30 seconds.
Locks and Security
81
Page 91 of 232
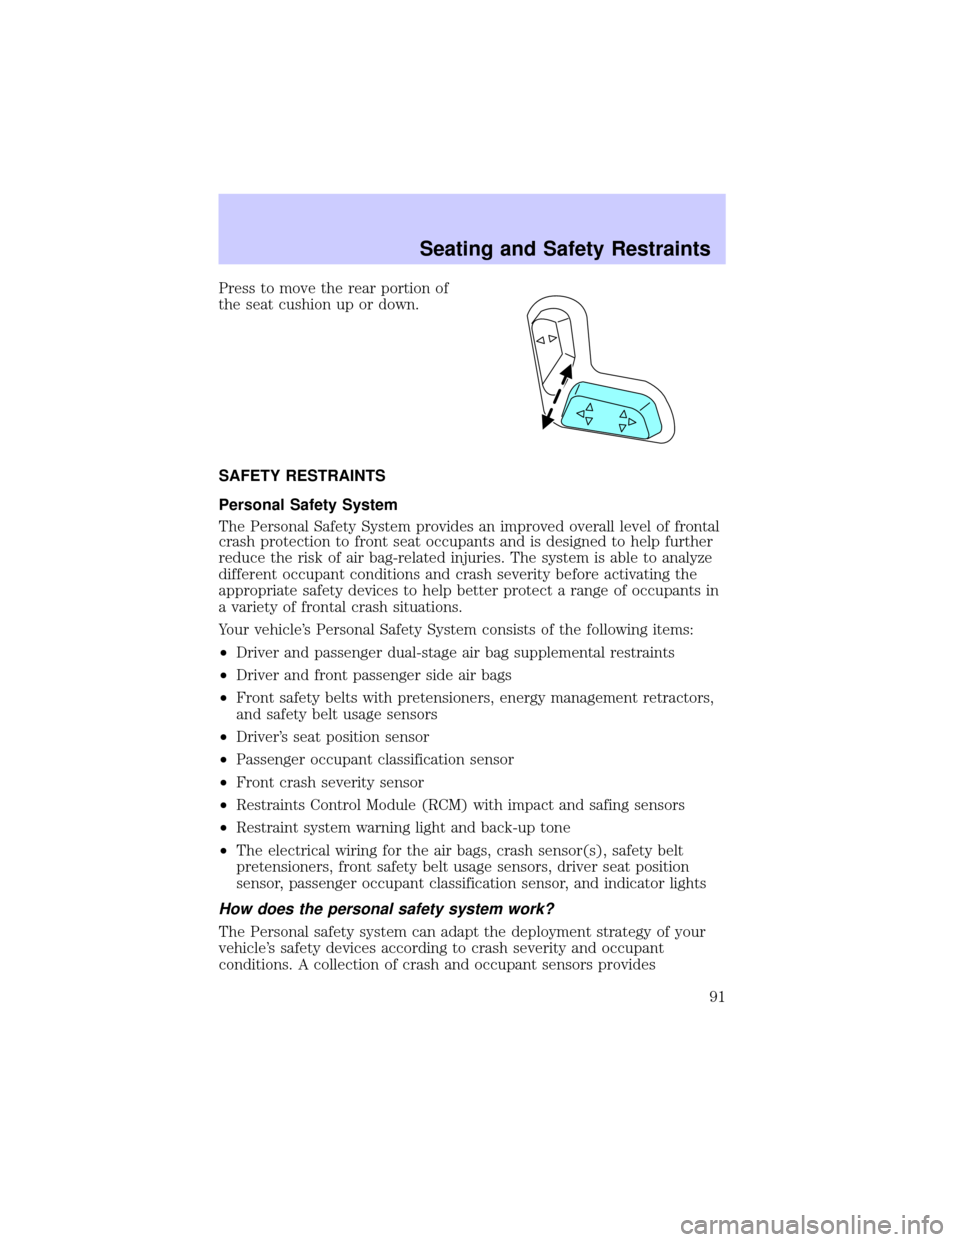
Press to move the rear portion of
the seat cushion up or down.
SAFETY RESTRAINTS
Personal Safety System
The Personal Safety System provides an improved overall level of frontal
crash protection to front seat occupants and is designed to help further
reduce the risk of air bag-related injuries. The system is able to analyze
different occupant conditions and crash severity before activating the
appropriate safety devices to help better protect a range of occupants in
a variety of frontal crash situations.
Your vehicle's Personal Safety System consists of the following items:
²Driver and passenger dual-stage air bag supplemental restraints
²Driver and front passenger side air bags
²Front safety belts with pretensioners, energy management retractors,
and safety belt usage sensors
²Driver's seat position sensor
²Passenger occupant classification sensor
²Front crash severity sensor
²Restraints Control Module (RCM) with impact and safing sensors
²Restraint system warning light and back-up tone
²The electrical wiring for the air bags, crash sensor(s), safety belt
pretensioners, front safety belt usage sensors, driver seat position
sensor, passenger occupant classification sensor, and indicator lights
How does the personal safety system work?
The Personal safety system can adapt the deployment strategy of your
vehicle's safety devices according to crash severity and occupant
conditions. A collection of crash and occupant sensors provides
Seating and Safety Restraints
91
Page 94 of 232
risk of force-related injuries to the occupant's chest by limiting the load
on the occupant. Refer toEnergy management featuresection in this
chapter.
Determining if the Personal safety system is operational
The Personal safety system uses a warning light in the instrument cluster
or a back-up tone to indicate the condition of the system. Refer to the
Warning lightsection in theInstrument clusterchapter. Routine
maintenance of the Personal safety system is not required.
The Restraints control module (RCM) monitors its own internal circuits
and the circuits for the air bag supplemental restraints, crash sensor(s),
safety belt pretensioners, front safety belt buckle sensors, driver seat
position sensor, and passenger occupant classification sensor. In addition,
the RCM also monitors the restraints warning light in the instrument
cluster. A difficulty with the system is indicated by one or more of the
following.
²The warning light will either flash or stay lit.
²The warning light will not illuminate immediately after ignition is
turned on.
²A series of five beeps will be heard. The tone pattern will repeat
periodically until the problem and warning light are repaired.
If any of these things happen, even intermittently, have the Personal
safety system serviced at your dealership or by a qualified technician
immediately. Unless serviced, the system may not function properly in
the event of a collision.
Safety restraints precautions
Always drive and ride with your seatback upright and the lap
belt snug and low across the hips.
To reduce the risk of injury, make sure children sit where they
can be properly restrained.
Never let a passenger hold a child on his or her lap while the
vehicle is moving. The passenger cannot protect the child from
injury in a collision.
Seating and Safety Restraints
94