radio Mercury Marauder 2003 s User Guide
[x] Cancel search | Manufacturer: MERCURY, Model Year: 2003, Model line: Marauder, Model: Mercury Marauder 2003Pages: 232, PDF Size: 2.29 MB
Page 68 of 232
²To close from the vent position, press and hold the rear portion of the
control.
Do not let children play with the moon roof. They may seriously
hurt themselves.
HOMELINKTUNIVERSAL TRANSCEIVER
The HomeLinktUniversal Transceiver, located on the driver's visor,
provides a convenient way to replace up to three hand-held transmitters
with a single built-in device. This feature will learn the radio frequency
codes of most current transmitters to operate garage doors, entry gate
operators, security systems, entry door locks, and home or office lighting.
When programming your HomeLinktUniversal Transceiver to a
garage door or gate, be sure that people and objects are out of
the way to prevent potential harm or damage.
Do not use the HomeLinktUniversal Transceiver with any garage door
opener that lacks safety stop and reverse features as required by U.S.
federal safety standards (this includes any garage door opener model
manufactured before April 1, 1982). A garage door which cannot detect
an object, signaling the door to stop and reverse, does not meet current
U.S. federal safety standards. For more information, contact HomeLinkt
at:www.homelink.comor1±800±355±3515.
Retain the original transmitter for use in other vehicles as well as for
future programming procedures (i.e. new HomeLinktequipped vehicle
purchase). It is also suggested that upon the sale of the vehicle, the
programmed HomelinktUniversal Transceiver buttons be erased for
security purposes, refer toProgrammingin this section.
Programming
Do not program the HomeLinktUniversal Transceiver with the
vehicle parked in the garage.
Note:Some vehicles may require the ignition switch to be turned to the
second (or ªACCº) position for programming and/or operation of the
HomeLinkt. It is also recommended that a new battery be placed in the
hand-held transmitter of the device being programmed to HomeLinktfor
quicker training and accurate transmission of the radio-frequency signal.
Driver Controls
68
Page 69 of 232
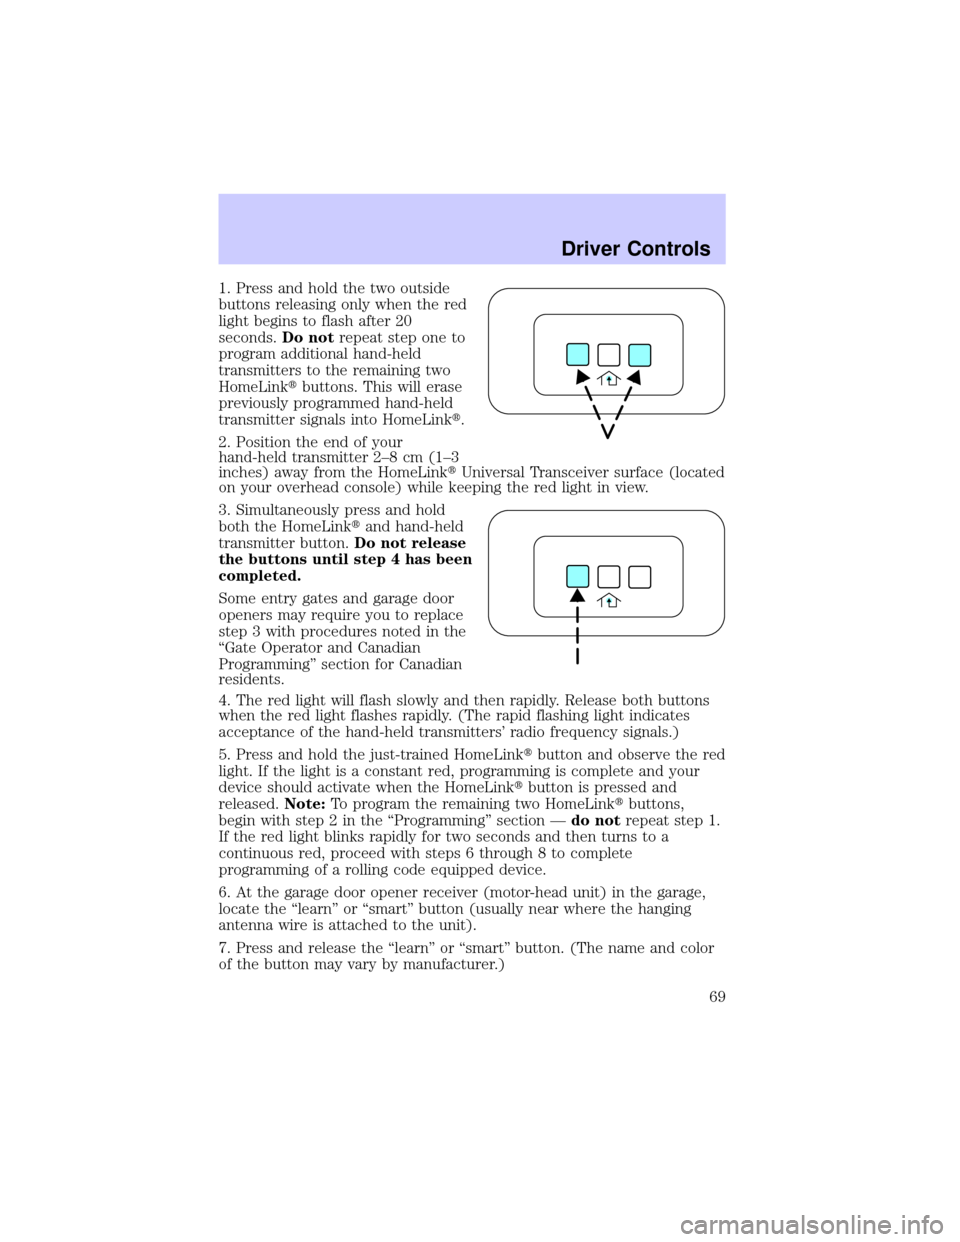
1. Press and hold the two outside
buttons releasing only when the red
light begins to flash after 20
seconds.Do notrepeat step one to
program additional hand-held
transmitters to the remaining two
HomeLinktbuttons. This will erase
previously programmed hand-held
transmitter signals into HomeLinkt.
2. Position the end of your
hand-held transmitter 2±8 cm (1±3
inches) away from the HomeLinktUniversal Transceiver surface (located
on your overhead console) while keeping the red light in view.
3. Simultaneously press and hold
both the HomeLinktand hand-held
transmitter button.Do not release
the buttons until step 4 has been
completed.
Some entry gates and garage door
openers may require you to replace
step 3 with procedures noted in the
ªGate Operator and Canadian
Programmingº section for Canadian
residents.
4. The red light will flash slowly and then rapidly. Release both buttons
when the red light flashes rapidly. (The rapid flashing light indicates
acceptance of the hand-held transmitters' radio frequency signals.)
5. Press and hold the just-trained HomeLinktbutton and observe the red
light. If the light is a constant red, programming is complete and your
device should activate when the HomeLinktbutton is pressed and
released.Note:To program the remaining two HomeLinktbuttons,
begin with step 2 in the ªProgrammingº section Ðdo notrepeat step 1.
If the red light blinks rapidly for two seconds and then turns to a
continuous red, proceed with steps 6 through 8 to complete
programming of a rolling code equipped device.
6. At the garage door opener receiver (motor-head unit) in the garage,
locate the ªlearnº or ªsmartº button (usually near where the hanging
antenna wire is attached to the unit).
7. Press and release the ªlearnº or ªsmartº button. (The name and color
of the button may vary by manufacturer.)
Driver Controls
69
Page 71 of 232
1. Press and hold the desired HomeLinktbutton.Do NOTrelease the
button.
2. The red indicator light will begin to flash after 20 seconds. Without
releasing the HomeLinktbutton, follow step 2 in the ªProgrammingº
section.
For questions or comments, contact HomeLinktatwww.homelink.com
or1±800±355±3515.
Gate Operator & Canadian Programming
During programming, your
hand-held transmitter may
automatically stop transmitting Ð
not allowing enough time for
HomeLinktto accept the signal
from the hand-held transmitter.
After completing steps 1 and 2
outlined in theªProgrammingº
section, replace step 3 with the
following:
Note:If programming a garage door opener or gate operator, it is
advised to unplug the device during the ªcyclingº process to prevent
overheating.
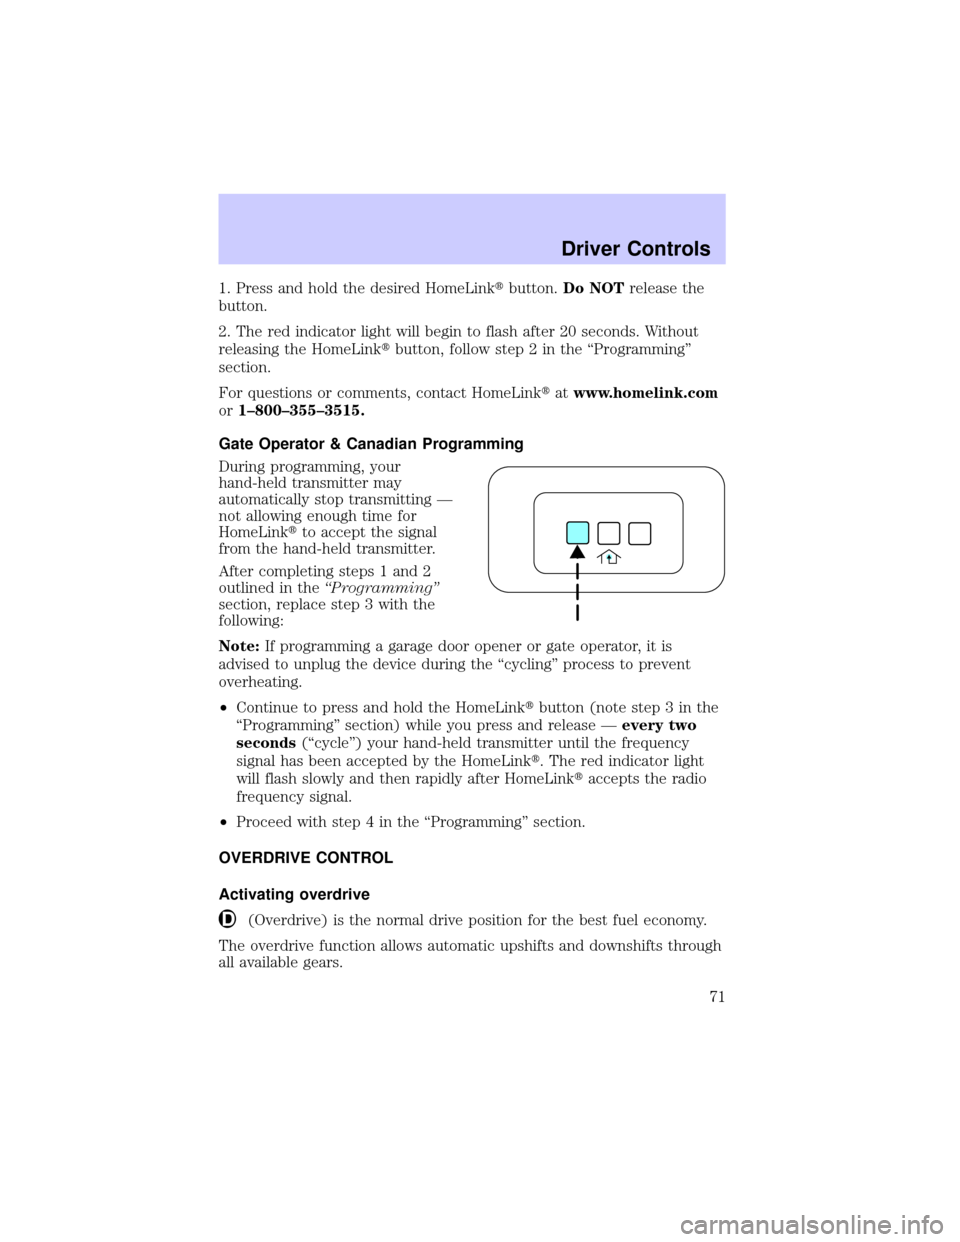
²Continue to press and hold the HomeLinktbutton (note step 3 in the
ªProgrammingº section) while you press and release Ðevery two
seconds(ªcycleº) your hand-held transmitter until the frequency
signal has been accepted by the HomeLinkt. The red indicator light
will flash slowly and then rapidly after HomeLinktaccepts the radio
frequency signal.
²Proceed with step 4 in the ªProgrammingº section.
OVERDRIVE CONTROL
Activating overdrive
(Overdrive) is the normal drive position for the best fuel economy.
The overdrive function allows automatic upshifts and downshifts through
all available gears.
Driver Controls
71
Page 73 of 232
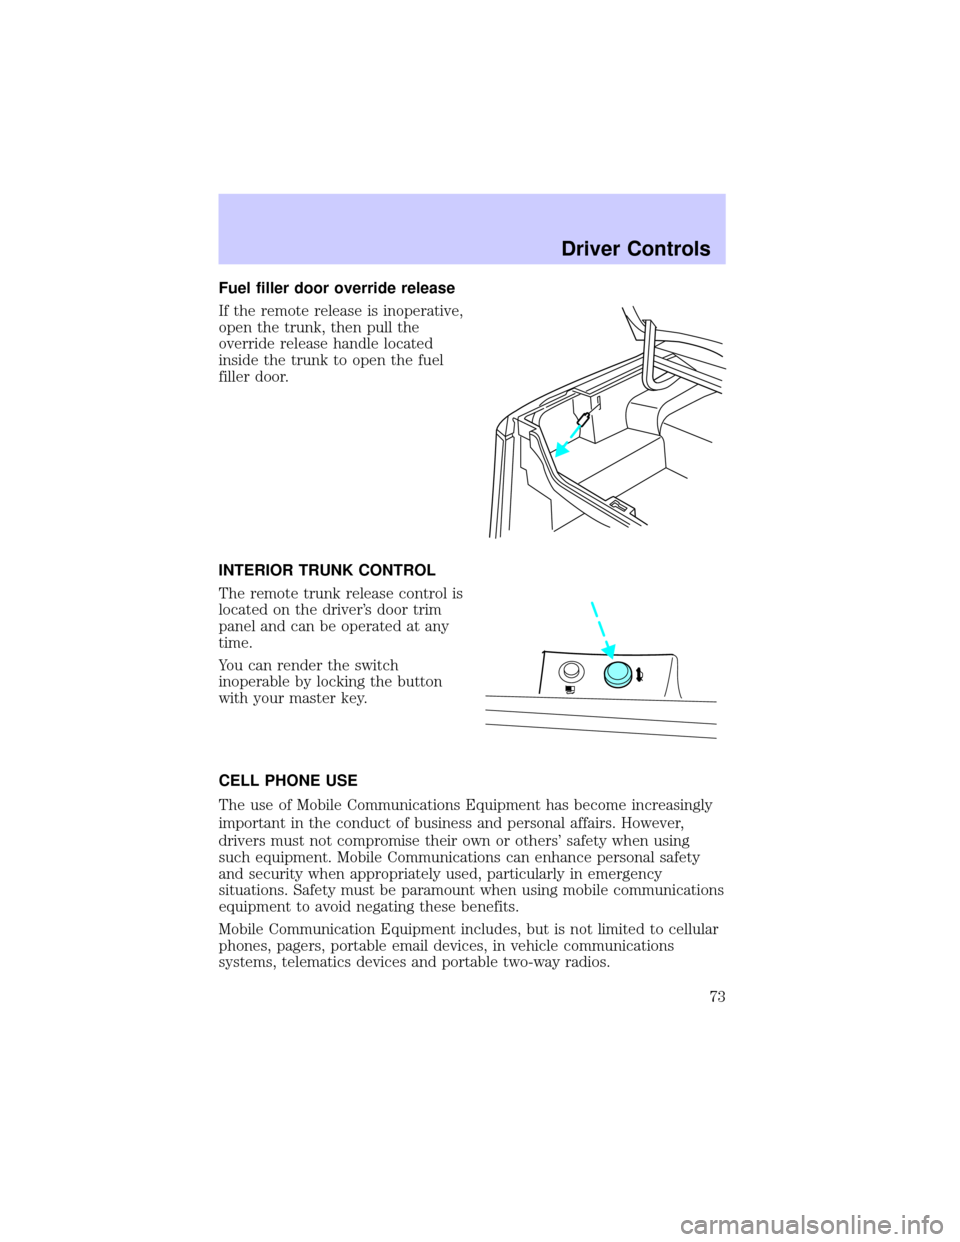
Fuel filler door override release
If the remote release is inoperative,
open the trunk, then pull the
override release handle located
inside the trunk to open the fuel
filler door.
INTERIOR TRUNK CONTROL
The remote trunk release control is
located on the driver's door trim
panel and can be operated at any
time.
You can render the switch
inoperable by locking the button
with your master key.
CELL PHONE USE
The use of Mobile Communications Equipment has become increasingly
important in the conduct of business and personal affairs. However,
drivers must not compromise their own or others' safety when using
such equipment. Mobile Communications can enhance personal safety
and security when appropriately used, particularly in emergency
situations. Safety must be paramount when using mobile communications
equipment to avoid negating these benefits.
Mobile Communication Equipment includes, but is not limited to cellular
phones, pagers, portable email devices, in vehicle communications
systems, telematics devices and portable two-way radios.
Driver Controls
73
Page 79 of 232
7. After a five to ten second delay, the door locks will cycle lock/unlock
to confirm successful programming.
8. Turn the ignition to OFF.
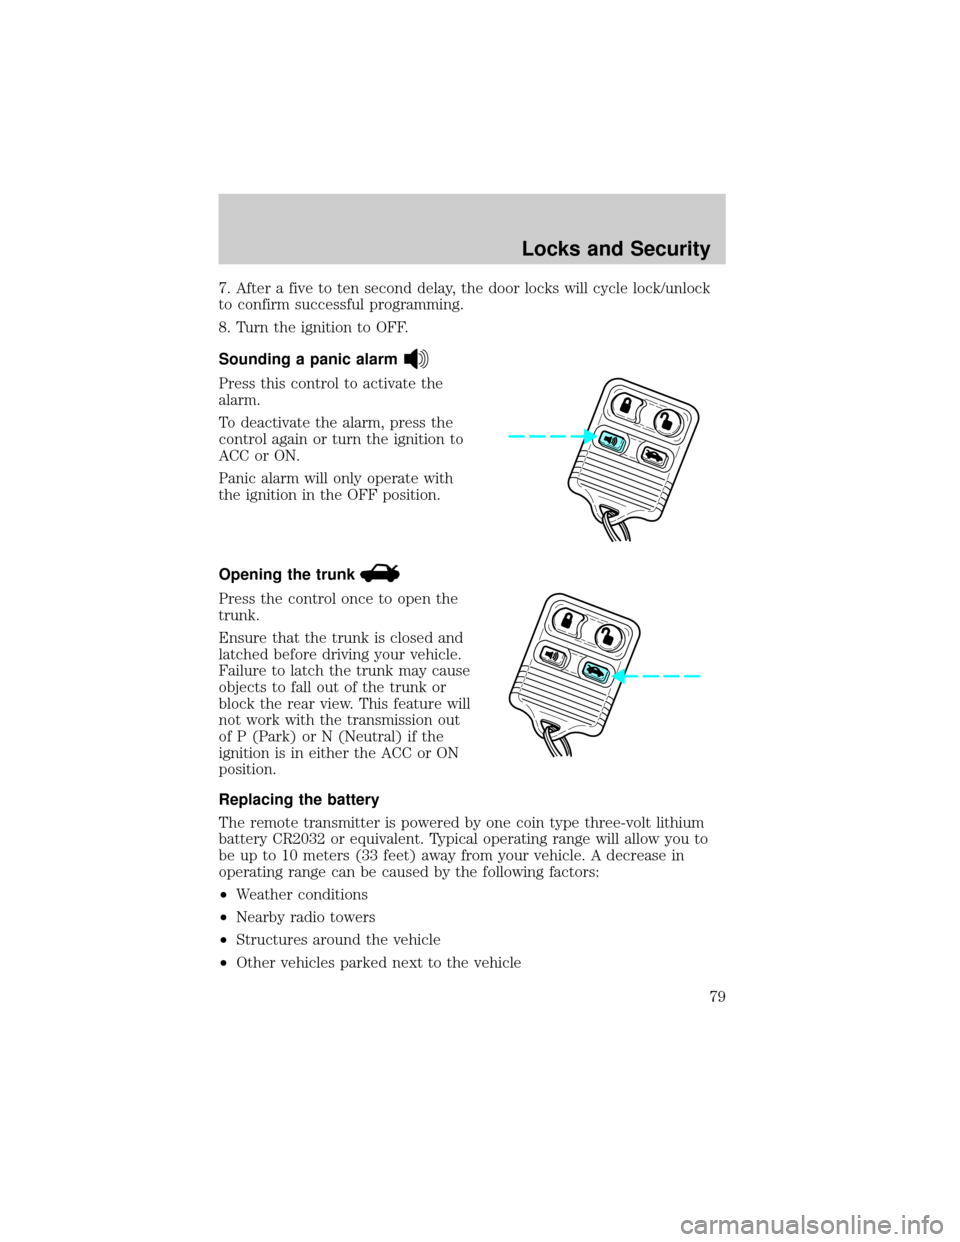
Sounding a panic alarm
Press this control to activate the
alarm.
To deactivate the alarm, press the
control again or turn the ignition to
ACC or ON.
Panic alarm will only operate with
the ignition in the OFF position.
Opening the trunk
Press the control once to open the
trunk.
Ensure that the trunk is closed and
latched before driving your vehicle.
Failure to latch the trunk may cause
objects to fall out of the trunk or
block the rear view. This feature will
not work with the transmission out
of P (Park) or N (Neutral) if the
ignition is in either the ACC or ON
position.
Replacing the battery
The remote transmitter is powered by one coin type three-volt lithium
battery CR2032 or equivalent. Typical operating range will allow you to
be up to 10 meters (33 feet) away from your vehicle. A decrease in
operating range can be caused by the following factors:
²Weather conditions
²Nearby radio towers
²Structures around the vehicle
²Other vehicles parked next to the vehicle
Locks and Security
79
Page 122 of 232
STARTING
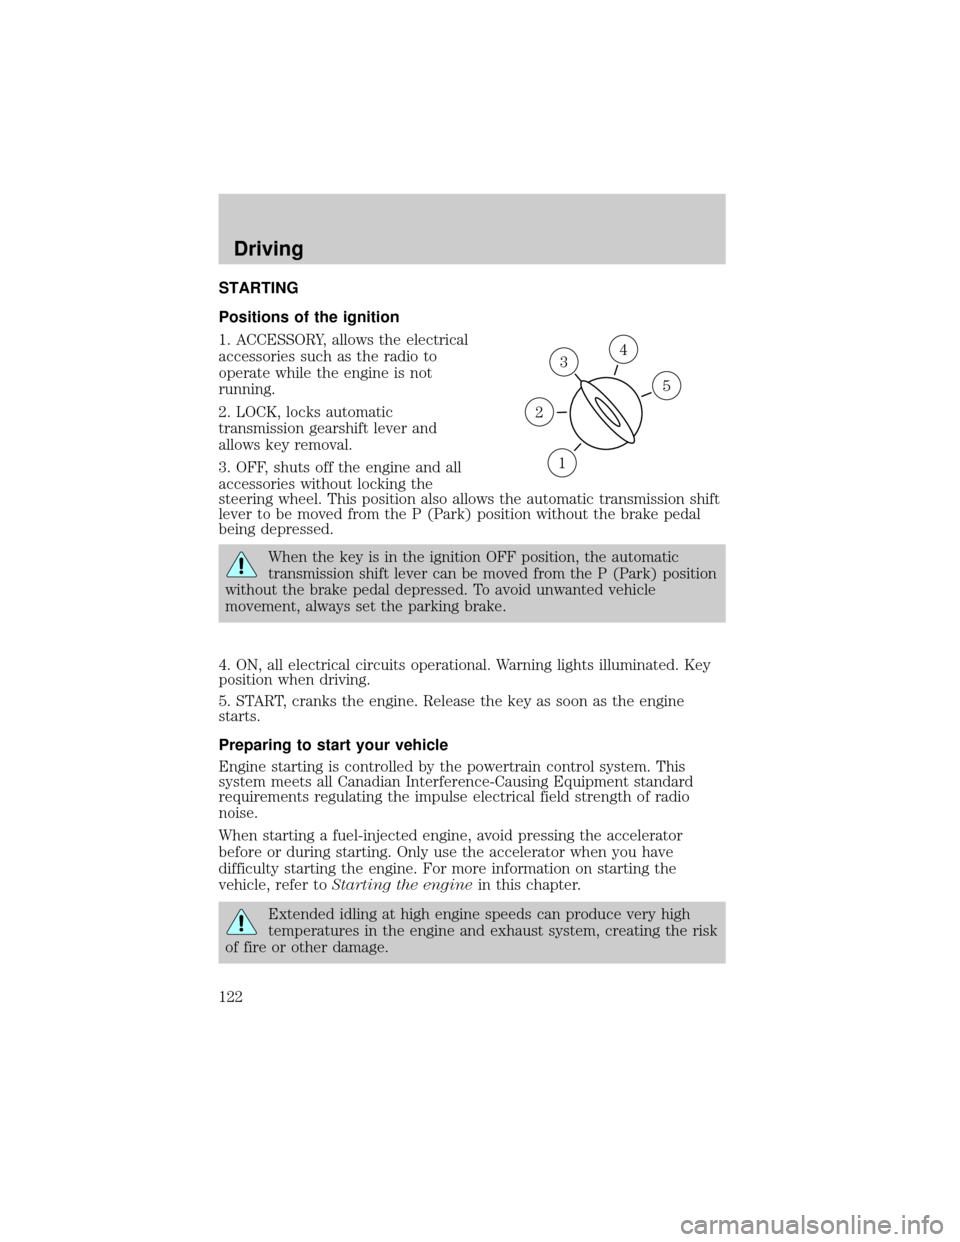
Positions of the ignition
1. ACCESSORY, allows the electrical
accessories such as the radio to
operate while the engine is not
running.
2. LOCK, locks automatic
transmission gearshift lever and
allows key removal.
3. OFF, shuts off the engine and all
accessories without locking the
steering wheel. This position also allows the automatic transmission shift
lever to be moved from the P (Park) position without the brake pedal
being depressed.
When the key is in the ignition OFF position, the automatic
transmission shift lever can be moved from the P (Park) position
without the brake pedal depressed. To avoid unwanted vehicle
movement, always set the parking brake.
4. ON, all electrical circuits operational. Warning lights illuminated. Key
position when driving.
5. START, cranks the engine. Release the key as soon as the engine
starts.
Preparing to start your vehicle
Engine starting is controlled by the powertrain control system. This
system meets all Canadian Interference-Causing Equipment standard
requirements regulating the impulse electrical field strength of radio
noise.
When starting a fuel-injected engine, avoid pressing the accelerator
before or during starting. Only use the accelerator when you have
difficulty starting the engine. For more information on starting the
vehicle, refer toStarting the enginein this chapter.
Extended idling at high engine speeds can produce very high
temperatures in the engine and exhaust system, creating the risk
of fire or other damage.
3
1
2
5
4
Driving
122
Page 146 of 232
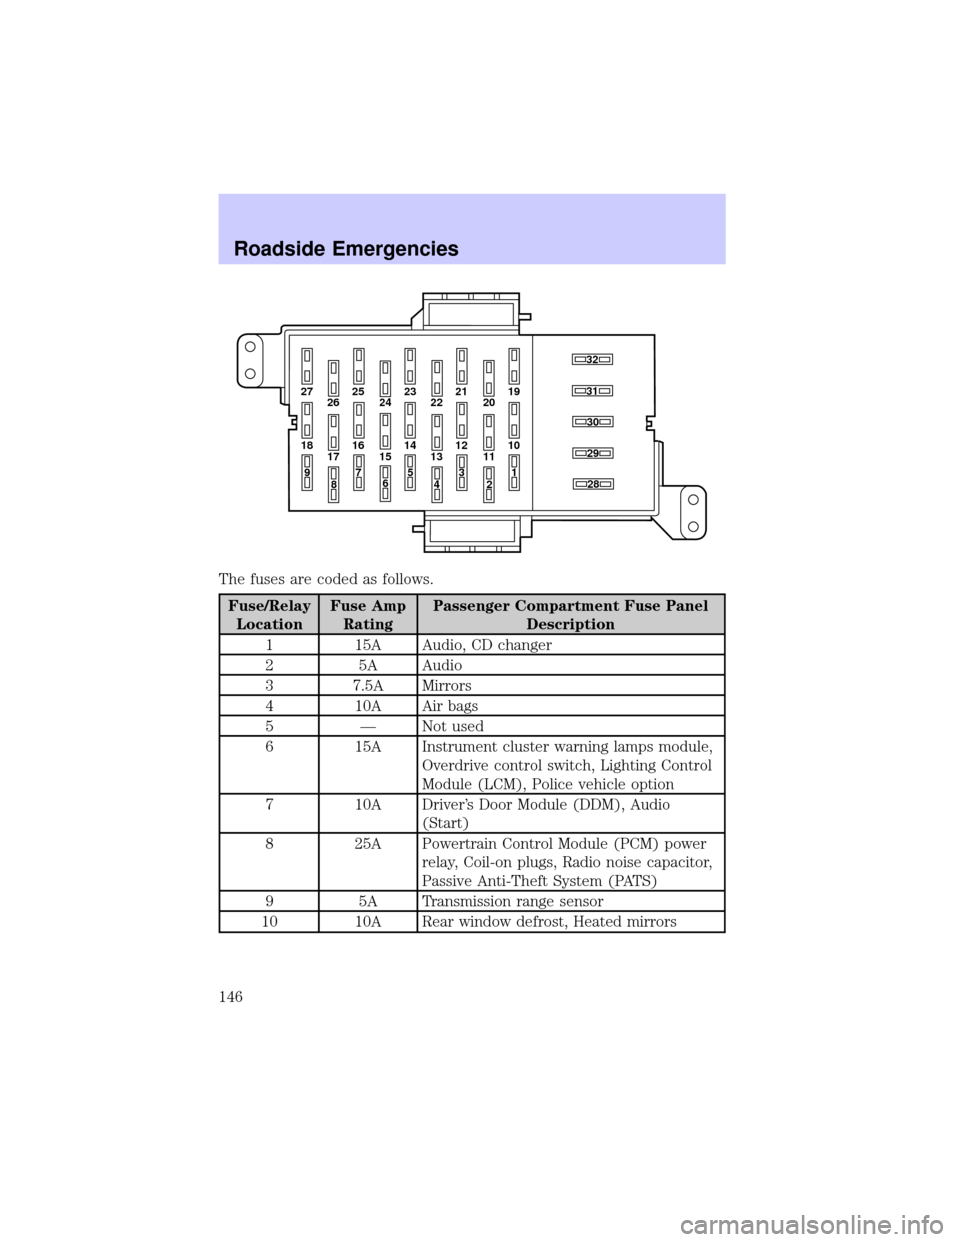
The fuses are coded as follows.
Fuse/Relay
LocationFuse Amp
RatingPassenger Compartment Fuse Panel
Description
1 15A Audio, CD changer
2 5A Audio
3 7.5A Mirrors
4 10A Air bags
5 Ð Not used
6 15A Instrument cluster warning lamps module,
Overdrive control switch, Lighting Control
Module (LCM), Police vehicle option
7 10A Driver's Door Module (DDM), Audio
(Start)
8 25A Powertrain Control Module (PCM) power
relay, Coil-on plugs, Radio noise capacitor,
Passive Anti-Theft System (PATS)
9 5A Transmission range sensor
10 10A Rear window defrost, Heated mirrors
27 25
26 2423 21
2219
20
18 16
17 1514 12
131030
32
31
28
29
11
97
8653
41
2
Roadside Emergencies
146
Page 187 of 232
When lifting a plastic-cased battery, excessive pressure on the
end walls could cause acid to flow through the vent caps,
resulting in personal injury and/or damage to the vehicle or battery.
Lift the battery with a battery carrier or with your hands on opposite
corners.
Keep batteries out of reach of children. Batteries contain sulfuric
acid. Avoid contact with skin, eyes or clothing. Shield your eyes
when working near the battery to protect against possible splashing of
acid solution. In case of acid contact with skin or eyes, flush
immediately with water for a minimum of 15 minutes and get prompt
medical attention. If acid is swallowed, call a physician immediately.
Battery posts, terminals and related accessories contain lead and
lead compounds.Wash hands after handling.
Because your vehicle's engine is electronically controlled by a computer,
some control conditions are maintained by power from the battery. When
the battery is disconnected or a new battery is installed, the engine must
relearn its idle and fuel trim strategy for optimum driveability and
performance. To begin this process:
1. With the vehicle at a complete stop, set the parking brake.
2. Put the gearshift in P (Park), turn off all accessories and start the
engine.
3. Run the engine until it reaches normal operating temperature.
4. Allow the engine to idle for at least one minute.
5. Turn the A/C on and allow the engine to idle for at least one minute.
6. Release the parking brake. With your foot on the brake pedal and with
the A/C on, put the vehicle in D (Drive) and allow the engine to idle for
at least one minute.
7. Drive the vehicle to complete the relearning process.
²The vehicle may need to be driven 16 km (10 miles) or more to
relearn the idle and fuel trim strategy.
²If you do not allow the engine to relearn its idle trim, the idle
quality of your vehicle may be adversely affected until the idle
trim is eventually relearned.
If the battery has been disconnected or a new battery has been installed,
the clock and radio settings must be reset once the battery is
reconnected.
Maintenance and Specifications
187
Page 220 of 232

For maximum vehicle performance, keep the following information in
mind when adding accessories or equipment to your vehicle:
²When adding accessories, equipment, passengers and luggage to your
vehicle, do not exceed the total weight capacity of the vehicle or of
the front or rear axle (GVWR or GAWR as indicated on the Safety
compliance certification label). Consult your dealer for specific weight
information.
²The Federal Communications Commission (FCC) and Canadian Radio
Telecommunications Commission (CRTC) regulate the use of mobile
communications systems - such as two-way radios, telephones and
theft alarms - that are equipped with radio transmitters. Any such
equipment installed in your vehicle should comply with FCC or CRTC
regulations and should be installed only by a qualified service
technician.
²Mobile communications systems may harm the operation of your
vehicle, particularly if they are not properly designed for automotive
use or are not properly installed. When operated, such systems may
cause the engine to stumble or stall or cause the transmission to be
damaged or operate improperly. In addition, such systems may be
damaged or their performance may be affected by operating your
vehicle. (Citizens band [CB] transceivers, garage door openers and
other transmitters with outputs of five watts or less will not ordinarily
affect your vehicle's operation.)
²Ford cannot assume responsibility for any adverse effects or damage
that may result from the use of such equipment.
Accessories
220
Page 221 of 232

A
ABS (see Brakes) .....................126
Air bag supplemental
restraint system ................104, 108
and child safety seats ............106
description ......................104, 108
disposal ....................................111
driver air bag ..................106, 109
indicator light ...........12, 108, 110
operation .........................106, 109
passenger air bag ...........106, 109
side air bag ..............................108
Air cleaner filter ...............206, 211
Air conditioning ..........................33
Air suspension ...........................130
description ..............................130
warning light .............................13
Antifreeze
(see Engine coolant) ................188
Anti-lock brake system
(see Brakes) ......................126±127
Audio system
(see Radio) ..................................19
Automatic transmission
driving an automatic
overdrive .................................132
fluid, adding ............................204
fluid, checking ........................204
fluid, refill capacities ..............211
fluid, specification ..................214
Auxiliary power point .................59
Axle
lubricant
specifications ..................212, 214
refill capacities ........................211B
Battery .......................................186
acid, treating emergencies .....186
charging system warning
light ............................................12
jumping a disabled battery ....156
maintenance-free ....................186
replacement, specifications ...211
servicing ..................................186
voltage gauge ............................16
BeltMinder ...................................99
Brakes ........................................126
anti-lock ...........................126±127
anti-lock brake system (ABS)
warning light .....................12, 127
brake warning light ..................11
fluid, checking and adding ....204
fluid, refill capacities ..............211
fluid, specifications .........212, 214
lubricant
specifications ..................212, 214
shift interlock ..........................131
Bulbs ............................................43
C
Capacities for refilling fluids ....211
CD changer .................................28
CD-single premium .....................19
Cell phone use ............................73
Certification Label ....................216
Changing a tire .........................151
Child safety restraints ..............111
child safety belts ....................111
Index
221