remote control Mercury Marauder 2003 Owner's Manuals
[x] Cancel search | Manufacturer: MERCURY, Model Year: 2003, Model line: Marauder, Model: Mercury Marauder 2003Pages: 232, PDF Size: 2.29 MB
Page 73 of 232
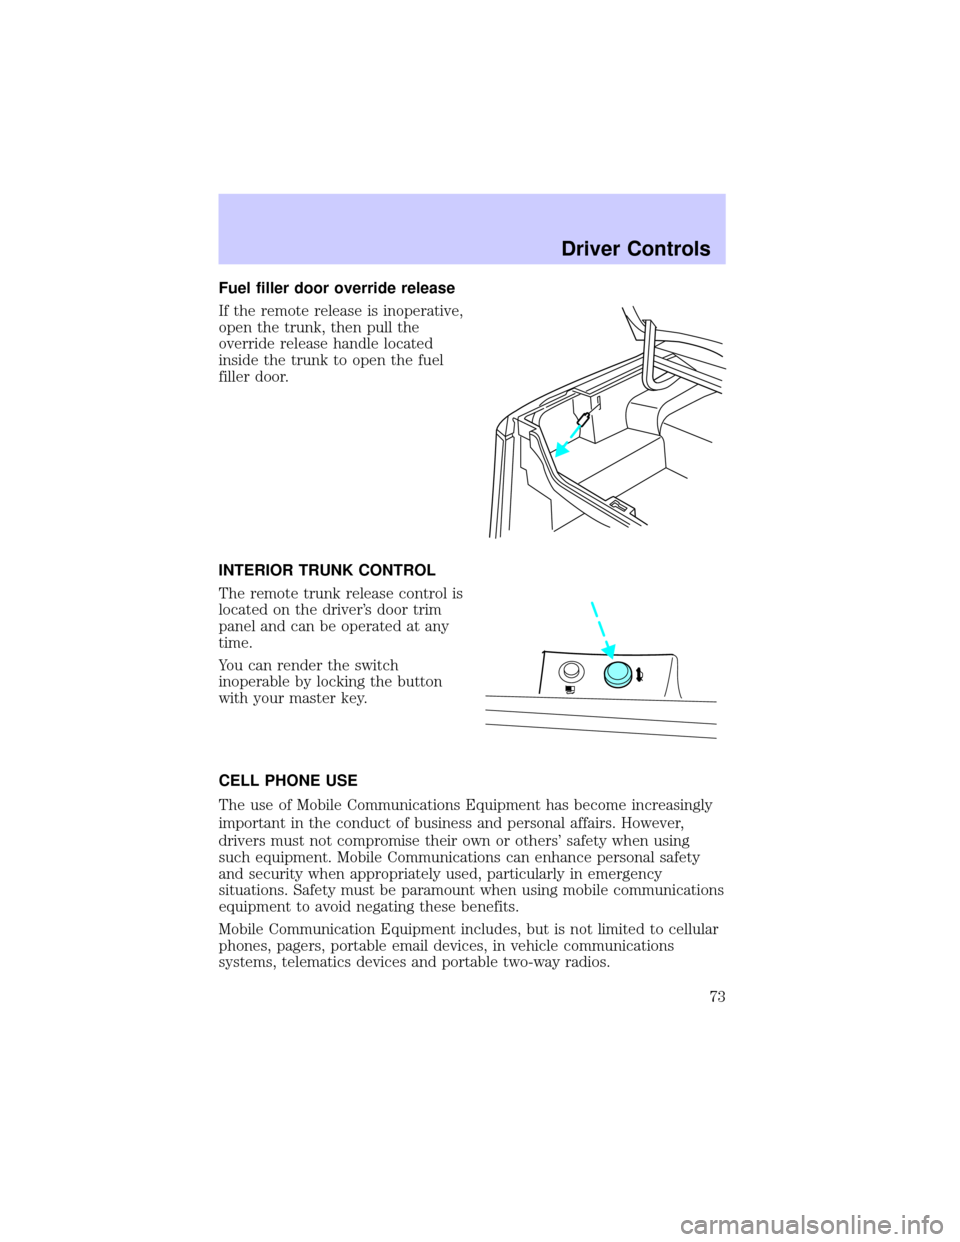
Fuel filler door override release
If the remote release is inoperative,
open the trunk, then pull the
override release handle located
inside the trunk to open the fuel
filler door.
INTERIOR TRUNK CONTROL
The remote trunk release control is
located on the driver's door trim
panel and can be operated at any
time.
You can render the switch
inoperable by locking the button
with your master key.
CELL PHONE USE
The use of Mobile Communications Equipment has become increasingly
important in the conduct of business and personal affairs. However,
drivers must not compromise their own or others' safety when using
such equipment. Mobile Communications can enhance personal safety
and security when appropriately used, particularly in emergency
situations. Safety must be paramount when using mobile communications
equipment to avoid negating these benefits.
Mobile Communication Equipment includes, but is not limited to cellular
phones, pagers, portable email devices, in vehicle communications
systems, telematics devices and portable two-way radios.
Driver Controls
73
Page 75 of 232
KEYS
The key operates all locks on your vehicle. In case of loss, replacement
keys are available from your dealer.
You should always carry a second key with you in a safe place in case
you require it in an emergency.
Refer toSecuriLockyPassive Anti-Theft Systemfor more information.
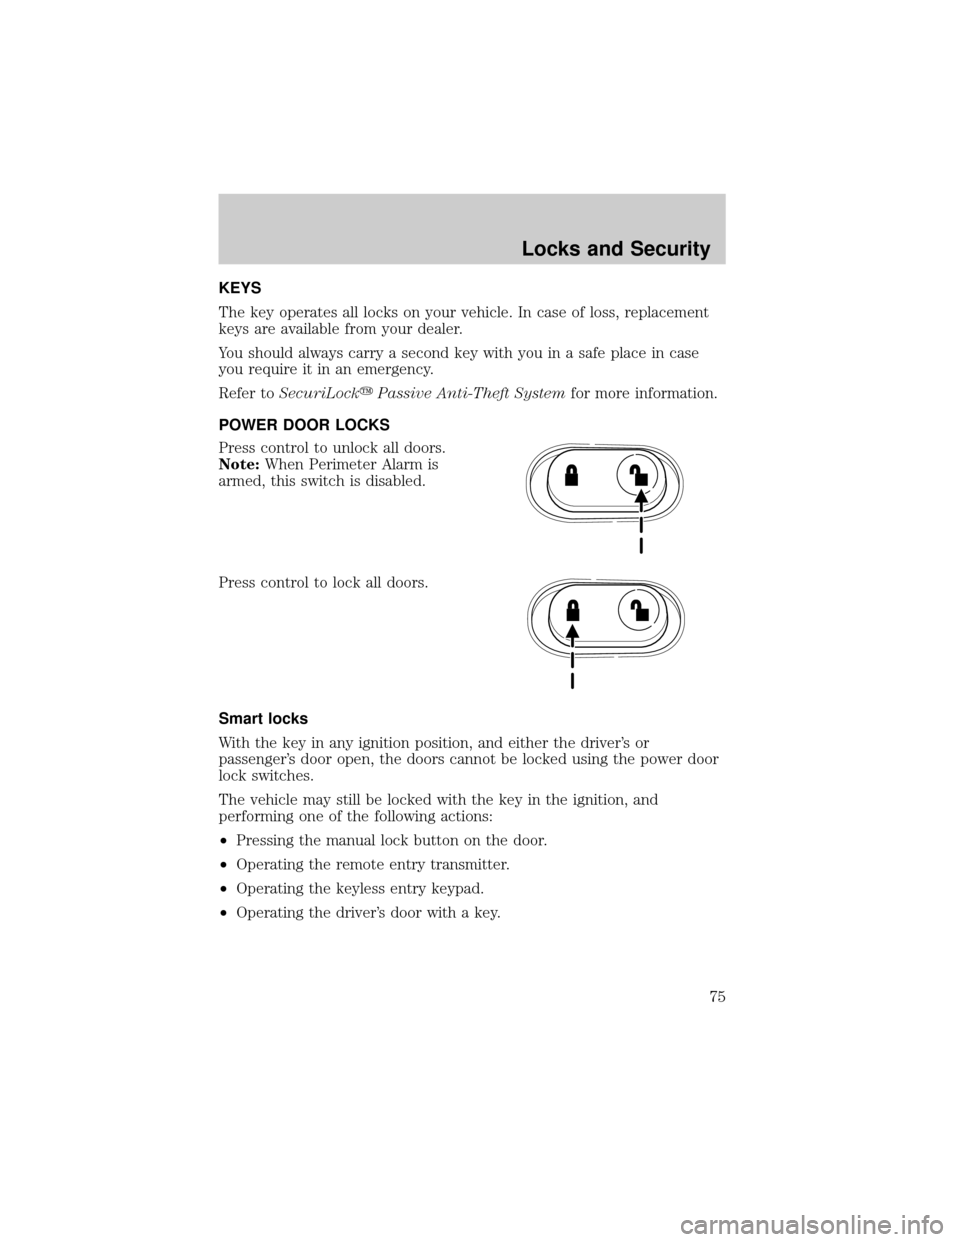
POWER DOOR LOCKS
Press control to unlock all doors.
Note:When Perimeter Alarm is
armed, this switch is disabled.
Press control to lock all doors.
Smart locks
With the key in any ignition position, and either the driver's or
passenger's door open, the doors cannot be locked using the power door
lock switches.
The vehicle may still be locked with the key in the ignition, and
performing one of the following actions:
²Pressing the manual lock button on the door.
²Operating the remote entry transmitter.
²Operating the keyless entry keypad.
²Operating the driver's door with a key.
Locks and Security
75
Page 79 of 232
7. After a five to ten second delay, the door locks will cycle lock/unlock
to confirm successful programming.
8. Turn the ignition to OFF.
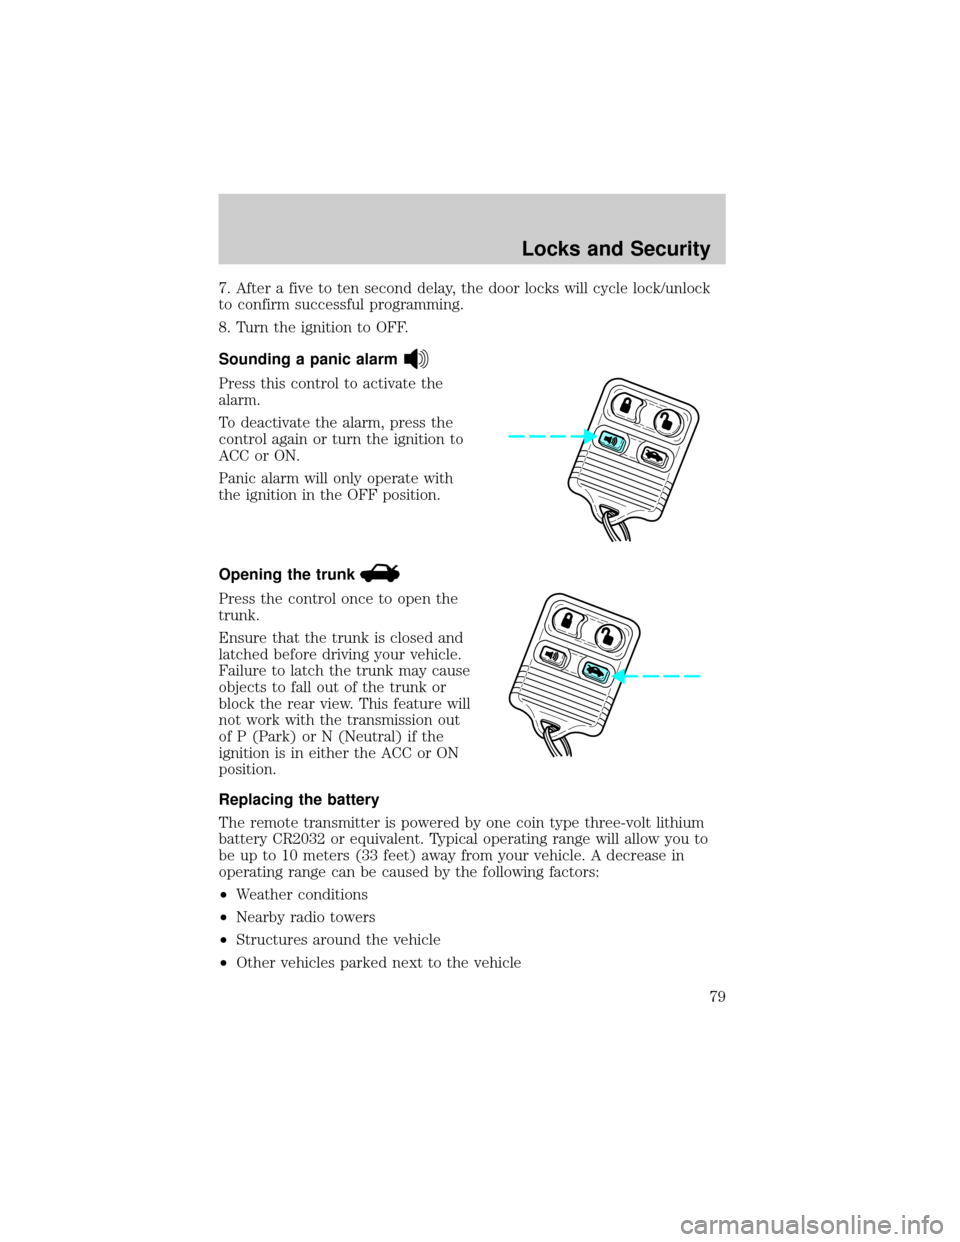
Sounding a panic alarm
Press this control to activate the
alarm.
To deactivate the alarm, press the
control again or turn the ignition to
ACC or ON.
Panic alarm will only operate with
the ignition in the OFF position.
Opening the trunk
Press the control once to open the
trunk.
Ensure that the trunk is closed and
latched before driving your vehicle.
Failure to latch the trunk may cause
objects to fall out of the trunk or
block the rear view. This feature will
not work with the transmission out
of P (Park) or N (Neutral) if the
ignition is in either the ACC or ON
position.
Replacing the battery
The remote transmitter is powered by one coin type three-volt lithium
battery CR2032 or equivalent. Typical operating range will allow you to
be up to 10 meters (33 feet) away from your vehicle. A decrease in
operating range can be caused by the following factors:
²Weather conditions
²Nearby radio towers
²Structures around the vehicle
²Other vehicles parked next to the vehicle
Locks and Security
79
Page 80 of 232
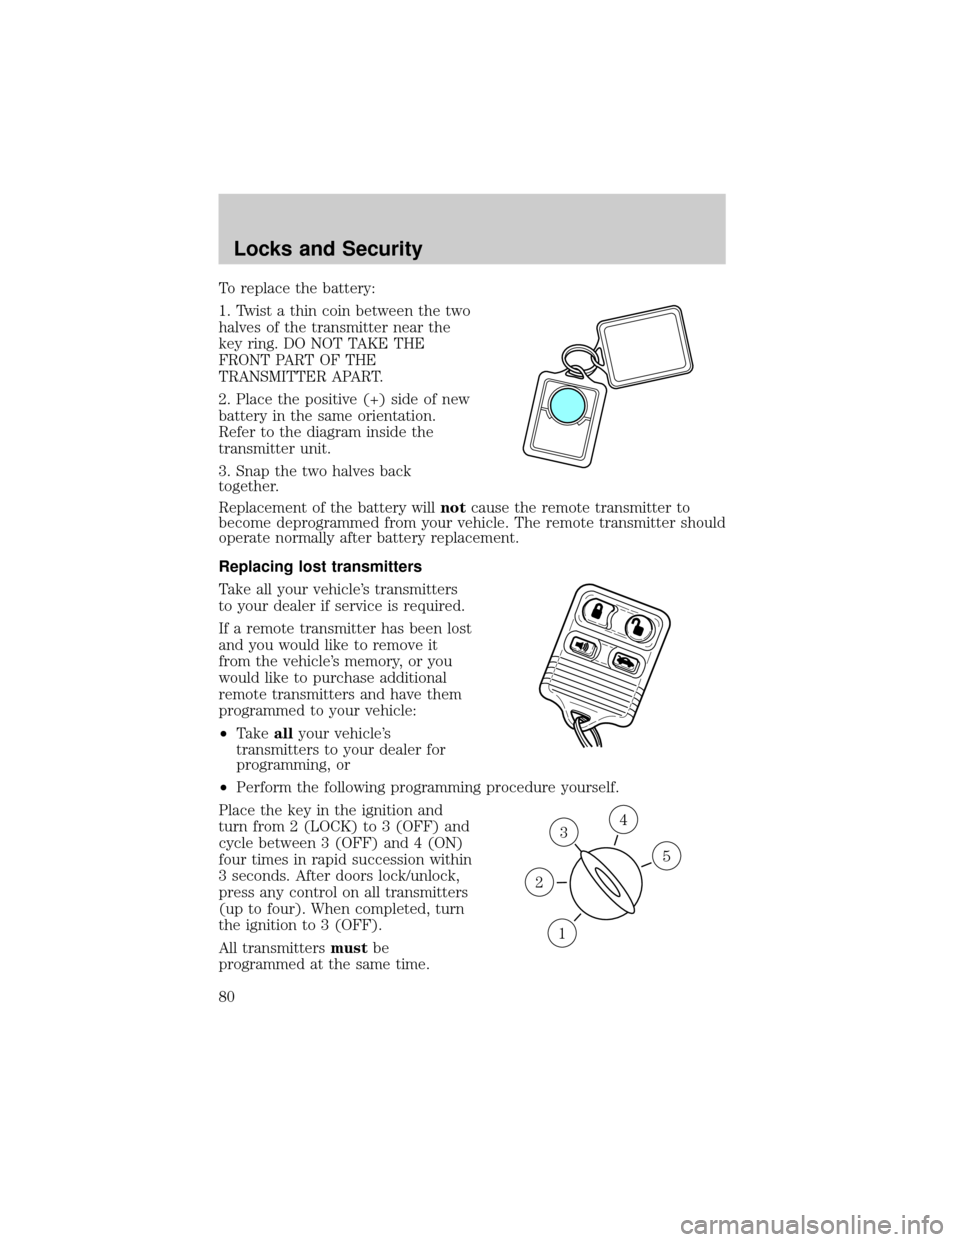
To replace the battery:
1. Twist a thin coin between the two
halves of the transmitter near the
key ring. DO NOT TAKE THE
FRONT PART OF THE
TRANSMITTER APART.
2. Place the positive (+) side of new
battery in the same orientation.
Refer to the diagram inside the
transmitter unit.
3. Snap the two halves back
together.
Replacement of the battery willnotcause the remote transmitter to
become deprogrammed from your vehicle. The remote transmitter should
operate normally after battery replacement.
Replacing lost transmitters
Take all your vehicle's transmitters
to your dealer if service is required.
If a remote transmitter has been lost
and you would like to remove it
from the vehicle's memory, or you
would like to purchase additional
remote transmitters and have them
programmed to your vehicle:
²Takeallyour vehicle's
transmitters to your dealer for
programming, or
²Perform the following programming procedure yourself.
Place the key in the ignition and
turn from 2 (LOCK) to 3 (OFF) and
cycle between 3 (OFF) and 4 (ON)
four times in rapid succession within
3 seconds. After doors lock/unlock,
press any control on all transmitters
(up to four). When completed, turn
the ignition to 3 (OFF).
All transmittersmustbe
programmed at the same time.
3
1
2
5
4
Locks and Security
80
Page 81 of 232

Illuminated entry
The interior lamps illuminate:
²when the remote entry system is used to unlock the door(s) or sound
the panic alarm, or
²when the driver door is unlocked using the key in the driver door key
cylinder.
The system automatically turns off after 25 seconds after the UNLOCK
button on the RUN or ACC position.
The inside lights will not turn off if:
²they have been turned on with the dimmer control, or
²any door is open.
The battery saver will shut off the interior lamps 10 minutes after the
ignition is turned off. Demand lighting will turn off after 30 minutes.
Autolock
This feature automatically locks all vehicle doors when:
²all doors are closed,
²the ignition is in the ON position,
²the brake pedal is depressed and
²you shift into any gear.
Relock
The autolock feature repeats when:
²the ignition is in the ON position,
²a door is open and then closed,
²the transmission is placed in Reverse or any Drive gear, and then
²the brake pedal is depressed and then released.
Deactivating/activating the autolock feature
Before following the procedure, make sure that the ignition is OFF and
all vehicle doors are closed.
Automatic door locks can be turned on/off with the keyless entry keypad
through the following procedure:
You must complete steps 1-5 within 30 seconds or the procedure will
have to be repeated. If the procedure needs to be repeated, you must
wait 30 seconds.
Locks and Security
81
Page 82 of 232

1. Enter the keyless entry keypad factory code.
2. Within 5 seconds, press and hold control 7/8.
3. Within 5 seconds (while holding down control 7/8), press and release
control 3/4.
4. Release control 7/8.
The door will lock/unlock to confirm the feature has been disabled. Once
disabled, the feature can be enabled by repeating the same sequence.
Automatic door locks can also be turned on/off through the following
procedure:
You must complete steps 1-7 within 30 seconds or the procedure will
have to be repeated. If the procedure needs to be repeated, you must
wait 30 seconds.
1. Turn the ignition key to ON.
2. Press the power door unlock control on the door panel three times.
3. Turn the ignition key from ON to OFF.
4. Press the power door unlock control three times.
5. Turn the ignition back to ON.
6. Press the unlock control once. After a five to ten second delay, the
door will lock/unlock to confirm successful programming.
7. Turn the ignition to OFF.
KEYLESS ENTRY SYSTEM
With the keyless entry keypad, you
can:
²lock or unlock the vehicle doors
without using the key.
²open the trunk.
²disable/enable autolock.
See alsoRemote entry systemin this chapter for more information.
Your vehicle has a factory-set 5±digit code that operates the keyless
entry system. You can also program your own 5±digit personal entry
code.
The factory-set code is located:
²On the owner's wallet card in the glove compartment,
²Taped to the computer module, or
123
45678
90
Locks and Security
82
Page 84 of 232
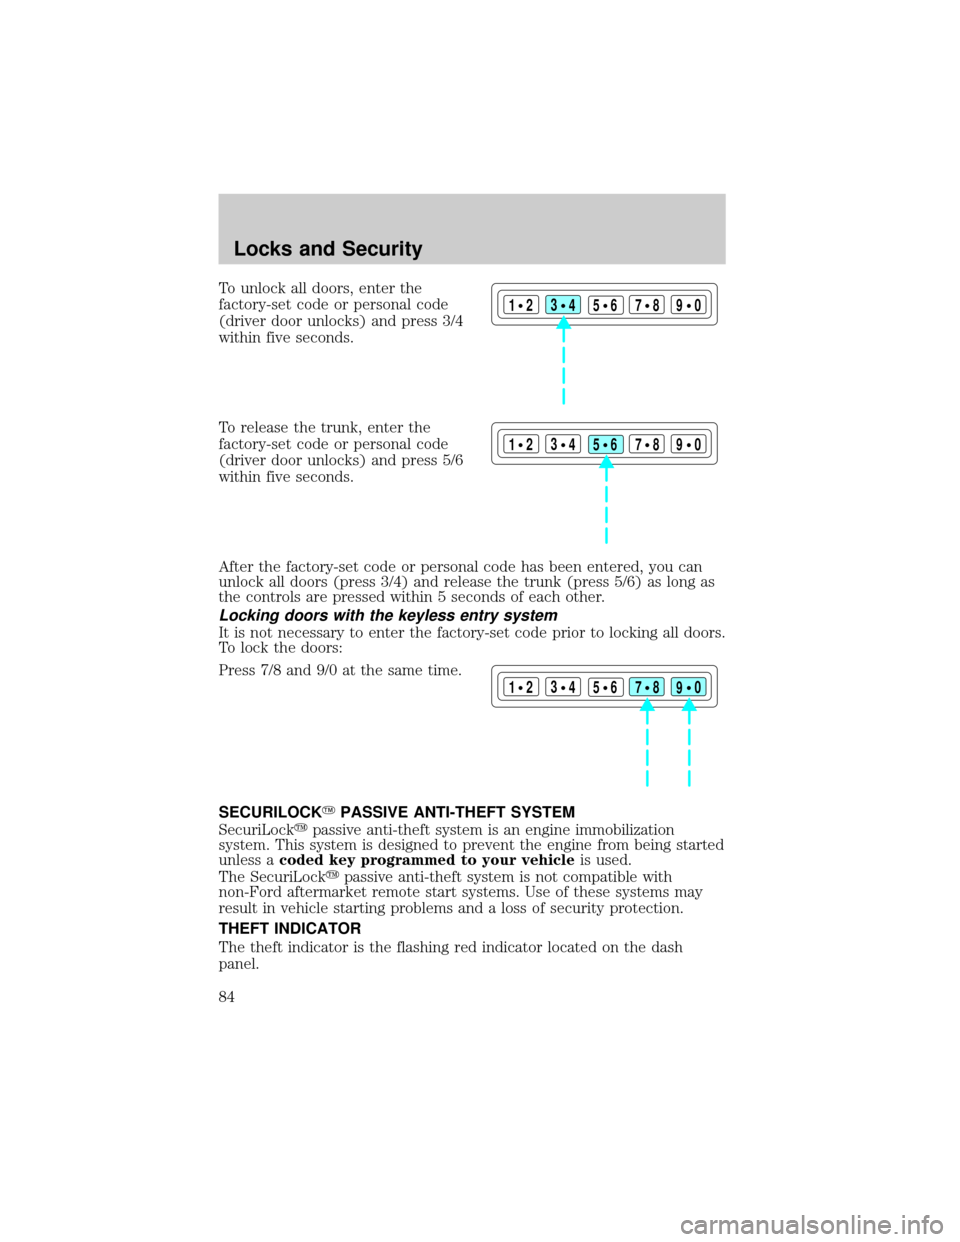
To unlock all doors, enter the
factory-set code or personal code
(driver door unlocks) and press 3/4
within five seconds.
To release the trunk, enter the
factory-set code or personal code
(driver door unlocks) and press 5/6
within five seconds.
After the factory-set code or personal code has been entered, you can
unlock all doors (press 3/4) and release the trunk (press 5/6) as long as
the controls are pressed within 5 seconds of each other.
Locking doors with the keyless entry system
It is not necessary to enter the factory-set code prior to locking all doors.
To lock the doors:
Press 7/8 and 9/0 at the same time.
SECURILOCKYPASSIVE ANTI-THEFT SYSTEM
SecuriLockypassive anti-theft system is an engine immobilization
system. This system is designed to prevent the engine from being started
unless acoded key programmed to your vehicleis used.
The SecuriLockypassive anti-theft system is not compatible with
non-Ford aftermarket remote start systems. Use of these systems may
result in vehicle starting problems and a loss of security protection.
THEFT INDICATOR
The theft indicator is the flashing red indicator located on the dash
panel.
123
45678
90
123
45678
90
123
45678
90
Locks and Security
84
Page 225 of 232

traction control active ..............13
turn signal indicator .................14
Limited-slip axle .......................135
Load limits .................................136
GAWR ......................................136
GVWR ......................................136
trailer towing ..........................136
Locks
autolock .....................................81
childproof ..................................76
doors ..........................................75
Lubricant specifications ...212, 214
Lumbar support, seats ...............88
M
Mirrors .........................................51
automatic dimming rearview
mirror ........................................62
fold away ...................................62
heated ........................................62
side view mirrors (power) .......61
Moon roof ....................................67
Motorcraft parts ................198, 211
O
Octane rating ............................197
Odometer .....................................17
Oil (see Engine oil) ..................182
Overdrive .............................71, 133
P
Panic alarm feature, remote
entry system ................................79
Parking brake ............................127
Parts (see Motorcraft parts) ....211Passenger Occupant
Classification Sensor ...................92
Pedals (see Power adjustable
foot pedals) .................................63
Power adjustable foot pedals .....63
Power distribution box
(see Fuses) ...............................148
Power door locks ..................75, 81
Power mirrors .............................61
Power point .................................59
Power steering ..................129±130
fluid, checking and adding ....203
fluid, refill capacity ................211
fluid, specifications .................212
Power Windows ...........................60
R
Radio ............................................19
Radio reception ...........................32
Rear window defroster ...............37
Relays ................................144, 151
Remote entry system ...........77, 79
illuminated entry ......................81
locking/unlocking doors .....75, 78
opening the trunk .....................79
panic alarm ...............................79
replacement/additional
transmitters ...............................80
replacing the batteries .............79
Roadside assistance ..................142
S
Safety belts (see Safety
restraints) ............14, 91, 94, 96±98
Safety defects, reporting ..........172
Index
225
Page 226 of 232

Safety restraints ........91, 94, 96±98
belt minder ...............................99
cleaning the safety belts ........103
extension assembly ................103
for adults .............................96±98
for children .............................111
Occupant Classification
Sensor ........................................92
warning light and
chime .......................12, 14, 98±99
Safety seats for children ..........114
Seat belts
(see Safety restraints) ...............91
Seats ............................................88
child safety seats ....................114
SecuriLock passive anti-theft
system ....................................84±86
Servicing your vehicle ..............179
Spare tire
(see Changing the Tire) ...........151
Spark plugs,
specifications .....................211, 214
Specification chart,
lubricants ...........................212, 214
Speed control ..............................63
Speedometer ...............................17
Starting your vehicle .......122±123,
125
jump starting ..........................156
Steering
speed sensitive .......................130
Steering wheel
controls ..........................50, 63, 67
tilting .........................................50T
Tachometer .................................18
Tires ...........................151, 207±209
changing ..........................151±152
checking the pressure ............209
replacing ..................................210
rotating ....................................209
snow tires and chains ............210
tire grades ...............................208
treadwear ................................208
Towing .......................................138
recreational towing .................140
trailer towing ..........................138
wrecker ....................................162
Traction control ........................128
active light ................................13
Transmission .............................131
fluid, checking and adding
(automatic) .............................204
fluid, refill capacities ..............211
lubricant
specifications ..................212, 214
Trip odometer .............................18
Trunk ...........................................76
remote release ....................73, 79
Turn signal ............................14, 42
V
Vehicle dimensions ...................214
Vehicle Identification Number
(VIN) ..........................................216
Vehicle loading ..........................136
Ventilating your vehicle ...........125
Index
226