roof Mercury Marauder 2003 Owner's Manuals
[x] Cancel search | Manufacturer: MERCURY, Model Year: 2003, Model line: Marauder, Model: Mercury Marauder 2003Pages: 232, PDF Size: 2.29 MB
Page 42 of 232
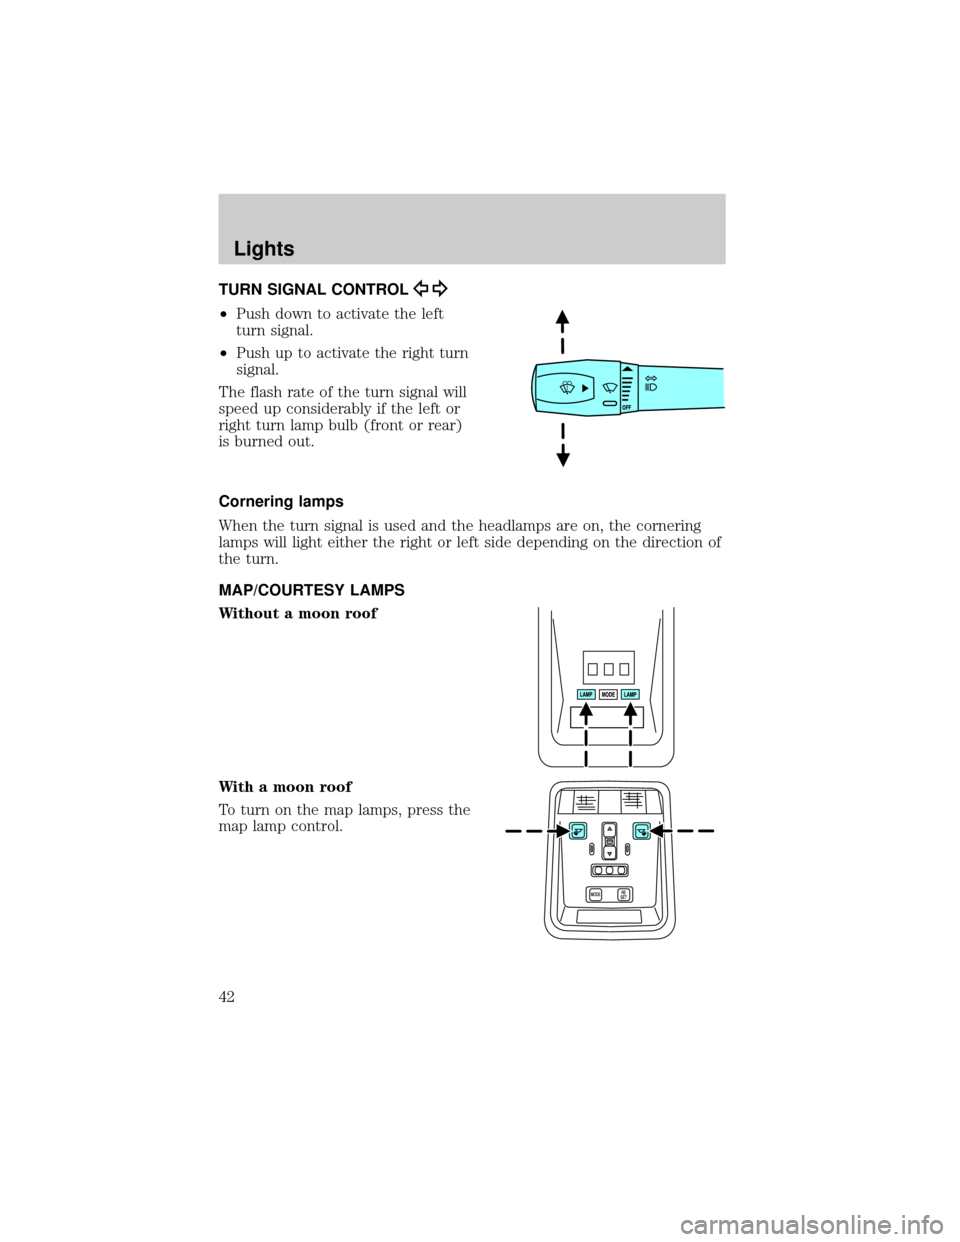
TURN SIGNAL CONTROL
²Push down to activate the left
turn signal.
²Push up to activate the right turn
signal.
The flash rate of the turn signal will
speed up considerably if the left or
right turn lamp bulb (front or rear)
is burned out.
Cornering lamps
When the turn signal is used and the headlamps are on, the cornering
lamps will light either the right or left side depending on the direction of
the turn.
MAP/COURTESY LAMPS
Without a moon roof
With a moon roof
To turn on the map lamps, press the
map lamp control.
Lights
42
Page 51 of 232
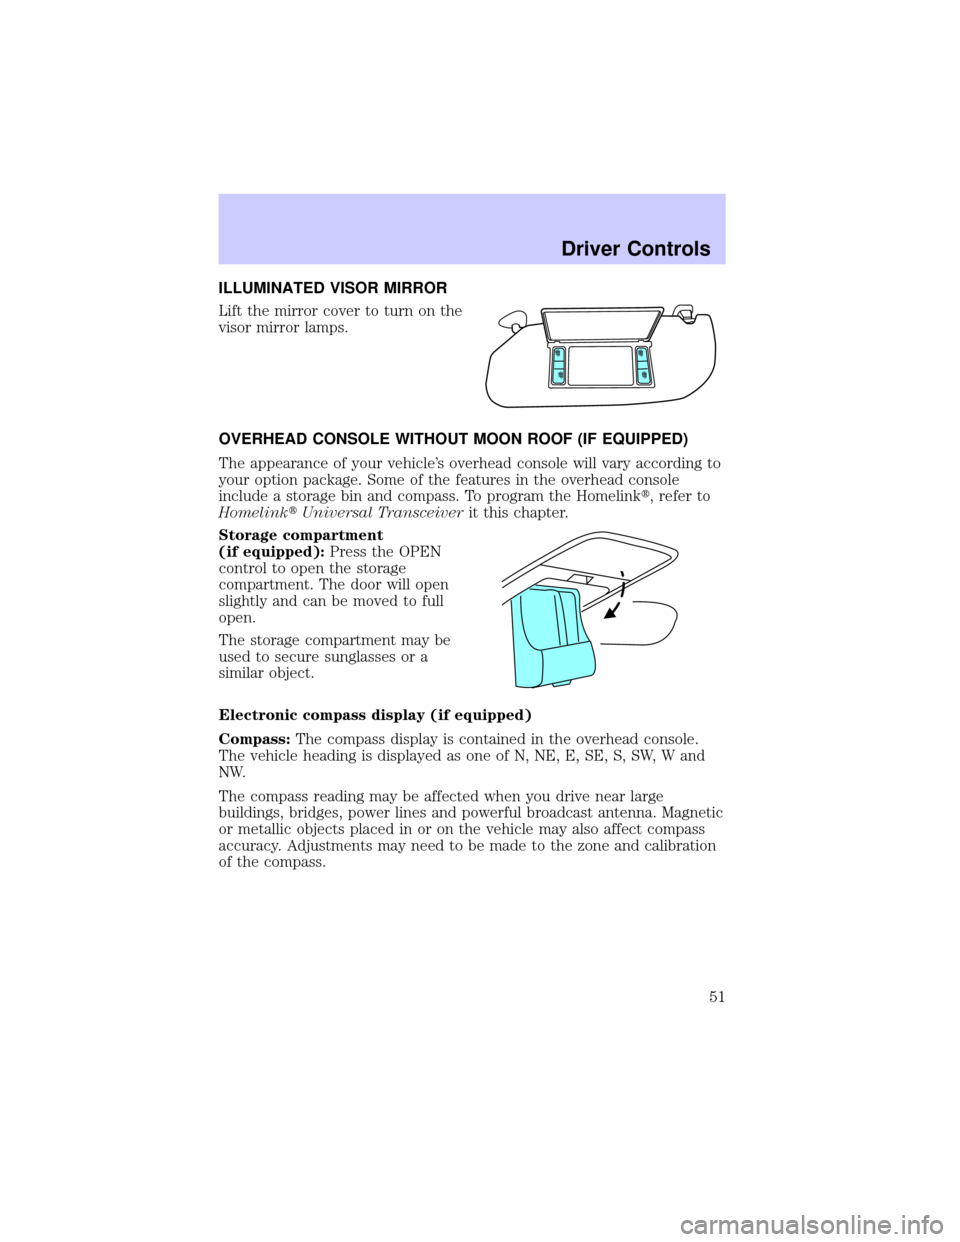
ILLUMINATED VISOR MIRROR
Lift the mirror cover to turn on the
visor mirror lamps.
OVERHEAD CONSOLE WITHOUT MOON ROOF (IF EQUIPPED)
The appearance of your vehicle's overhead console will vary according to
your option package. Some of the features in the overhead console
include a storage bin and compass. To program the Homelinkt, refer to
HomelinktUniversal Transceiverit this chapter.
Storage compartment
(if equipped):Press the OPEN
control to open the storage
compartment. The door will open
slightly and can be moved to full
open.
The storage compartment may be
used to secure sunglasses or a
similar object.
Electronic compass display (if equipped)
Compass:The compass display is contained in the overhead console.
The vehicle heading is displayed as one of N, NE, E, SE, S, SW, W and
NW.
The compass reading may be affected when you drive near large
buildings, bridges, power lines and powerful broadcast antenna. Magnetic
or metallic objects placed in or on the vehicle may also affect compass
accuracy. Adjustments may need to be made to the zone and calibration
of the compass.
Driver Controls
51
Page 52 of 232
Compass zone adjustment
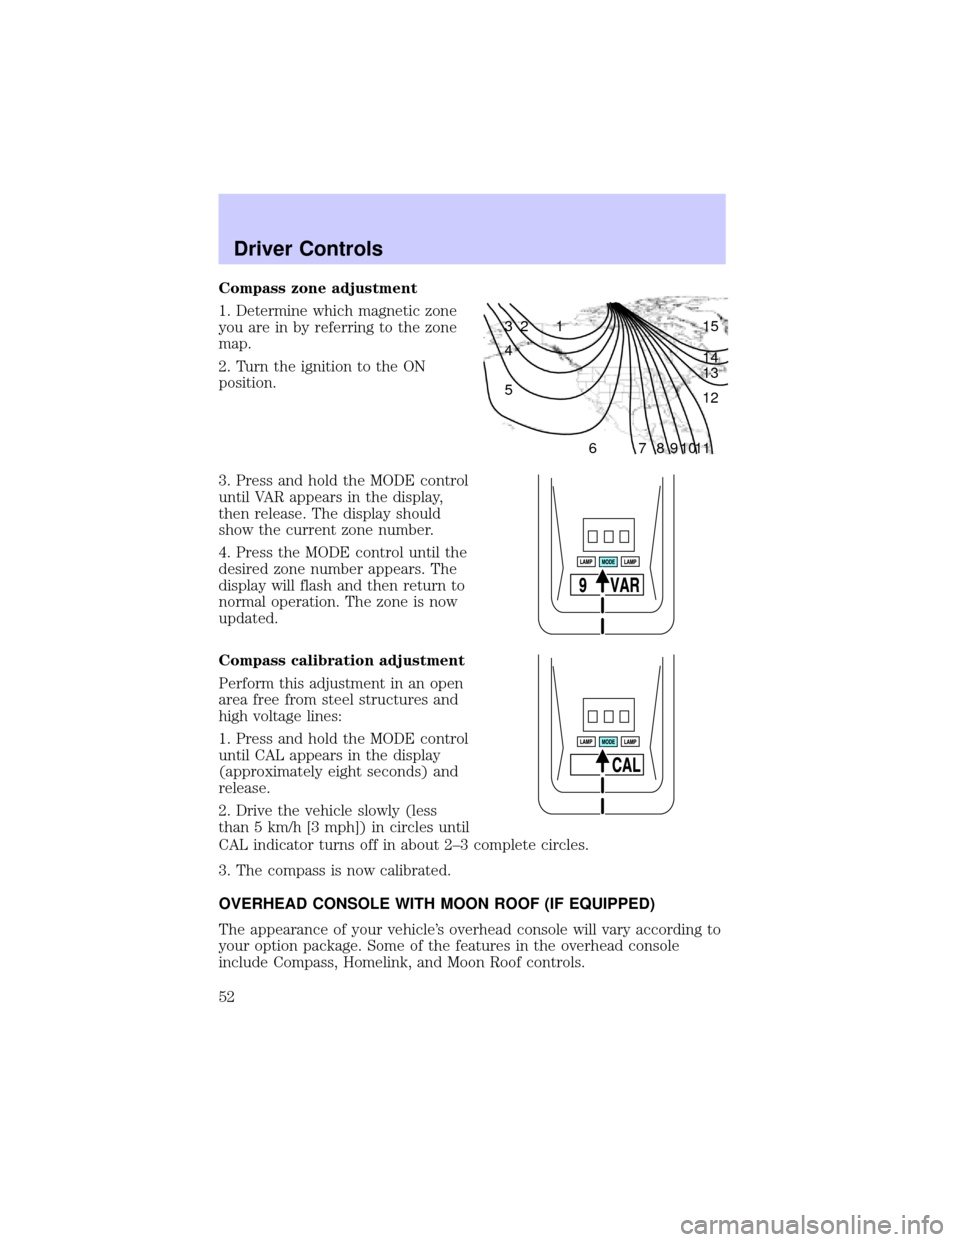
1. Determine which magnetic zone
you are in by referring to the zone
map.
2. Turn the ignition to the ON
position.
3. Press and hold the MODE control
until VAR appears in the display,
then release. The display should
show the current zone number.
4. Press the MODE control until the
desired zone number appears. The
display will flash and then return to
normal operation. The zone is now
updated.
Compass calibration adjustment
Perform this adjustment in an open
area free from steel structures and
high voltage lines:
1. Press and hold the MODE control
until CAL appears in the display
(approximately eight seconds) and
release.
2. Drive the vehicle slowly (less
than 5 km/h [3 mph]) in circles until
CAL indicator turns off in about 2±3 complete circles.
3. The compass is now calibrated.
OVERHEAD CONSOLE WITH MOON ROOF (IF EQUIPPED)
The appearance of your vehicle's overhead console will vary according to
your option package. Some of the features in the overhead console
include Compass, Homelink, and Moon Roof controls.
1 2 3
4
5
6 7 8 9 101112 13 14 15
Driver Controls
52
Page 67 of 232
STEERING WHEEL CONTROLS
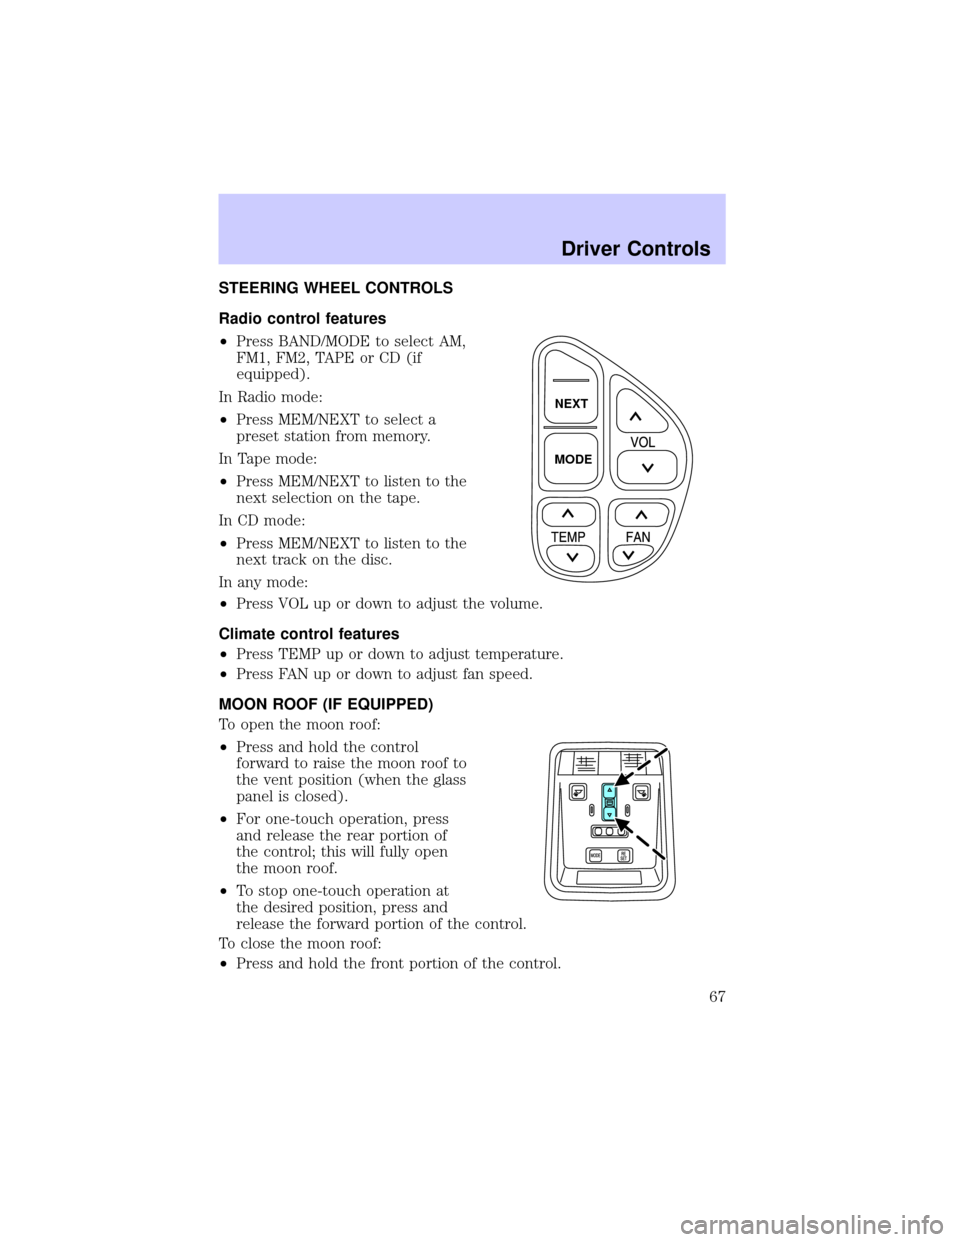
Radio control features
²Press BAND/MODE to select AM,
FM1, FM2, TAPE or CD (if
equipped).
In Radio mode:
²Press MEM/NEXT to select a
preset station from memory.
In Tape mode:
²Press MEM/NEXT to listen to the
next selection on the tape.
In CD mode:
²Press MEM/NEXT to listen to the
next track on the disc.
In any mode:
²Press VOL up or down to adjust the volume.
Climate control features
²Press TEMP up or down to adjust temperature.
²Press FAN up or down to adjust fan speed.
MOON ROOF (IF EQUIPPED)
To open the moon roof:
²Press and hold the control
forward to raise the moon roof to
the vent position (when the glass
panel is closed).
²For one-touch operation, press
and release the rear portion of
the control; this will fully open
the moon roof.
²To stop one-touch operation at
the desired position, press and
release the forward portion of the control.
To close the moon roof:
²Press and hold the front portion of the control.
NEXT
MODE
Driver Controls
67
Page 68 of 232
²To close from the vent position, press and hold the rear portion of the
control.
Do not let children play with the moon roof. They may seriously
hurt themselves.
HOMELINKTUNIVERSAL TRANSCEIVER
The HomeLinktUniversal Transceiver, located on the driver's visor,
provides a convenient way to replace up to three hand-held transmitters
with a single built-in device. This feature will learn the radio frequency
codes of most current transmitters to operate garage doors, entry gate
operators, security systems, entry door locks, and home or office lighting.
When programming your HomeLinktUniversal Transceiver to a
garage door or gate, be sure that people and objects are out of
the way to prevent potential harm or damage.
Do not use the HomeLinktUniversal Transceiver with any garage door
opener that lacks safety stop and reverse features as required by U.S.
federal safety standards (this includes any garage door opener model
manufactured before April 1, 1982). A garage door which cannot detect
an object, signaling the door to stop and reverse, does not meet current
U.S. federal safety standards. For more information, contact HomeLinkt
at:www.homelink.comor1±800±355±3515.
Retain the original transmitter for use in other vehicles as well as for
future programming procedures (i.e. new HomeLinktequipped vehicle
purchase). It is also suggested that upon the sale of the vehicle, the
programmed HomelinktUniversal Transceiver buttons be erased for
security purposes, refer toProgrammingin this section.
Programming
Do not program the HomeLinktUniversal Transceiver with the
vehicle parked in the garage.
Note:Some vehicles may require the ignition switch to be turned to the
second (or ªACCº) position for programming and/or operation of the
HomeLinkt. It is also recommended that a new battery be placed in the
hand-held transmitter of the device being programmed to HomeLinktfor
quicker training and accurate transmission of the radio-frequency signal.
Driver Controls
68
Page 76 of 232
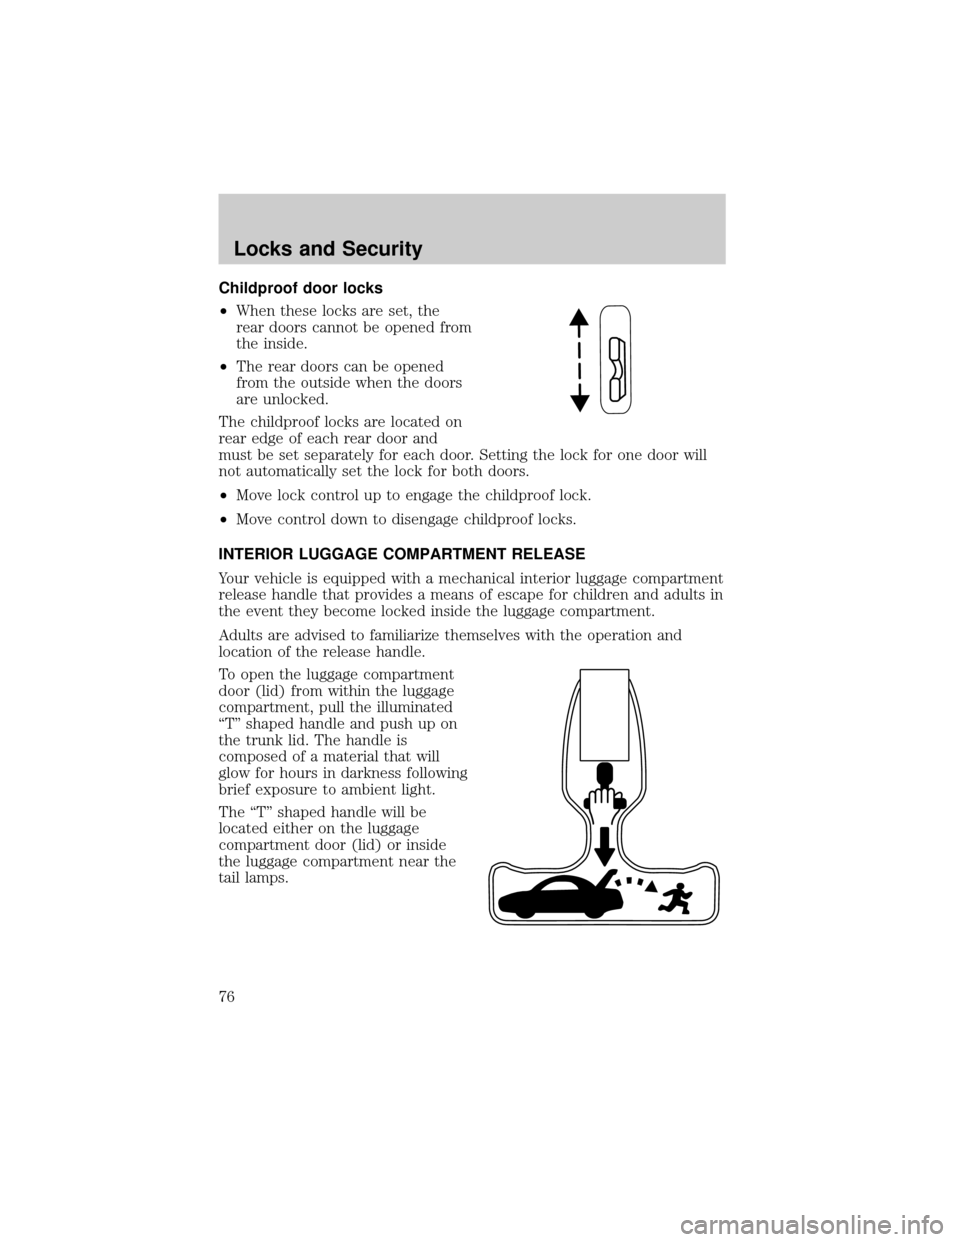
Childproof door locks
²When these locks are set, the
rear doors cannot be opened from
the inside.
²The rear doors can be opened
from the outside when the doors
are unlocked.
The childproof locks are located on
rear edge of each rear door and
must be set separately for each door. Setting the lock for one door will
not automatically set the lock for both doors.
²Move lock control up to engage the childproof lock.
²Move control down to disengage childproof locks.
INTERIOR LUGGAGE COMPARTMENT RELEASE
Your vehicle is equipped with a mechanical interior luggage compartment
release handle that provides a means of escape for children and adults in
the event they become locked inside the luggage compartment.
Adults are advised to familiarize themselves with the operation and
location of the release handle.
To open the luggage compartment
door (lid) from within the luggage
compartment, pull the illuminated
ªTº shaped handle and push up on
the trunk lid. The handle is
composed of a material that will
glow for hours in darkness following
brief exposure to ambient light.
The ªTº shaped handle will be
located either on the luggage
compartment door (lid) or inside
the luggage compartment near the
tail lamps.
Locks and Security
76
Page 149 of 232
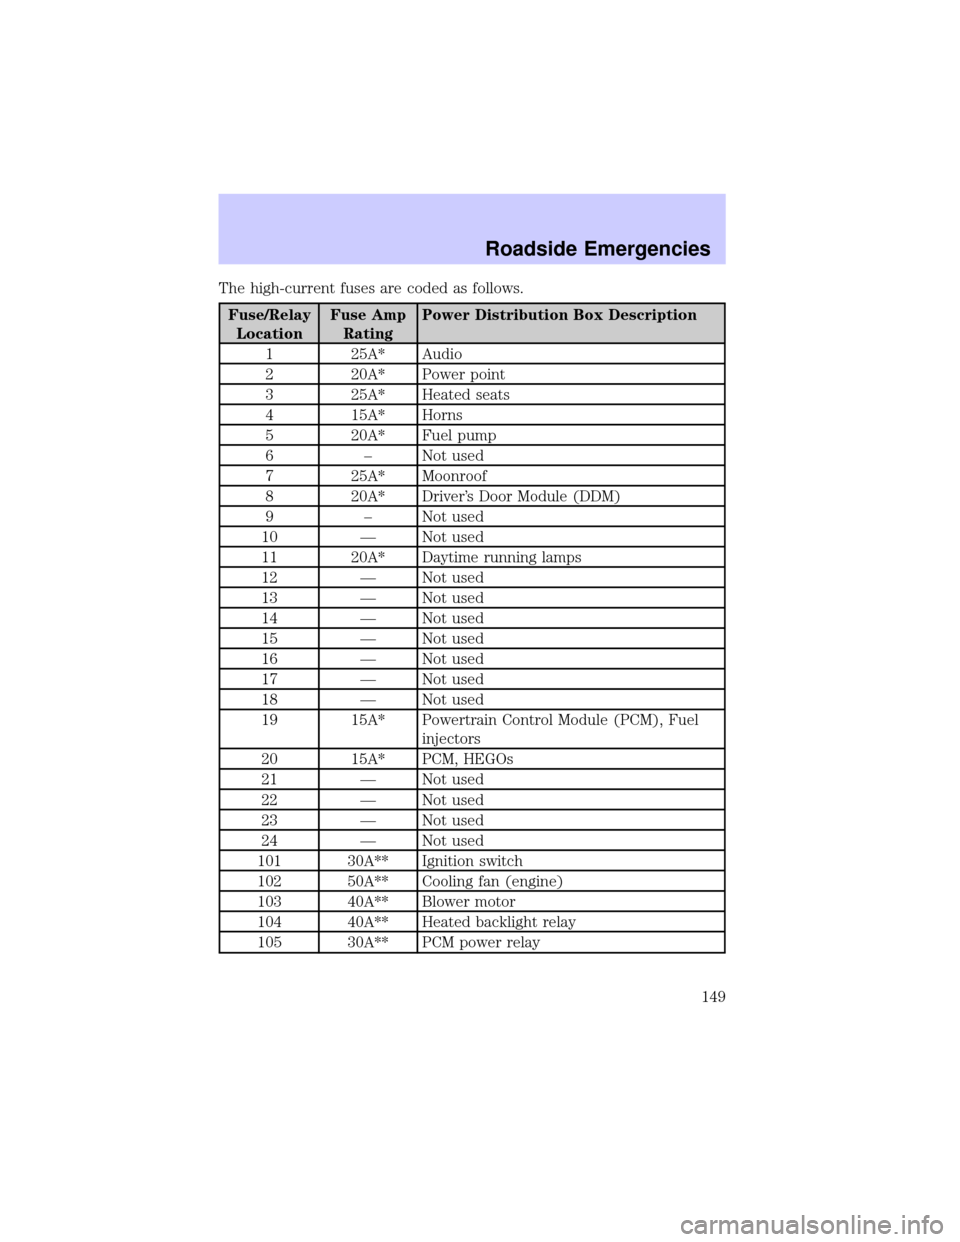
The high-current fuses are coded as follows.
Fuse/Relay
LocationFuse Amp
RatingPower Distribution Box Description
1 25A* Audio
2 20A* Power point
3 25A* Heated seats
4 15A* Horns
5 20A* Fuel pump
6 ± Not used
7 25A* Moonroof
8 20A* Driver's Door Module (DDM)
9 ± Not used
10 Ð Not used
11 20A* Daytime running lamps
12 Ð Not used
13 Ð Not used
14 Ð Not used
15 Ð Not used
16 Ð Not used
17 Ð Not used
18 Ð Not used
19 15A* Powertrain Control Module (PCM), Fuel
injectors
20 15A* PCM, HEGOs
21 Ð Not used
22 Ð Not used
23 Ð Not used
24 Ð Not used
101 30A** Ignition switch
102 50A** Cooling fan (engine)
103 40A** Blower motor
104 40A** Heated backlight relay
105 30A** PCM power relay
Roadside Emergencies
149
Page 150 of 232
Fuse/Relay
LocationFuse Amp
RatingPower Distribution Box Description
106 40A** Anti-lock Brake System (ABS)
107 Ð Not used
108 Ð Not used
109 ± Not used
110 ± Not used
111 ± Not used
112 50A** Ignition switch
113 50A** Feeds IP fuses 3, 5, 21, 23, 25, 27
114 30A** VAP Steering, Air suspension compressor,
Instrument cluster
115 50A** Ignition switch
116 30A** Wipers
117 ± Not used
118 20A** ABS
201 1/2 ISO Horn relay
202 1/2 ISO PCM relay
203 1/2 ISO Fuel pump relay
204 1/2 ISO A/C clutch relay
205 1/2 ISO Traction control switch relay
206 Ð Not used
207 1/2 ISO Fog lamp relay (Marauder only)
208 1/2 ISO Moonroof relay
209 Ð Not used
301 Full ISO Blower motor relay
302 Full ISO Starter solenoid relay
303 Full ISO Air suspension relay
304 Full ISO Heated backlight relay
401 Ð Not used
501 Diode PCM diode
502 Ð Not used
503 Ð Not used
Roadside Emergencies
150
Page 173 of 232

WASHING THE EXTERIOR
Wash your vehicle regularly with cool or lukewarm water and a neutral
Ph shampoo, such as Motorcraft Detail Wash (ZC-3±A), which is available
from your dealer.
²Never use strong household detergents or soap, such as dish washing
or laundry liquid. These products can discolor and spot painted
surfaces.
²Never wash a vehicle that is ªhot to the touchº or during exposure to
strong, direct sunlight.
²Always use a clean sponge or carwash mitt with plenty of water for
best results.
²Dry the vehicle with a chamois or soft terry cloth towel in order to
eliminate water spotting.
²It is especially important to wash the vehicle regularly during the
winter months, as dirt and road salt are difficult to remove and cause
damage to the vehicle.
²Immediately remove items such as gasoline, diesel fuel, bird droppings
and insect deposits because they can cause damage to the vehicle's
paintwork and trim over time.
²Remove any exterior accessories, such as antennas, before entering a
car wash.
²Suntan lotions and insect repellents can damage any painted
surface; if these substances come in contact with your vehicle,
wash off as soon as possible.
WAXING
Applying a polymer paint sealant to your vehicle every six months will
assist in reducing minor scratches and paint damage.
²Wash the vehicle first.
²Do not use waxes that contain abrasives.
²Do not allow paint sealant to come in contact with any non-body
(low-gloss black) colored trim, such as grained door handles, roof
racks, bumpers, side moldings, mirror housings or the windshield cowl
area. The paint sealant will ªgrayº or stain the parts over time.
Cleaning
173
Page 225 of 232

traction control active ..............13
turn signal indicator .................14
Limited-slip axle .......................135
Load limits .................................136
GAWR ......................................136
GVWR ......................................136
trailer towing ..........................136
Locks
autolock .....................................81
childproof ..................................76
doors ..........................................75
Lubricant specifications ...212, 214
Lumbar support, seats ...............88
M
Mirrors .........................................51
automatic dimming rearview
mirror ........................................62
fold away ...................................62
heated ........................................62
side view mirrors (power) .......61
Moon roof ....................................67
Motorcraft parts ................198, 211
O
Octane rating ............................197
Odometer .....................................17
Oil (see Engine oil) ..................182
Overdrive .............................71, 133
P
Panic alarm feature, remote
entry system ................................79
Parking brake ............................127
Parts (see Motorcraft parts) ....211Passenger Occupant
Classification Sensor ...................92
Pedals (see Power adjustable
foot pedals) .................................63
Power adjustable foot pedals .....63
Power distribution box
(see Fuses) ...............................148
Power door locks ..................75, 81
Power mirrors .............................61
Power point .................................59
Power steering ..................129±130
fluid, checking and adding ....203
fluid, refill capacity ................211
fluid, specifications .................212
Power Windows ...........................60
R
Radio ............................................19
Radio reception ...........................32
Rear window defroster ...............37
Relays ................................144, 151
Remote entry system ...........77, 79
illuminated entry ......................81
locking/unlocking doors .....75, 78
opening the trunk .....................79
panic alarm ...............................79
replacement/additional
transmitters ...............................80
replacing the batteries .............79
Roadside assistance ..................142
S
Safety belts (see Safety
restraints) ............14, 91, 94, 96±98
Safety defects, reporting ..........172
Index
225