tow Mercury Marauder 2004 s User Guide
[x] Cancel search | Manufacturer: MERCURY, Model Year: 2004, Model line: Marauder, Model: Mercury Marauder 2004Pages: 224, PDF Size: 3.21 MB
Page 90 of 224
The National Highway Traffic Safety Administration (NHTSA)
recommends a minimum distance of at least 25 cm (10 inches)
between an occupant's chest and the driver air bag module.
Never place your arm over the air bag module as a deploying air
bag can result in serious arm fractures or other injuries.
To properly position yourself away from the air bag:
²Move your seat to the rear as far as you can while still reaching the
pedals comfortably.
²Recline the seat slightly one or two degrees from the upright position.
Do not put anything on or over the air bag module. Placing
objects on or over the air bag inflation area may cause those
objects to be propelled by the air bag into your face and torso causing
serious injury.
Do not attempt to service, repair, or modify the air bag
supplemental restraint systems or its fuses. See your Ford or
Lincoln Mercury dealer.
The front passenger air bag is not designed to offer protection to
an occupant in the center front seating position.
Modifying or adding equipment to the front end of the vehicle
(including frame, bumper, front end body structure and tow
hooks) may affect the performance of the air bag system, increasing
the risk of injury. Do not modify the front end of the vehicle.
2004 Marauder(mdr)
Owners Guide (post-2002-fmt)
USA English(fus)
Seating and Safety Restraints
90
Page 99 of 224

never use a booster seat with a lap belt only. It is best to use a booster
seat with lap/shoulder belts in the back seat- the safest place for children
to ride.
Follow all instructions provided by the manufacturer of the
booster seat.
Never put the shoulder belt under a child's arm or behind the
back because it eliminates the protection for the upper part of
the body and may increase the risk of injury or death in a collision.
Never use pillows, books, or towels to boost a child. They can
slide around and increase the likelihood of injury or death in a
collision.
SAFETY SEATS FOR CHILDREN
Child and infant or child safety seats
Use a safety seat that is recommended for the size and weight of the
child. Carefully follow all of the manufacturer's instructions with the
safety seat you put in your vehicle. If you do not install and use the
safety seat properly, the child may be injured in a sudden stop or
collision.
When installing a child safety seat:
²Review and follow the information
presented in theAir bag
supplemental restraint system
(SRS) section in this chapter.
²Use the correct safety belt buckle
for that seating position (the
buckle closest to the direction the
tongue is coming from).
²Insert the belt tongue into the
proper buckle until you hear a
snap and feel it latch. Make sure the tongue is securely fastened in the
buckle.
²Keep the buckle release button pointing up and away from the safety
seat, with the tongue between the child seat and the release button,
to prevent accidental unbuckling.
2004 Marauder(mdr)
Owners Guide (post-2002-fmt)
USA English(fus)
Seating and Safety Restraints
99
Page 102 of 224

4. Insert the belt tongue into the
proper buckle (the buckle closest to
the direction the tongue is coming
from) for that seating position until
you hear a snap and feel the latch
engage. Make sure the tongue is
latched securely by pulling on it.
5. To put the retractor in the
automatic locking mode, grasp the
shoulder portion of the belt and pull
downward until all of the belt is
pulled out and a click is heard.
6. Allow the belt to retract. The belt will click as it retracts to indicate it
is in the automatic locking mode.
7. Pull the lap belt portion across
the child seat toward the buckle and
pull up on the shoulder belt while
pushing down with your knee on the
child seat.
2004 Marauder(mdr)
Owners Guide (post-2002-fmt)
USA English(fus)
Seating and Safety Restraints
102
Page 118 of 224
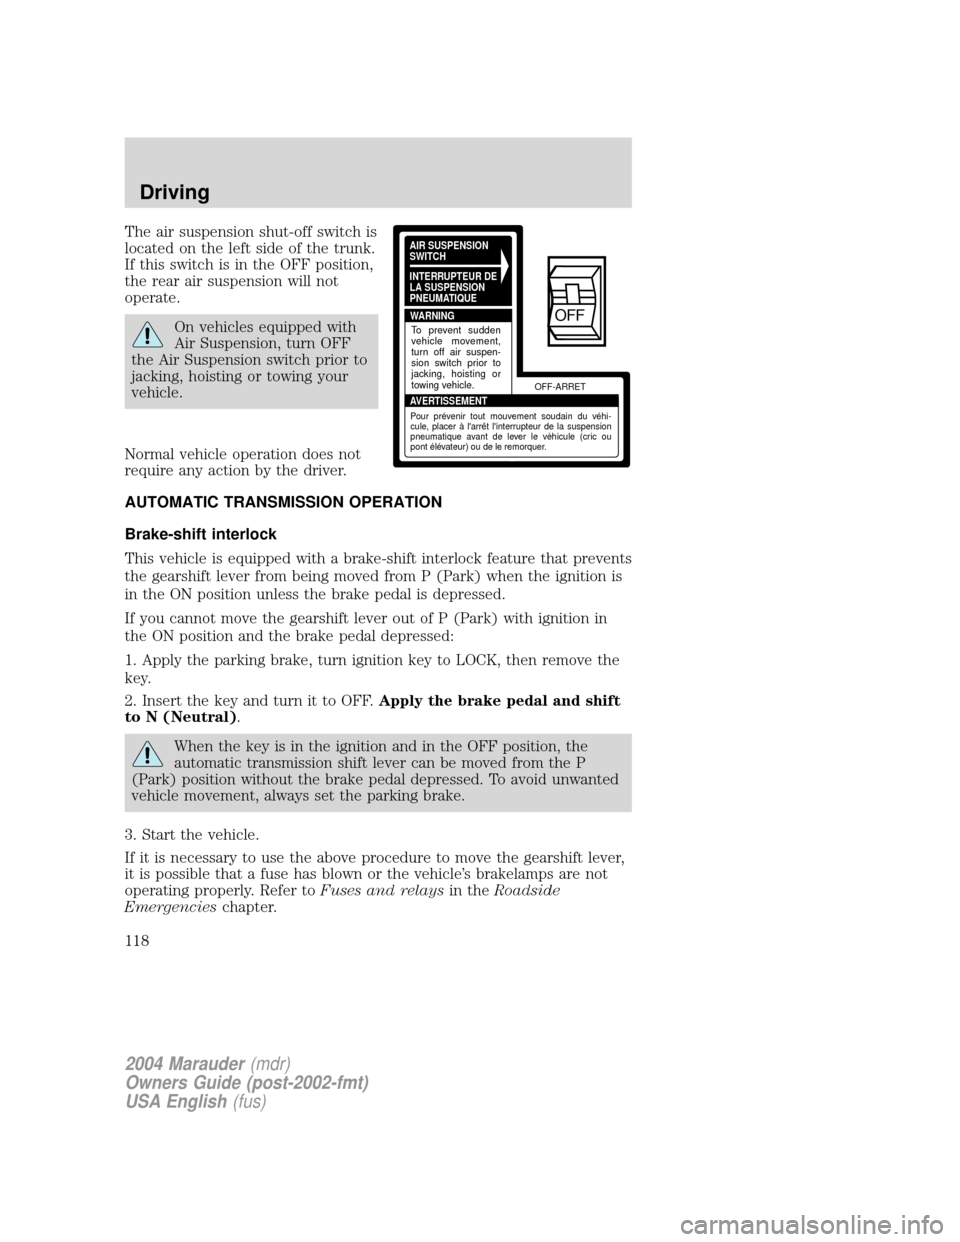
The air suspension shut-off switch is
located on the left side of the trunk.
If this switch is in the OFF position,
the rear air suspension will not
operate.
On vehicles equipped with
Air Suspension, turn OFF
the Air Suspension switch prior to
jacking, hoisting or towing your
vehicle.
Normal vehicle operation does not
require any action by the driver.
AUTOMATIC TRANSMISSION OPERATION
Brake-shift interlock
This vehicle is equipped with a brake-shift interlock feature that prevents
the gearshift lever from being moved from P (Park) when the ignition is
in the ON position unless the brake pedal is depressed.
If you cannot move the gearshift lever out of P (Park) with ignition in
the ON position and the brake pedal depressed:
1. Apply the parking brake, turn ignition key to LOCK, then remove the
key.
2. Insert the key and turn it to OFF.Apply the brake pedal and shift
to N (Neutral).
When the key is in the ignition and in the OFF position, the
automatic transmission shift lever can be moved from the P
(Park) position without the brake pedal depressed. To avoid unwanted
vehicle movement, always set the parking brake.
3. Start the vehicle.
If it is necessary to use the above procedure to move the gearshift lever,
it is possible that a fuse has blown or the vehicle's brakelamps are not
operating properly. Refer toFuses and relaysin theRoadside
Emergencieschapter.
AIR SUSPENSION
SWITCH
INTERRUPTEUR DE
LA SUSPENSION
PNEUMATIQUE
WARNING
AVERTISSEMENTOFF-ARRET
To prevent sudden
vehicle movement,
turn off air suspen-
sion switch prior to
jacking, hoisting or
towing vehicle.
Pour prévenir tout mouvement soudain du véhi-
cule, placer à l'arrêt l'interrupteur de la suspension
pneumatique avant de lever le véhicule (cric ou
pont élévateur) ou de le remorquer.
OFF
2004 Marauder(mdr)
Owners Guide (post-2002-fmt)
USA English(fus)
Driving
118
Page 121 of 224
²O/D OFF lamp is illuminated.
²Provides engine braking.
²Use when driving conditions cause excessive shifting from O/D to
other gears. Examples: city traffic, hilly terrain, heavy loads, trailer
towing and when engine braking is required.
²To return to O/D (overdrive mode), press the transmission control
switch. The O/D OFF lamp will not be illuminated.
²O/D (Overdrive) is automatically returned each time the key is turned
off.
2 (Second)
This position allows for second gear only.
²Provides engine braking.
²Use to start-up on slippery roads.
²To return to D (Overdrive), move the gearshift lever into the D
(Overdrive) position.
²Selecting 2 (Second) at higher speeds will cause the transmission to
downshift to second gear at the appropriate vehicle speed.
1 (First)
²Provides maximum engine braking.
²Allows upshifts by moving gearshift lever.
²Will not downshift into 1 (First) at high speeds; allows for 1 (First)
when vehicle reaches slower speeds.
Forced downshifts
²Allowed in D (Overdrive) or Drive.
²Depress the accelerator to the floor.
²Allows transmission to select an appropriate gear.
If your vehicle gets stuck in mud or snow
If your vehicle gets stuck in mud or snow, it may be rocked out by
shifting from forward and reverse gears, stopping between shifts in a
steady pattern. Press lightly on the accelerator in each gear.
Do not rock the vehicle if the engine is not at normal operating
temperature or damage to the transmission may occur.
O/ D
OFF
2004 Marauder(mdr)
Owners Guide (post-2002-fmt)
USA English(fus)
Driving
121
Page 123 of 224
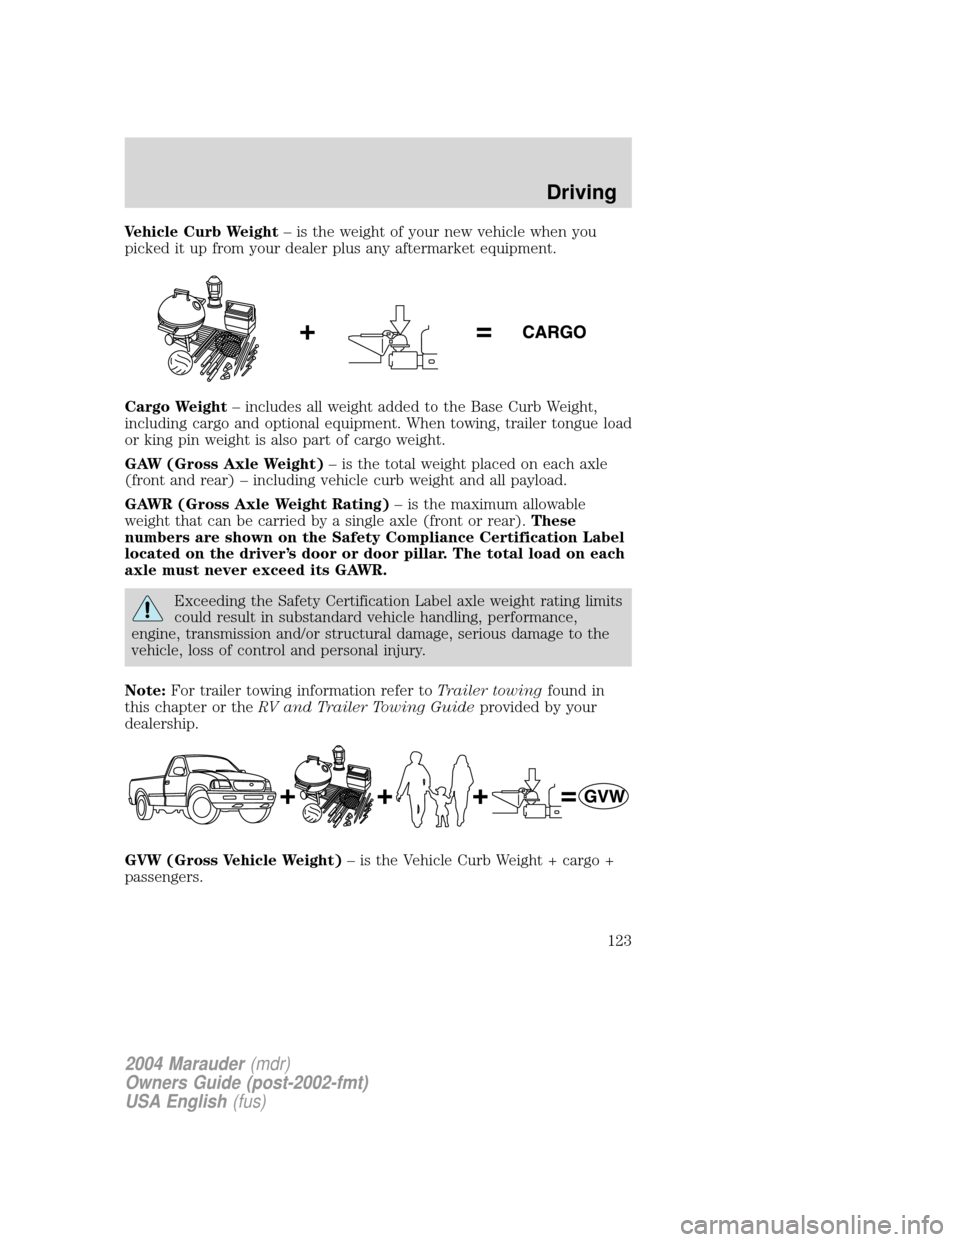
Vehicle Curb Weight± is the weight of your new vehicle when you
picked it up from your dealer plus any aftermarket equipment.
Cargo Weight± includes all weight added to the Base Curb Weight,
including cargo and optional equipment. When towing, trailer tongue load
or king pin weight is also part of cargo weight.
GAW (Gross Axle Weight)± is the total weight placed on each axle
(front and rear) ± including vehicle curb weight and all payload.
GAWR (Gross Axle Weight Rating)± is the maximum allowable
weight that can be carried by a single axle (front or rear).These
numbers are shown on the Safety Compliance Certification Label
located on the driver's door or door pillar. The total load on each
axle must never exceed its GAWR.
Exceeding the Safety Certification Label axle weight rating limits
could result in substandard vehicle handling, performance,
engine, transmission and/or structural damage, serious damage to the
vehicle, loss of control and personal injury.
Note:For trailer towing information refer toTrailer towingfound in
this chapter or theRV and Trailer Towing Guideprovided by your
dealership.
GVW (Gross Vehicle Weight)± is the Vehicle Curb Weight + cargo +
passengers.
2004 Marauder(mdr)
Owners Guide (post-2002-fmt)
USA English(fus)
Driving
123
Page 124 of 224
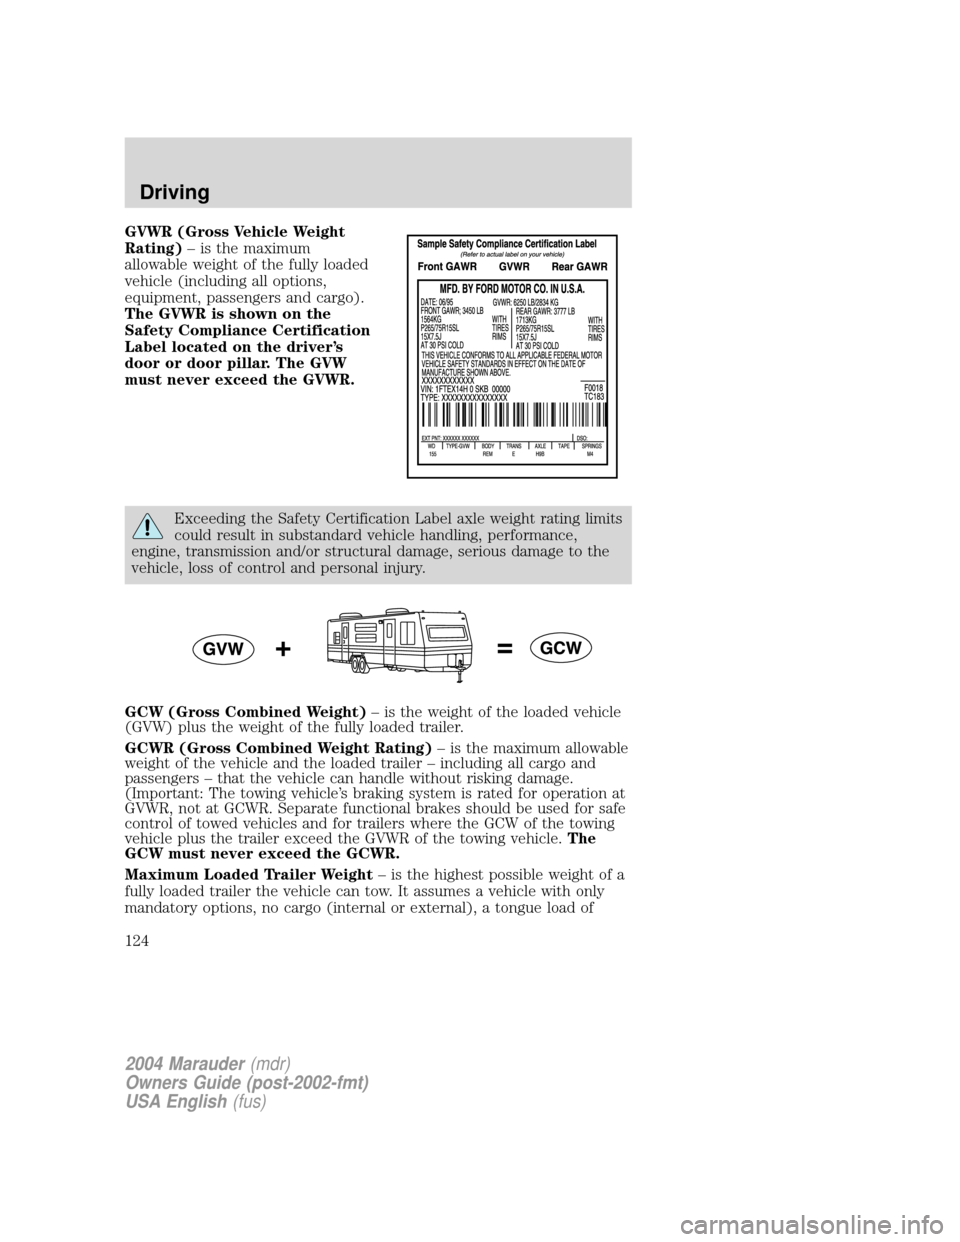
GVWR (Gross Vehicle Weight
Rating)± is the maximum
allowable weight of the fully loaded
vehicle (including all options,
equipment, passengers and cargo).
The GVWR is shown on the
Safety Compliance Certification
Label located on the driver's
door or door pillar. The GVW
must never exceed the GVWR.
Exceeding the Safety Certification Label axle weight rating limits
could result in substandard vehicle handling, performance,
engine, transmission and/or structural damage, serious damage to the
vehicle, loss of control and personal injury.
GCW (Gross Combined Weight)± is the weight of the loaded vehicle
(GVW) plus the weight of the fully loaded trailer.
GCWR (Gross Combined Weight Rating)± is the maximum allowable
weight of the vehicle and the loaded trailer ± including all cargo and
passengers ± that the vehicle can handle without risking damage.
(Important: The towing vehicle's braking system is rated for operation at
GVWR, not at GCWR. Separate functional brakes should be used for safe
control of towed vehicles and for trailers where the GCW of the towing
vehicle plus the trailer exceed the GVWR of the towing vehicle.The
GCW must never exceed the GCWR.
Maximum Loaded Trailer Weight± is the highest possible weight of a
fully loaded trailer the vehicle can tow. It assumes a vehicle with only
mandatory options, no cargo (internal or external), a tongue load of
2004 Marauder(mdr)
Owners Guide (post-2002-fmt)
USA English(fus)
Driving
124
Page 125 of 224
![Mercury Marauder 2004 s User Guide 10±15% (conventional trailer) or king pin weight of 15±25% (fifth wheel
trailer), and driver only (150 lbs [68 kg]).Consult your dealership (or
theRV and Trailer Towing Guideprovided by your dealers Mercury Marauder 2004 s User Guide 10±15% (conventional trailer) or king pin weight of 15±25% (fifth wheel
trailer), and driver only (150 lbs [68 kg]).Consult your dealership (or
theRV and Trailer Towing Guideprovided by your dealers](/img/33/10923/w960_10923-124.png)
10±15% (conventional trailer) or king pin weight of 15±25% (fifth wheel
trailer), and driver only (150 lbs [68 kg]).Consult your dealership (or
theRV and Trailer Towing Guideprovided by your dealership) for
more detailed information.
Tongue Load or Fifth Wheel King Pin Weight± refers to the amount
of the weight that a trailer pushes down on a trailer hitch.
Examples:For a 5,000 lbs. (2,268 kg) conventional trailer, multiply
5,000 by 0.10 and 0.15 to obtain a proper tongue load range of 500 to
750 lbs. (227 to 340 kg). For an 11,500 lbs. (5,216 kg) fifth wheel trailer,
multiply by 0.15 and 0.25 to obtain a proper king pin load range of 1,725
to 2,875 lbs. (782 to 1,304 kg)
Do not exceed the GVWR or the GAWR specified on the
certification label.
Do not use replacement tires with lower load carrying capacities
than the originals because they may lower the vehicle's GVWR
and GAWR limitations. Replacement tires with a higher limit than the
originals do not increase the GVWR and GAWR limitations.
Exceeding any vehicle weight rating limitation could result in
serious damage to the vehicle and/or personal injury.
TRAILER TOWING
Your vehicle is classified as a light duty towing vehicle. Do not tow a
trailer until your vehicle has been driven at least 2,000 miles (3,200 km).
Towing a trailer places an additional load on your vehicle's engine,
transmission, brakes, tires and suspension. Inspect these components
carefully after towing.
Your loaded trailer should weigh no more than 2,000 lbs. (907 kg).Do
not exceed the GVWR specified on the certification label.
Towing trailers beyond the maximum recommended gross trailer
weight exceeds the limit of the vehicle and could result in
engine damage, transmission damage, structural damage, loss of vehicle
control, vehicle rollover and personal injury.
The GCW of your vehicle and trailer should not exceed 6,000 lbs.
(2,993 kg).
2004 Marauder(mdr)
Owners Guide (post-2002-fmt)
USA English(fus)
Driving
125
Page 126 of 224
Preparing to tow
Use the proper equipment for towing a trailer and make sure it is
properly attached to your vehicle. See your dealer or a reliable trailer
dealer if you require assistance.
Hitches
Do not use hitches that clamp onto the vehicle bumper. Use a load
carrying hitch. You must distribute the load in your trailer so that
10±15% of the total weight of the trailer is on the tongue.
Safety chains
Always connect the trailer's safety chains to the frame or hook retainers
of the vehicle hitch. To connect the trailer's safety chains, cross the
chains under the trailer tongue and allow slack for turning corners.
If you use a rental trailer, follow the instructions that the rental agency
gives to you.
Do not attach safety chains to the bumper.
Trailer brakes
Electric brakes and manual, automatic or surge-type trailer brakes are
safe if installed properly and adjusted to the manufacturer's
specifications. The trailer brakes must meet local and Federal
regulations.
Do not connect a trailer's hydraulic brake system directly to your
vehicle's brake system. Your vehicle may not have enough
braking power and your chances of having a collision greatly increase.
The braking system of the tow vehicle is rated for operation at the
GVWR not GCWR.
Trailer lamps
Trailer lamps are required on most towed vehicles. Make sure all running
lights, brake lights, turn signals and hazard lights are working. See your
dealer or trailer rental agency for proper instructions and equipment for
hooking up trailer lamps.
2004 Marauder(mdr)
Owners Guide (post-2002-fmt)
USA English(fus)
Driving
126
Page 127 of 224
Driving while you tow
When towing a trailer:
²Turn off the speed control. The speed control may shut off
automatically when you are towing on long, steep grades.
²Consult your local motor vehicle speed regulations for towing a trailer.
²To eliminate excessive shifting, use a lower gear. This will also assist
in transmission cooling. (For additional information, refer to the
Understanding the positions of the 4±speed automatic
transmissionsection in this chapter.
²Anticipate stops and brake gradually.
²Do not exceed the GCWR rating or transmission damage may occur.
Servicing after towing
If you tow a trailer for long distances, your vehicle will require more
frequent service intervals. Refer to yourScheduled Maintenance Guide
for more information.
Trailer towing tips
²Practice turning, stopping and backing up before starting on a trip to
get the feel of the vehicle trailer combination. When turning, make
wider turns so the trailer wheels will clear curbs and other obstacles.
²Allow more distance for stopping with a trailer attached.
²If you are driving down a long or steep hill, shift to a lower gear. Do
not apply the brakes continuously, as they may overheat and become
less effective.
²The trailer tongue weight should be 10±15% of the loaded trailer
weight.
²After you have traveled 50 miles (80 km), thoroughly check your
hitch, electrical connections and trailer wheel lug nuts.
²To aid in engine/transmission cooling and A/C efficiency during hot
weather while stopped in traffic, place the gearshift lever in P (Park).
²Vehicles with trailers should not be parked on a grade. If you must
park on a grade, place wheel chocks under the trailer's wheels.
2004 Marauder(mdr)
Owners Guide (post-2002-fmt)
USA English(fus)
Driving
127