clock Mercury Marauder 2004 Owner's Manuals
[x] Cancel search | Manufacturer: MERCURY, Model Year: 2004, Model line: Marauder, Model: Mercury Marauder 2004Pages: 224, PDF Size: 3.21 MB
Page 20 of 224
RDS:(Radio Data System): Allows you to access FM stations which are
RDS- equipped. Press RDS then SEL to select from:
TrafficÐ Allows you to receive traffic announcements and control their
volume level.Traffic information is not available in most U.S.
markets.
ShowÐ Allows you to view the frequency and program type of the
chosen radio station.
Setting the clock:Press RDS until SELECT HOUR or SELECT MINS is
displayed. Press SEL to increase (
) or decrease ().
The Federal Communications Commission (FCC) and the Canadian Radio
and Telecommunications Commission (CRTC) recommend that FM radio
broadcasters use RDS technology to transmit information. FM radio
stations are independently operated and individually elect to use RDS
technology to transmit station ID and program type as desired.
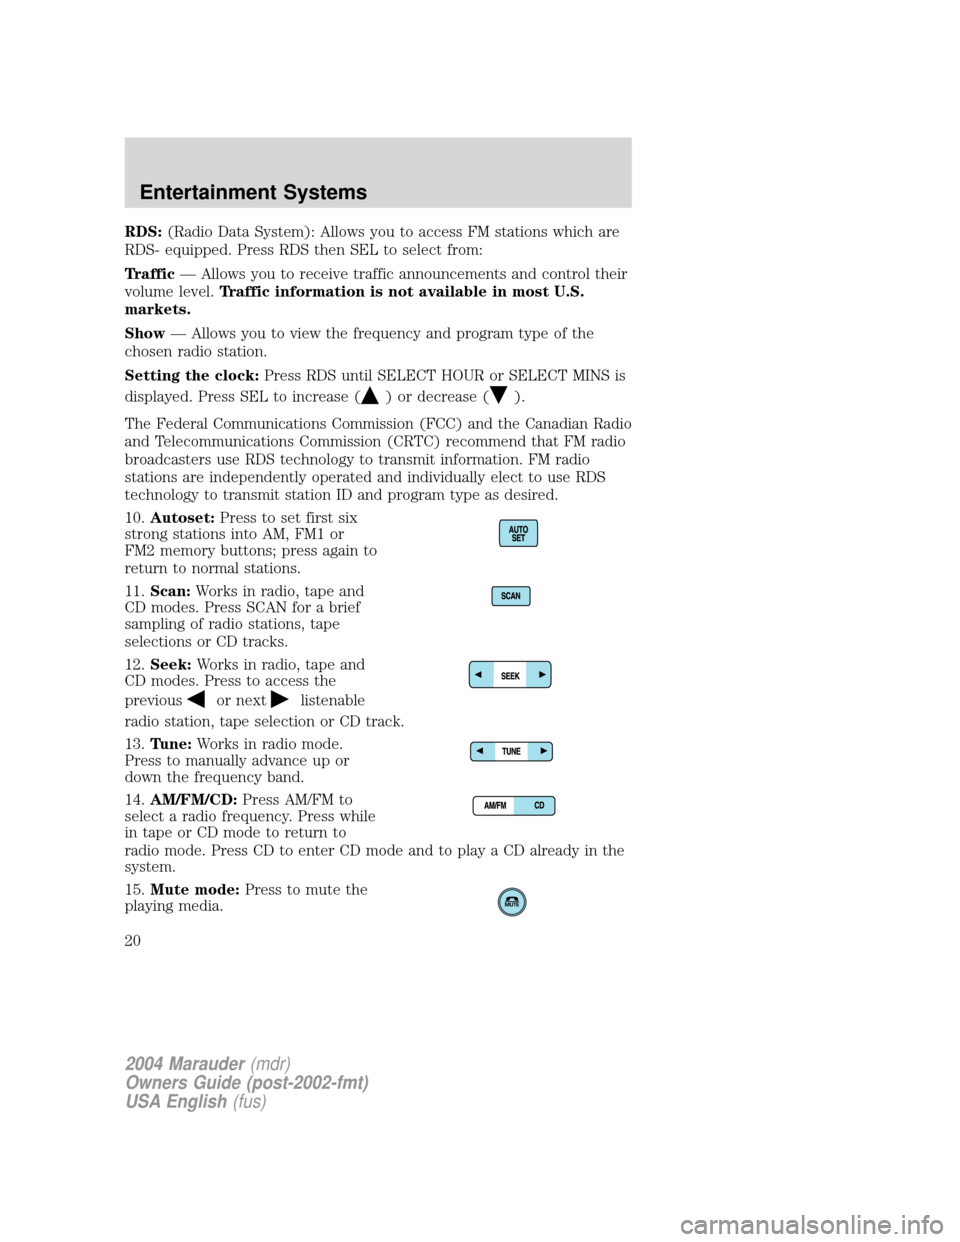
10.Autoset:Press to set first six
strong stations into AM, FM1 or
FM2 memory buttons; press again to
return to normal stations.
11.Scan:Works in radio, tape and
CD modes. Press SCAN for a brief
sampling of radio stations, tape
selections or CD tracks.
12.Seek:Works in radio, tape and
CD modes. Press to access the
previous
or nextlistenable
radio station, tape selection or CD track.
13.Tune:Works in radio mode.
Press to manually advance up or
down the frequency band.
14.AM/FM/CD:Press AM/FM to
select a radio frequency. Press while
in tape or CD mode to return to
radio mode. Press CD to enter CD mode and to play a CD already in the
system.
15.Mute mode:Press to mute the
playing media.
2004 Marauder(mdr)
Owners Guide (post-2002-fmt)
USA English(fus)
Entertainment Systems
20
Page 27 of 224
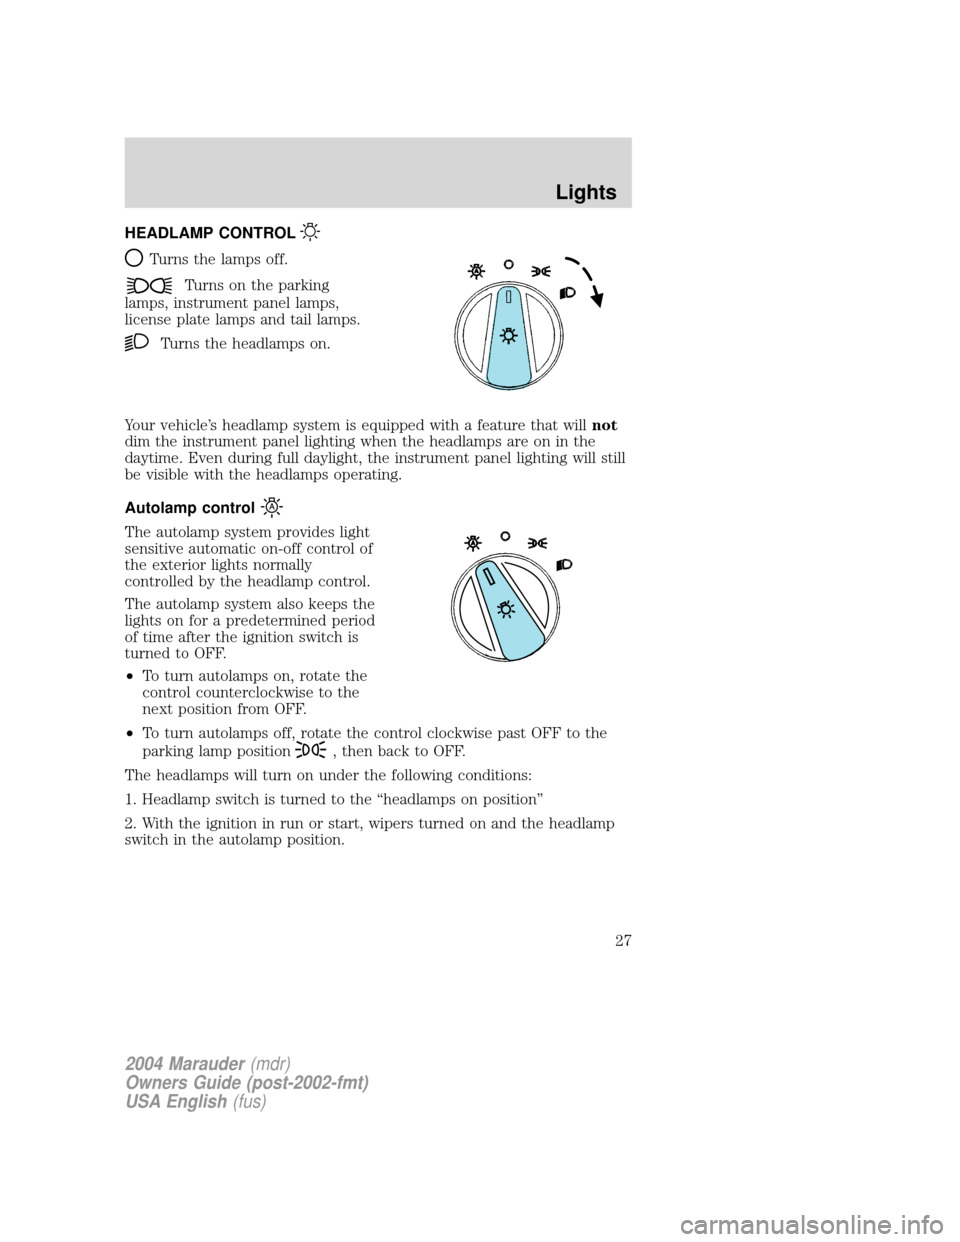
HEADLAMP CONTROL
Turns the lamps off.
Turns on the parking
lamps, instrument panel lamps,
license plate lamps and tail lamps.
Turns the headlamps on.
Your vehicle's headlamp system is equipped with a feature that willnot
dim the instrument panel lighting when the headlamps are on in the
daytime. Even during full daylight, the instrument panel lighting will still
be visible with the headlamps operating.
Autolamp control
The autolamp system provides light
sensitive automatic on-off control of
the exterior lights normally
controlled by the headlamp control.
The autolamp system also keeps the
lights on for a predetermined period
of time after the ignition switch is
turned to OFF.
²To turn autolamps on, rotate the
control counterclockwise to the
next position from OFF.
²To turn autolamps off, rotate the control clockwise past OFF to the
parking lamp position
, then back to OFF.
The headlamps will turn on under the following conditions:
1. Headlamp switch is turned to the ªheadlamps on positionº
2. With the ignition in run or start, wipers turned on and the headlamp
switch in the autolamp position.
2004 Marauder(mdr)
Owners Guide (post-2002-fmt)
USA English(fus)
Lights
Lights
27
Page 30 of 224
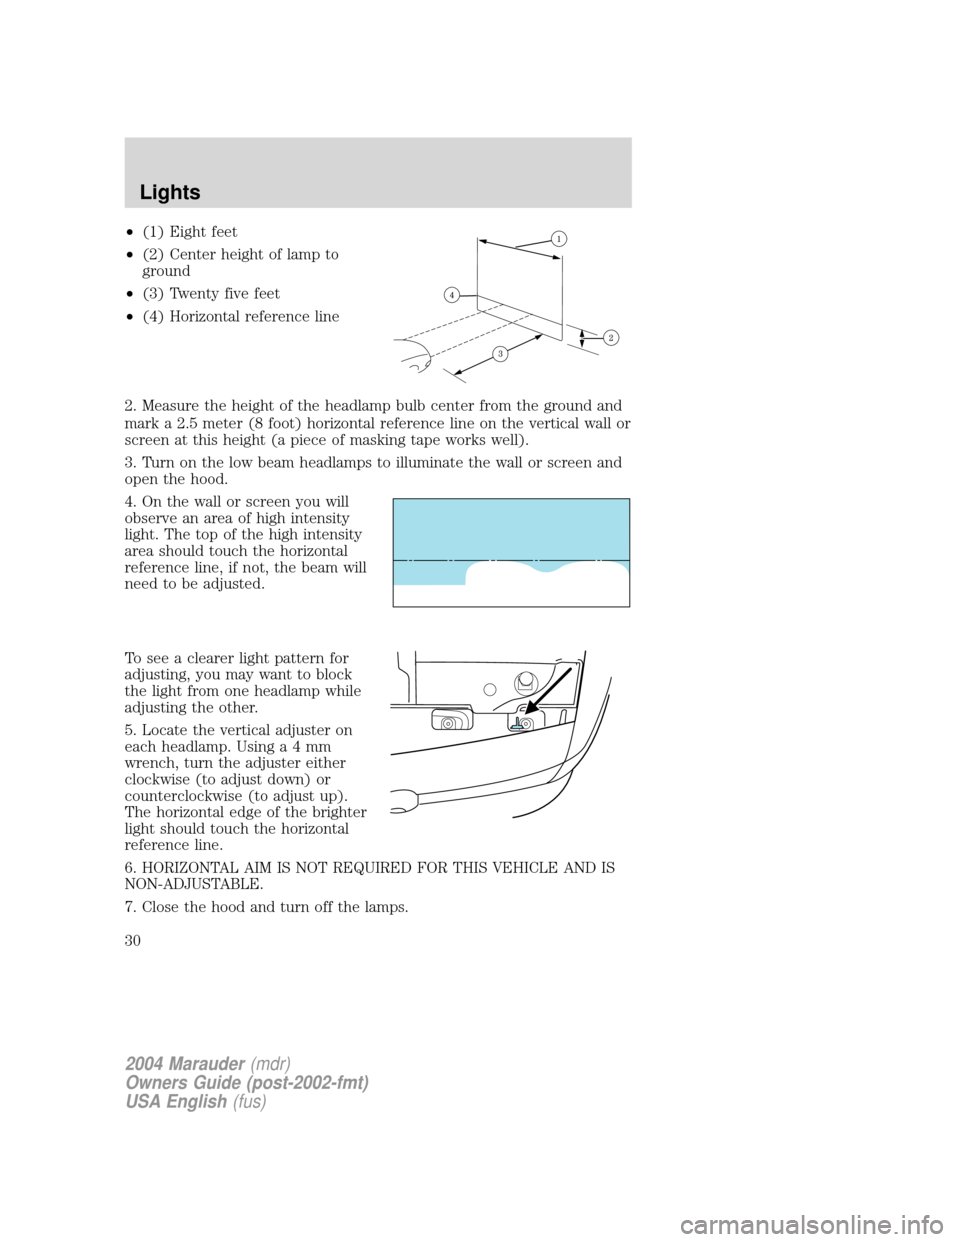
²(1) Eight feet
²(2) Center height of lamp to
ground
²(3) Twenty five feet
²(4) Horizontal reference line
2. Measure the height of the headlamp bulb center from the ground and
mark a 2.5 meter (8 foot) horizontal reference line on the vertical wall or
screen at this height (a piece of masking tape works well).
3. Turn on the low beam headlamps to illuminate the wall or screen and
open the hood.
4. On the wall or screen you will
observe an area of high intensity
light. The top of the high intensity
area should touch the horizontal
reference line, if not, the beam will
need to be adjusted.
To see a clearer light pattern for
adjusting, you may want to block
the light from one headlamp while
adjusting the other.
5. Locate the vertical adjuster on
each headlamp. Usinga4mm
wrench, turn the adjuster either
clockwise (to adjust down) or
counterclockwise (to adjust up).
The horizontal edge of the brighter
light should touch the horizontal
reference line.
6. HORIZONTAL AIM IS NOT REQUIRED FOR THIS VEHICLE AND IS
NON-ADJUSTABLE.
7. Close the hood and turn off the lamps.
2004 Marauder(mdr)
Owners Guide (post-2002-fmt)
USA English(fus)
Lights
30
Page 33 of 224
Replacing headlamp bulbs
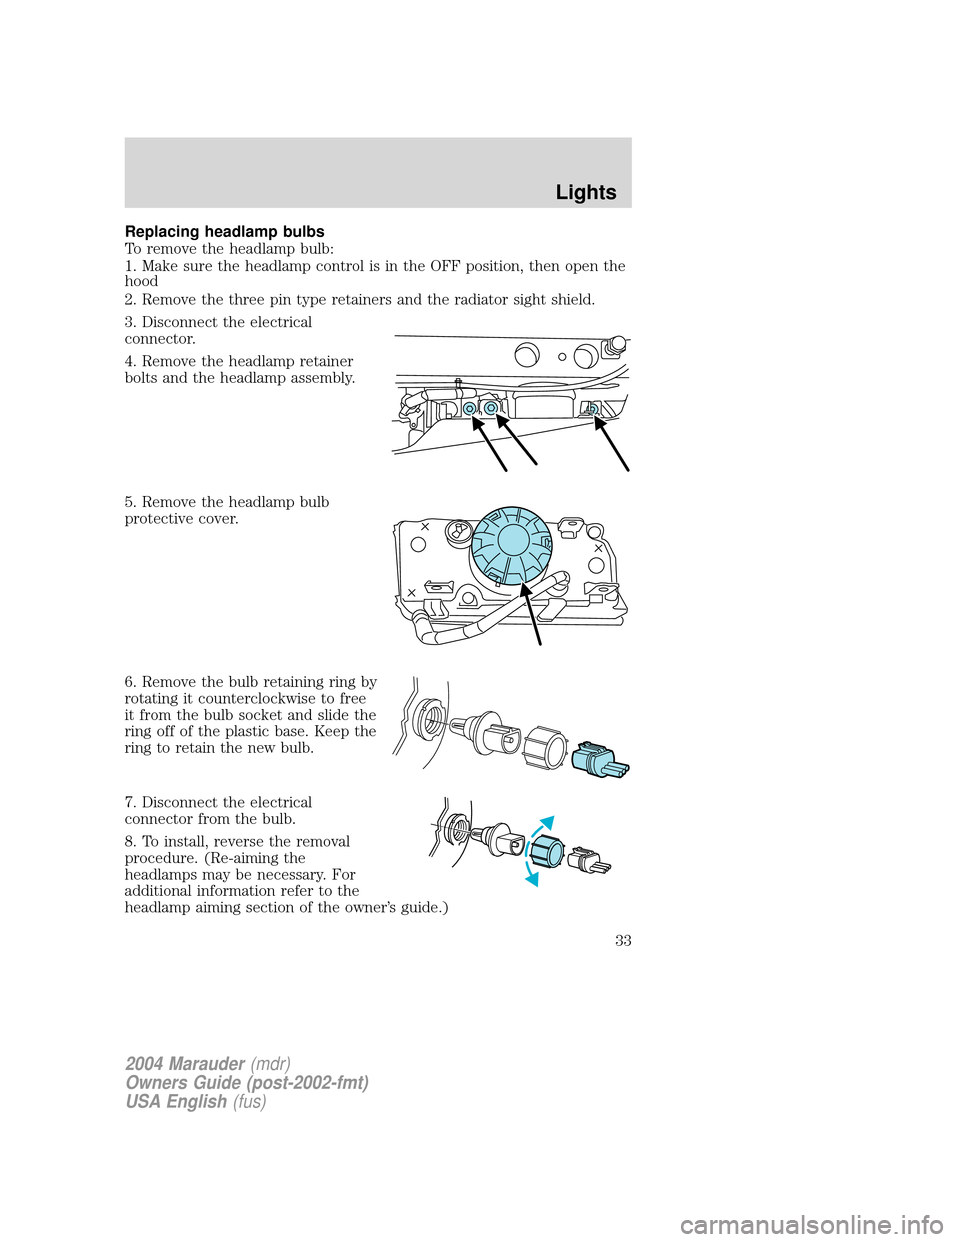
To remove the headlamp bulb:
1. Make sure the headlamp control is in the OFF position, then open the
hood
2. Remove the three pin type retainers and the radiator sight shield.
3. Disconnect the electrical
connector.
4. Remove the headlamp retainer
bolts and the headlamp assembly.
5. Remove the headlamp bulb
protective cover.
6. Remove the bulb retaining ring by
rotating it counterclockwise to free
it from the bulb socket and slide the
ring off of the plastic base. Keep the
ring to retain the new bulb.
7. Disconnect the electrical
connector from the bulb.
8. To install, reverse the removal
procedure. (Re-aiming the
headlamps may be necessary. For
additional information refer to the
headlamp aiming section of the owner's guide.)
2004 Marauder(mdr)
Owners Guide (post-2002-fmt)
USA English(fus)
Lights
33
Page 35 of 224
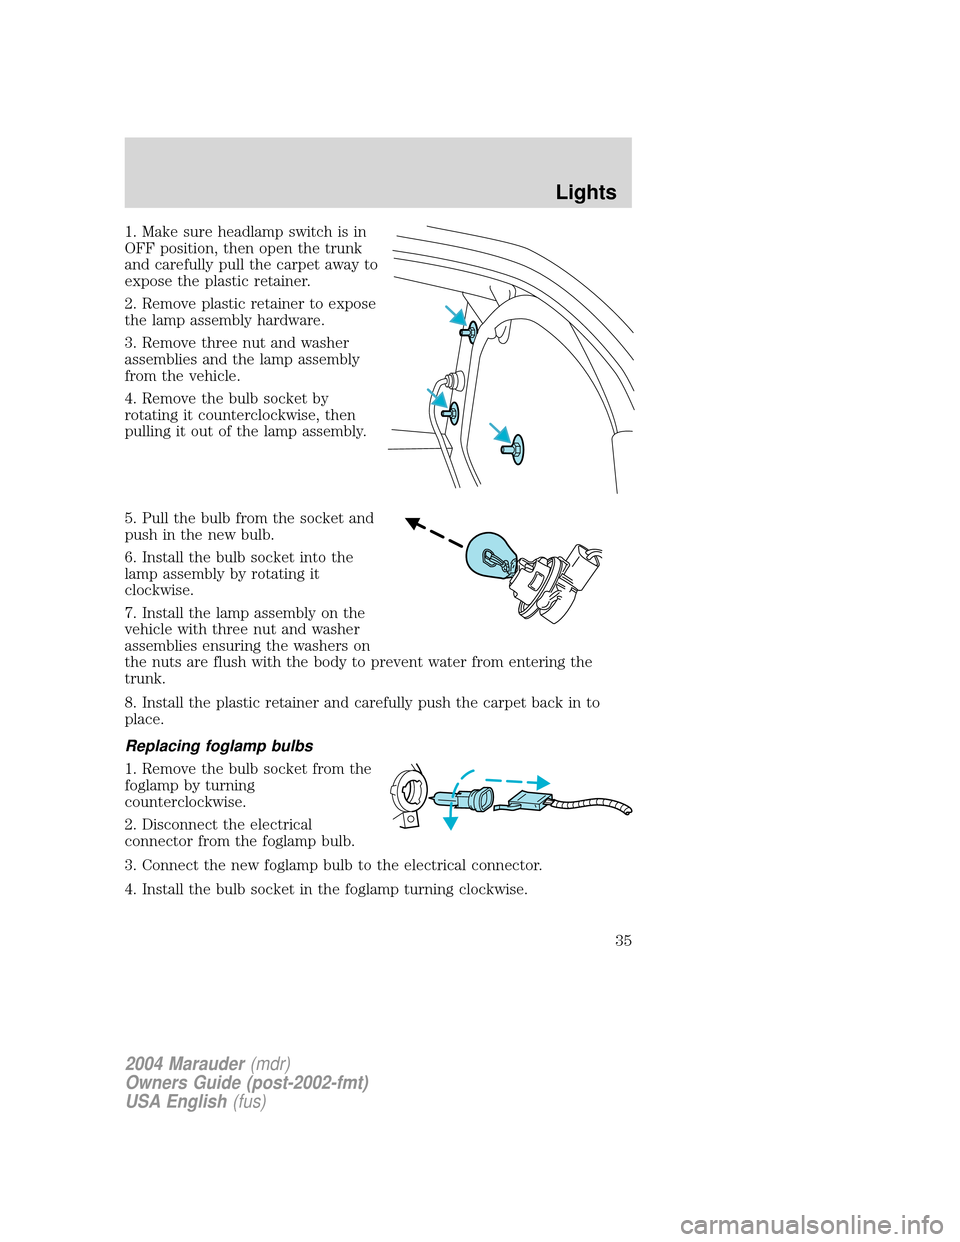
1. Make sure headlamp switch is in
OFF position, then open the trunk
and carefully pull the carpet away to
expose the plastic retainer.
2. Remove plastic retainer to expose
the lamp assembly hardware.
3. Remove three nut and washer
assemblies and the lamp assembly
from the vehicle.
4. Remove the bulb socket by
rotating it counterclockwise, then
pulling it out of the lamp assembly.
5. Pull the bulb from the socket and
push in the new bulb.
6. Install the bulb socket into the
lamp assembly by rotating it
clockwise.
7. Install the lamp assembly on the
vehicle with three nut and washer
assemblies ensuring the washers on
the nuts are flush with the body to prevent water from entering the
trunk.
8. Install the plastic retainer and carefully push the carpet back in to
place.
Replacing foglamp bulbs
1. Remove the bulb socket from the
foglamp by turning
counterclockwise.
2. Disconnect the electrical
connector from the foglamp bulb.
3. Connect the new foglamp bulb to the electrical connector.
4. Install the bulb socket in the foglamp turning clockwise.
2004 Marauder(mdr)
Owners Guide (post-2002-fmt)
USA English(fus)
Lights
35
Page 36 of 224
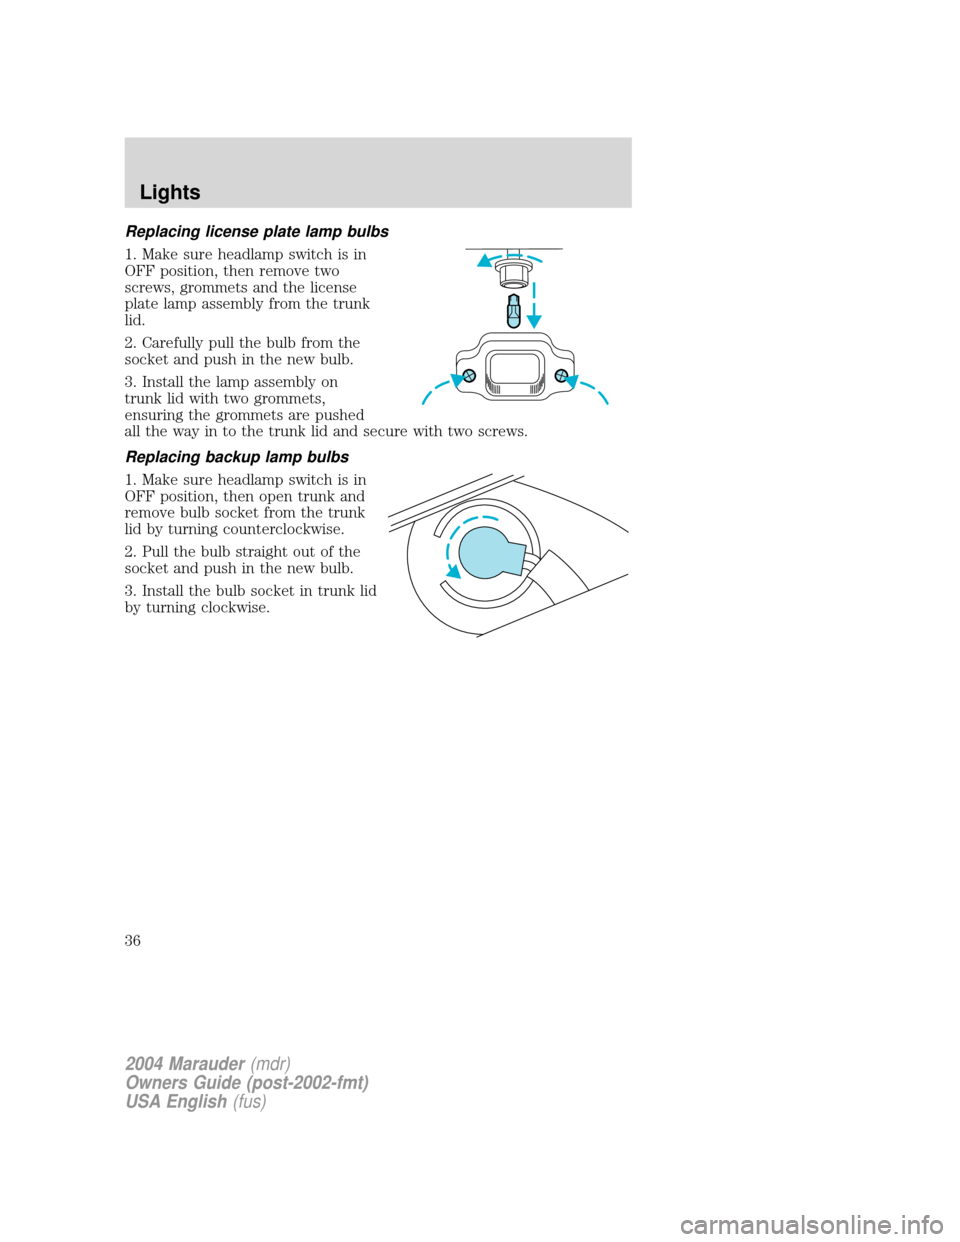
Replacing license plate lamp bulbs
1. Make sure headlamp switch is in
OFF position, then remove two
screws, grommets and the license
plate lamp assembly from the trunk
lid.
2. Carefully pull the bulb from the
socket and push in the new bulb.
3. Install the lamp assembly on
trunk lid with two grommets,
ensuring the grommets are pushed
all the way in to the trunk lid and secure with two screws.
Replacing backup lamp bulbs
1. Make sure headlamp switch is in
OFF position, then open trunk and
remove bulb socket from the trunk
lid by turning counterclockwise.
2. Pull the bulb straight out of the
socket and push in the new bulb.
3. Install the bulb socket in trunk lid
by turning clockwise.
2004 Marauder(mdr)
Owners Guide (post-2002-fmt)
USA English(fus)
Lights
36
Page 141 of 224
Tire change procedure
To help prevent the vehicle from moving when you change a tire,
be sure the parking brake is set, then block (in both directions)
the wheel that is diagonally opposite (other side and end of the
vehicle) to the tire being changed.
If the vehicle slips off the jack, you or someone else could be
seriously injured.
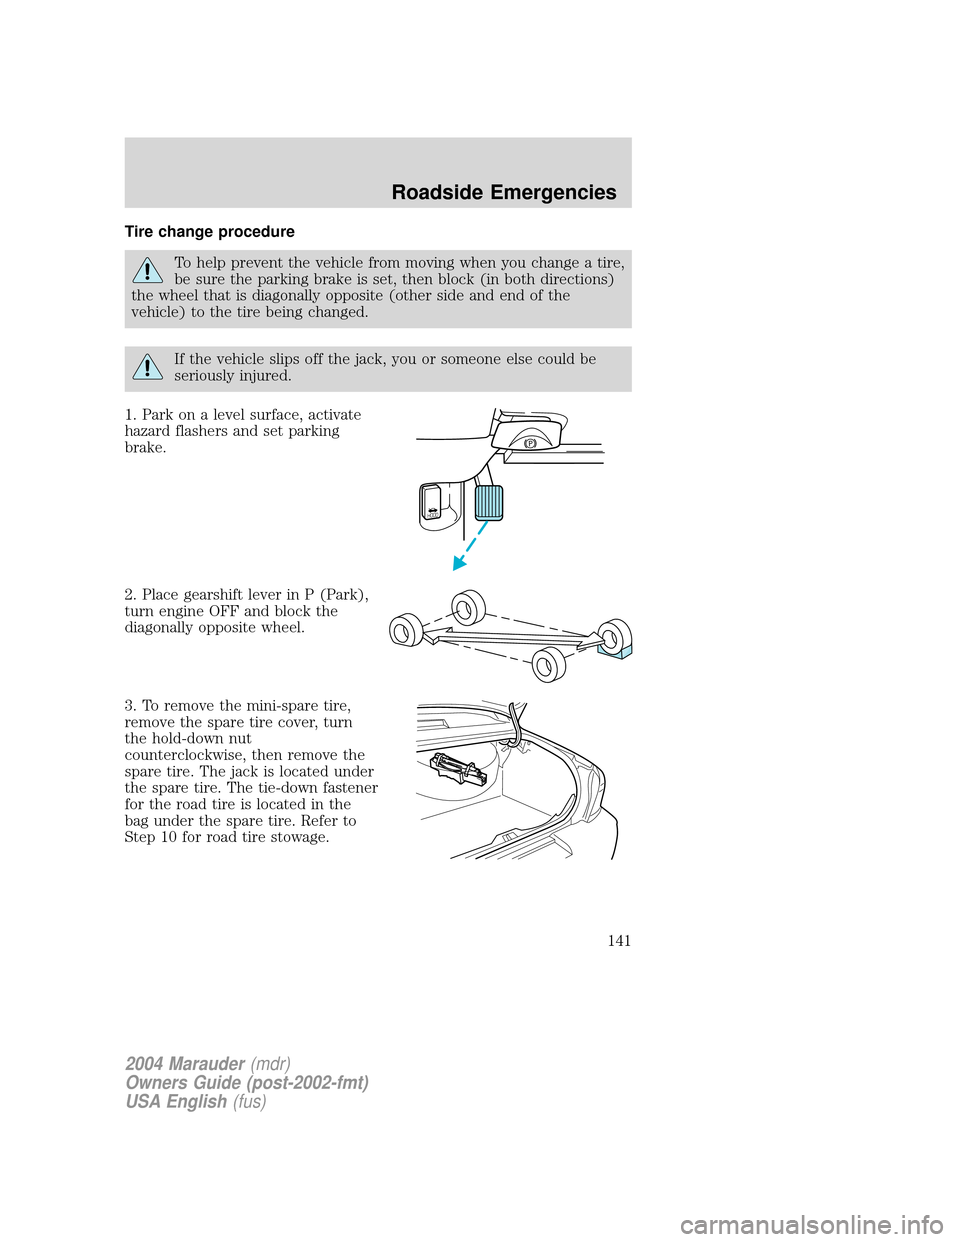
1. Park on a level surface, activate
hazard flashers and set parking
brake.
2. Place gearshift lever in P (Park),
turn engine OFF and block the
diagonally opposite wheel.
3. To remove the mini-spare tire,
remove the spare tire cover, turn
the hold-down nut
counterclockwise, then remove the
spare tire. The jack is located under
the spare tire. The tie-down fastener
for the road tire is located in the
bag under the spare tire. Refer to
Step 10 for road tire stowage.
HOOD
2004 Marauder(mdr)
Owners Guide (post-2002-fmt)
USA English(fus)
Roadside Emergencies
141
Page 142 of 224
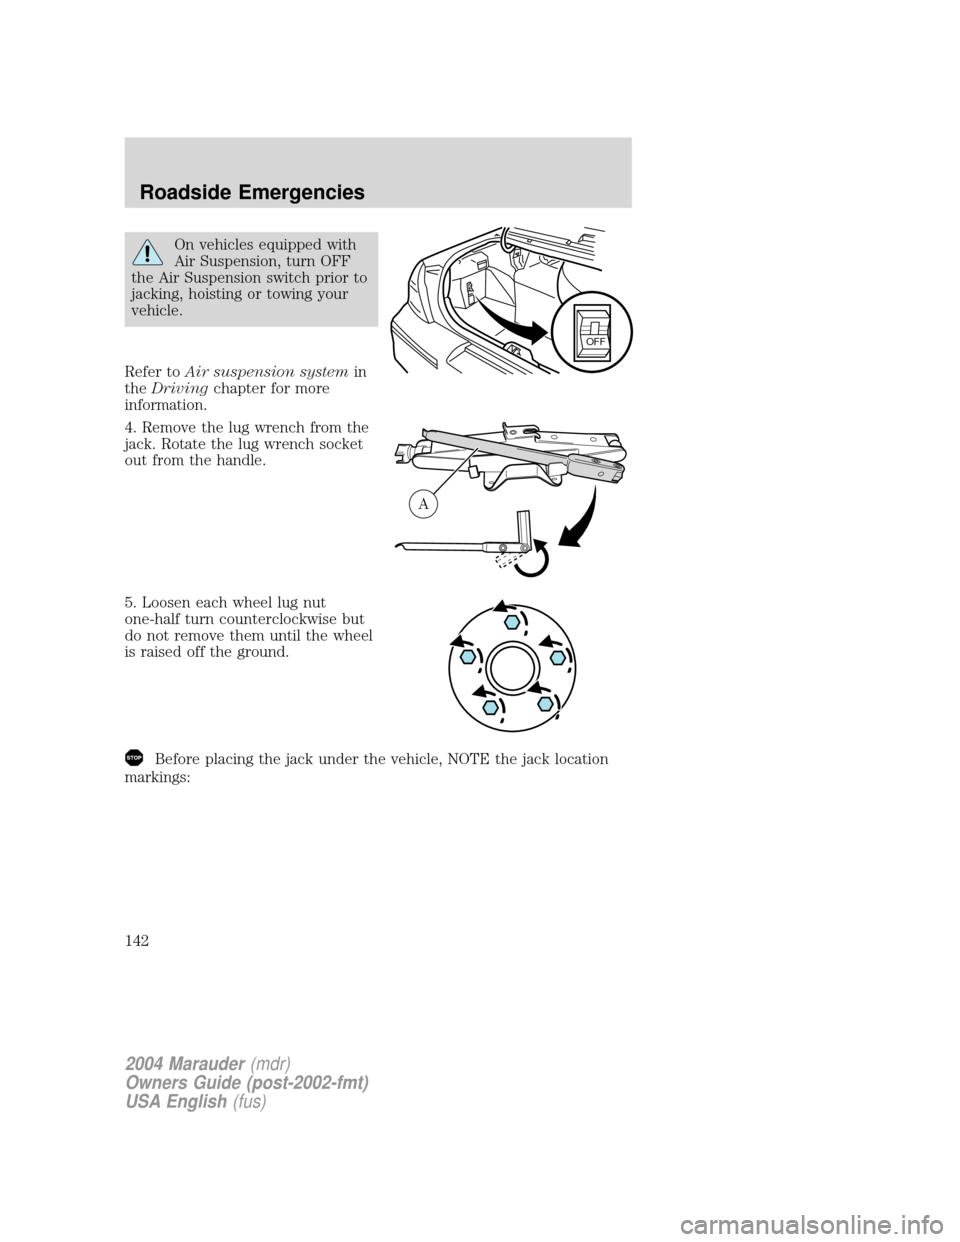
On vehicles equipped with
Air Suspension, turn OFF
the Air Suspension switch prior to
jacking, hoisting or towing your
vehicle.
Refer toAir suspension systemin
theDrivingchapter for more
information.
4. Remove the lug wrench from the
jack. Rotate the lug wrench socket
out from the handle.
5. Loosen each wheel lug nut
one-half turn counterclockwise but
do not remove them until the wheel
is raised off the ground.
Before placing the jack under the vehicle, NOTE the jack location
markings:
OFF
A
2004 Marauder(mdr)
Owners Guide (post-2002-fmt)
USA English(fus)
Roadside Emergencies
142
Page 143 of 224

JACK LOCATION-FRONT
The jack location markings can be
foundon the lower outer edge of
the body.
²Locate the jack locator mark (B -
circle) on the body (C) near the
tire you are changing, then place
the jack (D)under the frame
(A) of the vehiclealigning it
with the mark (B -circle).
JACK LOCATION-REAR
The jack location markings can be
foundon the lower outer edge of
the body.
²Locate the jack locator mark (B -
triangle) on the body (C) near
the tire you are changing, then
place the jack (D)under the
frame (A) of the vehicle
aligning it with the mark (B -
triangle).
²Position the jack according to the
following guides and turn the jack
handle clockwise until the wheel
is completely off the ground.
To lessen risk of personal injury, do not put any part of your
body under the vehicle while changing a tire. Do not start the
engine when your vehicle is on the jack. The jack is ONLY meant for
changing the tire.
A
D
B
C
2004 Marauder(mdr)
Owners Guide (post-2002-fmt)
USA English(fus)
Roadside Emergencies
143
Page 144 of 224
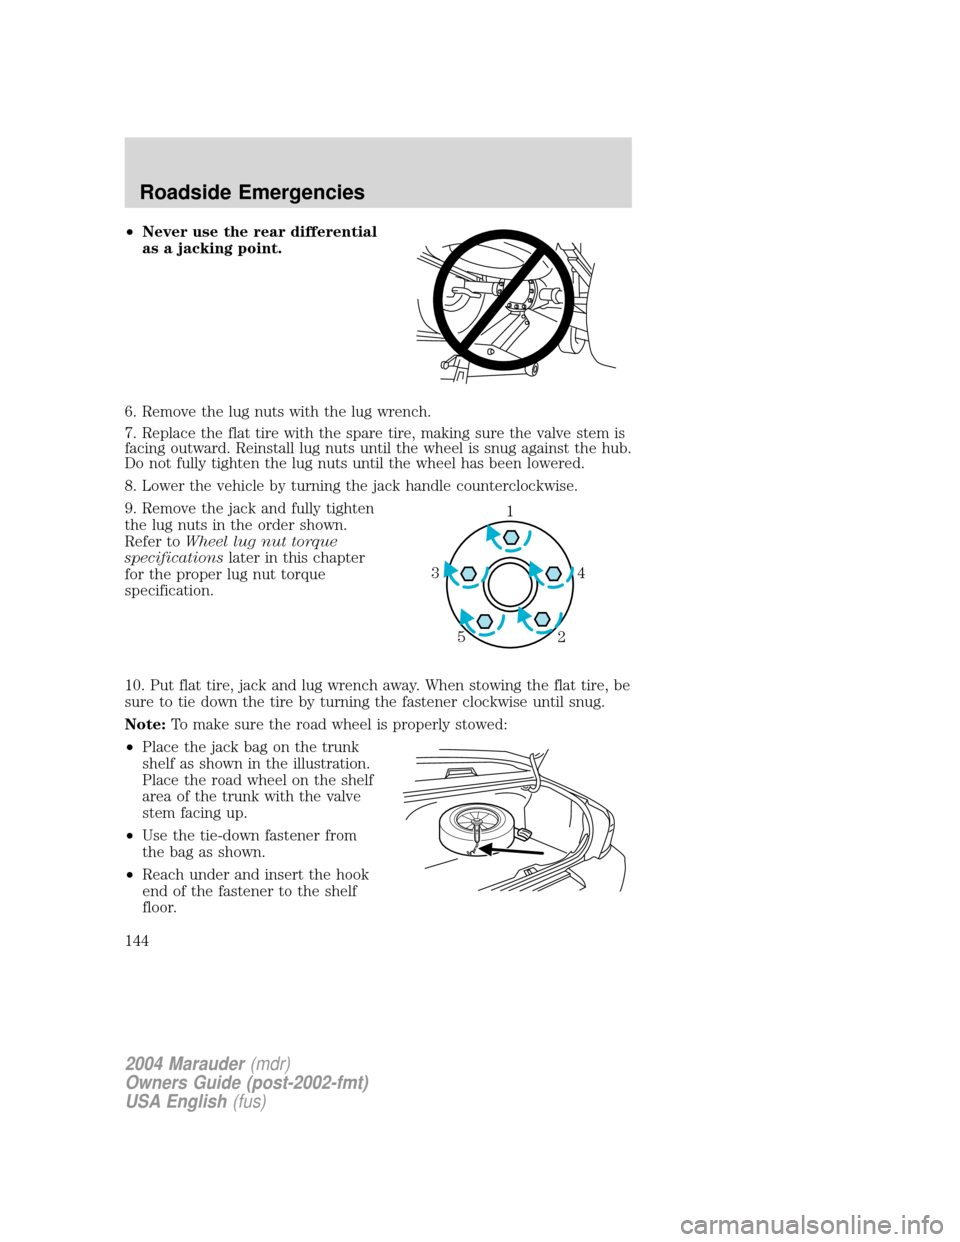
²Never use the rear differential
as a jacking point.
6. Remove the lug nuts with the lug wrench.
7. Replace the flat tire with the spare tire, making sure the valve stem is
facing outward. Reinstall lug nuts until the wheel is snug against the hub.
Do not fully tighten the lug nuts until the wheel has been lowered.
8. Lower the vehicle by turning the jack handle counterclockwise.
9. Remove the jack and fully tighten
the lug nuts in the order shown.
Refer toWheel lug nut torque
specificationslater in this chapter
for the proper lug nut torque
specification.
10. Put flat tire, jack and lug wrench away. When stowing the flat tire, be
sure to tie down the tire by turning the fastener clockwise until snug.
Note:To make sure the road wheel is properly stowed:
²Place the jack bag on the trunk
shelf as shown in the illustration.
Place the road wheel on the shelf
area of the trunk with the valve
stem facing up.
²Use the tie-down fastener from
the bag as shown.
²Reach under and insert the hook
end of the fastener to the shelf
floor.
1
4 3
2 5
2004 Marauder(mdr)
Owners Guide (post-2002-fmt)
USA English(fus)
Roadside Emergencies
144