remove seats Mercury Mariner 2010 Owner's Manuals
[x] Cancel search | Manufacturer: MERCURY, Model Year: 2010, Model line: Mariner, Model: Mercury Mariner 2010Pages: 339, PDF Size: 2.71 MB
Page 47 of 339
•Do not put objects under the front seats that will interfere with the
airflow to the back seats.
•Remove any snow, ice or leaves from the air intake area at the base of
the windshield.
•To improve the time to reach comfort in hot weather, drive with the
windows slightly open for 2-3 minutes after start up or until the
vehicle has been “aired out.”
During extreme high ambient temperatures when idling stationary for
extended periods of time in gear, it is recommended to run the A/C in
the MAX A/C position, reduce blower fan speed from the highest setting
and put the vehicle’s transmission into the P (Park) gear position
(automatic transmission only) to continue to receive cool air from your
A/C system.
For maximum cooling performance in MAX A/C mode:
1. Select MAX A/C.
2. Select the coolest temperature setting.
3. Set the fan to the highest speed initially. As the interior starts to cool
down, adjust the fan speed to maintain comfort.
To aid in side window defogging/demisting in cold weather:
1. Select
.
2. Select A/C.
3. Adjust the temperature control to maintain comfort.
4. Set the fan speed to the highest setting.
5. Direct the outer instrument panel vents towards the side windows.
To increase airflow to the outer instrument panel vents, close the vents
located in the middle of the instrument panel.
Climate Controls
47
2010 Mariner(mrn)
Owners Guide, 2nd Printing
USA(fus)
Page 50 of 339
14.Driver heated seat control (if equipped):Press to
activate/deactivate the driver heated seat. SeeHeated seatsin the
Seating and Safety Restraintschapter.
Outside temperature:The outside temperature will appear in the
display and is labeled EXT TEMP.
Temperature conversion:To switch between Fahrenheit and Celsius,
refer to theMessage centersection of theInstrument Clusterchapter.
Operating tips
•To reduce fog build up on the windshield during humid weather,
select
(defrost) or(floor/defrost).
•To reduce humidity build up inside the vehicle, do not drive with the
system OFF or with
(recirculated air) engaged and A/C off.
•Do not put objects under the front seats that will interfere with the
airflow to the back seats.
•Remove any snow, ice or leaves from the air intake area at the base of
the windshield.
•To improve the A/C cool down, drive with the windows slightly open
for 2-3 minutes after start up or until the vehicle has been “aired out.”
During extreme high ambient temperatures when idling stationary for
extended periods of time in gear, it is recommended to run the A/C in
the MAX A/C position, reduce blower fan speed from the highest setting
and put the vehicle’s transmission into the P (Park) gear position (for
automatic transmissions) to continue to receive cool air from your A/C
system.
For maximum cooling performance:
•Automatic operation:
1. Press AUTO for full automatic operation.
2. Do not override A/C or
(recirculated air).
3. Set the temperature to 60°F (16°C).
•Manual operation:
1. Select MAX A/C.
2. Select
or.
3. Select
(recirculated air) to provide colder airflow.
4. Set the temperature to 60°F (16°C).
Climate Controls
50
2010 Mariner(mrn)
Owners Guide, 2nd Printing
USA(fus)
Page 111 of 339
FRONT SEATS
WARNING:Reclining the seatback can cause an occupant to
slide under the seat’s safety belt, resulting in severe personal
injuries in the event of a collision.
WARNING:Do not pile cargo higher than the seatbacks to
reduce the risk of injury in a collision or sudden stop.
WARNING:Before returning the seatback to its original
position, make sure that cargo or any objects are not trapped
behind the seatback. After returning the seatback to its original
position, pull on the seatback to ensure that it has fully latched. An
unlatched seat may become dangerous in the event of a sudden stop or
collision.
Adjustable head restraints
Your vehicle is equipped with front row outboard head restraints that are
vertically adjustable.
WARNING:To minimize the risk of neck injury in the event of a
crash, the driver and passenger occupants should not sit in
and/or operate the vehicle, until the head restraint is placed in its
proper position. The driver should never adjust the head restraint
while the vehicle is in motion.
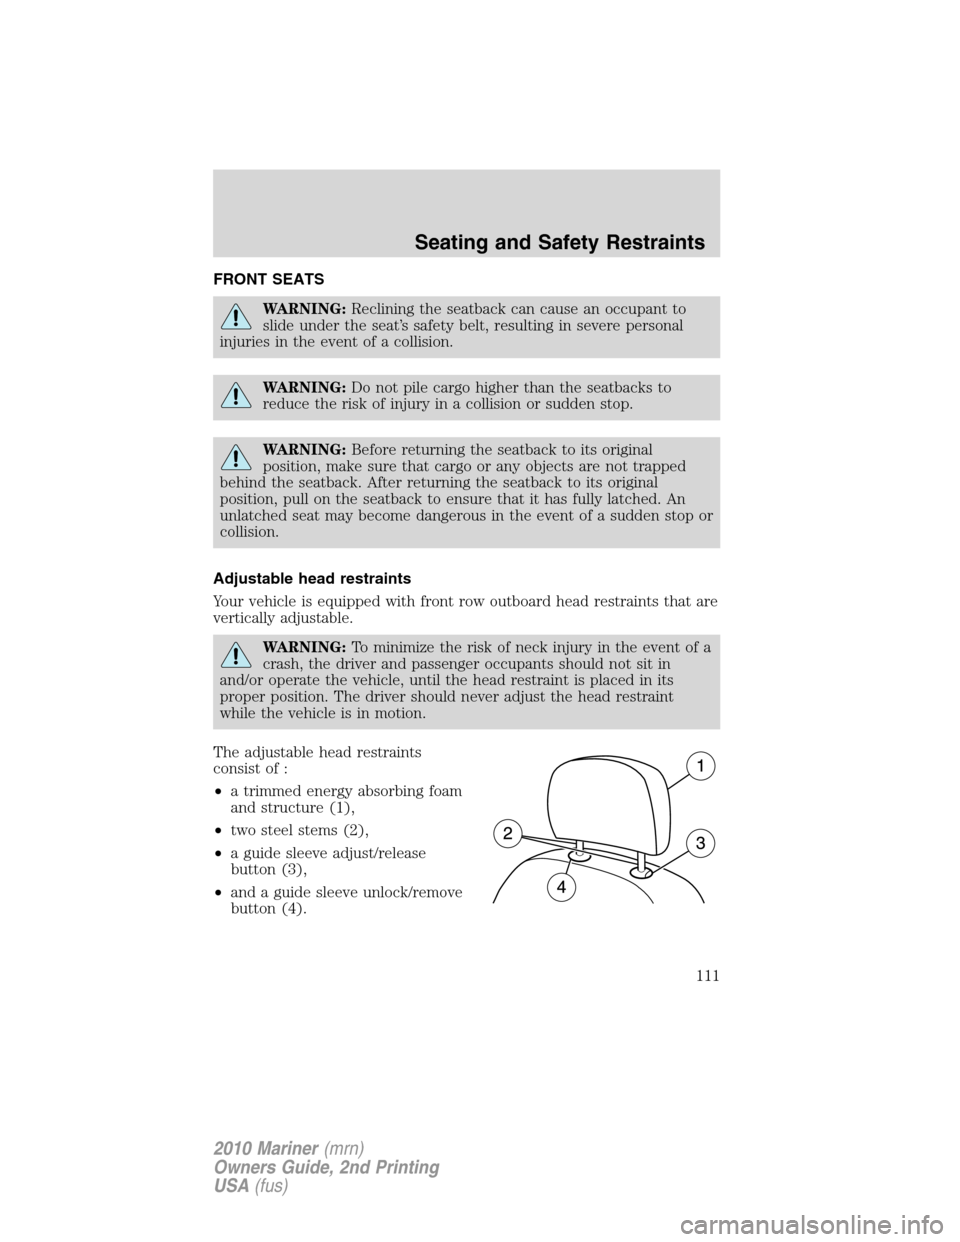
The adjustable head restraints
consist of :
•a trimmed energy absorbing foam
and structure (1),
•two steel stems (2),
•a guide sleeve adjust/release
button (3),
•and a guide sleeve unlock/remove
button (4).
Seating and Safety Restraints
111
2010 Mariner(mrn)
Owners Guide, 2nd Printing
USA(fus)
Page 117 of 339
•Operate the seat heater if water or any other liquid is spilled on the
seat. Allow the seat to dry thoroughly.
To operate the heated seats:
•Press the button located on the
instrument panel to activate.
•Press again to deactivate.
The heated seats will activate when the ignition is in the on position and
the engine is running.
REAR SEATS
Second row adjustable head restraints
Your vehicle is equipped with second row outboard and center head
restraints that are vertically adjustable.
WARNING:To minimize the risk of neck injury in the event of a
crash, the driver and passenger occupants should not sit in
and/or operate the vehicle, until the head restraint is placed in its
proper position. The driver should never adjust the head restraint
while the vehicle is in motion.
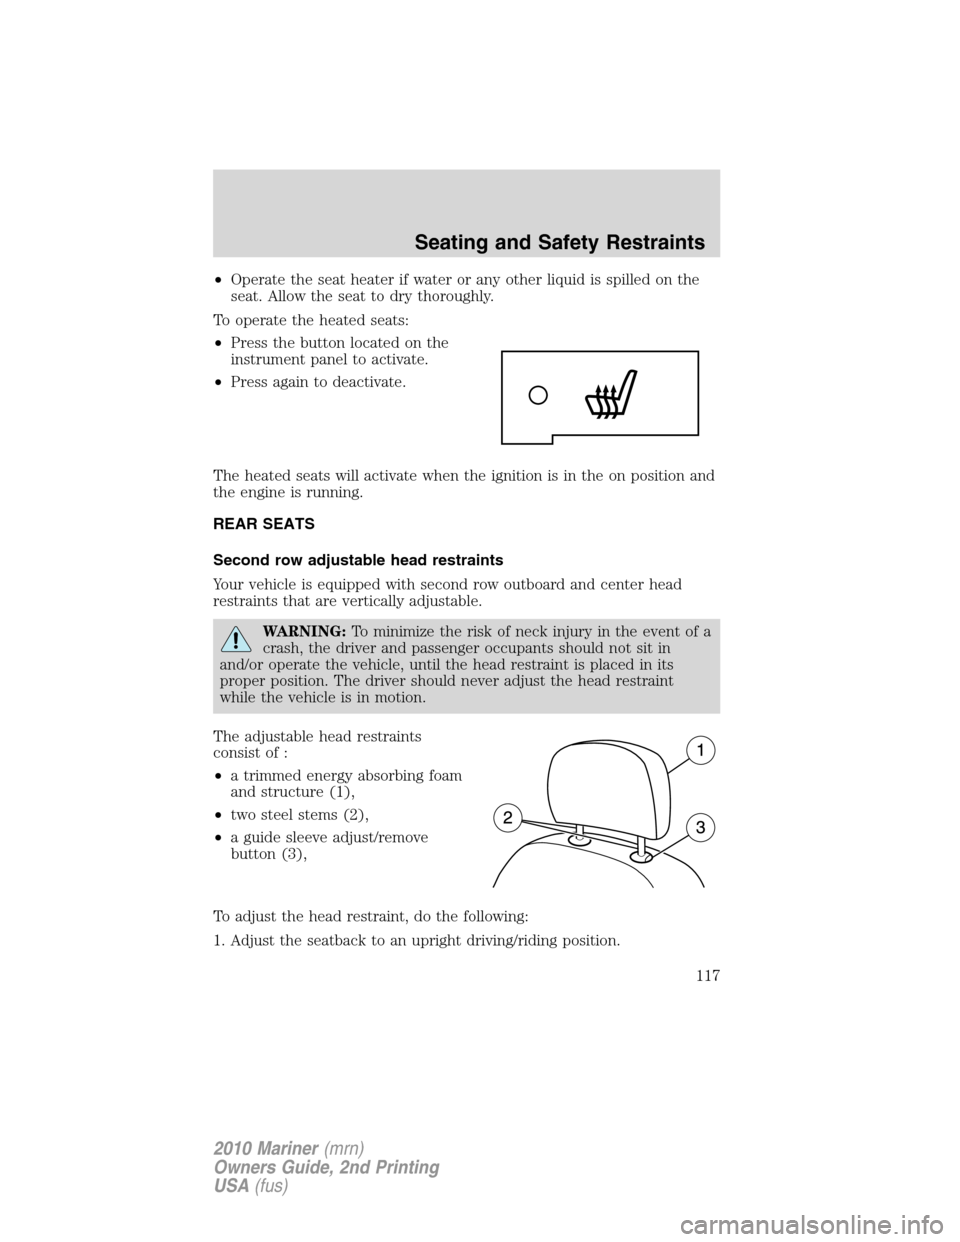
The adjustable head restraints
consist of :
•a trimmed energy absorbing foam
and structure (1),
•two steel stems (2),
•a guide sleeve adjust/remove
button (3),
To adjust the head restraint, do the following:
1. Adjust the seatback to an upright driving/riding position.
Seating and Safety Restraints
117
2010 Mariner(mrn)
Owners Guide, 2nd Printing
USA(fus)
Page 120 of 339

WARNING:To minimize the risk of neck injury in the event of a
crash, head restraints must be installed properly.
Folding down second row seats
1. Remove the second row head restraint. SeeSecond row adjustable
head restraintsin this chapter.
Note:Place the head restraint underneath the back of the front seat
for storage.
2. Pull the seat release strap.
Note:Make sure the floor is clear of all objects before folding the seat.
3. Flip seat forward.
Seating and Safety Restraints
120
2010 Mariner(mrn)
Owners Guide, 2nd Printing
USA(fus)
Page 122 of 339

Returning the second row seats to upright position
1. Pull seatback up and into upright
position making sure seatback locks
into place and the red seat
unlatched indicator on release
paddle is not visible.
2. Rotate seat cushion down into the
seating position making sure that
the seat cushion is locked into place
and that the safety belt buckles are
exposed.
WARNING:Make sure
safety belt buckle heads are
through elastic holders on seat
backs. Safety belt buckles may
break if they are trapped
underneath the seatback as the
seatback is rotated down.
WARNING:Before returning the seatback to its original
position, make sure that cargo or any objects are not trapped
behind the seatback. After returning the seatback to its original
position, reinstall the head restraints, and pull on the seatback to
ensure that it has fully latched. An unlatched seat may become
dangerous in the event of a sudden stop or collision.
3. Unsnap the safety belt webbing from the quarter trim panel.
4. Remove the second row head restraint from underneath the front seat
and reinstall. SeeSecond row adjustable head restraintsin this
chapter.
Seating and Safety Restraints
122
2010 Mariner(mrn)
Owners Guide, 2nd Printing
USA(fus)
Page 128 of 339
WARNING:When possible, all children 12 years old and under
should be properly restrained in a rear seating position.
WARNING:Safety belts and seats can become hot in a vehicle
that has been closed up in sunny weather; they could burn a
small child. Check seat covers and buckles before you place a child
anywhere near them.
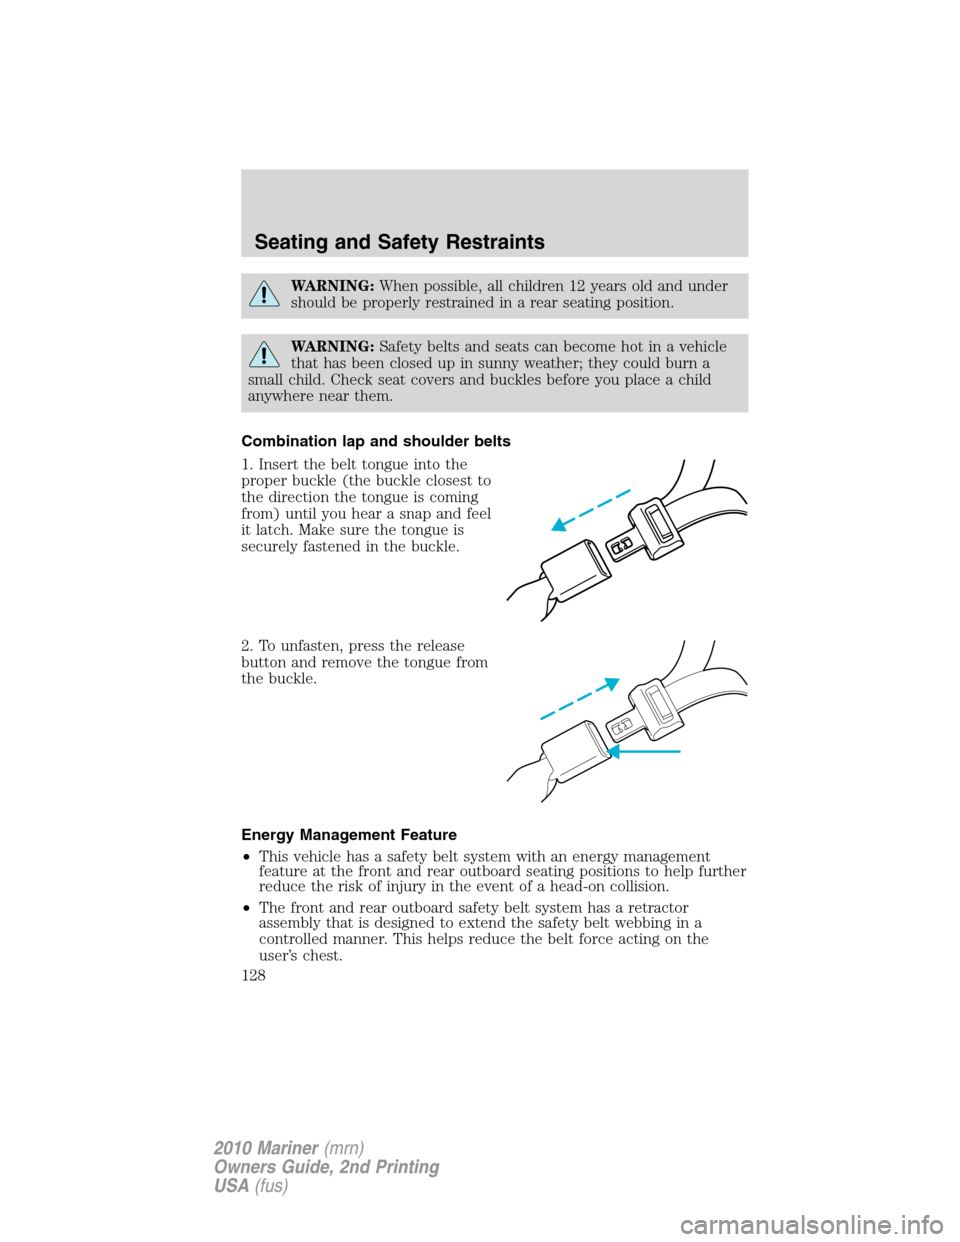
Combination lap and shoulder belts
1. Insert the belt tongue into the
proper buckle (the buckle closest to
the direction the tongue is coming
from) until you hear a snap and feel
it latch. Make sure the tongue is
securely fastened in the buckle.
2. To unfasten, press the release
button and remove the tongue from
the buckle.
Energy Management Feature
•This vehicle has a safety belt system with an energy management
feature at the front and rear outboard seating positions to help further
reduce the risk of injury in the event of a head-on collision.
•The front and rear outboard safety belt system has a retractor
assembly that is designed to extend the safety belt webbing in a
controlled manner. This helps reduce the belt force acting on the
user’s chest.
Seating and Safety Restraints
128
2010 Mariner(mrn)
Owners Guide, 2nd Printing
USA(fus)
Page 129 of 339
All safety belts in the vehicle are combination lap and shoulder belts.
The passenger safety belts have two types of locking modes described
below:
Vehicle sensitive mode
This is the normal retractor mode, which allows free shoulder belt length
adjustment to your movements and locking in response to vehicle
movement. For example, if the driver brakes suddenly or turns a corner
sharply, or the vehicle receives an impact of approximately 5 mph
(8 km/h) or more, the combination safety belts will lock to help reduce
forward movement of the driver and passengers.
Automatic locking mode
When to use the automatic locking mode
In this mode, the shoulder belt is automatically pre-locked. The belt will
still retract to remove any slack in the shoulder belt. The automatic
locking mode is not available on the driver safety belt.
This mode should be usedany timea child safety seat, except a
booster, is installed in passenger front or rear seating positions. Children
12 years old and under should be properly restrained in a rear seating
position whenever possible. Refer toSafety restraints for childrenor
Safety seats for childrenlater in this chapter.
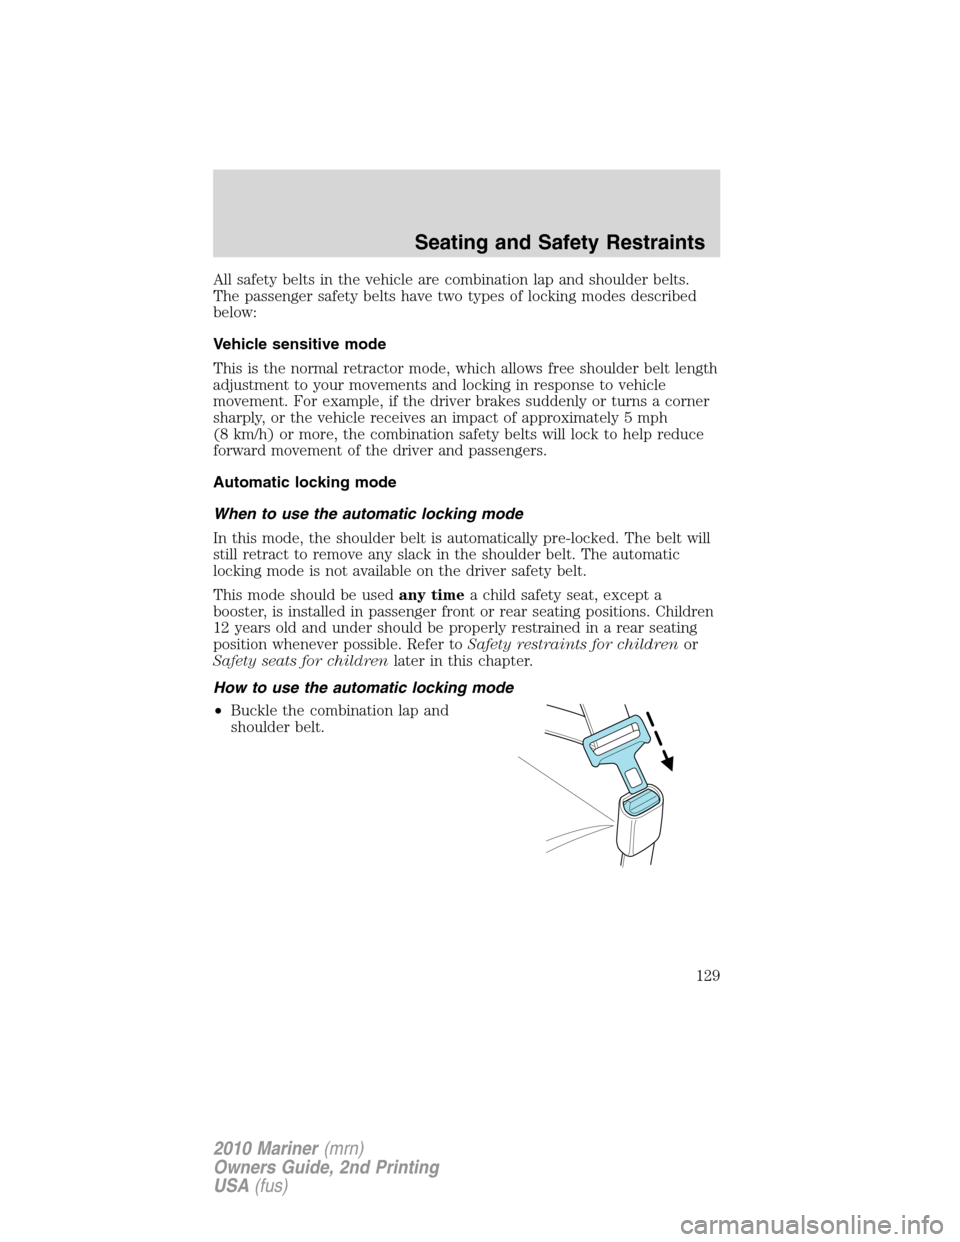
How to use the automatic locking mode
•Buckle the combination lap and
shoulder belt.
Seating and Safety Restraints
129
2010 Mariner(mrn)
Owners Guide, 2nd Printing
USA(fus)
Page 158 of 339

Airbags can kill or injure a child in a child seat. NEVER place a
rear-facing child seat in front of an active airbag. If you must use a
forward-facing child seat in the front seat, move the vehicle seat all the
way back.
Children 12 and under should be properly restrained in a rear seating
position whenever possible. If all children cannot be seated and
restrained properly in a rear seating position, properly restrain the
largest child in the front seat.
Installing child safety seats with combination lap and shoulder
belts
The rear seat head restraints must be removed when using a child
seat that utilizes the top tether anchor.
Check to make sure the child seat is properly secured before each use.
Children 12 and under should be properly restrained in a rear seating
position whenever possible. If all children cannot be seated and
restrained properly in a rear seating position, properly restrain the
largest child in the front seat.
When installing a child safety seat with combination lap/shoulder belts:
•Use the correct safety belt buckle for that seating position.
•Insert the belt tongue into the proper buckle until you hear a snap
and feel it latch. Make sure the tongue is securely fastened in the
buckle.
•Keep the buckle release button pointing up and away from the safety
seat, with the tongue between the child seat and the release button,
to help prevent accidental unbuckling.
•Place vehicle seat back in upright position.
•Put the safety belt in the automatic locking mode. Refer to step 5
below. This vehicle does not require the use of a locking clip.
WARNING:Depending on where you secure a child restraint,
and depending on the child restraint design, you may block
access to certain safety belt buckle assemblies and/or LATCH lower
anchors, rendering those features potentially unusable. To avoid risk of
injury, occupants should only use seating positions where they are able
to be properly restrained.
Seating and Safety Restraints
158
2010 Mariner(mrn)
Owners Guide, 2nd Printing
USA(fus)
Page 161 of 339

8. Remove remaining slack from the
belt. Force the seat down with extra
weight, e.g., by pressing down or
kneeling on the child restraint while
pulling up on the shoulder belt in
order to force slack from the belt.
This is necessary to remove the
remaining slack that will exist once
the additional weight of the child is
added to the child restraint. It also
helps to achieve the proper
snugness of the child seat to the
vehicle. Sometimes, a slight lean
towards the buckle will additionally
help to remove remaining slack from the belt.
9. Attach the tether strap (if the
child seat is equipped). Refer to
Attaching child safety seats with
tether strapslater in this chapter.
10. Before placing the child in the
seat, forcibly move the seat forward
and back to make sure the seat is
securely held in place. To check
this, grab the seat at the belt path
and attempt to move it side to side
and forward and back. There should
be no more than one inch (2.5 cm) of movement for proper installation.
11. Ford recommends checking with a NHTSA Certified Child Passenger
Safety Technician (CPST) to make certain the child restraint is properly
installed. In Canada, check with your local St. John Ambulance office for
referral to a CPST.
Attaching child safety seats with LATCH
(Lower Anchors and Tethers for CHildren) attachments
The LATCH system is composed of three vehicle anchor points: two (2)
lower anchors located where the vehicle seat back and seat cushion meet
(called the “seat bight”) and one (1) top tether anchor located behind
that seating position.
LATCH compatible child safety seats have two rigid or webbing mounted
attachments that connect to the two lower anchors at the LATCH
equipped seating positions in your vehicle. This type of attachment
Seating and Safety Restraints
161
2010 Mariner(mrn)
Owners Guide, 2nd Printing
USA(fus)