light Mercury Mariner 2011 s Repair Manual
[x] Cancel search | Manufacturer: MERCURY, Model Year: 2011, Model line: Mariner, Model: Mercury Mariner 2011Pages: 362, PDF Size: 2.55 MB
Page 150 of 362

The safety canopy is mounted to roof side-rail sheet metal, behind the
headliner, above the first and second row seats. The safety canopy is
designed to inflate between the side window area and occupants to
further enhance protection provided in side impact collisions and rollover
events.
The fact that the safety canopy did not activate in a collision does not
mean that something is wrong with the system. Rather, it means the
forces were not of the type sufficient to cause activation. The safety
canopy is designed to inflate in certain side impact collisions or rollover
events, not in rear impact, frontal or near-frontal collisions, unless the
collision causes sufficient lateral deceleration or rollover likelihood.
WARNING:Several Safety
Canopy System components
get hot after inflation. Do not
touch them after inflation.
WARNING:If the Safety Canopy System has deployed, the
safety canopy will not function again unless replaced. The Safety
Canopy System (including the A, B, C, and D pillar trim and headliner)
must be inspected and serviced by an authorized dealer. If the safety
canopy is not replaced, it will not function again, which will increase
the risk of injury in a future collision.
Determining if the system is operational
The SRS uses a readiness light in the instrument cluster or a tone to
indicate the condition of the system. Refer toWarning lights and
chimesin theInstrument Clusterchapter. Routine maintenance of the
side airbag is not required.
A difficulty with the system is indicated by one or more of the following:
•The readiness light (same light as for front airbag system) will either
flash or stay lit.
•The readiness light will not illuminate immediately after ignition is
turned on.
•A series of five beeps will be heard. The tone pattern will repeat
periodically until the problem and/or light are repaired.
Seating and Safety Restraints
150
2011 Mariner(mrn)
Owners Guide, 1st Printing
USA(fus)
Page 160 of 362

8. Remove remaining slack from the
belt. Force the seat down with extra
weight, e.g., by pressing down or
kneeling on the child restraint while
pulling up on the shoulder belt in
order to force slack from the belt.
This is necessary to remove the
remaining slack that will exist once
the additional weight of the child is
added to the child restraint. It also
helps to achieve the proper
snugness of the child seat to the
vehicle. Sometimes, a slight lean
towards the buckle will additionally
help to remove remaining slack from the belt.
9. Attach the tether strap (if the
child seat is equipped). Refer to
Attaching child safety seats with
tether strapslater in this chapter.
10. Before placing the child in the
seat, forcibly move the seat forward
and back to make sure the seat is
securely held in place. To check
this, grab the seat at the belt path
and attempt to move it side to side
and forward and back. There should
be no more than 1 inch (2.5 cm) of movement for proper installation.
11. Ford recommends checking with a NHTSA Certified Child Passenger
Safety Technician (CPST) to make certain the child restraint is properly
installed. In Canada, check with your local St. John Ambulance office for
referral to a CPST.
Attaching child safety seats with LATCH (Lower Anchors and
Tethers for CHildren) attachments
The LATCH system is composed of three vehicle anchor points: two (2)
lower anchors located where the vehicle seat back and seat cushion meet
(called the “seat bight”) and one (1) top tether anchor located behind
that seating position.
LATCH compatible child safety seats have two rigid or webbing mounted
attachments that connect to the two lower anchors at the LATCH
equipped seating positions in your vehicle. This type of attachment
Seating and Safety Restraints
160
2011 Mariner(mrn)
Owners Guide, 1st Printing
USA(fus)
Page 171 of 362

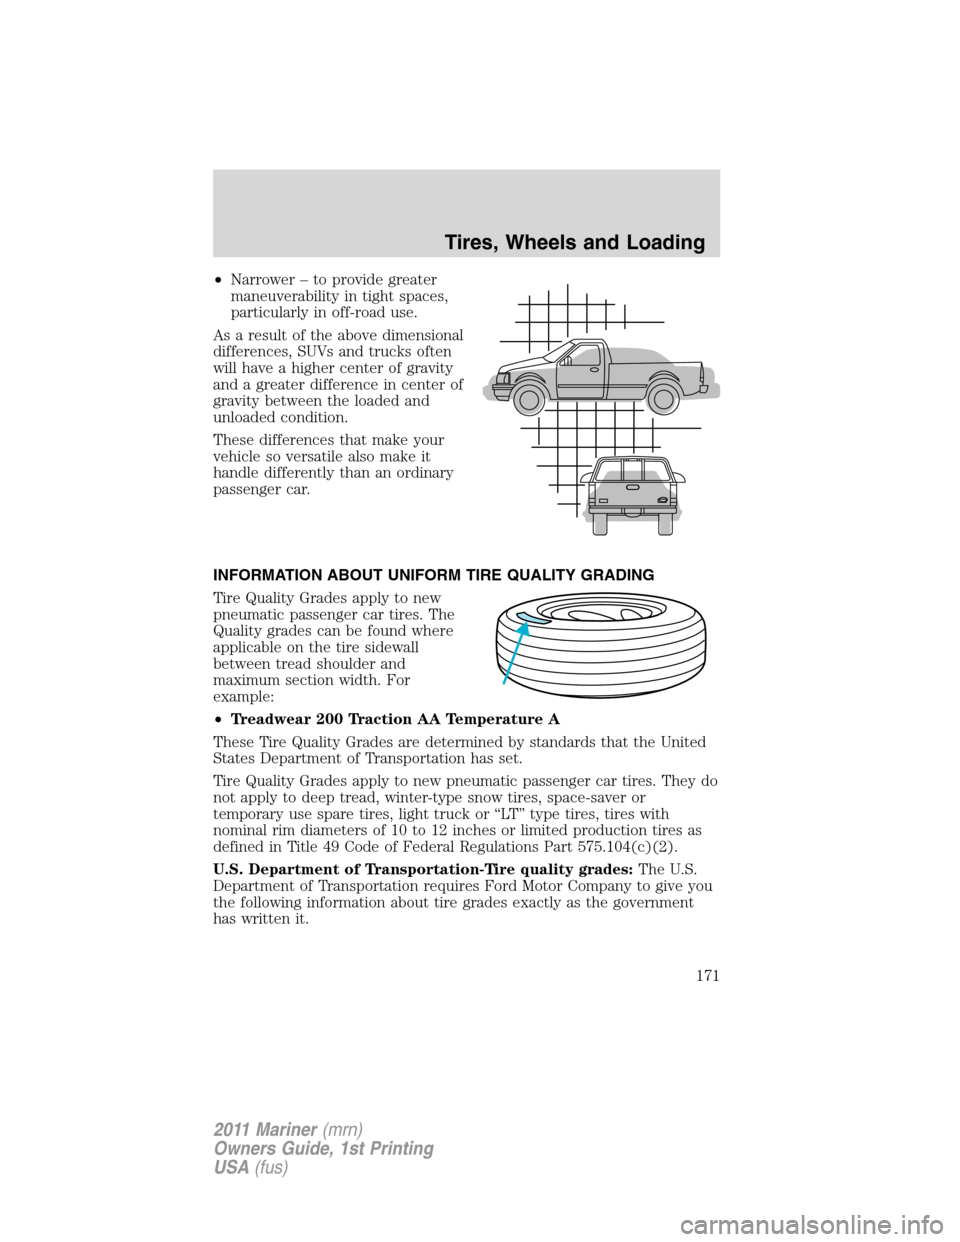
•Narrower – to provide greater
maneuverability in tight spaces,
particularly in off-road use.
As a result of the above dimensional
differences, SUVs and trucks often
will have a higher center of gravity
and a greater difference in center of
gravity between the loaded and
unloaded condition.
These differences that make your
vehicle so versatile also make it
handle differently than an ordinary
passenger car.
INFORMATION ABOUT UNIFORM TIRE QUALITY GRADING
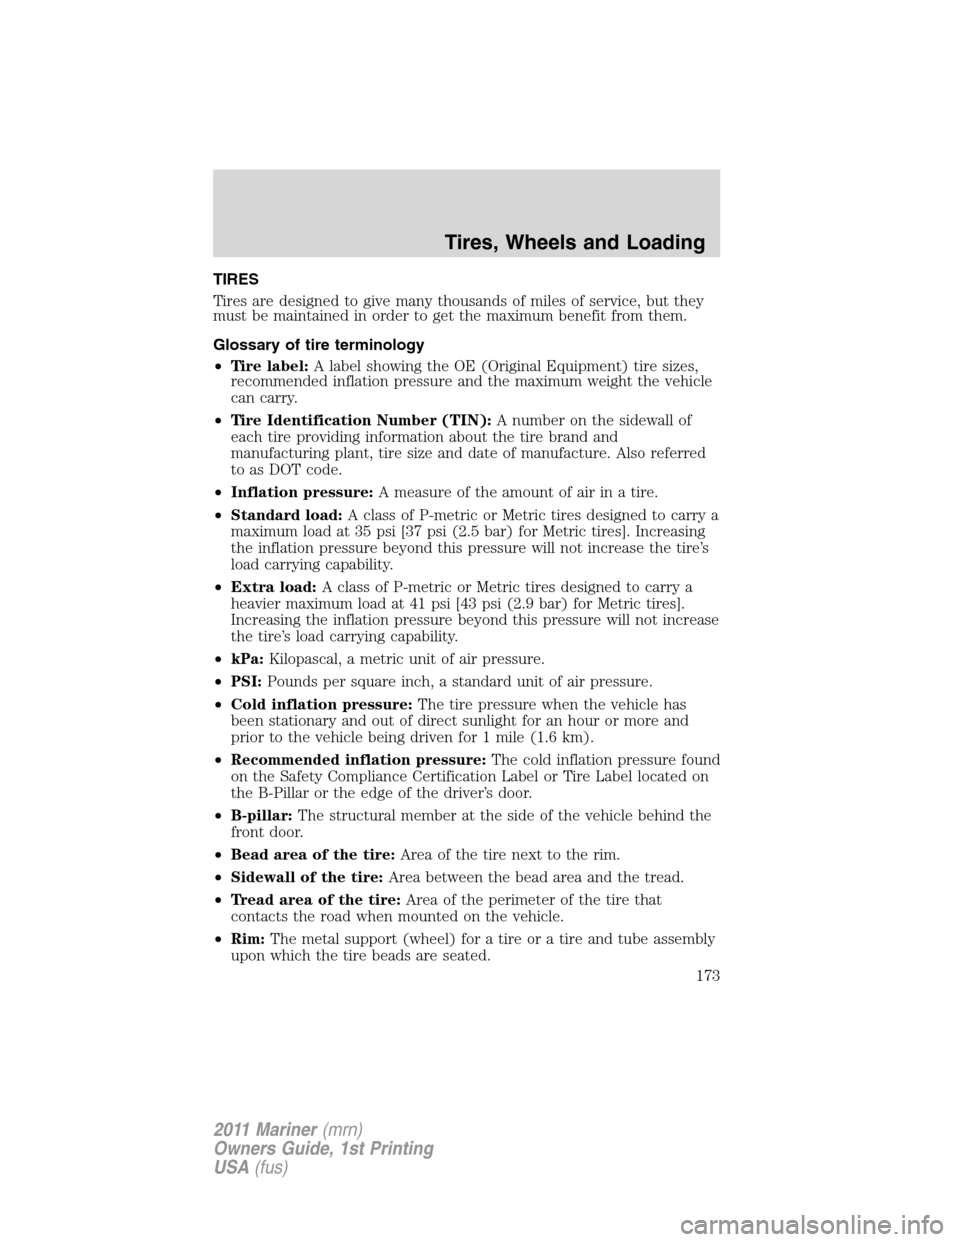
Tire Quality Grades apply to new
pneumatic passenger car tires. The
Quality grades can be found where
applicable on the tire sidewall
between tread shoulder and
maximum section width. For
example:
•Treadwear 200 Traction AA Temperature A
These Tire Quality Grades are determined by standards that the United
States Department of Transportation has set.
Tire Quality Grades apply to new pneumatic passenger car tires. They do
not apply to deep tread, winter-type snow tires, space-saver or
temporary use spare tires, light truck or “LT” type tires, tires with
nominal rim diameters of 10 to 12 inches or limited production tires as
defined in Title 49 Code of Federal Regulations Part 575.104(c)(2).
U.S. Department of Transportation-Tire quality grades:The U.S.
Department of Transportation requires Ford Motor Company to give you
the following information about tire grades exactly as the government
has written it.
Tires, Wheels and Loading
171
2011 Mariner(mrn)
Owners Guide, 1st Printing
USA(fus)
Page 173 of 362

TIRES
Tires are designed to give many thousands of miles of service, but they
must be maintained in order to get the maximum benefit from them.
Glossary of tire terminology
•Tire label:A label showing the OE (Original Equipment) tire sizes,
recommended inflation pressure and the maximum weight the vehicle
can carry.
•Tire Identification Number (TIN):A number on the sidewall of
each tire providing information about the tire brand and
manufacturing plant, tire size and date of manufacture. Also referred
to as DOT code.
•Inflation pressure:A measure of the amount of air in a tire.
•Standard load:A class of P-metric or Metric tires designed to carry a
maximum load at 35 psi [37 psi (2.5 bar) for Metric tires]. Increasing
the inflation pressure beyond this pressure will not increase the tire’s
load carrying capability.
•Extra load:A class of P-metric or Metric tires designed to carry a
heavier maximum load at 41 psi [43 psi (2.9 bar) for Metric tires].
Increasing the inflation pressure beyond this pressure will not increase
the tire’s load carrying capability.
•kPa:Kilopascal, a metric unit of air pressure.
•PSI:Pounds per square inch, a standard unit of air pressure.
•Cold inflation pressure:The tire pressure when the vehicle has
been stationary and out of direct sunlight for an hour or more and
prior to the vehicle being driven for 1 mile (1.6 km).
•Recommended inflation pressure:The cold inflation pressure found
on the Safety Compliance Certification Label or Tire Label located on
the B-Pillar or the edge of the driver’s door.
•B-pillar:The structural member at the side of the vehicle behind the
front door.
•Bead area of the tire:Area of the tire next to the rim.
•Sidewall of the tire:Area between the bead area and the tread.
•Tread area of the tire:Area of the perimeter of the tire that
contacts the road when mounted on the vehicle.
•Rim:The metal support (wheel) for a tire or a tire and tube assembly
upon which the tire beads are seated.
Tires, Wheels and Loading
173
2011 Mariner(mrn)
Owners Guide, 1st Printing
USA(fus)
Page 182 of 362

Information on “P” type tires
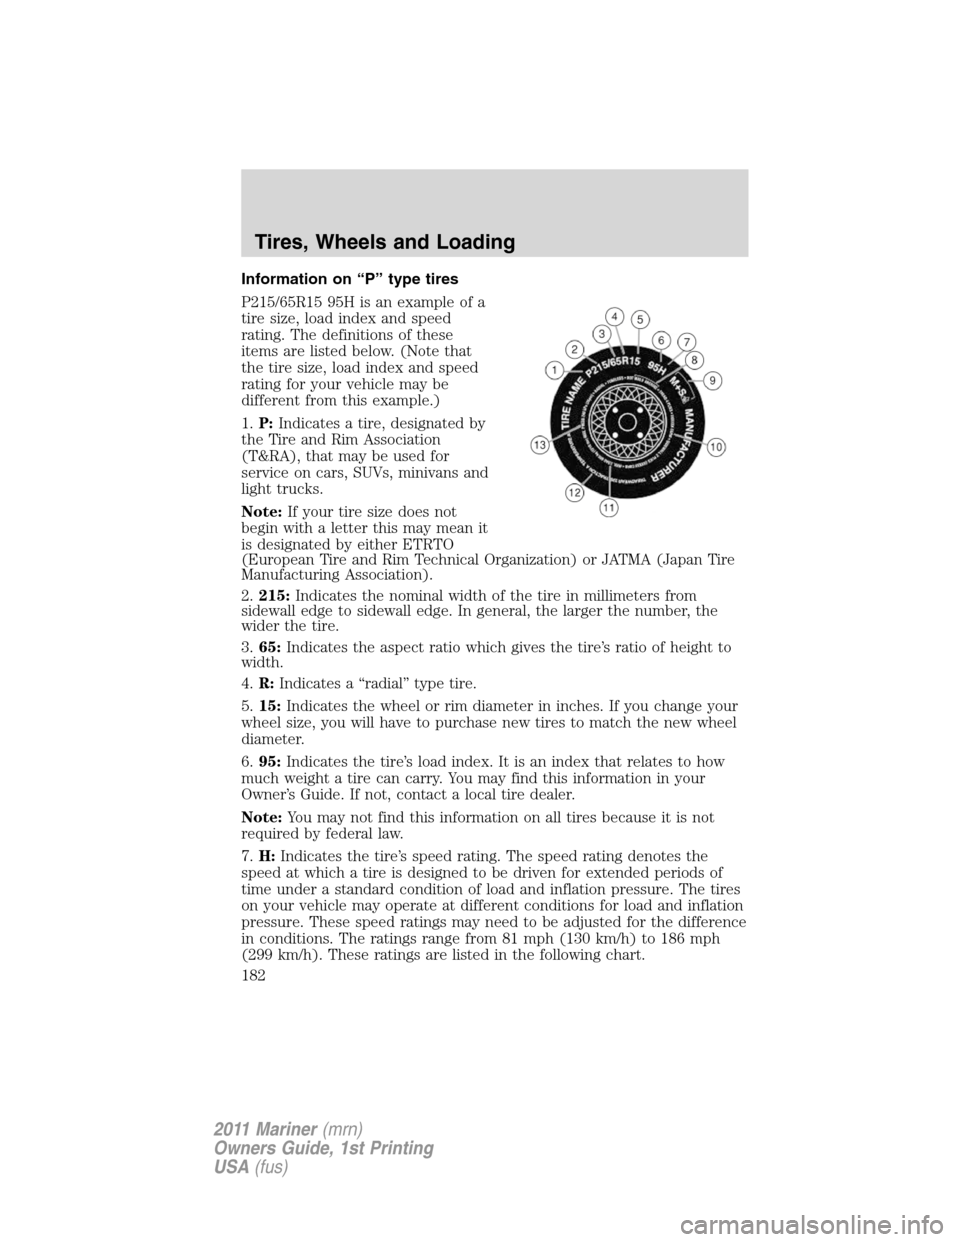
P215/65R15 95H is an example of a
tire size, load index and speed
rating. The definitions of these
items are listed below. (Note that
the tire size, load index and speed
rating for your vehicle may be
different from this example.)
1.P:Indicates a tire, designated by
the Tire and Rim Association
(T&RA), that may be used for
service on cars, SUVs, minivans and
light trucks.
Note:If your tire size does not
begin with a letter this may mean it
is designated by either ETRTO
(European Tire and Rim Technical Organization) or JATMA (Japan Tire
Manufacturing Association).
2.215:Indicates the nominal width of the tire in millimeters from
sidewall edge to sidewall edge. In general, the larger the number, the
wider the tire.
3.65:Indicates the aspect ratio which gives the tire’s ratio of height to
width.
4.R:Indicates a “radial” type tire.
5.15:Indicates the wheel or rim diameter in inches. If you change your
wheel size, you will have to purchase new tires to match the new wheel
diameter.
6.95:Indicates the tire’s load index. It is an index that relates to how
much weight a tire can carry. You may find this information in your
Owner’s Guide. If not, contact a local tire dealer.
Note:You may not find this information on all tires because it is not
required by federal law.
7.H:Indicates the tire’s speed rating. The speed rating denotes the
speed at which a tire is designed to be driven for extended periods of
time under a standard condition of load and inflation pressure. The tires
on your vehicle may operate at different conditions for load and inflation
pressure. These speed ratings may need to be adjusted for the difference
in conditions. The ratings range from 81 mph (130 km/h) to 186 mph
(299 km/h). These ratings are listed in the following chart.
Tires, Wheels and Loading
182
2011 Mariner(mrn)
Owners Guide, 1st Printing
USA(fus)
Page 185 of 362

Additional information contained on the tire sidewall for “LT” type
tires
“LT” type tires have some additional
information beyond those of “P”
type tires; these differences are
described below.
Note:Tire Quality Grades do not
apply to this type of tire.
1.LT:Indicates a tire, designated by
the Tire and Rim Association
(T&RA), that is intended for service
on light trucks.
2.Load Range/Load Inflation
Limits:Indicates the tire’s
load-carrying capabilities and its
inflation limits.
3.Maximum Load Dual lb (kg) at psi (kPa) cold:Indicates the
maximum load and tire pressure when the tire is used as a dual; defined
as four tires on the rear axle (a total of six or more tires on the vehicle).
4.Maximum Load Single lb (kg) at psi (kPa) cold:Indicates the
maximum load and tire pressure when the tire is used as a single;
defined as two tires (total) on the rear axle.
Tires, Wheels and Loading
185
2011 Mariner(mrn)
Owners Guide, 1st Printing
USA(fus)
Page 186 of 362

Information on “T” type tires
“T” type tires have some additional
information beyond those of “P”
type tires; these differences are
described below:
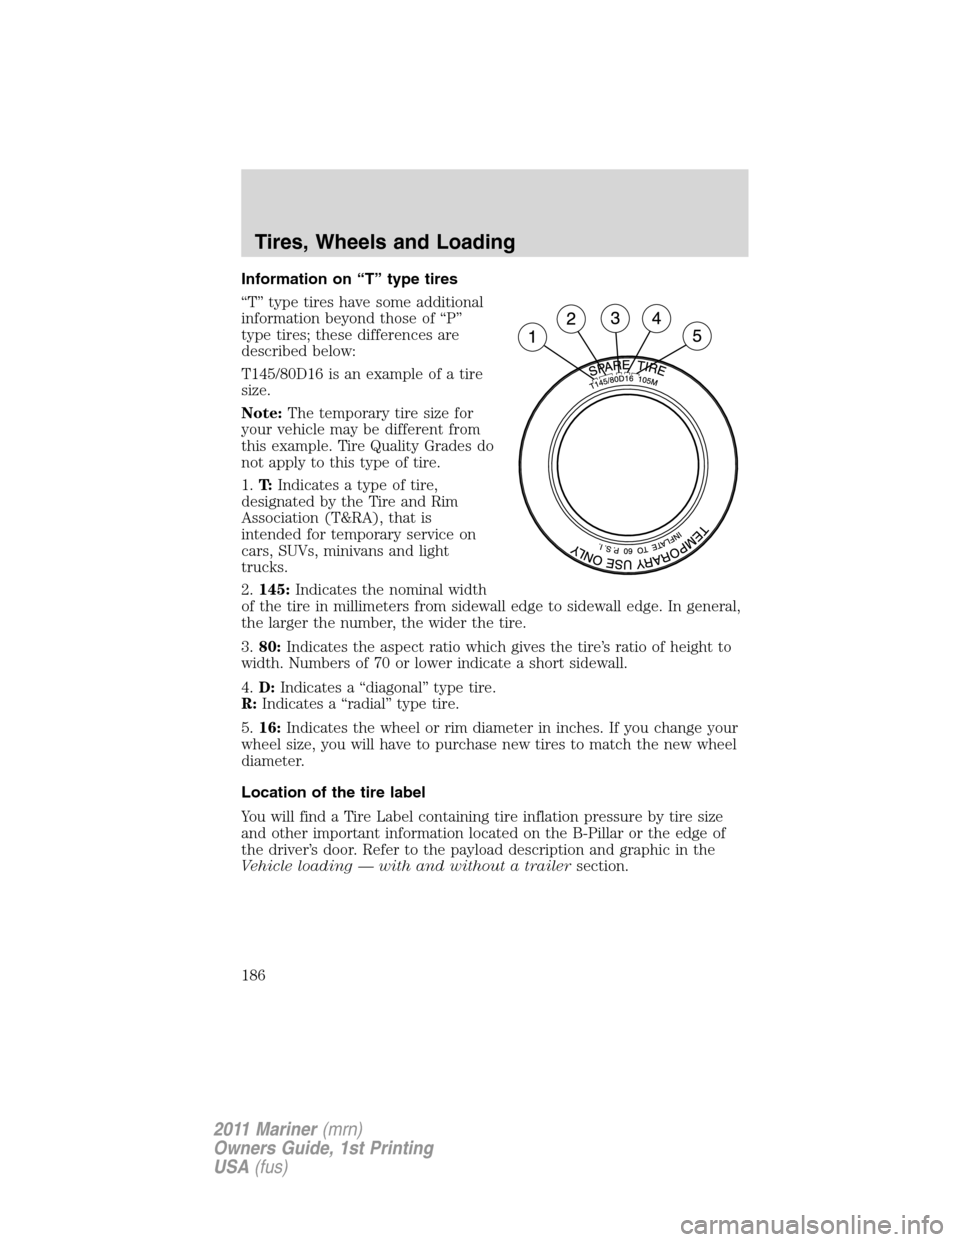
T145/80D16 is an example of a tire
size.
Note:The temporary tire size for
your vehicle may be different from
this example. Tire Quality Grades do
not apply to this type of tire.
1.T:Indicates a type of tire,
designated by the Tire and Rim
Association (T&RA), that is
intended for temporary service on
cars, SUVs, minivans and light
trucks.
2.145:Indicates the nominal width
of the tire in millimeters from sidewall edge to sidewall edge. In general,
the larger the number, the wider the tire.
3.80:Indicates the aspect ratio which gives the tire’s ratio of height to
width. Numbers of 70 or lower indicate a short sidewall.
4.D:Indicates a “diagonal” type tire.
R:Indicates a “radial” type tire.
5.16:Indicates the wheel or rim diameter in inches. If you change your
wheel size, you will have to purchase new tires to match the new wheel
diameter.
Location of the tire label
You will find a Tire Label containing tire inflation pressure by tire size
and other important information located on the B-Pillar or the edge of
the driver’s door. Refer to the payload description and graphic in the
Vehicle loading — with and without a trailersection.
Tires, Wheels and Loading
186
2011 Mariner(mrn)
Owners Guide, 1st Printing
USA(fus)
Page 188 of 362

following two conditions: (1) This device may not cause harmful
interference, and (2) This device must accept any interference received,
including interference that may cause undesired operation.
WARNING:The tire pressure monitoring system is NOT a
substitute for manually checking tire pressure. The tire pressure
should be checked periodically (at least monthly) using a tire gauge,
seeInflating your tiresin this chapter. Failure to properly maintain
your tire pressure could increase the risk of tire failure, loss of control,
vehicle rollover and personal injury.
Changing tires with TPMS
Each road tire is equipped with
a tire pressure sensor located
inside the tire/wheel cavity. The
pressure sensor is attached to
the valve stem. The pressure
sensor is covered by the tire and
is not visible unless the tire is
removed. Care must be taken
when changing the tire to avoid
damaging the sensor.It is
recommended that you always have
your tires serviced by an authorized dealer.
The tire pressure should be checked periodically (at least monthly) using
an accurate tire gauge, refer toInflating your tiresin this chapter.
Understanding your tire pressure monitoring system (TPMS)
The tire pressure monitoring system measures pressure in your four road
tires and sends the tire pressure readings to your vehicle. The low tire
pressure warning lamp will turn on if the tire pressure is significantly
low. Once the light is illuminated, your tires are under inflated and need
to be inflated to the manufacturer’s recommended tire pressure. Even if
the light turns on and a short time later turns off, your tire pressure still
needs to be checked. Visit www.checkmytires.org for additional
information.
When your temporary spare tire is installed
When one of your road tires needs to be replaced with the temporary
spare, the TPMS system will continue to identify an issue to remind you
that the damaged road wheel/tire needs to be repaired and put back on
your vehicle.
Tires, Wheels and Loading
188
2011 Mariner(mrn)
Owners Guide, 1st Printing
USA(fus)
Page 190 of 362

Low tire pressure
warning lightPossible cause Customer action required
Solid warning light Tire(s)
under-inflated1. Check your tire pressure to
ensure tires are properly
inflated; refer toInflating
your tiresin this chapter.
2. After inflating your tires to
the manufacturer’s
recommended inflation
pressure as shown on the Tire
Label (located on the edge of
driver’s door or the B-Pillar),
the vehicle must be driven for
at least two minutes over
20 mph (32 km/h) before the
light will turn off.
Spare tire in use Your temporary spare tire is in
use. Repair the damaged road
wheel/tire and reinstall it on
the vehicle to restore system
functionality. For a description
on how the system functions,
refer toWhen your temporary
spare tire is installedin this
section.
TPMS
malfunctionIf your tires are properly
inflated and your spare tire is
not in use and the light
remains on, contact your
authorized dealer as soon as
possible.
Tires, Wheels and Loading
190
2011 Mariner(mrn)
Owners Guide, 1st Printing
USA(fus)
Page 191 of 362

Low tire pressure
warning lightPossible cause Customer action required
Flashing warning
lightSpare tire in use Your temporary spare tire is in
use. Repair the damaged road
wheel and re-mount it on the
vehicle to restore system
functionality. For a description
of how the system functions
under these conditions, refer to
When your temporary spare
tire is installedin this section.
TPMS
malfunctionIf your tires are properly
inflated and your spare tire is
not in use and the TPMS
warning light still flashes,
contact your authorized dealer
as soon as possible.
When inflating your tires
When putting air into your tires (such as at a gas station or in your
garage), the tire pressure monitoring system may not respond
immediately to the air added to your tires.
It may take up to two minutes of driving over 20 mph (32 km/h) for the
light to turn off after you have filled your tires to the recommended
inflation pressure.
How temperature affects your tire pressure
The tire pressure monitoring system (TPMS) monitors tire pressure in
each pneumatic tire. While driving in a normal manner, a typical
passenger tire inflation pressure may increase approximately 2 to 4 psi
(14 to 28 kPa) from a cold start situation. If the vehicle is stationary
over night with the outside temperature significantly lower than the
daytime temperature, the tire pressure may decrease approximately 3 psi
(21 kPa) for a drop of 30°F (17°C) in ambient temperature. This lower
pressure value may be detected by the TPMS as being significantly lower
than the recommended inflation pressure and activate the TPMS warning
for low tire pressure. If the low tire pressure warning light is on, visually
check each tire to verify that no tire is flat. (If one or more tires are flat,
repair as necessary.) Check air pressure in the road tires. If any tire is
Tires, Wheels and Loading
191
2011 Mariner(mrn)
Owners Guide, 1st Printing
USA(fus)