ECU Mercury Mariner Hybrid 2007 s Owner's Guide
[x] Cancel search | Manufacturer: MERCURY, Model Year: 2007, Model line: Mariner Hybrid, Model: Mercury Mariner Hybrid 2007Pages: 336, PDF Size: 2.89 MB
Page 160 of 336
Never use pillows, books, or towels to boost a child. They can
slide around and increase the likelihood of injury or death in a
collision.
SAFETY SEATS FOR CHILDREN
Child and infant or child safety seats
Use a safety seat that is recommended for the size and weight of the
child. Carefully follow all of the manufacturer’s instructions with the
safety seat you put in your vehicle. If you do not install and use the
safety seat properly, the child may be injured in a sudden stop or
collision.
When installing a child safety seat:
•Review and follow the information
presented in theairbag
supplemental restraint system
(SRS) section in this chapter.
•Use the correct safety belt buckle
for that seating position (the
buckle closest to the direction the
tongue is coming from).
•Insert the belt tongue into the
proper buckle until you hear a
snap and feel it latch. Make sure the tongue is securely fastened in the
buckle.
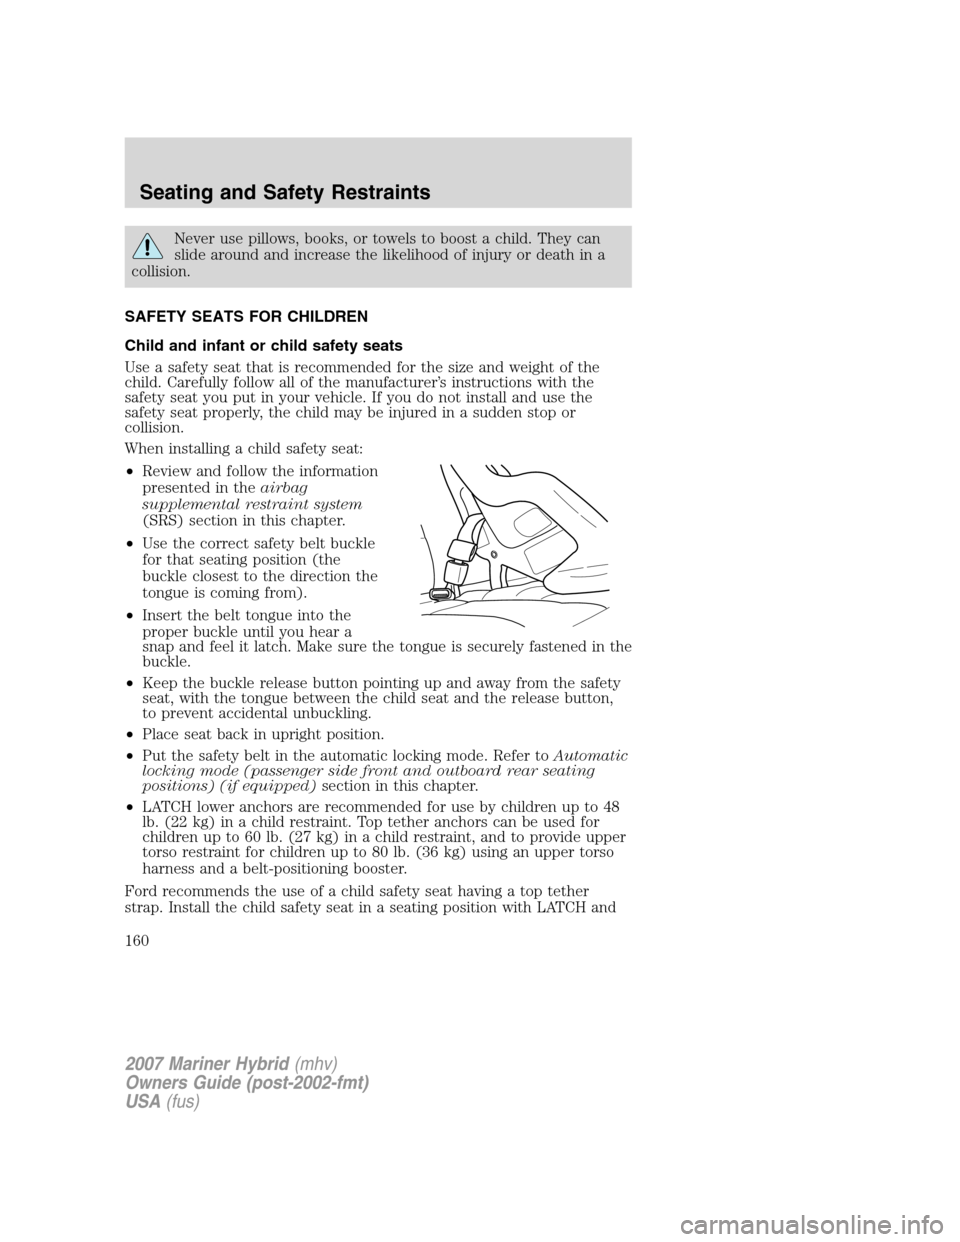
•Keep the buckle release button pointing up and away from the safety
seat, with the tongue between the child seat and the release button,
to prevent accidental unbuckling.
•Place seat back in upright position.
•Put the safety belt in the automatic locking mode. Refer toAutomatic
locking mode (passenger side front and outboard rear seating
positions) (if equipped)section in this chapter.
•LATCH lower anchors are recommended for use by children up to 48
lb. (22 kg) in a child restraint. Top tether anchors can be used for
children up to 60 lb. (27 kg) in a child restraint, and to provide upper
torso restraint for children up to 80 lb. (36 kg) using an upper torso
harness and a belt-positioning booster.
Ford recommends the use of a child safety seat having a top tether
strap. Install the child safety seat in a seating position with LATCH and
2007 Mariner Hybrid(mhv)
Owners Guide (post-2002-fmt)
USA(fus)
Seating and Safety Restraints
160
Page 162 of 336
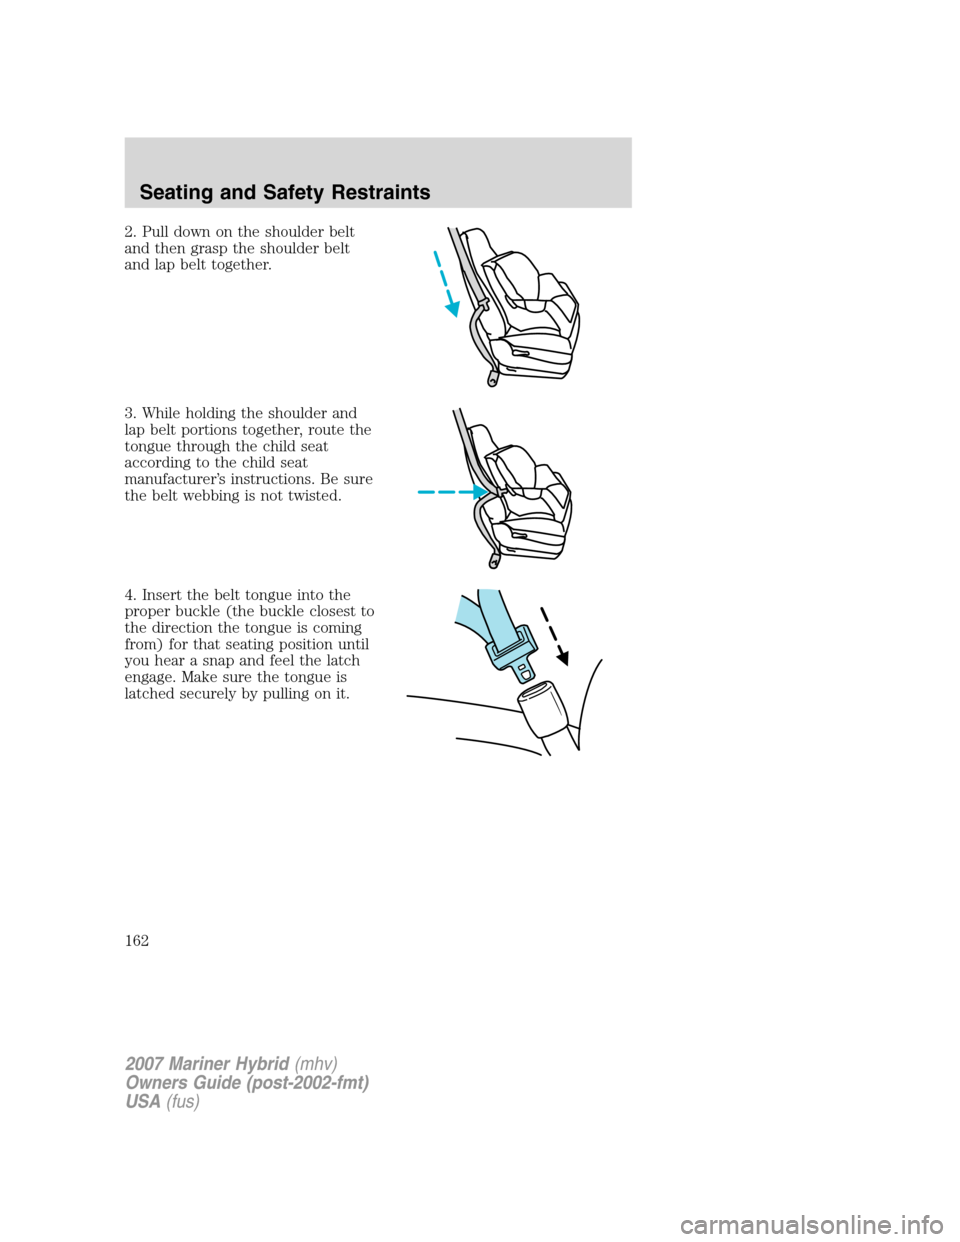
2. Pull down on the shoulder belt
and then grasp the shoulder belt
and lap belt together.
3. While holding the shoulder and
lap belt portions together, route the
tongue through the child seat
according to the child seat
manufacturer’s instructions. Be sure
the belt webbing is not twisted.
4. Insert the belt tongue into the
proper buckle (the buckle closest to
the direction the tongue is coming
from) for that seating position until
you hear a snap and feel the latch
engage. Make sure the tongue is
latched securely by pulling on it.
2007 Mariner Hybrid(mhv)
Owners Guide (post-2002-fmt)
USA(fus)
Seating and Safety Restraints
162
Page 163 of 336
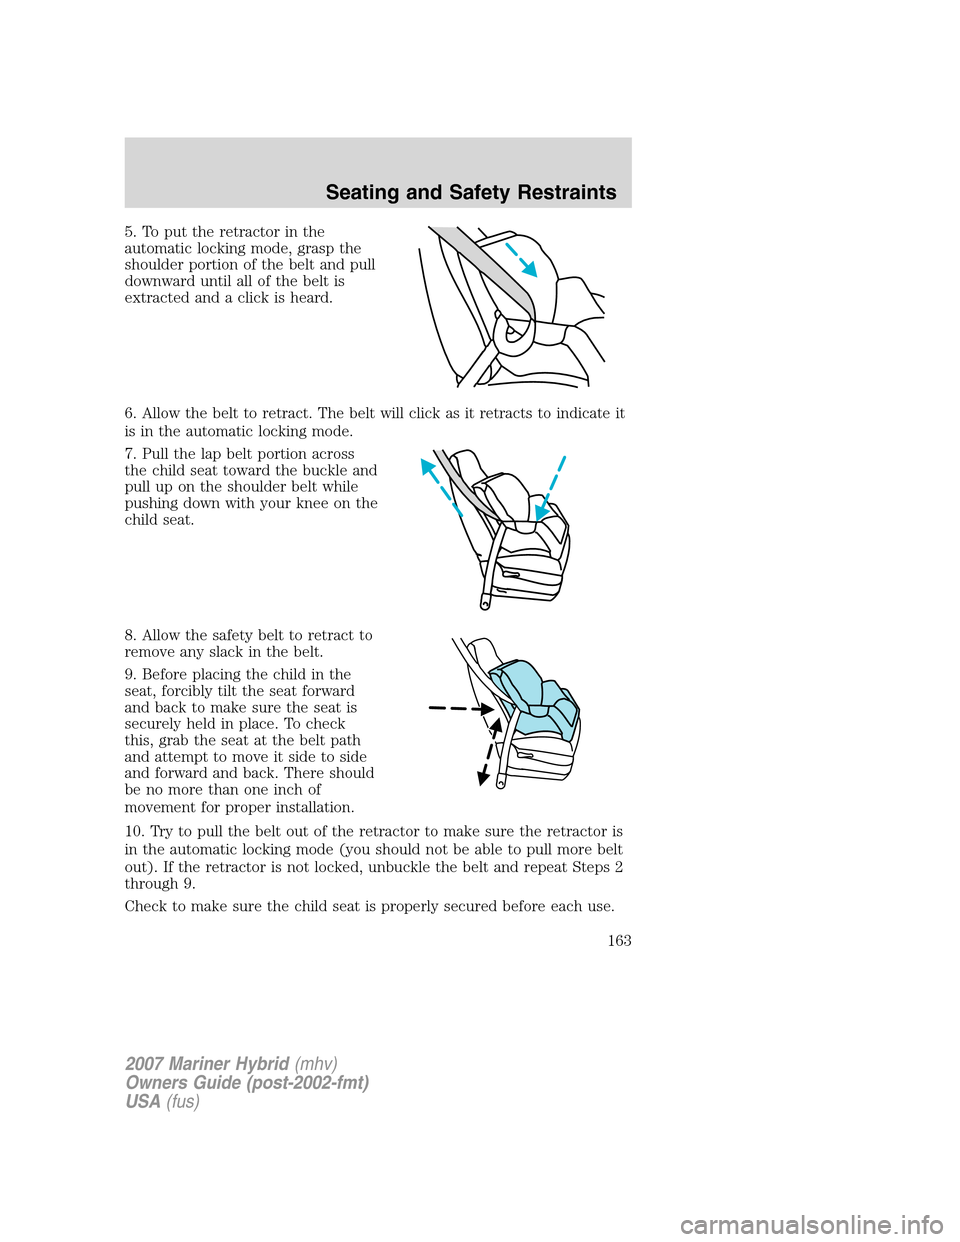
5. To put the retractor in the
automatic locking mode, grasp the
shoulder portion of the belt and pull
downward until all of the belt is
extracted and a click is heard.
6. Allow the belt to retract. The belt will click as it retracts to indicate it
is in the automatic locking mode.
7. Pull the lap belt portion across
the child seat toward the buckle and
pull up on the shoulder belt while
pushing down with your knee on the
child seat.
8. Allow the safety belt to retract to
remove any slack in the belt.
9. Before placing the child in the
seat, forcibly tilt the seat forward
and back to make sure the seat is
securely held in place. To check
this, grab the seat at the belt path
and attempt to move it side to side
and forward and back. There should
be no more than one inch of
movement for proper installation.
10. Try to pull the belt out of the retractor to make sure the retractor is
in the automatic locking mode (you should not be able to pull more belt
out). If the retractor is not locked, unbuckle the belt and repeat Steps 2
through 9.
Check to make sure the child seat is properly secured before each use.
2007 Mariner Hybrid(mhv)
Owners Guide (post-2002-fmt)
USA(fus)
Seating and Safety Restraints
163
Page 188 of 336
any tire is under-inflated, carefully drive the vehicle to the nearest
location where air can be added to the tires. Inflate all the tires to the
recommended inflation pressure.
USING SNOW TIRES AND TRACTION DEVICES
Snow tires must be the same size and grade as the tires you
currently have on your vehicle.
The tires on your vehicle have all-weather treads to provide traction in
rain and snow. However, in some climates, using snow tires or traction
devices may be necessary.
Follow these guidelines when using snow tires and traction devices:
•SAE class “S” cables should ONLY be used on the front axle for
P235/70R16 tires.
•Install cables or chains securely, verifying that the cables or chains do
not touch any wiring, brake lines or fuel lines.
•Drive cautiously. If you hear the cables or chains rub or bang against
the vehicle, stop and retighten them. If this does not work, remove the
cables or chains to prevent vehicle damage.
•Avoid overloading your vehicle.
•Remove the cables or chains when they are no longer needed.
•Do not use cables or chains on dry roads.
•Do not exceed 30 mph (48 km/h) with tire cables or chains on your
vehicle.
Consult your authorized dealer for information on other Ford Motor
Company approved methods of traction control.
VEHICLE LOADING – WITH AND WITHOUT A TRAILER
This section will guide you in the proper loading of your vehicle and/or
trailer, to keep your loaded vehicle weight within its design rating
capability, with or without a trailer. Properly loading your vehicle will
provide maximum return of vehicle design performance. Before loading
your vehicle, familiarize yourself with the following terms for determining
your vehicle’s weight ratings, with or without a trailer, from the vehicle’s
Tire Label or Safety Compliance Certification Label:
Base Curb Weight– is the weight of the vehicle including a full tank of
fuel and all standard equipment. It does not include passengers, cargo, or
optional equipment.
2007 Mariner Hybrid(mhv)
Owners Guide (post-2002-fmt)
USA(fus)
Tires, Wheels and Loading
188
Page 204 of 336
motion back into the battery to improve fuel economy. The standard
brake system is designed to fully stop the car if regenerative braking is
not available. During regenerative braking, the motor is spun as a
generator to create electrical current. This recharges the high voltage
battery and slows the vehicle. In effect, once the accelerator pedal is
released, the motor changes from an energy user to an energy producer.
When the accelerator pedal is released or the brake pedal is applied, the
brake controller automatically detects the amount of deceleration
requested and optimizes how much of the deceleration will be produced
by regenerative braking. The remaining portion is generated by standard
friction braking. When the battery is almost fully charged, the amount of
regenerative braking is limited to avoid overcharging, and the requested
deceleration is produced by standard friction braking alone.
Regenerative braking does not take the place of the standard friction
brakes; it only assists them. Regenerative braking has also been designed
to interact with the anti-lock brake system (ABS). Regenerative braking
is disabled when the ABS is activated or the battery is fully charged.
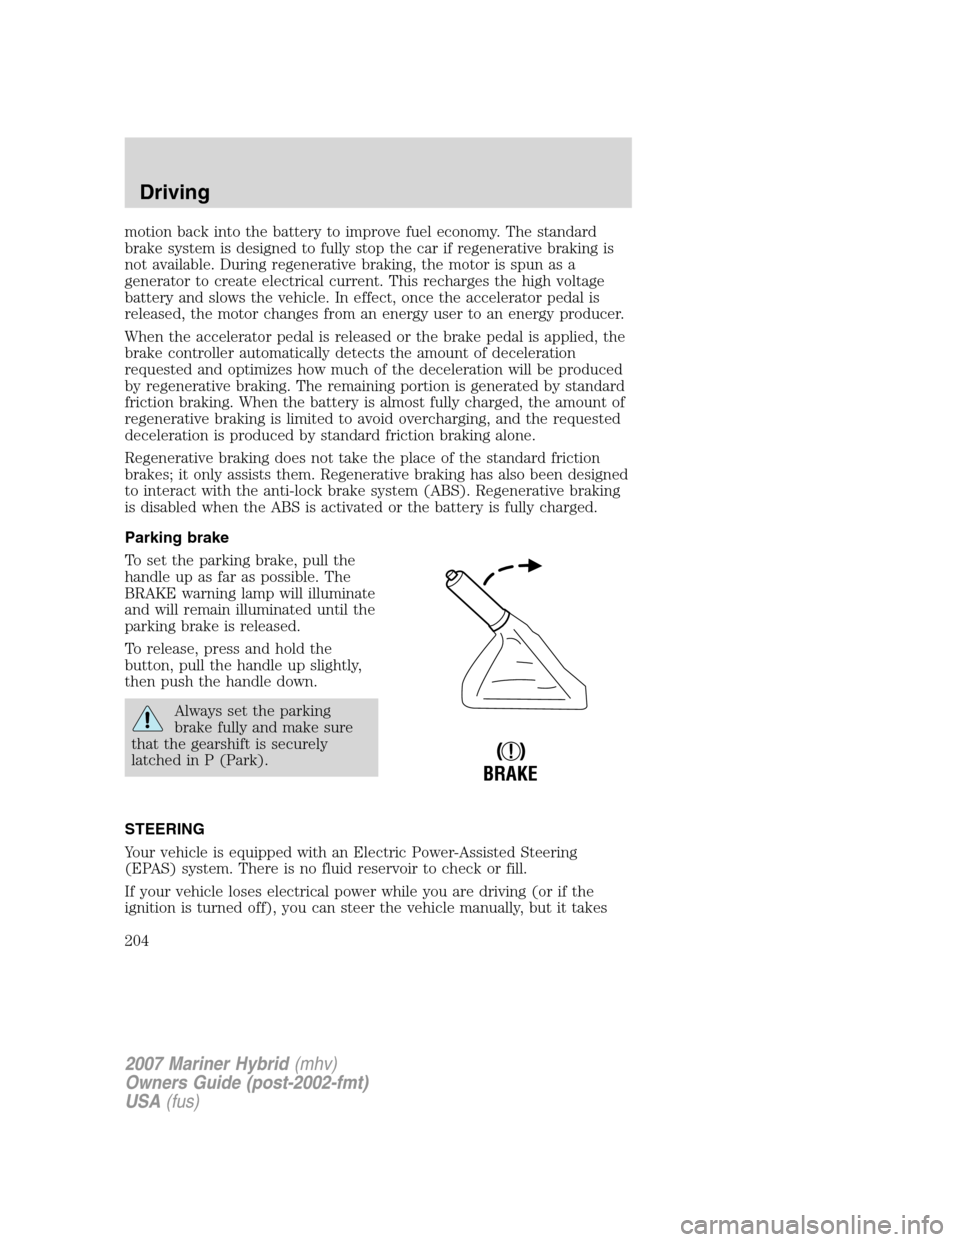
Parking brake
To set the parking brake, pull the
handle up as far as possible. The
BRAKE warning lamp will illuminate
and will remain illuminated until the
parking brake is released.
To release, press and hold the
button, pull the handle up slightly,
then push the handle down.
Always set the parking
brake fully and make sure
that the gearshift is securely
latched in P (Park).
STEERING
Your vehicle is equipped with an Electric Power-Assisted Steering
(EPAS) system. There is no fluid reservoir to check or fill.
If your vehicle loses electrical power while you are driving (or if the
ignition is turned off), you can steer the vehicle manually, but it takes
!
BRAKE
2007 Mariner Hybrid(mhv)
Owners Guide (post-2002-fmt)
USA(fus)
Driving
204
Page 207 of 336

Always set the parking brake fully and make sure the gearshift is
latched in P (Park). Turn the ignition to the LOCK position and
remove the key whenever you leave your vehicle.
If the parking brake is fully released, but the brake warning lamp
remains illuminated, the brakes may not be working properly.
See your authorized dealer as soon as possible.
Understanding the gearshift positions of the
electronically-controlled Continuously Variable Transaxle (eCVT)
P (Park)
This position locks the transaxle and prevents the front wheels from
turning.
To put your vehicle in gear:
•Start the engine
•Release the parking brake
•Depress the brake pedal
•Move the gearshift lever into the desired gear
To put your vehicle in P (Park):
•Come to a complete stop
•Move the gearshift lever and securely latch it in P (Park)
Always set the parking brake fully and make sure the gearshift is
latched in P (Park). Turn the ignition to the LOCK position and
remove the key whenever you leave your vehicle.
2007 Mariner Hybrid(mhv)
Owners Guide (post-2002-fmt)
USA(fus)
Driving
207
Page 208 of 336

R (Reverse)
With the gearshift lever in R (Reverse), the vehicle will move backward.
Always come to a complete stop before shifting into and out of R
(Reverse).
N (Neutral)
With the gearshift lever in N (Neutral), the vehicle is free to roll; hold
the brake pedal down while in this position. Because of the unique
nature of the hybrid vehicle, the engine will not start in the N (Neutral)
position.
The vehicle does not charge the high voltage battery in the N (Neutral)
position. Do not idle the vehicle in N (Neutral) for extended periods as
this will discharge your high voltage battery.
D (Drive)
The normal driving position for the best fuel economy.
L (Low)
•Provides maximum engine braking.
•The transmission may be shifted into L (Low) at any vehicle speed.
When parking, do not use the gearshift in place of the parking
brake. Always set the parking brake fully and make sure that the
gearshift is securely latched in P (Park). Turn off the ignition
whenever you leave your vehicle. Never leave your vehicle unattended
while it is running. If you do not take these precautions, your vehicle
may move unexpectedly and injure someone.
If your vehicle gets stuck in mud or snow
If your vehicle gets stuck in mud or snow, it may be rocked out by
shifting between forward and reverse gears, stopping between shifts in a
steady pattern. Press lightly on the accelerator in each gear.
Do not rock the vehicle if the engine is not at normal operating
temperature or damage to the transmission may occur.
Do not rock the vehicle for more than a minute or damage to the
transmission and tires may occur, or the engine may overheat.
REVERSE SENSING SYSTEM (IF EQUIPPED)
The Reverse Sensing System (RSS) sounds a tone to warn the driver of
obstacles near the rear bumper when R (Reverse) is selected and the
2007 Mariner Hybrid(mhv)
Owners Guide (post-2002-fmt)
USA(fus)
Driving
208
Page 238 of 336

Reinstall the jack and tools in the cargo area. To replace the jack in the
vehicle,
•guide the jack bottom first in the
trim opening and position in the
bracket (3),
•secure the retention clip on the
upper part of the jack (2), and
•close the thumbscrew (1).
Make sure the jack is fastened so it
does not rattle when you drive.
Stowing the flat/spare tire
Note:Failure to follow spare tire stowage instructions may result in
failure of cable or loss of spare tire.
If you are stowing a tire that requires reattaching it to the
vehicle with a tether, perform these steps first, then proceed with
the steps following.
1. Place tire on end with valve stem
facing rearward, away from vehicle.
2. Place tether into bolt holes in
wheel and attach lug nut using lug
wrench.
2007 Mariner Hybrid(mhv)
Owners Guide (post-2002-fmt)
USA(fus)
Roadside Emergencies
238
Page 240 of 336

When a wheel is installed, always remove any corrosion, dirt or
foreign materials present on the mounting surfaces of the wheel
or the surface of the wheel hub, brake drum or brake disc that
contacts the wheel. Ensure that any fasteners that attach the rotor to
the hub are secured so they do not interfere with the mounting
surfaces of the wheel. Installing wheels without correct metal-to-metal
contact at the wheel mounting surfaces can cause the wheel nuts to
loosen and the wheel to come off while the vehicle is in motion,
resulting in loss of control.
JUMP STARTING (LOW VOLTAGE [UNDERHOOD] BATTERY
ONLY)
Your vehicle has two separate jump starting procedures; the following
procedure is for the low voltage (underhood) battery only. Refer to
Jump starting the high voltage batteryin this chapter for information
on jump starting the high voltage battery.
The gases around the battery can explode if exposed to flames,
sparks, or lit cigarettes. An explosion could result in injury or
vehicle damage.
Batteries contain sulfuric acid which can burn skin, eyes and
clothing, if contacted.
Do not attempt to push-start your automatic transmission
vehicle. Automatic transmissions do not have push-start
capability. Attempting to push-start a vehicle with an automatic
transmission may cause transmission damage.
Preparing your vehicle
If your low voltage (underhood) battery becomes disconnected or
disabled for any reason, the vehicle controller must relearn the engine’s
operating characteristics in order to operate it at maximum efficiency.
This relearning process occurs the first time the vehicle is driven after
reconnecting the low voltage battery. If the learning procedure does not
have time to complete during the drive, the engine will continue to
operate for 3-5 seconds after you turn the ignition off to complete the
relearning process. This is a normal condition and will not re-occur until
the low voltage battery is disconnected again. The brake system must
also be reset. Refer toLow voltage (underhood) batteryin the
Maintenance and Specificationchapter for more information.
2007 Mariner Hybrid(mhv)
Owners Guide (post-2002-fmt)
USA(fus)
Roadside Emergencies
240
Page 250 of 336

In some states (in the U.S.) you must directly notify Ford in writing
before pursuing remedies under your state’s warranty laws. Ford is also
allowed a final repair attempt in some states.
In the United States, a warranty dispute must be submitted to the BBB
AUTO LINE before taking action under the Magnuson-Moss Warranty
Act, or to the extent allowed by state law, before pursuing replacement
or repurchase remedies provided by certain state laws. This dispute
handling procedure is not required prior to enforcing state created rights
or other rights which are independent of the Magnuson-Moss Warranty
Act or state replacement or repurchase laws.
IN CALIFORNIA (U.S. ONLY)
California Civil Code Section 1793.2(d) requires that, if a manufacturer
or its representative is unable to repair a motor vehicle to conform to the
vehicle’s applicable express warranty after a reasonable number of
attempts, the manufacturer shall be required to either replace the
vehicle with one substantially identical or repurchase the vehicle and
reimburse the buyer in an amount equal to the actual price paid or
payable by the consumer (less a reasonable allowance for consumer
use). The consumer has the right to choose whether to receive a refund
or replacement vehicle.
California Civil Code Section 1793.22(b) presumes that the manufacturer
has had a reasonable number of attempts to conform the vehicle to its
applicable express warranties if, within the first 18 months of ownership
of a new vehicle or the first 18,000 miles (29,000 km), whichever occurs
first:
1. Two or more repair attempts are made on the same non-conformity
likely to cause death or serious bodily injury OR
2. Four or more repair attempts are made on the same nonconformity (a
defect or condition that substantially impairs the use, value or safety of
the vehicle) OR
3. The vehicle is out of service for repair of nonconformities for a total of
more than 30 calendar days (not necessarily all at one time)
In the case of 1 or 2 above, the consumer must also notify the
manufacturer of the need for the repair of the nonconformity at the
following address:
Ford Motor Company
16800 Executive Plaza Drive
Mail Drop 3NE-B
Dearborn, MI 48126
2007 Mariner Hybrid(mhv)
Owners Guide (post-2002-fmt)
USA(fus)
Customer Assistance
250