Mercury Mariner Hybrid 2009 s Workshop Manual
Manufacturer: MERCURY, Model Year: 2009, Model line: Mariner Hybrid, Model: Mercury Mariner Hybrid 2009Pages: 333, PDF Size: 2.33 MB
Page 51 of 333

PANEL DIMMER CONTROL
Use to adjust the brightness of the
instrument panel and all applicable
switches in the vehicle during
headlamp and parking lamp
operation.
Move the control to the full upright
position, past detent, to turn on the
interior lamps.
Rotate to full down position (past
detent) to prevent interior lamps
from illuminating when the doors are opened.
Note:If the battery is disconnected, discharged, or a new battery is
installed, the dimmer switch requires re-calibration. Rotate the dimmer
switch from the full dim position to the full Dome/ON position to reset.
This will ensure that your displays are visible under all lighting
conditions.
AIMING THE HEADLAMPS
The headlamps on your vehicle are properly aimed at the assembly plant.
If your vehicle has been in an accident, the alignment of your headlamps
should be checked by your authorized dealer.
Vertical aim adjustment
1. Park the vehicle directly in front of a wall or screen on a level surface,
approximately 25 feet (7.6 meters) away.
•(1) 8 feet (2.4 meters)
•(2) Center height of lamp to
ground
•(3) 25 feet (7.6 meters)
•(4) Horizontal reference line
2. Measure the height from the
center of your headlamp to the
ground and mark an 8 foot
(2.4 meter) horizontal reference line
on the vertical wall or screen at this
height (a piece of masking tape works well). The center of the lamp is
marked by a 3.0 mm circle on the headlamp lens.
3. Turn on the low beam headlamps to illuminate the wall or screen and
open the hood. Cover the left-hand headlamp with an opaque cloth.
2009 Mariner Hybrid(mhv)
Owners Guide, 1st Printing
USA(fus)
Lights
51
Page 52 of 333
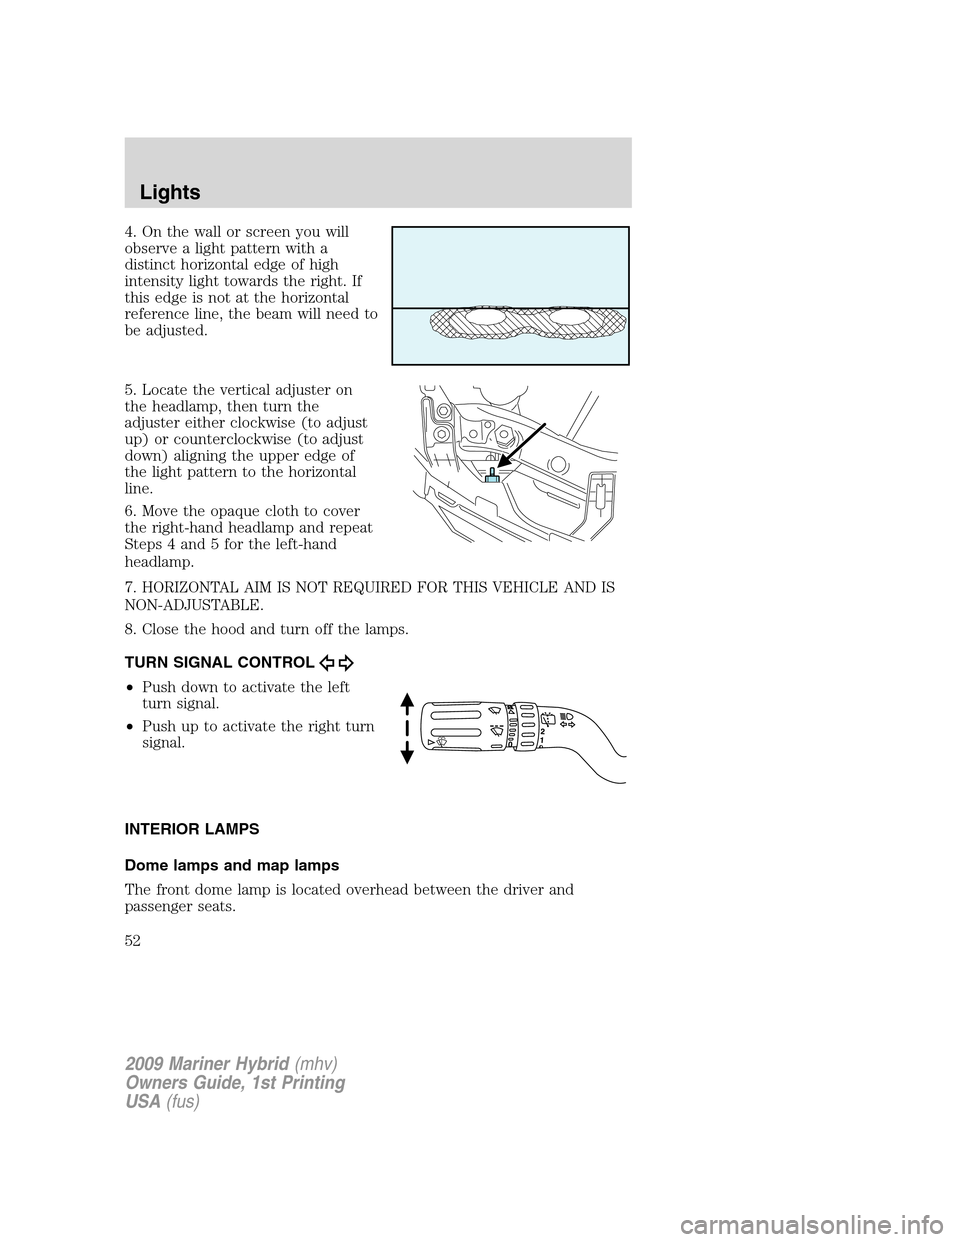
4. On the wall or screen you will
observe a light pattern with a
distinct horizontal edge of high
intensity light towards the right. If
this edge is not at the horizontal
reference line, the beam will need to
be adjusted.
5. Locate the vertical adjuster on
the headlamp, then turn the
adjuster either clockwise (to adjust
up) or counterclockwise (to adjust
down) aligning the upper edge of
the light pattern to the horizontal
line.
6. Move the opaque cloth to cover
the right-hand headlamp and repeat
Steps 4 and 5 for the left-hand
headlamp.
7. HORIZONTAL AIM IS NOT REQUIRED FOR THIS VEHICLE AND IS
NON-ADJUSTABLE.
8. Close the hood and turn off the lamps.
TURN SIGNAL CONTROL
•Push down to activate the left
turn signal.
•Push up to activate the right turn
signal.
INTERIOR LAMPS
Dome lamps and map lamps
The front dome lamp is located overhead between the driver and
passenger seats.
2009 Mariner Hybrid(mhv)
Owners Guide, 1st Printing
USA(fus)
Lights
52
Page 53 of 333
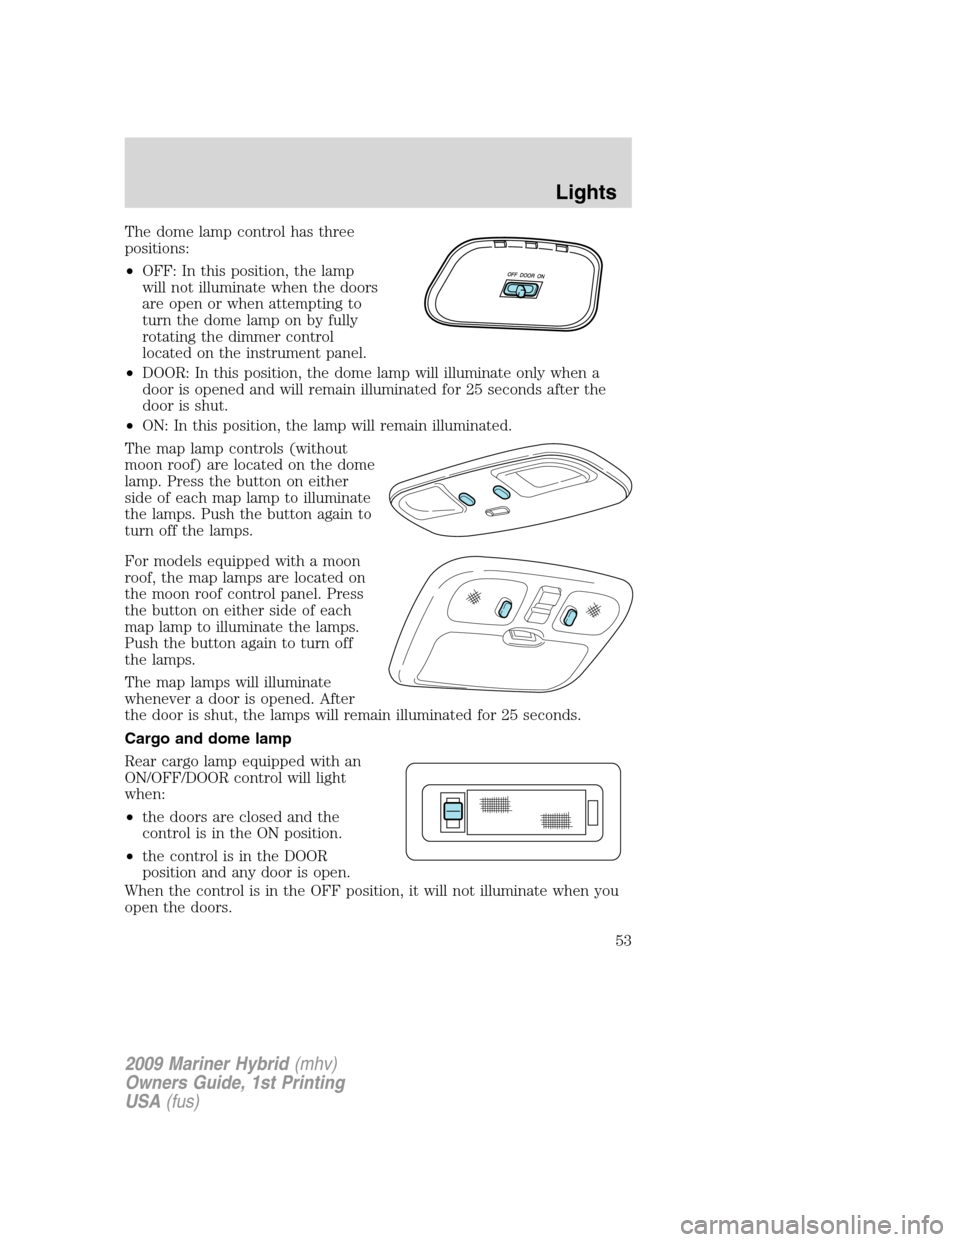
The dome lamp control has three
positions:
•OFF: In this position, the lamp
will not illuminate when the doors
are open or when attempting to
turn the dome lamp on by fully
rotating the dimmer control
located on the instrument panel.
•DOOR: In this position, the dome lamp will illuminate only when a
door is opened and will remain illuminated for 25 seconds after the
door is shut.
•ON: In this position, the lamp will remain illuminated.
The map lamp controls (without
moon roof) are located on the dome
lamp. Press the button on either
side of each map lamp to illuminate
the lamps. Push the button again to
turn off the lamps.
For models equipped with a moon
roof, the map lamps are located on
the moon roof control panel. Press
the button on either side of each
map lamp to illuminate the lamps.
Push the button again to turn off
the lamps.
The map lamps will illuminate
whenever a door is opened. After
the door is shut, the lamps will remain illuminated for 25 seconds.
Cargo and dome lamp
Rear cargo lamp equipped with an
ON/OFF/DOOR control will light
when:
•the doors are closed and the
control is in the ON position.
•the control is in the DOOR
position and any door is open.
When the control is in the OFF position, it will not illuminate when you
open the doors.
2009 Mariner Hybrid(mhv)
Owners Guide, 1st Printing
USA(fus)
Lights
53
Page 54 of 333

Ambient lighting (if equipped)
Illuminates footwells, cupholders,
the console bin and the console tray
with a choice of seven colors. The
ambient lighting control switch is
located on the floor console. To
activate, press and release the
control switch to cycle through the
seven color choices plus the off
state.
The lights come on whenever the ignition is in either the on or accessory
position.
Note:The ambient lights will stay on until after the ignition is placed in
the off position and either of the front doors are opened or the delay
accessory timer expires.
Interior lighting battery saver
The interior lamps will automatically extinguish after 10 minutes when
the ignition key is in the off/lock position, a door has been left open or
the interior lamp controls are in the on position.
BULB REPLACEMENT
Headlamp condensation
Exterior lamps are vented to accommodate normal changes in pressure.
Condensation can be a natural by-product of this design. When moist air
enters the lamp assembly through the vents, condensation can occur
when the temperature is cold. When normal condensation occurs, a thin
film of mist can form on the interior of the lens. The thin mist eventually
clears and exits through the vents during normal operation. Clearing
time may take as long as 48 hours under dry weather conditions.
Examples of acceptable condensation are:
•Presence of thin mist (no streaks, drip marks or droplets)
•Fine mist covers less than 50% of the lens
Examples of unacceptable moisture (usually caused by a lamp water
leak) are:
•Water puddle inside the lamp
•Large water droplets, drip marks or streaks present on the interior of
the lens
2009 Mariner Hybrid(mhv)
Owners Guide, 1st Printing
USA(fus)
Lights
54
Page 55 of 333

Take your vehicle to dealer for service if any of the above conditions of
unacceptable moisture are present.
Using the right bulbs
Replacement bulbs are specified in the chart below. Headlamp bulbs
must be marked with an authorized “D.O.T.” for North America and an
“E” for Europe to ensure lamp performance, light brightness and pattern
and safe visibility. The correct bulbs will not damage the lamp assembly
or void the lamp assembly warranty and will provide quality bulb burn
time.
Function Number of bulbs Trade number
Headlamps (high and
low beams)2
H13
Park/turn/sidemarker
lamps (front)2
3457AK (amber)
Side turn (fender) 2 WY5W (amber)
Rear
stop/turn/tail/sidemarker2
3157K / 4157K
Backup lamp 2 921
Fog lamp (front) 2 9145
Center High-mount
stop lamp5
W5WL
Rear license plate
lamp2
168
All replacement bulbs are clear in color except where noted.
To replace all instrument panel lights - see your authorized dealer
Replacing the interior bulbs
Check the operation of all bulbs frequently.
Replacing exterior bulbs
Check the operation of all the bulbs frequently.
2009 Mariner Hybrid(mhv)
Owners Guide, 1st Printing
USA(fus)
Lights
55
Page 56 of 333
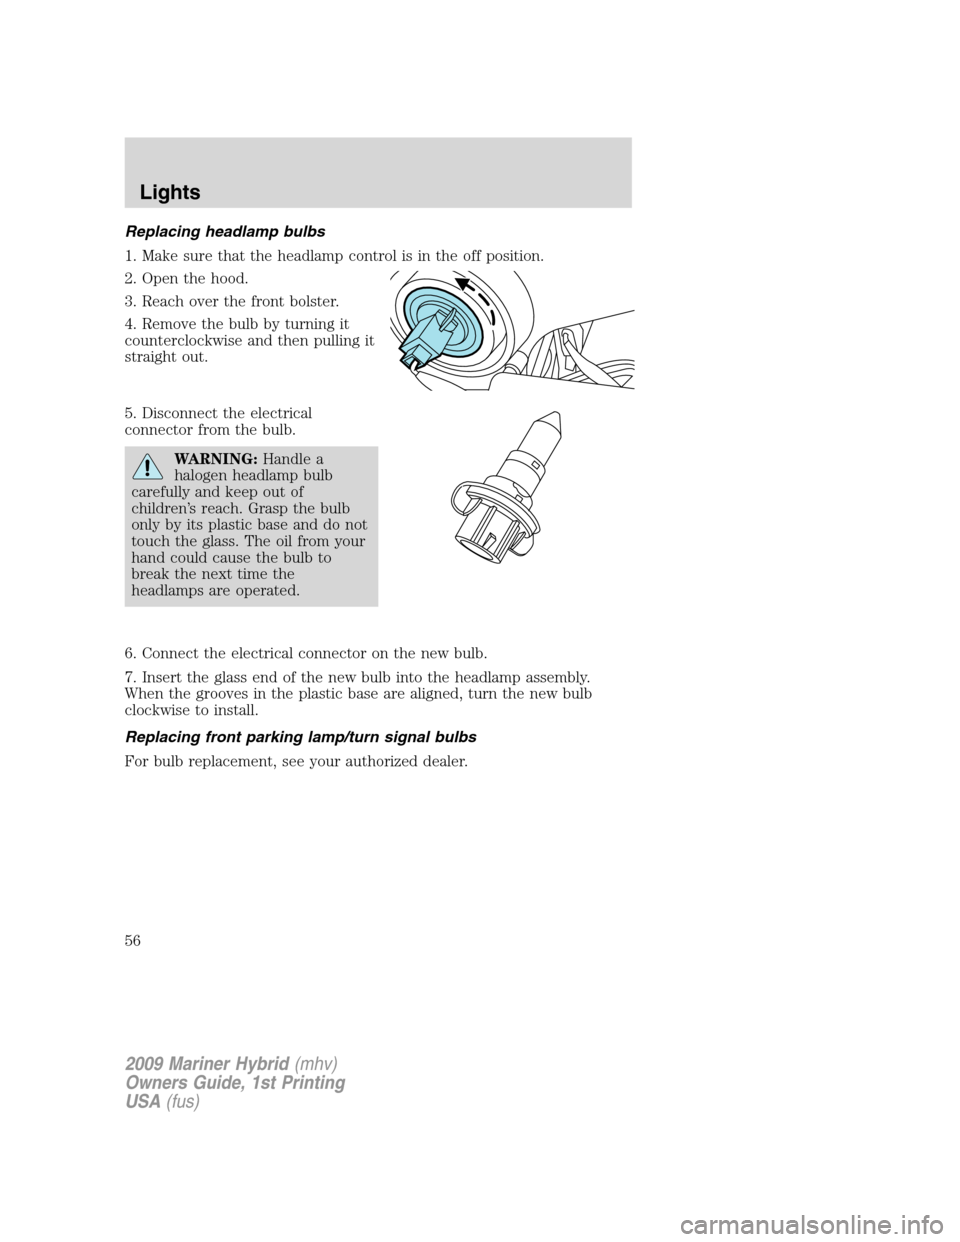
Replacing headlamp bulbs
1. Make sure that the headlamp control is in the off position.
2. Open the hood.
3. Reach over the front bolster.
4. Remove the bulb by turning it
counterclockwise and then pulling it
straight out.
5. Disconnect the electrical
connector from the bulb.
WARNING:Handle a
halogen headlamp bulb
carefully and keep out of
children’s reach. Grasp the bulb
only by its plastic base and do not
touch the glass. The oil from your
hand could cause the bulb to
break the next time the
headlamps are operated.
6. Connect the electrical connector on the new bulb.
7. Insert the glass end of the new bulb into the headlamp assembly.
When the grooves in the plastic base are aligned, turn the new bulb
clockwise to install.
Replacing front parking lamp/turn signal bulbs
For bulb replacement, see your authorized dealer.
2009 Mariner Hybrid(mhv)
Owners Guide, 1st Printing
USA(fus)
Lights
56
Page 57 of 333
Replacing side marker bulbs
1. Make sure the headlamp switch is
in the off position.
2. Push the lamp rearward and pull
the front edge of the lamp outward
to remove it from the fender.
3. Rotate the bulb socket
counterclockwise, replace the bulb
and reinstall the bulb socket.
4. To reinstall the lamp, place the
front edge of the lamp in the hole
and push the lamp inward to lock it in place.
Replacing tail/stop/turn/backup/sidemarker bulbs
The tail/stop/turn/sidemarker/backup lamp bulbs are located in the same
portion of the tail lamp assembly, one just below the other. Follow the
same steps to replace either bulb:
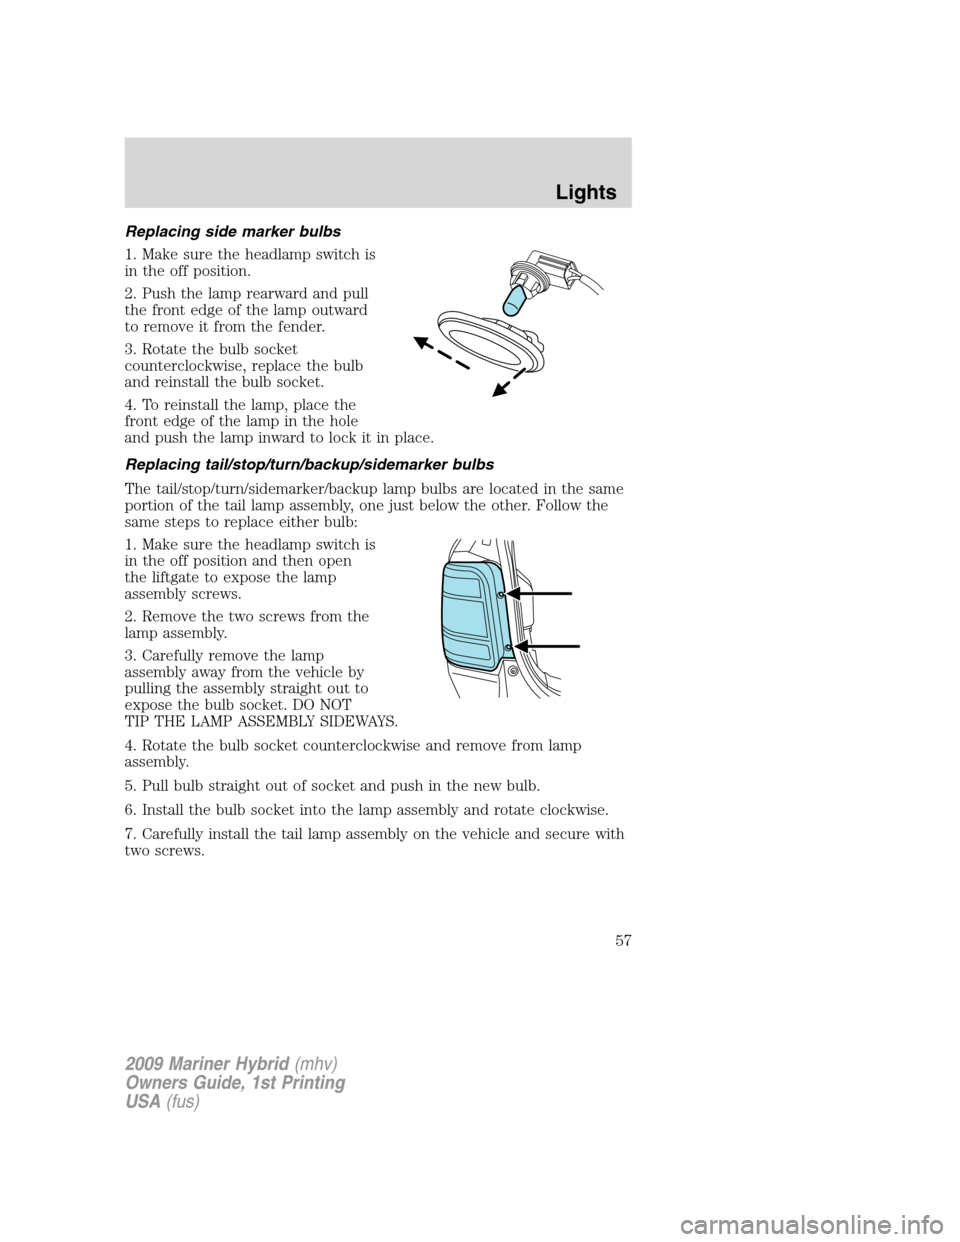
1. Make sure the headlamp switch is
in the off position and then open
the liftgate to expose the lamp
assembly screws.
2. Remove the two screws from the
lamp assembly.
3. Carefully remove the lamp
assembly away from the vehicle by
pulling the assembly straight out to
expose the bulb socket. DO NOT
TIP THE LAMP ASSEMBLY SIDEWAYS.
4. Rotate the bulb socket counterclockwise and remove from lamp
assembly.
5. Pull bulb straight out of socket and push in the new bulb.
6. Install the bulb socket into the lamp assembly and rotate clockwise.
7. Carefully install the tail lamp assembly on the vehicle and secure with
two screws.
2009 Mariner Hybrid(mhv)
Owners Guide, 1st Printing
USA(fus)
Lights
57
Page 58 of 333
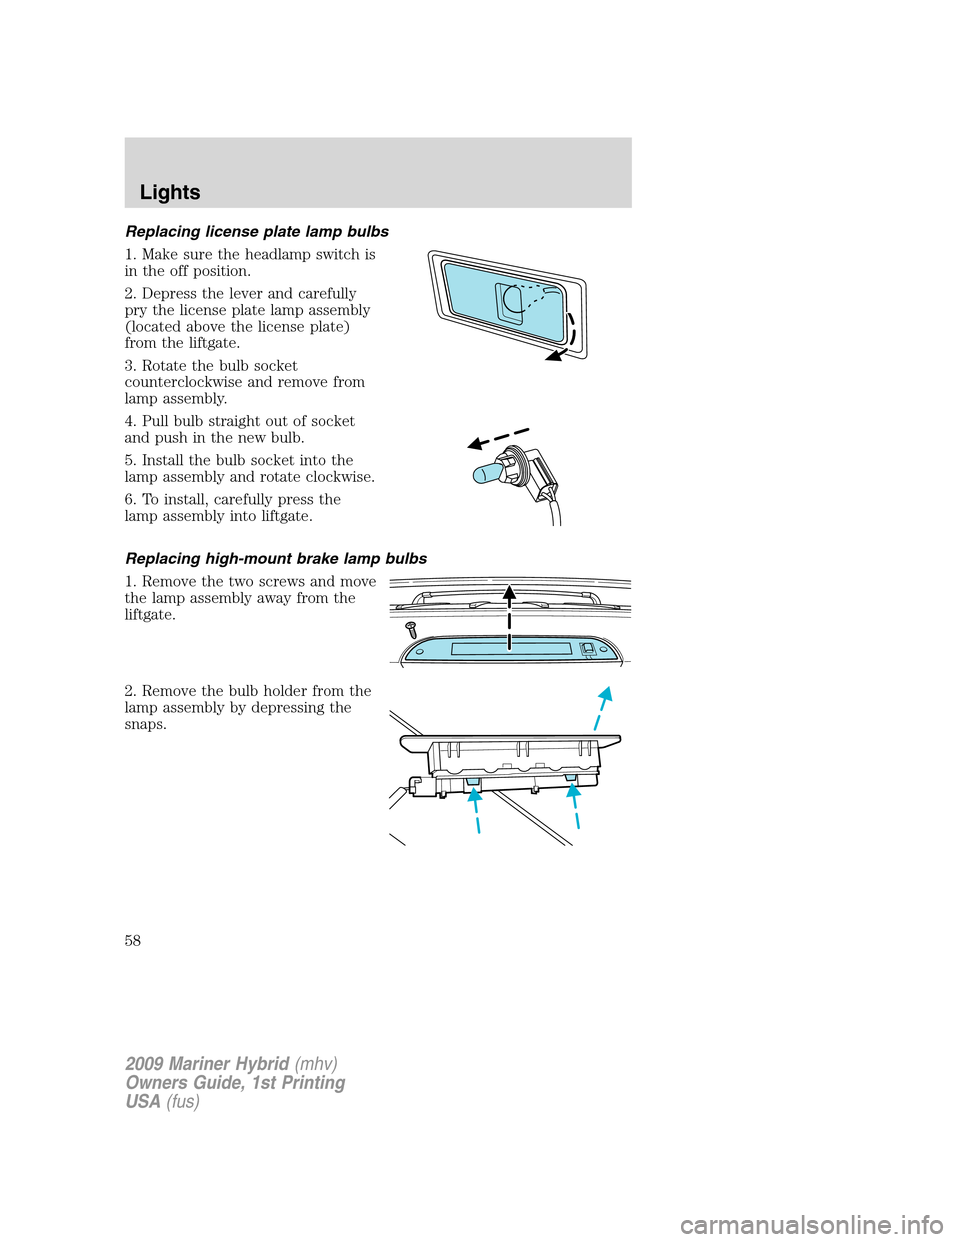
Replacing license plate lamp bulbs
1. Make sure the headlamp switch is
in the off position.
2. Depress the lever and carefully
pry the license plate lamp assembly
(located above the license plate)
from the liftgate.
3. Rotate the bulb socket
counterclockwise and remove from
lamp assembly.
4. Pull bulb straight out of socket
and push in the new bulb.
5. Install the bulb socket into the
lamp assembly and rotate clockwise.
6. To install, carefully press the
lamp assembly into liftgate.
Replacing high-mount brake lamp bulbs
1. Remove the two screws and move
the lamp assembly away from the
liftgate.
2. Remove the bulb holder from the
lamp assembly by depressing the
snaps.
2009 Mariner Hybrid(mhv)
Owners Guide, 1st Printing
USA(fus)
Lights
58
Page 59 of 333

3. Pull the bulb straight out of the
socket and push in the new bulb.
Install the new bulbs in reverse
order.
Replacing fog lamp bulbs (if equipped)
1. Make sure the fog lamp switch is
in the off position.
2. From underneath the vehicle,
carefully disconnect the electrical
connector from the bulb.
3. Carefully disconnect the bulb
from the harness assembly via the
two snap clips.
Install the new bulb in reverse
order.
2009 Mariner Hybrid(mhv)
Owners Guide, 1st Printing
USA(fus)
Lights
59
Page 60 of 333

MULTI-FUNCTION LEVER
Windshield wiper:Rotate the end
of the control away from you to
increase the speed of the wipers;
rotate towards you to decrease the
speed of the wipers.
Windshield washer:Push the end
of the stalk:
•briefly: causes a single swipe of
the wipers without washer fluid.
•a quick push and hold: the wipers
will swipe three times with
washer fluid.
•a long push and hold: the wipers and washer fluid will be activated for
up to ten seconds.
Courtesy wipe feature:One extra wipe will occur a few seconds after
washing the front window to clear any excess washer fluid remaining on
the windshield.
Note:Do not operate the washer when the washer reservoir is empty.
This may cause the washer pump to overheat. Check the washer fluid
level frequently. Do not operate the wipers when the windshield is dry.
This may scratch the glass, damage the wiper blades and cause the wiper
motor to burn out. Before operating the wiper on a dry windshield,
always use the windshield washer. In freezing weather, be sure the wiper
blades are not frozen to the windshield before operating the wipers.
Windshield wiper rainlamp feature (if equipped with Autolamp)
When the windshield wipers are turned on during daylight, and the
headlamp control is in the autolamp position, the exterior lamps will turn
on after a brief delay and will remain on until the wipers are turned off.
2009 Mariner Hybrid(mhv)
Owners Guide, 1st Printing
USA(fus)
Driver Controls
60