high beam Mercury Milan 2006 Owner's Manuals
[x] Cancel search | Manufacturer: MERCURY, Model Year: 2006, Model line: Milan, Model: Mercury Milan 2006Pages: 256, PDF Size: 2.45 MB
Page 13 of 256
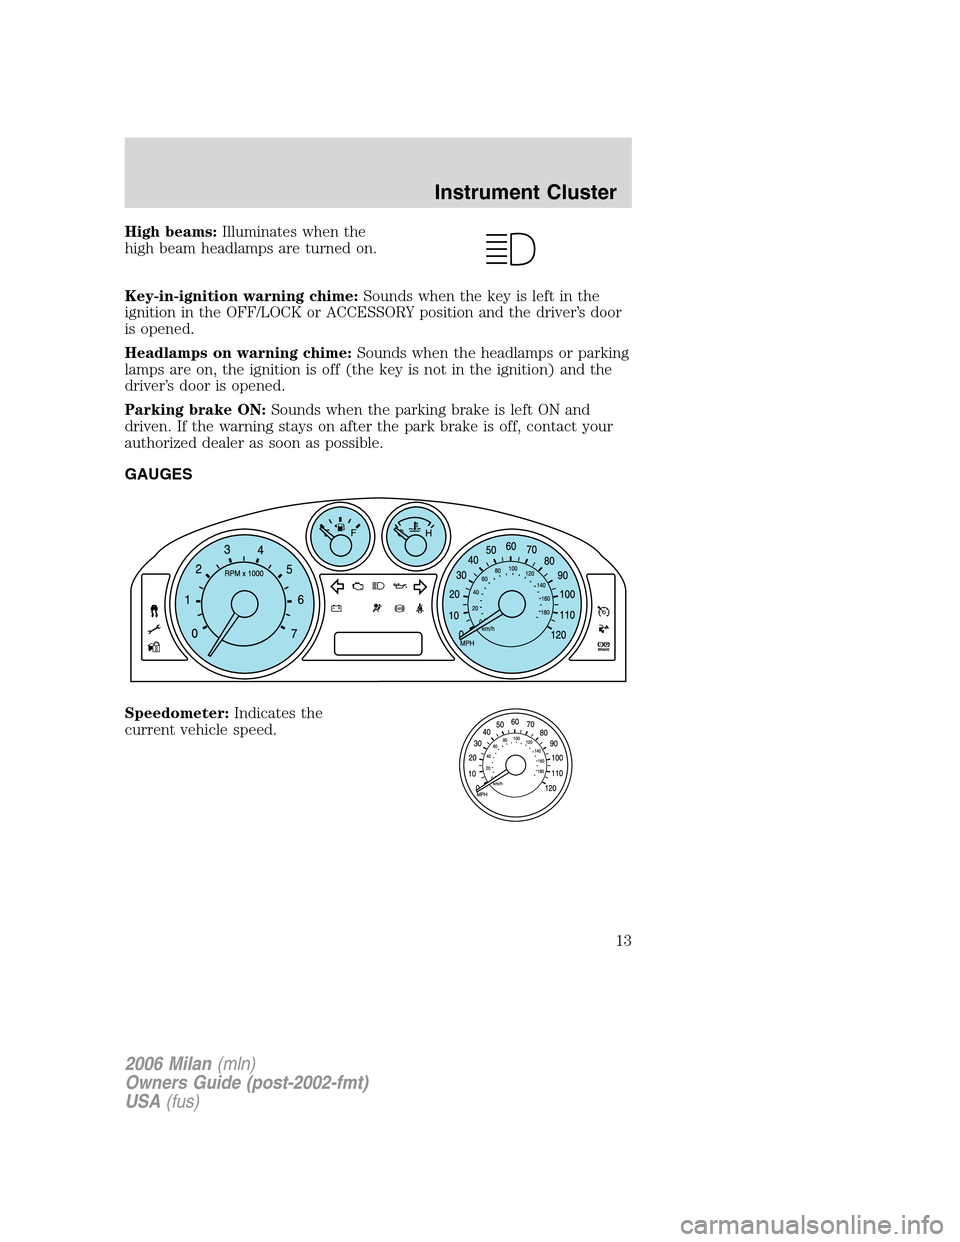
High beams:Illuminates when the
high beam headlamps are turned on.
Key-in-ignition warning chime:Sounds when the key is left in the
ignition in the OFF/LOCK or ACCESSORY position and the driver’s door
is opened.
Headlamps on warning chime:Sounds when the headlamps or parking
lamps are on, the ignition is off (the key is not in the ignition) and the
driver’s door is opened.
Parking brake ON:Sounds when the parking brake is left ON and
driven. If the warning stays on after the park brake is off, contact your
authorized dealer as soon as possible.
GAUGES
Speedometer:Indicates the
current vehicle speed.
2006 Milan(mln)
Owners Guide (post-2002-fmt)
USA(fus)
Instrument Cluster
13
Page 35 of 256
5. Wait the desired amount of time for the exit delay you want (up to
three minutes), then turn the headlamp switch to
. The headlamps
will turn off.
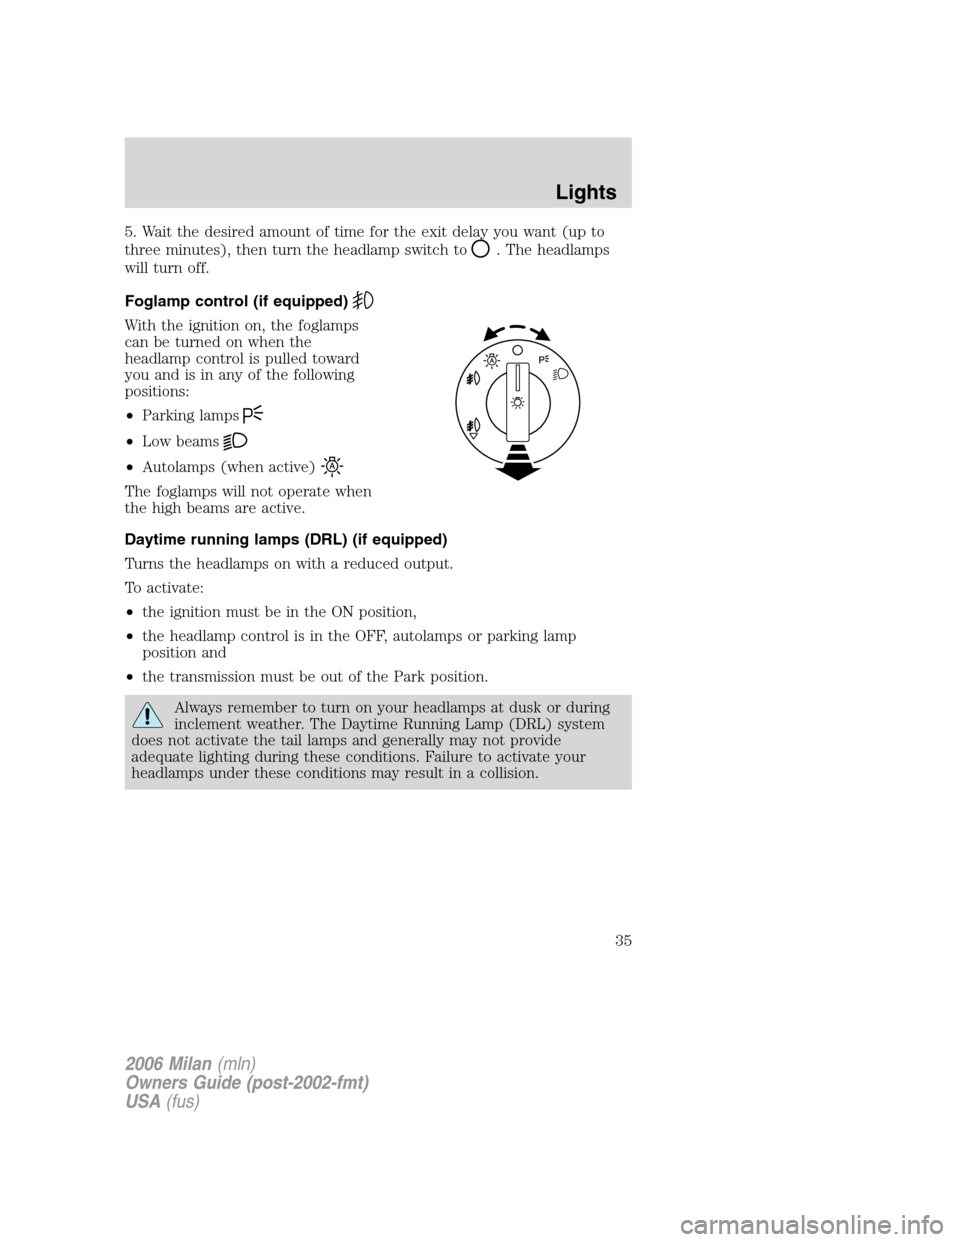
Foglamp control (if equipped)
With the ignition on, the foglamps
can be turned on when the
headlamp control is pulled toward
you and is in any of the following
positions:
•Parking lamps
•Low beams
•Autolamps (when active)
The foglamps will not operate when
the high beams are active.
Daytime running lamps (DRL) (if equipped)
Turns the headlamps on with a reduced output.
To activate:
•the ignition must be in the ON position,
•the headlamp control is in the OFF, autolamps or parking lamp
position and
•the transmission must be out of the Park position.
Always remember to turn on your headlamps at dusk or during
inclement weather. The Daytime Running Lamp (DRL) system
does not activate the tail lamps and generally may not provide
adequate lighting during these conditions. Failure to activate your
headlamps under these conditions may result in a collision.
2006 Milan(mln)
Owners Guide (post-2002-fmt)
USA(fus)
Lights
35
Page 36 of 256
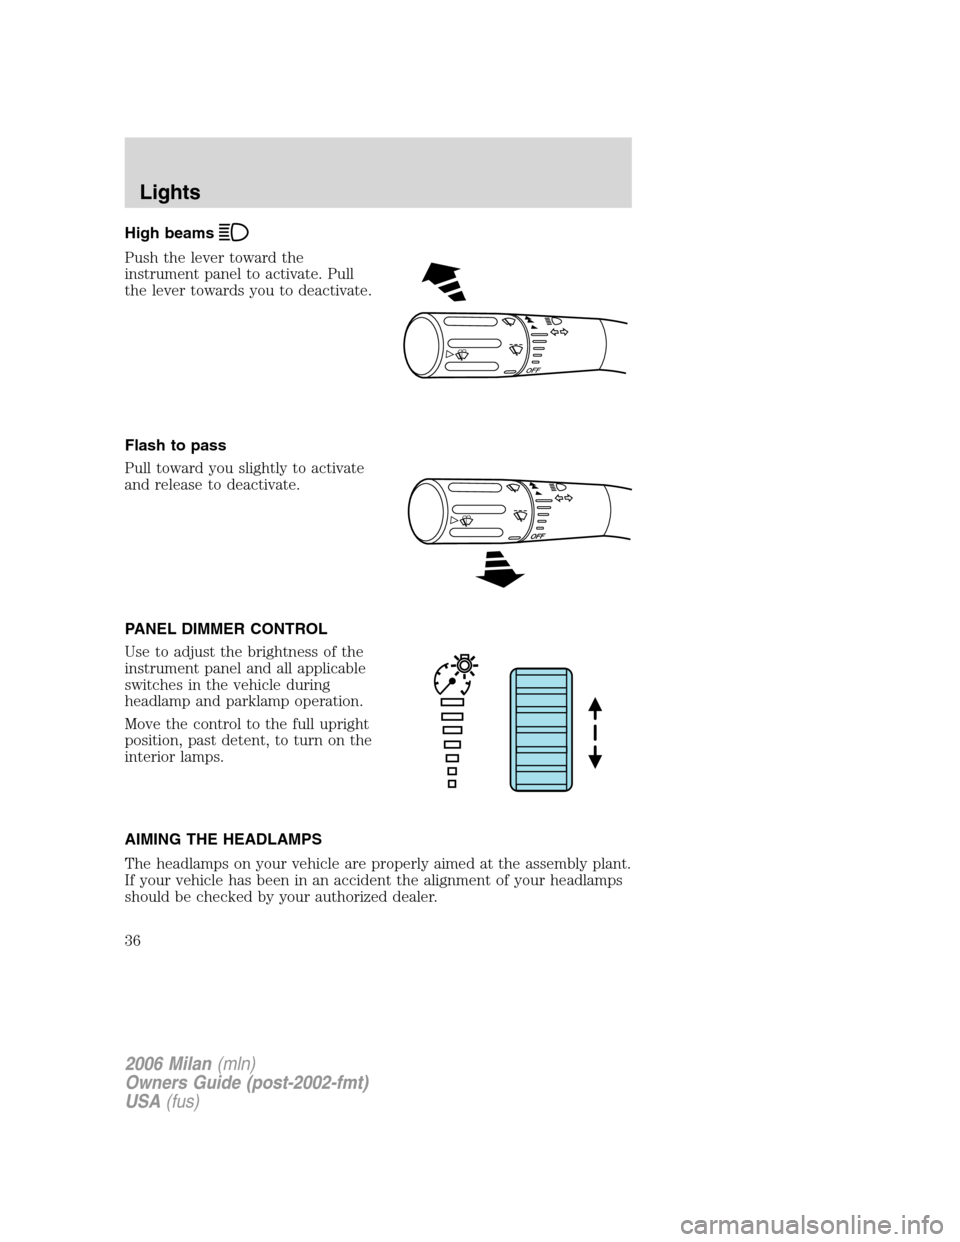
High beams
Push the lever toward the
instrument panel to activate. Pull
the lever towards you to deactivate.
Flash to pass
Pull toward you slightly to activate
and release to deactivate.
PANEL DIMMER CONTROL
Use to adjust the brightness of the
instrument panel and all applicable
switches in the vehicle during
headlamp and parklamp operation.
Move the control to the full upright
position, past detent, to turn on the
interior lamps.
AIMING THE HEADLAMPS
The headlamps on your vehicle are properly aimed at the assembly plant.
If your vehicle has been in an accident the alignment of your headlamps
should be checked by your authorized dealer.
O
F
F
2006 Milan(mln)
Owners Guide (post-2002-fmt)
USA(fus)
Lights
36
Page 37 of 256
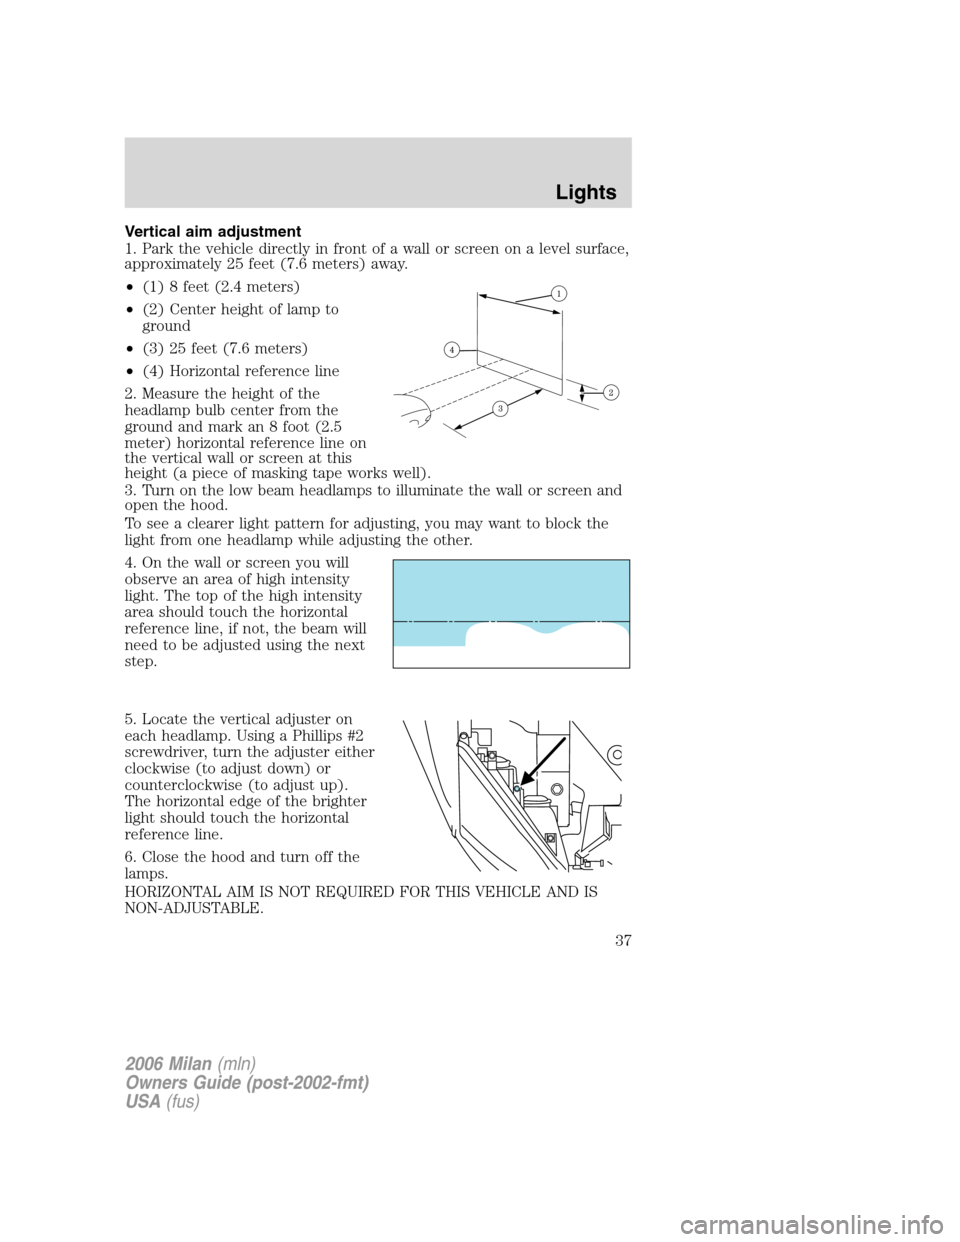
Vertical aim adjustment
1. Park the vehicle directly in front of a wall or screen on a level surface,
approximately 25 feet (7.6 meters) away.
•(1) 8 feet (2.4 meters)
•(2) Center height of lamp to
ground
•(3) 25 feet (7.6 meters)
•(4) Horizontal reference line
2. Measure the height of the
headlamp bulb center from the
ground and mark an 8 foot (2.5
meter) horizontal reference line on
the vertical wall or screen at this
height (a piece of masking tape works well).
3. Turn on the low beam headlamps to illuminate the wall or screen and
open the hood.
To see a clearer light pattern for adjusting, you may want to block the
light from one headlamp while adjusting the other.
4. On the wall or screen you will
observe an area of high intensity
light. The top of the high intensity
area should touch the horizontal
reference line, if not, the beam will
need to be adjusted using the next
step.
5. Locate the vertical adjuster on
each headlamp. Using a Phillips #2
screwdriver, turn the adjuster either
clockwise (to adjust down) or
counterclockwise (to adjust up).
The horizontal edge of the brighter
light should touch the horizontal
reference line.
6. Close the hood and turn off the
lamps.
HORIZONTAL AIM IS NOT REQUIRED FOR THIS VEHICLE AND IS
NON-ADJUSTABLE.
2006 Milan(mln)
Owners Guide (post-2002-fmt)
USA(fus)
Lights
37
Page 39 of 256
Using the right bulbs
Replacement bulbs are specified in the chart below. Headlamp bulbs
must be marked with an authorized “D.O.T.” for North America and an
“E” for Europe to ensure lamp performance, light brightness and pattern
and safe visibility. The correct bulbs will not damage the lamp assembly
or void the lamp assembly warranty and will provide quality bulb burn
time.
Function Number of bulbs Trade number
Headlamp high beam 2 H7
Headlamp low beam 2 H11LL
Front park/turn signal lamp 2 3457NAK (amber)
Front sidemarker lamp 2 168
*Rear sidemarker lamp N/A SNAP LED 70
*Stop/tail lamp N/A LED
Rear turn signal lamp 2 3157 A (amber)
Backup lamp 2 921
License plate lamp 2 168
High-mount brake lamp 1 921
Foglamp (if equipped) 2 H11
Map lamp 2 12V6W
Dome/reading lamp 6 578
Visor vanity lamp - Slide on
Rail system (SOR)237
Puddle lamp (if equipped) 2 W5W
Glove box lamp 1 194
Luggage compartment lamp 1 578
All replacement bulbs are clear in color except where noted.
To replace all instrument panel lights - see your authorized dealer.
*To replace these lamps - see your authorized dealer.
Replacing headlamp bulbs
Highbeam bulb replacement
1. Make sure headlamp switch is in the OFF position, then open the
hood.
2. Reach over the front bolster.
2006 Milan(mln)
Owners Guide (post-2002-fmt)
USA(fus)
Lights
39
Page 40 of 256
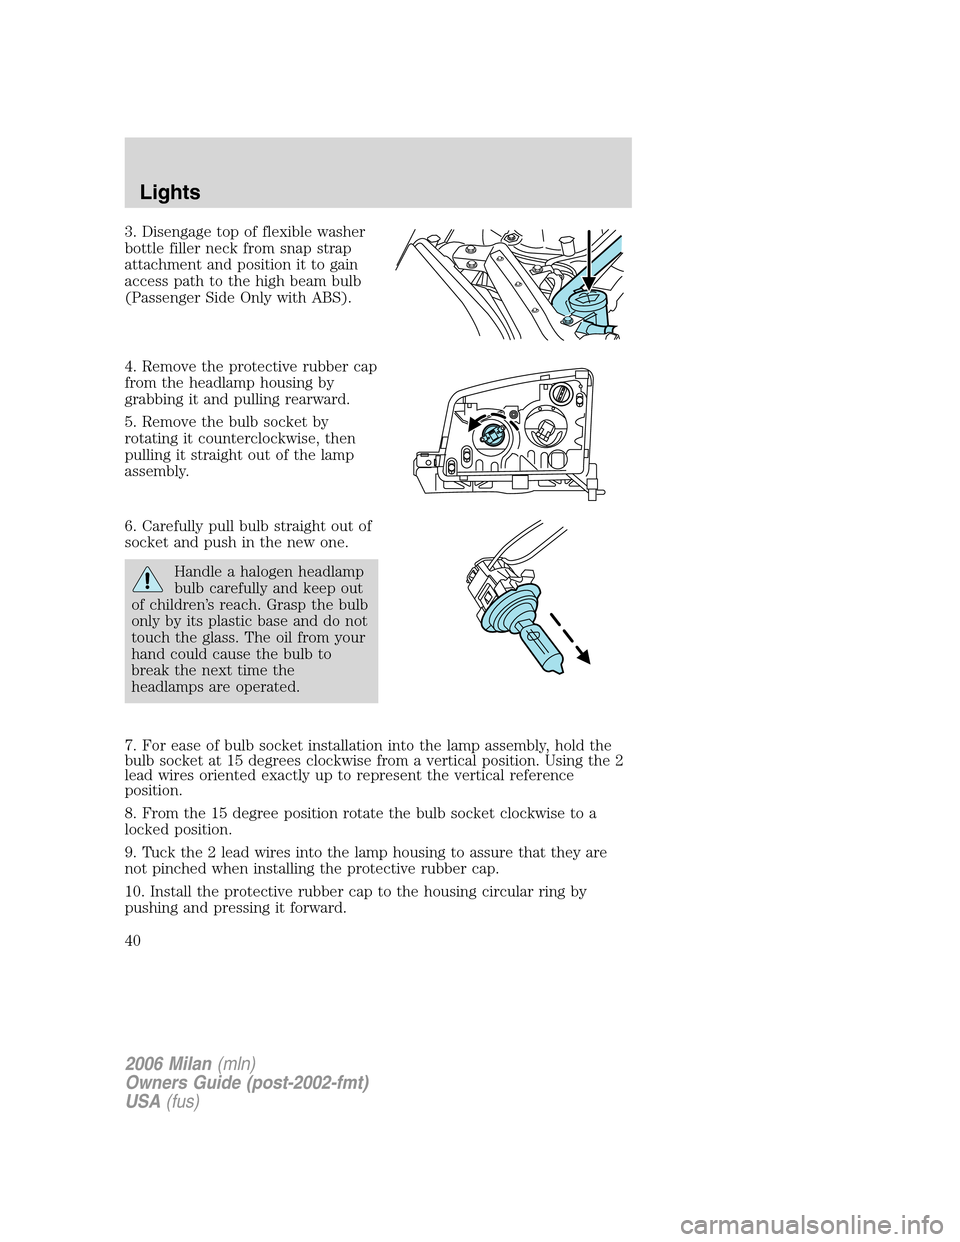
3. Disengage top of flexible washer
bottle filler neck from snap strap
attachment and position it to gain
access path to the high beam bulb
(Passenger Side Only with ABS).
4. Remove the protective rubber cap
from the headlamp housing by
grabbing it and pulling rearward.
5. Remove the bulb socket by
rotating it counterclockwise, then
pulling it straight out of the lamp
assembly.
6. Carefully pull bulb straight out of
socket and push in the new one.
Handle a halogen headlamp
bulb carefully and keep out
of children’s reach. Grasp the bulb
only by its plastic base and do not
touch the glass. The oil from your
hand could cause the bulb to
break the next time the
headlamps are operated.
7. For ease of bulb socket installation into the lamp assembly, hold the
bulb socket at 15 degrees clockwise from a vertical position. Using the 2
lead wires oriented exactly up to represent the vertical reference
position.
8. From the 15 degree position rotate the bulb socket clockwise to a
locked position.
9. Tuck the 2 lead wires into the lamp housing to assure that they are
not pinched when installing the protective rubber cap.
10. Install the protective rubber cap to the housing circular ring by
pushing and pressing it forward.
2006 Milan(mln)
Owners Guide (post-2002-fmt)
USA(fus)
Lights
40
Page 174 of 256
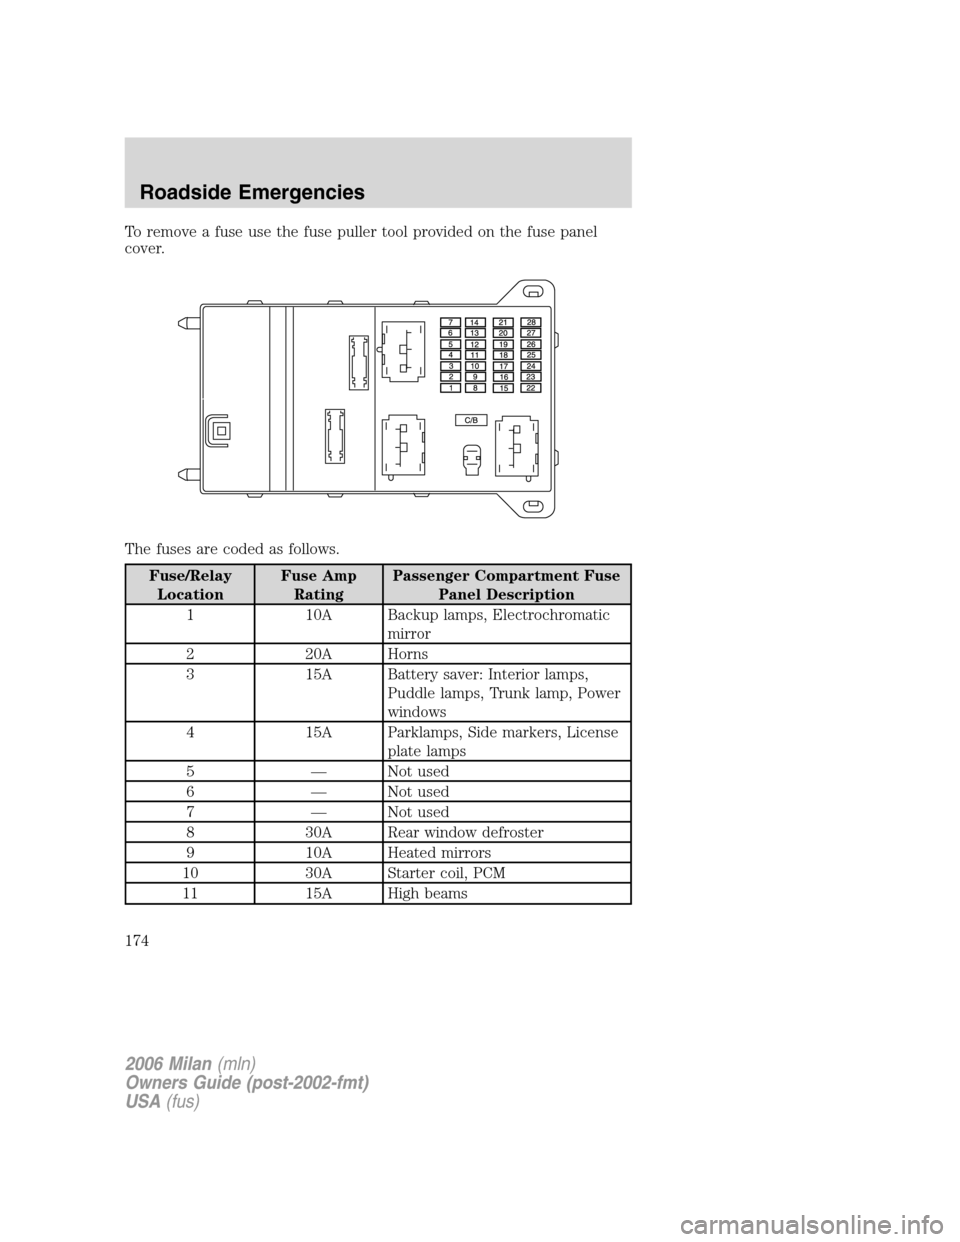
To remove a fuse use the fuse puller tool provided on the fuse panel
cover.
The fuses are coded as follows.
Fuse/Relay
LocationFuse Amp
RatingPassenger Compartment Fuse
Panel Description
1 10A Backup lamps, Electrochromatic
mirror
2 20A Horns
3 15A Battery saver: Interior lamps,
Puddle lamps, Trunk lamp, Power
windows
4 15A Parklamps, Side markers, License
plate lamps
5 — Not used
6 — Not used
7 — Not used
8 30A Rear window defroster
9 10A Heated mirrors
10 30A Starter coil, PCM
11 15A High beams
2006 Milan(mln)
Owners Guide (post-2002-fmt)
USA(fus)
Roadside Emergencies
174
Page 253 of 256
F
Fail safe cooling ........................222
Fluid capacities .........................241
Foglamps .....................................35
Fuel ............................................223
calculating fuel economy..62, 227
cap ...........................................225
capacity ...................................241
choosing the right fuel ...........226
comparisons with EPA fuel
economy estimates .................230
detergent in fuel .....................227
filling your vehicle with
fuel ...........................223, 225, 228
filter, specifications ........223, 240
fuel pump shut-off switch .....172
improving fuel economy ........227
octane rating ...........226, 244–245
quality ......................................227
running out of fuel .................227
safety information relating to
automotive fuels .....................223
Fuel pump shut-off switch .......172
Fuses ..........................................173
G
Gas cap (see Fuel cap) ............225
Gas mileage
(see Fuel economy) .................227
Gauges .........................................13
H
Hazard flashers .........................172
Head restraints ...........................89
Headlamps ...................................34
aiming ..................................36–37autolamp system .......................34
bulb specifications ....................39
daytime running lights .............35
flash to pass ..............................36
high beam .................................36
replacing bulbs .........................39
turning on and off ....................34
Heating
heating and air conditioning
system ...........................26, 28, 30
Hood ..........................................206
I
Ignition .......................156, 244–245
Illuminated visor mirror .............50
Infant seats (see Safety seats)..127
Inspection/maintenance (I/M)
testing ........................................232
Instrument panel ........................52
cleaning ...................................202
cluster ........................................10
lighting up panel and interior...36
J
Jack ............................................179
positioning ...............................179
storage .....................................179
Jump-starting your vehicle ......185
K
Keyless entry system
autolock .....................................81
Keys .......................................69, 84
positions of the ignition .........156
2006 Milan(mln)
Owners Guide (post-2002-fmt)
USA(fus)
Index
253