interior lights Mercury Milan 2006 Owner's Manuals
[x] Cancel search | Manufacturer: MERCURY, Model Year: 2006, Model line: Milan, Model: Mercury Milan 2006Pages: 256, PDF Size: 2.45 MB
Page 10 of 256
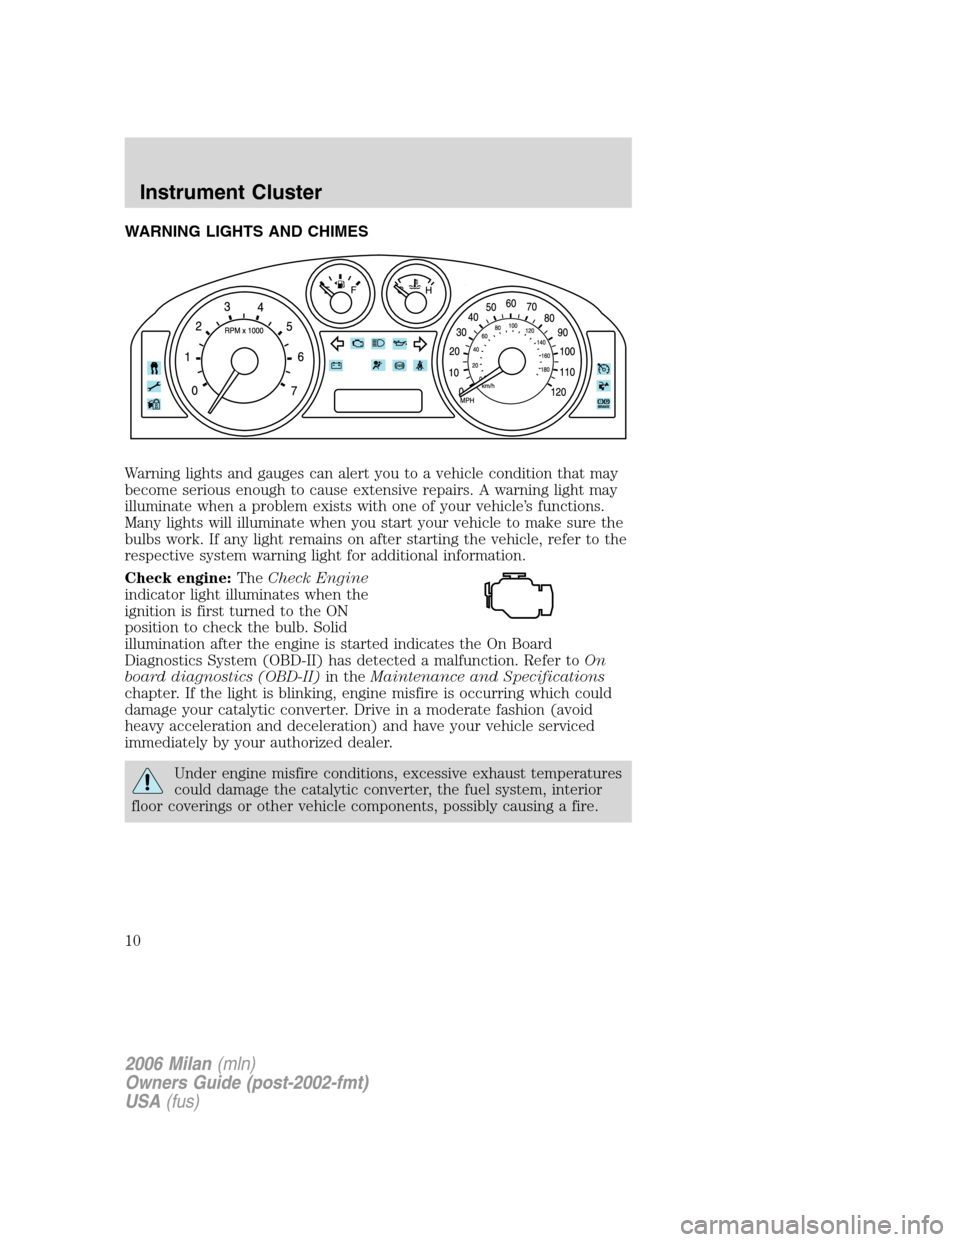
WARNING LIGHTS AND CHIMES
Warning lights and gauges can alert you to a vehicle condition that may
become serious enough to cause extensive repairs. A warning light may
illuminate when a problem exists with one of your vehicle’s functions.
Many lights will illuminate when you start your vehicle to make sure the
bulbs work. If any light remains on after starting the vehicle, refer to the
respective system warning light for additional information.
Check engine:TheCheck Engine
indicator light illuminates when the
ignition is first turned to the ON
position to check the bulb. Solid
illumination after the engine is started indicates the On Board
Diagnostics System (OBD-II) has detected a malfunction. Refer toOn
board diagnostics (OBD-II)in theMaintenance and Specifications
chapter. If the light is blinking, engine misfire is occurring which could
damage your catalytic converter. Drive in a moderate fashion (avoid
heavy acceleration and deceleration) and have your vehicle serviced
immediately by your authorized dealer.
Under engine misfire conditions, excessive exhaust temperatures
could damage the catalytic converter, the fuel system, interior
floor coverings or other vehicle components, possibly causing a fire.
2006 Milan(mln)
Owners Guide (post-2002-fmt)
USA(fus)
Instrument Cluster
10
Page 31 of 256
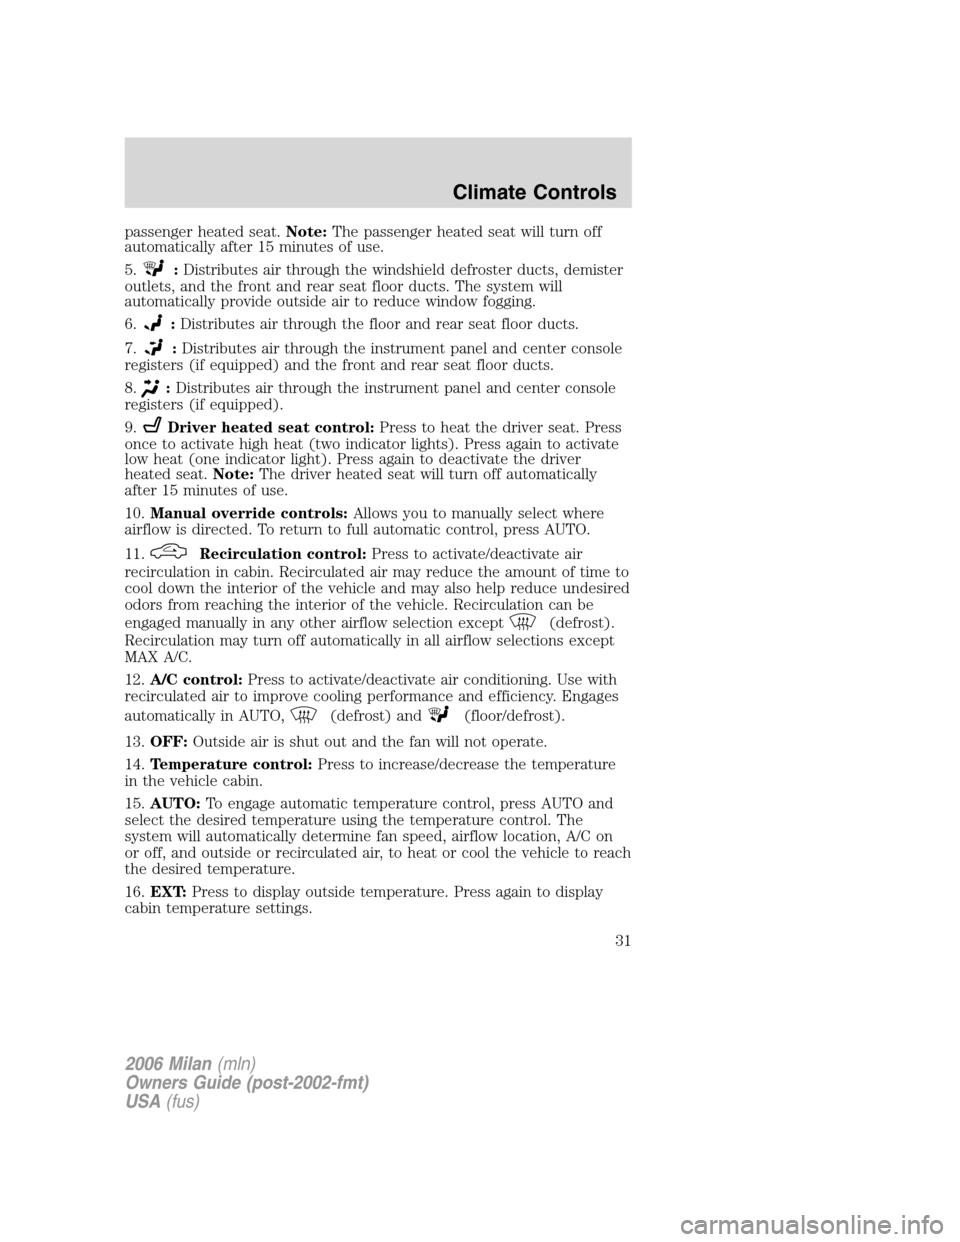
passenger heated seat.Note:The passenger heated seat will turn off
automatically after 15 minutes of use.
5.
:Distributes air through the windshield defroster ducts, demister
outlets, and the front and rear seat floor ducts. The system will
automatically provide outside air to reduce window fogging.
6.
:Distributes air through the floor and rear seat floor ducts.
7.
:Distributes air through the instrument panel and center console
registers (if equipped) and the front and rear seat floor ducts.
8.
:Distributes air through the instrument panel and center console
registers (if equipped).
9.
Driver heated seat control:Press to heat the driver seat. Press
once to activate high heat (two indicator lights). Press again to activate
low heat (one indicator light). Press again to deactivate the driver
heated seat.Note:The driver heated seat will turn off automatically
after 15 minutes of use.
10.Manual override controls:Allows you to manually select where
airflow is directed. To return to full automatic control, press AUTO.
11.
Recirculation control:Press to activate/deactivate air
recirculation in cabin. Recirculated air may reduce the amount of time to
cool down the interior of the vehicle and may also help reduce undesired
odors from reaching the interior of the vehicle. Recirculation can be
engaged manually in any other airflow selection except
(defrost).
Recirculation may turn off automatically in all airflow selections except
MAX A/C.
12.A/C control:Press to activate/deactivate air conditioning. Use with
recirculated air to improve cooling performance and efficiency. Engages
automatically in AUTO,
(defrost) and(floor/defrost).
13.OFF:Outside air is shut out and the fan will not operate.
14.Temperature control:Press to increase/decrease the temperature
in the vehicle cabin.
15.AUTO:To engage automatic temperature control, press AUTO and
select the desired temperature using the temperature control. The
system will automatically determine fan speed, airflow location, A/C on
or off, and outside or recirculated air, to heat or cool the vehicle to reach
the desired temperature.
16.EXT:Press to display outside temperature. Press again to display
cabin temperature settings.
2006 Milan(mln)
Owners Guide (post-2002-fmt)
USA(fus)
Climate Controls
31
Page 36 of 256
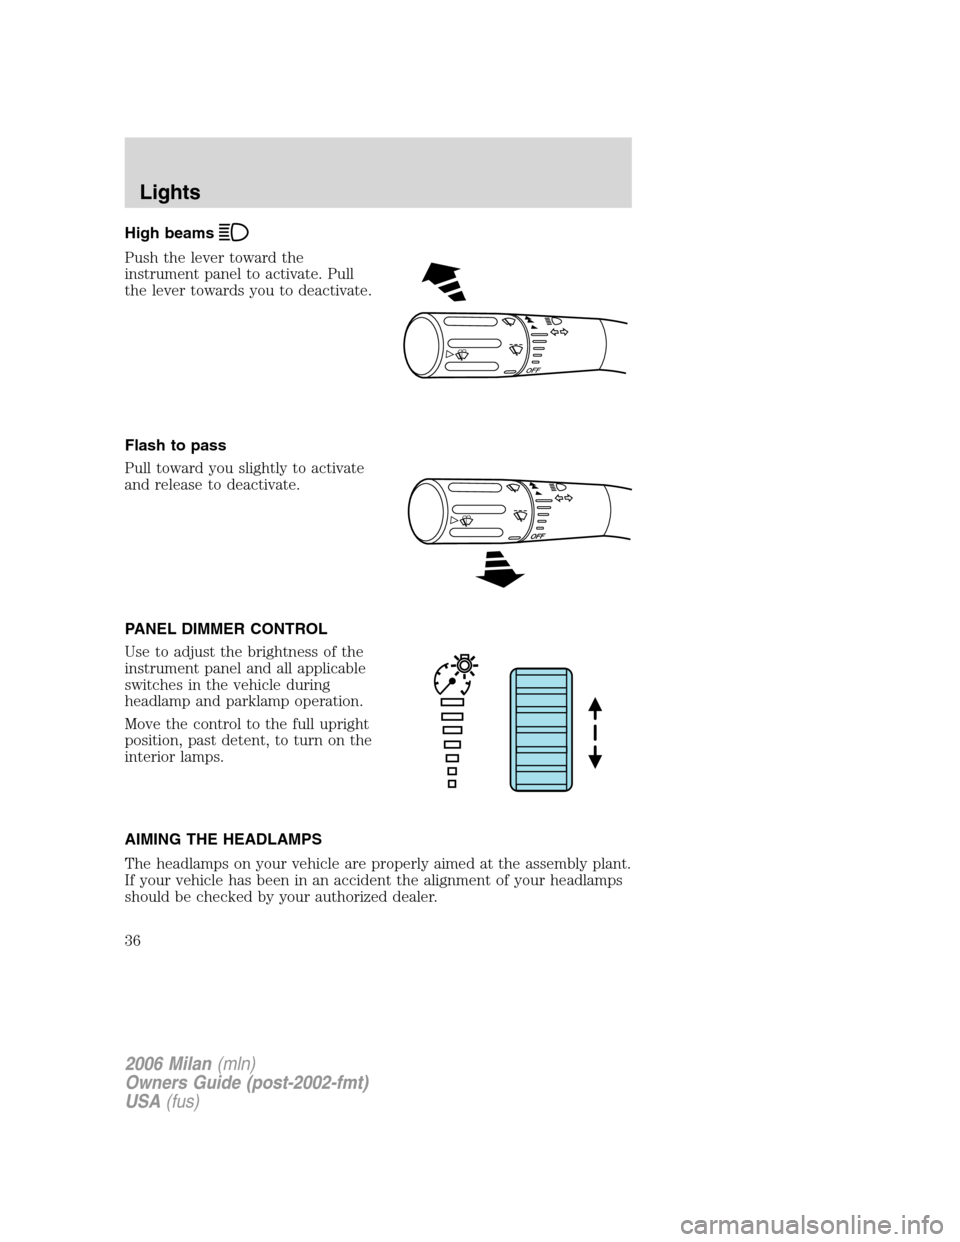
High beams
Push the lever toward the
instrument panel to activate. Pull
the lever towards you to deactivate.
Flash to pass
Pull toward you slightly to activate
and release to deactivate.
PANEL DIMMER CONTROL
Use to adjust the brightness of the
instrument panel and all applicable
switches in the vehicle during
headlamp and parklamp operation.
Move the control to the full upright
position, past detent, to turn on the
interior lamps.
AIMING THE HEADLAMPS
The headlamps on your vehicle are properly aimed at the assembly plant.
If your vehicle has been in an accident the alignment of your headlamps
should be checked by your authorized dealer.
O
F
F
2006 Milan(mln)
Owners Guide (post-2002-fmt)
USA(fus)
Lights
36
Page 38 of 256
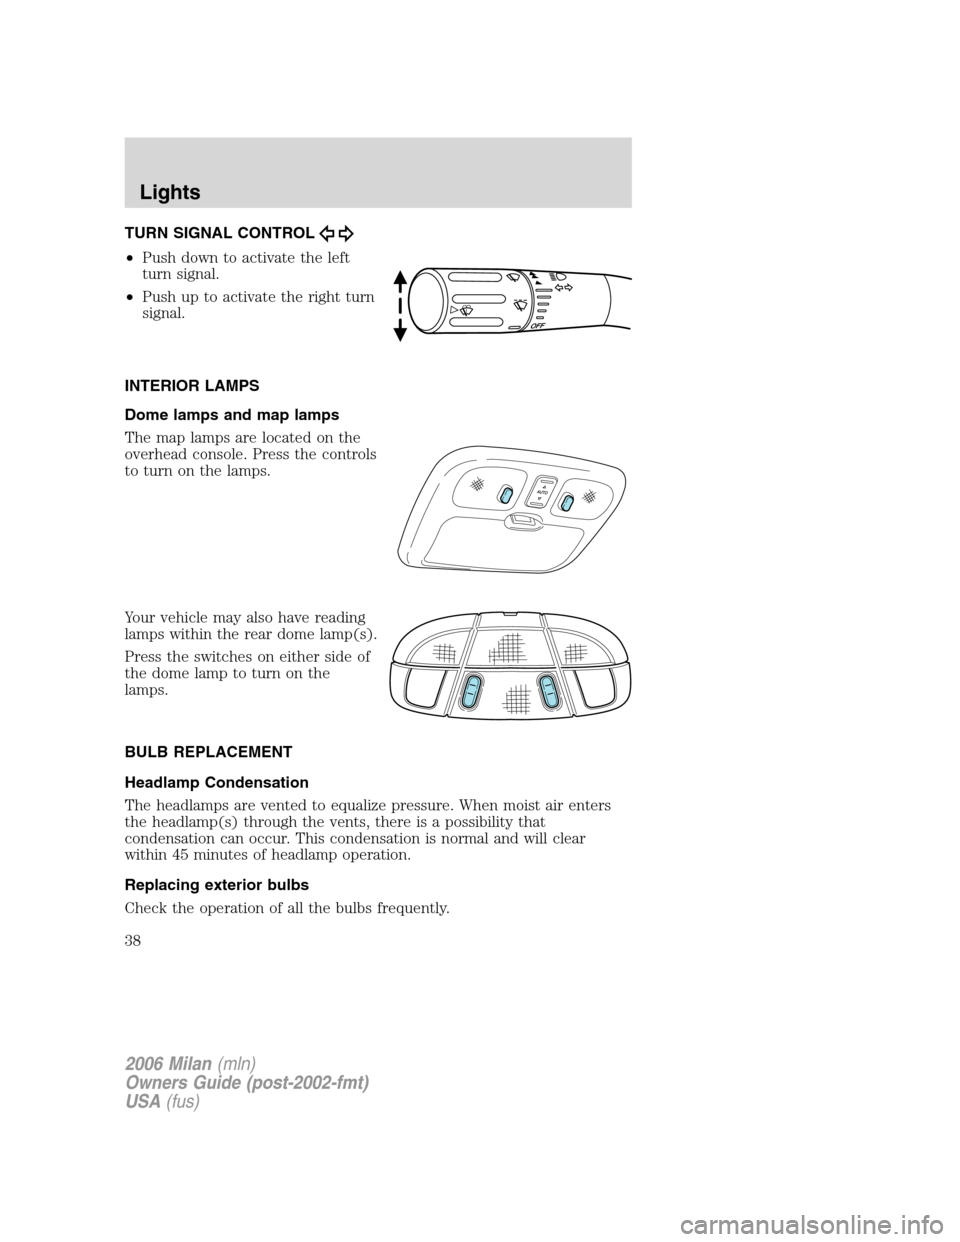
TURN SIGNAL CONTROL
•Push down to activate the left
turn signal.
•Push up to activate the right turn
signal.
INTERIOR LAMPS
Dome lamps and map lamps
The map lamps are located on the
overhead console. Press the controls
to turn on the lamps.
Your vehicle may also have reading
lamps within the rear dome lamp(s).
Press the switches on either side of
the dome lamp to turn on the
lamps.
BULB REPLACEMENT
Headlamp Condensation
The headlamps are vented to equalize pressure. When moist air enters
the headlamp(s) through the vents, there is a possibility that
condensation can occur. This condensation is normal and will clear
within 45 minutes of headlamp operation.
Replacing exterior bulbs
Check the operation of all the bulbs frequently.
2006 Milan(mln)
Owners Guide (post-2002-fmt)
USA(fus)
Lights
38
Page 68 of 256
CHECK BRAKE SYSTEM.Displayed when the brake system needs
servicing. If the warning stays on or continues to come on, contact your
authorized dealer as soon as possible.
LOW BRAKE FLUID.Indicates the brake fluid level is low and the
brake system should be inspected immediately. Refer toBrake fluid
reservoirin theMaintenance and Specificationschapter.
TRUNK AJAR.Displayed when the trunk is not completely closed.
COMPASS ERROR (if equipped).Displayed when the compass is not
operating properly. If the warning stays on or continues to come on,
contact your authorized dealer as soon as possible.
CHECK LEFT OR RIGHT HEADLAMPS.Displayed when the
headlamps are activated and at least one low beam is burned out. Check
the lamps as soon as possible and have the burned out lamp replaced.
Refer toReplacing headlamp bulbsin theLightschapter.
CHECK LF OR RF TURN LAMPS.Displayed when the turn signals are
activated and at least one is burned out. Check the lamps as soon as
safely possible and have the burned out lamp replaced. Refer to
Replacing headlamp bulbsin theLightschapter.
CHECK LR OR RR TURN LAMPS.Displayed when the rear turn
signals are activated and at least one is burned out. Check the lamps as
soon as safely possible and have the burned out lamp replaced. Refer to
Replacing headlamp bulbsin theLightschapter.
INTEGRATED KEY PROGRAMMING STATUS.Displayed when an
attempt is made to program a fifth Integrated Key to the Remote Key
Entry System. For more information on Integrated Key, refer toLocks
and Securitychapter in this manual.
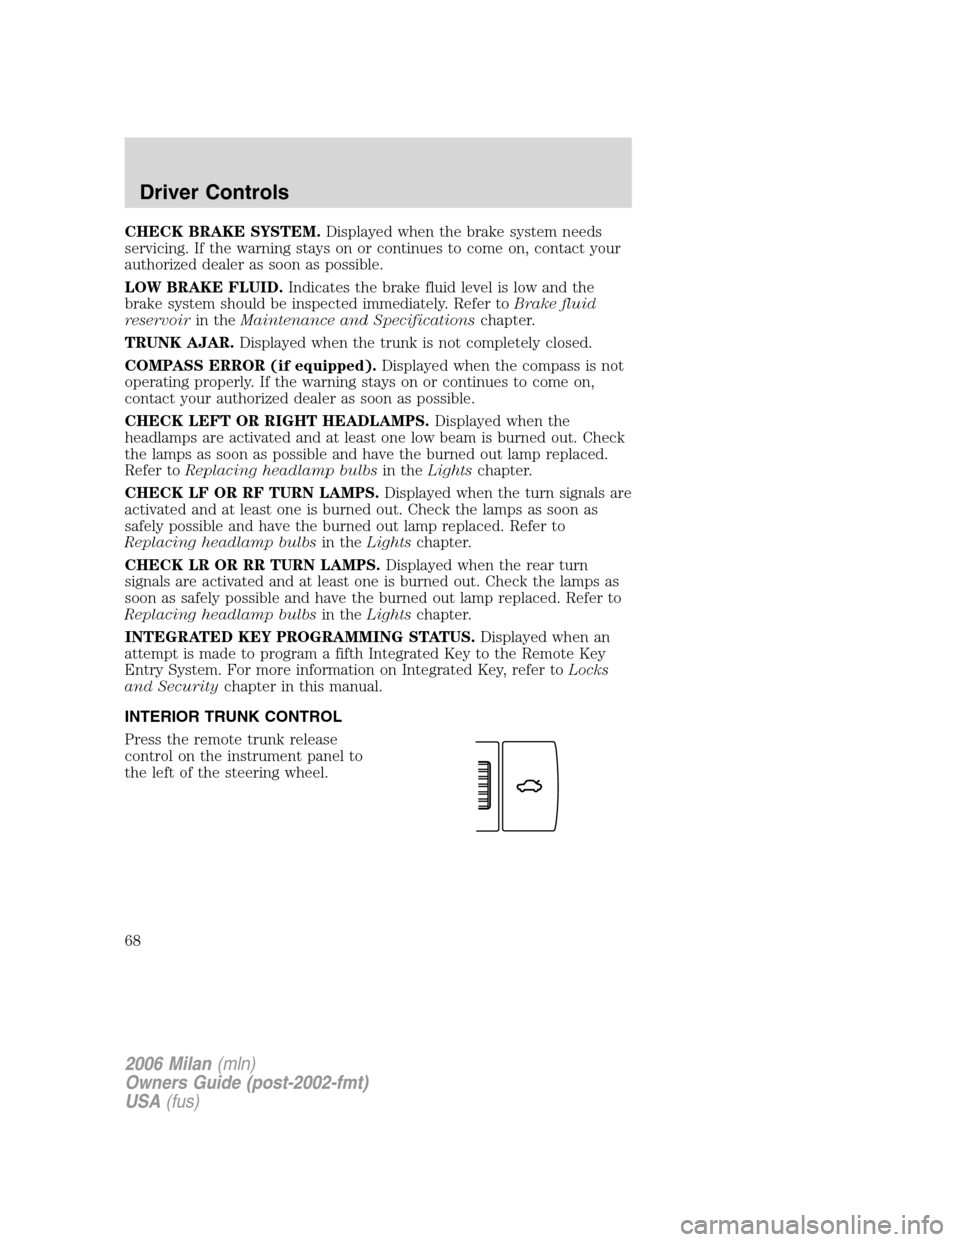
INTERIOR TRUNK CONTROL
Press the remote trunk release
control on the instrument panel to
the left of the steering wheel.
2006 Milan(mln)
Owners Guide (post-2002-fmt)
USA(fus)
Driver Controls
68
Page 76 of 256
Unlocking the doors/two stage unlock
1. Pressand release to unlock the driver’s door.Note:The interior
lamps will illuminate.
2. Press
and release again within five seconds to unlock all the doors.
The remote entry system activates the illuminated entry feature; this
feature turns on the lamps for 25 seconds or until the ignition is turned
to the 3 (RUN) position.
The inside lights will not turn off if:
•they have been turned on using the dimmer control or
•any door is open.
The battery saver feature will turn off the interior lamps 30 minutes after
the ignition is turned to the 1 (LOCK) position.
Two stage unlocking may be disabled or re-enabled by simultaneously
pressing the
andcontrols on the IKT for four seconds (disabling
two stage unlock allows all vehicle doors to unlock simultaneously). The
turn lamps will flash twice to indicate that two-stage unlock was enabled
or disabled.
Locking the doors
1. Pressand release to lock all the doors. The turn lamps will flash.
2. Press
and release again within three seconds to confirm that all
the doors are closed.Note:The doors will lock again, the horn will chirp
and the turn lamps will flash once if all the doors and trunk are closed.
Note:If any door or the trunk is not closed, or if the hood is not closed
in vehicles equipped with the perimeter alarm feature, the horn will
chirp twice and the lamps will not flash.
Sounding a panic alarm
Press
to activate the alarm. The horn will sound and the turn lamps
will flash for a maximum of 3 minutes. Press again or turn the ignition to
the 3 (RUN) position to deactivate, or wait for the alarm to timeout in 3
minutes.
Note:The panic alarm will only operate when the ignition is in the 1
(LOCK) position.
2006 Milan(mln)
Owners Guide (post-2002-fmt)
USA(fus)
Locks and Security
76
Page 79 of 256

Illuminated entry
The interior lamps and puddle lamps (if equipped) illuminate when the
Integrated Keyhead Transmitter is used to unlock the door(s).
The illuminated entry system will turn off the interior lights if:
•the ignition is turned to the 3 (RUN) position, or
•the Integrated Keyhead Transmitter lock control is pressed, or
•after 25 seconds of illumination.
The inside lights will not turn off if:
•they have been turned on with the dimmer control, or
•any door is open.
Perimeter lamps illuminated entry
With the Integrated Keyhead Transmitter system, the following items will
illuminate when the
(unlock) control on the transmitter is pressed:
•Head lamps
•Park lamps
•Tail lamps
The lamps will automatically turn off:
•if the ignition switch is turned to the 3 (RUN) position, or
•the IKT
(lock) control is pressed, or
•after 25 seconds of illumination.
Note:On some vehicles, the perimeter lamps illuminated entry feature
will not activate in daylight conditions.
Deactivating/activating perimeter lamps illuminated entry
You may enable/disable this feature by having your vehicle serviced by
your authorized dealer.
You may also perform the following power door lock sequence to
enable/disable the perimeter lamps feature.Note:Before starting, ensure
the ignition is in the 1 (LOCK) position and all vehicle doors are closed.
You must complete Steps 1–5 within 30 seconds or the procedure will
have to be repeated. If the procedure needs to be repeated, wait a
minimum of 30 seconds before beginning again.
2006 Milan(mln)
Owners Guide (post-2002-fmt)
USA(fus)
Locks and Security
79
Page 80 of 256
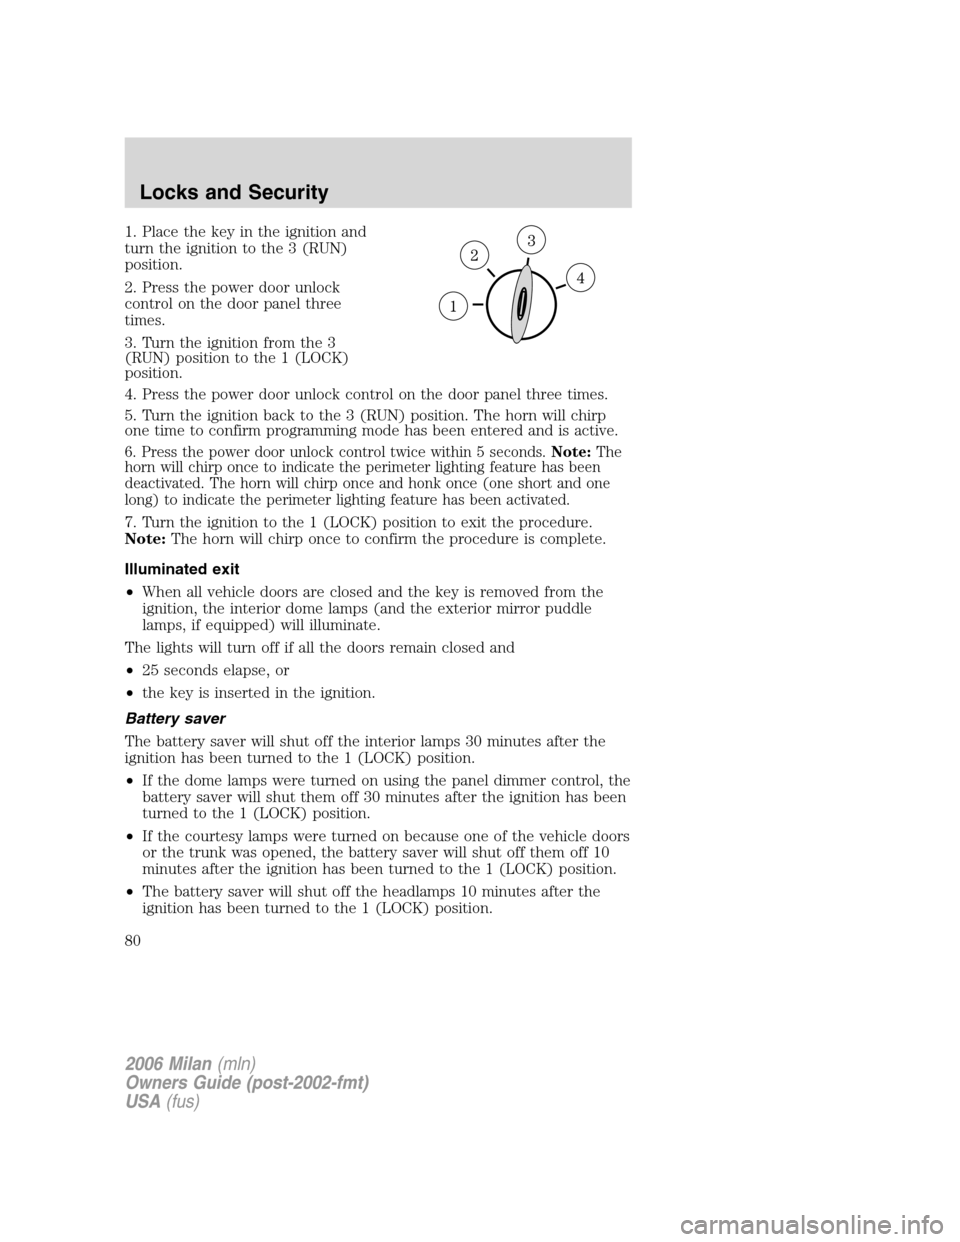
1. Place the key in the ignition and
turn the ignition to the 3 (RUN)
position.
2. Press the power door unlock
control on the door panel three
times.
3. Turn the ignition from the 3
(RUN) position to the 1 (LOCK)
position.
4. Press the power door unlock control on the door panel three times.
5. Turn the ignition back to the 3 (RUN) position. The horn will chirp
one time to confirm programming mode has been entered and is active.
6. Press the power door unlock control twice within 5 seconds.Note:The
horn will chirp once to indicate the perimeter lighting feature has been
deactivated. The horn will chirp once and honk once (one short and one
long) to indicate the perimeter lighting feature has been activated.
7. Turn the ignition to the 1 (LOCK) position to exit the procedure.
Note:The horn will chirp once to confirm the procedure is complete.
Illuminated exit
•When all vehicle doors are closed and the key is removed from the
ignition, the interior dome lamps (and the exterior mirror puddle
lamps, if equipped) will illuminate.
The lights will turn off if all the doors remain closed and
•25 seconds elapse, or
•the key is inserted in the ignition.
Battery saver
The battery saver will shut off the interior lamps 30 minutes after the
ignition has been turned to the 1 (LOCK) position.
•If the dome lamps were turned on using the panel dimmer control, the
battery saver will shut them off 30 minutes after the ignition has been
turned to the 1 (LOCK) position.
•If the courtesy lamps were turned on because one of the vehicle doors
or the trunk was opened, the battery saver will shut off them off 10
minutes after the ignition has been turned to the 1 (LOCK) position.
•The battery saver will shut off the headlamps 10 minutes after the
ignition has been turned to the 1 (LOCK) position.
2006 Milan(mln)
Owners Guide (post-2002-fmt)
USA(fus)
Locks and Security
80
Page 249 of 256

GENUINE MERCURY ACCESSORIES FOR YOUR VEHICLE
A wide selection of Genuine Mercury Accessories are available for your
vehicle through your local Mercury or Ford of Canada dealer. These
quality accessories have been specifically engineered to fulfill your
automotive needs; they are custom designed to complement the style
and aerodynamic appearance of your vehicle. In addition, each accessory
is made from high quality materials and meets or exceeds Mercury’s
rigorous engineering and safety specifications. Ford Motor Company will
repair or replace any properly dealer-installed Genuine Mercury
Accessories found to be defective in factory-supplied materials or
workmanship during the warranty period, as well as any component
damaged by the defective accessories. The accessories will be warranted
for whichever provides you the greatest benefit:
•12 months or 12,000 miles (20,000 km) (whichever occurs first), or
•the remainder of your new vehicle limited warranty.
This means that Genuine Mercury Accessories purchased along with your
new vehicle and installed by a dealer are covered for the full length of
your New Vehicle’s Limited Warranty — 3 years or 36,000 miles (60,000
km) (whichever occurs first). Contact your dealer for details and a copy
of the warranty.
Not all accessories are available for all models.
Following is a list of several Genuine Mercury Accessories. Not all
accessories are available for all models. To find out what accessories are
available for your vehicle, please contact your dealer or visit our online
store at: www.mercuryaccessories.com.
Exterior style
Bug shields
Deflectors
Front end covers
Fog lights
Splash guards
Wheels
Interior style
Electrochromatic compass/temperature interior mirrors
Floor mats
Scuff plates
2006 Milan(mln)
Owners Guide (post-2002-fmt)
USA(fus)
Accessories
249
Page 253 of 256
F
Fail safe cooling ........................222
Fluid capacities .........................241
Foglamps .....................................35
Fuel ............................................223
calculating fuel economy..62, 227
cap ...........................................225
capacity ...................................241
choosing the right fuel ...........226
comparisons with EPA fuel
economy estimates .................230
detergent in fuel .....................227
filling your vehicle with
fuel ...........................223, 225, 228
filter, specifications ........223, 240
fuel pump shut-off switch .....172
improving fuel economy ........227
octane rating ...........226, 244–245
quality ......................................227
running out of fuel .................227
safety information relating to
automotive fuels .....................223
Fuel pump shut-off switch .......172
Fuses ..........................................173
G
Gas cap (see Fuel cap) ............225
Gas mileage
(see Fuel economy) .................227
Gauges .........................................13
H
Hazard flashers .........................172
Head restraints ...........................89
Headlamps ...................................34
aiming ..................................36–37autolamp system .......................34
bulb specifications ....................39
daytime running lights .............35
flash to pass ..............................36
high beam .................................36
replacing bulbs .........................39
turning on and off ....................34
Heating
heating and air conditioning
system ...........................26, 28, 30
Hood ..........................................206
I
Ignition .......................156, 244–245
Illuminated visor mirror .............50
Infant seats (see Safety seats)..127
Inspection/maintenance (I/M)
testing ........................................232
Instrument panel ........................52
cleaning ...................................202
cluster ........................................10
lighting up panel and interior...36
J
Jack ............................................179
positioning ...............................179
storage .....................................179
Jump-starting your vehicle ......185
K
Keyless entry system
autolock .....................................81
Keys .......................................69, 84
positions of the ignition .........156
2006 Milan(mln)
Owners Guide (post-2002-fmt)
USA(fus)
Index
253