tow Mercury Monterey 2004 Owner's Manuals
[x] Cancel search | Manufacturer: MERCURY, Model Year: 2004, Model line: Monterey, Model: Mercury Monterey 2004Pages: 272, PDF Size: 4.29 MB
Page 2 of 272
Locks and Security 82
Keys 82
Locks 82
Anti-theft system 84
Seating and Safety Restraints 97
Seating 97
Safety restraints 116
Air bags 129
Child restraints 140
Driving 154
Starting 154
Brakes 157
Transmission operation 162
Vehicle loading 169
Trailer towing 172
Roadside Emergencies 177
Getting roadside assistance 177
Hazard flasher switch 178
Fuel pump shut-off switch 178
Fuses and relays 179
Changing tires 187
Jump starting 194
Wrecker towing 200
2004 Monterey(mty)
Owners Guide (post-2002-fmt)
USA English(fus)
Table of Contents
2
Page 5 of 272
SAFETY AND ENVIRONMENT PROTECTION
Warning symbols in this guide
How can you reduce the risk of personal injury and prevent possible
damage to others, your vehicle and its equipment? In this guide, answers
to such questions are contained in comments highlighted by the warning
triangle symbol. These comments should be read and observed.
Warning symbols on your vehicle
When you see this symbol, it is
imperative that you consult the
relevant section of this guide before
touching or attempting adjustment
of any kind.
Protecting the environment
We must all play our part in
protecting the environment. Correct
vehicle usage and the authorized
disposal of waste, cleaning and
lubrication materials are significant
steps towards this aim. Information in this respect is highlighted in this
guide with the tree symbol.
BREAKING-IN YOUR VEHICLE
Your vehicle does not need an extensive break-in. Try not to drive
continuously at the same speed for the first 1,600 km (1,000 miles) of
new vehicle operation. Vary your speed to allow parts to adjust
themselves to other parts.
Drive your new vehicle at least 800 km (500 miles) before towing a
trailer.
Do not add friction modifier compounds or special break-in oils during
the first few thousand kilometers (miles) of operation, since these
additives may prevent piston ring seating. SeeEngine oilin the
Maintenance and specificationschapter for more information on oil
usage.
2004 Monterey(mty)
Owners Guide (post-2002-fmt)
USA English(fus)
Introduction
5
Page 24 of 272
When the rear seat controls are activated, rear seat passengers can use
the controls to change the playing media for all passengers (Single Play
mode). In this mode, all speakers will play audio from the same media
source for all passengers to hear.
If there is a discrepancy between the rear seat controls and the front
audio controls (such as both trying to listen to the same playing media),
the front audio system will receive the desired selection.
To activate Dual Play mode (rear seat passengers listen to a different
playing media than the front seat passengers):
•Press the speaker/headphone control.
•Press MEDIA to change audio sources (for headphone mode only).
•Use the SEEK, VOLUME and MEMORY controls to make adjustments
to the playing media.
RADIO FREQUENCIES
AM and FM frequencies are established by the Federal Communications
Commission (FCC) and the Canadian Radio and Telecommunications
Commission (CRTC). Those frequencies are:
AM - 530, 540–1700, 1710 kHz
FM- 87.7, 87.9–107.7, 107.9 MHz
RADIO RECEPTION FACTORS
There are three factors that can affect radio reception:
•Distance/strength: The further you travel from an FM station, the
weaker the signal and the weaker the reception.
•Terrain: Hills, mountains, tall buildings, power lines, electric fences,
traffic lights and thunderstorms can interfere with your reception.
•Station overload: When you pass a broadcast tower, a stronger signal
may overtake a weaker one and play while the weak station frequency
is displayed.
CASSETTE/PLAYER CARE
Do:
•Tighten very loose tapes by inserting a pen or pencil into the hole and
turning the hub.
•Remove loose labels before inserting tapes.
•Allow tapes which have been subjected to extreme heat, humidity or
cold to reach a moderate temperature before playing.
2004 Monterey(mty)
Owners Guide (post-2002-fmt)
USA English(fus)
Entertainment Systems
24
Page 27 of 272
with MAX A/C or can be engaged manually in any mode except Defrost.
Press to engage/disengage. To reduce humidity inside the vehicle, turn
recirculation off.
7.A/C:Press to engage/disengage. Uses outside or recirculated air to
cool the vehicle. Engages automatically in MAX A/C, Defrost and
Floor/Defrost. The A/C indicator light will illuminate in MAX A/C mode
and may or may not illuminate in Defrost, Floor/Defrost modes
depending on the previous selections.
8.Fan speed adjustment:Controls the volume of air circulated in the
vehicle.
9.Left temperature selection:Controls the temperature of the airflow
to the driver in the front of the vehicle.
10.Right temperature selection:Controls the temperature of the
airflow to the passenger in the front of the vehicle.
Operating tips
•To reduce fog build up on the windshield during humid weather, place
the air flow selector in the
position.
•To reduce humidity build-up inside the vehicle, do not drive in
recirculated air mode without the A/C running.
•Do not put objects under the front seats that will interfere with the
airflow to the back seats.
•Remove any snow, ice or leaves from the air intake area at the base of
the windshield.
To aid in side window defogging/demisting in cold weather:
1. Select
2. Select A/C
3. Set the temperature control to full heat.
4. Set the fan speed to the highest setting.
5. Direct the outer instrument panel vents towards the side windows
Do not place objects on top of the instrument panel as these
objects may become projectiles in a collision or sudden stop.
2004 Monterey(mty)
Owners Guide (post-2002-fmt)
USA English(fus)
Climate Controls
27
Page 34 of 272
17.REAR:Press to activate the rear climate controls.
18.
Recirculation control:Press to engage/disengage. Used to
manually enable or disable recirculated air operation. When activated,
recirculates air in the cabin thereby reducing the amount of time to cool
down the interior of the vehicle when used with A/C. May also help
reduce undesired outside odors from reaching the interior of the vehicle.
Engages automatically with AUTO or can be engaged manually in any
mode except Defrost. Press to engage/disengage. To reduce humidity
inside the vehicle, turn recirculation off.
OPERATING TIPS
Automatic fan and air distribution are set primarily by the driver
temperature settings. When the driver and passenger temperature
settings are very different, you may need to use the manual fan speed
setting to achieve passenger comfort.
•To reduce fog build up on the windshield during humid weather, place
the air flow selector in the
position.
•To reduce humidity build up inside the vehicle: do not drive with the
air flow selector in the OFF or MAX A/C position.
•Do not put objects under the front seats that will interfere with the
airflow to the back seats.
•Remove any snow, ice or leaves from the air intake area at the base of
the windshield.
To aid in side window defogging/demisting in cold weather:
1. Select
2. Select A/C
3. Modulate the temperature control to maintain comfort.
4. Set the fan speed to HI
5. Direct the outer instrument panel vents towards the side windows
Do not place objects on top of the instrument panel as these
objects may become projectiles in a collision or sudden stop.
2004 Monterey(mty)
Owners Guide (post-2002-fmt)
USA English(fus)
Climate Controls
34
Page 37 of 272
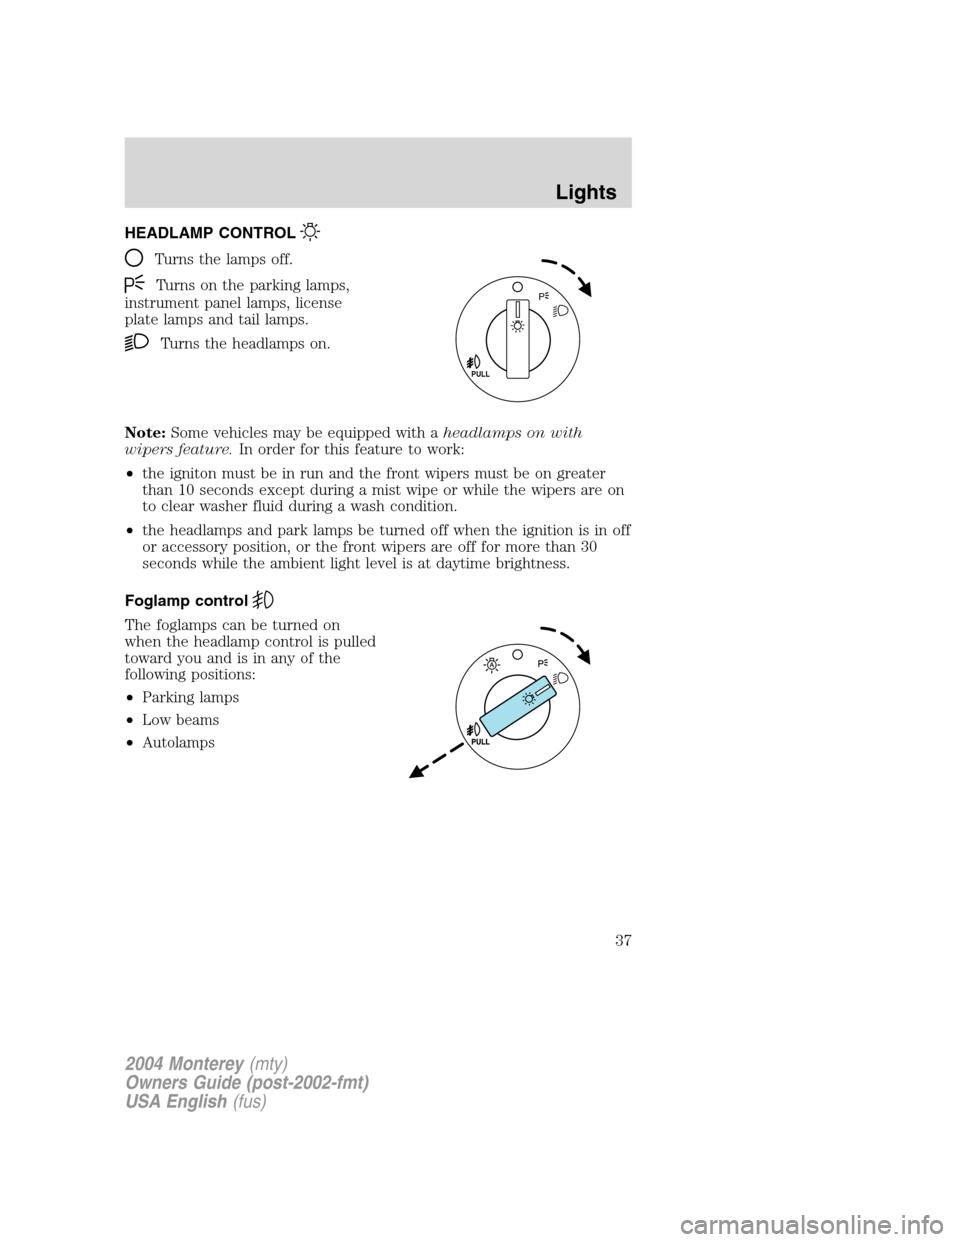
HEADLAMP CONTROL
Turns the lamps off.
Turns on the parking lamps,
instrument panel lamps, license
plate lamps and tail lamps.
Turns the headlamps on.
Note:Some vehicles may be equipped with aheadlamps on with
wipers feature.In order for this feature to work:
•the igniton must be in run and the front wipers must be on greater
than 10 seconds except during a mist wipe or while the wipers are on
to clear washer fluid during a wash condition.
•the headlamps and park lamps be turned off when the ignition is in off
or accessory position, or the front wipers are off for more than 30
seconds while the ambient light level is at daytime brightness.
Foglamp control
The foglamps can be turned on
when the headlamp control is pulled
toward you and is in any of the
following positions:
•Parking lamps
•Low beams
•Autolamps
PULL
P
2004 Monterey(mty)
Owners Guide (post-2002-fmt)
USA English(fus)
Lights
Lights
37
Page 38 of 272
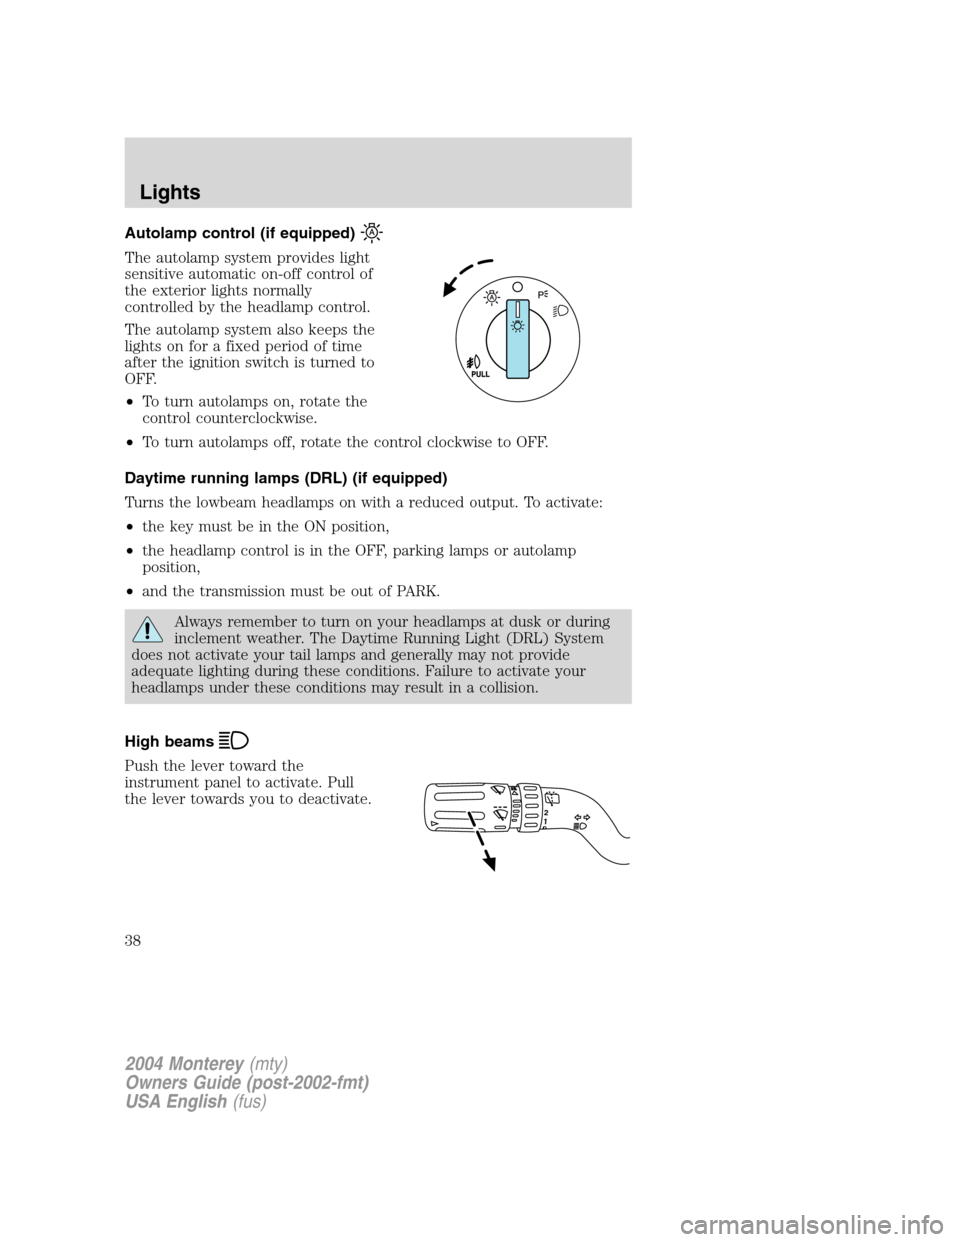
Autolamp control (if equipped)
The autolamp system provides light
sensitive automatic on-off control of
the exterior lights normally
controlled by the headlamp control.
The autolamp system also keeps the
lights on for a fixed period of time
after the ignition switch is turned to
OFF.
•To turn autolamps on, rotate the
control counterclockwise.
•To turn autolamps off, rotate the control clockwise to OFF.
Daytime running lamps (DRL) (if equipped)
Turns the lowbeam headlamps on with a reduced output. To activate:
•the key must be in the ON position,
•the headlamp control is in the OFF, parking lamps or autolamp
position,
•and the transmission must be out of PARK.
Always remember to turn on your headlamps at dusk or during
inclement weather. The Daytime Running Light (DRL) System
does not activate your tail lamps and generally may not provide
adequate lighting during these conditions. Failure to activate your
headlamps under these conditions may result in a collision.
High beams
Push the lever toward the
instrument panel to activate. Pull
the lever towards you to deactivate.
12
2004 Monterey(mty)
Owners Guide (post-2002-fmt)
USA English(fus)
Lights
38
Page 39 of 272
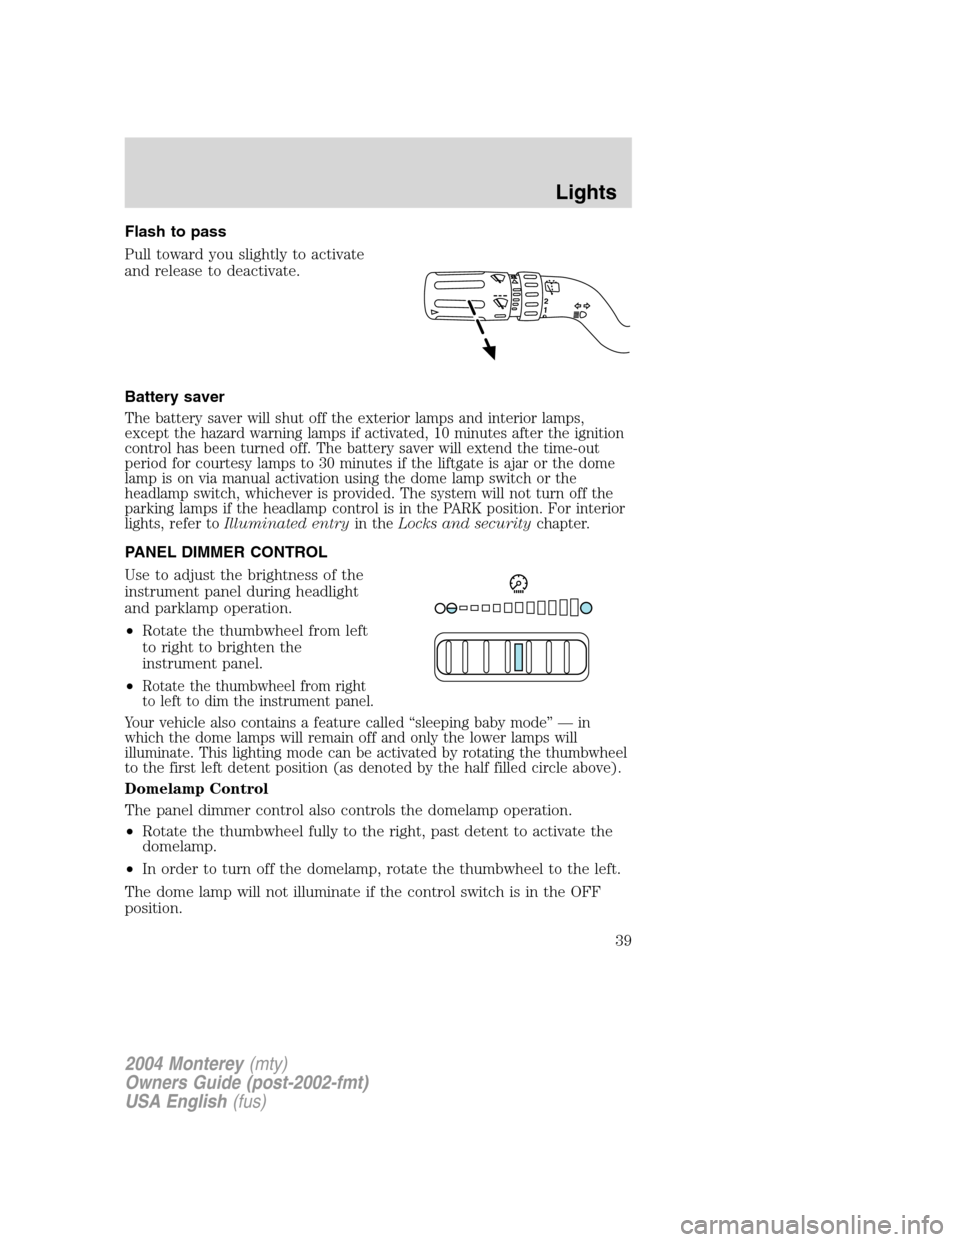
Flash to pass
Pull toward you slightly to activate
and release to deactivate.
Battery saver
The battery saver will shut off the exterior lamps and interior lamps,
except the hazard warning lamps if activated, 10 minutes after the ignition
control has been turned off. The battery saver will extend the time-out
period for courtesy lamps to 30 minutes if the liftgate is ajar or the dome
lamp is on via manual activation using the dome lamp switch or the
headlamp switch, whichever is provided. The system will not turn off the
parking lamps if the headlamp control is in the PARK position. For interior
lights, refer toIlluminated entryin theLocks and securitychapter.
PANEL DIMMER CONTROL
Use to adjust the brightness of the
instrument panel during headlight
and parklamp operation.
•Rotate the thumbwheel from left
to right to brighten the
instrument panel.
•
Rotate the thumbwheel from right
to left to dim the instrument panel.
Your vehicle also contains a feature called“sleeping baby mode”—in
which the dome lamps will remain off and only the lower lamps will
illuminate. This lighting mode can be activated by rotating the thumbwheel
to the first left detent position (as denoted by the half filled circle above).
Domelamp Control
The panel dimmer control also controls the domelamp operation.
•Rotate the thumbwheel fully to the right, past detent to activate the
domelamp.
•In order to turn off the domelamp, rotate the thumbwheel to the left.
The dome lamp will not illuminate if the control switch is in the OFF
position.
12
2004 Monterey(mty)
Owners Guide (post-2002-fmt)
USA English(fus)
Lights
39
Page 47 of 272
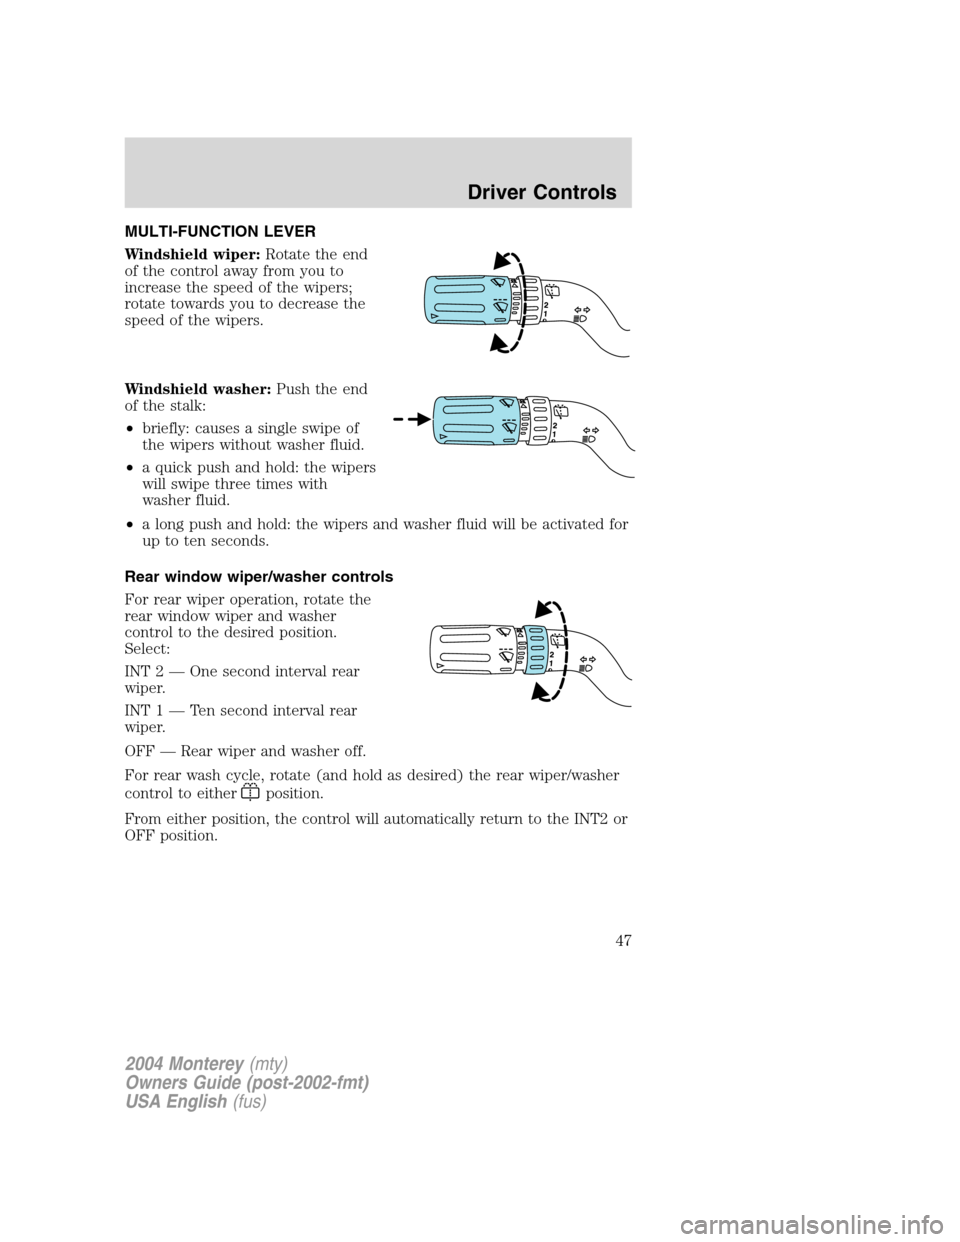
MULTI-FUNCTION LEVER
Windshield wiper:Rotate the end
of the control away from you to
increase the speed of the wipers;
rotate towards you to decrease the
speed of the wipers.
Windshield washer:Push the end
of the stalk:
•briefly: causes a single swipe of
the wipers without washer fluid.
•a quick push and hold: the wipers
will swipe three times with
washer fluid.
•a long push and hold: the wipers and washer fluid will be activated for
up to ten seconds.
Rear window wiper/washer controls
For rear wiper operation, rotate the
rear window wiper and washer
control to the desired position.
Select:
INT 2—One second interval rear
wiper.
INT 1—Ten second interval rear
wiper.
OFF—Rear wiper and washer off.
For rear wash cycle, rotate (and hold as desired) the rear wiper/washer
control to either
position.
From either position, the control will automatically return to the INT2 or
OFF position.
2004 Monterey(mty)
Owners Guide (post-2002-fmt)
USA English(fus)
Driver Controls
Driver Controls
47
Page 48 of 272
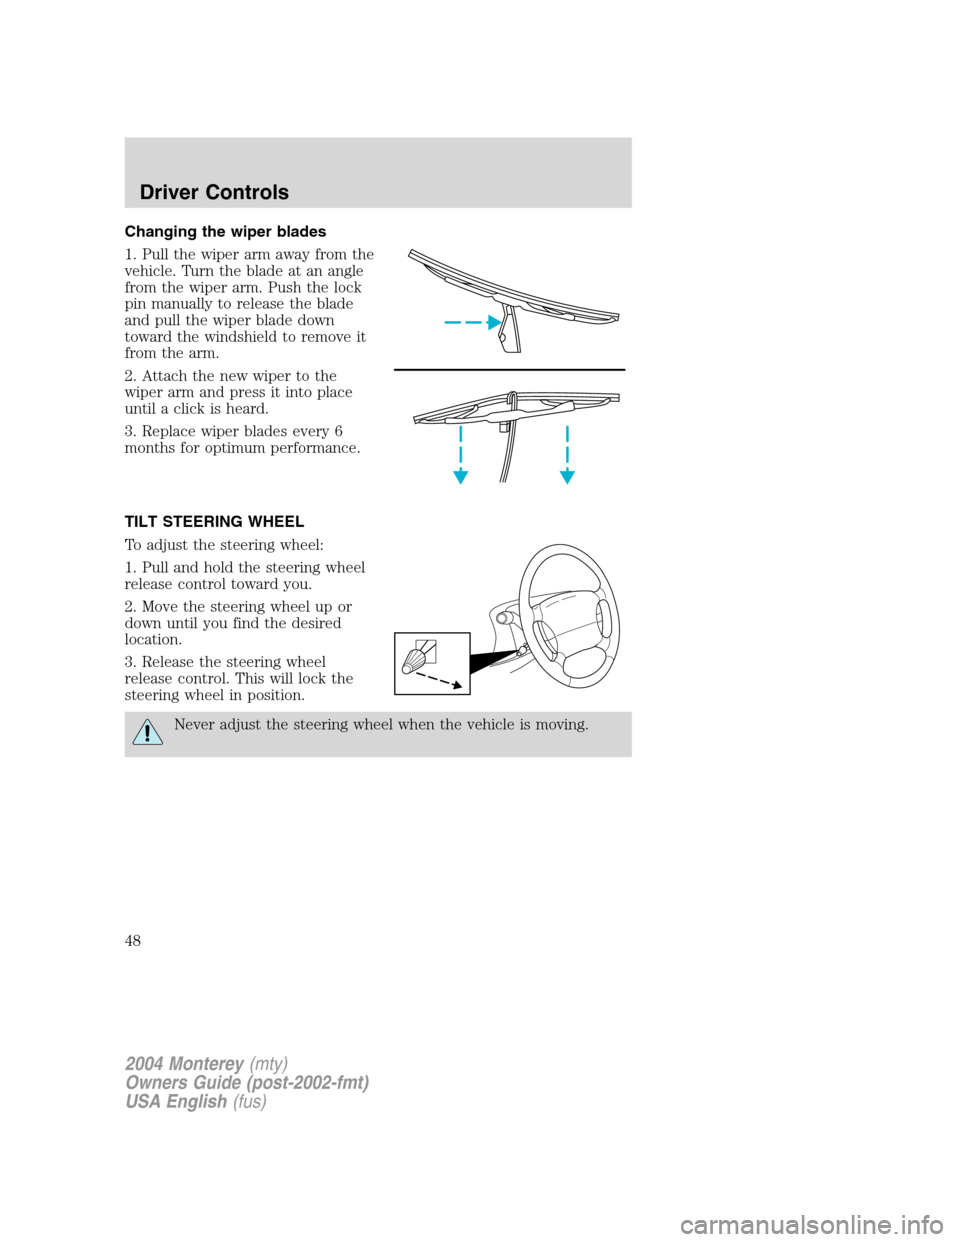
Changing the wiper blades
1. Pull the wiper arm away from the
vehicle. Turn the blade at an angle
from the wiper arm. Push the lock
pin manually to release the blade
and pull the wiper blade down
toward the windshield to remove it
from the arm.
2. Attach the new wiper to the
wiper arm and press it into place
until a click is heard.
3. Replace wiper blades every 6
months for optimum performance.
TILT STEERING WHEEL
To adjust the steering wheel:
1. Pull and hold the steering wheel
release control toward you.
2. Move the steering wheel up or
down until you find the desired
location.
3. Release the steering wheel
release control. This will lock the
steering wheel in position.
Never adjust the steering wheel when the vehicle is moving.
2004 Monterey(mty)
Owners Guide (post-2002-fmt)
USA English(fus)
Driver Controls
48