ECO mode Mercury Monterey 2007 Owner's Manuals
[x] Cancel search | Manufacturer: MERCURY, Model Year: 2007, Model line: Monterey, Model: Mercury Monterey 2007Pages: 312, PDF Size: 3.57 MB
Page 10 of 312

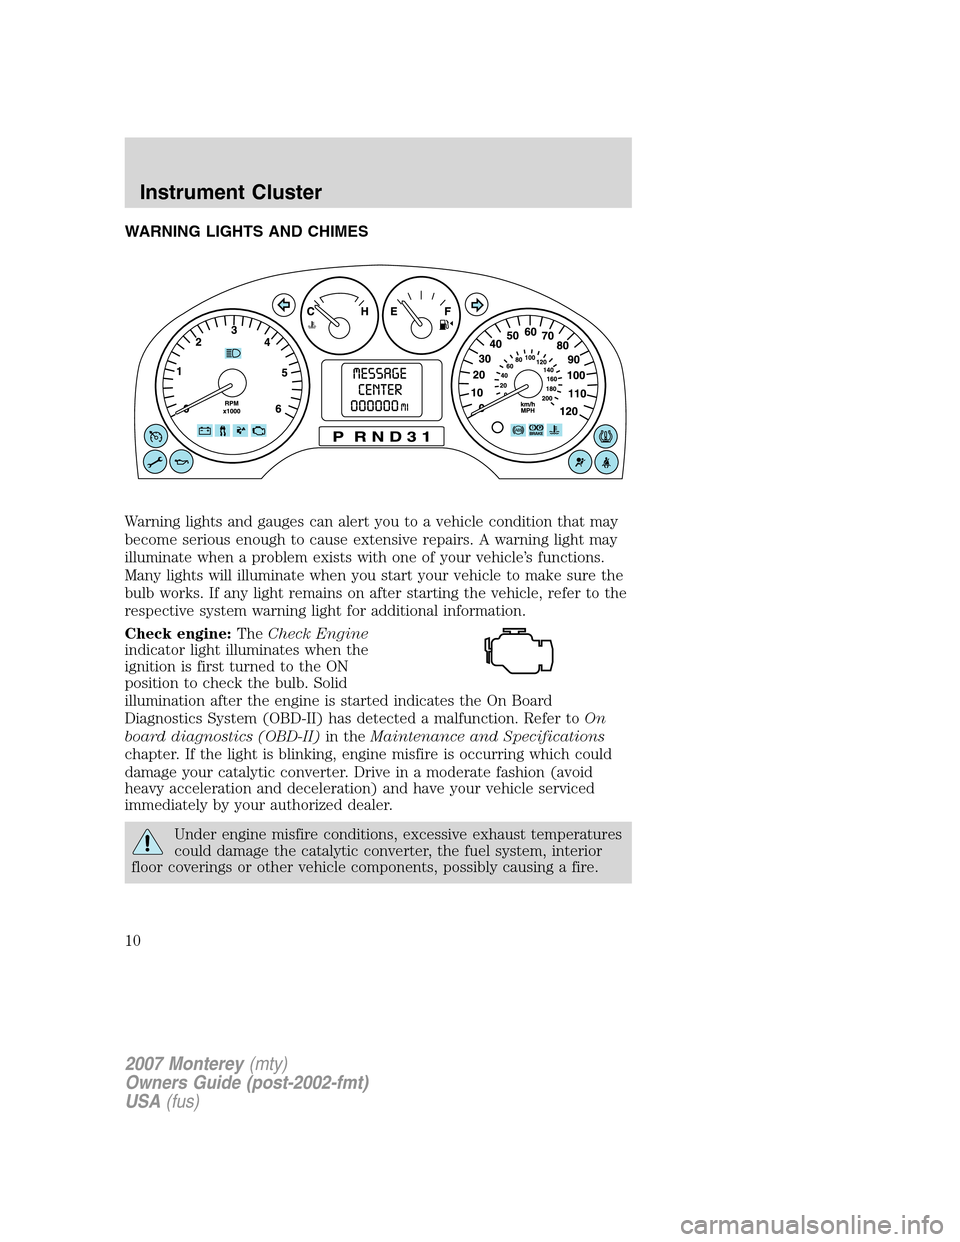
WARNING LIGHTS AND CHIMES
Warning lights and gauges can alert you to a vehicle condition that may
become serious enough to cause extensive repairs. A warning light may
illuminate when a problem exists with one of your vehicle’s functions.
Many lights will illuminate when you start your vehicle to make sure the
bulb works. If any light remains on after starting the vehicle, refer to the
respective system warning light for additional information.
Check engine:TheCheck Engine
indicator light illuminates when the
ignition is first turned to the ON
position to check the bulb. Solid
illumination after the engine is started indicates the On Board
Diagnostics System (OBD-II) has detected a malfunction. Refer toOn
board diagnostics (OBD-II)in theMaintenance and Specifications
chapter. If the light is blinking, engine misfire is occurring which could
damage your catalytic converter. Drive in a moderate fashion (avoid
heavy acceleration and deceleration) and have your vehicle serviced
immediately by your authorized dealer.
Under engine misfire conditions, excessive exhaust temperatures
could damage the catalytic converter, the fuel system, interior
floor coverings or other vehicle components, possibly causing a fire.
2007 Monterey(mty)
Owners Guide (post-2002-fmt)
USA(fus)
Instrument Cluster
10
Page 18 of 312

Treble:Press to adjust the treble setting. Use//SEEK.
Balance:Press to adjust the audio between the left and right speakers.
Use
//SEEK.
Fade:Press to adjust the audio between the front and rear speakers.
Use
//SEEK.
Speed sensitive volume (if equipped):Radio volume automatically
changes slightly with vehicle speed to compensate for road and wind
noise. Press MENU to access and use
//SEEKto adjust.
The recommended level is 1–3. Level 0 (SPEED OFF) turns the feature
off and level 7 is the maximum setting.
Setting the clock:Your vehicle is equipped with an in-dash clock. For
directions on setting the time, refer toClockin theDriver Controls
chapter.
4.Aux:Press to toggle between
FES/DVD and AUX modes. If no
auxiliary sources are available, NO
AUX AUDIO will be displayed.
5.Seek:Press to access the next
strong station or track.
6.Text:In CD mode, this feature
reads track name, artist name, and
disc name (if available).
7.Shuffle:Press to play tracks in
random order.
8.Comp (Compression):In CD
mode, brings soft and loud CD
passages together for a more
consistent listening level.
9.Repeat:Press to repeat the
current CD track.
2007 Monterey(mty)
Owners Guide (post-2002-fmt)
USA(fus)
Entertainment Systems
18
Page 27 of 312

mode). In this mode, all speakers will play audio from the same media
source for all passengers to hear.
If there is a discrepancy between the rear seat controls and the front
audio controls (such as both trying to listen to the same playing media),
the front audio system will receive the desired selection.
To activate Dual Play mode (rear seat passengers listen to a different
playing media than the front seat passengers):
•Press the speaker/headphone control.
•Press MEDIA to change audio sources (for headphone mode only).
•Use the SEEK, VOLUME and MEMORY controls to make adjustments
to the playing media.
Parental control
Simultaneously press the radio
preset controls 3 and 5 to
enable/disable the rear seat audio
controls as well as the Family Entertainment system (if equipped).
Dual play mode
Press
/on the rear seat audio
controls or simultaneously press the
radio preset controls 2 and 4 to
enable/disable dual play.
During dual play, the rear vehicle speakers will be deactivated and the
wired headphones (if equipped) will become active. Two different medias
can be played in the vehicle simultaneously:
•The driver can select a media from the main radio face (radio, tape,
CD or DVD if equipped) and listen using the front speakers.
•Rear seat passengers may listen to a different media source than the
front passengers (radio, tape, CD or DVD if equipped) using 3.5 mm
wired headphones (not included) that shall be plugged into the
headphone icon jacks on the rear audio control face. Infrared
headphones are included in vehicles equipped with the Family
Entertainment System and shall only be used to listed to the media
(DVD or CD) that is playing in the Family Entertainment System.
Wireless headphoneswill not playaudio from any other sources
(AM, FM, tape, or Radio CD).
The front and rear seat passengers cannot listen to two different radio
stations at the same time.
COMPRESS
COMPRESS
2007 Monterey(mty)
Owners Guide (post-2002-fmt)
USA(fus)
Entertainment Systems
27
Page 28 of 312

GENERAL AUDIO INFORMATION
Radio frequencies:
AM and FM frequencies are established by the Federal Communications
Commission (FCC) and the Canadian Radio and Telecommunications
Commission (CRTC). Those frequencies are:
AM: 530, 540 – 1700, 1710 kHz
FM: 87.7, 87.9 – 107.7, 107.9 MHz
Radio reception factors:
There are three factors that can affect radio reception:
•Distance/strength: The further you travel from a station, the weaker
the signal and the weaker the reception.
•Terrain: Hills, mountains, tall buildings, power lines, electric fences,
traffic lights and thunderstorms can interfere with your reception.
•Station overload: When you pass a broadcast tower, a stronger signal
may overtake a weaker one and play while the weak station frequency
is displayed.
Cassette/player care
Do:
•Tighten very loose tapes by inserting a pen or pencil into the hole and
turning the hub.
•Remove loose labels before inserting tapes.
•Allow tapes which have been subjected to extreme heat, humidity or
cold to reach a moderate temperature before playing.
•Clean the cassette player head with a cassette cleaning cartridge after
10–12 hours of play to maintain good sound/operation.
Don’t:
•Use cassettes that are longer than 90 minutes.
•Expose tapes to direct sunlight, extreme humidity, heat or cold.
•Leave tapes in the cassette player for a long time when not being
played.
CD/CD player care
Do:
•Handle discs by their edges only. Never touch the playing surface.
•Inspect discs before playing. Clean only with an approved CD cleaner
and wipe from the center out.
2007 Monterey(mty)
Owners Guide (post-2002-fmt)
USA(fus)
Entertainment Systems
28
Page 32 of 312

In theandmodes:
•Move the temperature control selector to the coldest setting.
•Select A/C and recirculated air
. Usewith A/C to provide
colder airflow.
•Set the fan to the highest speed initially, then adjust to maintain
passenger comfort.
In extremely cold temperatures, to maximize overall heater performance
it is suggested to not operate the auxiliary system (if so equipped) until
the engine temperature gauge crosses into the normal operating range.
To aid in side window defogging/demisting in cold weather:
1. Select
.
2. Select A/C.
3. Set the temperature control to full heat.
4. Set the fan speed to the highest setting.
5. Direct the outer instrument panel vents towards the side windows.
Do not place objects on top of the instrument panel as these
objects may become projectiles in a collision or sudden stop.
2007 Monterey(mty)
Owners Guide (post-2002-fmt)
USA(fus)
Climate Controls
32
Page 38 of 312

6.Passenger heated seat control:Press once to activate the high
heat setting (2 indicator lights). Press again to activate the low heat
setting (1 indicator light). Press again to deactivate the passenger heated
seat.
7.
Passenger cooled seat control:Press once to activate the high
cool setting (2 indicator lights). Press again to activate the low cool
setting (1 indicator light). Press again to deactivate the passenger cooled
seat.
8.DUAL:Press to engage/disengage separate passenger side
temperature control.
9.
Airflow direction control:Press to toggle through the air
distribution modes listed below. The selected mode will be shown in the
display.
:Distributes air through the instrument panel vents.
:Distributes air through the instrument panel and the floor vents.
:Distributes air through the floor vents.
:Distributes air through the windshield defroster vents and the floor
vents.
10.
Driver heated seat control:Press once to activate the high
heat setting (2 indicator lights). Press again to activate the low heat
setting (1 indicator light). Press again to deactivate the passenger heated
seat.
11.
Driver cooled seat control:Press once to activate the high
cool setting (2 indicator lights). Press again to activate the low cool
setting (1 indicator light). Press again to deactivate the passenger cooled
seat.
12. F
Front fan speed control:Press to manually increase or
decrease the fan speed. To return to full automatic control, press AUTO.
13.OFF:Outside air is shut out and the climate system is turned off.
14.Driver temperature control:Press to increase or decrease the
temperature on the driver side of the cabin. Sets the passenger side
temperature also when DUAL is disengaged.Note:The recommended
vehicle cabin setting is between 72°F (22°C) and 75°F (24°C).
15.AUTO:Press to engage full automatic operation, and select the
desired temperature using the temperature control. The system will
automatically determine fan speed, airflow location, A/C on or off, and
outside or recirculated air, to heat or cool the vehicle to reach the
desired temperature.
2007 Monterey(mty)
Owners Guide (post-2002-fmt)
USA(fus)
Climate Controls
38
Page 40 of 312

3. Adjust the temperature control to maintain comfort.
4. Set the fan to the highest speed.
5. Direct the outer instrument panel vents towards the side windows.
Do not place objects on top of the instrument panel as these
objects may become projectiles in a collision or sudden stop.
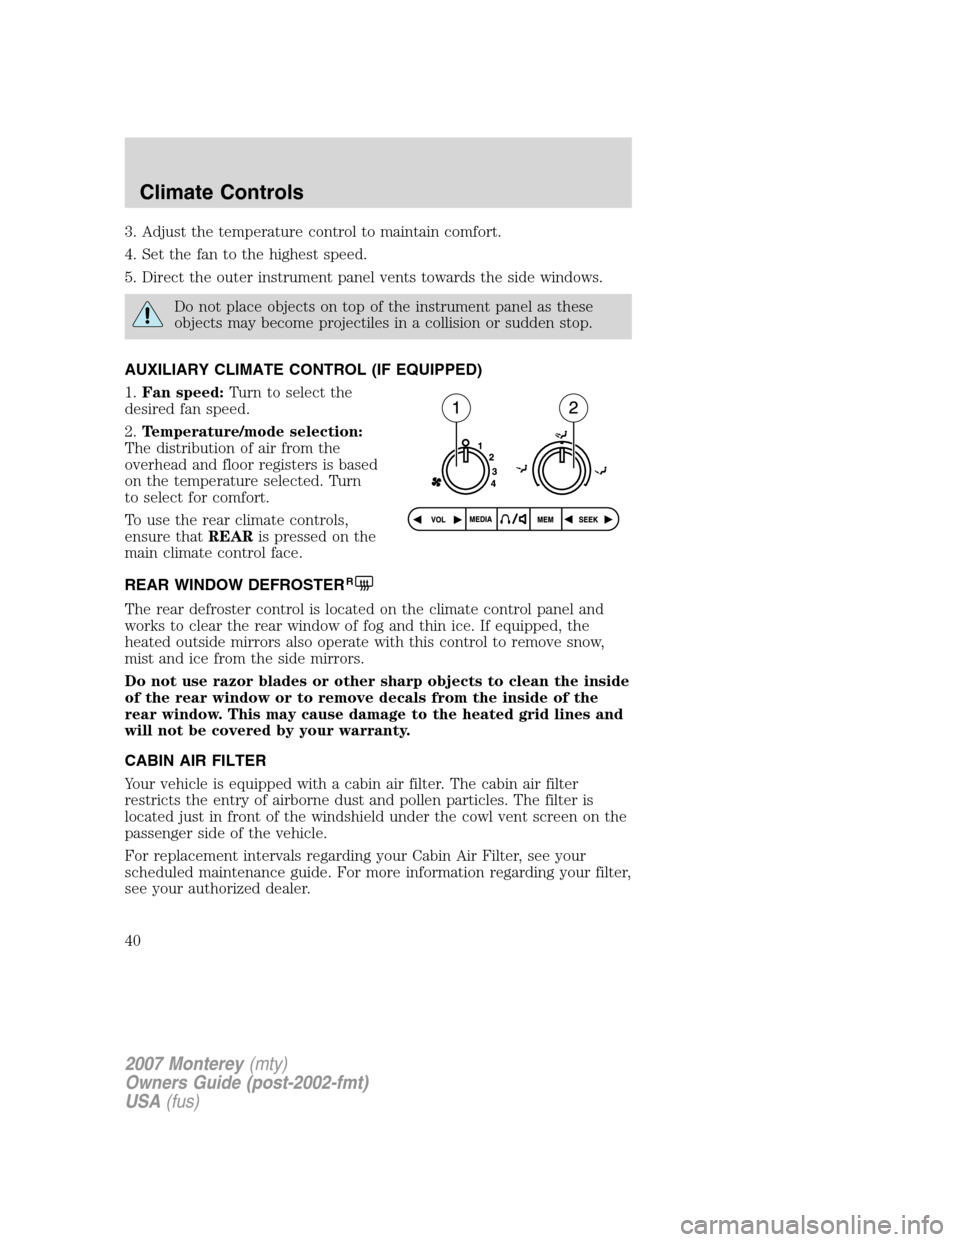
AUXILIARY CLIMATE CONTROL (IF EQUIPPED)
1.Fan speed:Turn to select the
desired fan speed.
2.Temperature/mode selection:
The distribution of air from the
overhead and floor registers is based
on the temperature selected. Turn
to select for comfort.
To use the rear climate controls,
ensure thatREARis pressed on the
main climate control face.
REAR WINDOW DEFROSTER
R
The rear defroster control is located on the climate control panel and
works to clear the rear window of fog and thin ice. If equipped, the
heated outside mirrors also operate with this control to remove snow,
mist and ice from the side mirrors.
Do not use razor blades or other sharp objects to clean the inside
of the rear window or to remove decals from the inside of the
rear window. This may cause damage to the heated grid lines and
will not be covered by your warranty.
CABIN AIR FILTER
Your vehicle is equipped with a cabin air filter. The cabin air filter
restricts the entry of airborne dust and pollen particles. The filter is
located just in front of the windshield under the cowl vent screen on the
passenger side of the vehicle.
For replacement intervals regarding your Cabin Air Filter, see your
scheduled maintenance guide. For more information regarding your filter,
see your authorized dealer.
2007 Monterey(mty)
Owners Guide (post-2002-fmt)
USA(fus)
Climate Controls
40
Page 41 of 312

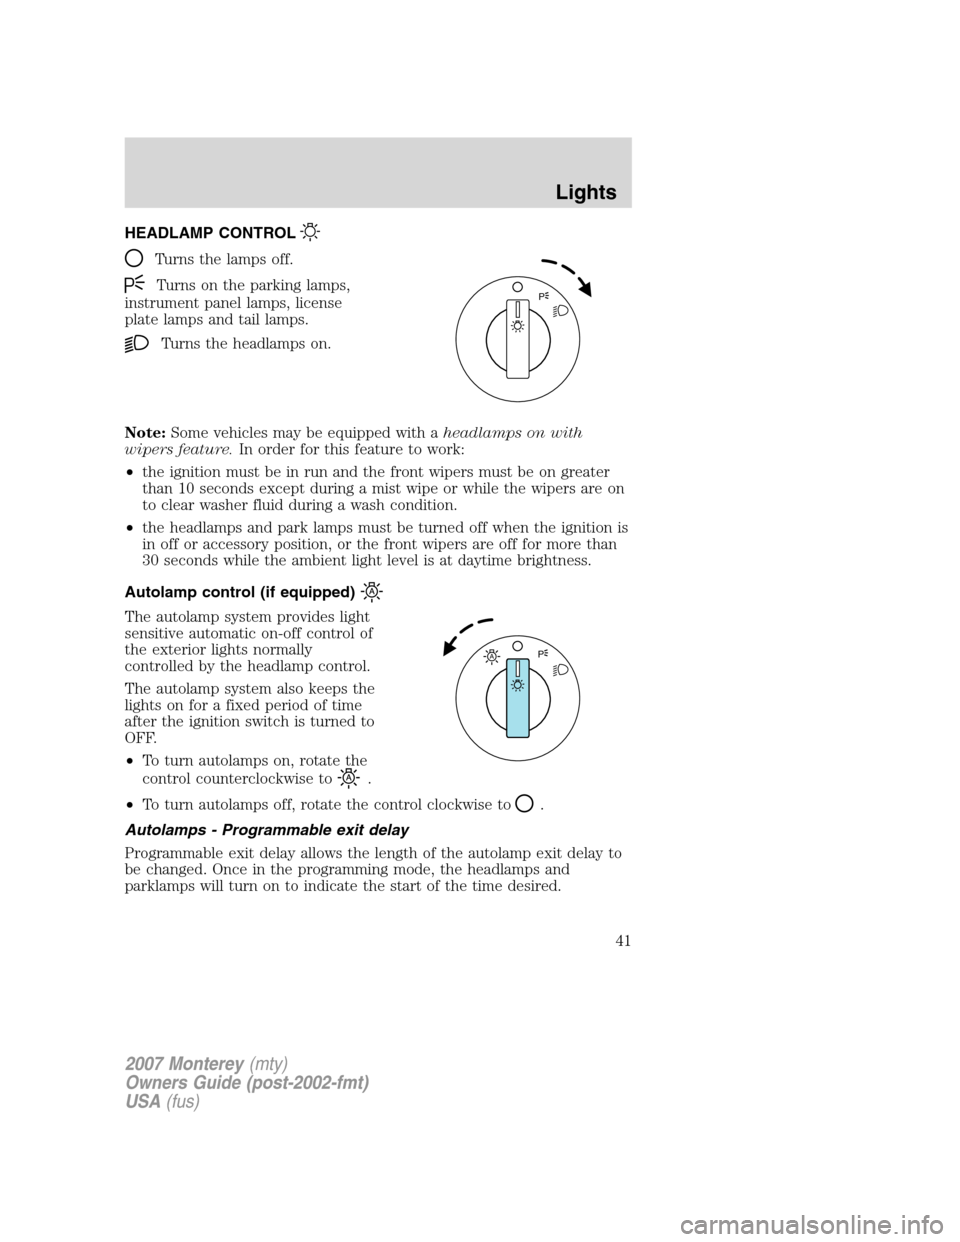
HEADLAMP CONTROL
Turns the lamps off.
Turns on the parking lamps,
instrument panel lamps, license
plate lamps and tail lamps.
Turns the headlamps on.
Note:Some vehicles may be equipped with aheadlamps on with
wipers feature.In order for this feature to work:
•the ignition must be in run and the front wipers must be on greater
than 10 seconds except during a mist wipe or while the wipers are on
to clear washer fluid during a wash condition.
•the headlamps and park lamps must be turned off when the ignition is
in off or accessory position, or the front wipers are off for more than
30 seconds while the ambient light level is at daytime brightness.
Autolamp control (if equipped)
The autolamp system provides light
sensitive automatic on-off control of
the exterior lights normally
controlled by the headlamp control.
The autolamp system also keeps the
lights on for a fixed period of time
after the ignition switch is turned to
OFF.
•To turn autolamps on, rotate the
control counterclockwise to
.
•To turn autolamps off, rotate the control clockwise to
.
Autolamps - Programmable exit delay
Programmable exit delay allows the length of the autolamp exit delay to
be changed. Once in the programming mode, the headlamps and
parklamps will turn on to indicate the start of the time desired.
P
AP
2007 Monterey(mty)
Owners Guide (post-2002-fmt)
USA(fus)
Lights
41
Page 56 of 312

or metallic objects placed in or on the vehicle may also affect compass
accuracy. Adjustments may need to be made to the zone and calibration
of the compass.
Zone variation mode
1. Determine which magnetic zone
you are in by referring to the zone
map.
2. Turn the ignition to the ON
position.
3. Press and hold the momentary
push-button for approximately
4 seconds, until VAR is displayed,
then release it. (Pressing the
momentary push-button for
8 seconds de-calibrates the
compass—seeCompass
Calibration Mode).
4. Press the button to increment the
VAR number to the desired VAR
number. Wait 5 seconds without
button activity and the compass will return to the heading mode.
Note:If there is no button activity for 5 seconds, the compass writes the
displayed zone VAR number to memory and exits Zone Variation Mode
1 2 3
4
5
6 7 8 9 101112 13 14 15
2007 Monterey(mty)
Owners Guide (post-2002-fmt)
USA(fus)
Driver Controls
56
Page 57 of 312

Compass calibration mode
1. Press the momentary push button
and hold it for more than 8 seconds.
After 8 seconds, CAL is displayed,
then release it.
Note:After button release CAL will
be displayed with a heading. The
compass is now de-calibrated and
enters the Initial AutoCal Mode.
2. Drive the vehicle in a tight circle
in a magnetically clean area such as
an open parking lot. Drive at a rate not faster than 15 seconds per circle
5 mph (8km/h).
Note:Look for a parking lot away from buildings, light posts, manhole
covers, sewer and drainage grates and other metallic objects. Some
magnetic objects may be hidden underground. Look for signs of
underground utilities, water mains or other industrial structures. The
parking lot should be level and have a smooth surface. Blacktop is
preferred over cement as a cement surface often contains iron
reinforcing bars or metallic mesh that could interfere with the calibration
process.
•The CAL indicator will turn off when the calibration process is
complete, leaving the compass heading on the display.
Note:This process normally takes about 1
1�2circles but may take longer
if magnetic noise is present or if the circles are driven too fast.
SLIDING DOOR OPERATION
Manual door operation
If equipped with a Power Sliding Door (PSD), turn the Power Door
Lockout control on the overhead console to the OFF position. Refer to
theDisabling power operation of the PSDsection in this chapter for
more information.
Note:Before unlatching the left side door, verify that the fuel fill door is
closed. The left hand door will not open if the fuel door is open.
Slide the door carefully in a controlled manner to the full open position.
At the end of travel, firmly push the door against the bump stop to
engage the hold open mechanism to restrain the door. When operating
the door on a gradient, special care should be taken to manually control
the opening and closing speed of the door.
2007 Monterey(mty)
Owners Guide (post-2002-fmt)
USA(fus)
Driver Controls
57