ECO mode Mercury Mountaineer 1997 Owner's Manuals
[x] Cancel search | Manufacturer: MERCURY, Model Year: 1997, Model line: Mountaineer, Model: Mercury Mountaineer 1997Pages: 197, PDF Size: 2.08 MB
Page 3 of 197

differences for towing, hauling, and
off-road operation. For this reason,
Mercury urges you to read and
understand the contents of the
Four-Wheelingsupplement.
Breaking in your vehicle
Your new vehicle goes through an
adjustment or breaking-in period
during the first 1,000 miles (1,600
km) of driving. During this period:
²Change your vehicle's speed
often as you drive. Do not drive
at one speed for a long time.
²Use only the type of engine oil
Ford recommends. Do not use
special ªbreak-inº oils.
²Avoid sudden stops. The
break-in period for brake linings
lasts for 1,600 km (1,000 miles)
of highway driving or 160 km
(100 miles) of city driving.
Information about this guide
This guide describes equipment
and gives specifications for
equipment that was in effect when
this guide was approved for
printing. Mercury may discontinue
models or change specifications or
design without any notice and
without incurring obligation.
Introduction
3
Page 20 of 197
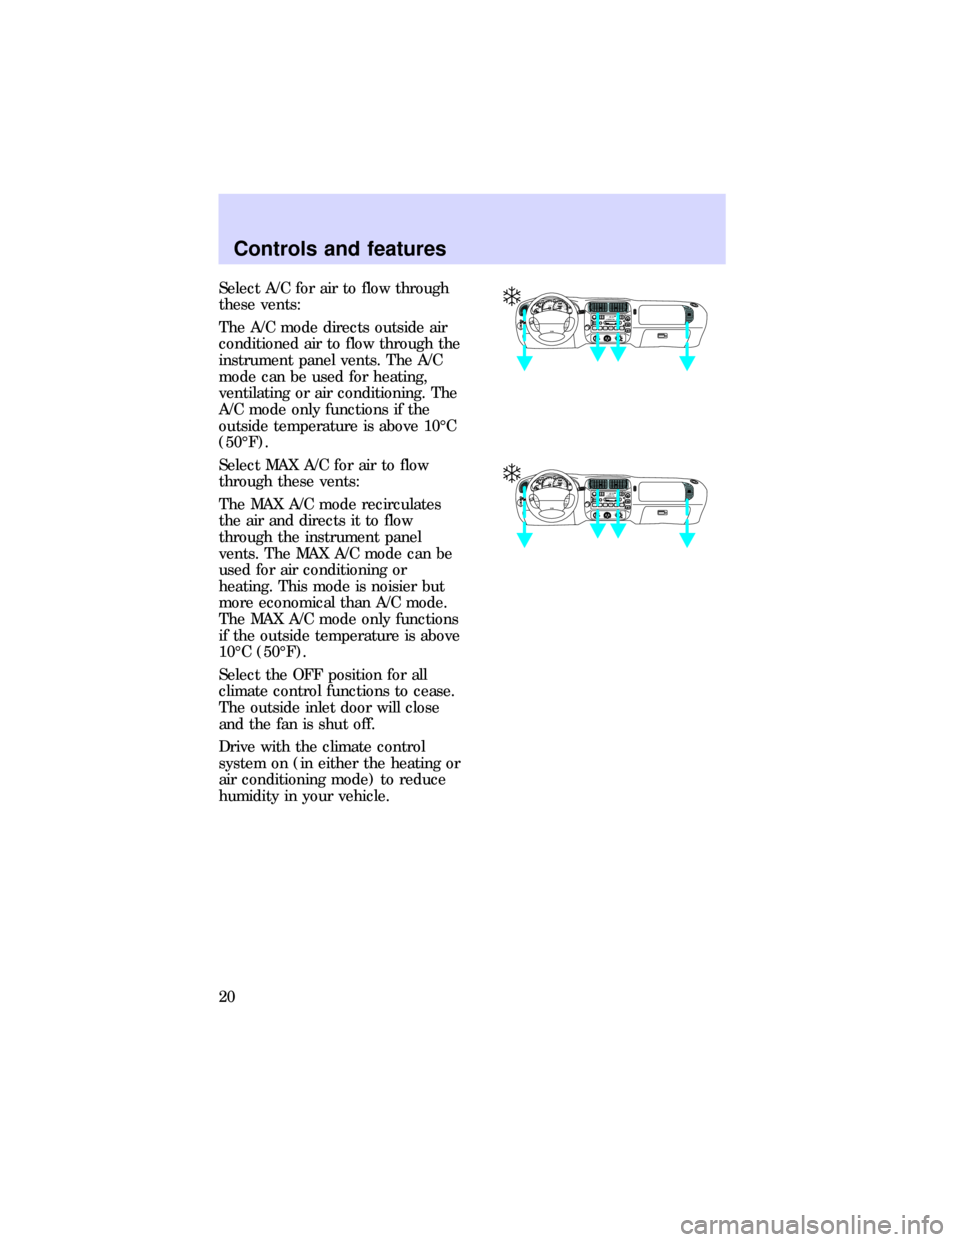
Select A/C for air to flow through
these vents:
The A/C mode directs outside air
conditioned air to flow through the
instrument panel vents. The A/C
mode can be used for heating,
ventilating or air conditioning. The
A/C mode only functions if the
outside temperature is above 10ÉC
(50ÉF).
Select MAX A/C for air to flow
through these vents:
The MAX A/C mode recirculates
the air and directs it to flow
through the instrument panel
vents. The MAX A/C mode can be
used for air conditioning or
heating. This mode is noisier but
more economical than A/C mode.
The MAX A/C mode only functions
if the outside temperature is above
10ÉC (50ÉF).
Select the OFF position for all
climate control functions to cease.
The outside inlet door will close
and the fan is shut off.
Drive with the climate control
system on (in either the heating or
air conditioning mode) to reduce
humidity in your vehicle.
0P RND21UNLEADED
FUEL ONLY
RPM x 100012345
6H
C
F
E020
1030405060
70
80
90
110
200000000ooookm/h100
20406080100
120
140
160
180RSM
SET
ACC
COAST OFF ONOFFSRSHI LOOFF*A/C*MAX
A/CREW
1FF
2SIDE 1-2
3FM 1STVOL – PUSH ON
AM
FMBASS TREBBAL FADE
AUTO
SET CLKSEEKTUNE
DISCSSCAN4DOLBY SYSTEMEJTAPE CDCOMP
5SHUFFLE
6PUSHd
Controls and features
20
Page 26 of 197
Overdrive control
Activating overdrive
OverdriveDis the normal drive
position for the best fuel economy
and will remain on until overdrive
is deactivated.
The overdrive function allows
automatic upshifts to 2nd, 3rd, and
4th gear.
Deactivating overdrive
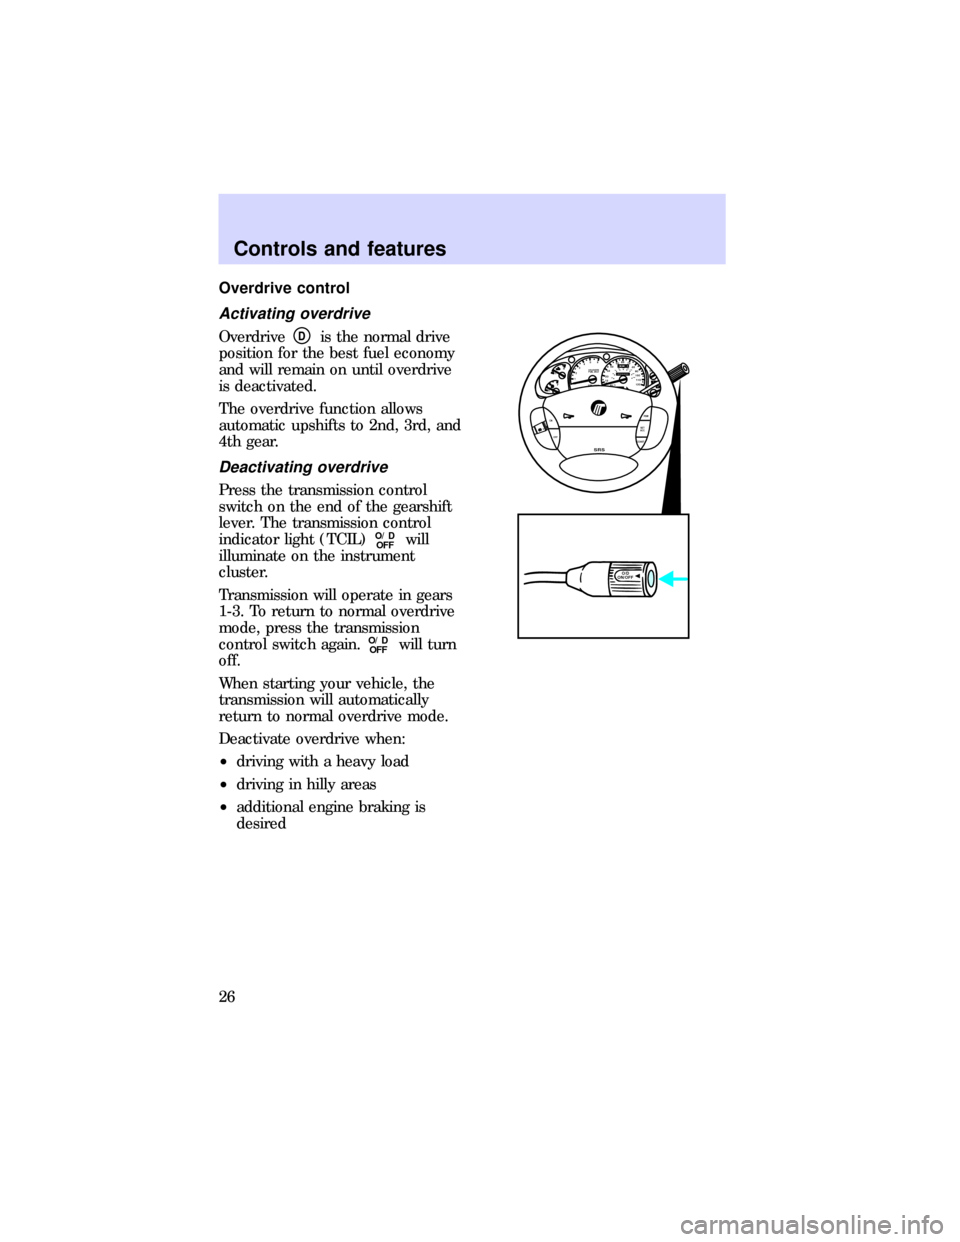
Press the transmission control
switch on the end of the gearshift
lever. The transmission control
indicator light (TCIL)
O/D
OFFwill
illuminate on the instrument
cluster.
Transmission will operate in gears
1-3. To return to normal overdrive
mode, press the transmission
control switch again.
O/D
OFFwill turn
off.
When starting your vehicle, the
transmission will automatically
return to normal overdrive mode.
Deactivate overdrive when:
²driving with a heavy load
²driving in hilly areas
²additional engine braking is
desired
0P RND21
UNLEADED
FUEL ONLY
RPM x 100012345
6H
C
F
E
RSM
SET
ACC
COAST OFF ON
SRS
- +H
H
L L020
1030405060
70
80
90
110
120000000oooo
km/h100
20406080100
120
140
160
180
O/D
ON/OFF
Controls and features
26
Page 30 of 197
Compass zone adjustment
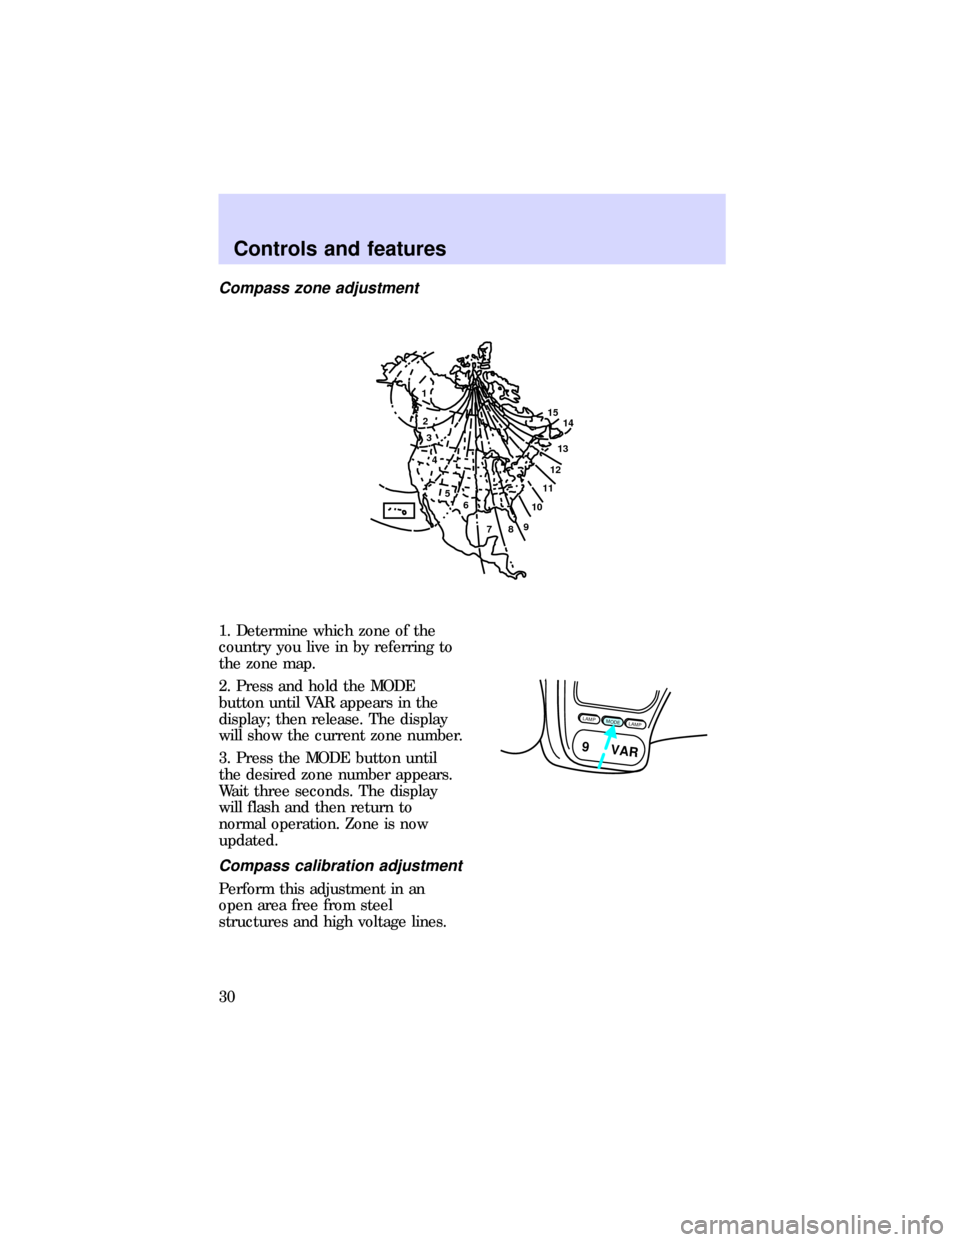
1. Determine which zone of the
country you live in by referring to
the zone map.
2. Press and hold the MODE
button until VAR appears in the
display; then release. The display
will show the current zone number.
3. Press the MODE button until
the desired zone number appears.
Wait three seconds. The display
will flash and then return to
normal operation. Zone is now
updated.
Compass calibration adjustment
Perform this adjustment in an
open area free from steel
structures and high voltage lines.
1
2
3
4
5
6
7891011121314 15
LAMPMODELAMP
9 VAR
Controls and features
30
Page 31 of 197
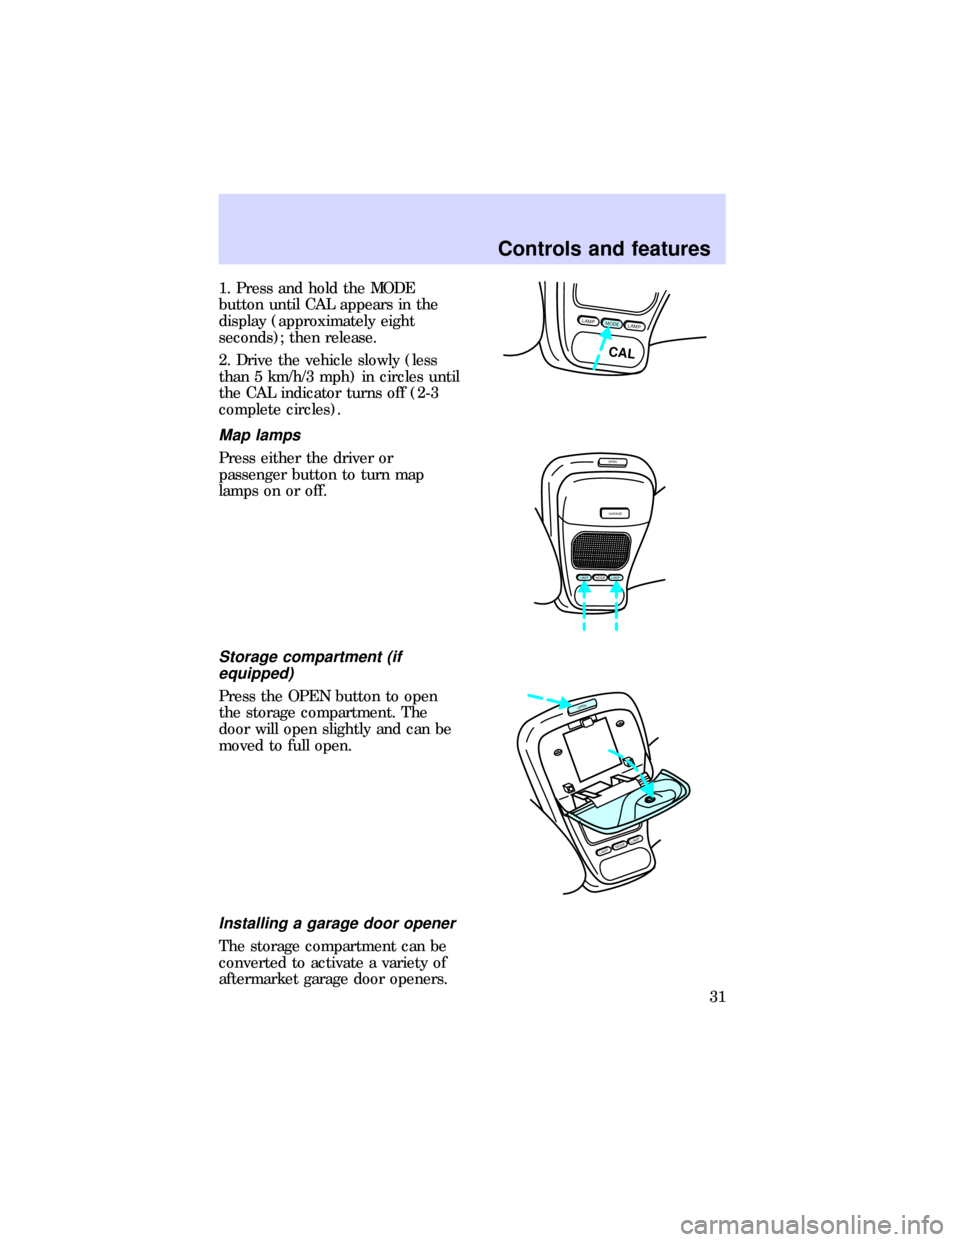
1. Press and hold the MODE
button until CAL appears in the
display (approximately eight
seconds); then release.
2. Drive the vehicle slowly (less
than 5 km/h/3 mph) in circles until
the CAL indicator turns off (2-3
complete circles).
Map lamps
Press either the driver or
passenger button to turn map
lamps on or off.
Storage compartment (if
equipped)
Press the OPEN button to open
the storage compartment. The
door will open slightly and can be
moved to full open.
Installing a garage door opener
The storage compartment can be
converted to activate a variety of
aftermarket garage door openers.
LAMPMODELAMP
CAL
OPEN
GARAGE
MODELAMPLAMP
MODELAMPLAMP
OPEN
Controls and features
31
Page 79 of 197
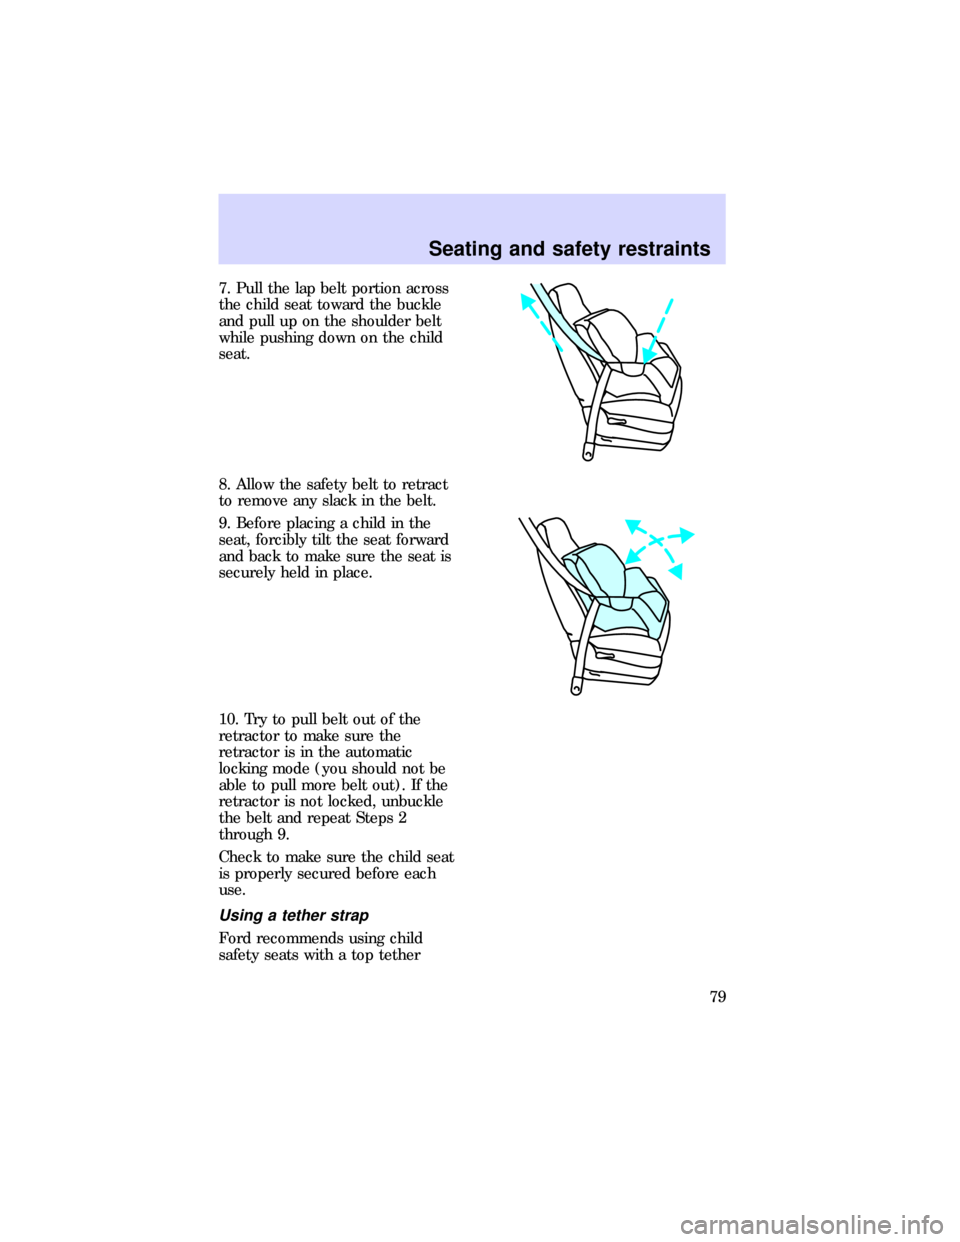
7. Pull the lap belt portion across
the child seat toward the buckle
and pull up on the shoulder belt
while pushing down on the child
seat.
8. Allow the safety belt to retract
to remove any slack in the belt.
9. Before placing a child in the
seat, forcibly tilt the seat forward
and back to make sure the seat is
securely held in place.
10. Try to pull belt out of the
retractor to make sure the
retractor is in the automatic
locking mode (you should not be
able to pull more belt out). If the
retractor is not locked, unbuckle
the belt and repeat Steps 2
through 9.
Check to make sure the child seat
is properly secured before each
use.
Using a tether strap
Ford recommends using child
safety seats with a top tether
Seating and safety restraints
79
Page 80 of 197
strap. Contact the manufacturer of
your safety seat for information
about ordering a tether strap if
one is not provided to you. Contact
your Ford dealer for a free tether
anchor kit (613D74) so you can
attach a tether anchor bracket to
the tether anchor attachment
locations in the rear floor.
Carefully follow the instructions
provided with the kit.
Only use the tether
attachment hole locations
shown. The tether anchor may
not perform properly if the
wrong mounting location is used.
Follow the child seat
manufacturer's instructions for
installing a child seat with a tether
strap.
Ford recommends you attach
tethered safety seats in a rear
seating position with the tether
strap attached to the tether
anchoring bracket as shown in the
instructions provided with the
tether anchor kit.
If a tethered seat must be installed
in the front passenger seat:
1. Buckle the safety belt in the
seat directly behind the front
passenger seat.
2. Place the rear safety belt in the
automatic locking mode. Refer to
How to use the automatic locking
modein this chapter.
3. Install the child safety seat in
the front seat. Refer to the
Seating and safety restraints
80
Page 100 of 197
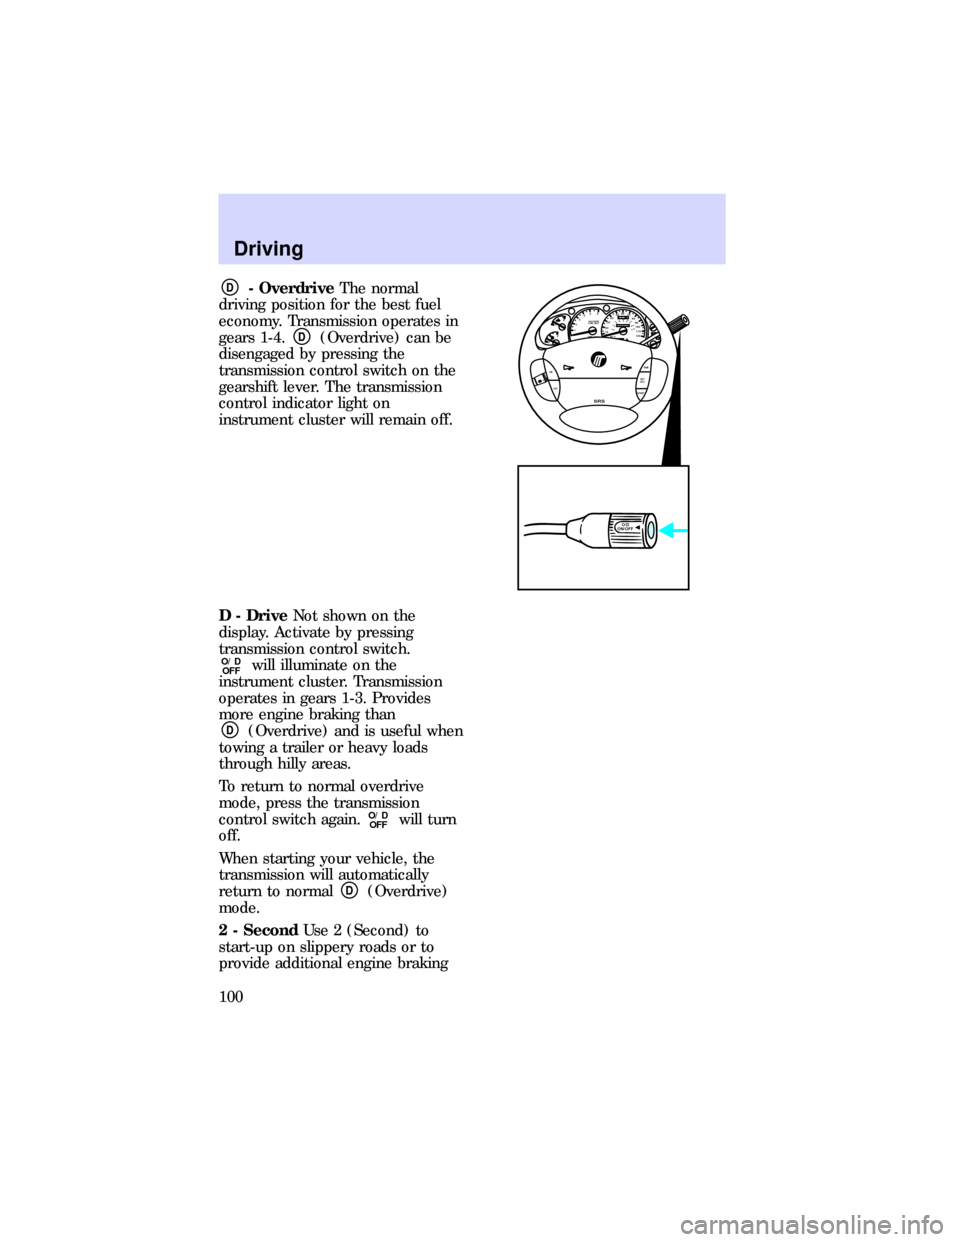
D- OverdriveThe normal
driving position for the best fuel
economy. Transmission operates in
gears 1-4.
D(Overdrive) can be
disengaged by pressing the
transmission control switch on the
gearshift lever. The transmission
control indicator light on
instrument cluster will remain off.
D - DriveNot shown on the
display. Activate by pressing
transmission control switch.
O/D
OFFwill illuminate on the
instrument cluster. Transmission
operates in gears 1-3. Provides
more engine braking than
D(Overdrive) and is useful when
towing a trailer or heavy loads
through hilly areas.
To return to normal overdrive
mode, press the transmission
control switch again.
O/D
OFFwill turn
off.
When starting your vehicle, the
transmission will automatically
return to normal
D(Overdrive)
mode.
2 - SecondUse 2 (Second) to
start-up on slippery roads or to
provide additional engine braking
0P RND21
UNLEADED
FUEL ONLY
RPM x 100012345
6H
C
F
E
RSM
SET
ACC
COAST OFF ON
SRS
- +H
H
L L020
1030405060
70
80
90
110
120000000oooo
km/h100
20406080100
120
140
160
180
O/D
ON/OFF
Driving
100
Page 171 of 197

Preparing your vehicle for
inspection/maintenance testing
In some localities it may become a
legal requirement to pass an
Inspection/Maintenance test of the
On-Board Diagnostic (OBD II)
system. If the vehicle's powertrain
system or battery has just been
serviced, the OBD II system is
reset to a not ready for I/M testing
condition. To ready the OBD II
system for I/M testing, the law
specifies that additional mixed city
and highway driving is necessary
to complete the check of the OBD
II system.
The driving modes required to
reach the ready condition consist
of a minimum of 30 minutes of city
and highway driving as described
below:
²20 minutes of driving in stop
and go city-type traffic with at
least four idle periods.
²10 minutes of driving on an
expressway or highway.
Before completing the above
driving modes, the engine must be
warmed up and at operating
temperature. Once started, the
vehicle must not be turned off
during the above driving modes. If
the vehicle owner is unable to
meet the I/M requirements by
using these driving patterns, an
authorized service center can
perform a detailed OBD II Drive
Cycle as it would any other type of
repair work.
Maintenance and care
171