headlamp Mercury Mountaineer 1998 Owner's Manuals
[x] Cancel search | Manufacturer: MERCURY, Model Year: 1998, Model line: Mountaineer, Model: Mercury Mountaineer 1998Pages: 216, PDF Size: 1.72 MB
Page 4 of 216

012345
6
H
C
F
E
OFF
20
1030405060
70
80
90
110
200000000
oooo
10020406080100
120
140
160
180
UNLEADED
FUEL ONLY
RSM
SET
ACC
COAST OFF ON
SRS
H
H
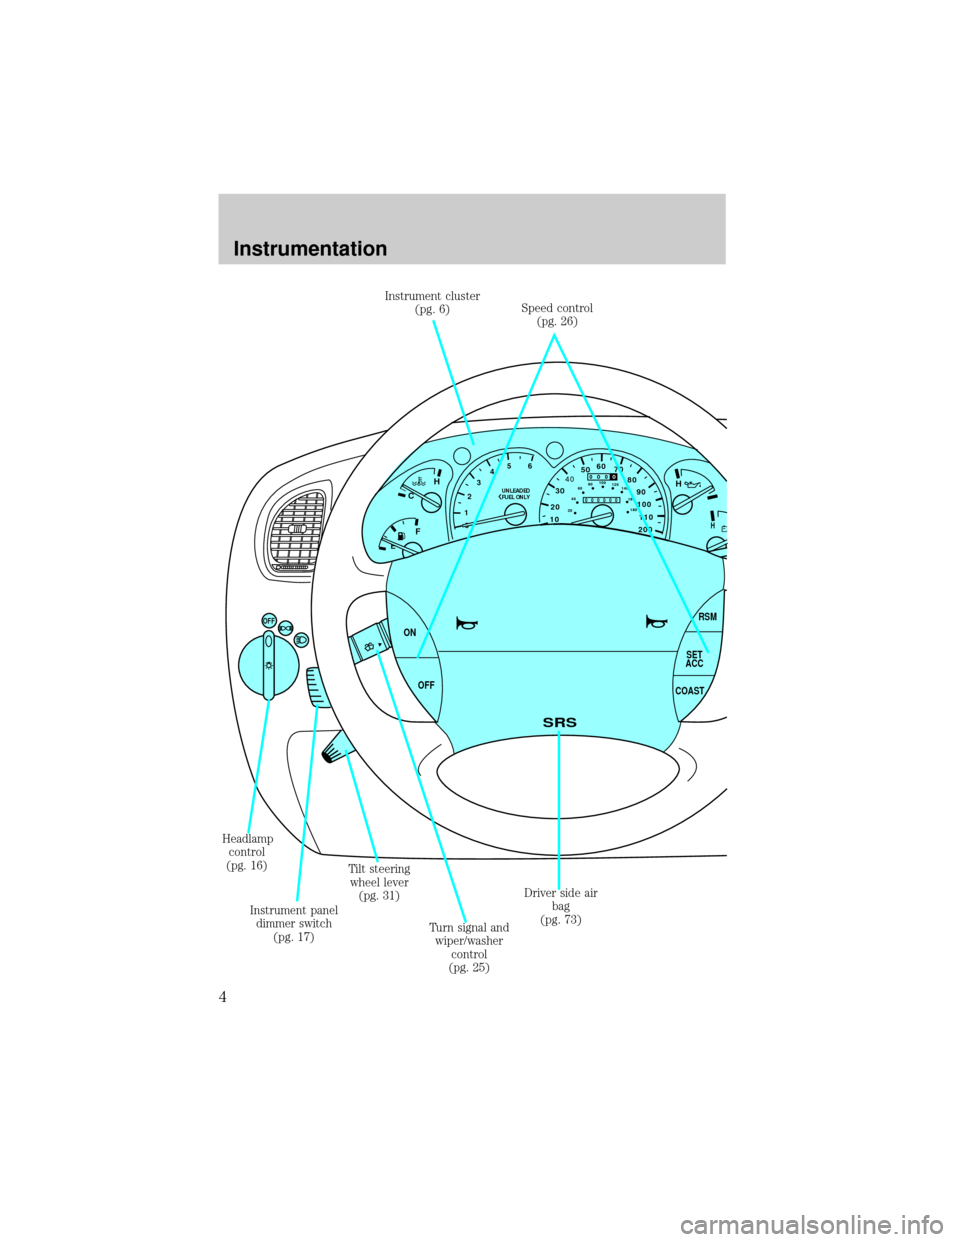
Instrument cluster
(pg. 6)Speed control
(pg. 26)
Driver side air
bag
(pg. 73) Headlamp
control
(pg. 16)
Instrument panel
dimmer switch
(pg. 17)Tilt steering
wheel lever
(pg. 31)
Turn signal and
wiper/washer
control
(pg. 25)
Instrumentation
4
Page 9 of 216

Brake system warning
Momentarily illuminates when the
ignition is turned ONand the
engine is off. Also illuminates when
the parking brake is engaged.
Illumination after releasing the
parking brake indicates low brake
fluid level.
Anti-lock brake system (ABS)
Momentarily illuminates when the
ignition is turned on and the
engine is off. If the light remains
on, continues to flash or fails to
illuminate, have the system
serviced immediately.
Turn signal
Illuminates when the left or right
turn signal or the hazard lights are
turned on. If one or both of the
indicators stay on continuously,
check for a burned-out turn signal
bulb. Refer toExterior bulbsin
theMaintenance and care
chapter.
High beams
Illuminates when the high beam
headlamps are turned on.
!
BRAKE
ABS
Instrumentation
9
Page 12 of 216

Key-in-ignition warning chime
Sounds when the key is left in the
ignition in the OFF/LOCK or ACC
position and the driver's door is
opened.
Headlamps on warning chime
Sounds when the headlamps or
parking lamps are on, the ignition
is off (and the key is not in the
ignition) and the driver's door is
opened.
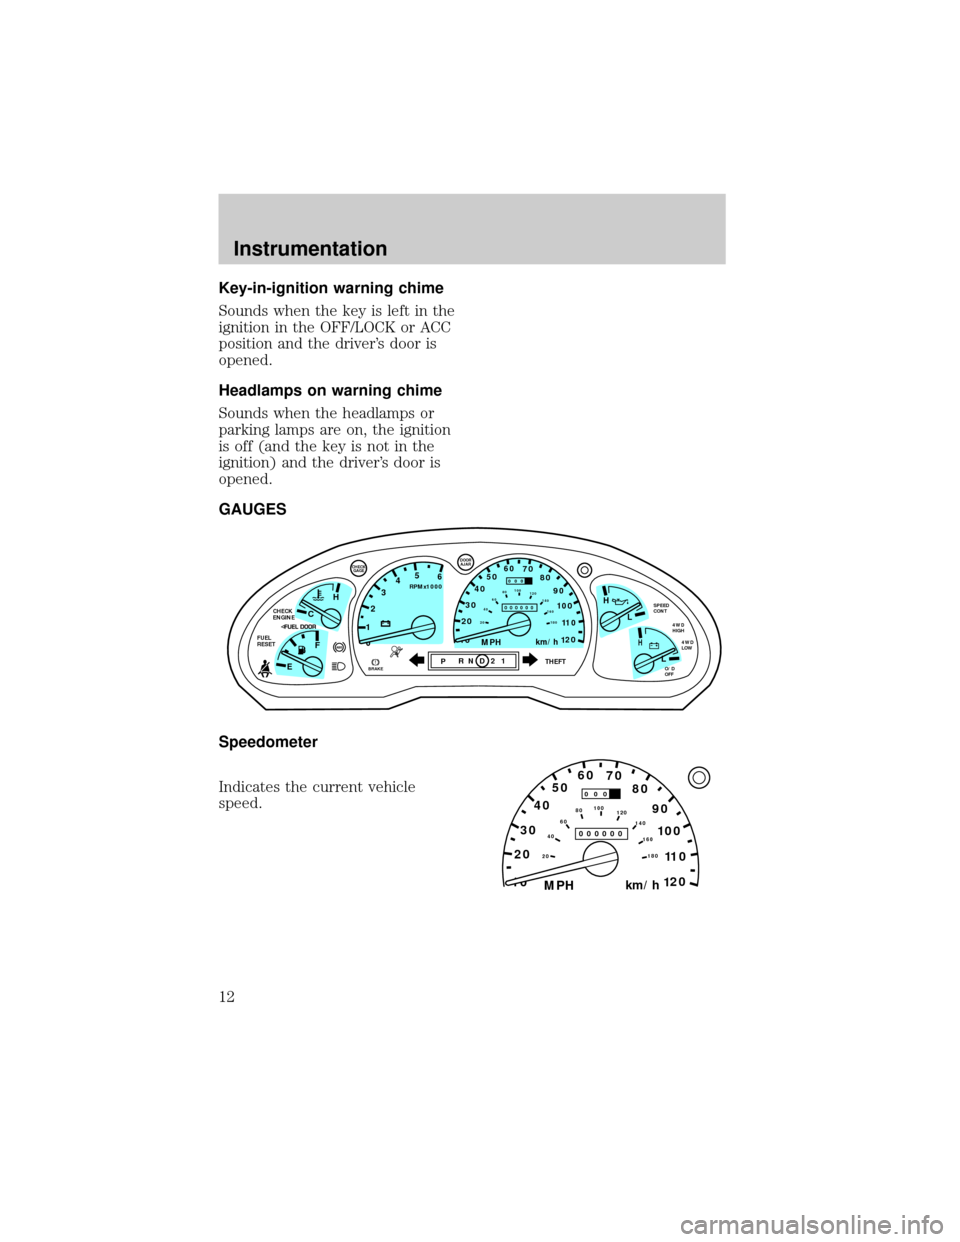
GAUGES
Speedometer
Indicates the current vehicle
speed.
C
012345
6
RPMx1000
ABS
CHECK
ENGINE
FUEL
RESET
EFH
H
H
PRN D 2 1THEFT
SPEED
CONT
4WD
HIGH
4WD
LOW
O/D
OFFL
L
10MPH 205060
70
304080
90
km/h
0 0 0
10 100
1
20
1
0 0 0 0 0 0406080100
120
140
160
180
20
DOOR
AJAR
CHECK
GAGE
!BRAKE
10MPH 205060
70
304080
90
km/h
0 0 0
10 100
1
20
1
0 0 0 0 0 0406080100
120
140
160
180
20
Instrumentation
12
Page 16 of 216

HEADLAMP CONTROL
Rotate the headlamp control
clockwise to the first position to
turn on the parking lamps only.
Rotate to the second position to
also turn on the headlamps.
Foglamp control (if equipped)
Turn on the low-beam headlamps
and press the foglamp control to
activate the foglamps. The foglamp
control button will illuminate when
the foglamps are on.
Press the foglamp control a second
time to deactivate the foglamps.
Daytime running lamps (DRL)
(if equipped)
Turns the highbeam headlamps on
with a reduced output. To activate:
²the engine must be running
²the gearshift must not be in P
(Park)
²the headlamp control is in the
OFF or Parking lamps position.
The Daytime Running
Light (DRL) system will
not illuminate the tail lamps and
parking lamps. Turn on your
headlamps at dusk. Failure to do
so may result in a collision.
OFF
Controls and features
16
Page 37 of 216

2. Press and hold the MODE
control until VAR appears in the
display, then release. The display
should show the current zone
number.
3. Press the MODE control until
the desired zone number appears.
The display will flash and then
return to normal operation. The
zone is now updated.
Compass calibration adjustment
Perform this adjustment in an
open area free from steel
structures and high voltage lines:
²Press and hold the MODE
control until CAL appears in the
display (approximately eight
seconds) and release.
²Drive the vehicle slowly (less
than 5 km/h [3 mph]) in circles
until CAL indicator turns off in
about 2±3 complete circles.
AUTOLAMP DELAY SYSTEM
(IF EQUIPPED)
The autolamp sets the headlamps
to turn on and off automatically.
The autolamp may be set to:
²turn on the lamps automatically
at night
²turn off the lamps automatically
during daylight
²keep the lamps on for up to
three minutes after the key is
turned to OFF
LAMPMODELAMP
9 VAR
LAMPMODELAMP
CAL
Controls and features
37
Page 38 of 216

Setting autolamp
1. Make sure the headlamp control
is in the OFF position. Leaving the
headlamp control on will override
the autolamp.
2. Turn the ignition to the ON
position or start the vehicle.
3. Slide the delay control all the
way to the left.
The further you move the knob to
the right, the longer the headlamps
stay on after the ignition is turned
to the OFF position. The autolamp
will keep the headlamps on for a
maximum of three minutes after
the ignition is turned to OFF.
4. The autolamp automatically
turns the lamps on and off. The
indicator light will illuminate when
the headlamps turn on.
Automatic dimming rear view
mirror
The autolamp/automatic dimming
mirror is equipped with an
automatic dimming feature. This
feature will change from the
normal state to the non-glare
ªactiveº state when bright lights
(glare) reach the mirror. When the
mirror detects bright light from
front or behind, it will adjust
automatically to minimize glare.
The mirror will automatically
return to the normal position
OFF
AUTOLAMP
OFFMAX.DELAY
AUTOLAMP
OFFMAX.DELAY
Controls and features
38
Page 55 of 216

Operating your perimeter alarm
system (if equipped) from the
keyless entry pad
The keyless entry system arms by
pressing 7/8 and 9/0.
To disarm or reset a triggered
alarm, enter the five digit code.
All doors must be fully closed for
the alarm system to arm. Refer to
thePerimeter alarm system
section, if equipped, in this chapter
for more details.
PERIMETER ALARM SYSTEM
Arming the system
When armed, this system will help
protect your vehicle from
unauthorized entry. When
unauthorized entry occurs, the
system will flash the headlamps,
parking lamps and the theft
indicator lamp and will chirp the
horn.
The system is ready to arm
whenever the ignition is turned
OFF. Any of the following actions
will prearm the alarm system:
²Press the remote entry lock
control
²Open a door and press the
power door lock control to lock
the doors123
45678
90
Controls and features
55
Page 95 of 216

Do not start your vehicle
in a closed garage or in
other enclosed areas. Exhaust
fumes can be toxic. Always open
the garage door before you start
the engine. SeeGuarding
against exhaust fumesin this
chapter for more instructions.
If you smell exhaust fumes
inside your vehicle, have
your dealer inspect your vehicle
immediately. Do not drive if you
smell exhaust fumes.
Important safety precautions
A computer system controls the
engine's idle revolutions per
minute (RPM). When the engine
starts, the idle RPM runs faster to
warm the engine. If the engine idle
speed does not slow down
automatically, have the vehicle
checked.
Before starting the vehicle:
1. Make sure all vehicle occupants
have buckled their safety belts. For
more information on safety belts
and their proper usage, refer to
theSeating and safety restraints
chapter.
2. Make sure the headlamps and
vehicle accessories are off.
Starting
95
Page 139 of 216

The fuses are coded as follows.
Fuse/Relay
LocationFuse Amp
RatingDescription
1 7.5A Power Mirror Switch
2 7.5A Blower Motor Relay, PAD Module,
Air Bag Diagnostic Monitor
3 7.5A Trailer Tow Connector
4 10A Left Headlamp
5 10A Data Link Connector (DLC)
6 7.5A Air Bag Diagnostic Monitor,
Blower Motor Relay, Passive
Deactivation (PAD) Module
7 7.5A Trailer Tow Connector
8 10A Right Headlamp, Daytime Running
Lamps (DRL) Module, Foglamp
Relay
9 7.5A Stop Lamp Switch
10 7.5A Speed Control/Amplifier Assembly,
Brake Pressure Switch, Generic
electronic Module (GEM), Shift
Lock Actuator, Blend Door
Actuator, Main Light Switch,
RABS Resistor, A/C - Heater
Assembly, Flasher
11 7.5A Instrument Cluster, Main Light
Switch, RABS Resistor
12 10A Power Window Relay, Washer
Pump Relay
13 20A Stop Lamp Switch, Brake
Pressure Switch
14 20A Rear Anti-Lock Brake System
(RABS) Module
Roadside emergencies
139
Page 141 of 216

Fuse/Relay
LocationFuse Amp
RatingDescription
30 15A Park Lamp/Trailer Tow Relay
31 Ð NOT USED
32 10A Rear Blower
33 15A Headlamps, Daytime Running
Lamps (DRL) Module, Instrument
Cluster
34 7.5A Rear Integrated Control Panel, CD
35 10A RABS Test Connector
36 7.5A CD, Rear Integrated Control
Panel, Memory Seat, Message
Center
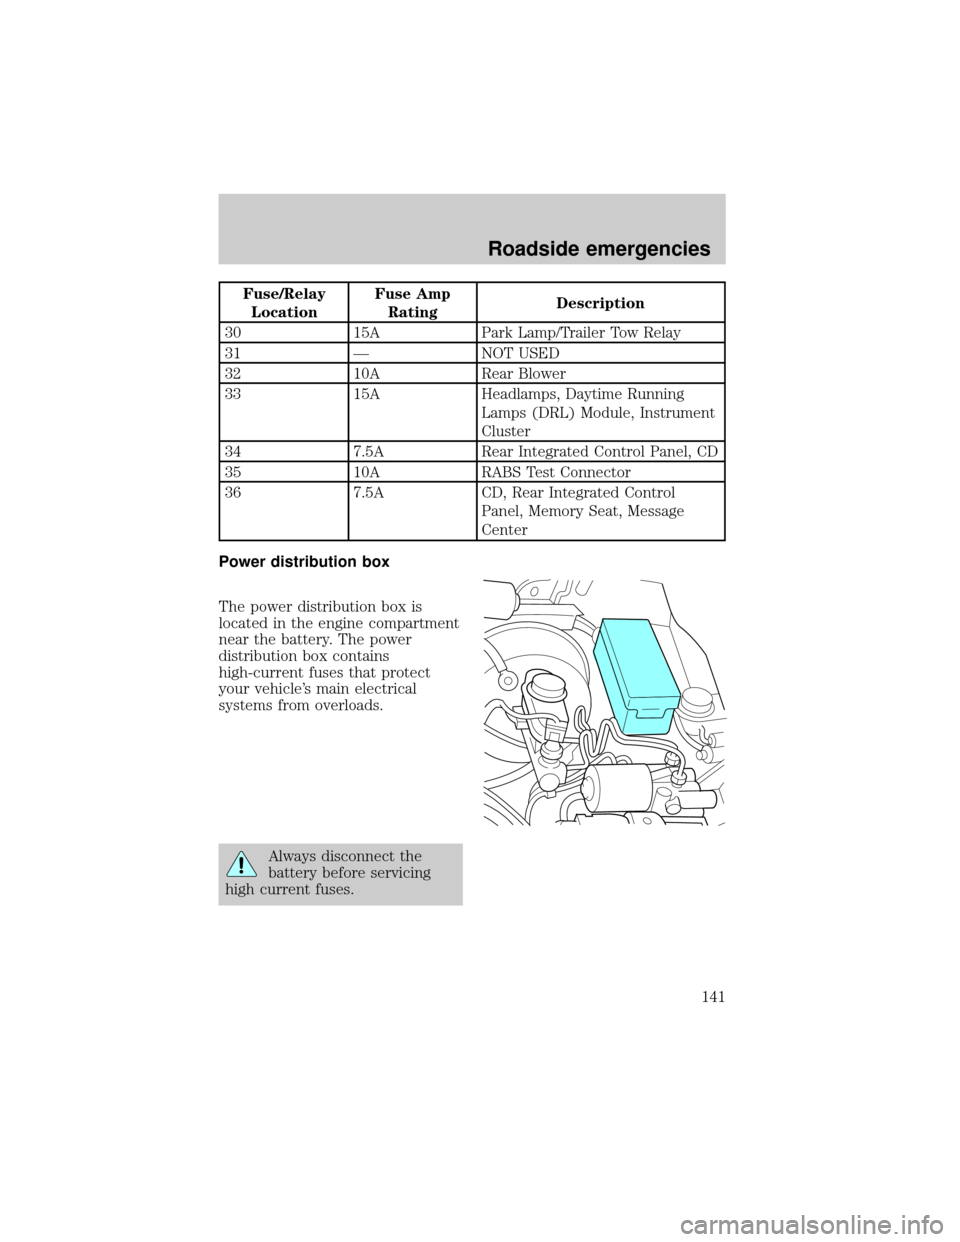
Power distribution box
The power distribution box is
located in the engine compartment
near the battery. The power
distribution box contains
high-current fuses that protect
your vehicle's main electrical
systems from overloads.
Always disconnect the
battery before servicing
high current fuses.
Roadside emergencies
141