height Mercury Mountaineer 1998 Owner's Manuals
[x] Cancel search | Manufacturer: MERCURY, Model Year: 1998, Model line: Mountaineer, Model: Mercury Mountaineer 1998Pages: 216, PDF Size: 1.72 MB
Page 34 of 216

²Remove the storage clip from
the door.
²Place Velcroyhook onto side of
aftermarket transmitter opposite
of actuator control.
²Place the transmitter into
storage compartment, control
down.
²Place the provided height
adaptors onto the back of the
GARAGE control as needed.
²Press the GARAGE control to
activate the transmitter.
Moon roof (if equipped)
²Press and release the rear
portion of the moon roof control
to open.
²To halt motion at any point
during one-touch opening, press
the control a second time.
²Press and hold (as desired) the
front portion of the moon roof
control to close.
MODELAMPLAMP
Controls and features
34
Page 70 of 216

²Grasp the shoulder portion and
pull downward until the entire
belt is extracted.
²Allow the belt to retract. As the
belt retracts, you will hear a
clicking sound. This indicates
the safety belt is now in the
automatic locking mode.
How to disengage the automatic
locking mode
Disconnect the combination
lap/shoulder belt and allow it to
retract completely to disengage the
automatic locking mode and
activate the vehicle sensitive
(emergency) locking mode.
Front safety belt height
adjustment
Your vehicle has safety belt height
adjustments for the driver and
front passenger. Adjust the height
of the shoulder belt so the belt
rests across the middle of your
shoulder.
To lower the shoulder belt height,
push the button and slide the
height control down. To raise the
height of the shoulder belt, slide
the height adjuster up. Pull down
on the height adjustment assembly
Seating and safety restraints
70
Page 71 of 216

to make sure it is locked in place.
Position the shoulder belt
height adjuster so that the
belt rests across the middle of
your shoulder. Failure to adjust
the safety belt properly could
reduce the effectiveness of the
safety belt and increase the risk
of injury in a collision.
Safety belt extension assembly
If the safety belt assembly is too
short, even when fully extended,
20 cm (8 inches) can be added to
the safety belt assembly by adding
a safety belt extension assembly
(part number 611C22). Safety belt
extension assemblies can be
obtained from your dealer at no
cost.
Use only extensions manufactured
by the same supplier as the safety
belt. Manufacturer identification is
located at the end of the webbing
on the label. Also, use the safety
belt extension only if the safety
belt is too short for you when fully
extended. Do not use extensions
to change the fit of the shoulder
belt across the torso.
Safety belt warning light and
indicator chime
The seat belt warning light
illuminates in the instrument
cluster and a chime sounds to
remind the occupants to fasten
their safety belts.
Seating and safety restraints
71
Page 72 of 216

Conditions of operation
If... Then...
The driver's safety belt is not
buckled before the ignition key
is turned to ON...The safety belt warning light
illuminates for one to two minutes and
the warning chime sounds for four to
eight seconds.
The driver's safety belt is
buckled while the indicator
light is illuminated and the
warning chime is sounding...The safety belt warning light turns off.
The driver's safety belt is
buckled before the ignition key
is turned to ON...The safety belt warning light remains
off.
Safety belt maintenance
Check the safety belt systems
periodically to make sure they
work properly and are not
damaged. Check the safety belts to
make sure there are no nicks,
wears or cuts. All safety belt
assemblies, including retractors,
buckles, front seat belt buckle
assemblies (slide bar)(if
equipped), shoulder belt height
adjusters (if equipped), child
safety seat tether bracket
assemblies (if equipped), and
attaching hardware, should be
inspected after a collision. Ford
recommends that all safety belt
assemblies used in vehicles
involved in a collision be replaced.
However, if the collision was minor
and a qualified technician finds
that the belts do not show damage
and continue to operate properly,
they do not need to be replaced.
Seating and safety restraints
72
Page 103 of 216

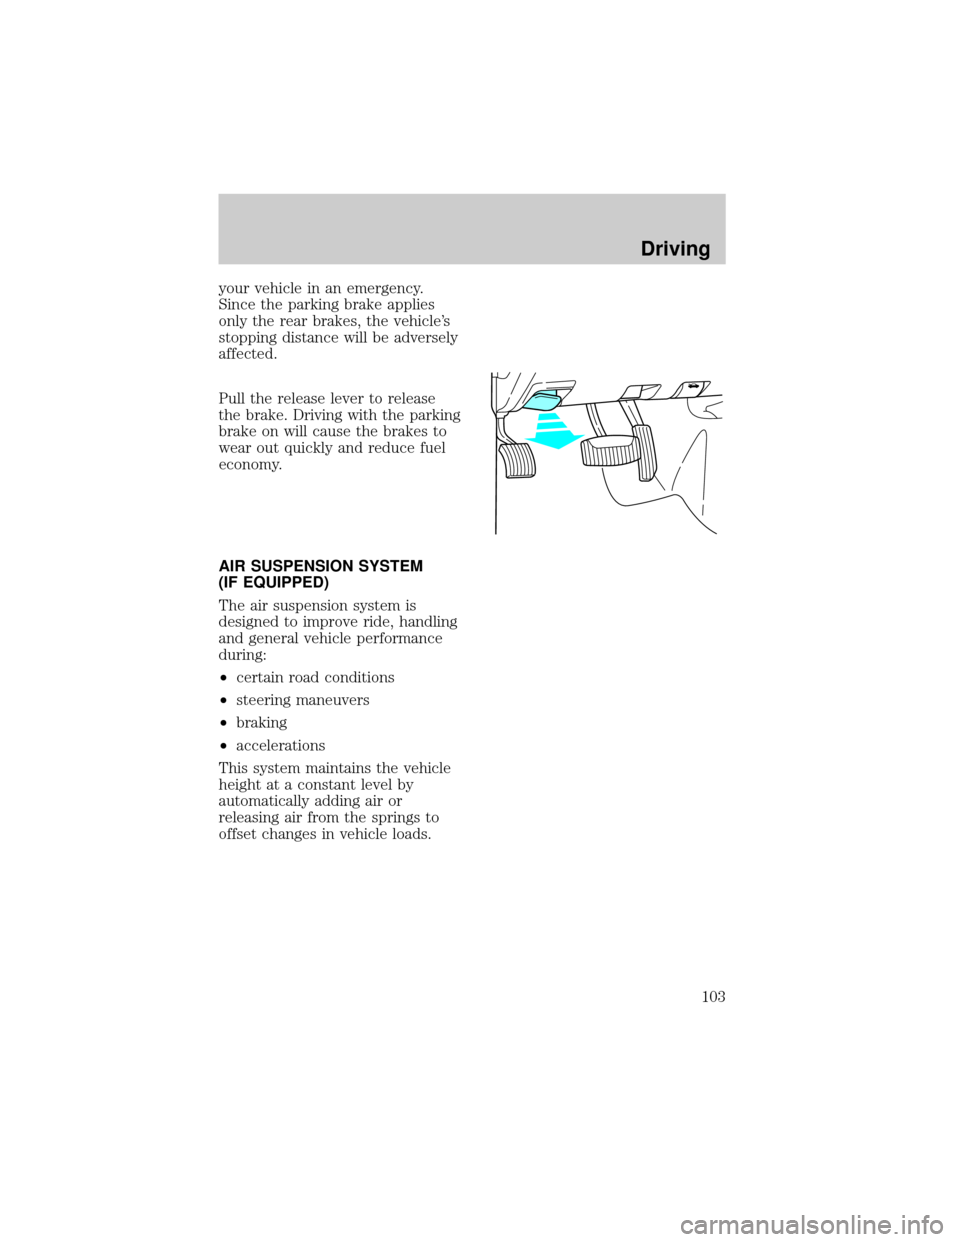
your vehicle in an emergency.
Since the parking brake applies
only the rear brakes, the vehicle's
stopping distance will be adversely
affected.
Pull the release lever to release
the brake. Driving with the parking
brake on will cause the brakes to
wear out quickly and reduce fuel
economy.
AIR SUSPENSION SYSTEM
(IF EQUIPPED)
The air suspension system is
designed to improve ride, handling
and general vehicle performance
during:
²certain road conditions
²steering maneuvers
²braking
²accelerations
This system maintains the vehicle
height at a constant level by
automatically adding air or
releasing air from the springs to
offset changes in vehicle loads.
Driving
103
Page 209 of 216

applications must add 118ml
(4 oz.) of additive friction modifier
C8AZ-19B546±A, Ford specification
EST-M2C118±A to the rear axle
whenever the axle has been
serviced.
ENGINE DATA
Engine 5.0L engine 4.0L SOHC engine
Cubic inches 302 245
Horsepower 215 @ 4200 rpm 205 @ 5000 rpm
Torque 288 lbs.ft. @ 3300 rpm 250 lb. ft. @ 3000 rpm
Required fuel grade 87 octane 87 Octane
Firing order 1-3-7-2-6-5-4-8 1-4-2-5-3-6
Spark plug gap 1.3 mm-1.4 mm
(0.052-.056 inch)1.3 mm-1.4 mm
(0.052-.056 inch)
Ignition system EDIS EDIS
Compression ratio 9.0:1 9.7:1
VEHICLE DIMENSIONS
Dimensions mm (in.)
(1) Overall length 4 788 (188.5)
(2) Overall width 1 783 (70.2)
(3) Maximum height 1 725 (67.9)
(4) Wheelbase 2 835 (111.6)
(5) Front track/ rear 1 486/1487 (58.5/58.5)
Capacities and specifications
209