bulb Mercury Mountaineer 1999 Owner's Manuals
[x] Cancel search | Manufacturer: MERCURY, Model Year: 1999, Model line: Mountaineer, Model: Mercury Mountaineer 1999Pages: 248, PDF Size: 1.74 MB
Page 6 of 248
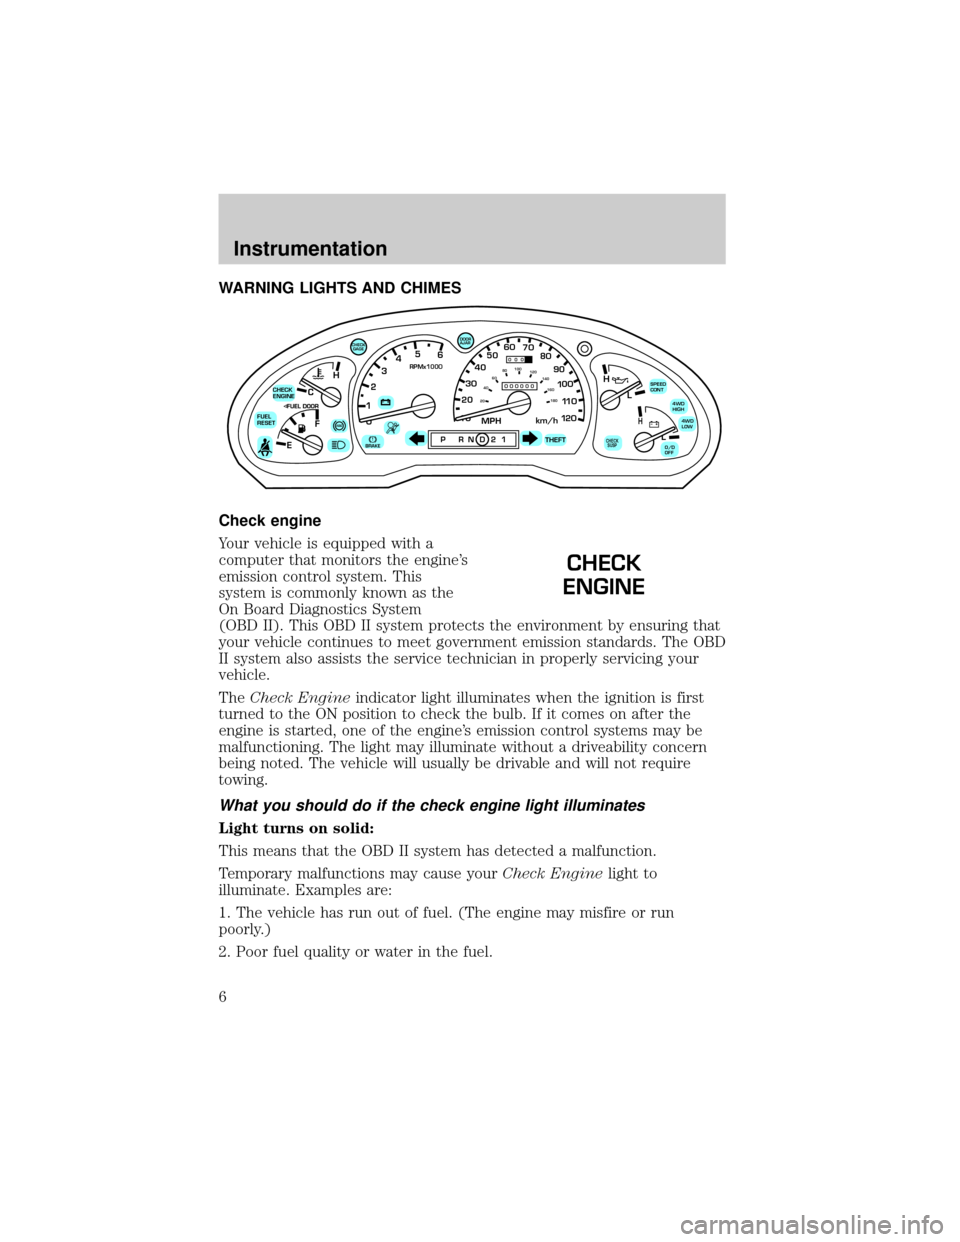
WARNING LIGHTS AND CHIMES
Check engine
Your vehicle is equipped with a
computer that monitors the engine's
emission control system. This
system is commonly known as the
On Board Diagnostics System
(OBD II). This OBD II system protects the environment by ensuring that
your vehicle continues to meet government emission standards. The OBD
II system also assists the service technician in properly servicing your
vehicle.
TheCheck Engineindicator light illuminates when the ignition is first
turned to the ON position to check the bulb. If it comes on after the
engine is started, one of the engine's emission control systems may be
malfunctioning. The light may illuminate without a driveability concern
being noted. The vehicle will usually be drivable and will not require
towing.
What you should do if the check engine light illuminates
Light turns on solid:
This means that the OBD II system has detected a malfunction.
Temporary malfunctions may cause yourCheck Enginelight to
illuminate. Examples are:
1. The vehicle has run out of fuel. (The engine may misfire or run
poorly.)
2. Poor fuel quality or water in the fuel.
C
012345
6
RPMx1000
ABS!BRAKE
CHECK
ENGINE
FUEL
RESET
EFH
H
H
PRN D 2 1THEFT
SPEED
CONT
4WD
HIGH
4WD
LOW
O/D
OFFL
L
10MPH 205060
70
304080
90
km/h
0 0 0
10 100
1
20
1
0 0 0 0 0 0406080100
120
140
160
180
20
DOOR
AJAR
CHECK
GAGE
CHECK
SUSP
CHECK
ENGINE
Instrumentation
6
Page 8 of 248
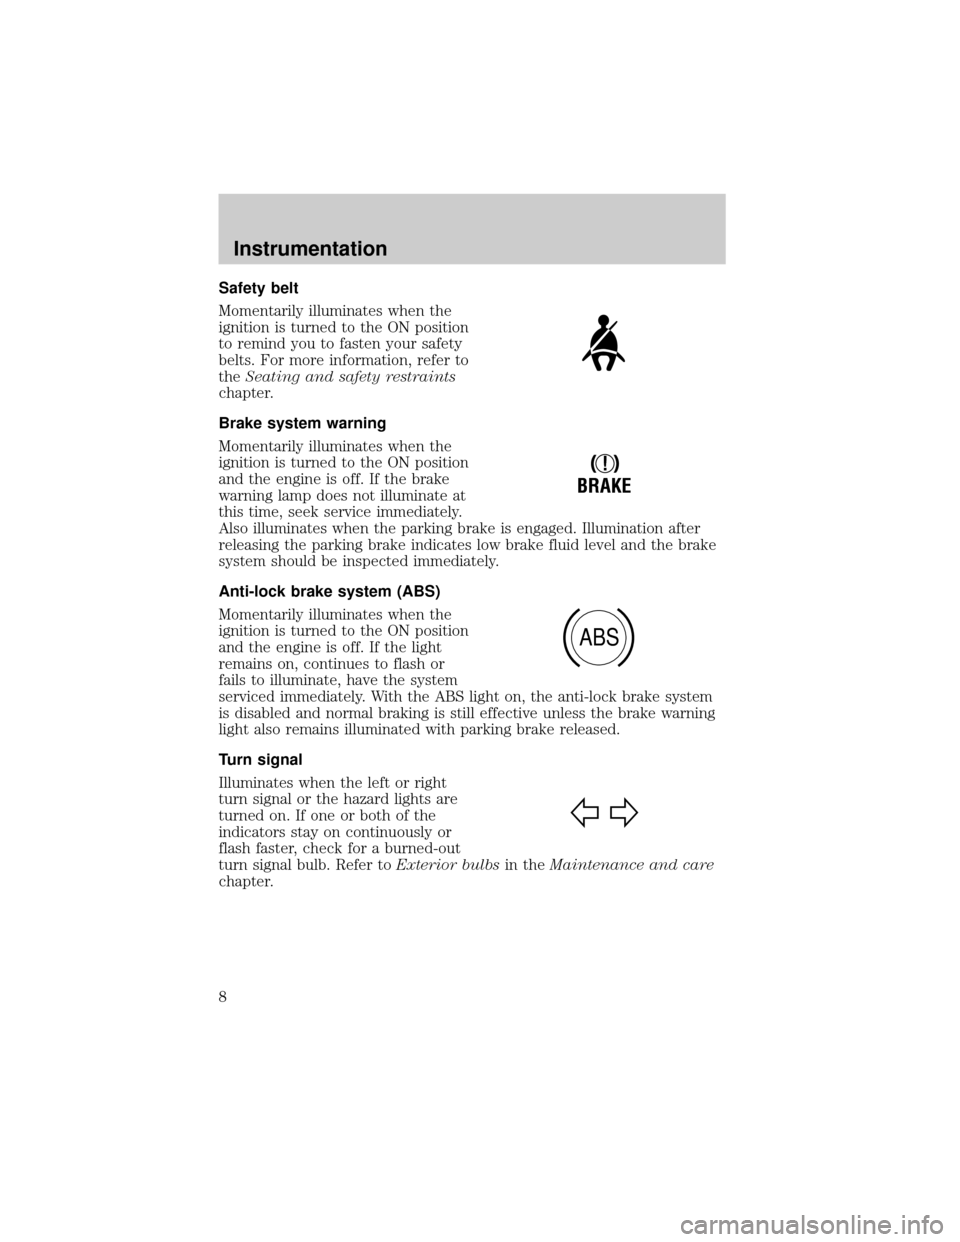
Safety belt
Momentarily illuminates when the
ignition is turned to the ON position
to remind you to fasten your safety
belts. For more information, refer to
theSeating and safety restraints
chapter.
Brake system warning
Momentarily illuminates when the
ignition is turned to the ON position
and the engine is off. If the brake
warning lamp does not illuminate at
this time, seek service immediately.
Also illuminates when the parking brake is engaged. Illumination after
releasing the parking brake indicates low brake fluid level and the brake
system should be inspected immediately.
Anti-lock brake system (ABS)
Momentarily illuminates when the
ignition is turned to the ON position
and the engine is off. If the light
remains on, continues to flash or
fails to illuminate, have the system
serviced immediately. With the ABS light on, the anti-lock brake system
is disabled and normal braking is still effective unless the brake warning
light also remains illuminated with parking brake released.
Turn signal
Illuminates when the left or right
turn signal or the hazard lights are
turned on. If one or both of the
indicators stay on continuously or
flash faster, check for a burned-out
turn signal bulb. Refer toExterior bulbsin theMaintenance and care
chapter.
!
BRAKE
ABS
Instrumentation
8
Page 222 of 248
Do not make any unauthorized changes to your vehicle or engine. By
law, vehicle owners and anyone who manufactures, repairs, items, sells,
leases, trades vehicles, or supervises a fleet of vehicles are not permitted
to intentionally remove an emission control device or prevent it from
working. Information about your vehicle's emission system is on the
Vehicle Emission Control Information Decal located on or near the
engine. This decal identifies engine displacement and gives some tune up
specifications.
Please consult your ªWarranty Guideº for complete emission warranty
information.
Readiness for inspection/maintenance (I/M) testing
In some localities, it may be a legal requirement to pass an I/M test of
the on-board diagnostic (OBD-II) system. If your ªCheck Engine/Service
Engine Soonº light is on, refer to the description in theWarning Lights
and Chimessection of theInstrumentationchapter. Your vehicle may
not pass the I/M test with the ªCheck Engine/Service Engine Soonº light
on.
If the vehicle's powertrain system or its battery has just been serviced,
the OBD-II system is reset to a ªnot ready for I/M testº condition. To
ready the OBD-II system for I/M testing, a minimum of 30 minutes of city
and highway driving is necessary as described below:
²First, at least 10 minutes of driving on an expressway or highway.
²Next, at least 20 minutes driving in stop-and-go, city-type traffic with
at least four idle periods.
Allow the vehicle to sit for at least eight hours without starting the
engine. Then, start the engine and complete the above driving cycle. The
engine must warm up to its normal operating temperature. Once started,
do not turn off the engine until the above driving cycle is complete.
EXTERIOR BULBS
Replacing exterior bulbs
Check the operation of the following lamps frequently:
²Headlamps
²Foglamps
²High-mount brakelamp
²Brakelamps
Maintenance and care
222
Page 223 of 248
²Turn signals
²License plate lamp
²Tail lamps
²Back-up lamps
Do not remove lamp bulbs unless they can be replaced immediately with
new ones. If a bulb is removed for an extended period of time,
contaminants may enter the lamp housings and affect lamp performance.
Replacing headlamp bulbs
Handle a halogen headlamp bulb carefully and keep out of
children's reach. Grasp the bulb only by its plastic base and do
not touch the glass. The oil from your hand could cause the bulb to
break the next time the headlamps are operated.
If the bulb is accidentally touched, it should be cleaned with rubbing
alcohol before being used.
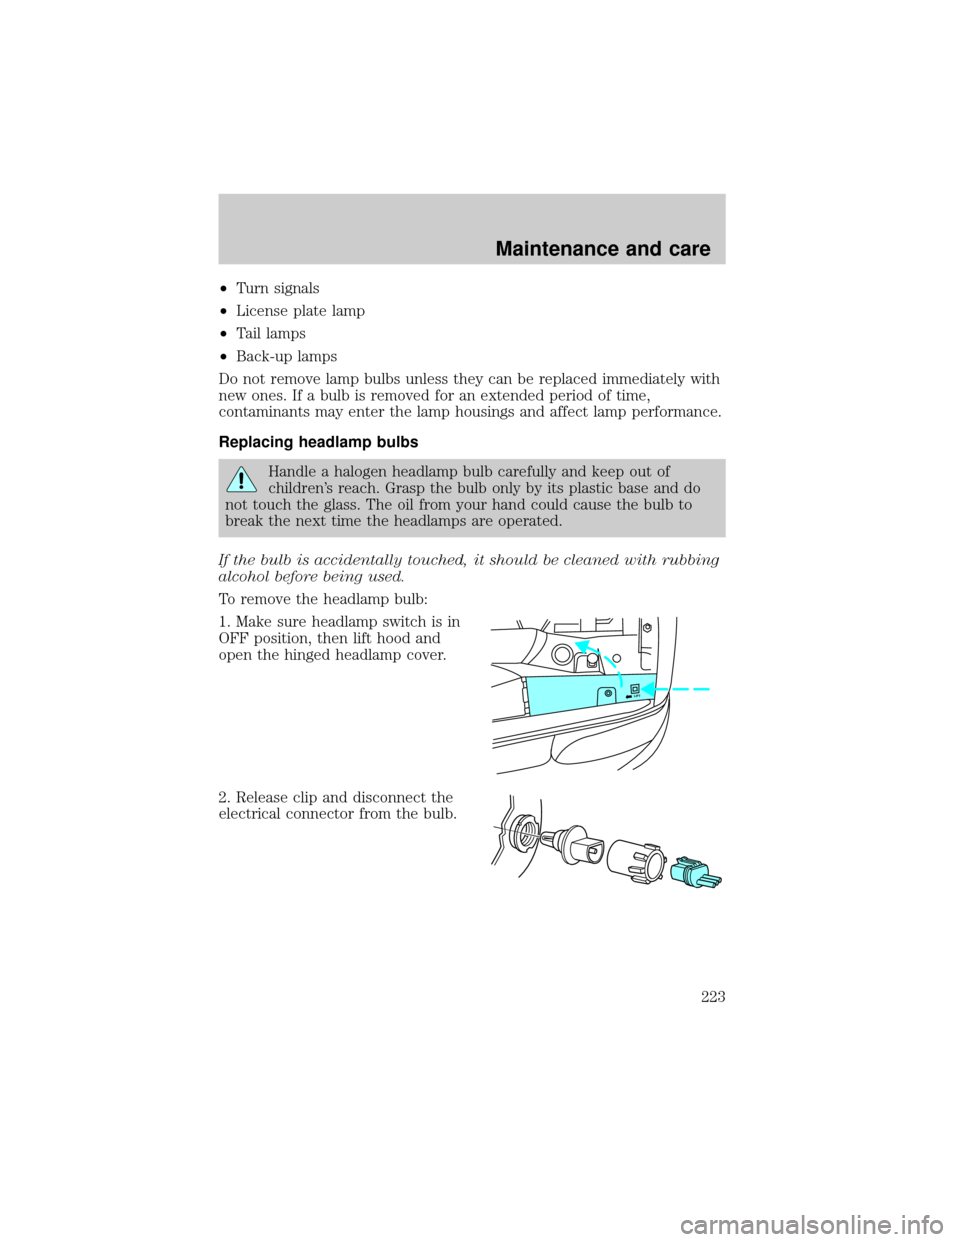
To remove the headlamp bulb:
1. Make sure headlamp switch is in
OFF position, then lift hood and
open the hinged headlamp cover.
2. Release clip and disconnect the
electrical connector from the bulb.
LIFT
Maintenance and care
223
Page 224 of 248
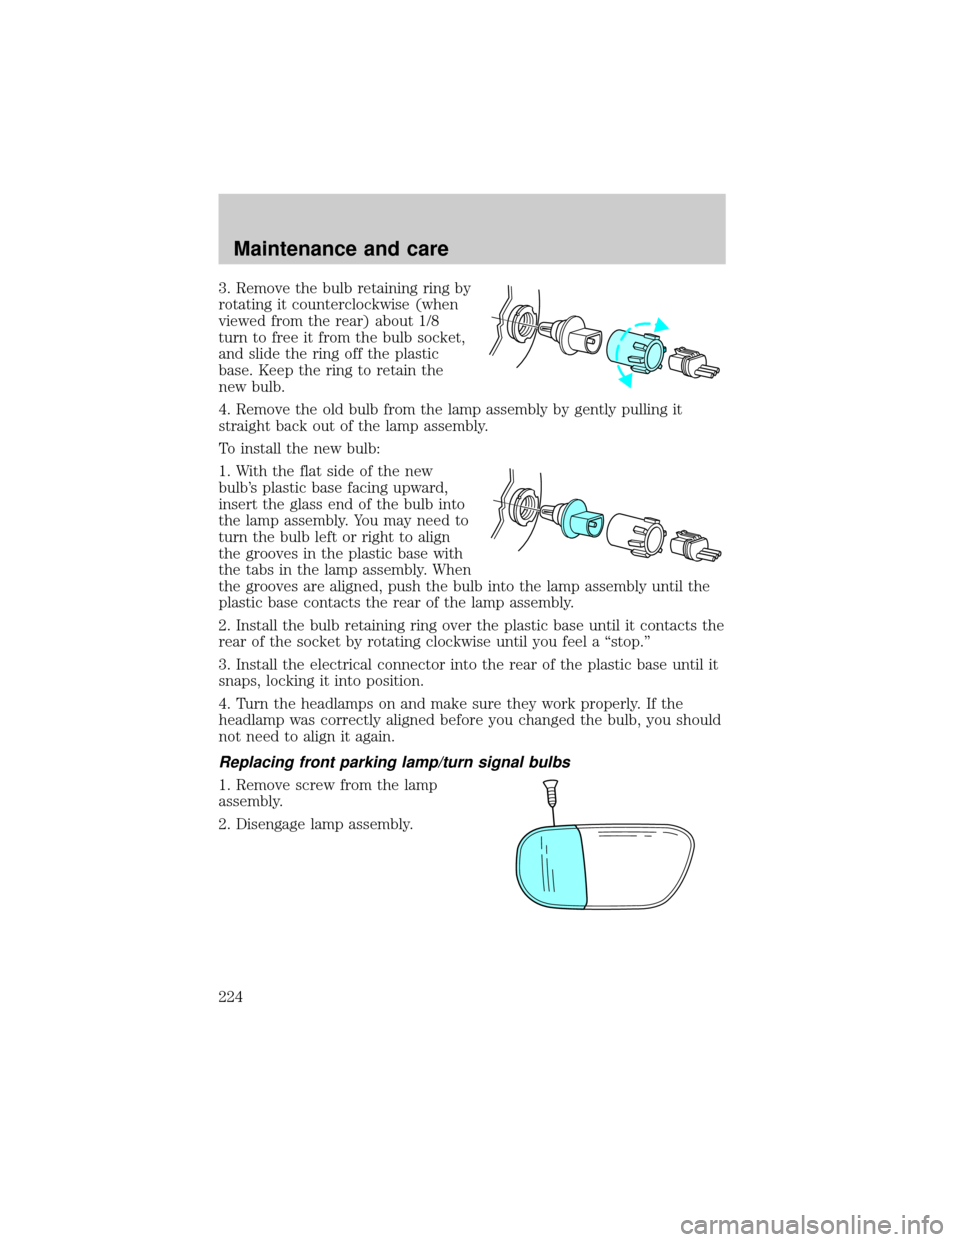
3. Remove the bulb retaining ring by
rotating it counterclockwise (when
viewed from the rear) about 1/8
turn to free it from the bulb socket,
and slide the ring off the plastic
base. Keep the ring to retain the
new bulb.
4. Remove the old bulb from the lamp assembly by gently pulling it
straight back out of the lamp assembly.
To install the new bulb:
1. With the flat side of the new
bulb's plastic base facing upward,
insert the glass end of the bulb into
the lamp assembly. You may need to
turn the bulb left or right to align
the grooves in the plastic base with
the tabs in the lamp assembly. When
the grooves are aligned, push the bulb into the lamp assembly until the
plastic base contacts the rear of the lamp assembly.
2. Install the bulb retaining ring over the plastic base until it contacts the
rear of the socket by rotating clockwise until you feel a ªstop.º
3. Install the electrical connector into the rear of the plastic base until it
snaps, locking it into position.
4. Turn the headlamps on and make sure they work properly. If the
headlamp was correctly aligned before you changed the bulb, you should
not need to align it again.
Replacing front parking lamp/turn signal bulbs
1. Remove screw from the lamp
assembly.
2. Disengage lamp assembly.
Maintenance and care
224
Page 225 of 248
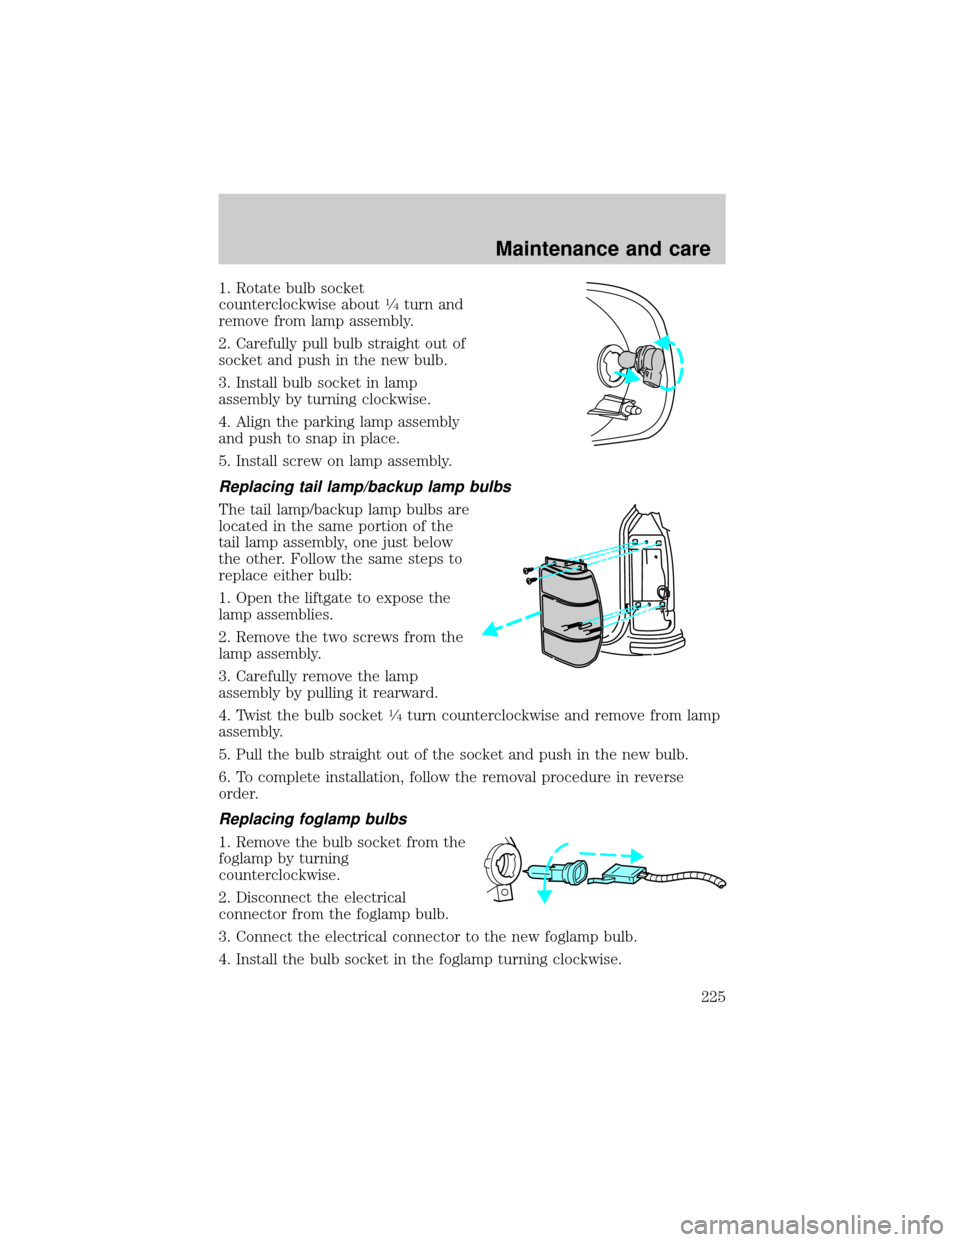
1. Rotate bulb socket
counterclockwise about1¤4turn and
remove from lamp assembly.
2. Carefully pull bulb straight out of
socket and push in the new bulb.
3. Install bulb socket in lamp
assembly by turning clockwise.
4. Align the parking lamp assembly
and push to snap in place.
5. Install screw on lamp assembly.
Replacing tail lamp/backup lamp bulbs
The tail lamp/backup lamp bulbs are
located in the same portion of the
tail lamp assembly, one just below
the other. Follow the same steps to
replace either bulb:
1. Open the liftgate to expose the
lamp assemblies.
2. Remove the two screws from the
lamp assembly.
3. Carefully remove the lamp
assembly by pulling it rearward.
4. Twist the bulb socket
1¤4turn counterclockwise and remove from lamp
assembly.
5. Pull the bulb straight out of the socket and push in the new bulb.
6. To complete installation, follow the removal procedure in reverse
order.
Replacing foglamp bulbs
1. Remove the bulb socket from the
foglamp by turning
counterclockwise.
2. Disconnect the electrical
connector from the foglamp bulb.
3. Connect the electrical connector to the new foglamp bulb.
4. Install the bulb socket in the foglamp turning clockwise.
Maintenance and care
225
Page 226 of 248
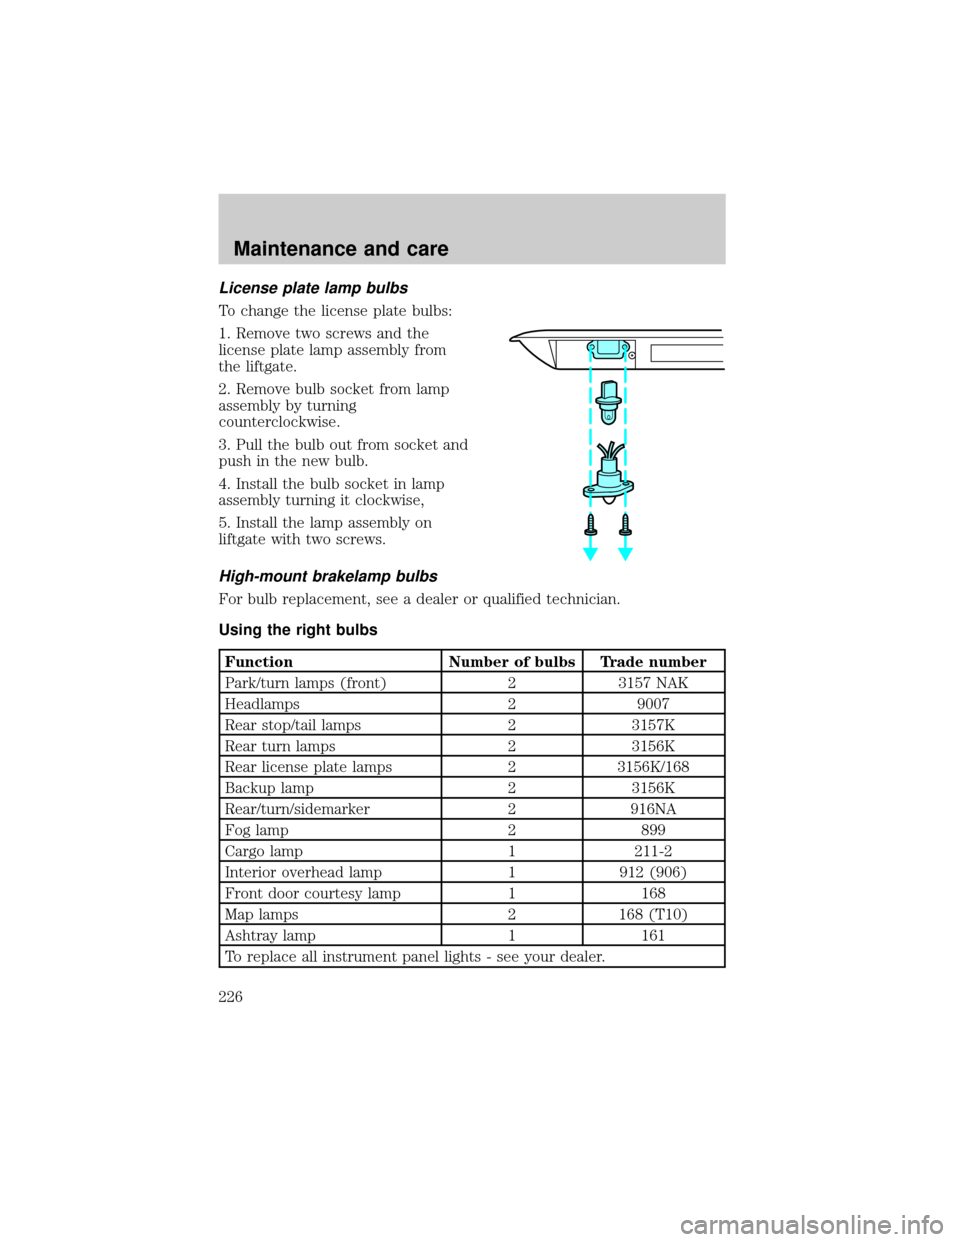
License plate lamp bulbs
To change the license plate bulbs:
1. Remove two screws and the
license plate lamp assembly from
the liftgate.
2. Remove bulb socket from lamp
assembly by turning
counterclockwise.
3. Pull the bulb out from socket and
push in the new bulb.
4. Install the bulb socket in lamp
assembly turning it clockwise,
5. Install the lamp assembly on
liftgate with two screws.
High-mount brakelamp bulbs
For bulb replacement, see a dealer or qualified technician.
Using the right bulbs
Function Number of bulbs Trade number
Park/turn lamps (front) 2 3157 NAK
Headlamps 2 9007
Rear stop/tail lamps 2 3157K
Rear turn lamps 2 3156K
Rear license plate lamps 2 3156K/168
Backup lamp 2 3156K
Rear/turn/sidemarker 2 916NA
Fog lamp 2 899
Cargo lamp 1 211-2
Interior overhead lamp 1 912 (906)
Front door courtesy lamp 1 168
Map lamps 2 168 (T10)
Ashtray lamp 1 161
To replace all instrument panel lights - see your dealer.
Maintenance and care
226
Page 243 of 248

Exhaust fumes ..........................142
Floor mats .................................103
Four-Wheel Drive
vehicles ..............................9,10,152
control trac .............................152
description ................153,154,155
driving off road ................155,158
electronic shift ..........................32
Fuel
choosing the right fuel ...........214
comparisons with EPA fuel
economy estimates .................220
detergent in fuel .....................215
filling your vehicle with fuel....213,
216
gauge .........................................15
quality ......................................215
running out of fuel .................216
safety information relating to
automotive fuels .....................213
Fuses ............................170,171,172
Gas mileage (see
Fuel economy) .....217,218,219,220
Gauges .........................................11
engine coolant temperature
gauge .........................................12
engine oil pressure gauge ........14
GVWR (Gross Vehicle
Weight Rating)
calculating ...............................162
Hazard flashers .........................169
Headlamps
aiming ......................................227
autolamp system ..................97,98
bulb specifications ..................226
high beam ..............................9,20
warning chime ..........................11
Heating ........................................21
heating and air conditioning
system .............................21,22,23
Hood ..........................................192
Ignition .......................................237Inspection/maintenance (I/M)
testing ........................................222
Instrument panel
cleaning ...................................231
Keyless entry system
autolock ............................109,110
keypad .....................................111
locking and unlocking doors ..112
programming entry
code ..................................111,112
Keys
key in ignition chime ...............11
positions of the ignition ...........80
Lamps
daytime running light ...............20
fog lamps ...................................20
headlamps .................................20
headlamps, flash to pass ..........21
instrument panel, dimming .....21
replacing bulbs ................222,223
,224,225,226
Lane change indicator
(see Turn signal) ........................80
Liftgate ......................................103
Lights, warning and indicator
air bag ..........................................7
anti-lock brakes (ABS) ..............8
anti-theft .....................................9
brake ............................................8
charging system ..........................9
check coolant ..............................9
cruise indicator .........................10
door ajar ....................................10
fuel reset .....................................7
overdrive off ..............................10
safety belt ...................................8
speed control ............................84
turn signal indicator ...................8
Locks
childproof ................................100
Lumbar support, seats .............116
Message center ......................15,16
Index
243