light Mercury Mountaineer 2000 Owner's Manuals
[x] Cancel search | Manufacturer: MERCURY, Model Year: 2000, Model line: Mountaineer, Model: Mercury Mountaineer 2000Pages: 264, PDF Size: 2.29 MB
Page 4 of 264
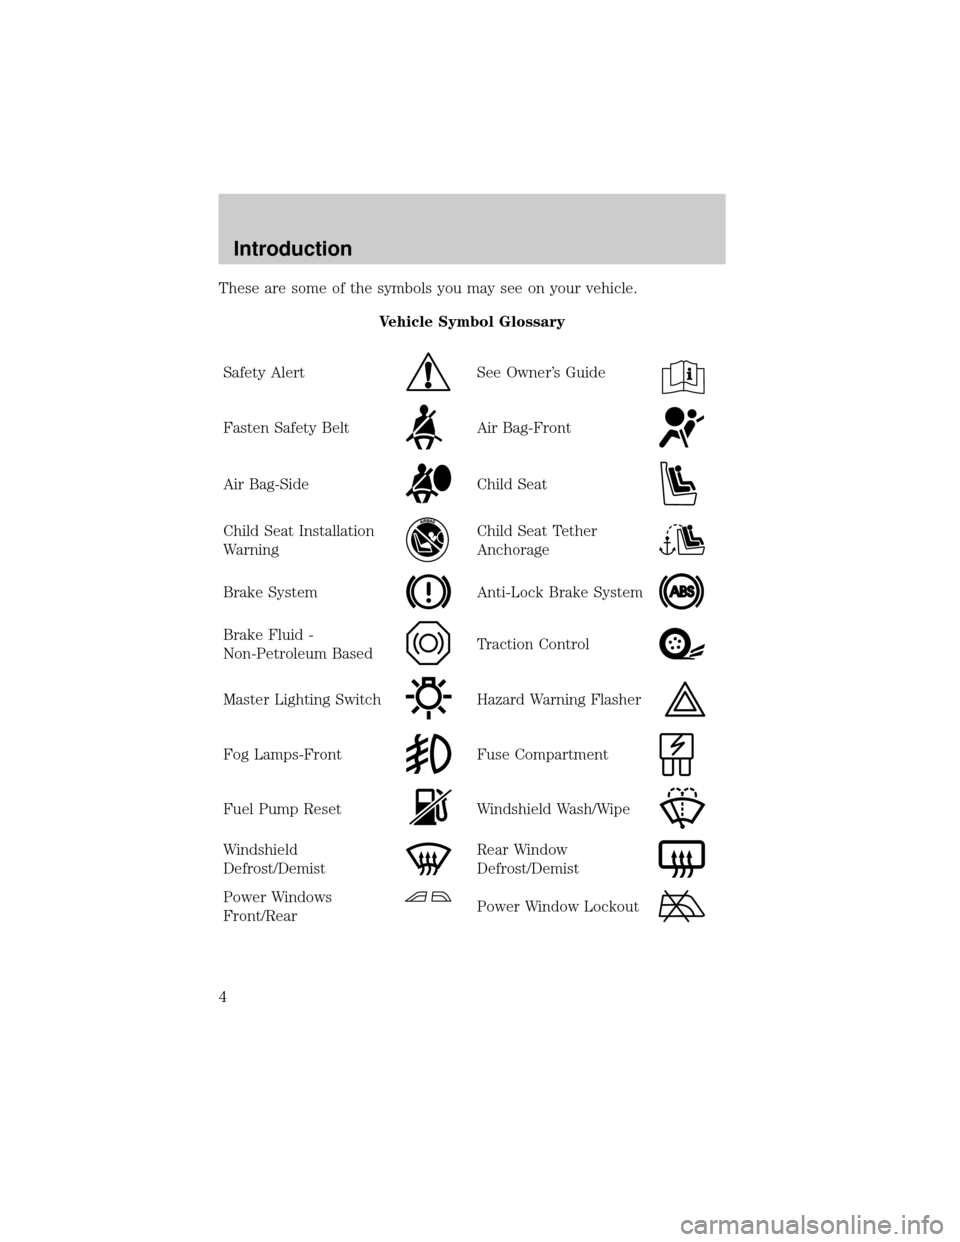
These are some of the symbols you may see on your vehicle.
Vehicle Symbol Glossary
Safety Alert
See Owner's Guide
Fasten Safety BeltAir Bag-Front
Air Bag-SideChild Seat
Child Seat Installation
WarningChild Seat Tether
Anchorage
Brake SystemAnti-Lock Brake System
Brake Fluid -
Non-Petroleum BasedTraction Control
Master Lighting SwitchHazard Warning Flasher
Fog Lamps-FrontFuse Compartment
Fuel Pump ResetWindshield Wash/Wipe
Windshield
Defrost/DemistRear Window
Defrost/Demist
Power Windows
Front/RearPower Window Lockout
Introduction
4
Page 8 of 264
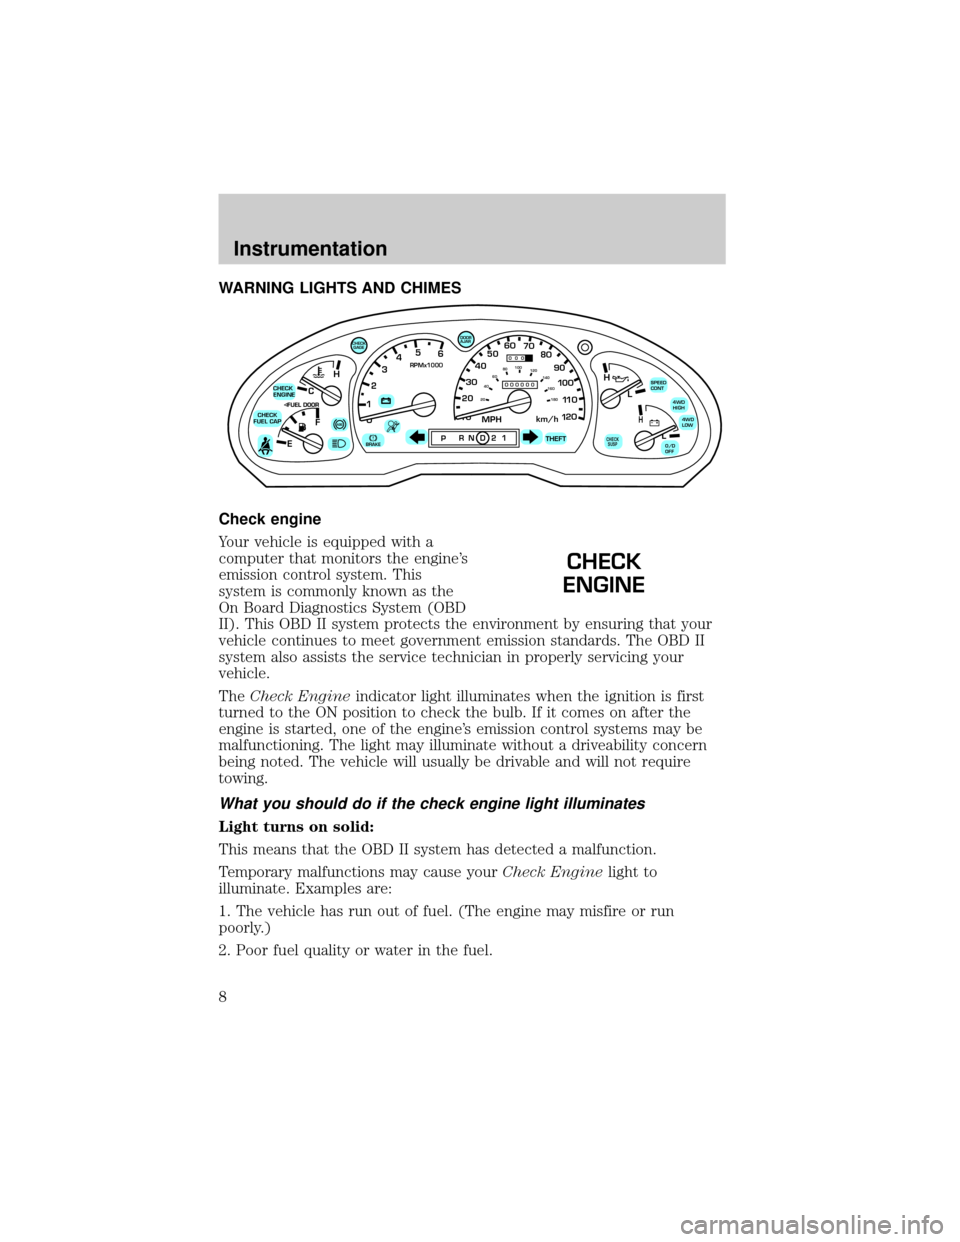
WARNING LIGHTS AND CHIMES
Check engine
Your vehicle is equipped with a
computer that monitors the engine's
emission control system. This
system is commonly known as the
On Board Diagnostics System (OBD
II). This OBD II system protects the environment by ensuring that your
vehicle continues to meet government emission standards. The OBD II
system also assists the service technician in properly servicing your
vehicle.
TheCheck Engineindicator light illuminates when the ignition is first
turned to the ON position to check the bulb. If it comes on after the
engine is started, one of the engine's emission control systems may be
malfunctioning. The light may illuminate without a driveability concern
being noted. The vehicle will usually be drivable and will not require
towing.
What you should do if the check engine light illuminates
Light turns on solid:
This means that the OBD II system has detected a malfunction.
Temporary malfunctions may cause yourCheck Enginelight to
illuminate. Examples are:
1. The vehicle has run out of fuel. (The engine may misfire or run
poorly.)
2. Poor fuel quality or water in the fuel.
C
012345
6
RPMx1000
ABS!BRAKE
CHECK
ENGINE
CHECK
FUEL CAP
EFH
H
H
PRN D 2 1THEFT
SPEED
CONT
4WD
HIGH
4WD
LOW
O/D
OFFL
L
10MPH 205060
70
304080
90
km/h
0 0 0
10 100
1
20
1
0 0 0 0 0 0406080100
120
140
160
180
20
DOOR
AJAR
CHECK
GAGE
CHECK
SUSP
CHECK
ENGINE
Instrumentation
8
Page 9 of 264
3. The fuel cap may not have been properly installed and securely
tightened.
These temporary malfunctions can be corrected by filling the fuel tank
with high quality fuel of the recommended octane and/or properly
installing and securely tightening the gas cap. After three driving cycles
without these or any other temporary malfunctions present, theCheck
Enginelight should turn off. (A driving cycle consists of a cold engine
startup followed by mixed city/highway driving.) No additional vehicle
service is required.
If theCheck Enginelight remains on, have your vehicle serviced at the
first available opportunity.
Light is blinking:
Engine misfire is occurring which could damage your catalytic converter.
You should drive in a moderate fashion (avoid heavy acceleration and
deceleration) and have your vehicle serviced at the first available
opportunity.
Under engine misfire conditions, excessive exhaust temperatures
could damage the catalytic converter, the fuel system, interior
floor coverings or other vehicle components, possibly causing a fire.
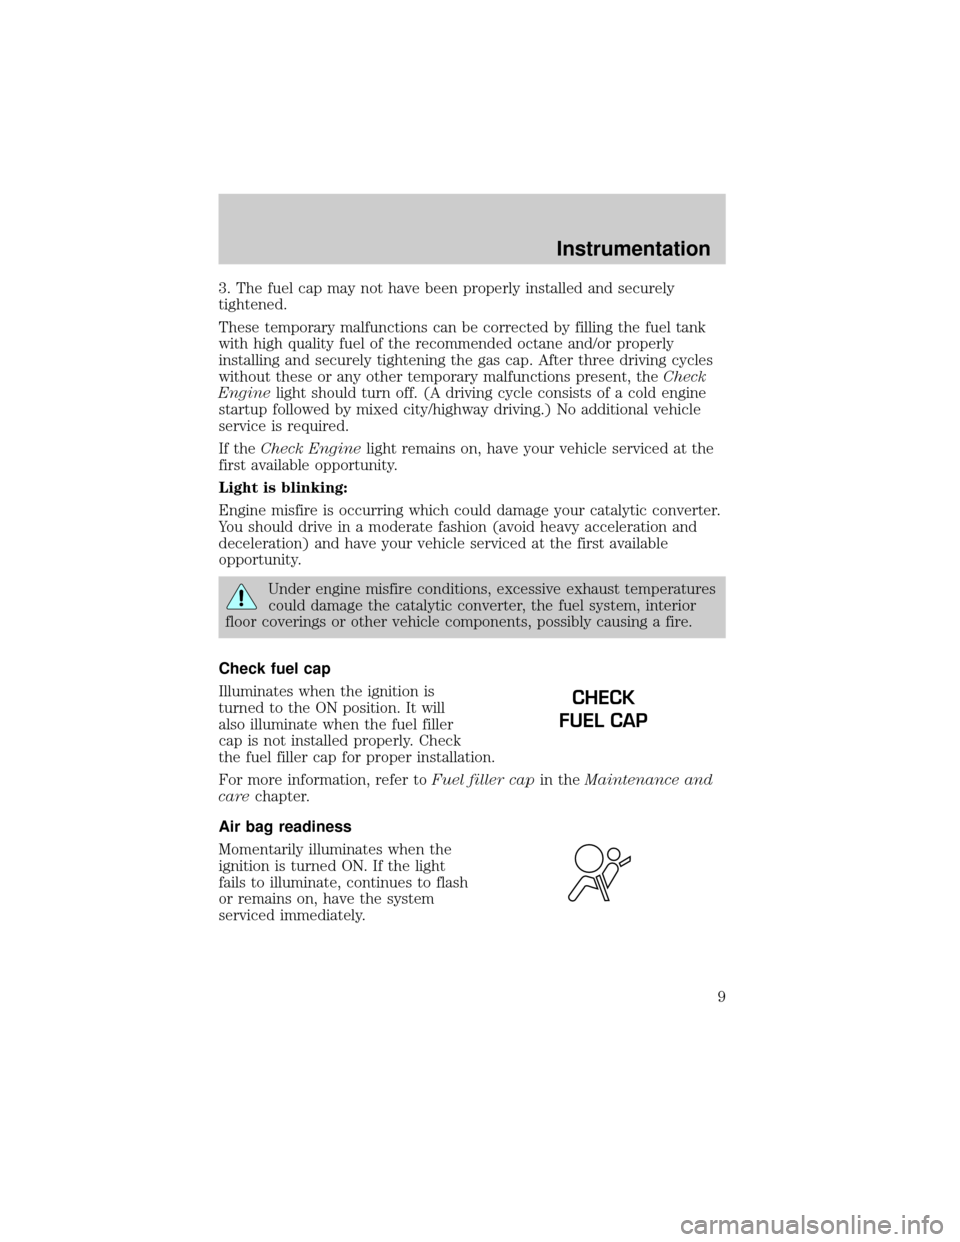
Check fuel cap
Illuminates when the ignition is
turned to the ON position. It will
also illuminate when the fuel filler
cap is not installed properly. Check
the fuel filler cap for proper installation.
For more information, refer toFuel filler capin theMaintenance and
carechapter.
Air bag readiness
Momentarily illuminates when the
ignition is turned ON. If the light
fails to illuminate, continues to flash
or remains on, have the system
serviced immediately.
CHECK
FUEL CAP
Instrumentation
9
Page 10 of 264
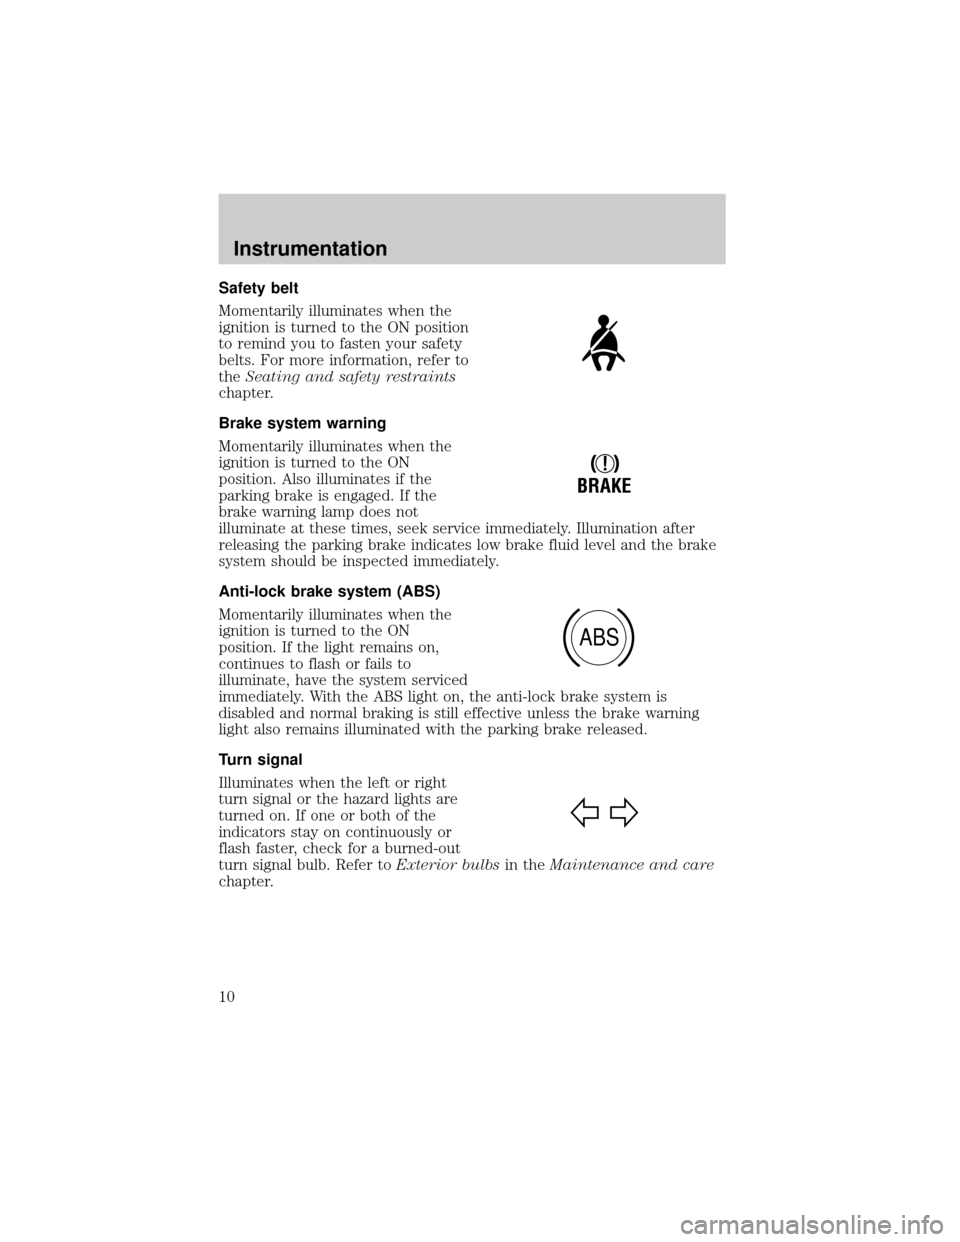
Safety belt
Momentarily illuminates when the
ignition is turned to the ON position
to remind you to fasten your safety
belts. For more information, refer to
theSeating and safety restraints
chapter.
Brake system warning
Momentarily illuminates when the
ignition is turned to the ON
position. Also illuminates if the
parking brake is engaged. If the
brake warning lamp does not
illuminate at these times, seek service immediately. Illumination after
releasing the parking brake indicates low brake fluid level and the brake
system should be inspected immediately.
Anti-lock brake system (ABS)
Momentarily illuminates when the
ignition is turned to the ON
position. If the light remains on,
continues to flash or fails to
illuminate, have the system serviced
immediately. With the ABS light on, the anti-lock brake system is
disabled and normal braking is still effective unless the brake warning
light also remains illuminated with the parking brake released.
Turn signal
Illuminates when the left or right
turn signal or the hazard lights are
turned on. If one or both of the
indicators stay on continuously or
flash faster, check for a burned-out
turn signal bulb. Refer toExterior bulbsin theMaintenance and care
chapter.
!
BRAKE
ABS
Instrumentation
10
Page 11 of 264

High beams
Illuminates when the high beam
headlamps are turned on.
Anti-theft system (if equipped)
Refer toSecuriLockypassive
anti-theft systemin theControls
and featureschapter.
Charging system
Illuminates when the ignition is
turned to the ON position and the
engine is off. The light also
illuminates when the battery is not
charging properly, requiring
electrical system service.
Check gage
Illuminates when the engine coolant
temperature is high, the engine oil
pressure is low or the fuel gauge is
at or near empty. The ignition must
be in the ON position for this lamp to illuminate. The lamp will also
illuminate for several seconds after the ignition is turned to the ON
position. Refer toEngine coolant temperature gauge, Engine oil
pressure gaugeorFuel gaugein this chapter for more information.
Four wheel drive low (if equipped)
Momentarily illuminates when the
ignition is turned to the START
position. Illuminates when
four-wheel drive low is engaged. If
the light continues to flash have the system serviced.
THEFT
CHECK
GAGE
4WD
LOW
Instrumentation
11
Page 12 of 264

Four wheel drive high (if equipped)
Momentarily illuminates when the
ignition is turned to the START
position. Illuminates when
four-wheel drive high is engaged. If
the light continues to flash have the system serviced.
Door ajar
Illuminates when the ignition is in
the ON or START position and any
door is open.
O/D off
Illuminates when the Transmission
Control Switch (TCS), refer to
Overdrive controlin theControls
and Featureschapter, has been
pushed turning the transmission overdrive function OFF. When the light
is on, the transmission does not operate in the overdrive mode, refer to
theDrivingchapter for transmission function and operation.
The light may also flash steadily if a transmission malfunction is
detected. If the light does not come on when the Transmission Control
Switch is depressed or if the light flashes steadily, have your vehicle
serviced as soon as possible, damage to the transmission could occur.
Check air suspension (if equipped)
Illuminates momentarily when the
ignition is turned to the ON position
and the engine is OFF. The light
also illuminates when the air
suspension system requires servicing.
For information, refer toAir suspension systemin theDrivingchapter.
4WD
HIGH
DOOR
AJAR
O/D
OFF
CHECK
SUSP
Instrumentation
12
Page 13 of 264

Speed control
This light comes on when either the
SET/ACCEL or RESUME controls
are pressed. It turns off when the
speed control OFF control is
pressed, the brake is applied or the ignition is turned to the OFF
position.
Safety belt warning chime
Sounds to remind you to fasten your safety belts.
For information on the safety belt warning chime, refer to theSeating
and safety restraintschapter.
Supplemental restraint system (SRS) warning chime
For information on the SRS warning chime, refer to theSeating and
safety restraintschapter.
Key-in-ignition warning chime
Sounds when the key is left in the ignition in the OFF/LOCK or ACC
position and the driver's door is opened.
Headlamps on warning chime
Sounds when the headlamps or parking lamps are on, the ignition is off
(and the key is not in the ignition) and the driver's door is opened.
SPEED
CONT
Instrumentation
13
Page 16 of 264

Battery voltage gauge
This shows the battery voltage when
the ignition is in the ON position. If
the pointer moves and stays outside
the normal operating range (as
indicated), have the vehicle's
electrical system checked as soon as
possible.
Engine oil pressure gauge
This shows the engine oil pressure
in the system. Sufficient pressure
exists as long as the needle remains
in the normal range (the area
between the ªLº and ªHº).
If the gauge indicates low pressure,
stop the vehicle as soon as safely
possible and switch off the engine
immediately. Check the oil level.
Add oil if needed (refer toEngine
oilin theMaintenance and care
chapter). If the oil level is correct, have your vehicle checked at your
dealership or by a qualified technician.
Fuel gauge
Displays approximately how much
fuel is in the fuel tank (when the
key is in the ON position). The fuel
gauge may vary slightly when the
vehicle is in motion. The ignition
should be in the OFF position while
the vehicle is being refueled. When
the gauge first indicates empty,
there is a small amount of reserve
fuel in the tank. When refueling the
vehicle from empty indication, the
amount of fuel that can be added will be less than the advertised
capacity due to the reserve fuel.
L
H
H
L
EF
Instrumentation
16
Page 21 of 264

HEADLAMP CONTROL
Rotate the headlamp control to the
first position to turn on the parking
lamps. Rotate to the second position
to also turn on the headlamps.
Foglamp control (if equipped)
Turn on the low-beam headlamps
and press the foglamp control to
activate the foglamps. The foglamp
control will illuminate when the
foglamps are on.
Press the foglamp control a second time to deactivate the foglamps.
Daytime running lamps (DRL) (if equipped)
Turns the headlamps on with a reduced output. To activate:
²the ignition must be in the ON position and
²the headlamp control is in the OFF or Parking lamps position.
Always remember to turn on your headlamps at dusk or during
inclement weather. The Daytime Running Light (DRL) System
does not activate your tail lamps and generally may not provide
adequate lighting during these conditions. Failure to activate your
headlamps under these conditions may result in a collision.
High beams
Push forward to activate.
Pull toward you to deactivate.
OFF
Controls and features
21
Page 24 of 264
hot and full cold positions, the air distributed through the floor ducts
will be slightly warmer than the air sent to the instrument panel
registers.
²
(Floor)-Allows for maximum heating by distributing outside air
through the floor ducts. However, the air will not be cooled below the
outside temperature because the air conditioning does not operate in
this mode.
²
(Floor and defrost)-Distributes outside air through the
windshield defroster ducts and the floor ducts. Heating and air
conditioning capabilities are provided in this mode. For added
customer comfort, when the temperature control knob is anywhere in
between the full hot and full cold positions, the air distributed through
the floor ducts will be slightly warmer than the air sent to the
windshield defrost ducts. For added customer comfort, when the
temperature control knob is anywhere in between the full hot and full
cold positions, the air distributed through the floor ducts will be
slightly warmer than the air sent to the windshield defroster ducts. If
the temperature is about 10ÉC (50ÉF) or higher, the air conditioner
will automatically dehumidify the air to reduce fogging.
²
(Defrost)-Distributes outside air through the windshield
defroster ducts. It can be used to clear ice or fog from the windshield.
If the temperature is about 10ÉC (50ÉF) or higher, the air conditioner
will automatically dehumidify the air to reduce fogging.
To aide in defogging and demisting (removing condensation on the inside
of the windshield) in cool weather:
1. Select PANEL & FLOOR
2. Set the temperature control to full heat
3. Select A/C
4. Set the fan speed to HI
5. Direct the outer panel vents towards to side windows
To increase airflow to the outer panel vents, close the central panel
vents.
Operating tips
²In humid weather, selectbefore driving. This will reduce fogging
on your windshield. After a few minutes, select any desired position.
Controls and features
24