ECU Mercury Mountaineer 2005 s Owner's Guide
[x] Cancel search | Manufacturer: MERCURY, Model Year: 2005, Model line: Mountaineer, Model: Mercury Mountaineer 2005Pages: 304, PDF Size: 4.34 MB
Page 121 of 304

•This safety belt system has a retractor assembly that is designed to
extend the safety belt webbing in a controlled manner. This helps
reduce the belt force acting on the user’s chest.
BELT AND RETRACTOR ASSEMBLY MUST BE REPLACED if
the safety belt assembly automatic locking retractor feature or
any other safety belt function is not operating properly when checked
according to the procedures inWorkshop Manual. Failure to replace
the Belt and Retractor assembly could increase the risk of injury in
collisions.
Combination lap and shoulder belts
1. Insert the belt tongue into the proper buckle (the buckle closest to
the direction the tongue is coming from) until you hear a snap and feel it
latch. Make sure the tongue is securely fastened in the buckle.
•Front and rear seats
2. To unfasten, push the release button and remove the tongue from the
buckle.
•Front and rear seats
2005 Mountaineer(mnt)
Owners Guide (post-2002-fmt)
USA(fus)
Seating and Safety Restraints
121
Page 142 of 304

When installing a child safety seat:
•Review and follow the information
presented in theairbag
supplemental restraint system
(SRS) section in this chapter.
•Use the correct safety belt buckle
for that seating position (the
buckle closest to the direction the
tongue is coming from).
•Insert the belt tongue into the
proper buckle until you hear a
snap and feel it latch. Make sure the tongue is securely fastened in the
buckle.
•Keep the buckle release button pointing up and away from the safety
seat, with the tongue between the child seat and the release button,
to prevent accidental unbuckling.
•Place seat back in upright position.
•Put the safety belt in the automatic locking mode. Refer toAutomatic
locking mode(passenger side front and outboard rear seating
positions) (if equipped) section in this chapter.
•LATCH lower anchors are recommended for use by children up to 48
lb. (22 kg) in a child restraint. Top tether anchors can be used for
children up to 60 pounds (27 kg) in a child restraint, and to provide
upper torso restraint for children up to 80 lb. (36 kg) using an upper
torso harness and a belt-positioning booster.
Ford recommends the use of a child safety seat having a top tether
strap. Install the child safety seat in a seating position with LATCH and
tether anchors. For more information on top tether straps and anchors,
refer toAttaching safety seats with tether strapsin this chapter. For
more information of LATCH anchors refer toAttaching safety seats with
LATCH (Lower Anchors and Tethers for Children) attachmentsin this
chapter.
Carefully follow all of the manufacturer’s instructions included
with the safety seat you put in your vehicle. If you do not install
and use the safety seat properly, the child may be injured in a sudden
stop or collision.
2005 Mountaineer(mnt)
Owners Guide (post-2002-fmt)
USA(fus)
Seating and Safety Restraints
142
Page 144 of 304

3. While holding the shoulder and
lap belt portions together, route the
tongue through the child seat
according to the child seat
manufacturer’s instructions. Be sure
the belt webbing is not twisted.
4. Insert the belt tongue into the
proper buckle (the buckle closest to
the direction the tongue is coming
from) for that seating position until
you hear a snap and feel the latch
engage. Make sure the tongue is
latched securely by pulling on it.
5. To put the retractor in the
automatic locking mode, grasp the
shoulder portion of the belt and pull
downward until all of the belt is
pulled out and a click is heard.
6. Allow the belt to retract. The belt will click as it retracts to indicate it
is in the automatic locking mode.
2005 Mountaineer(mnt)
Owners Guide (post-2002-fmt)
USA(fus)
Seating and Safety Restraints
144
Page 145 of 304

7. Pull the lap belt portion across
the child seat toward the buckle and
pull up on the shoulder belt while
pushing down with your knee on the
child seat.
8. Allow the safety belt to retract to
remove any slack in the belt.
9. Before placing the child in the
seat, forcibly move the seat forward
and back to make sure the seat is
securely held in place. To check
this, grab the seat at the belt path
and attempt to move it side to side
and forward. There should be no
more than one inch of movement for
proper installation.
10. Try to pull the belt out of the retractor to make sure the retractor is
in the automatic locking mode (you should not be able to pull more belt
out). If the retractor is not locked, unbuckle the belt and repeat Steps 2
through 9.
Check to make sure the child seat is properly secured before each use.
Attaching child safety seats with tether straps
Most new forward-facing child safety seats include a tether strap which
goes over the back of the seat and hooks to an anchoring point. Tether
straps are available as an accessory for many older safety seats. Contact
the manufacturer of your child seat for information about ordering a
tether strap.
The rear seats of your vehicle are equipped with built-in tether strap
anchors located behind the seats as shown below.
2005 Mountaineer(mnt)
Owners Guide (post-2002-fmt)
USA(fus)
Seating and Safety Restraints
145
Page 161 of 304

•All-Wheel driving capability (if applicable)
•Load leveling adjustment (if applicable)
When driving with the dissimilar spare tire/wheel additional caution
should be given to:
•Towing a trailer
•Driving vehicles equipped with a camper body
•Driving vehicles with a load on the cargo rack
Drive cautiously when using a dissimilar spare tire/wheel and seek
service as soon as possible.
Stopping and securing the vehicle
1. If you get a flat tire while driving,
do not apply the brake heavily;
instead, gradually decrease your
speed. Hold the steering wheel
firmly and slowly move to a safe
place on the side of the road.
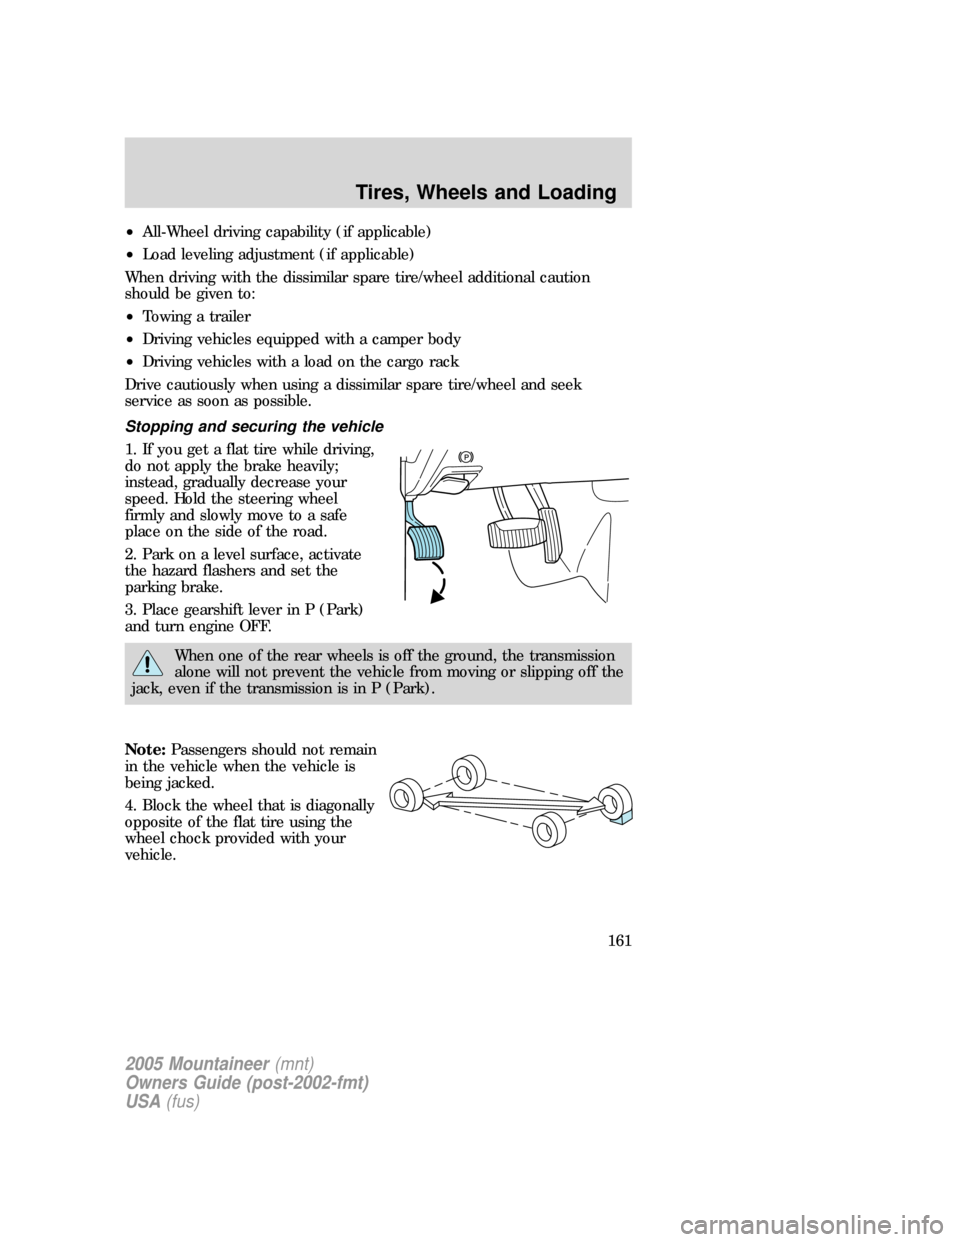
2. Park on a level surface, activate
the hazard flashers and set the
parking brake.
3. Place gearshift lever in P (Park)
and turn engine OFF.
When one of the rear wheels is off the ground, the transmission
alone will not prevent the vehicle from moving or slipping off the
jack, even if the transmission is in P (Park).
Note:Passengers should not remain
in the vehicle when the vehicle is
being jacked.
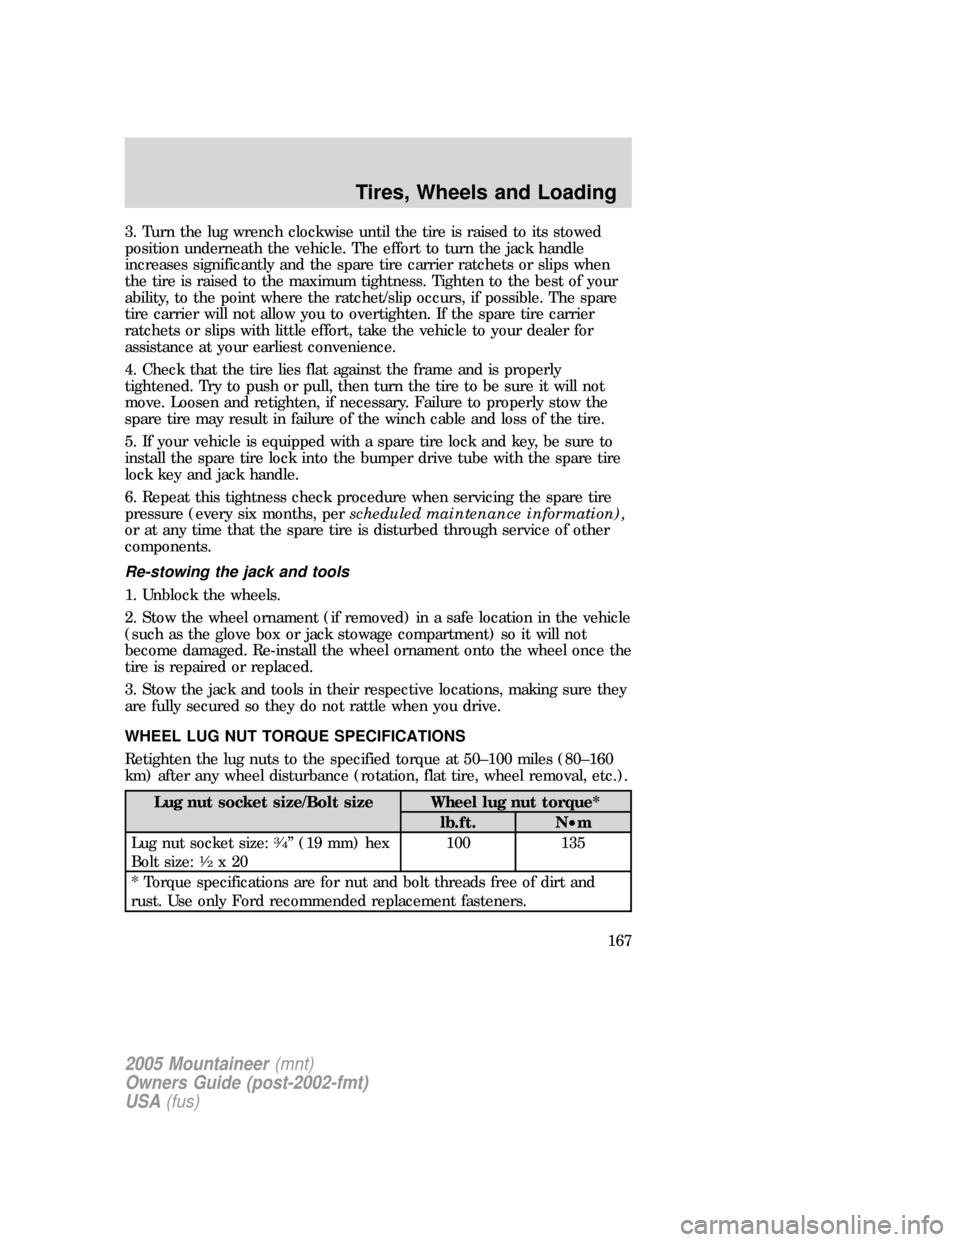
4. Block the wheel that is diagonally
opposite of the flat tire using the
wheel chock provided with your
vehicle.
2005 Mountaineer(mnt)
Owners Guide (post-2002-fmt)
USA(fus)
Tires, Wheels and Loading
161
Page 167 of 304

3. Turn the lug wrench clockwise until the tire is raised to its stowed
position underneath the vehicle. The effort to turn the jack handle
increases significantly and the spare tire carrier ratchets or slips when
the tire is raised to the maximum tightness. Tighten to the best of your
ability, to the point where the ratchet/slip occurs, if possible. The spare
tire carrier will not allow you to overtighten. If the spare tire carrier
ratchets or slips with little effort, take the vehicle to your dealer for
assistance at your earliest convenience.
4. Check that the tire lies flat against the frame and is properly
tightened. Try to push or pull, then turn the tire to be sure it will not
move. Loosen and retighten, if necessary. Failure to properly stow the
spare tire may result in failure of the winch cable and loss of the tire.
5. If your vehicle is equipped with a spare tire lock and key, be sure to
install the spare tire lock into the bumper drive tube with the spare tire
lock key and jack handle.
6. Repeat this tightness check procedure when servicing the spare tire
pressure (every six months, perscheduled maintenance information),
or at any time that the spare tire is disturbed through service of other
components.
Re-stowing the jack and tools
1. Unblock the wheels.
2. Stow the wheel ornament (if removed) in a safe location in the vehicle
(such as the glove box or jack stowage compartment) so it will not
become damaged. Re-install the wheel ornament onto the wheel once the
tire is repaired or replaced.
3. Stow the jack and tools in their respective locations, making sure they
are fully secured so they do not rattle when you drive.
WHEEL LUG NUT TORQUE SPECIFICATIONS
Retighten the lug nuts to the specified torque at 50–100 miles (80–160
km) after any wheel disturbance (rotation, flat tire, wheel removal, etc.).
Lug nut socket size/Bolt size Wheel lug nut torque*
lb.ft. N•m
Lug nut socket size:
3�4” (19 mm) hex
Bolt size:1�2x20100 135
* Torque specifications are for nut and bolt threads free of dirt and
rust. Use only Ford recommended replacement fasteners.
2005 Mountaineer(mnt)
Owners Guide (post-2002-fmt)
USA(fus)
Tires, Wheels and Loading
167
Page 181 of 304

tires are flat, repair as necessary. If all tires appear to be inflated,
carefully drive the vehicle to the nearest location where air can be added
to the tires. Turn the ignition to the “off” position. Inflate all the tires to
the recommended cold pressure.
The Tire Pressure Monitoring System complies with part 15 of the FCC
rules and with RS-210 of Industry Canada. Operation is subject to the
following two conditions: (1) This device may not cause harmful
interference, and (2) This device must accept any interference received,
including interference that may cause undesired operation.
The Tire Pressure Monitoring System is NOT a substitute for
manually checking tire pressure. The tire pressure should be
checked periodically (at least monthly) using a tire gauge, see
Inspecting and inflating your tiresin this chapter. Failure to
properly maintain your tire pressure could increase the risk of tire
failure, loss of control, vehicle rollover and personal injury.
USING SNOW TIRES AND TRACTION DEVICES
Snow tires must be the same size and grade as the tires you
currently have on your vehicle.
The tires on your vehicle have all-weather treads to provide traction in
rain and snow. However, in some climates, using snow tires or traction
devices may be necessary. Ford offers tire cables as a Ford approved
accessory and recommends use of these or SAE class “S” tire cables. See
your dealer or qualified service technician for more information on tire
cables for your vehicle.
Follow these guidelines when using snow tires and traction devices:
•Cables or chains should only be used on the rear wheels.
•Install cables or chains securely, verifying that the cables or chains do
not touch any wiring, brake lines or fuel lines.
•Drive cautiously. If you hear the cables or chains rub or bang against
the vehicle, stop and retighten them. If this does not work, remove the
cables or chains to prevent vehicle damage.
•Avoid overloading your vehicle.
•Remove the cables or chains when they are no longer needed.
•Do not use cables or chains on dry roads.
•Do not exceed 30 mph (48 km/h) with tire cables or chains on your
vehicle.
2005 Mountaineer(mnt)
Owners Guide (post-2002-fmt)
USA(fus)
Tires, Wheels and Loading
181
Page 200 of 304

Parking brake
Apply the parking brake whenever
the vehicle is parked. To set the
parking brake, press the parking
brake pedal down until the pedal
stops.
The BRAKE warning lamp in the
instrument cluster illuminates and
remains illuminated (when the
ignition is turned ON) until the
parking brake is released.
Always set the parking brake fully and make sure that the
gearshift is securely latched in P (Park).
If the parking brake is fully released, but the brake warning lamp
remains illuminated, the brakes may not be working properly.
See your dealer or a qualified service technician.
The parking brake is not recommended to stop a moving vehicle.
However, if the normal brakes fail, the parking brake can be used to stop
your vehicle in an emergency. Since the parking brake applies only the
rear brakes, the vehicle’s stopping distance will increase greatly and the
handling of your vehicle will be adversely affected.
P!
BRAKE
2005 Mountaineer(mnt)
Owners Guide (post-2002-fmt)
USA(fus)
Driving
200
Page 207 of 304

Driving with a 5–speed automatic transmission
This vehicle is equipped with an adaptive Transmission Shift Strategy.
Adaptive Shift Strategy offers the optimal transmission operation and
shift quality. When the vehicle’s battery has been disconnected for any
type of service or repair, the transmission will need to relearn the normal
shift strategy parameters, much like having to reset your radio stations
when your vehicle battery has been disconnected. The Adaptive
Transmission Strategy allows the transmission to relearn these operating
parameters. This learning process could take several transmission
upshifts and downshifts; during this learning process, slightly firmer
shifts may occur. After this learning process, normal shift feel and shift
scheduling will resume.
P (Park)
This position locks the transmission and prevents the rear wheels from
turning.
To put your vehicle in gear:
•Start the engine
•Depress the brake pedal
•Move the gearshift lever into the desired gear
To put your vehicle in P (Park):
•Come to a complete stop
•Move the gearshift lever and securely latch it in P (Park)
Always set the parking brake fully and make sure the gearshift is
latched in P (Park). Turn the ignition to the LOCK position and
remove the key whenever you leave your vehicle.
R (Reverse)
With the gearshift lever in R (Reverse), the vehicle will move backward.
Always come to a complete stop before shifting into and out of R
(Reverse).
N (Neutral)
With the gearshift lever in N (Neutral), the vehicle can be started and is
free to roll. Hold the brake pedal down while in this position.
2005 Mountaineer(mnt)
Owners Guide (post-2002-fmt)
USA(fus)
Driving
207
Page 224 of 304

The fuses are coded as follows:
Fuse/Relay
LocationFuse Amp
RatingPassenger Compartment Fuse
Panel Description
1 30A Memory seat module, Driver
power seat, Driver power lumbar
2 20A Moonroof
3 20A Radio, Amplifier, DVD
4 5A Front wiper module
5 15A Flasher relay (Turn, hazards)
6 10A Key-in-chime
7 15A Heated mirrors
8 5A Heated PCV (4.0L engine only)
9 15A Not used
10 10A Heated backlight relay coil, A/C
clutch contact
11 20A Heated seats
12 5A Not used
13 5A Overdrive cancel switch
14 5A PATS
15 5A Rear wiper module, Cluster
16 5A Power mirror, Manual climate
control, TPMS
17 15A Delayed accessory relay
coil/Battery saver coil and
contact/Reading and glove box
lamps
18 10A Flexible fuel pump
19 10A Restraint Control Module (RCM)
20 5A Memory driver seat switch, Driver
seat module, Body Security
Module (BSM), PATS LED
21 5A Instrument cluster, Compass,
Flasher coil
22 10A ABS, IVD Controller
2005 Mountaineer(mnt)
Owners Guide (post-2002-fmt)
USA(fus)
Roadside Emergencies
224