brake light Mercury Mountaineer 2005 Owner's Manuals
[x] Cancel search | Manufacturer: MERCURY, Model Year: 2005, Model line: Mountaineer, Model: Mercury Mountaineer 2005Pages: 304, PDF Size: 4.34 MB
Page 8 of 304
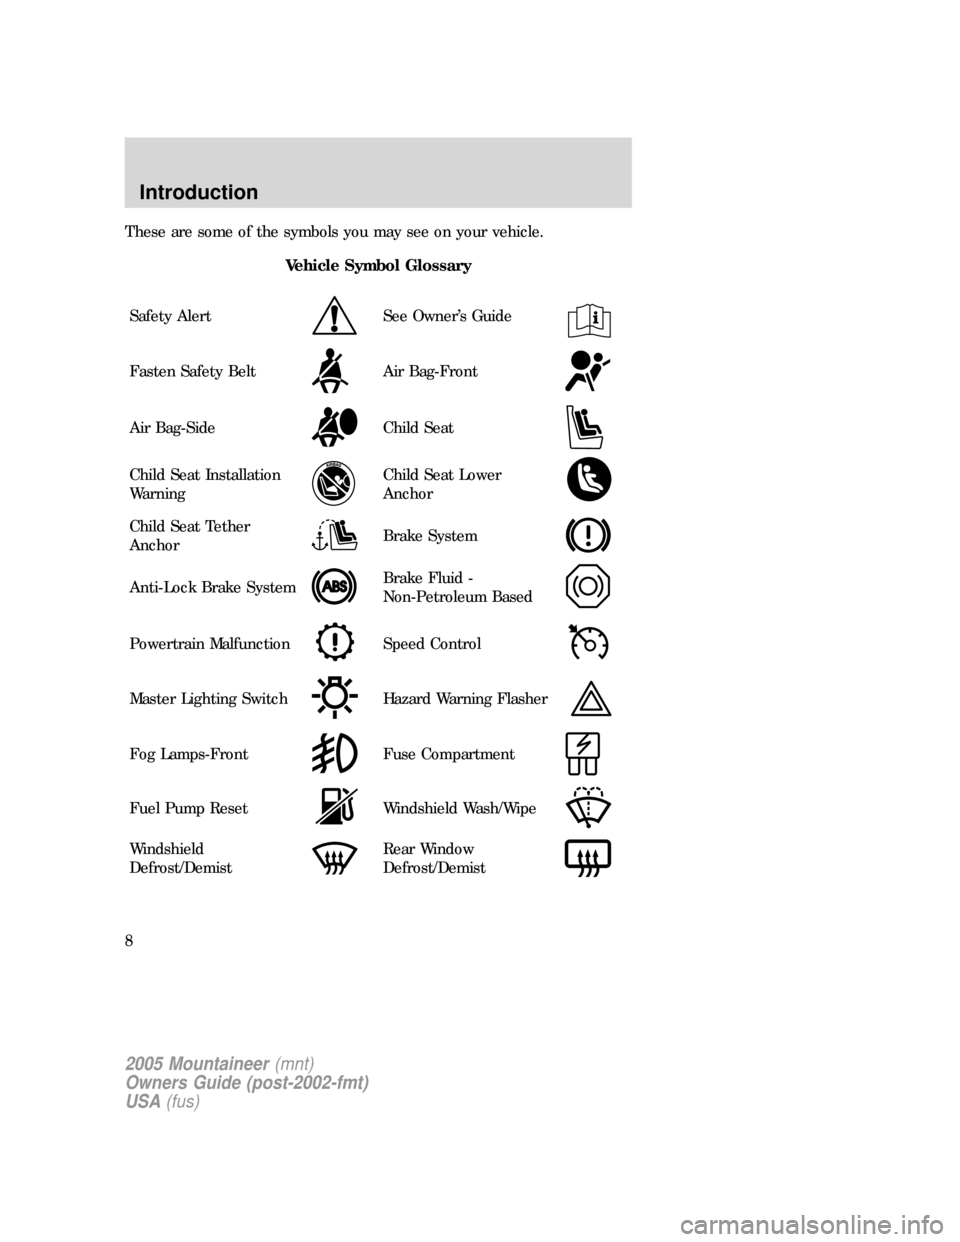
These are some of the symbols you may see on your vehicle.
Vehicle Symbol Glossary
Safety Alert
See Owner’s Guide
Fasten Safety BeltAir Bag-Front
Air Bag-SideChild Seat
Child Seat Installation
WarningChild Seat Lower
Anchor
Child Seat Tether
AnchorBrake System
Anti-Lock Brake SystemBrake Fluid -
Non-Petroleum Based
Powertrain MalfunctionSpeed Control
Master Lighting SwitchHazard Warning Flasher
Fog Lamps-FrontFuse Compartment
Fuel Pump ResetWindshield Wash/Wipe
Windshield
Defrost/DemistRear Window
Defrost/Demist
2005 Mountaineer(mnt)
Owners Guide (post-2002-fmt)
USA(fus)
Introduction
8
Page 11 of 304
On board diagnostics (OBD-II)in theMaintenance and Specifications
chapter. If the light is blinking, engine misfire is occurring which could
damage your catalytic converter. Drive in a moderate fashion (avoid
heavy acceleration and deceleration) and have your vehicle serviced
immediately.
Under engine misfire conditions, excessive exhaust temperatures
could damage the catalytic converter, the fuel system, interior
floor coverings or other vehicle components, possibly causing a fire.
Check fuel cap (if equipped):
Illuminates when the fuel cap may
not be properly installed. Continued
driving with this light on may cause
the Service engine soon light to
come on, refer toFuel filler capin theMaintenance and
Specificationschapter.
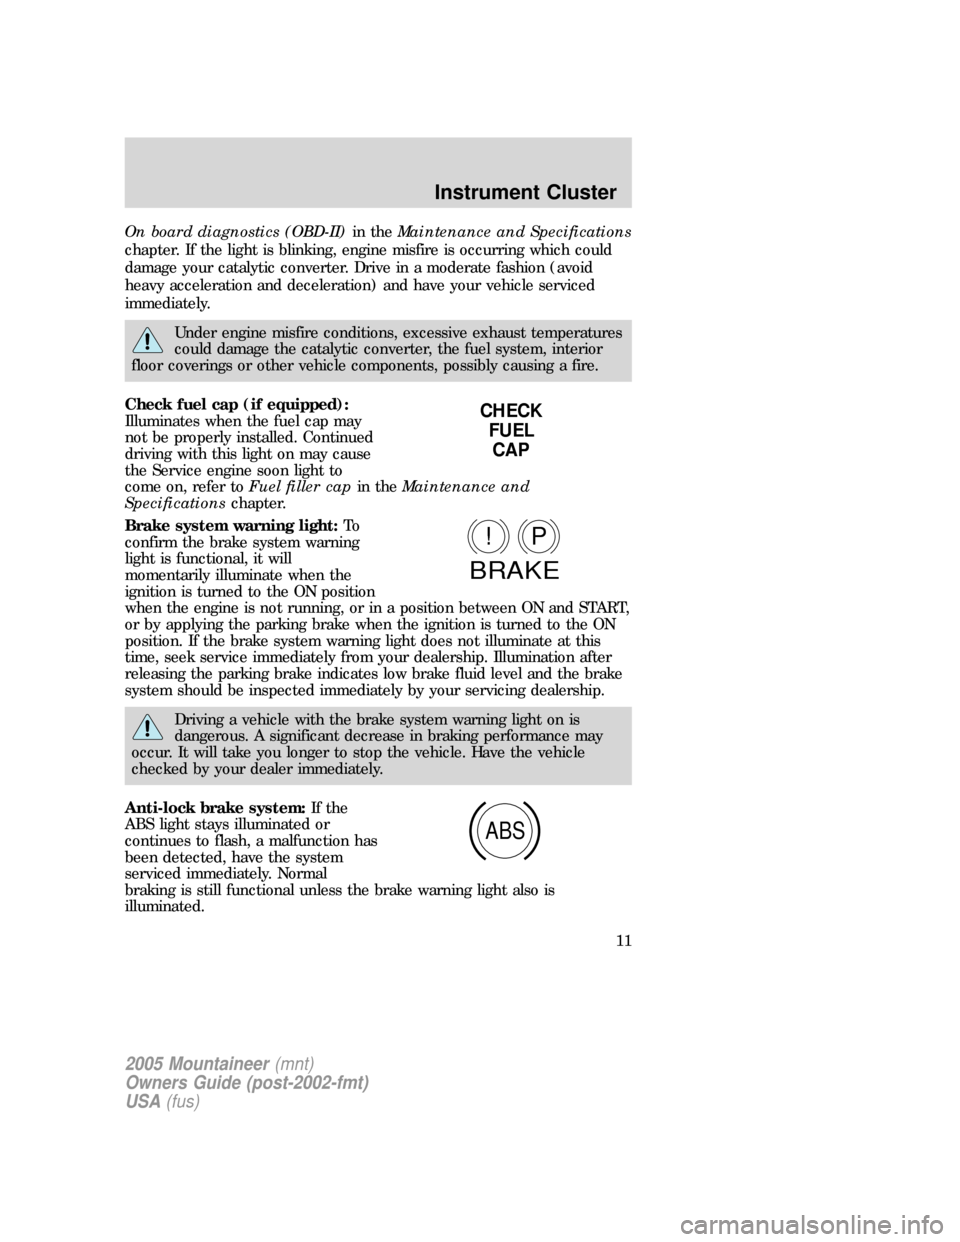
Brake system warning light:To
confirm the brake system warning
light is functional, it will
momentarily illuminate when the
ignition is turned to the ON position
when the engine is not running, or in a position between ON and START,
or by applying the parking brake when the ignition is turned to the ON
position. If the brake system warning light does not illuminate at this
time, seek service immediately from your dealership. Illumination after
releasing the parking brake indicates low brake fluid level and the brake
system should be inspected immediately by your servicing dealership.
Driving a vehicle with the brake system warning light on is
dangerous. A significant decrease in braking performance may
occur. It will take you longer to stop the vehicle. Have the vehicle
checked by your dealer immediately.
Anti-lock brake system:If the
ABS light stays illuminated or
continues to flash, a malfunction has
been detected, have the system
serviced immediately. Normal
braking is still functional unless the brake warning light also is
illuminated.
CHECK
FUEL
CAP
P!
BRAKE
ABS
2005 Mountaineer(mnt)
Owners Guide (post-2002-fmt)
USA(fus)
Instrument Cluster
11
Page 44 of 304
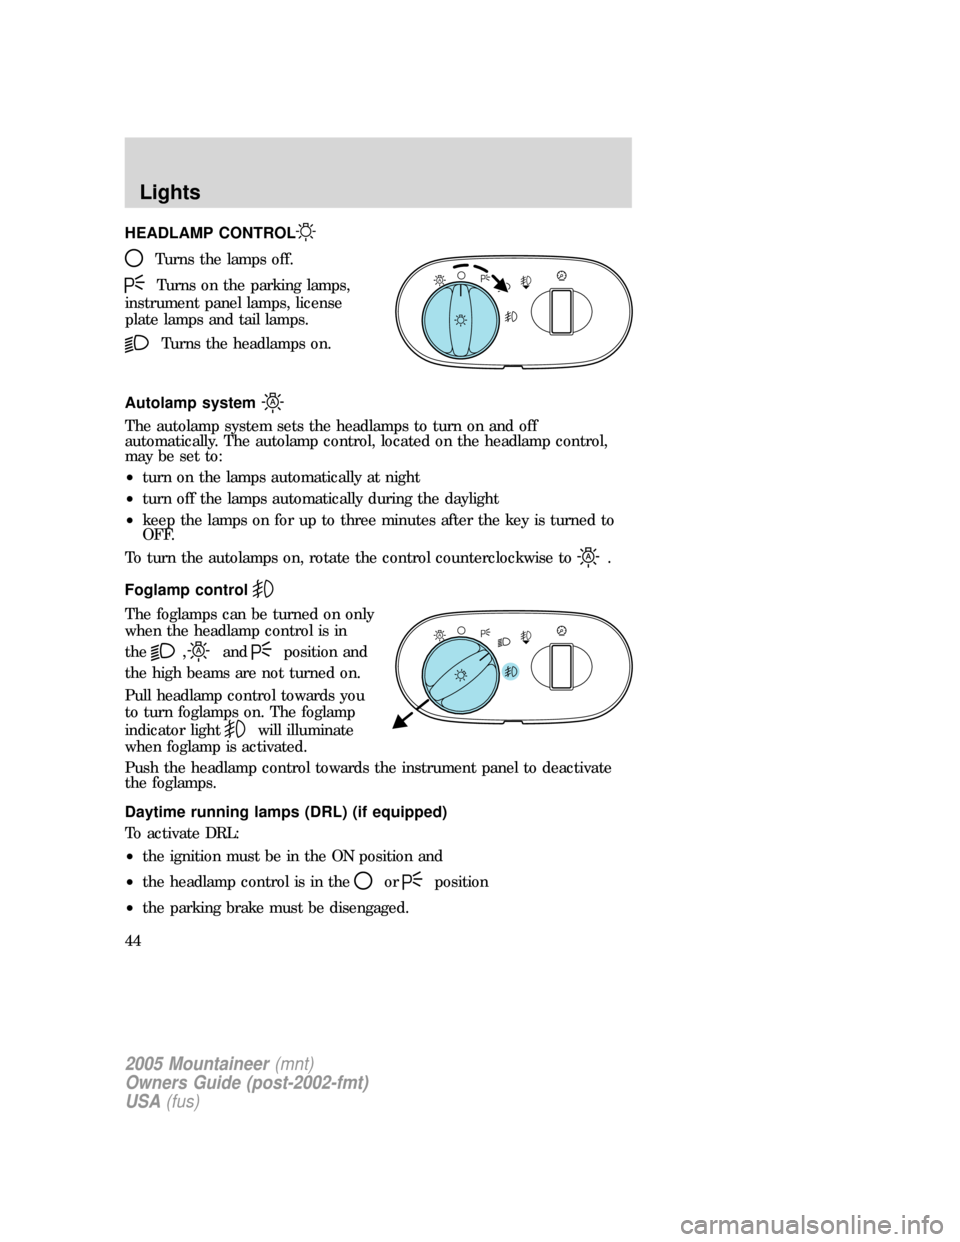
HEADLAMP CONTROL
Turns the lamps off.
Turns on the parking lamps,
instrument panel lamps, license
plate lamps and tail lamps.
Turns the headlamps on.
Autolamp system
The autolamp system sets the headlamps to turn on and off
automatically. The autolamp control, located on the headlamp control,
may be set to:
•turn on the lamps automatically at night
•turn off the lamps automatically during the daylight
•keep the lamps on for up to three minutes after the key is turned to
OFF.
To turn the autolamps on, rotate the control counterclockwise to
.
Foglamp control
The foglamps can be turned on only
when the headlamp control is in
the
,andposition and
the high beams are not turned on.
Pull headlamp control towards you
to turn foglamps on. The foglamp
indicator light
will illuminate
when foglamp is activated.
Push the headlamp control towards the instrument panel to deactivate
the foglamps.
Daytime running lamps (DRL) (if equipped)
To activate DRL:
•the ignition must be in the ON position and
•the headlamp control is in the
orposition
•the parking brake must be disengaged.
A
A
2005 Mountaineer(mnt)
Owners Guide (post-2002-fmt)
USA(fus)
Lights
44
Page 49 of 304

Function Number of bulbs Trade number
Park/turn lamps
(front)2
3157 AK (amber)
Headlamps 2 9007
Rear stop/turn/tail
lamps4
3057
Rear license plate
lamps2
168
Backup lamp 2 3156K
High-mount brake
lamps5
W5W
Side mounted turn
signal2
WY5W (amber)
Front sidemarker 2 194
Rear sidemarker 2 194
Fog lamp 2 9145
Cargo lamp 1 211-2
Interior overhead lamp 1 912 (906)
Front door courtesy
lamp1
168
Map lamps 2 168 (T10)
Ashtray lamp 1 161
All replacement bulbs are clear in color except where noted.
To replace all instrument panel lights - see your dealer.
2005 Mountaineer(mnt)
Owners Guide (post-2002-fmt)
USA(fus)
Lights
49
Page 53 of 304

Replacing front/rear side marker bulbs
1. Turn the headlamp switch to off.
2. Reach under the bumper and
rotate the bulb socket
counterclockwise to remove it.
3. Pull the bulb straight out.
Reverse steps to reinstall bulb(s).
Replacing tail/brake/turn/backup lamp bulbs
1. Turn the headlamp switch to OFF
and open the liftgate.
2. Remove the two screws from the
lamp assembly.
3. Remove the lamp assembly.
4. Rotate the bulb socket
counterclockwise and remove it
from the lamp assembly.
5. Pull the bulb straight out of the
socket.
Reverse steps to reinstall bulb(s).
Replacing foglamp bulbs
1. Make sure the headlamp switch is
in the OFF position.
2. Remove the plastic splash shield
by removing the two screws on the
front of the fenderwell.
3. Remove the bulb socket from the
foglamp by turning it
counterclockwise.
4. Disconnect the electrical connector.
Reverse steps to reinstall bulb(s).
2005 Mountaineer(mnt)
Owners Guide (post-2002-fmt)
USA(fus)
Lights
53
Page 54 of 304

Replacing license plate lamp bulbs
1. Make sure the headlamp switch is
in the OFF position and then
remove two screws and the license
plate lamp assembly.
2. Remove the bulb socket from the
lamp assembly by turning
counterclockwise and pull the bulb
straight out.
Reverse steps to reinstall bulb(s).
Replacing high-mount brakelamp bulb
1. Remove the two screws and lamp
assembly from vehicle.
2. Remove the bulb socket from the
lamp assembly by depressing the
snaps and pull the bulb straight out.
Reverse steps to reinstall bulb(s).
2005 Mountaineer(mnt)
Owners Guide (post-2002-fmt)
USA(fus)
Lights
54
Page 63 of 304
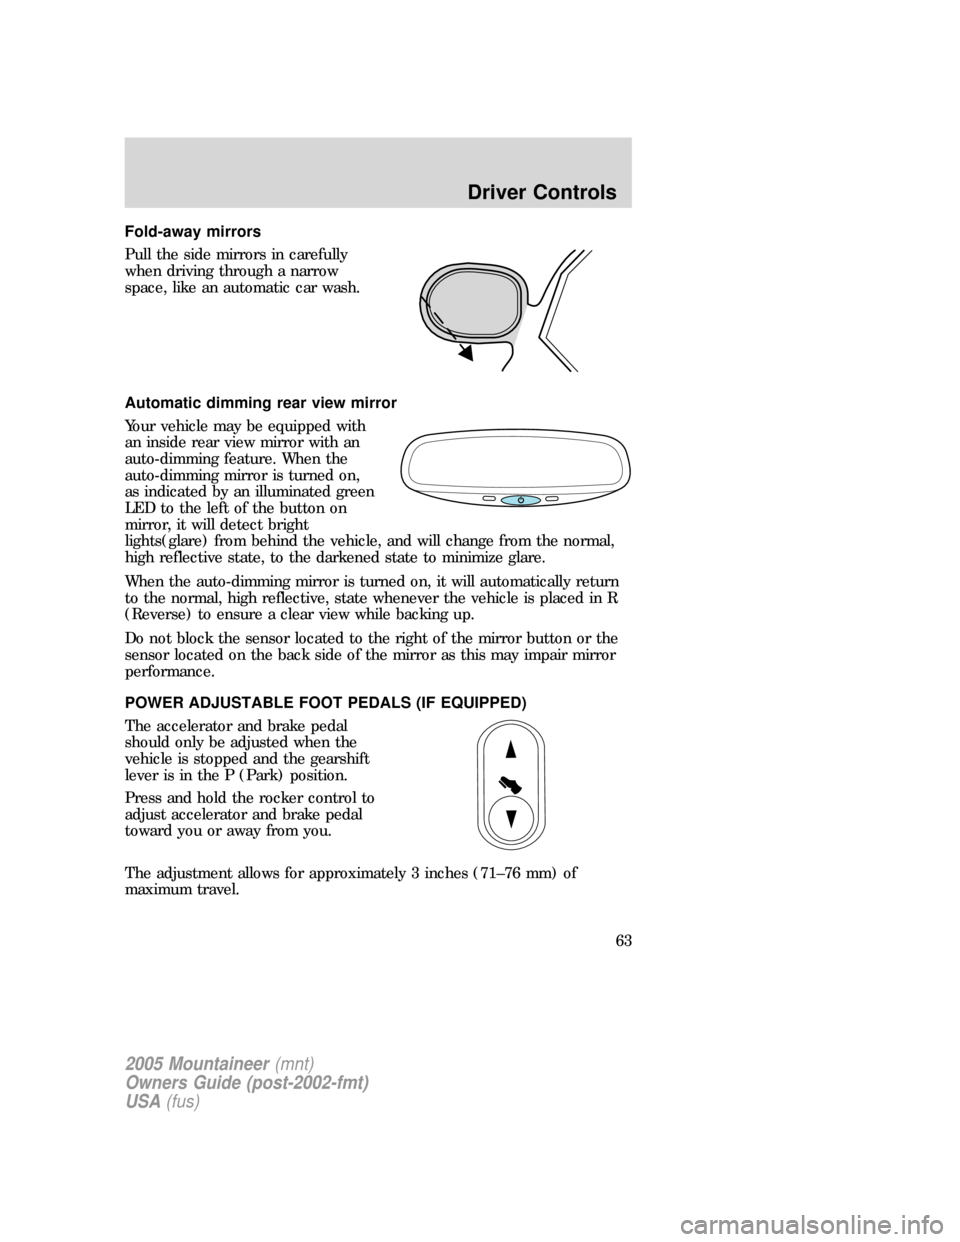
Fold-away mirrors
Pull the side mirrors in carefully
when driving through a narrow
space, like an automatic car wash.
Automatic dimming rear view mirror
Your vehicle may be equipped with
an inside rear view mirror with an
auto-dimming feature. When the
auto-dimming mirror is turned on,
as indicated by an illuminated green
LED to the left of the button on
mirror, it will detect bright
lights(glare) from behind the vehicle, and will change from the normal,
high reflective state, to the darkened state to minimize glare.
When the auto-dimming mirror is turned on, it will automatically return
to the normal, high reflective, state whenever the vehicle is placed in R
(Reverse) to ensure a clear view while backing up.
Do not block the sensor located to the right of the mirror button or the
sensor located on the back side of the mirror as this may impair mirror
performance.
POWER ADJUSTABLE FOOT PEDALS (IF EQUIPPED)
The accelerator and brake pedal
should only be adjusted when the
vehicle is stopped and the gearshift
lever is in the P (Park) position.
Press and hold the rocker control to
adjust accelerator and brake pedal
toward you or away from you.
The adjustment allows for approximately 3 inches (71–76 mm) of
maximum travel.
2005 Mountaineer(mnt)
Owners Guide (post-2002-fmt)
USA(fus)
Driver Controls
63
Page 64 of 304

Never adjust the accelerator and brake pedal with feet on the
pedals while the vehicle is moving.
SPEED CONTROL
With speed control set, you can maintain a speed of 30 mph (48 km/h)
or more without keeping your foot on the accelerator pedal. Speed
control does not work at speeds below 30 mph (48 km/h).
Do not use the speed control in heavy traffic or on roads that
are winding, slippery or unpaved.
Setting speed control
The controls for using your speed
control are located on the steering
wheel for your convenience.
1. Press the ON control and release
it.
2. Accelerate to the desired speed.
3. Press the SET + control and
release it.
4. Take your foot off the accelerator
pedal.
5. The indicator light
on the
instrument cluster will turn on.
Note:
•Vehicle speed may vary momentarily when driving up and down a
steep hill.
•If the vehicle speed increases above the set speed on a downhill, you
may want to apply the brakes to reduce the speed.
•If the vehicle speed decreases more than 10 mph (16 km/h) below
your set speed on an uphill, your speed control will disengage.
RES
SET
COAST+
2005 Mountaineer(mnt)
Owners Guide (post-2002-fmt)
USA(fus)
Driver Controls
64
Page 159 of 304
The installation of replacement tires with steel cord body plies in the tire
sidewall may cause malfunction of the Tire Pressure Monitoring System
(TPMS), and is not recommended (cord material information is molded
on the tire sidewall). Additionally, if your vehicle was originally equipped
with run-flat tires, replacing them with tires that are not identical to
those originally fitted may cause malfunction of the TPMS, and is not
recommended. Run-flat tires should not be used to replace regular tires.
Always check your TPMS indicator immediately after replacing one or
more tires on your vehicle. If the TPMS indicator is on, your TPMS is
malfunctioning. Your replacement tire might be incompatible with your
TPMS system, or some component of the TPMS system may be damaged.
Important:Ford recommends you replace your tires every 6 years
regardless of the condition of the tire tread wear. As tires age, the
rubber weakens, potentially increasing the risk of a tire failure during
use, causing loss of vehicle control and personal injury.
Important:Remember to replace the spare tire when you replace the
road tires on your vehicle. Even if it has never been used, the spare tire
should be replaced because tires degrade over time.
Important:Remember to replace the wheel air valves when the road
tires are replaced on your vehicle.
CHANGING THE TIRES
If you get a flat tire while driving:
•do not brake heavily.
•gradually decrease the vehicle’s speed.
•hold the steering wheel firmly.
•slowly move to a safe place on the side of the road.
Note:If your vehicle is equipped with the tire pressure monitoring
system (TPMS), the system indicator light will illuminate when the spare
is in use. To restore the full functionality of the monitoring system, all
road wheels equipped with tire pressure monitoring sensors must be
mounted on the vehicle.
If your vehicle is equipped with TPMS, have a flat serviced by a dealer or
a qualified technician in order to prevent damage to the TPMS sensor,
refer toChanging tires with TPMSin theTires, Wheels and Loading
chapter. Replace the spare tire with a road tire as soon as possible.
2005 Mountaineer(mnt)
Owners Guide (post-2002-fmt)
USA(fus)
Tires, Wheels and Loading
159
Page 168 of 304
When a wheel is installed, always remove any corrosion, dirt and
foreign materials present on the mounting surfaces of the wheel
and the surface of the front disc brake hub and rotor that contacts the
wheel. Installing wheels without correct metal-to-metal contact at the
wheel mounting surfaces can cause the wheel nuts to loosen and the
wheel to come off while the vehicle is in motion, resulting in loss of
control.
Note:If there is corrosion on the area where the wheel contacts the
hub, apply a thin film of grease or anti-seize compound on that area.
INFORMATION CONTAINED ON THE TIRE SIDEWALL
Federal law requires tire manufacturers to place standardized
information on the sidewall of all tires. This information identifies and
describes the fundamental characteristics of the tire and also provides a
U.S. DOT Tire Identification Number for safety standard certification and
in case of a recall.
Information on “P” type tires
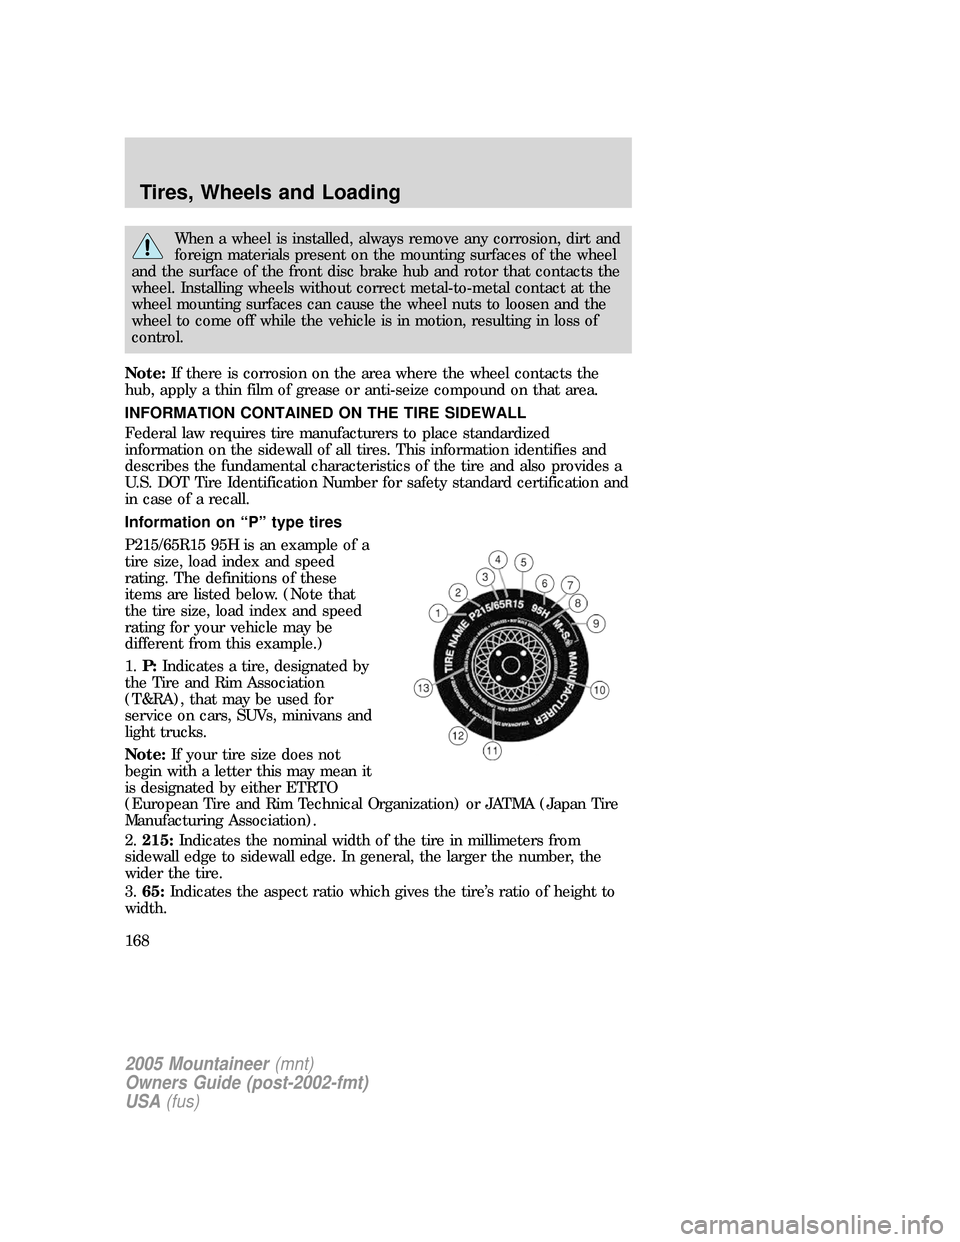
P215/65R15 95H is an example of a
tire size, load index and speed
rating. The definitions of these
items are listed below. (Note that
the tire size, load index and speed
rating for your vehicle may be
different from this example.)
1.P:Indicates a tire, designated by
the Tire and Rim Association
(T&RA), that may be used for
service on cars, SUVs, minivans and
light trucks.
Note:If your tire size does not
begin with a letter this may mean it
is designated by either ETRTO
(European Tire and Rim Technical Organization) or JATMA (Japan Tire
Manufacturing Association).
2.215:Indicates the nominal width of the tire in millimeters from
sidewall edge to sidewall edge. In general, the larger the number, the
wider the tire.
3.65:Indicates the aspect ratio which gives the tire’s ratio of height to
width.
2005 Mountaineer(mnt)
Owners Guide (post-2002-fmt)
USA(fus)
Tires, Wheels and Loading
168