battery Mercury Mountaineer 2006 s User Guide
[x] Cancel search | Manufacturer: MERCURY, Model Year: 2006, Model line: Mountaineer, Model: Mercury Mountaineer 2006Pages: 344, PDF Size: 2.66 MB
Page 114 of 344

2. Do not wipe off any grease on the
battery terminals on the back
surface of the circuit board.
3. Remove the old battery.Note:Please refer to local regulations when
disposing of transmitter batteries.
4. Insert the new battery. Refer to the diagram inside the remote entry
transmitter for the correct orientation of the battery. Press the battery
down to ensure that the battery is fully seated in the battery housing
cavity.
5. Snap the two halves back together.
Note:Replacement of the battery willnotcause the remote transmitter
to become deprogrammed from your vehicle. The remote transmitter
should operate normally after battery replacement.
Replacing lost remote entry transmitters
If you would like to have your remote entry transmitter reprogrammed
because you lost one, or would like to buy additional remote entry
transmitters, you can either reprogram them yourself, or takeall
remote entry transmittersto your authorized dealer for
reprogramming.
How to reprogram your remote entry transmitters
You must haveall remote entry transmitters(maximum of six)
available before beginning this procedure. If all remote entry transmitters
are not present during the programming procedure, the transmitters that
are not present during programming will no longer operate the vehicle.
2006 Mountaineer(mnt)
Owners Guide (post-2002-fmt)
USA(fus)
Locks and Security
114
Page 116 of 344

The inside lights will not turn off if:
•they have been turned on with the dimmer control, or
•any door is open.
The battery saver will shut off the interior lamps 10 minutes after the
ignition has been turned to the 1 (OFF/LOCK) position.
KEYLESS ENTRY SYSTEM (IF EQUIPPED)
You can use the keyless entry
keypad to:
•lock or unlock the doors without
using a key.
•open the liftgate window.
•activate or deactivate the
autolock feature.
The keypad can be operated with
the factory set 5–digit entry code;
this code is located on the owner’s
wallet card in the glove box, is
marked on the computer module,
and is available from your
authorized dealer. You can also
create your own 5–digit personal
entry code. In the event the wallet card is lost, the factory set code
cannot be reprogrammed.
When pressing the controls on the keypad, press the middle of the
controls to ensure a good activation.
Programming a personal entry code
Up to three personal entry codes may be programmed to the vehicle. To
create your own personal entry code:
1. Enter the factory set code.
2. Within five seconds press the 1•2 on the keypad.
3. Enter your personal 5-digit code. Each number must be entered
within five seconds of each other.
4. Press 1•2, 3•4or5•6 to indicate which of the three personal
entry code positions you wish to use.
5. The doors will again lock then unlock to confirm that your personal
key code has been programmed to the module.
2006 Mountaineer(mnt)
Owners Guide (post-2002-fmt)
USA(fus)
Locks and Security
116
Page 135 of 344

The control buttons are located on
the driver-side rear quarter trim
panel (accessible from the liftgate
area).
Push the bottom portion of the
control button to lower the desired
seatback.
Push the top of the control button
to return the seatback to its original
position.
The power fold down seats will operate for 30 minutes after the
ignition switch is in the 1 (OFF/Lock) position. The transmission
must be in P (Park), and the liftgate, or liftgate glass must be
open. Similar to the Battery Saver feature, the power 3rd row
seat will be disabled 30 minutes after turning the vehicle off. If
the power 3rd row seat is disabled after 30 minutes, the seat can
be enabled by opening any door, pressing the unlock control on
the remote entry transmitter, pressing any keyless keypad button
(if equipped), or turning the ignition key.
2006 Mountaineer(mnt)
Owners Guide (post-2002-fmt)
USA(fus)
Seating and Safety Restraints
135
Page 200 of 344

Low Tire Pressure
Warning LightPossible cause Customer Action Required
Flashing Warning
Light (flashes for a
short time either at
start-up or while
driving)Spare tire in use Your temporary spare tire is in
use. Repair the damaged road
wheel and re-mount it on the
vehicle to restore system
functionality. For a description
of how the system functions
under these conditions, refer to
Changing tires with TPMSin
this section.
TPMS
malfunctionIf your tires are properly
inflated and your spare tire is
not in use and a flashing TPMS
warning light is still ON, have
the system inspected by your
authorized dealer.
When inflating your tires
When putting air into your tires (such as at a gas station or in your
garage), the Tire Pressure Monitoring System may not respond
immediately to the air added to your tires. Here are the details:
•The tire pressure sensors mounted in your wheels updates your
vehicle with tire pressure information only once every minute,
therefore it may take up to two minutes of driving over 20 mph (32
km/h) for the light to turn OFF after you have filled your tires to the
recommended tire pressure.
•If your vehicle has been parked for over 30 minutes, the sensors go
into a low power mode to conserve battery life and therefore only
transmit about once every 6 hours. If you inflate your tires under
these conditions, it may take up to two minutes of driving over 20
mph (32 km/h) for the light to turn OFF after you have filled your
tires to the recommended tire pressure.
For these reasons, the low tire pressure warning light is NOT a
substitute for using an accurate tire gauge when checking and filling
your tires.
2006 Mountaineer(mnt)
Owners Guide (post-2002-fmt)
USA(fus)
Tires, Wheels and Loading
200
Page 228 of 344

If the parking brake is fully released, but the brake warning lamp
remains illuminated, the brakes may not be working properly.
See your authorized dealer.
Driving with a 5–speed automatic transmission (if equipped)
This vehicle is equipped with an Adaptive Transmission Control Strategy.
This Adaptive Transmission Control Strategy offers the optimal
transmission operation and shift quality. When the vehicle’s battery has
been disconnected for any type of service or repair, the transmission will
need to relearn the normal shift strategy parameters, much like having to
reset your radio stations when your vehicle battery has been
disconnected. The Adaptive Transmission Control Strategy allows the
transmission to relearn these operating parameters. This learning process
could take several transmission upshifts and downshifts; during this
learning process, slightly firmer shifts may occur. After this learning
process, normal shift feel and shift scheduling will resume.
2006 Mountaineer(mnt)
Owners Guide (post-2002-fmt)
USA(fus)
Driving
228
Page 231 of 344

Forced downshifts
•Allowed in D (Overdrive) or Drive.
•Depress the accelerator to the floor.
•Allows transmission to select an appropriate gear.
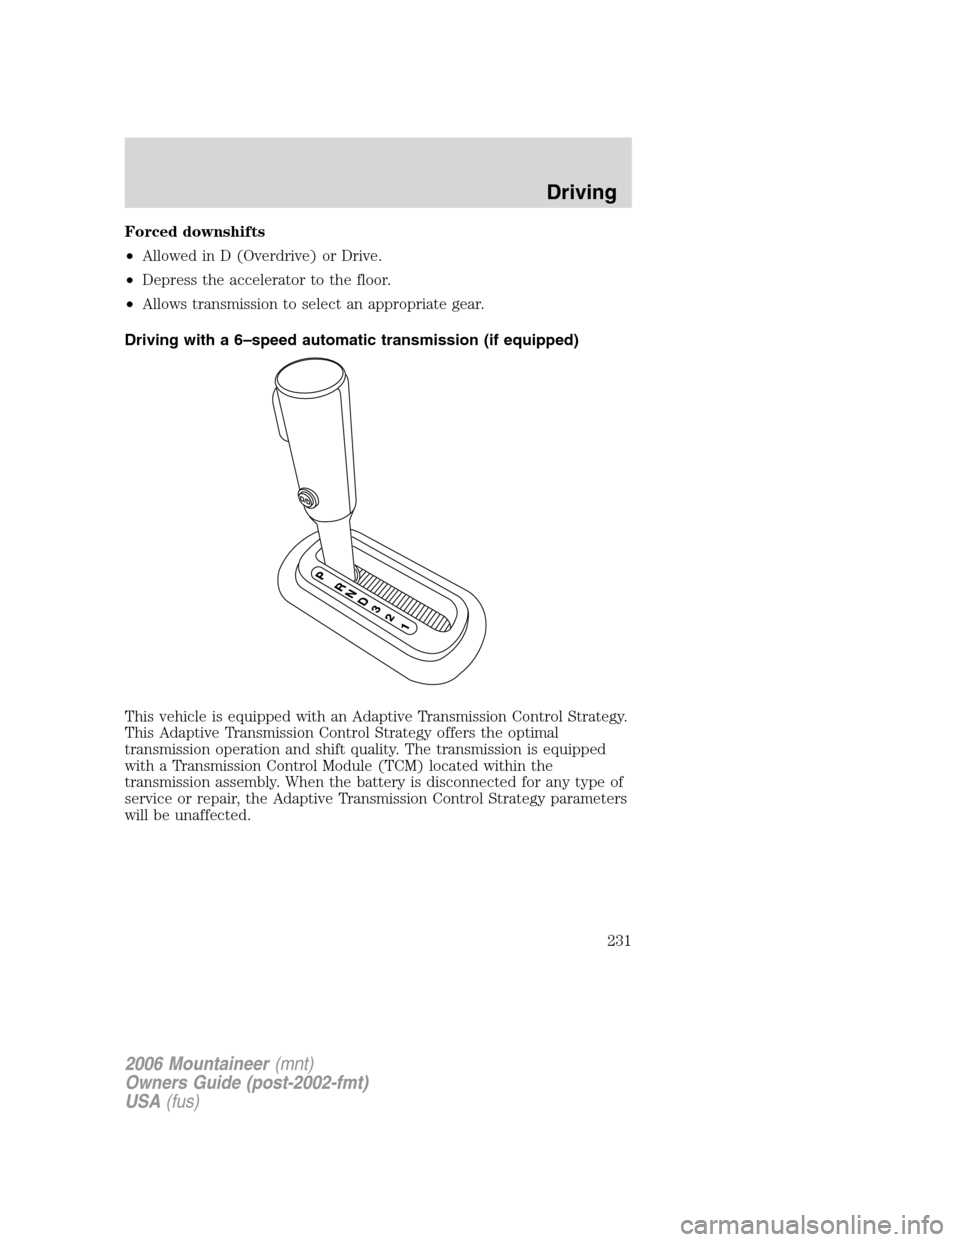
Driving with a 6–speed automatic transmission (if equipped)
This vehicle is equipped with an Adaptive Transmission Control Strategy.
This Adaptive Transmission Control Strategy offers the optimal
transmission operation and shift quality. The transmission is equipped
with a Transmission Control Module (TCM) located within the
transmission assembly. When the battery is disconnected for any type of
service or repair, the Adaptive Transmission Control Strategy parameters
will be unaffected.
2006 Mountaineer(mnt)
Owners Guide (post-2002-fmt)
USA(fus)
Driving
231
Page 245 of 344

ROADSIDE ASSISTANCE
Getting roadside assistance
To fully assist you should you have a vehicle concern, Ford Motor
Company offers a complimentary roadside assistance program. This
program is separate from the New Vehicle Limited Warranty. The service
is available:
•24–hours, seven days a week
•for the New Vehicle Limited Warranty period of three years or 36,000
miles (60,000 km), whichever occurs first on Ford and Mercury
vehicles, and four years or 50,000 miles (80,000 km) on Lincoln
vehicles.
Roadside assistance will cover:
•a flat tire change with a good spare (except Ford GT which has a tire
inflation kit)
•battery jump start
•lock-out assistance (key replacement cost is the customer’s
responsibility)
•fuel delivery – Independent Service Contractors, if not prohibited by
state, local or municipal law shall deliver up to 2.0 gallons (7.5L) of
gasoline or 5 gallons (18.9L) of diesel fuel to a disabled vehicle.
•winch out – available within 100 feet (30.5 meters) of a paved or
county maintained road, no recoveries.
•towing – Ford/Mercury/Lincoln eligible vehicle towed to an authorized
dealer within 35 miles (56.3 km) of the disablement location or to the
nearest authorized dealer. If a member requests to be towed to an
authorized dealer more than 35 miles (56.3 km) from the disablement
location, the member shall be responsible for any mileage costs in
excess of 35 miles (56.3 km).
Trailers shall be covered up to $100 if the disabled eligible vehicle
requires service at the nearest authorized dealer. If the trailer is disabled,
but the towing vehicle is operational, the trailer does not qualify for any
roadside services.
2006 Mountaineer(mnt)
Owners Guide (post-2002-fmt)
USA(fus)
Roadside Emergencies
245
Page 247 of 344

HAZARD FLASHER
The hazard flasher is located on the
steering column, just behind the
steering wheel. The hazard flashers
will operate when the ignition is in
any position or if the key is not in
the ignition.
Push in the flasher control and all
front and rear direction signals will
flash. Press the flasher control again
to turn them off. Use it when your
vehicle is disabled and is creating a
safety hazard for other motorists.
Note:With extended use, the flasher may run down your battery.
FUEL PUMP SHUT-OFF SWITCH
FUEL
RESET
The fuel pump shut-off switch is a device intended to stop the electric
fuel pump when your vehicle has been involved in a substantial jolt.
After a collision, if the engine cranks but does not start, the fuel pump
shut-off switch may have been activated.
2006 Mountaineer(mnt)
Owners Guide (post-2002-fmt)
USA(fus)
Roadside Emergencies
247
Page 251 of 344

Fuse/Relay
LocationFuse Amp
RatingPassenger Compartment Fuse
Panel Description
6 20A Liftglass release motor, Door
unlock/lock
7 15A Trailer stop/turn
8 15A Ignition switch power, PATS
9 2A 6R TCM/PCM (Ignition
RUN/START), Fuel pump relay
10 5A Front wiper RUN/ACC relay in
PDB
11 5A Radio start
12 5A Rear wiper motor RUN/ACC,
Trailer battery charge relay in
PDB, Radio
13 15A Heated mirror, Rear defrost
indicator
14 20A Horn
15 10A Reverse lamps
16 10A Trailer reverse lamps
17 10A RCM, PAD lamp, OCS module
18 10A Reverse park aid, IVD switch,
IVD, AWD module, Heated seat
switches, Compass,
Electrochromatic mirror, AUX
climate control
19 — Not used
20 10A Manual climate, DEATC, Brake
shift
21 — Not used
22 15A Brake switch, Bi-color stop lamps,
CHMSL all turn
23 15A Power mirrors, Interior lamps,
Puddle lamps, Battery saver,
Instrument illumination, Homelink
2006 Mountaineer(mnt)
Owners Guide (post-2002-fmt)
USA(fus)
Roadside Emergencies
251
Page 253 of 344

Power distribution box
The power distribution box is
located in the engine compartment.
The power distribution box contains
high-current fuses that protect your
vehicle’s main electrical systems
from overloads.
Always disconnect the battery before servicing high current
fuses.
To reduce risk of electrical shock, always replace the cover to
the Power Distribution Box before reconnecting the battery or
refilling fluid reservoirs.
If the battery has been disconnected and reconnected, refer to the
Batterysection of theMaintenance and Specificationschapter.
2006 Mountaineer(mnt)
Owners Guide (post-2002-fmt)
USA(fus)
Roadside Emergencies
253