light Mercury Mountaineer 2006 s Owner's Guide
[x] Cancel search | Manufacturer: MERCURY, Model Year: 2006, Model line: Mountaineer, Model: Mercury Mountaineer 2006Pages: 344, PDF Size: 2.66 MB
Page 51 of 344

3. Turn on the low beam headlamps.
The brightest part of the light
should be below the horizontal line
(4). If it is above the line the
headlamp will need to be adjusted.
4. Open the hood.
5. Locate the vertical adjuster for
each headlamp. Adjust the aim by
turning the adjuster control either
clockwise (to adjust down) or
counterclockwise (to adjust up).
Note:Usea4mmsocket or box
wrench to turn the vertical adjuster
control.
6. Horizontal aiming is not required
for this vehicle and is
non-adjustable.
TURN SIGNAL CONTROL
•Push down to activate the left
turn signal.
•Push up to activate the right turn
signal.
2006 Mountaineer(mnt)
Owners Guide (post-2002-fmt)
USA(fus)
Lights
51
Page 52 of 344
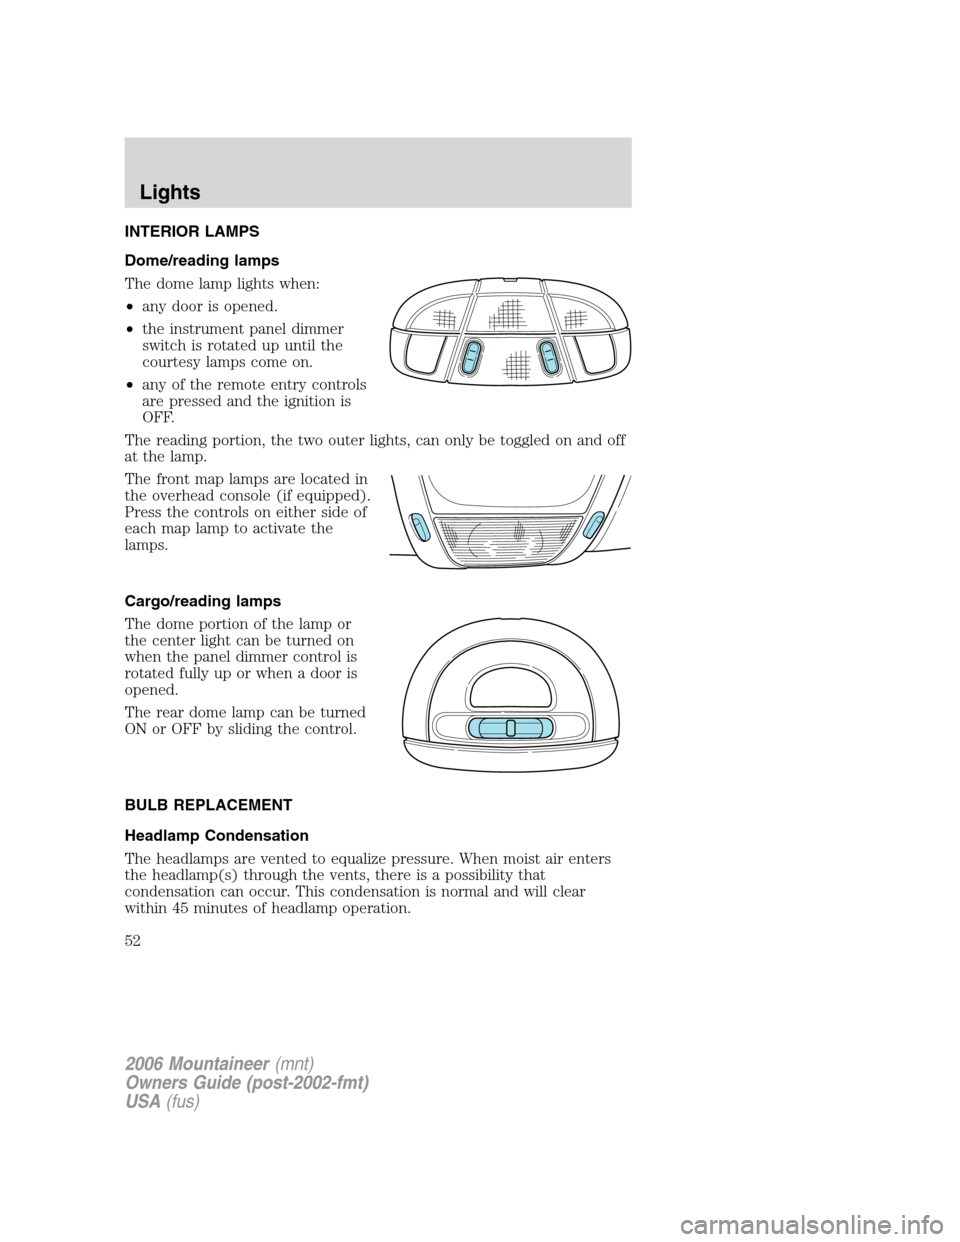
INTERIOR LAMPS
Dome/reading lamps
The dome lamp lights when:
•any door is opened.
•the instrument panel dimmer
switch is rotated up until the
courtesy lamps come on.
•any of the remote entry controls
are pressed and the ignition is
OFF.
The reading portion, the two outer lights, can only be toggled on and off
at the lamp.
The front map lamps are located in
the overhead console (if equipped).
Press the controls on either side of
each map lamp to activate the
lamps.
Cargo/reading lamps
The dome portion of the lamp or
the center light can be turned on
when the panel dimmer control is
rotated fully up or when a door is
opened.
The rear dome lamp can be turned
ON or OFF by sliding the control.
BULB REPLACEMENT
Headlamp Condensation
The headlamps are vented to equalize pressure. When moist air enters
the headlamp(s) through the vents, there is a possibility that
condensation can occur. This condensation is normal and will clear
within 45 minutes of headlamp operation.
2006 Mountaineer(mnt)
Owners Guide (post-2002-fmt)
USA(fus)
Lights
52
Page 53 of 344
Replacing exterior bulbs
Check the operation of all the bulbs frequently.
Replacing the interior bulbs
Check the operation of the bulbs frequently. To replace any of the
interior bulbs, see a dealer or qualified technician.
Using the right bulbs
Replacement bulbs are specified in the chart below. Headlamp bulbs
must be marked with an authorized “D.O.T.” for North America and an
“E” for Europe to ensure lamp performance, light brightness and pattern
and safe visibility. Using incorrect bulbs may damage the lamp assembly
or void the lamp assembly warranty or may not provide quality bulb burn
time.
Function Number of bulbs Trade number
Park/turn lamps (front) 2 3157 A (amber)
Headlamps 2 9007
Rear stop/tail lamps 2 L1224R
Rear turn lamps 2 3157 A (amber)
Rear license plate lamps 2 168
Backup lamp 2 3156K
High-mount brake lamps 5 W5WL
Side mounted turn signal 2 WY5W (amber)
Front sidemarker 2 194
Rear sidemarker 2 194
Fog lamp 2 9145
Cargo lamp 1 211-2
Interior overhead lamp 1 912 (906)
Front door courtesy lamp 1 168
Map lamps 2 168 (T10)
Ashtray lamp 1 161
All replacement bulbs are clear in color except where noted.
To replace all instrument panel lights - see your authorized dealer.
2006 Mountaineer(mnt)
Owners Guide (post-2002-fmt)
USA(fus)
Lights
53
Page 54 of 344
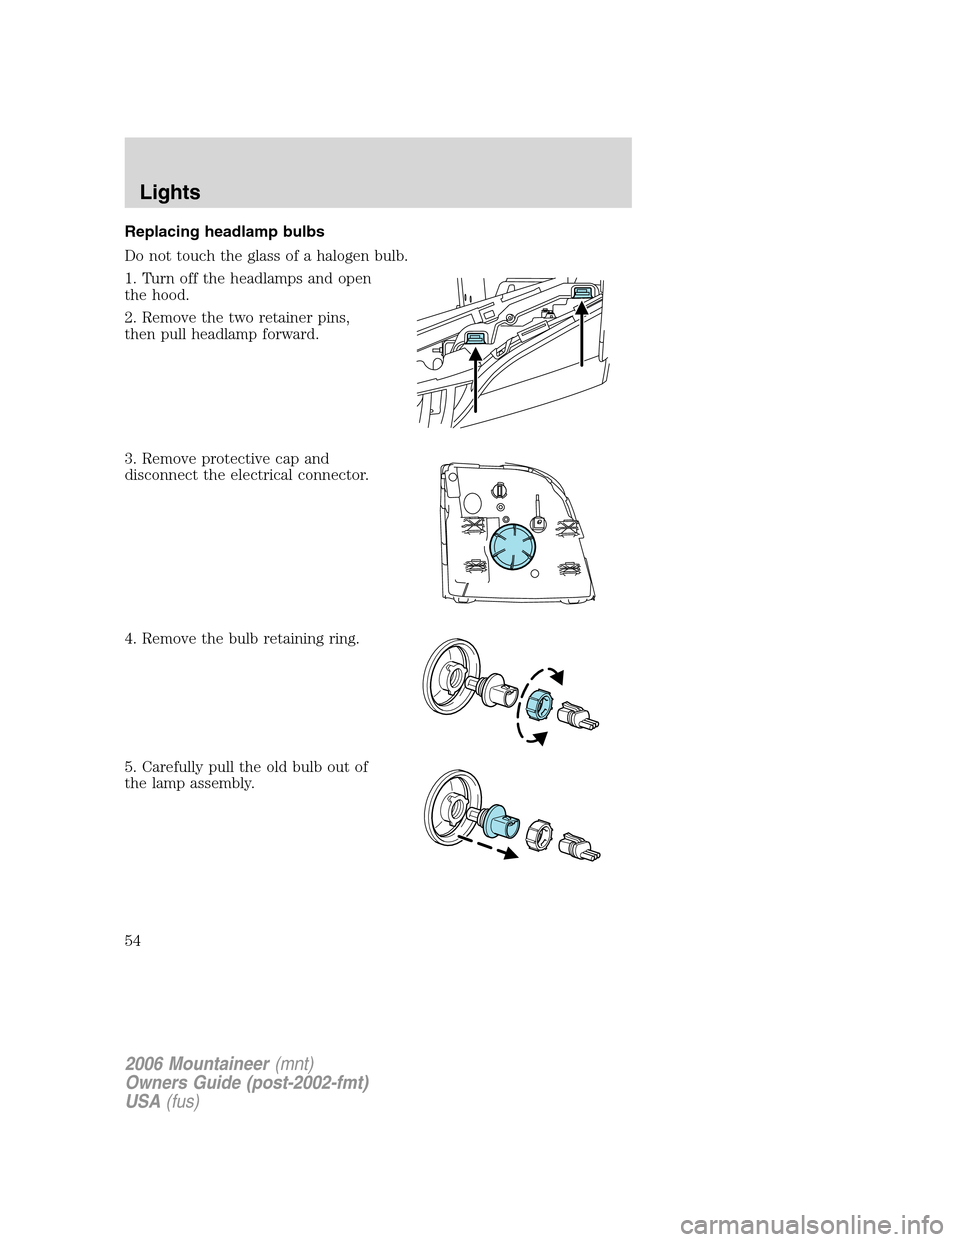
Replacing headlamp bulbs
Do not touch the glass of a halogen bulb.
1. Turn off the headlamps and open
the hood.
2. Remove the two retainer pins,
then pull headlamp forward.
3. Remove protective cap and
disconnect the electrical connector.
4. Remove the bulb retaining ring.
5. Carefully pull the old bulb out of
the lamp assembly.
2006 Mountaineer(mnt)
Owners Guide (post-2002-fmt)
USA(fus)
Lights
54
Page 55 of 344
Handle a halogen headlamp bulb carefully and keep out of
children’s reach. Grasp the bulb only by its plastic base and do
not touch the glass. The oil from your hand could cause the bulb to
break the next time the headlamps are operated.
Reverse steps to reinstall bulb(s).
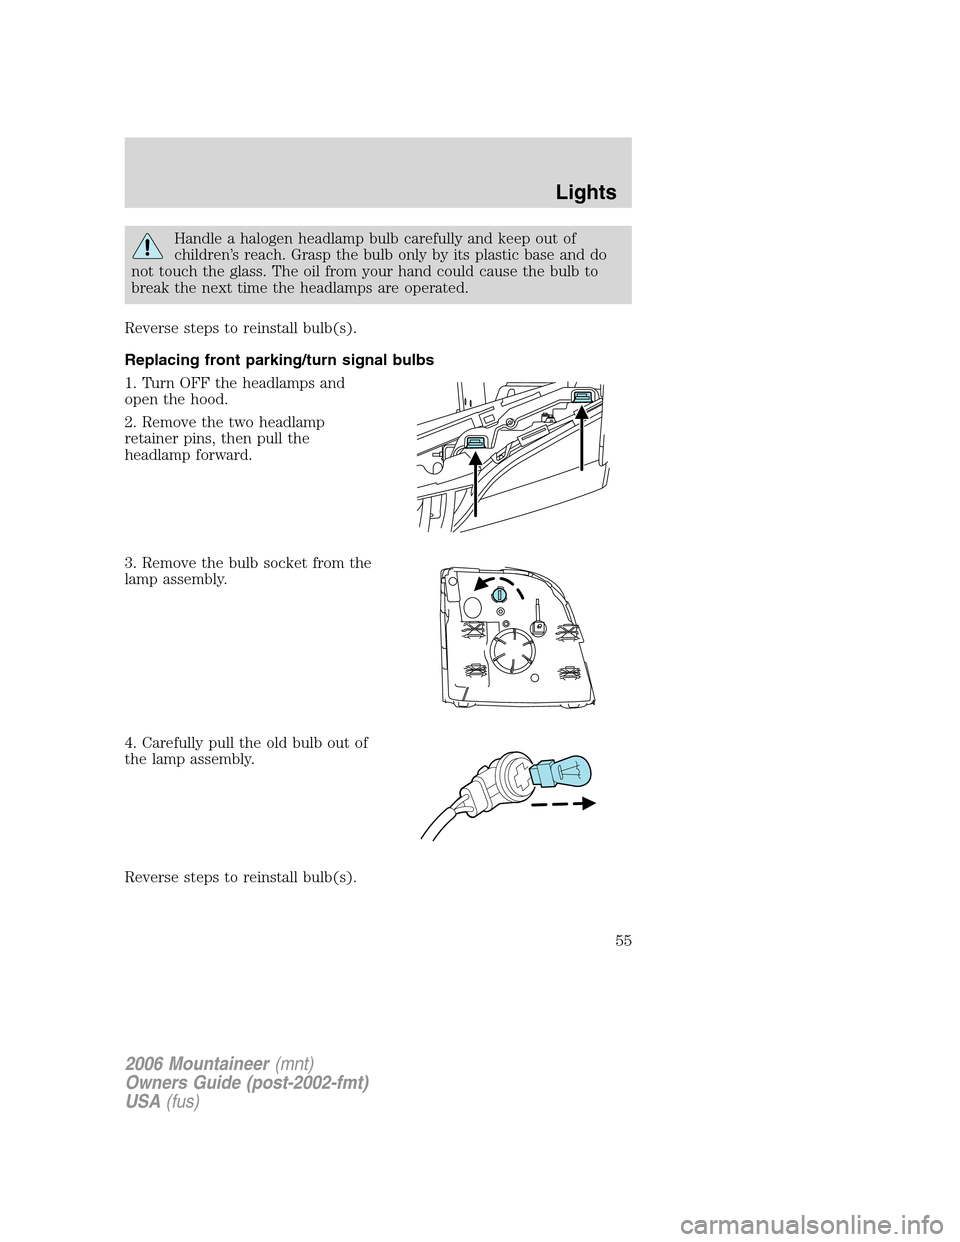
Replacing front parking/turn signal bulbs
1. Turn OFF the headlamps and
open the hood.
2. Remove the two headlamp
retainer pins, then pull the
headlamp forward.
3. Remove the bulb socket from the
lamp assembly.
4. Carefully pull the old bulb out of
the lamp assembly.
Reverse steps to reinstall bulb(s).
2006 Mountaineer(mnt)
Owners Guide (post-2002-fmt)
USA(fus)
Lights
55
Page 56 of 344
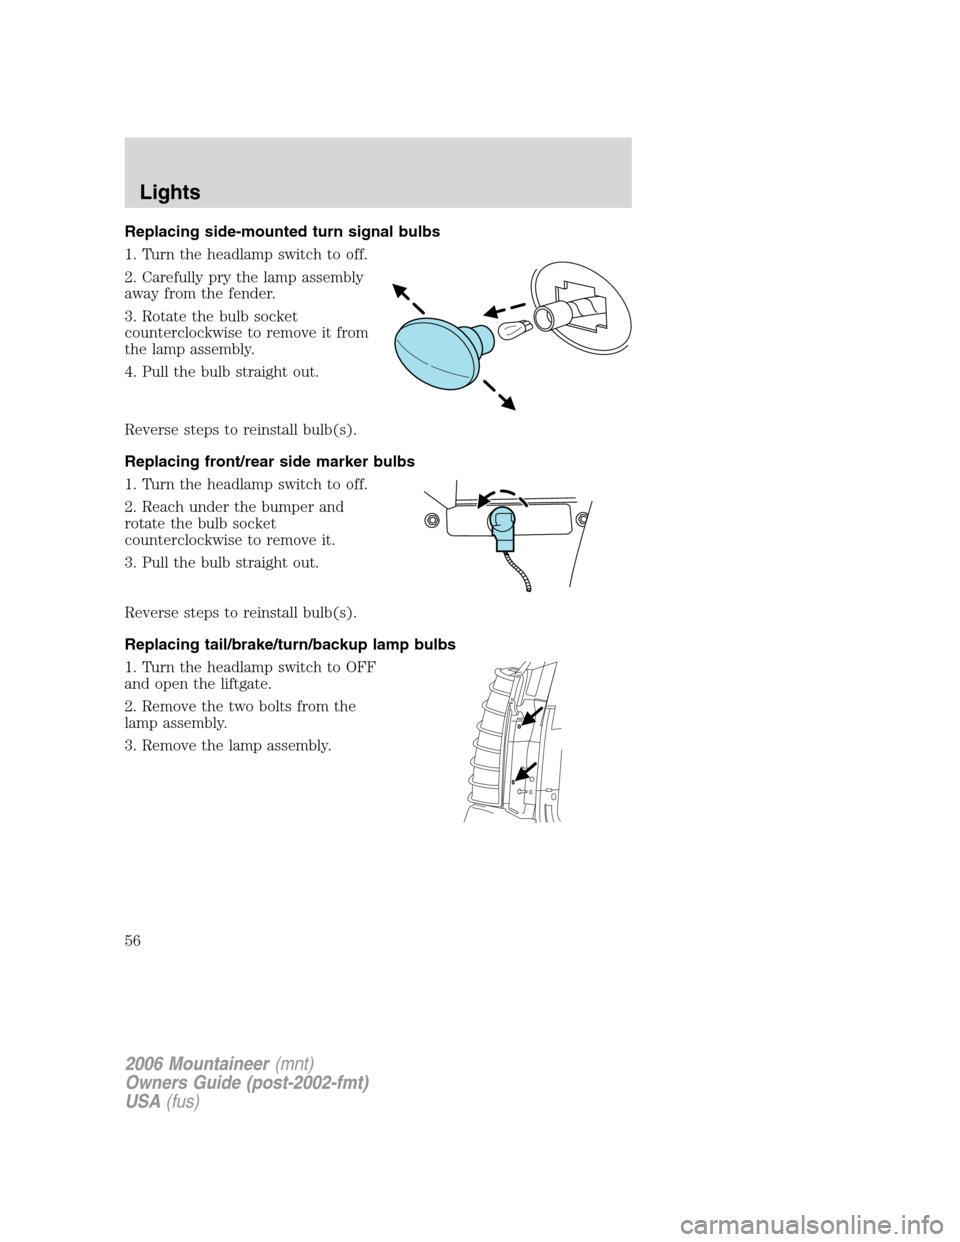
Replacing side-mounted turn signal bulbs
1. Turn the headlamp switch to off.
2. Carefully pry the lamp assembly
away from the fender.
3. Rotate the bulb socket
counterclockwise to remove it from
the lamp assembly.
4. Pull the bulb straight out.
Reverse steps to reinstall bulb(s).
Replacing front/rear side marker bulbs
1. Turn the headlamp switch to off.
2. Reach under the bumper and
rotate the bulb socket
counterclockwise to remove it.
3. Pull the bulb straight out.
Reverse steps to reinstall bulb(s).
Replacing tail/brake/turn/backup lamp bulbs
1. Turn the headlamp switch to OFF
and open the liftgate.
2. Remove the two bolts from the
lamp assembly.
3. Remove the lamp assembly.
2006 Mountaineer(mnt)
Owners Guide (post-2002-fmt)
USA(fus)
Lights
56
Page 57 of 344
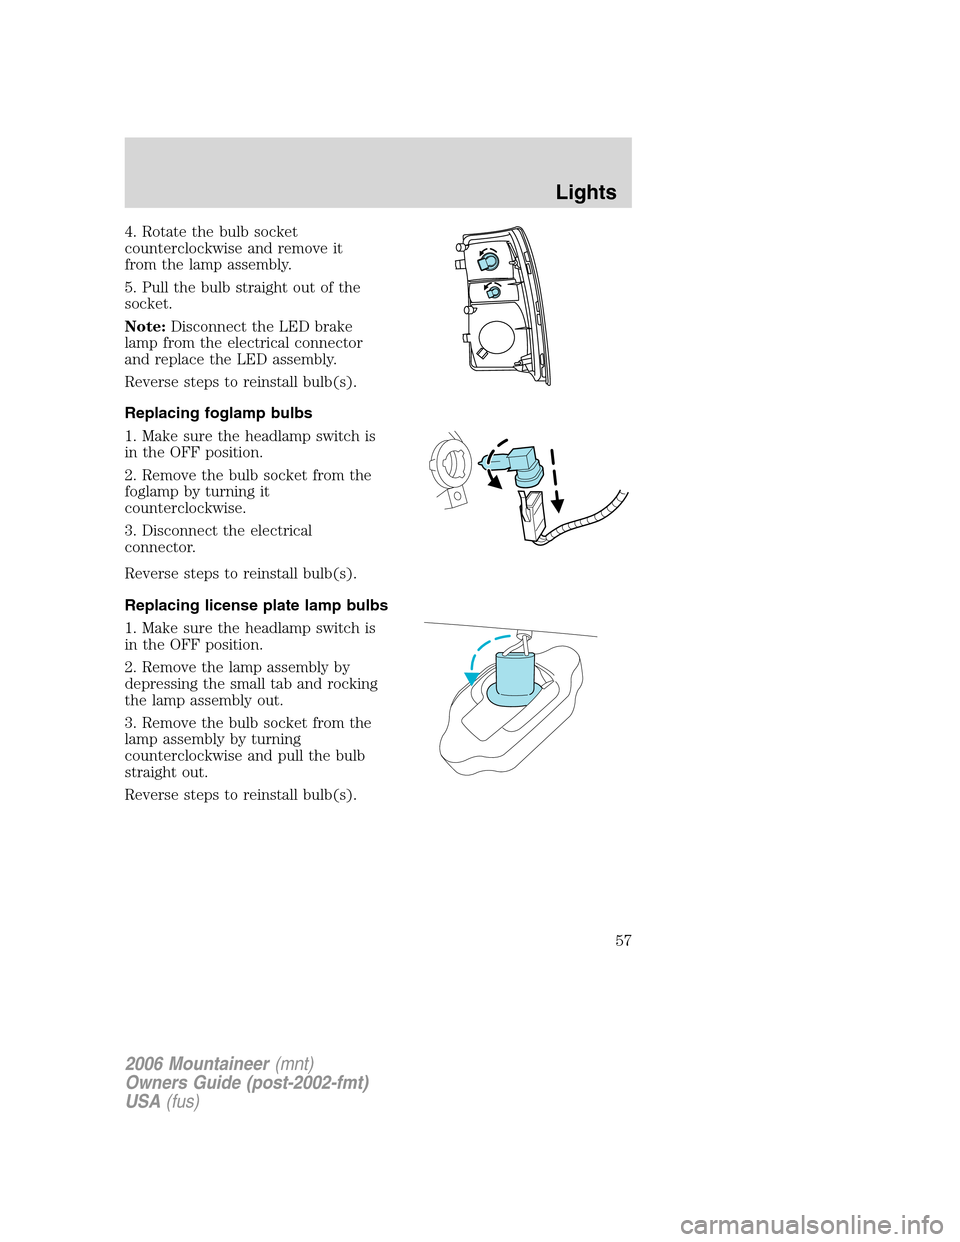
4. Rotate the bulb socket
counterclockwise and remove it
from the lamp assembly.
5. Pull the bulb straight out of the
socket.
Note:Disconnect the LED brake
lamp from the electrical connector
and replace the LED assembly.
Reverse steps to reinstall bulb(s).
Replacing foglamp bulbs
1. Make sure the headlamp switch is
in the OFF position.
2. Remove the bulb socket from the
foglamp by turning it
counterclockwise.
3. Disconnect the electrical
connector.
Reverse steps to reinstall bulb(s).
Replacing license plate lamp bulbs
1. Make sure the headlamp switch is
in the OFF position.
2. Remove the lamp assembly by
depressing the small tab and rocking
the lamp assembly out.
3. Remove the bulb socket from the
lamp assembly by turning
counterclockwise and pull the bulb
straight out.
Reverse steps to reinstall bulb(s).
2006 Mountaineer(mnt)
Owners Guide (post-2002-fmt)
USA(fus)
Lights
57
Page 58 of 344

Replacing high-mount brakelamp bulb
1. Remove the two screws and lamp
assembly away from the vehicle.
2. Remove the bulb holder from the
lamp assembly by depressing the
snaps.
3. Pull the bulb straight out of the
socket and push in the new bulb.
Reverse steps to reinstall bulb(s).
2006 Mountaineer(mnt)
Owners Guide (post-2002-fmt)
USA(fus)
Lights
58
Page 61 of 344

Slide on rod feature
Rotate the visor towards the side
window and extend it rearward for
additional sunlight coverage.
Note:To stow the visor back into
the headliner, visor must be
retracted before moving it back
towards the windshield.
OVERHEAD CONSOLE (IF EQUIPPED)
The appearance of your vehicle’s overhead console will vary according to
your option package.
Storage compartment
Press the latch to open the storage
compartment.
2006 Mountaineer(mnt)
Owners Guide (post-2002-fmt)
USA(fus)
Driver Controls
61
Page 63 of 344

The auxiliary power point is located
in the floor console.
Do not use the power point for
operating the cigarette lighter
element (if equipped).
To prevent the fuse from being
blown, do not use the power
point(s) over the vehicle capacity of
12 VDC/180W.
To prevent the battery from being
discharged, do not use the power point longer than necessary when the
engine is not running.
Always keep the power point caps closed when not being used.
Cigar/Cigarette lighter (if equipped)
Do not plug optional electrical accessories into the cigarette lighter
socket.
Do not hold the lighter in with your hand while it is heating, this will
damage the lighter element and socket. The lighter will be released from
its heating position when it is ready to be used.
Improper use of the lighter can cause damage not covered by your
warranty.
Rear auxiliary power point (if equipped)
A second auxiliary power point is located on the rear side of the console.
It is accessible from the rear seats.
CENTER CONSOLE
1. Cupholders
2. Tissue holder in lid
3. Rear power point
4. Large utility compartment has an
exterior power point in front of the
lid, and inside the compartment has
coin holder slots and a
business/credit card holder
The rear side of the console may
incorporate the following features:
•Air vents
2006 Mountaineer(mnt)
Owners Guide (post-2002-fmt)
USA(fus)
Driver Controls
63