Mercury Mountaineer 2007 Manual de Usuario (in Spanish)
Manufacturer: MERCURY, Model Year: 2007, Model line: Mountaineer, Model: Mercury Mountaineer 2007Pages: 48, tamaño PDF: 0.37 MB
Page 31 of 48

Emergency maneuvers
²In an emergency situation where a sudden sharp turn must be made,
remember to avoid ªover-drivingº your vehicle, i.e., turn the steering
wheel only as rapidly and as far as required to avoid the emergency.
Avoid abrupt steering, acceleration or braking which could increase
the risk of loss of vehicle control or vehicle rollover. Instead, smooth
variations of the accelerator and/or brake pedal pressure should be
utilized if changes in vehicle speed are called for. Use all available road
surface to return the vehicle to a safe direction of travel.
²In the event of an emergency stop, avoid skidding the tires and do not
attempt any sharp steering wheel movements.
²If the vehicle goes from one type of road surface to another (i.e., from
concrete to gravel), there will be a change in the way the vehicle
responds in steering, acceleration or braking. Again, avoid abrupt
inputs steering or braking inputs.
Snow and ice
Your 4WD or AWD vehicle will have advantages over two-wheel drive
vehicles in snow and on ice by providing increased driving traction.
However, if you suddenly change speed or direction, you may lose
traction and in turn, control as is the case with all vehicles. 4WD and
AWD vehicles can slide on slippery roads just like any other vehicle.
Should the rear end of the vehicle start to slide while cornering on
snowy or icy roads, turn the steering wheel in the direction of the slide
until you regain control. Avoid sudden braking as well. Although a 4WD
or AWD vehicle may accelerate better than a two-wheel drive vehicle in
snow and ice, it won't stop any faster, because as in two-wheel drive
vehicles, braking occurs at all four wheels. Do not become overconfident
in the ability of 4WD and AWD vehicles to compensate for aggressive
driving maneuvers in poor road conditions.
Make sure you allow sufficient distance between you and other vehicles
for stopping. In emergency stopping situations, avoid locking the wheels.
²For vehicles without anti-lock brakes, use a ªsqueezeº technique: push
on the brake pedal with a steadily increasing force which allows the
wheels to brake yet continue to roll so that you may steer in the
direction you want to travel. If you lock the wheels, release the brake
pedal and repeat the squeeze technique.
Driving On Roadways
7
Page 32 of 48
²For vehicles with anti-lock brakes, apply and hold the brake firmly. Do
not ªpumpº the brakes. During hard stopping or stopping on slippery
surfaces, you may feel or hear a pulsing or vibration in the brake
pedal. Do not be alarmed because this is your anti-lock brake system
working. See your ªOwner's Guideº for additional information on the
operation of the anti-lock brake system.
Parking
Before leaving the driver's seat, make sure that the gearshift is engaged
in P (Park) with an automatic transmission or either 1 (First) or R
(Reverse) with a manual transmission. Set the parking brake fully, shut
off the ignition and remove the key.
Some 4WD vehicles include a Neutral mode. When the transfer case is in
the N (Neutral) position, the engine and transmission are disconnected
from the rest of the driveline. Therefore, the vehicle is free to roll even if
the automatic transmission is in P (Park) or the manual transmission is
in gear.
Do not leave the vehicle unattended with the transfer case in N
(Neutral) position. Always set the parking brake fully and turn
off the ignition when leaving the vehicle. If you do not follow these
precautions your vehicle may move unexpectedly and injure someone.
Driving On Roadways
8
Page 33 of 48
DRIVING OFF-ROAD
ªTread Lightlyº is an educational
program designed to increase
public awareness of land-use
regulations and responsibilities in
our nations wilderness areas.
Ford joins the U. S. Forest Service and the Bureau of Land
Management in encouraging you to help preserve our national forest
and other public and private lands by ªtreading lightlyº.
Driving off-road requires good judgment to avoid personal injury and
vehicle damage from concealed objects such as rocks and stumps. Know
the terrain or examine maps of the area before driving off road. Map out
your route before driving in the area. To maintain steering and braking
control of your vehicle, you must have all four wheels on the ground and
they must be rolling, not sliding or spinning. To avoid loss of control,
maintain a firm grip on the steering wheel, especially in rough terrain.
Sudden changes in terrain can result in abrupt steering wheel
motion. To maintain better control and avoid injury to your hand
or wrist, grip the steering wheel from the outside. Do not grip the
spokes.
Driving on sand
When driving over sand, try to keep all four wheels on the most solid
area of the trail. Avoid reducing the tire pressure. Instead, shift to a
lower gear and drive steadily through the terrain. Apply the accelerator
slowly and avoid spinning the wheels.
Avoid reducing tire pressure. Operating your vehicle with below
the recommended tire pressure can increase the risk of loss of
vehicle control, vehicle rollover, personal injury and death. If you
choose to reduce the tire pressure for off-road operation, make sure
you re-inflate the tires as soon as possible.
Avoid excessive speed because vehicle momentum can work against you
and cause the vehicle to become stuck to the point that assistance may
be required from another vehicle. Remember, you may be able to back
out the way you came if you proceed with caution.
Driving Off-Road
Driving Off-Road
9
Page 34 of 48
Driving in mud
Be cautious of sudden changes in vehicle speed or direction when you
are driving in mud. Even 4WD and AWD vehicles can lose traction in
slick mud. As when you are driving over sand, apply the accelerator
slowly and avoid spinning your wheels. If the rear end of the vehicle
does slide while cornering, steer in the direction of the slide until you
regain control of the vehicle.
After driving through mud, clean off residue stuck to rotating tires,
wheels and driveshafts. Excess mud stuck on tires, wheels and rotating
driveshafts causes an imbalance that could damage vehicle components.
Driving through water
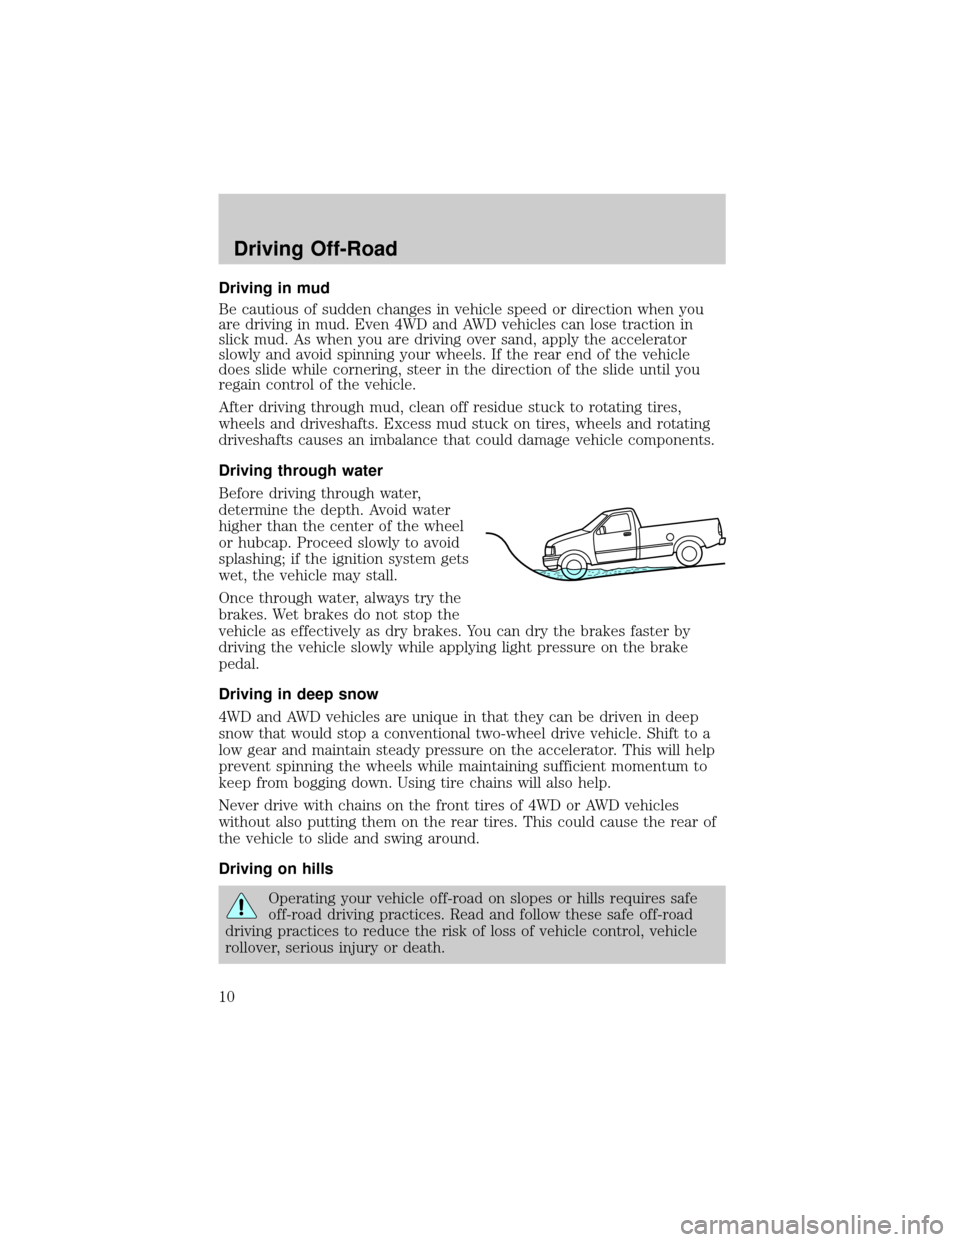
Before driving through water,
determine the depth. Avoid water
higher than the center of the wheel
or hubcap. Proceed slowly to avoid
splashing; if the ignition system gets
wet, the vehicle may stall.
Once through water, always try the
brakes. Wet brakes do not stop the
vehicle as effectively as dry brakes. You can dry the brakes faster by
driving the vehicle slowly while applying light pressure on the brake
pedal.
Driving in deep snow
4WD and AWD vehicles are unique in that they can be driven in deep
snow that would stop a conventional two-wheel drive vehicle. Shift to a
low gear and maintain steady pressure on the accelerator. This will help
prevent spinning the wheels while maintaining sufficient momentum to
keep from bogging down. Using tire chains will also help.
Never drive with chains on the front tires of 4WD or AWD vehicles
without also putting them on the rear tires. This could cause the rear of
the vehicle to slide and swing around.
Driving on hills
Operating your vehicle off-road on slopes or hills requires safe
off-road driving practices. Read and follow these safe off-road
driving practices to reduce the risk of loss of vehicle control, vehicle
rollover, serious injury or death.
Driving Off-Road
10
Page 35 of 48
Although natural obstacles may make it necessary to travel diagonally up
or down a hill or steep incline, you should always try to drive straight up
or straight down.Avoid driving crosswise or turning on steep
slopes or hills. A danger lies in losing traction, slipping sideways and
possibly rolling over. Whenever driving on a hill, determine beforehand
the route you will use. Do not drive over the crest of a hill without
seeing what conditions are on the other side. Do not drive in reverse
over a hill without the aid of an observer.
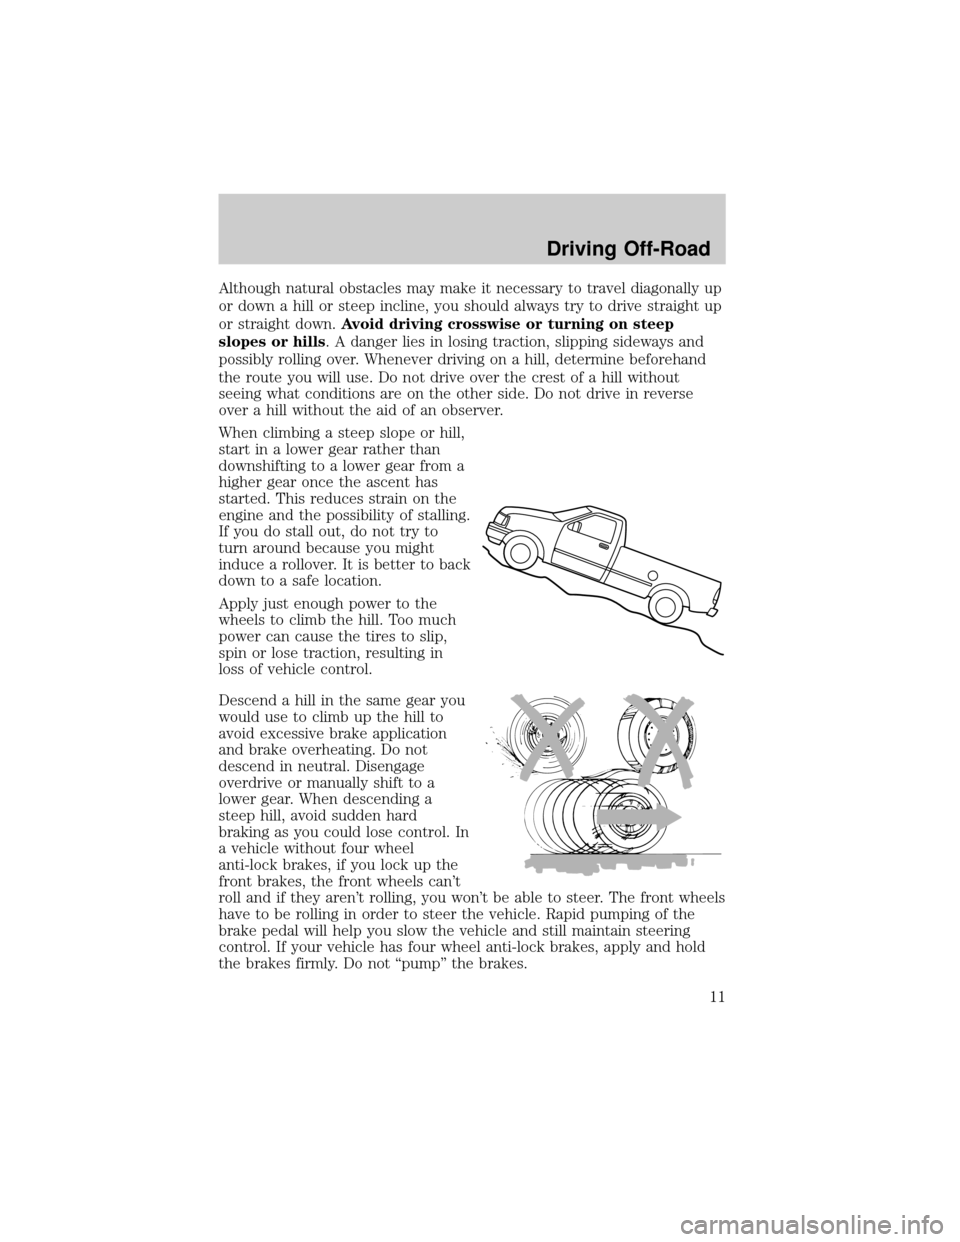
When climbing a steep slope or hill,
start in a lower gear rather than
downshifting to a lower gear from a
higher gear once the ascent has
started. This reduces strain on the
engine and the possibility of stalling.
If you do stall out, do not try to
turn around because you might
induce a rollover. It is better to back
down to a safe location.
Apply just enough power to the
wheels to climb the hill. Too much
power can cause the tires to slip,
spin or lose traction, resulting in
loss of vehicle control.
Descend a hill in the same gear you
would use to climb up the hill to
avoid excessive brake application
and brake overheating. Do not
descend in neutral. Disengage
overdrive or manually shift to a
lower gear. When descending a
steep hill, avoid sudden hard
braking as you could lose control. In
a vehicle without four wheel
anti-lock brakes, if you lock up the
front brakes, the front wheels can't
roll and if they aren't rolling, you won't be able to steer. The front wheels
have to be rolling in order to steer the vehicle. Rapid pumping of the
brake pedal will help you slow the vehicle and still maintain steering
control. If your vehicle has four wheel anti-lock brakes, apply and hold
the brakes firmly. Do not ªpumpº the brakes.
Driving Off-Road
11
Page 36 of 48
Parking
Before leaving the driver's seat, make sure that the gearshift is engaged
in P (Park) with an automatic transmission or either 1 (First) or R
(Reverse) with a manual transmission. Set the parking brake fully, shut
off the ignition and remove the key.
Some 4WD vehicles include a Neutral mode. When the transfer case is in
the N (Neutral) position, the engine and transmission are disconnected
from the rest of the driveline. Therefore, the vehicle is free to roll even if
the automatic transmission is in P (Park) or the manual transmission is
in gear.
Do not leave the vehicle unattended with the transfer case in N
(Neutral) position. Always set the parking brake fully and turn
off the ignition when leaving the vehicle. If you do not follow these
precautions your vehicle may move unexpectedly and injure someone.
Driving Off-Road
12
Page 37 of 48

INSPECTING AND INFLATING YOUR TIRES
Safe operation of your vehicle requires that your tires are properly
inflated. Remember that a tire can lose up to half of its air pressure
without appearing flat.
Every day before you drive, check
your tires. If one looks lower than
the others, use a tire gauge to check
pressure of all tires, and adjust if
required.
At least once a month and before long
trips, inspect each tire and check the
tire pressure with a tire gauge
(including spare). Inflate all tires to
the inflation pressure recommended
by Ford Motor Company.
Inspecting your tires
Periodically inspect the tire treads for uneven or excessive wear and
remove stones, nails, glass or other objects that may be wedged in the
tread grooves. Check for holes or cuts that may permit air leakage from
the tire and make necessary repairs.
Also inspect the tire sidewalls for cuts, bruises and other damage. If
internal damage to the tire is suspected, have the tire demounted and
inspected in case it needs to be repaired or replaced. For your safety,
tires that are damaged should not be used because they are more likely
to blow out or fail. Tires can be damaged during off-road use, so
inspection after off-road use is also recommended.
Inflating Your Tires
Use a tire gauge to check the tire inflation pressure, including the spare,
at least monthly and before long trips. You are strongly urged to buy a
reliable tire pressure gauge, as automatic service station gauges may be
inaccurate. Ford recommends the use of a digital or dial type tire
pressure gauge rather than a stick type tire pressure gauge.
Always inflate your tires to the Ford recommended inflation pressure
even if it is less than the maximum inflation pressure information found
on the tire. The Ford recommended tire inflation pressure is found on
the tire and loading information label or certification label attached to
the left front door lock facing or door latch post pillar. Failure to follow
tire pressure recommendations can cause uneven treadwear patterns and
adversely affect the way your vehicle handles.
Inspecting and Inflating Your Tires
Inspecting and Inflating Your Tires
13
Page 38 of 48
Maximum Permissible Inflation Pressure
Tire manufactures maximum permissible pressure and/or the pressure at
which the maximum load can be carried by the tire. This pressure is
normally higher than the manufacturer's recommended cold inflation
pressure which can be found on either the tire label or certification label
which is located on the structure by the trailing edge of the driver's door
or the edge of the driver's door. The cold inflation pressure should never
be set lower than the recommended pressure on the vehicle
label.
Note:You may not find this information on all tires because it is not
required by federal law.
The tire suppliers may have additional markings, notes or warnings such
as standard load, radial tubeless, etc.
Tires can slowly lose pressure due to normal use or due to changes in
weather. For example, a 10 degree temperature drop can cause a
corresponding drop of 7 kPa (1 psi) in tire inflation pressure.
Maintain proper tire inflation pressure. Under-inflation is the
most common cause of tire failures. Under-inflation increases
sidewall flexing and rolling resistance, resulting in heat buildup and
internal damage to the tire. Operating your vehicle with under-inflated
tires may result in severe tire cracking, tread separation or tire
ªblowoutº, which can lead to loss of vehicle control, vehicle rollover,
serious injury or death.
The Ford recommended inflation pressure is based on cold tire pressure.
Tire pressure increases even after driving short distances, so try to check
tire inflation pressures before driving. If you are checking tire pressure
when the tire is hot, (i.e. driven more than 1.6 km [1mile]), never ªbleedº
or reduce air pressure. A hot tire with a tire pressure at or below
recommended cold inflation pressure could be significantly under-inflated.
To check the pressure in your tire(s):
1. Make sure the tires are cool, meaning they are not hot from driving
even a mile.
Note:If you have to drive a distance to get air for your tire(s), check
and record the tire pressure first and add the appropriate air pressure
when you get to the pump. It is normal for tires to heat up and the air
pressure inside to go up as you drive. Never ªbleedº or reduce air
pressure when tires are hot.
2. Remove the cap from the valve on one tire, then firmly press the tire
gauge onto the valve.
Inspecting and Inflating Your Tires
14
Page 39 of 48
3. Add air to reach the Ford recommended air pressure.
Note:If you overfill the tire, release air by pushing on the metal stem in
the center of the valve. Then recheck the pressure with your tire gauge.
4. Replace the valve cap.
5. Repeat this procedure for each tire, including the spare.
Note:Some spare tires require higher inflation pressure than the other tires.
6. Visually inspect the tires to make sure there are no nails or other objects
embedded that could poke a hole in the tire and cause an air leak.
7. Check the sidewalls to make sure there are no gouges, cuts, bulges or
other irregularities.
TIRE REPLACEMENT REQUIREMENTS
Your vehicle is equipped with tires designed to provide safe ride and
handling capability.
Only use replacement tires and wheels that are the same size
and type (such as P-metric versus LT-metric or all-season versus
all-terrain) as those originally provided by Ford. Use of any tire or
wheel not recommended by Ford can affect the safety and
performance of your vehicle, which could result in an increased risk of
loss of vehicle control, vehicle rollover, personal injury and death.
Additionally the use of non-recommended tires and wheels could cause
steering, suspension, axle or transfer case/power transfer unit failure.
See your Owner Guide for additional information. If you have questions
regarding tire replacement, see an authorized Ford or Lincoln/Mercury
dealer.
Make sure all tires and wheels on the vehicle are of the same size, type,
tread design, brand, load-carrying capacity and speed rating because it
can affect the safety and performance of your vehicle, which could result
in an increased risk of loss of vehicle control, vehicle rollover, personal
injury and death.
Tire Replacement Requirements
Tire Replacement Requirements
15
Page 40 of 48
LOADING YOUR VEHICLE
Passenger and cargo load limits
The combined weight of all occupants and all cargo (including added
accessories) must not exceed themaximum payloadfor your vehicle.
The maximum payload for your vehicle can be found on the tire label on
the driver's door or door pillar. Look for statement ªTHE COMBINED
WEIGHT OF OCCUPANTS AND CARGO SHOULD NEVER EXCEED XXX
KG OR XXX LBSº to determine your vehicle's maximum payload.
The appropriate loading capacity of your vehicle can be limited
either by volume capacity (how much space is available) or by
payload capacity (how much weight the vehicle should carry). Once
you have reached the maximum payload of your vehicle, do not add
more cargo, even if there is space available. Overloading or improperly
loading your vehicle can contribute to loss of vehicle control and
vehicle rollover.
In addition tomaximum payload, additional loading terms and weight
ratings are very important, particularly when towing a trailer or when a
heavy accessory such as a snowplow has been added to the vehicle.
Other terms related to loading includebase curb weight, gross vehicle
weight rating(GVWR),gross axle weight rating(GAWR),gross
combined weight rating(GCWR). Refer to your ªOwner's Guideº for
additional information regarding these terms and maximum safe weight
limits.
Effects of improperly loading or overloading your vehicle
Improper weight distribution and exceeding the maximum payload can
have serious consequences in terms of passenger safety, including
damage to the suspension system, springs, and shock absorbers, reduced
braking capability, handling or steering problems, irregular tire wear, tire
failure or other damage.
Loaded vehicles, with a higher center of gravity, may handle
differently than unloaded vehicles. Do not overload your vehicle
and use extra precautions, such as driving at slower speeds, avoiding
abrupt steering changes and allowing for increased stopping distance,
when driving a heavily loaded vehicle. Over loading or loading the
vehicle improperly can deteriorate handling capability and contribute
to loss of vehicle control and vehicle rollover.
Loading Your Vehicle
Loading Your Vehicle
16