ECO mode Mercury Mountaineer 2007 Owner's Manuals
[x] Cancel search | Manufacturer: MERCURY, Model Year: 2007, Model line: Mountaineer, Model: Mercury Mountaineer 2007Pages: 360, PDF Size: 3.36 MB
Page 22 of 360
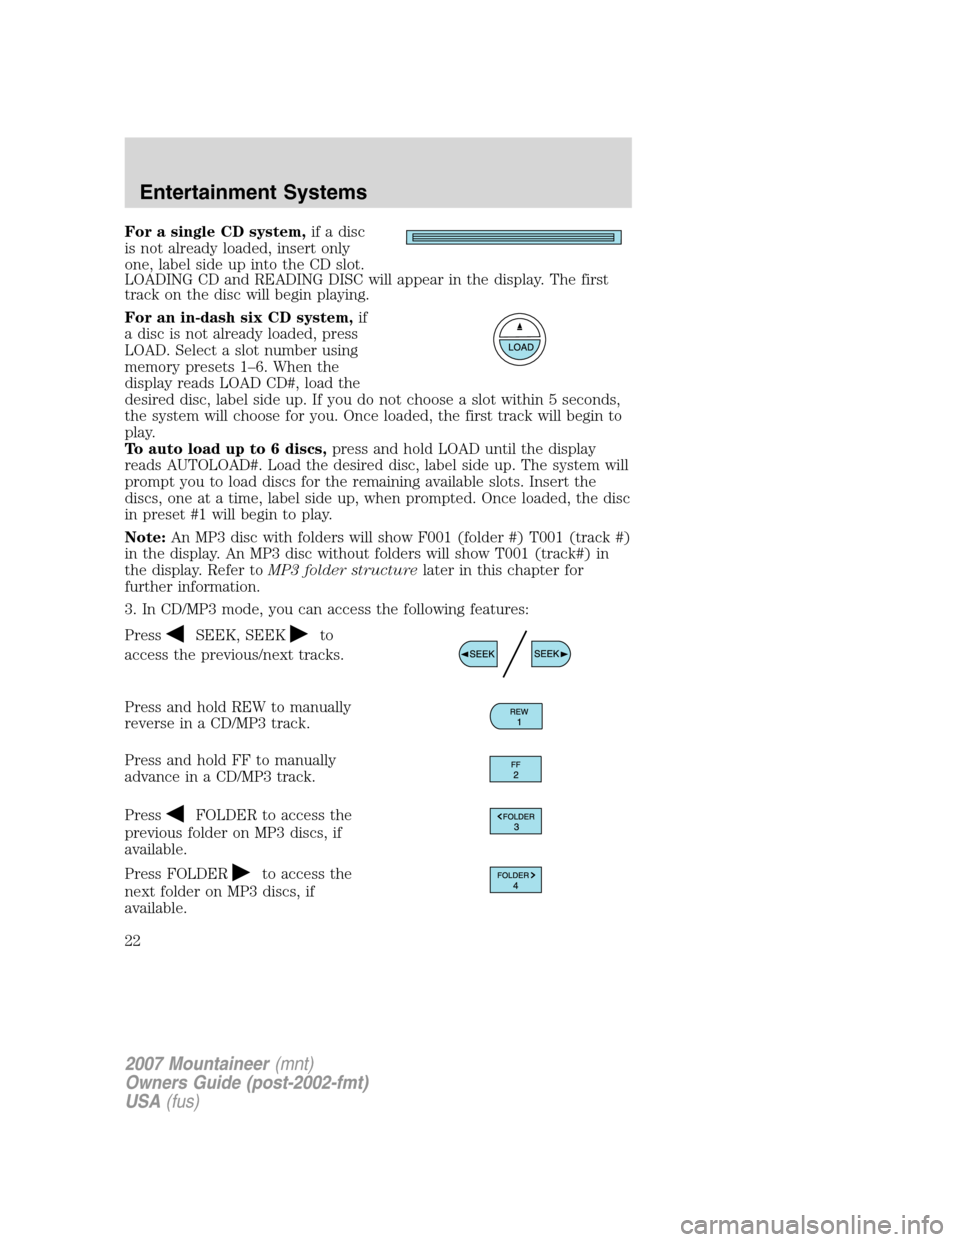
For a single CD system,if a disc
is not already loaded, insert only
one, label side up into the CD slot.
LOADING CD and READING DISC will appear in the display. The first
track on the disc will begin playing.
For an in-dash six CD system,if
a disc is not already loaded, press
LOAD. Select a slot number using
memory presets 1–6. When the
display reads LOAD CD#, load the
desired disc, label side up. If you do not choose a slot within 5 seconds,
the system will choose for you. Once loaded, the first track will begin to
play.
To auto load up to 6 discs,press and hold LOAD until the display
reads AUTOLOAD#. Load the desired disc, label side up. The system will
prompt you to load discs for the remaining available slots. Insert the
discs, one at a time, label side up, when prompted. Once loaded, the disc
in preset #1 will begin to play.
Note:An MP3 disc with folders will show F001 (folder #) T001 (track #)
in the display. An MP3 disc without folders will show T001 (track#) in
the display. Refer toMP3 folder structurelater in this chapter for
further information.
3. In CD/MP3 mode, you can access the following features:
Press
SEEK, SEEKto
access the previous/next tracks.
Press and hold REW to manually
reverse in a CD/MP3 track.
Press and hold FF to manually
advance in a CD/MP3 track.
Press
FOLDER to access the
previous folder on MP3 discs, if
available.
Press FOLDER
to access the
next folder on MP3 discs, if
available.
2007 Mountaineer(mnt)
Owners Guide (post-2002-fmt)
USA(fus)
Entertainment Systems
22
Page 23 of 360
Press SHUFFLE to engage shuffle
mode. SHUFFLE ON will appear in
the display. If you wish to engage
shuffle mode right away, press SEEK to begin random play. Otherwise,
random play will begin when the current track is finished playing. CD
SHUF will appear in the display.
To disengage, press SHUFFLE again. SHUFFLE OFF will appear in the
display.
Note:In track mode, all tracks on thecurrentdisc will shuffle in
random order. In MP3 folder mode, the system will randomly play all
tracks within thecurrentfolder.
Press
/(play/pause) when a
CD/MP3 is playing to pause the disc.
CD PAUSE will appear in the
display. Press again to resume play.
4.For a single cd system,
press
to eject the current disc.
The display will read CD EJECT.
For an in-dash six CD system,
press
. Select the correct slot
number using memory presets 1–6. When ready, the system will eject the
disc and the display will read REMOVE CD. If the disc is not removed in
15 seconds, the system will reload the disc.
To auto eject up to 6 discs,press and hold
until the system
begins ejecting all loaded discs. If the discs are not removed, the system
will reload the discs.
2007 Mountaineer(mnt)
Owners Guide (post-2002-fmt)
USA(fus)
Entertainment Systems
23
Page 26 of 360
The default setting isoff;increasing your vehicle speed will not change
the volume level.
Adjust1–7:Increasing this setting from 1 (lowest setting) to 7 (highest
setting) allows the radio volume to automatically change slightly with
vehicle speed to compensate for road and wind noise.
Recommended level is1–3;SPEED OFF turns the feature off and level 7
is the maximum setting.
TRACK/FOLDER MODE:Available only on MP3 discs in CD mode.
In track mode, press
SEEK, SEEKto scroll through all tracks on
the disc
In folder mode, press
SEEK, SEEKto scroll through tracks
within the selected folder.
Press
FOLDER, FOLDERto access the previous/next folder (if
available).
COMPRESS (Compression):Available only in CD/MP3 mode. Press
MENU until COMPRESS ON/OFF appears in the display. Use
//
SEEK, SEEKto toggle ON/OFF. When COMPRESS is ON, the
system will bring the soft and loud CD passages together for a more
consistent listening level.
SINGLE PLAY/DUAL PLAY (if equipped):If SINGLE PLAY is ON,
press
/for DUAL PLAY. For further information on Single
Play/Dual Play, please refer to theFamily Entertainment DVD system
later in this section.
4.AUX:Press repeatedly to cycle
through FES/DVD (if equipped),
LINE IN (auxiliary audio mode) and
SAT1, SAT2 and SAT3 modes (satellite radio, if equipped).
For location and further information on auxiliary audio mode, refer to
Auxiliary input jacklater in this chapter.
Satellite radio is available only with a valid SIRIUS radio
subscription. Check with your authorized dealer for availability.
If your vehicle is equipped with a Family Entertainment System (FES)
please refer to theFamily Entertainment DVD systemlater in this
section.
2007 Mountaineer(mnt)
Owners Guide (post-2002-fmt)
USA(fus)
Entertainment Systems
26
Page 32 of 360
To search for specific RBDS music categories:When the desired
category appears in the display, press
/to find the desired type,
then press and release
SEEK, SEEKor press and hold SCAN to
begin the search.
To view the station name or type:When the desired category appears
in the display, press TEXT/SCAN to toggle between displaying the station
type (COUNTRY, ROCK, etc.) or the station name (WYCD, WXYT, etc.).
BASS:Press MENU to reach the bass setting. Use
/to adjust.
TREB (Treble):Press MENU to reach the treble setting. Use
/to
adjust.
BAL (Balance):Press MENU to reach the balance setting. Use
/
to adjust the audio between the left (L) and right (R) speakers.
FADE:Press MENU to reach the fade setting. Use
/to adjust the
audio between the back (B) and front (F) speakers.
SPEED VOL (Speed sensitive volume, if equipped):Press MENU to
reach the SPEEDVOL setting. Radio volume automatically gets louder
with increasing vehicle speed to compensate for road and wind noise.
Use
/to adjust.
The default setting isoff;increasing your vehicle speed will not change
the volume level.
Adjust1–7:Increasing this setting from 1 (lowest setting) to 7 (highest
setting) allows the radio volume to automatically change slightly with
vehicle speed to compensate for road and wind noise.
Recommended level is1–3;SPEED OFF turns the feature off and level 7
is the maximum setting.
Track/Folder mode:Available only on MP3 discs in CD mode.
In track mode, press
SEEK, SEEKto scroll through all tracks on
the disc
In folder mode, press
SEEK, SEEKto scroll through tracks
within the selected folder.
Press
FOLDER, FOLDERto access the previous/next folder (if
available).
COMPRESS (Compression):Available only in CD/MP3 mode. Press
MENU until COMPRESS ON/OFF appears in the display. Use
//
2007 Mountaineer(mnt)
Owners Guide (post-2002-fmt)
USA(fus)
Entertainment Systems
32
Page 39 of 360
CD/CD player care
Do:
•Handle discs by their edges only. Never touch the playing surface.
•Inspect discs before playing. Clean only with an approved CD cleaner
and wipe from the center out.
Don’t:
•Expose discs to direct sunlight or heat sources for extended periods
of time.
•Clean using a circular motion.
CD units are designed to play commercially pressed 4.75 in
(12 cm) audio compact discs only. Due to technical
incompatibility, certain recordable and re-recordable compact
discs may not function correctly when used in Ford CD players.
Dirty, warped or damaged CDs, irregular shaped CDs, CDs with a
scratch protection film attached, and CDs with homemade paper
(adhesive) labels should not be inserted into the CD player. The
label may peel and cause the CD to become jammed. It is
recommended that homemade CDs be identified with permanent
felt tip marker rather than adhesive labels. Ballpoint pens may
damage CDs. Please contact your authorized dealer for further
information.
Audio system warranty and service
Refer to theWarranty Guidefor audio system warranty information. If
service is necessary, see your dealer or qualified technician.
MP3 track and folder structure
Your MP3 system recognizes MP3 individual tracks and folder structure
as follows:
•There are two different modes for MP3 disc playback: MP3 track mode
(system default) and MP3 folder mode. For more information on track
and folder mode, refer toSample MP3 structurein the following
section.
•MP3 track mode ignores any folder structure on the MP3 disc. The
player numbers each MP3 track on the disc (noted by the .mp3 file
extension) from T001 to T255.
•MP3 folder mode represents a folder structure consisting of one level
of folders. The CD player numbers all MP3 tracks on the disc (noted
by the .mp3 file extension) and all folders containing MP3 files, from
F001 (folder) T001 (track) to F253 T255.
2007 Mountaineer(mnt)
Owners Guide (post-2002-fmt)
USA(fus)
Entertainment Systems
39
Page 45 of 360
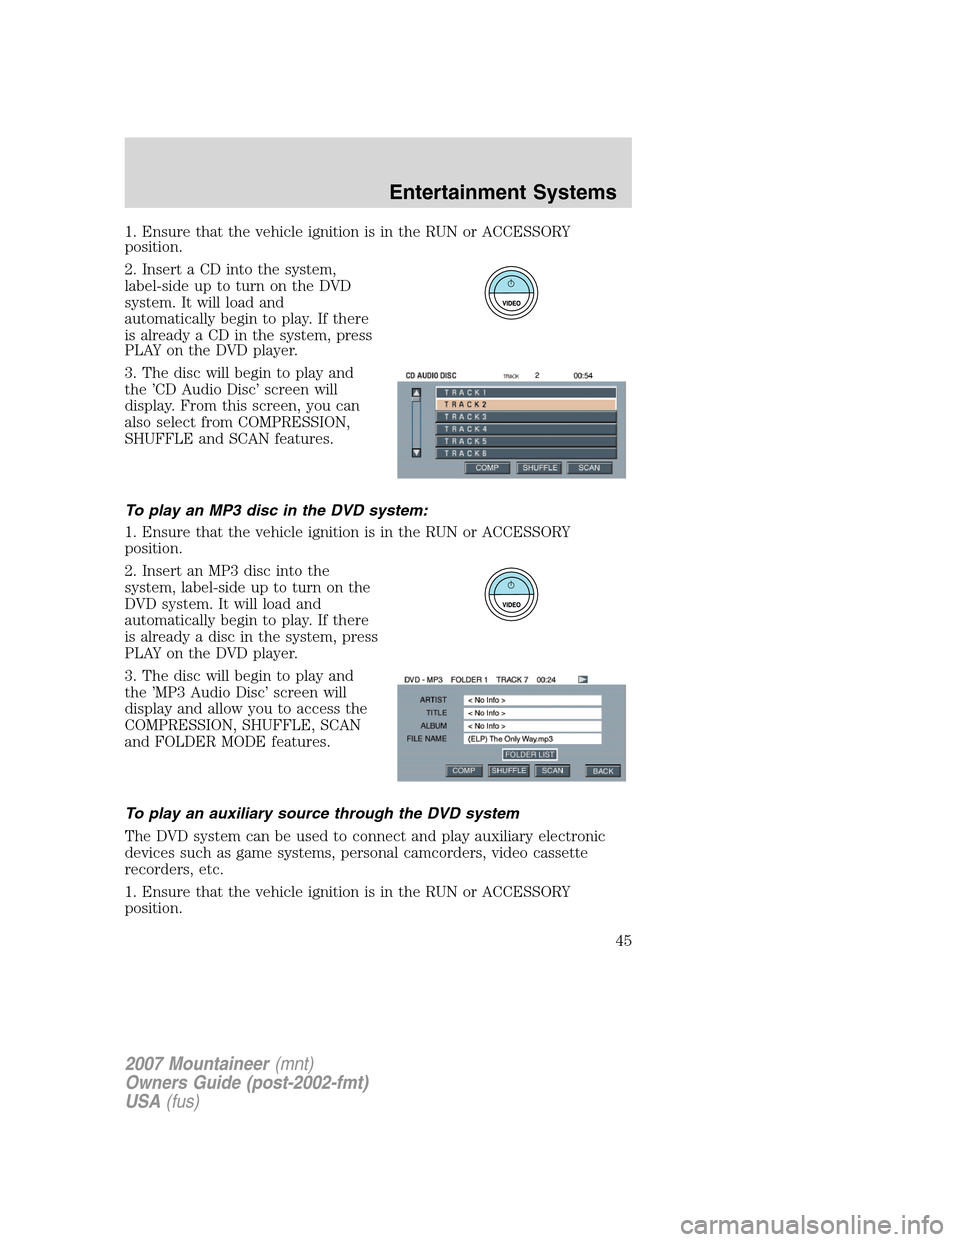
1. Ensure that the vehicle ignition is in the RUN or ACCESSORY
position.
2. Insert a CD into the system,
label-sideuptoturnontheDVD
system. It will load and
automatically begin to play. If there
is already a CD in the system, press
PLAY on the DVD player.
3. The disc will begin to play and
the ’CD Audio Disc’ screen will
display. From this screen, you can
also select from COMPRESSION,
SHUFFLE and SCAN features.
To play an MP3 disc in the DVD system:
1. Ensure that the vehicle ignition is in the RUN or ACCESSORY
position.
2. Insert an MP3 disc into the
system, label-side up to turn on the
DVD system. It will load and
automatically begin to play. If there
is already a disc in the system, press
PLAY on the DVD player.
3. The disc will begin to play and
the ’MP3 Audio Disc’ screen will
display and allow you to access the
COMPRESSION, SHUFFLE, SCAN
and FOLDER MODE features.
To play an auxiliary source through the DVD system
The DVD system can be used to connect and play auxiliary electronic
devices such as game systems, personal camcorders, video cassette
recorders, etc.
1. Ensure that the vehicle ignition is in the RUN or ACCESSORY
position.
2007 Mountaineer(mnt)
Owners Guide (post-2002-fmt)
USA(fus)
Entertainment Systems
45
Page 48 of 360
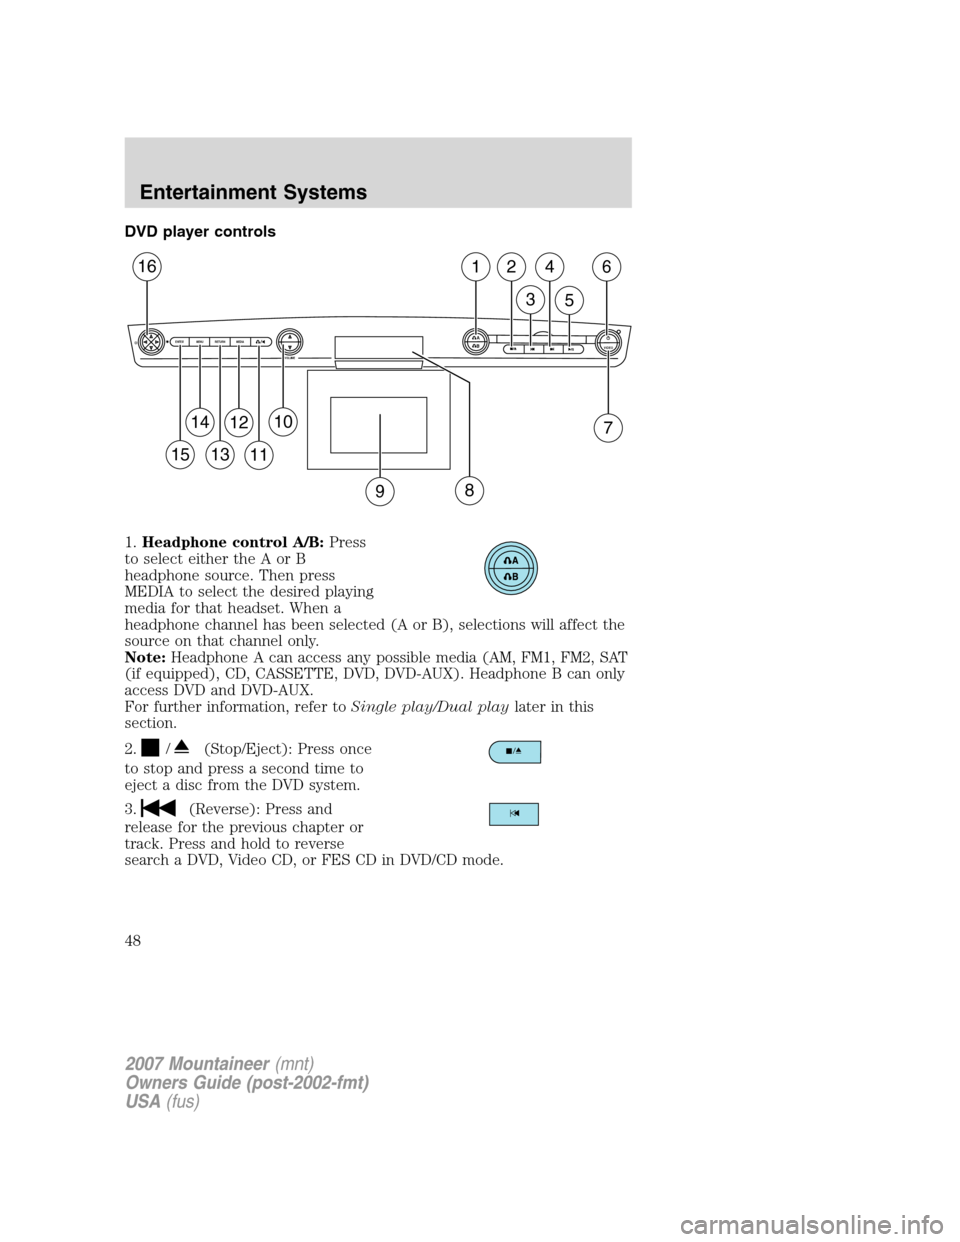
DVD player controls
1.Headphone control A/B:Press
to select either the A or B
headphone source. Then press
MEDIA to select the desired playing
media for that headset. When a
headphone channel has been selected (A or B), selections will affect the
source on that channel only.
Note:Headphone A can access any possible media (AM, FM1, FM2, SAT
(if equipped), CD, CASSETTE, DVD, DVD-AUX). Headphone B can only
access DVD and DVD-AUX.
For further information, refer toSingle play/Dual playlater in this
section.
2.
/(Stop/Eject): Press once
to stop and press a second time to
eject a disc from the DVD system.
3.
(Reverse): Press and
release for the previous chapter or
track. Press and hold to reverse
search a DVD, Video CD, or FES CD in DVD/CD mode.
A
BVIDEOVOLUME MEDIA RETURN MENU ENTER
1
7
2
3
4
5
6
9
10
11
12
13
14
15
16
8
2007 Mountaineer(mnt)
Owners Guide (post-2002-fmt)
USA(fus)
Entertainment Systems
48
Page 55 of 360
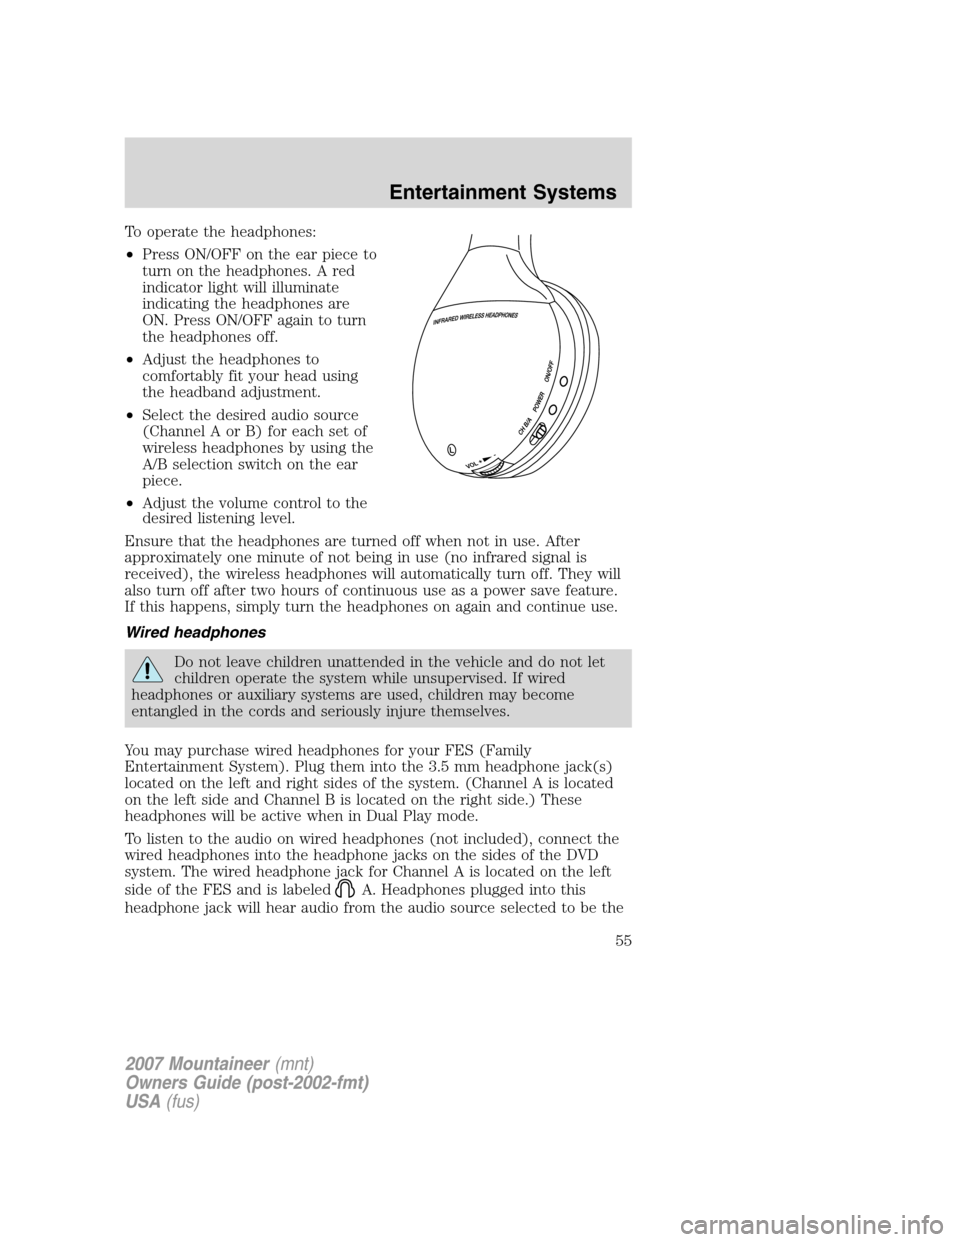
To operate the headphones:
•Press ON/OFF on the ear piece to
turn on the headphones. A red
indicator light will illuminate
indicating the headphones are
ON. Press ON/OFF again to turn
the headphones off.
•Adjust the headphones to
comfortably fit your head using
the headband adjustment.
•Select the desired audio source
(Channel A or B) for each set of
wireless headphones by using the
A/B selection switch on the ear
piece.
•Adjust the volume control to the
desired listening level.
Ensure that the headphones are turned off when not in use. After
approximately one minute of not being in use (no infrared signal is
received), the wireless headphones will automatically turn off. They will
also turn off after two hours of continuous use as a power save feature.
If this happens, simply turn the headphones on again and continue use.
Wired headphones
Do not leave children unattended in the vehicle and do not let
children operate the system while unsupervised. If wired
headphones or auxiliary systems are used, children may become
entangled in the cords and seriously injure themselves.
You may purchase wired headphones for your FES (Family
Entertainment System). Plug them into the 3.5 mm headphone jack(s)
located on the left and right sides of the system. (Channel A is located
on the left side and Channel B is located on the right side.) These
headphones will be active when in Dual Play mode.
To listen to the audio on wired headphones (not included), connect the
wired headphones into the headphone jacks on the sides of the DVD
system. The wired headphone jack for Channel A is located on the left
side of the FES and is labeled
A. Headphones plugged into this
headphone jack will hear audio from the audio source selected to be the
2007 Mountaineer(mnt)
Owners Guide (post-2002-fmt)
USA(fus)
Entertainment Systems
55
Page 61 of 360
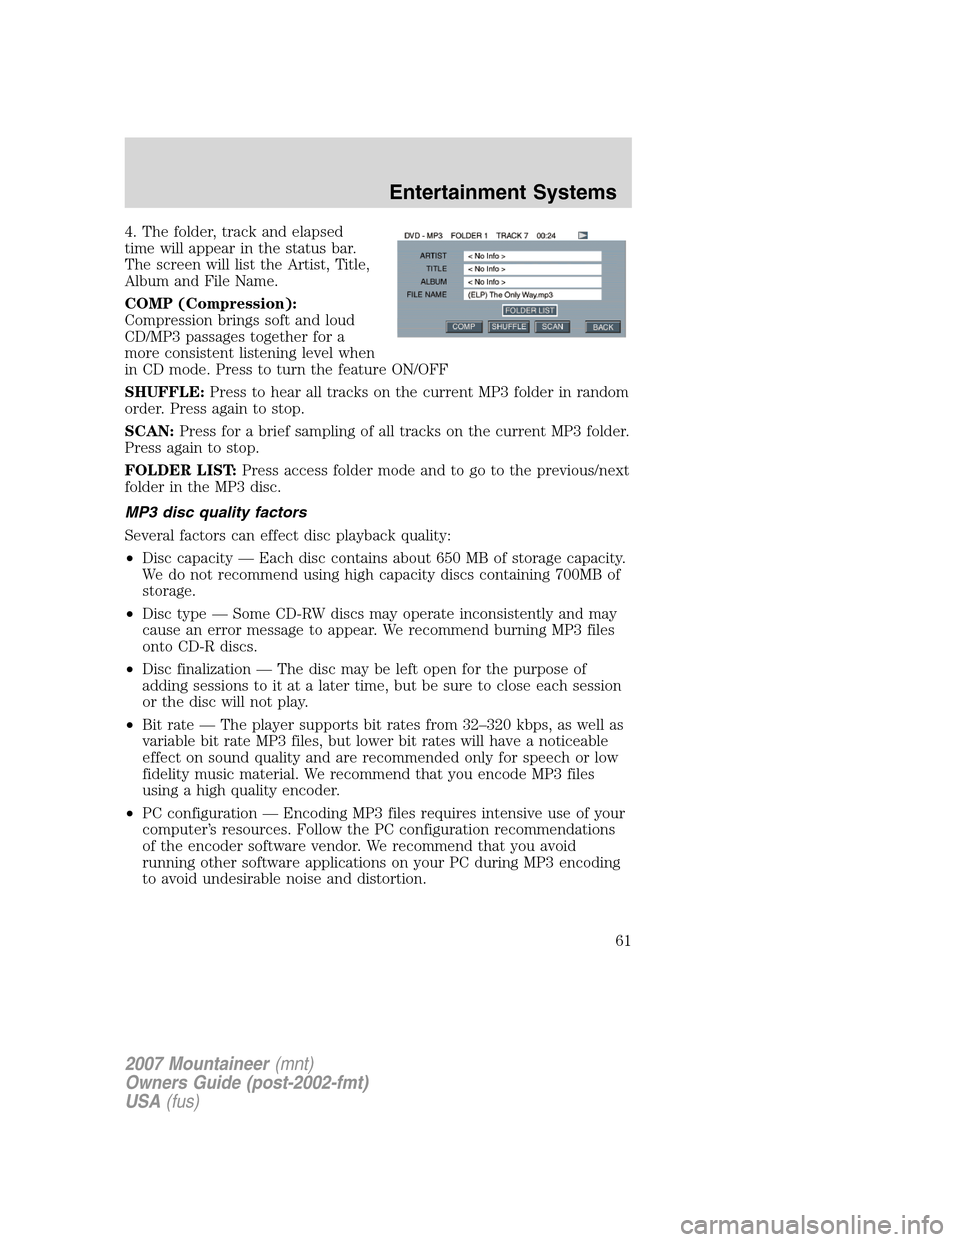
4. The folder, track and elapsed
time will appear in the status bar.
The screen will list the Artist, Title,
Album and File Name.
COMP (Compression):
Compression brings soft and loud
CD/MP3 passages together for a
more consistent listening level when
in CD mode. Press to turn the feature ON/OFF
SHUFFLE:Press to hear all tracks on the current MP3 folder in random
order. Press again to stop.
SCAN:Press for a brief sampling of all tracks on the current MP3 folder.
Press again to stop.
FOLDER LIST:Press access folder mode and to go to the previous/next
folder in the MP3 disc.
MP3 disc quality factors
Several factors can effect disc playback quality:
•Disc capacity — Each disc contains about 650 MB of storage capacity.
We do not recommend using high capacity discs containing 700MB of
storage.
•Disc type — Some CD-RW discs may operate inconsistently and may
cause an error message to appear. We recommend burning MP3 files
onto CD-R discs.
•Disc finalization — The disc may be left open for the purpose of
adding sessions to it at a later time, but be sure to close each session
or the disc will not play.
•Bit rate — The player supports bit rates from 32–320 kbps, as well as
variable bit rate MP3 files, but lower bit rates will have a noticeable
effect on sound quality and are recommended only for speech or low
fidelity music material. We recommend that you encode MP3 files
using a high quality encoder.
•PC configuration — Encoding MP3 files requires intensive use of your
computer’s resources. Follow the PC configuration recommendations
of the encoder software vendor. We recommend that you avoid
running other software applications on your PC during MP3 encoding
to avoid undesirable noise and distortion.
2007 Mountaineer(mnt)
Owners Guide (post-2002-fmt)
USA(fus)
Entertainment Systems
61
Page 64 of 360
2. Press the right cursor button. The
DVD will advance one frame. Each
press of the right cursor button will
advance the DVD video by one
frame.
Headphone/auxiliary jacks
There are wired headphones (not included) and auxiliary jacks on the
left and right side of your DVD system. They can be used to plug in
wired headphones or to connect and play auxiliary electronic devices
such as game systems, personal camcorders, video cassette recorders,
etc.
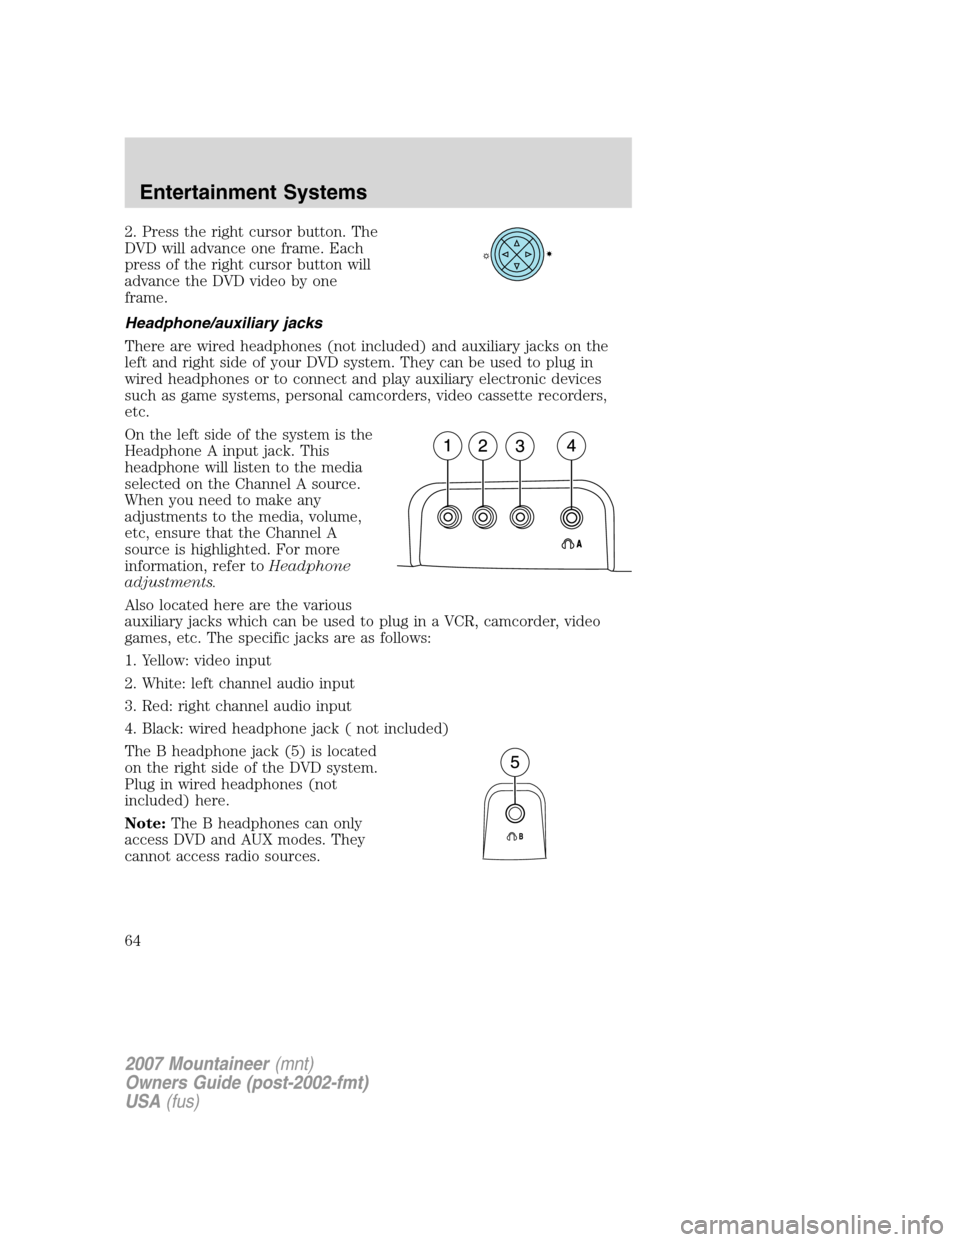
On the left side of the system is the
Headphone A input jack. This
headphone will listen to the media
selected on the Channel A source.
When you need to make any
adjustments to the media, volume,
etc, ensure that the Channel A
source is highlighted. For more
information, refer toHeadphone
adjustments.
Also located here are the various
auxiliary jacks which can be used to plug in a VCR, camcorder, video
games, etc. The specific jacks are as follows:
1. Yellow: video input
2. White: left channel audio input
3. Red: right channel audio input
4. Black: wired headphone jack ( not included)
The B headphone jack (5) is located
on the right side of the DVD system.
Plug in wired headphones (not
included) here.
Note:The B headphones can only
access DVD and AUX modes. They
cannot access radio sources.
2007 Mountaineer(mnt)
Owners Guide (post-2002-fmt)
USA(fus)
Entertainment Systems
64