Jack Mercury Mountaineer 2007 Owner's Manuals
[x] Cancel search | Manufacturer: MERCURY, Model Year: 2007, Model line: Mountaineer, Model: Mercury Mountaineer 2007Pages: 360, PDF Size: 3.36 MB
Page 1 of 360
Introduction 4
Instrument Cluster 12
Warning lights and chimes 12
Gauges 17
Entertainment Systems 20
How to get going 20
AM/FM stereo with CD 24
AM/FM stereo with in-dash six CD 30
Auxiliary input jack 37
Satellite radio information 40
Family entertainment system 43
Navigation system 69
Climate Controls 70
Manual heating and air conditioning 70
Automatic temperature control 72
Auxiliary passenger climate control 75
Rear window defroster 75
Lights 77
Driver Controls 88
Windshield wiper/washer control 88
Steering wheel adjustment 89
Power windows 93
Mirrors 95
Speed control 96
Moon roof 101
Message center 106
Locks and Security 126
Keys 126
Locks 126
Anti-theft system 132
Table of Contents
1
2007 Mountaineer(mnt)
Owners Guide (post-2002-fmt)
USA(fus)
Page 11 of 360
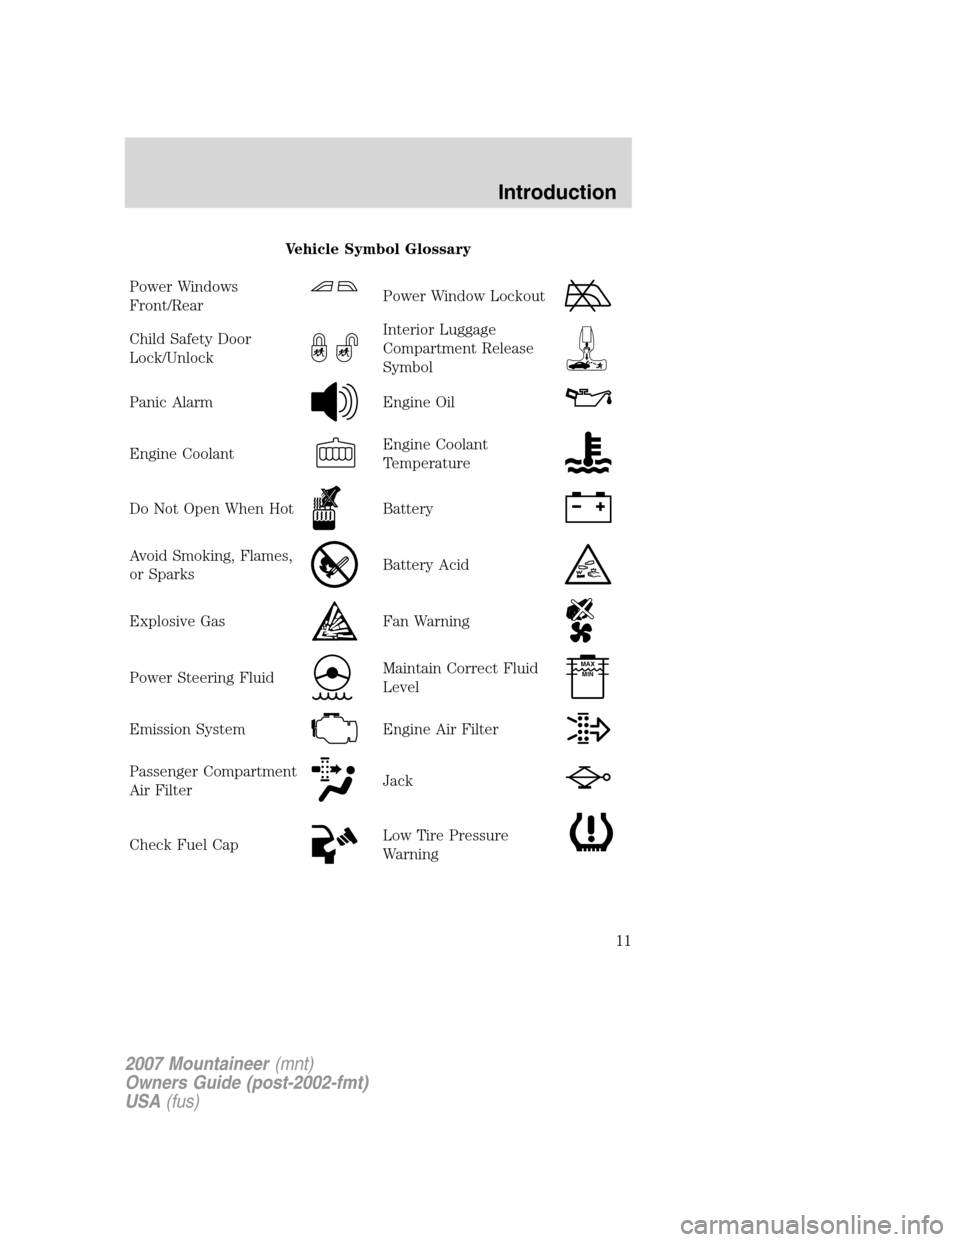
Vehicle Symbol Glossary
Power Windows
Front/Rear
Power Window Lockout
Child Safety Door
Lock/UnlockInterior Luggage
Compartment Release
Symbol
Panic AlarmEngine Oil
Engine CoolantEngine Coolant
Temperature
Do Not Open When HotBattery
Avoid Smoking, Flames,
or SparksBattery Acid
Explosive GasFan Warning
Power Steering FluidMaintain Correct Fluid
LevelMAX
MIN
Emission SystemEngine Air Filter
Passenger Compartment
Air FilterJack
Check Fuel CapLow Tire Pressure
Warning
2007 Mountaineer(mnt)
Owners Guide (post-2002-fmt)
USA(fus)
Introduction
11
Page 26 of 360
The default setting isoff;increasing your vehicle speed will not change
the volume level.
Adjust1–7:Increasing this setting from 1 (lowest setting) to 7 (highest
setting) allows the radio volume to automatically change slightly with
vehicle speed to compensate for road and wind noise.
Recommended level is1–3;SPEED OFF turns the feature off and level 7
is the maximum setting.
TRACK/FOLDER MODE:Available only on MP3 discs in CD mode.
In track mode, press
SEEK, SEEKto scroll through all tracks on
the disc
In folder mode, press
SEEK, SEEKto scroll through tracks
within the selected folder.
Press
FOLDER, FOLDERto access the previous/next folder (if
available).
COMPRESS (Compression):Available only in CD/MP3 mode. Press
MENU until COMPRESS ON/OFF appears in the display. Use
//
SEEK, SEEKto toggle ON/OFF. When COMPRESS is ON, the
system will bring the soft and loud CD passages together for a more
consistent listening level.
SINGLE PLAY/DUAL PLAY (if equipped):If SINGLE PLAY is ON,
press
/for DUAL PLAY. For further information on Single
Play/Dual Play, please refer to theFamily Entertainment DVD system
later in this section.
4.AUX:Press repeatedly to cycle
through FES/DVD (if equipped),
LINE IN (auxiliary audio mode) and
SAT1, SAT2 and SAT3 modes (satellite radio, if equipped).
For location and further information on auxiliary audio mode, refer to
Auxiliary input jacklater in this chapter.
Satellite radio is available only with a valid SIRIUS radio
subscription. Check with your authorized dealer for availability.
If your vehicle is equipped with a Family Entertainment System (FES)
please refer to theFamily Entertainment DVD systemlater in this
section.
2007 Mountaineer(mnt)
Owners Guide (post-2002-fmt)
USA(fus)
Entertainment Systems
26
Page 33 of 360
SEEK, SEEKto toggle ON/OFF. When COMPRESS is ON, the
system will bring the soft and loud CD passages together for a more
consistent listening level.
ALL SEATS (Occupancy mode):Use
/to select and optimize
sound for ALL SEATS, DRIVERS SEAT or REAR SEATS.
SINGLE PLAY/DUAL PLAY (if equipped):If SINGLE PLAY is ON,
press
/for DUAL PLAY. For further information on Single
Play/Dual Play, please refer to theFamily Entertainment DVD system
later in this section.
4.AUX:Press repeatedly to cycle
through FES/DVD (if equipped),
LINE IN (auxiliary audio mode) and
SAT1, SAT2 and SAT3 modes (satellite radio, if equipped).
For location and further information on auxiliary audio mode, refer to
Auxiliary input jacklater in this chapter.
Satellite radio is available only with a valid SIRIUS radio
subscription. Check with your authorized dealer for availability.
If your vehicle is equipped with a Family Entertainment System (FES)
please refer to theFamily Entertainment DVD systemlater in this
section.
5.SEEK:In radio and CD/MP3
mode,press to access the previous
(
) or next () strong station
or track.
In satellite radio mode (if equipped),press
SEEKto seek to
the previous/next channel. If a specific category is selected, (Jazz, Rock,
News, etc.), press
SEEK, SEEKto seek to the previous/next
channel in the selected category. Press and hold
SEEK, SEEKto
fast seek through the previous /next channels.
In TEXT MODE,press
SEEK, SEEKto view the
previous/additional display text.
In CATEGORY MODE,press
SEEKto select a category.
Satellite radio is available only with a valid SIRIUS subscription.
Check with your authorized dealer for availability.
2007 Mountaineer(mnt)
Owners Guide (post-2002-fmt)
USA(fus)
Entertainment Systems
33
Page 37 of 360
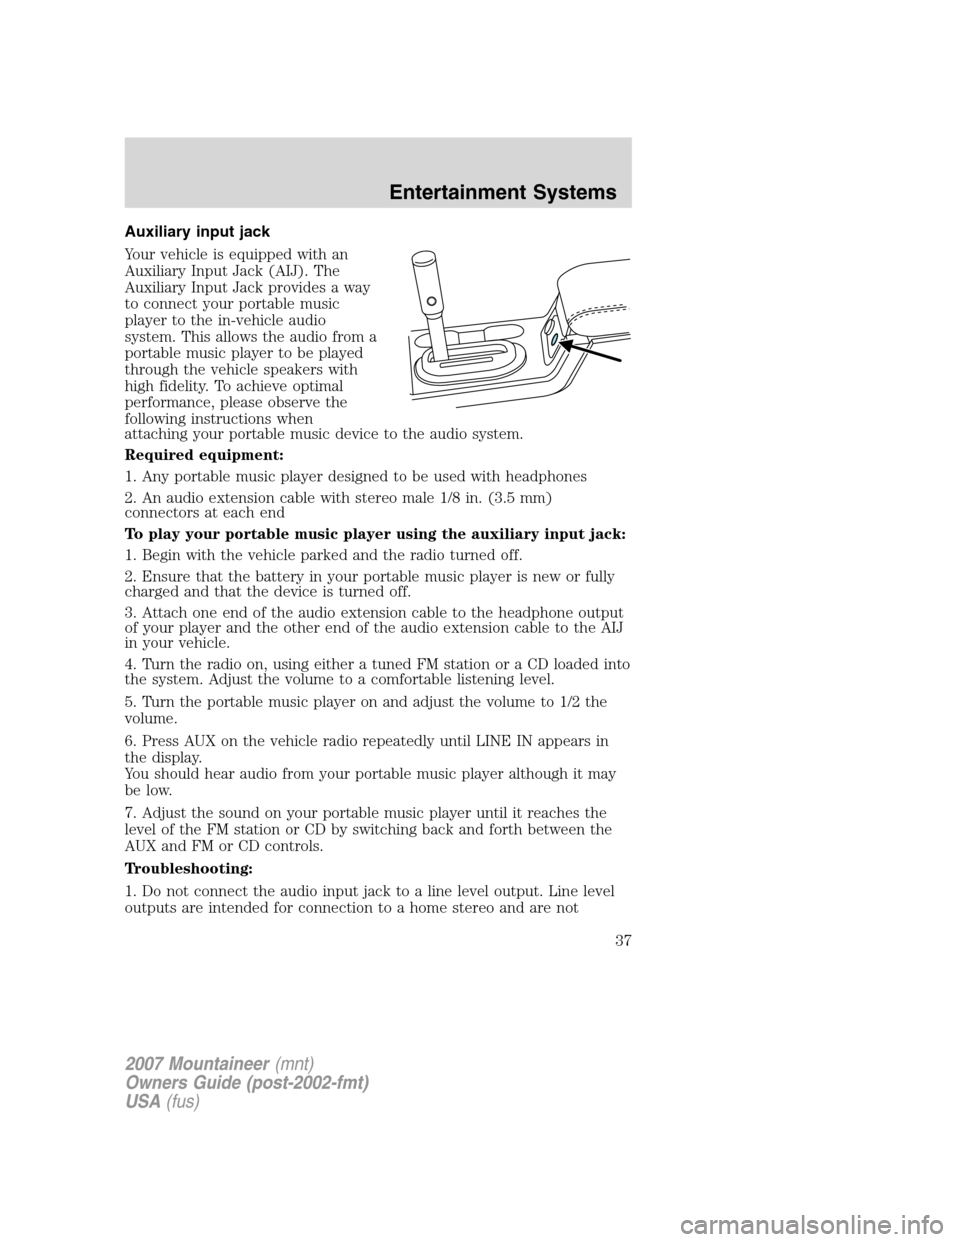
Auxiliary input jack
Your vehicle is equipped with an
Auxiliary Input Jack (AIJ). The
Auxiliary Input Jack provides a way
to connect your portable music
player to the in-vehicle audio
system. This allows the audio from a
portable music player to be played
through the vehicle speakers with
high fidelity. To achieve optimal
performance, please observe the
following instructions when
attaching your portable music device to the audio system.
Required equipment:
1. Any portable music player designed to be used with headphones
2. An audio extension cable with stereo male 1/8 in. (3.5 mm)
connectors at each end
To play your portable music player using the auxiliary input jack:
1. Begin with the vehicle parked and the radio turned off.
2. Ensure that the battery in your portable music player is new or fully
charged and that the device is turned off.
3. Attach one end of the audio extension cable to the headphone output
of your player and the other end of the audio extension cable to the AIJ
in your vehicle.
4. Turn the radio on, using either a tuned FM station or a CD loaded into
the system. Adjust the volume to a comfortable listening level.
5. Turn the portable music player on and adjust the volume to 1/2 the
volume.
6. Press AUX on the vehicle radio repeatedly until LINE IN appears in
the display.
You should hear audio from your portable music player although it may
be low.
7. Adjust the sound on your portable music player until it reaches the
level of the FM station or CD by switching back and forth between the
AUX and FM or CD controls.
Troubleshooting:
1. Do not connect the audio input jack to a line level output. Line level
outputs are intended for connection to a home stereo and are not
2007 Mountaineer(mnt)
Owners Guide (post-2002-fmt)
USA(fus)
Entertainment Systems
37
Page 46 of 360
2. Press the power button to turn
the DVD system on. The indicator
light next to the power button will
illuminate.
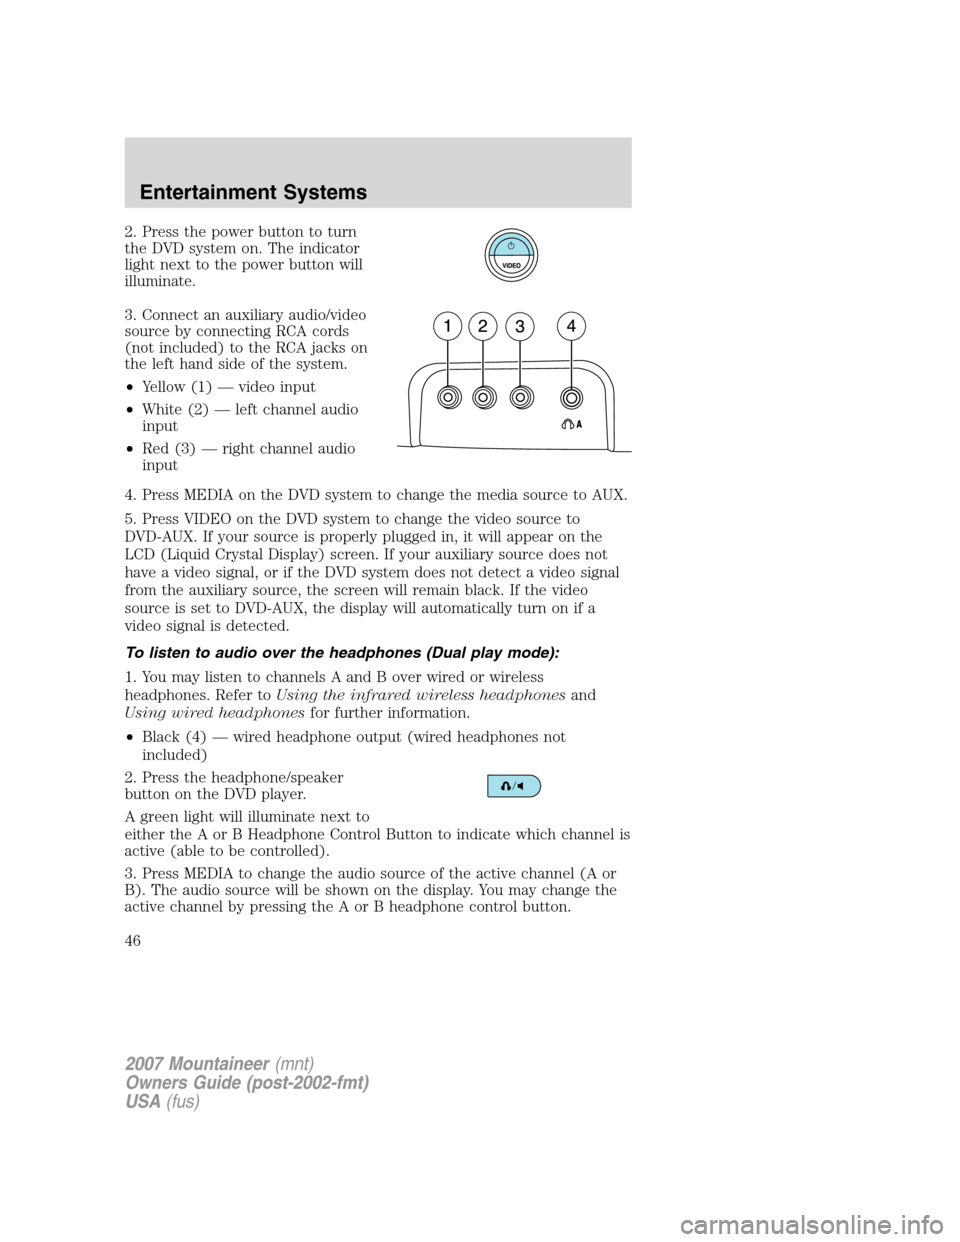
3. Connect an auxiliary audio/video
source by connecting RCA cords
(not included) to the RCA jacks on
the left hand side of the system.
•Yellow (1) — video input
•White (2) — left channel audio
input
•Red (3) — right channel audio
input
4. Press MEDIA on the DVD system to change the media source to AUX.
5. Press VIDEO on the DVD system to change the video source to
DVD-AUX. If your source is properly plugged in, it will appear on the
LCD (Liquid Crystal Display) screen. If your auxiliary source does not
have a video signal, or if the DVD system does not detect a video signal
from the auxiliary source, the screen will remain black. If the video
source is set to DVD-AUX, the display will automatically turn on if a
video signal is detected.
To listen to audio over the headphones (Dual play mode):
1. You may listen to channels A and B over wired or wireless
headphones. Refer toUsing the infrared wireless headphonesand
Using wired headphonesfor further information.
•Black (4) — wired headphone output (wired headphones not
included)
2. Press the headphone/speaker
button on the DVD player.
A green light will illuminate next to
either the A or B Headphone Control Button to indicate which channel is
active (able to be controlled).
3. Press MEDIA to change the audio source of the active channel (A or
B). The audio source will be shown on the display. You may change the
active channel by pressing the A or B headphone control button.
2007 Mountaineer(mnt)
Owners Guide (post-2002-fmt)
USA(fus)
Entertainment Systems
46
Page 47 of 360
Note:Channel A can access any possible media source (AM, FM1, FM2,
SAT (if equipped), CD, DVD, AUX). Channel B can only access DVD and
AUX sources.
Note:Refer toSingle play/Dual playfor more information.
Using the infrared (IR) wireless headphones:
1. Press the power control on the earpiece to turn the headphones ON.
2. Select Channel A or B for each set of wireless headphones by using
the A/B control on the ear piece.
3. Adjust the headphone volume using the rotary dial on the earpiece.
Using wired headphones (not included):
Do not leave children unattended in the vehicle and do not let
children operate the system while unsupervised. If wired
headphones or auxiliary systems are used, children may become
entangled in the cords and seriously injure themselves.
1. Connect the wired headphones in to the headphone jacks on either
side of the DVD system. Each side is labeled
AorB. Headphones
plugged into jack A will listen to Channel A and headphones plugged into
jack B will listen to Channel B.
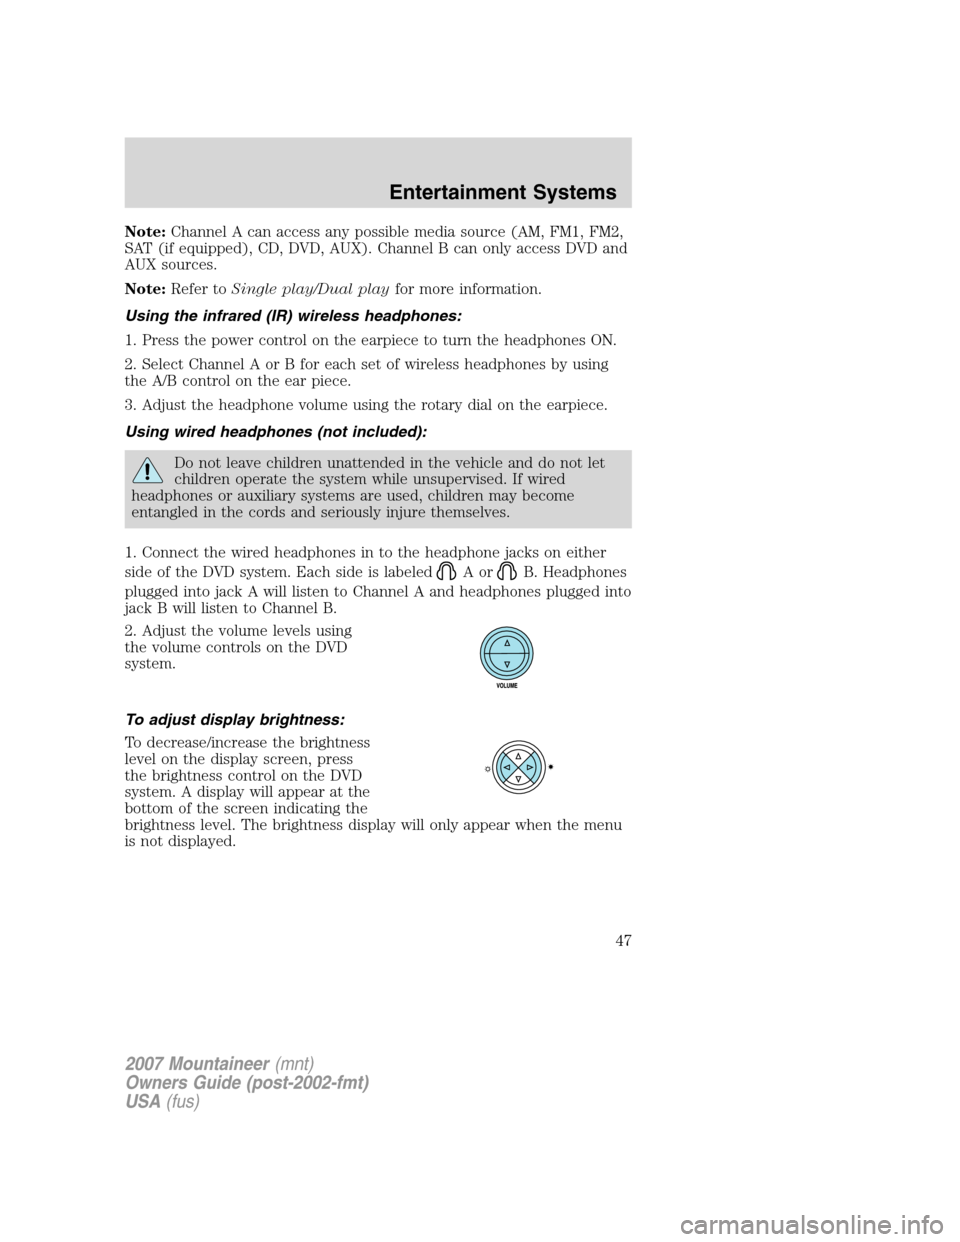
2. Adjust the volume levels using
the volume controls on the DVD
system.
To adjust display brightness:
To decrease/increase the brightness
level on the display screen, press
the brightness control on the DVD
system. A display will appear at the
bottom of the screen indicating the
brightness level. The brightness display will only appear when the menu
is not displayed.
2007 Mountaineer(mnt)
Owners Guide (post-2002-fmt)
USA(fus)
Entertainment Systems
47
Page 55 of 360
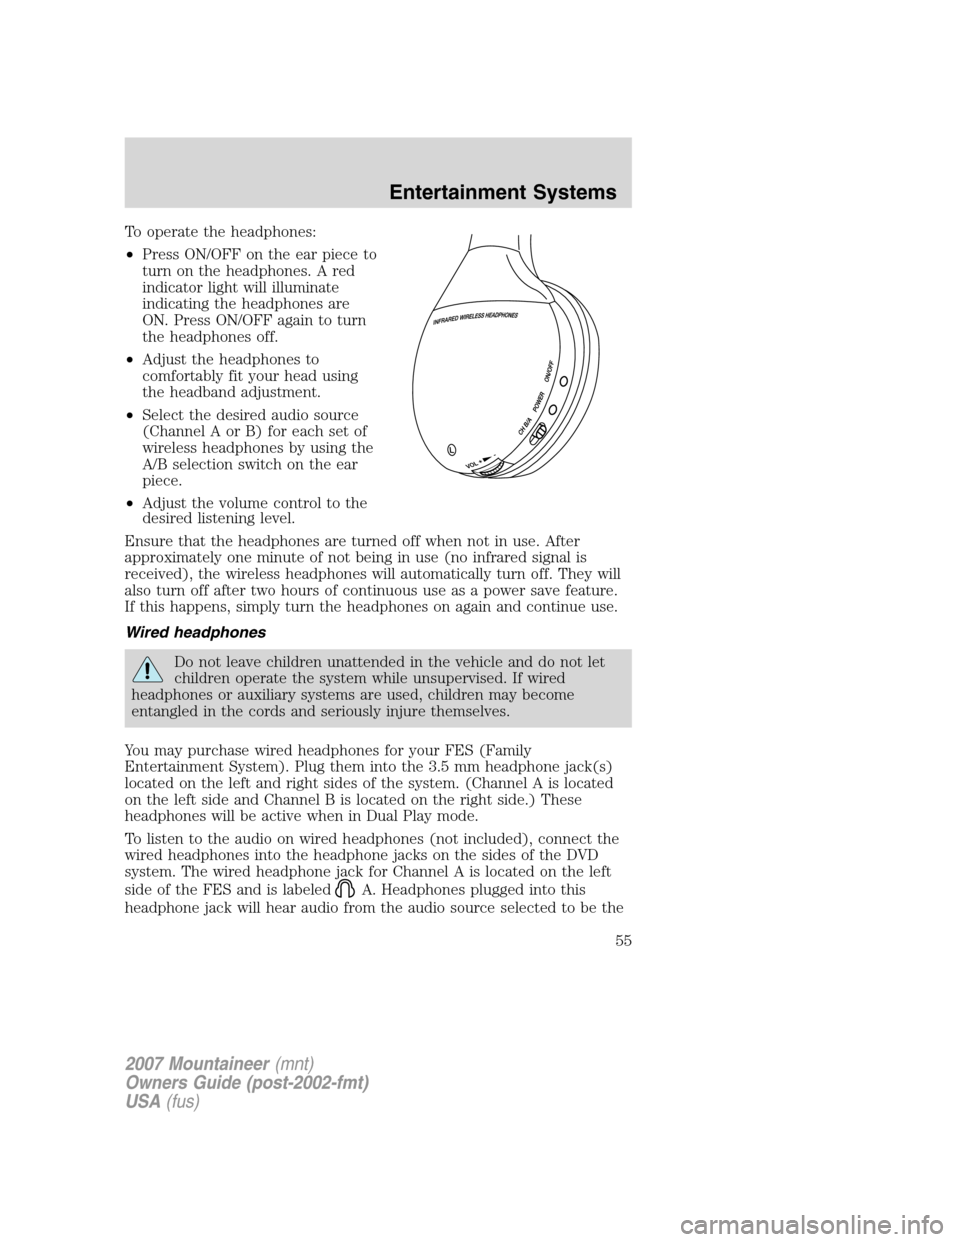
To operate the headphones:
•Press ON/OFF on the ear piece to
turn on the headphones. A red
indicator light will illuminate
indicating the headphones are
ON. Press ON/OFF again to turn
the headphones off.
•Adjust the headphones to
comfortably fit your head using
the headband adjustment.
•Select the desired audio source
(Channel A or B) for each set of
wireless headphones by using the
A/B selection switch on the ear
piece.
•Adjust the volume control to the
desired listening level.
Ensure that the headphones are turned off when not in use. After
approximately one minute of not being in use (no infrared signal is
received), the wireless headphones will automatically turn off. They will
also turn off after two hours of continuous use as a power save feature.
If this happens, simply turn the headphones on again and continue use.
Wired headphones
Do not leave children unattended in the vehicle and do not let
children operate the system while unsupervised. If wired
headphones or auxiliary systems are used, children may become
entangled in the cords and seriously injure themselves.
You may purchase wired headphones for your FES (Family
Entertainment System). Plug them into the 3.5 mm headphone jack(s)
located on the left and right sides of the system. (Channel A is located
on the left side and Channel B is located on the right side.) These
headphones will be active when in Dual Play mode.
To listen to the audio on wired headphones (not included), connect the
wired headphones into the headphone jacks on the sides of the DVD
system. The wired headphone jack for Channel A is located on the left
side of the FES and is labeled
A. Headphones plugged into this
headphone jack will hear audio from the audio source selected to be the
2007 Mountaineer(mnt)
Owners Guide (post-2002-fmt)
USA(fus)
Entertainment Systems
55
Page 56 of 360
Channel A source. The wired headphone jack for Channel B is located on
the right side of the FES and is labeled
B. Headphones plugged into
this headphone jack will hear audio from the audio source selected to be
the Channel B source.
Adjust the headphone volume using
the volume control on the DVD
system.
Operation
Single play/Dual play
Your DVD and audio system work together with the infrared headphones
and wired headphones (not included) to enable the front and rear seat
passengers to listen to a variety of sources a variety of ways.
Single Play:Single play consists of all occupants in the vehicle listening
to the same playing media over the front and rear speakers. When the
DVD system is on, and the same source is playing through the front and
rear speakers, SINGLE PLAY will appear in the front radio display.
Dual Play:Dual play is when the rear seat passengers choose to listen
to a different playing media than the front seat passengers. With the
DVD and Rear Seat Controls turned ON, the rear seat passengers may
choose to listen to the radio, CD, MP3, DVD, or DVD-AUX media sources
over headphones while the front speakers play the chosen selection for
the front audio system, they may listen to another over the headphones.
DUAL PLAY will appear in the radio display.
When both the front seat passengers and the rear seat passengers listen
to the same audio source, SHARED MODE will appear on the radio.
Note:If the front seat passengers are listening to the radio, the rear seat
passengers can also listen to the radio, however they will be limited to
listening to the same radio channel.
Press
/on the DVD player to
listen to audio over the headphones.
The headphone control will now be active and a green light next to the
A or B headphone control buttons will illuminate. The system can output
two different audio sources over the headphones. These are called
Channel A and Channel B. Both Channel A and Channel B can be
listened to on the wired headphones (not included) or on the infrared
(IR) wireless headphones.
2007 Mountaineer(mnt)
Owners Guide (post-2002-fmt)
USA(fus)
Entertainment Systems
56
Page 64 of 360
2. Press the right cursor button. The
DVD will advance one frame. Each
press of the right cursor button will
advance the DVD video by one
frame.
Headphone/auxiliary jacks
There are wired headphones (not included) and auxiliary jacks on the
left and right side of your DVD system. They can be used to plug in
wired headphones or to connect and play auxiliary electronic devices
such as game systems, personal camcorders, video cassette recorders,
etc.
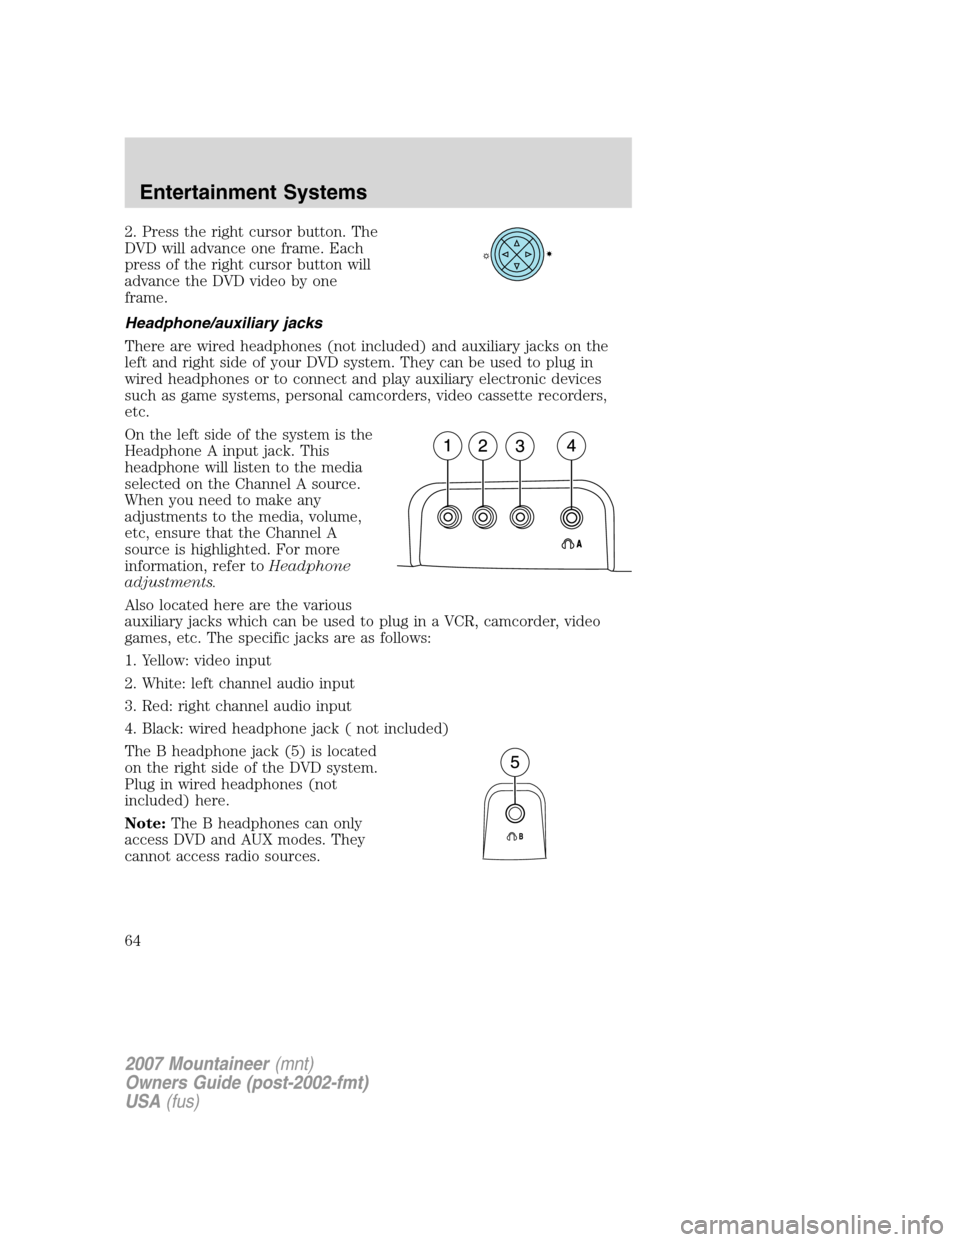
On the left side of the system is the
Headphone A input jack. This
headphone will listen to the media
selected on the Channel A source.
When you need to make any
adjustments to the media, volume,
etc, ensure that the Channel A
source is highlighted. For more
information, refer toHeadphone
adjustments.
Also located here are the various
auxiliary jacks which can be used to plug in a VCR, camcorder, video
games, etc. The specific jacks are as follows:
1. Yellow: video input
2. White: left channel audio input
3. Red: right channel audio input
4. Black: wired headphone jack ( not included)
The B headphone jack (5) is located
on the right side of the DVD system.
Plug in wired headphones (not
included) here.
Note:The B headphones can only
access DVD and AUX modes. They
cannot access radio sources.
2007 Mountaineer(mnt)
Owners Guide (post-2002-fmt)
USA(fus)
Entertainment Systems
64