remote control Mercury Mountaineer 2009 Owner's Manuals
[x] Cancel search | Manufacturer: MERCURY, Model Year: 2009, Model line: Mountaineer, Model: Mercury Mountaineer 2009Pages: 388, PDF Size: 3.28 MB
Page 47 of 388
Quick start
Your Family Entertainment System includes a DVD system, two sets of
wireless infrared (IR) headphones and a wireless infrared (IR) remote
control.
To play a DVD in the DVD system:
The DVD system can play DVD-Video, DVD-R, DVD-R/W discs as well as
audio CDs and video CDs. To ensure proper disc operation, check the
disc for finger prints, scratches and cleanliness. Clean with a soft cloth,
wiping from center to edge.
1. Ensure that the vehicle is on or the ignition is in accessory mode.
2. Insert a DVD into the system, label-side up to turn on the system. It
will load automatically.
3. Press the power button on the
DVD player, then press Play
to
begin to play the disc.
If a DVD is already loaded into the
system, press PLAY on the DVD
player.
Note:If sound can be heard, but no video is present, press VIDEO to
select the video source (DVD or aux-inputs).
Note (navigation-based radio
systems only):Whenadiscis
inserted, the FES switches to
dual-play mode–rear speakers turn off, and headphones turn on. To
switch back to all four speakers on, press the headphone button.
Press VIDEO to change the source
displayed on the screen. Press
repeatedly to cycle through:
DVD-DISC, DVD-AUX, NON-DVD,
OFF.
Press the power button to turn the
system off. The indicator light will
turn off indicating the system is off.
Note:The audio from the DVD system will play over all vehicle speakers
and can be adjusted by the radio volume control.
2009 Mountaineer(mnt)
Owners Guide, 2nd Printing
USA(fus)
Entertainment Systems
47
Page 53 of 388
2./(Stop/Eject):Press
once to stop and press a second
time to eject a disc from the DVD
system.
3.
(Reverse):Press and
release for the previous chapter or
track. Press and hold to reverse
search a DVD, Video CD, or FES CD in DVD/CD mode.
4.
(Fast forward):Press and
release for the next chapter or
track. Press and hold to forward
search a DVD, Video CD, or FES CD in DVD/CD mode.
5.
/(Play/Pause):Press
(Play) to select DVD mode (and to
turn the DVD system on if it is off).
If a disc is present, it will resume or begin to play. Press (Pause) while
playing a disc to pause a DVD or CD.
6.On/Off:Press to turn the DVD
system On/Off.
7.VIDEO:Press repeatedly to cycle
through the following video state
options which will be indicated on
the bottom right hand corner of the
display: DVD DISC, DVD-AUX,
NON-DVD and Off (no indicator). If you select the DVD-AUX video
source, the display will turn off if there is no video signal detected. When
a video signal is detected on the auxiliary video input, and the display is
in the DVD-AUX video mode, the display will automatically turn on.
8.Infrared (IR) Receiver & Transmitter:System sensor which reads
the signals from the remote control and sends audio signals to the
infrared (IR) wireless headphones.
9.LCD screen:The eight inch diagonal screen rotates down to view and
up into housing to store when not in use. Ensure that the screen is
latched into the housing when being stored.
2009 Mountaineer(mnt)
Owners Guide, 2nd Printing
USA(fus)
Entertainment Systems
53
Page 55 of 388
16.Cursor /Brightness controls:
Use the cursor controls to make
various selections when in any
menu. When not in a menu, and in
DVD mode, press
/to adjust
the brightness. A display bar will appear at the bottom of the screen
indicating the brightness levels.
Remote control
Unless otherwise stated, all operations can be carried out with the
remote control. Always point the remote control directly at the player.
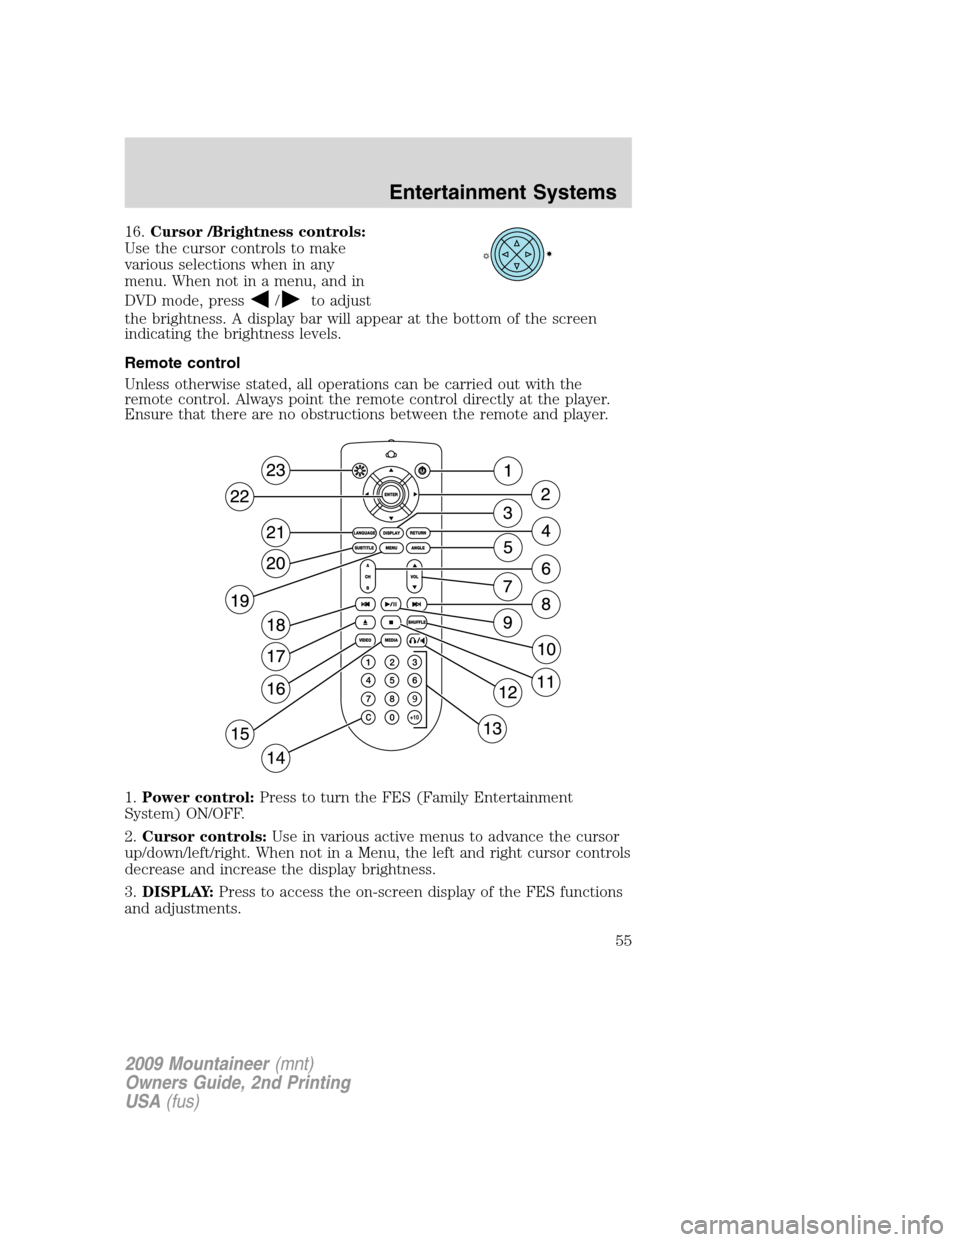
Ensure that there are no obstructions between the remote and player.
1.Power control:Press to turn the FES (Family Entertainment
System) ON/OFF.
2.Cursor controls:Use in various active menus to advance the cursor
up/down/left/right. When not in a Menu, the left and right cursor controls
decrease and increase the display brightness.
3.DISPLAY:Press to access the on-screen display of the FES functions
and adjustments.
2009 Mountaineer(mnt)
Owners Guide, 2nd Printing
USA(fus)
Entertainment Systems
55
Page 57 of 388
19.MENU:Press to access the DVD disc menu for selections. Press
MENU again when in the DVD disc menu to access the system set-up
menu.
20.SUBTITLE(DVD dependent): Press to turn the subtitle feature ON
or OFF.
21.
LANGUAGE(DVD dependent): Press to select the desired language.
22.ENTER:Press to select the highlighted menu option.
23.ILLUMINATION: Press to illuminate the remote control and
backlight all of the buttons.
Battery replacement
Batteries are supplied with the remote control unit. Since all batteries
have a limited shelf life, replace them when the unit fails to control the
DVD player.
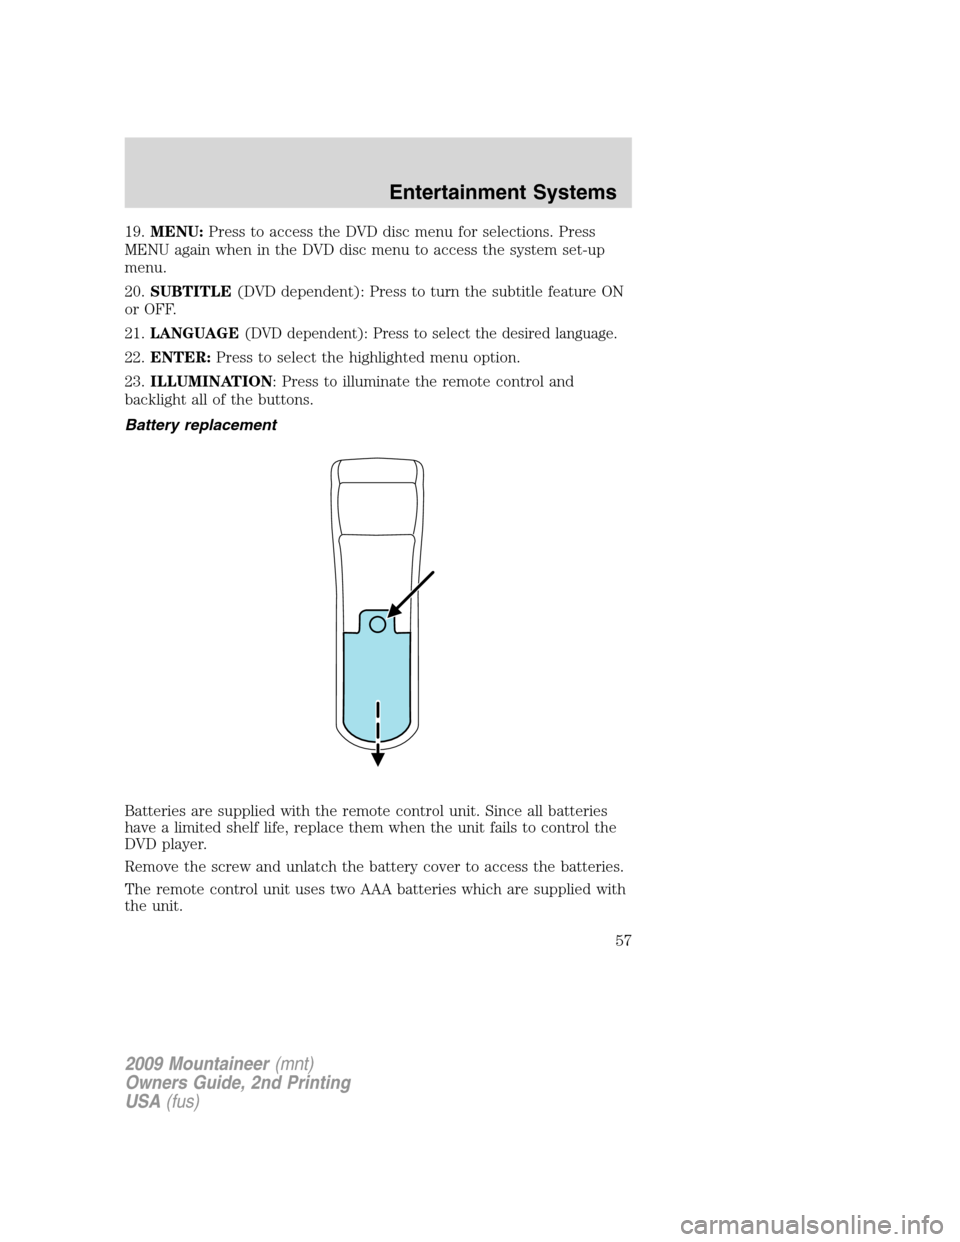
Remove the screw and unlatch the battery cover to access the batteries.
The remote control unit uses two AAA batteries which are supplied with
the unit.
2009 Mountaineer(mnt)
Owners Guide, 2nd Printing
USA(fus)
Entertainment Systems
57
Page 74 of 388

Safety information
WARNING:Driving while distracted can result in loss of vehicle
control, accident and injury. Ford strongly recommends that
drivers use extreme caution when using any device that may take their
focus off the road. The driver’s primary responsibility is the safe
operation of their vehicle. Only use cell phones and other devices not
essential to the driving task when it is safe to do so.
Read all of the safety and operating instructions before operating the
system and retain for future reference.
Do not attempt to service, repair or modify the Family Entertainment
System (FES). See your dealer.
Do not insert foreign objects into the DVD compartment.
WARNING:Do not leave children unattended in the vehicle and
do not let children operate the system while unsupervised. If
wired headphones or auxiliary systems are used, children may become
entangled in the cords and seriously injure themselves.
WARNING:The front glass on the liquid crystal display (LCD)
flip-down screen may break when hit with a hard surface. If the
glass breaks, do not touch the liquid crystalline material. In case of
contact with skin, wash immediately with soap and water.
WARNING:The driver should not attempt to operate any
function of the DVD system while the vehicle is in motion. Give
full attention to driving and to the road. Pull off the road in a safe
place before inserting or extracting DVDs from the system. A remote
control is included in the system to allow the rear seat occupants to
operate the FES functions without distracting the driver.
Do not expose the liquid crystal display (LCD) flip-down screen
to direct sunlight or intensive ultraviolet rays for extensive
periods of time. Ultraviolet rays deteriorate the liquid crystal.
Be sure to review User Manuals for video games and video game
equipment when used as auxiliary inputs for your Family Entertainment
System (FES).
2009 Mountaineer(mnt)
Owners Guide, 2nd Printing
USA(fus)
Entertainment Systems
74
Page 89 of 388

TURN SIGNAL CONTROL
•Push down to activate the left
turn signal.
•Push up to activate the right turn
signal.
INTERIOR LAMPS
Dome/reading lamps
The dome lamp lights when:
•any door is opened.
•the instrument panel dimmer
switch is rotated up until the
courtesy lamps come on.
•any of the remote entry controls
are pressed and the ignition is
off.
The reading portion, the two outer lights, can only be toggled on and off
at the lamp.
The front map lamps are located in
the overhead console (if equipped).
Press the controls on either side of
each map lamp to activate the
lamps.
2009 Mountaineer(mnt)
Owners Guide, 2nd Printing
USA(fus)
Lights
89
Page 137 of 388

5 passenger stowage:
When the lid is open, it will stand
up on its own.
1. To open, lift the release handle
and the lid.
2. To close, lower the lid, lift the
release handle and press down on
the lid.
REAR LIFTGATE
The liftgate area is only intended for cargo, not passengers. You can open
and close the liftgate from outside the vehicle. It cannot be opened from
inside the cargo area.
•To open the liftgate window,
press the control on the remote
entry transmitter or, with the
liftgate unlocked, push the
control button on theright side
under the license plate lamp
shield.
•To open the liftgate, unlock the
liftgate (with the power door
locks, the remote entry or the
keyless entry pad) and pull the
middlelever under the license plate lamp shield.
To lock the liftgate and the liftgate window, use the power door locks.
The liftgate door and window should be closed before driving. If not,
possible damage may occur to your vehicle.
WARNING:Always close liftgate window before opening liftgate.
Liftgate glass and liftgate should never be open at the same
time. Failure to observe this warning may result in personal injury or
damage to your vehicle.
2009 Mountaineer(mnt)
Owners Guide, 2nd Printing
USA(fus)
Driver Controls
137
Page 144 of 388
Power door lock/unlock inhibit feature (if equipped)
If the key is not in the ignition, all doors are closed, and the vehicle has
been locked using the remote entry transmitter, keypad (if equipped) or
the power door unlock control on the door panel while a front door is
open (then subsequently closed), the power door unlock control on the
door panel will become disabled 20 seconds after the lock event
occurred. Your vehicle comes with this feature enabled, but there are
two methods to disable it:
•Through your authorized dealer, or
•Performing the following power door lock control procedure.
Before following the activation or deactivation procedures, make sure
that the anti-theft system is not armed, ignition is in the off position, and
all vehicle doors, liftgate and liftgate window are closed.
You must complete Steps 1-5 within 30 seconds or the procedure will
have to be repeated. If the procedure needs to be repeated, you must
wait 30 seconds.Note: Alldoors must be closed and remain closed
throughout the configuration process.
1. Place the key in the ignition and turn the ignition to the on position.
2. Press the power door unlock control on the door panel three times.
3. Turn the ignition from the on position to the off position.
4. Press the power door unlock control on the door panel three times.
5. Turn the ignition back to the on position. The horn will chirp one time
to confirm programming mode has been entered and is active.
6. Press the power door lock control on the door panel two times within
five seconds. The horn will chirp once if trim switch inhibit was
deactivated or twice (one short and one long chirp) if trim switch inhibit
was activated.
7. Turn the ignition to the off position. The horn will chirp once to
confirm the procedure is complete.
2009 Mountaineer(mnt)
Owners Guide, 2nd Printing
USA(fus)
Locks and Security
144
Page 145 of 388
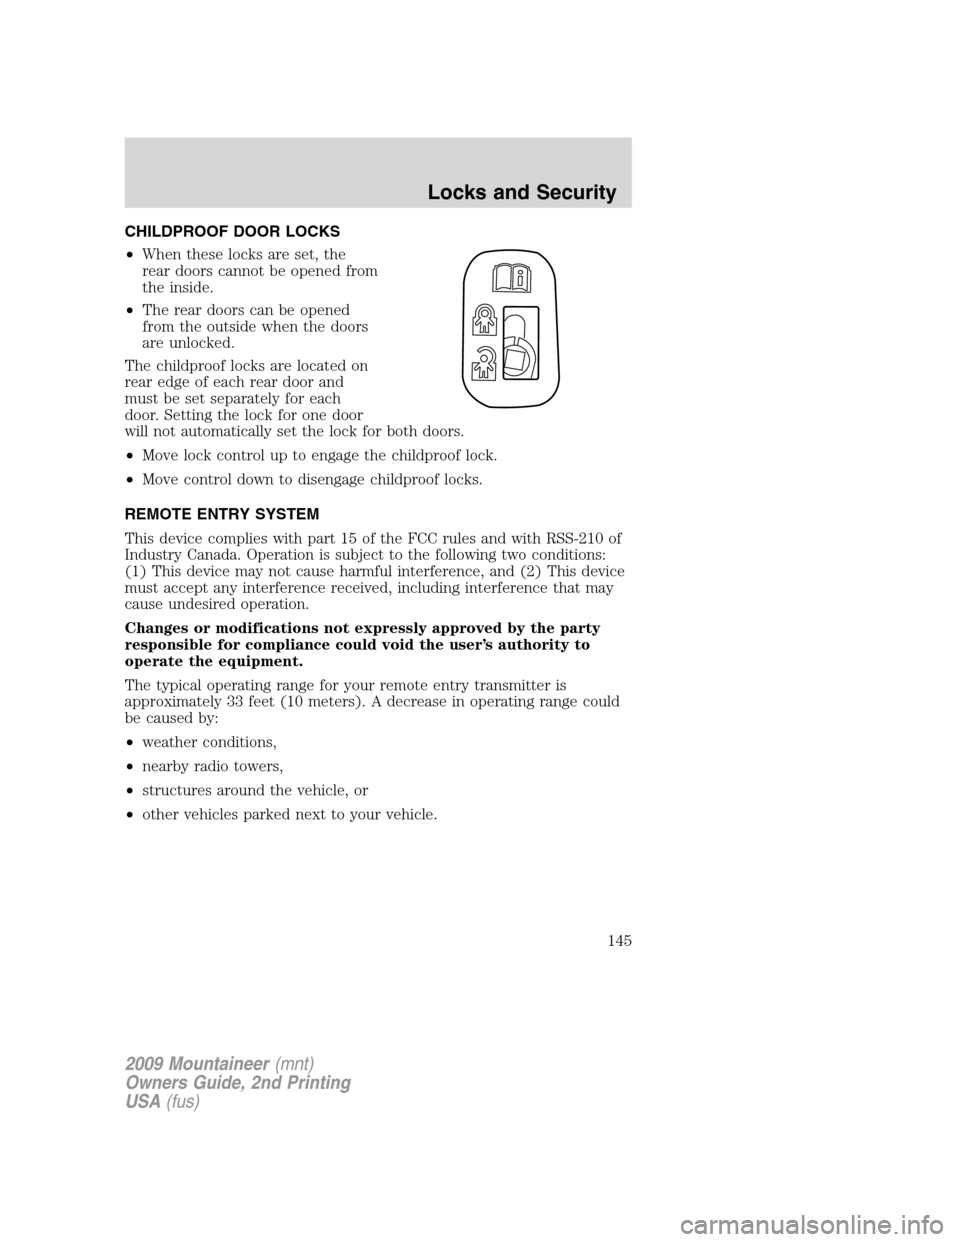
CHILDPROOF DOOR LOCKS
•When these locks are set, the
rear doors cannot be opened from
the inside.
•The rear doors can be opened
from the outside when the doors
are unlocked.
The childproof locks are located on
rear edge of each rear door and
must be set separately for each
door. Setting the lock for one door
will not automatically set the lock for both doors.
•Move lock control up to engage the childproof lock.
•Move control down to disengage childproof locks.
REMOTE ENTRY SYSTEM
This device complies with part 15 of the FCC rules and with RSS-210 of
Industry Canada. Operation is subject to the following two conditions:
(1) This device may not cause harmful interference, and (2) This device
must accept any interference received, including interference that may
cause undesired operation.
Changes or modifications not expressly approved by the party
responsible for compliance could void the user’s authority to
operate the equipment.
The typical operating range for your remote entry transmitter is
approximately 33 feet (10 meters). A decrease in operating range could
be caused by:
•weather conditions,
•nearby radio towers,
•structures around the vehicle, or
•other vehicles parked next to your vehicle.
2009 Mountaineer(mnt)
Owners Guide, 2nd Printing
USA(fus)
Locks and Security
145
Page 146 of 388

The remote entry system allows you
to lock or unlock all vehicle doors
and liftgate, open the liftgate
window without a key and activate
the panic alarm.
The remote entry lock/unlock
feature operates in any ignition
position. The liftgate glass feature
operates as long as the vehicle’s
speed is less than 3 mph (5 km/h).
The panic feature operates with the
key in the off position.
If there is any potential remote keyless entry problem with your vehicle,
ensureALLremote entry transmitters are brought to the authorized
dealer to aid in troubleshooting.
Two step door unlocking
1. Pressand release to unlock the driver’s door.Note:The interior
lamps will illuminate (refer to theIlluminated entryfeature later in this
section) if the control on the overhead lamp isnotset to theoff
position and the perimeter alarm system (if equipped) will deactivate.
2. Press
and release again within three seconds to unlock the
passenger doors, the liftgate and liftgate glass.
The battery saver feature will turn off the interior lamps 30 minutes after
the ignition is turned to the off position.
One step door unlocking
If the one step door unlocking feature is activated, press
and release
once to unlock all of the doors, the liftgate and liftgate glass.Note:The
interior lamps will illuminate (refer to theIlluminated entryfeature
later in this section). If the control on the overhead lamp is in the door
position, the perimeter alarm system (if equipped) will deactivate.
Switching from two step to one step door unlocking
Your vehicle comes with two step unlocking enabled. Unlocking can be
switched between two step and one step door unlocking by pressing and
holding both the
andbuttons simultaneously on the remote entry
transmitter for approximately four seconds. The parklamps will flash
twice to indicate that the vehicle has switched to one step unlocking.
Repeat the procedure to switch back to two-step unlocking.
2009 Mountaineer(mnt)
Owners Guide, 2nd Printing
USA(fus)
Locks and Security
146