instrument cluster Mercury Mountaineer 2010 s User Guide
[x] Cancel search | Manufacturer: MERCURY, Model Year: 2010, Model line: Mountaineer, Model: Mercury Mountaineer 2010Pages: 390, PDF Size: 2.75 MB
Page 21 of 390
FUEL ECONOMY MPG (L/km)
This displays instantaneous fuel economy as a bar graph ranging from↓
poor economy to↑excellent economy.
Your vehicle must be moving to calculate instantaneous fuel economy.
When your vehicle is not moving, this function shows↓, one or no bars
illuminated. Instantaneous fuel economy cannot be reset.
FUEL USED XX.X GAL (L)
This displays the fuel used since last reset. The information displayed
will be in gallons or liters, depending on English/Metric mode state.
DRIVE TIME
Timer displays the trip elapsed drive time.
To operate, do the following:
1. Press and release RESET in order to start the timer.
2. Press and release RESET to pause the timer.
3. Press and hold RESET until the timer resets.
Blank display
Select this function from the info menu to turn the upper two lines of
the message center display off.
System check and vehicle feature customization
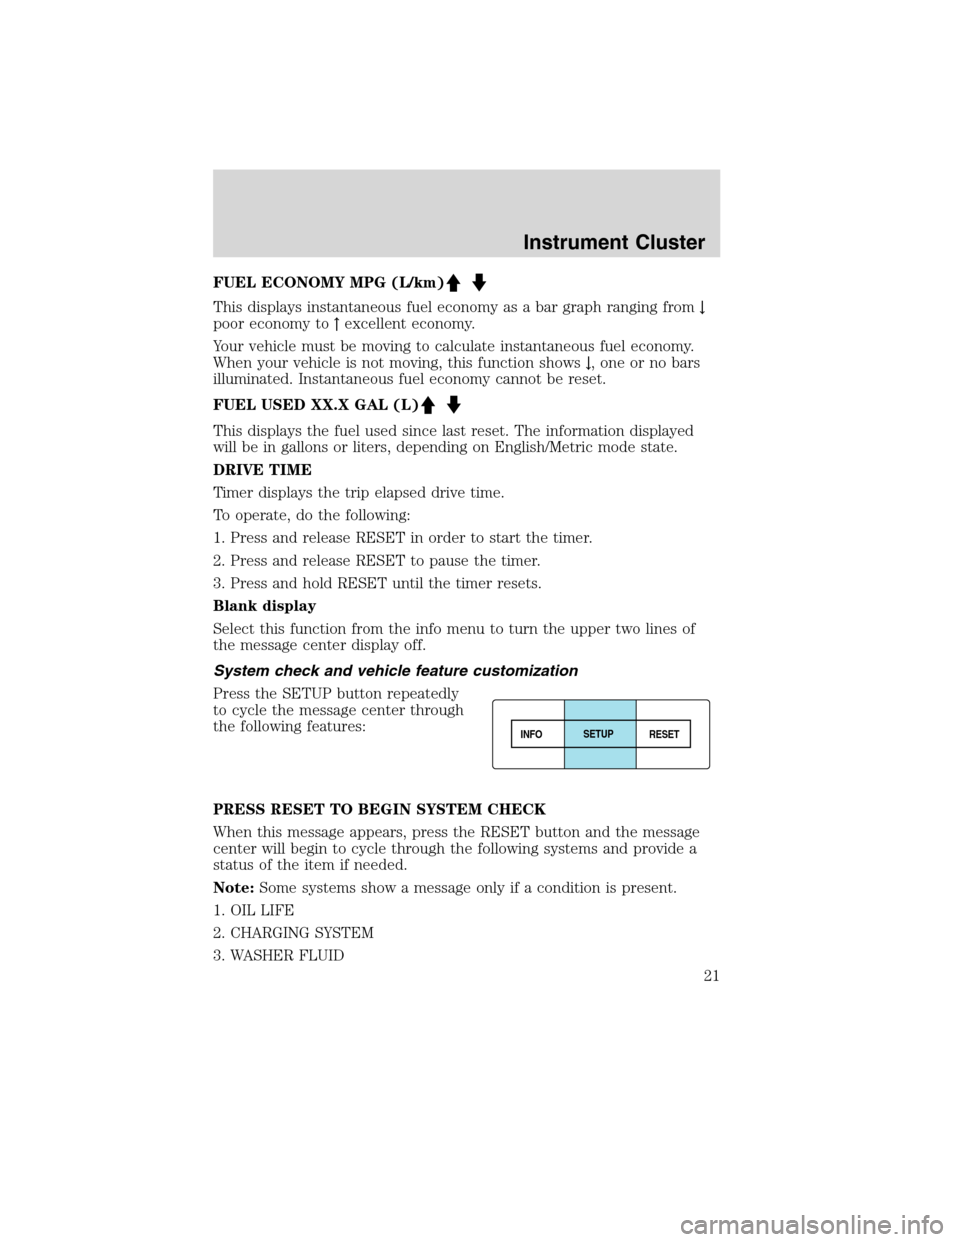
Press the SETUP button repeatedly
to cycle the message center through
the following features:
PRESS RESET TO BEGIN SYSTEM CHECK
When this message appears, press the RESET button and the message
center will begin to cycle through the following systems and provide a
status of the item if needed.
Note:Some systems show a message only if a condition is present.
1. OIL LIFE
2. CHARGING SYSTEM
3. WASHER FLUID
INFOSETUP
RESET
Instrument Cluster
21
2010 Mountaineer(mnt)
Owners Guide(own2002), 1st Printing
USA(fus)
Page 22 of 390
4. DOOR AJAR
5. EXTERIOR LAMP
6. BRAKE FLUID LEVEL
7. PARK BRAKE
8. FUEL LEVEL AND DISTANCE TO EMPTY
AWD AUTO / LOCKED (if equipped)
This feature disables/enables the AWD feature.
Press the RESET button to select the AUTO or LOCKED mode.
Note:When the AWD system is in the locked mode, the 4X4 indicator
will be illuminated.
UNITS
Displays the current units English or Metric.
Press the RESET button to change from English to Metric.
LANGUAGE ENGLISH / SPANISH / FRENCH / JAPANESE /
ARABIC
Note:When entering the SETUP MENU and a non-English language has
been selected, PRESS RESET FOR ENGLISH will be displayed to change
back to English.
Allows you to choose which language the message center will display in.
Selectable languages are English, Spanish, French, Japanese, or Arabic
Waiting four seconds or pressing the RESET button cycles the message
center through each of the language choices.
Press the RESET button to set the language choice.
AUTOLAMP
This feature keeps your headlights on for up to three minutes after the
ignition is switched off.
Press the RESET button to select the new Autolamp delay values of 0,
10, 20, 30, 60, 90, 120 or 180 seconds.
AUTOLOCK
This feature automatically locks all vehicle doors when the vehicle is
shifted into any gear, putting the vehicle in motion.
Press the RESET button to turn autolock on or off.
AUTOUNLOCK
This feature automatically unlocks all vehicle doors when the driver’s
door is opened within 10 minutes of the ignition being turned off.
Instrument Cluster
22
2010 Mountaineer(mnt)
Owners Guide(own2002), 1st Printing
USA(fus)
Page 23 of 390
Press the RESET button to turn autounlock on or off.
RUNNING BRDS (if equipped)
This feature automatically deploys the side running boards for easy
entry/exit from the vehicle or for cleaning.
1. To disable/enable the power running board feature the vehicle must be
in P (Park),
2. To change operation of the power running board feature, select this
function from the SETUP MENU.
3. Press the RESETbutton to select the running boards setting as
follows:
•AUTOMATIC: the running boards will automatically deploy when a
door is opened and automatically retract when the door is closed,
•OUT: the running boards will remain OUT regardless of the doors
being open/closed. For example, use this setting when washing the
vehicle, or
•OFF: the running boards will remain IN regardless of the doors being
open/closed.
EASY ENTRY
This feature automatically moves the driver’s seat backwards for easy
exit/entry from the vehicle.
Press the RESET button to turn the easy entry/exit seat on or off.
PARK AID (if equipped)
This feature sounds a warning tone to warn the driver of obstacles near
the rear bumper, and functions only when R (Reverse) gear is selected.
Press the RESET button to turn the rear park assist on or off.
This function choice will also appear when putting the transmission in
reverse and can be turned on/off at that time.
TRAILER SWAY
This feature uses the electronic stability control to mitigate trailer sway,
Press the RESET button to turn trailer sway on or off.
N, NE, E, SE, S, SW, W, NW (compass display–if equipped)
The compass heading is displayed as one of N, NE, E, SE, S, SW, W and
NW in the message center display.
The compass reading may be affected when you drive near large
buildings, bridges, power lines and powerful broadcast antenna. Magnetic
or metallic objects placed in, on or near the vehicle may also affect
compass accuracy.
Instrument Cluster
23
2010 Mountaineer(mnt)
Owners Guide(own2002), 1st Printing
USA(fus)
Page 24 of 390
Usually, when something affects the compass readings, the compass will
correct itself after a few days of operating your vehicle in normal
conditions. If the compass still appears to be inaccurate, a manual
calibration may be necessary. Refer toRESET FOR ZONE SETTING /
PRESS RESET FOR CALIBRATIONfollowing.
Most geographic areas (zones) have a magnetic north compass point that
varies slightly from the northerly direction on maps. This variation is four
degrees between adjacent zones and will become noticeable as the
vehicle crosses multiple zones. A correct zone setting will eliminate this
error. Refer toRESET FOR ZONE SETTING / PRESS RESET FOR
CALIBRATIONfollowing.
RESET FOR ZONE SETTING
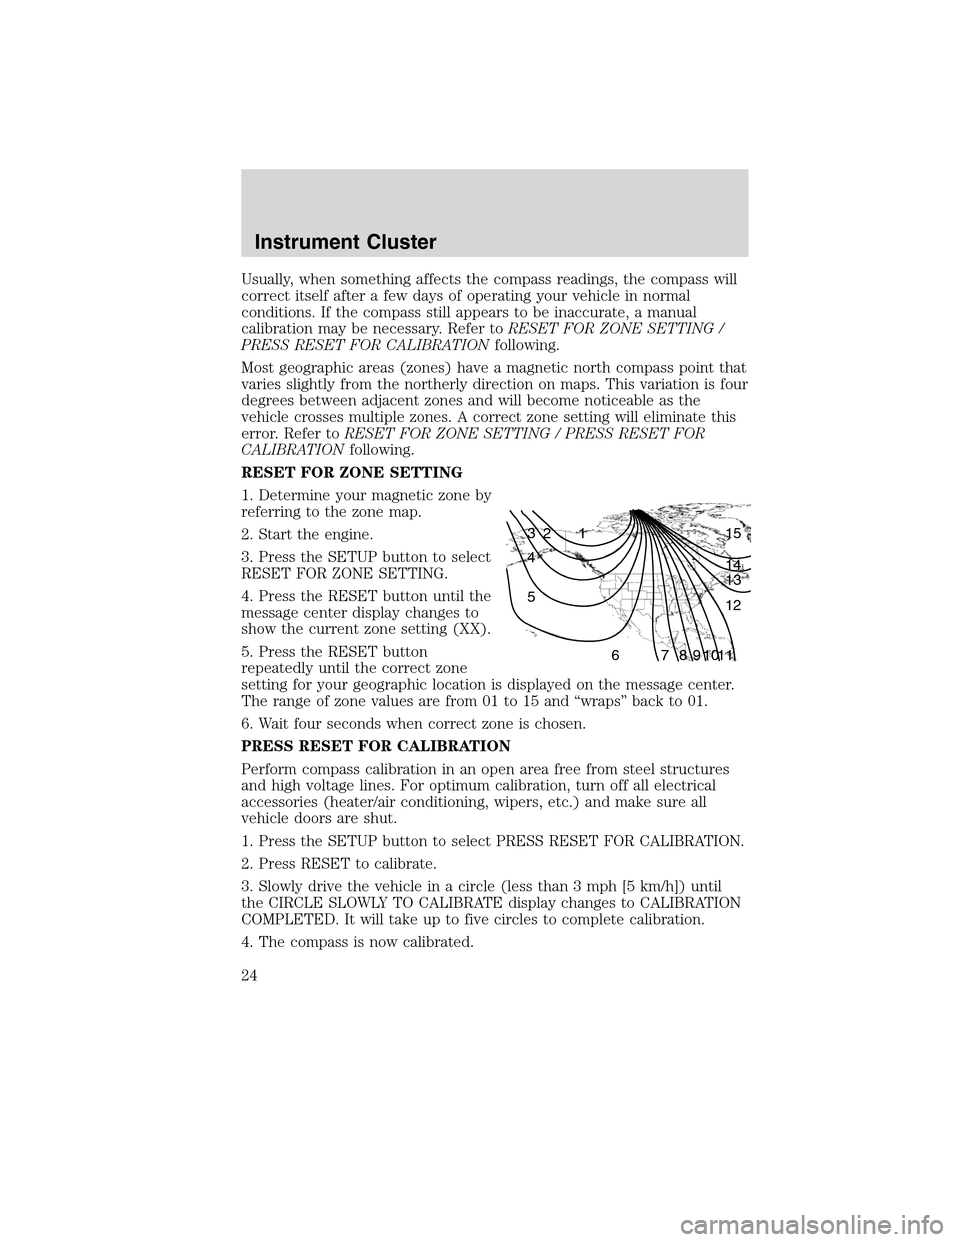
1. Determine your magnetic zone by
referring to the zone map.
2. Start the engine.
3. Press the SETUP button to select
RESET FOR ZONE SETTING.
4. Press the RESET button until the
message center display changes to
show the current zone setting (XX).
5. Press the RESET button
repeatedly until the correct zone
setting for your geographic location is displayed on the message center.
The range of zone values are from 01 to 15 and “wraps” back to 01.
6. Wait four seconds when correct zone is chosen.
PRESS RESET FOR CALIBRATION
Perform compass calibration in an open area free from steel structures
and high voltage lines. For optimum calibration, turn off all electrical
accessories (heater/air conditioning, wipers, etc.) and make sure all
vehicle doors are shut.
1. Press the SETUP button to select PRESS RESET FOR CALIBRATION.
2. Press RESET to calibrate.
3. Slowly drive the vehicle in a circle (less than 3 mph [5 km/h]) until
the CIRCLE SLOWLY TO CALIBRATE display changes to CALIBRATION
COMPLETED. It will take up to five circles to complete calibration.
4. The compass is now calibrated.
1 2 3
4
5
6 7 8 9 101112 13 14 15
Instrument Cluster
24
2010 Mountaineer(mnt)
Owners Guide(own2002), 1st Printing
USA(fus)
Page 25 of 390
![Mercury Mountaineer 2010 s User Guide HOLD RESET IF NEW OIL
To reset the oil monitoring system to 100% after each oil change
(approximately 7,500 miles [12,000 km] or six months) perform the
following:
1. Press RESET button to display HOL Mercury Mountaineer 2010 s User Guide HOLD RESET IF NEW OIL
To reset the oil monitoring system to 100% after each oil change
(approximately 7,500 miles [12,000 km] or six months) perform the
following:
1. Press RESET button to display HOL](/img/33/10968/w960_10968-24.png)
HOLD RESET IF NEW OIL
To reset the oil monitoring system to 100% after each oil change
(approximately 7,500 miles [12,000 km] or six months) perform the
following:
1. Press RESET button to display HOLD RESET IF NEW OIL.
2. Press and hold the RESET button for more than two seconds. Oil life
is set to 100% and OIL CHANGE SET TO 100% is displayed.
Note:To change oil life 100% miles value from 7,500 miles (12,000 km)
or six months to another value, proceed to Step 3.
3. Once OIL LIFE SET TO XXX% is displayed, release and press the
RESET button to change the Oil Life Start Value. Each release and press
will reduce the value by 10%.
Note:Oil Life Start Value of 100% equals 7,500 miles (12,000 km) or six
months. For example, setting Oil Life Start Value to 60% sets the Oil Life
Start Value to 3,000 miles (4,800 km) and 120 days.
System warnings
System warnings alert you to possible problems or malfunctions in your
vehicle’s operating systems.
In the event of a multiple warning situation, the message center will
cycle the display to show all warnings by displaying each one for four
seconds.
The message center will display the last selected feature if there are no
more warning messages.
Types of messages and warnings:
•Some messages will appear briefly to inform you of something you
may need to take action on or be informed of.
•Some messages will appear once and then again when the vehicle is
restarted.
•Some messages will reappear after clearing or being reset if a problem
or condition is still present and needs your attention.
•Some messages can be acknowledged and reset by pressing RESET.
This allows you to use the full message center functionality by clearing
the message.
DOOR AJAR— Displayed when a door is not completely closed.
Instrument Cluster
25
2010 Mountaineer(mnt)
Owners Guide(own2002), 1st Printing
USA(fus)
Page 26 of 390
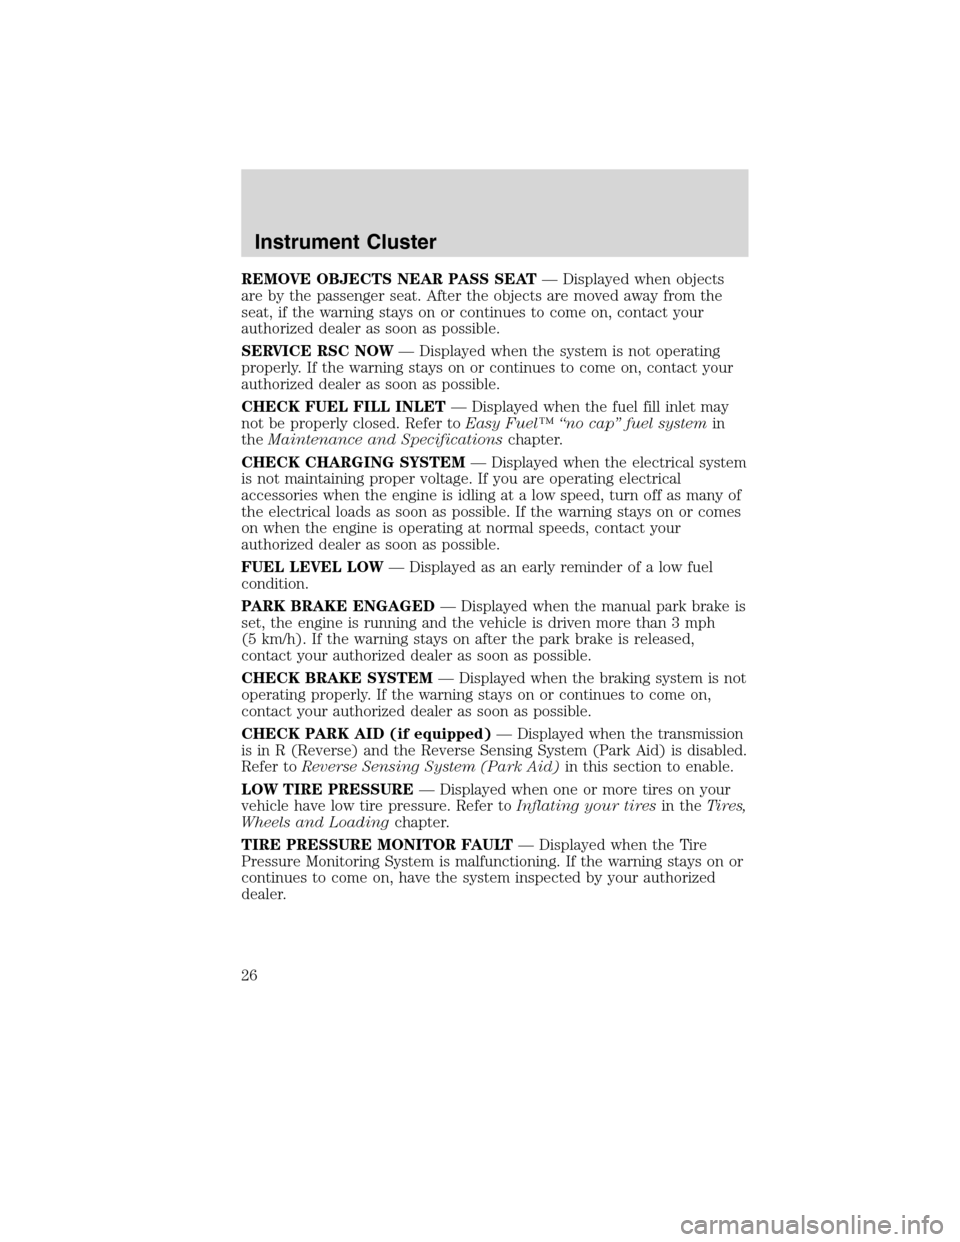
REMOVE OBJECTS NEAR PASS SEAT— Displayed when objects
are by the passenger seat. After the objects are moved away from the
seat, if the warning stays on or continues to come on, contact your
authorized dealer as soon as possible.
SERVICE RSC NOW— Displayed when the system is not operating
properly. If the warning stays on or continues to come on, contact your
authorized dealer as soon as possible.
CHECK FUEL FILL INLET— Displayed when the fuel fill inlet may
not be properly closed. Refer toEasy Fuel™ “no cap” fuel systemin
theMaintenance and Specificationschapter.
CHECK CHARGING SYSTEM— Displayed when the electrical system
is not maintaining proper voltage. If you are operating electrical
accessories when the engine is idling at a low speed, turn off as many of
the electrical loads as soon as possible. If the warning stays on or comes
on when the engine is operating at normal speeds, contact your
authorized dealer as soon as possible.
FUEL LEVEL LOW— Displayed as an early reminder of a low fuel
condition.
PARK BRAKE ENGAGED— Displayed when the manual park brake is
set, the engine is running and the vehicle is driven more than 3 mph
(5 km/h). If the warning stays on after the park brake is released,
contact your authorized dealer as soon as possible.
CHECK BRAKE SYSTEM— Displayed when the braking system is not
operating properly. If the warning stays on or continues to come on,
contact your authorized dealer as soon as possible.
CHECK PARK AID (if equipped)— Displayed when the transmission
is in R (Reverse) and the Reverse Sensing System (Park Aid) is disabled.
Refer toReverse Sensing System (Park Aid)in this section to enable.
LOW TIRE PRESSURE— Displayed when one or more tires on your
vehicle have low tire pressure. Refer toInflating your tiresin theTires,
Wheels and Loadingchapter.
TIRE PRESSURE MONITOR FAULT— Displayed when the Tire
Pressure Monitoring System is malfunctioning. If the warning stays on or
continues to come on, have the system inspected by your authorized
dealer.
Instrument Cluster
26
2010 Mountaineer(mnt)
Owners Guide(own2002), 1st Printing
USA(fus)
Page 27 of 390
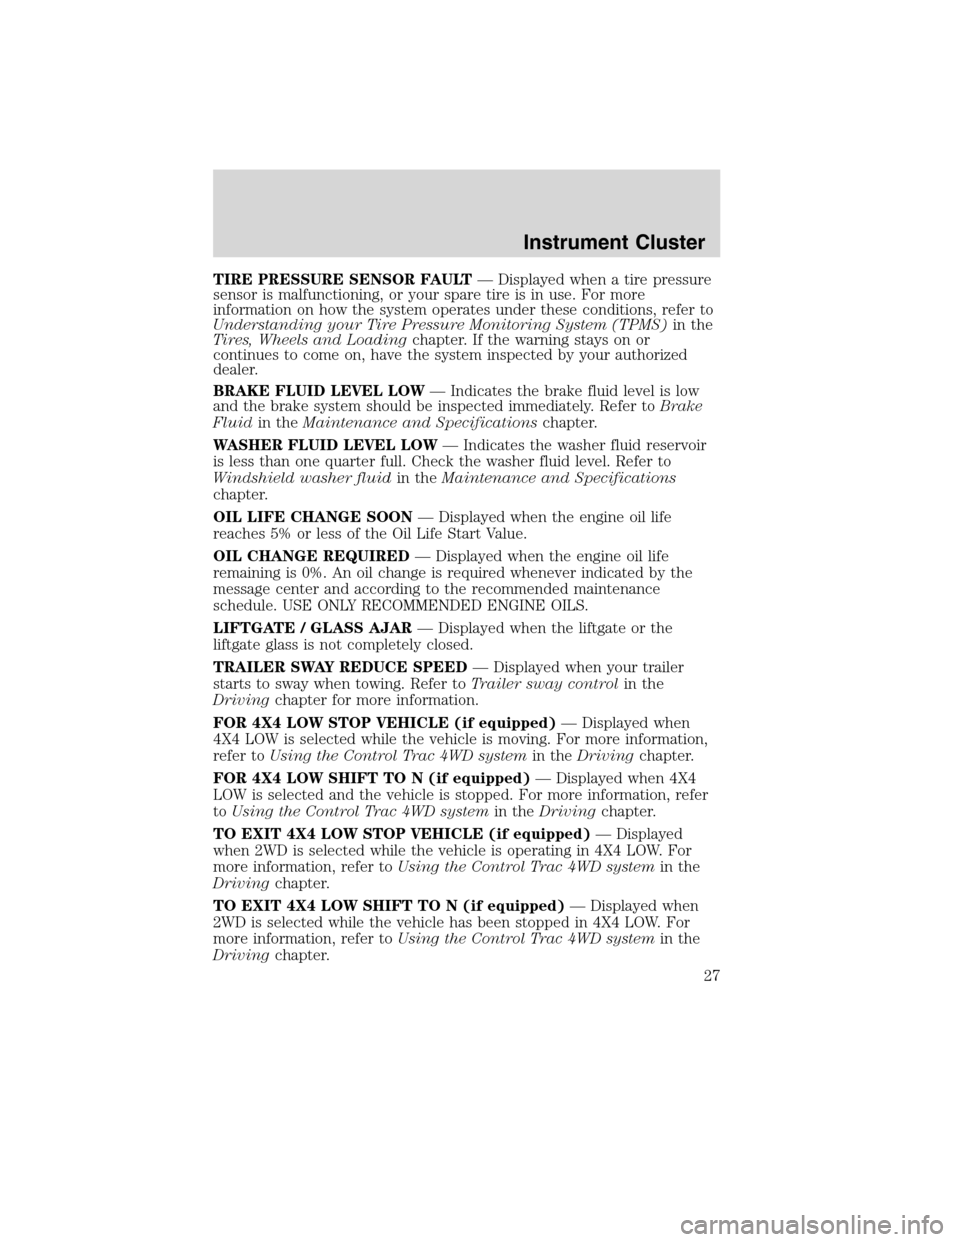
TIRE PRESSURE SENSOR FAULT— Displayed when a tire pressure
sensor is malfunctioning, or your spare tire is in use. For more
information on how the system operates under these conditions, refer to
Understanding your Tire Pressure Monitoring System (TPMS)in the
Tires, Wheels and Loadingchapter. If the warning stays on or
continues to come on, have the system inspected by your authorized
dealer.
BRAKE FLUID LEVEL LOW— Indicates the brake fluid level is low
and the brake system should be inspected immediately. Refer toBrake
Fluidin theMaintenance and Specificationschapter.
WASHER FLUID LEVEL LOW— Indicates the washer fluid reservoir
is less than one quarter full. Check the washer fluid level. Refer to
Windshield washer fluidin theMaintenance and Specifications
chapter.
OIL LIFE CHANGE SOON— Displayed when the engine oil life
reaches 5% or less of the Oil Life Start Value.
OIL CHANGE REQUIRED— Displayed when the engine oil life
remaining is 0%. An oil change is required whenever indicated by the
message center and according to the recommended maintenance
schedule. USE ONLY RECOMMENDED ENGINE OILS.
LIFTGATE / GLASS AJAR— Displayed when the liftgate or the
liftgate glass is not completely closed.
TRAILER SWAY REDUCE SPEED— Displayed when your trailer
starts to sway when towing. Refer toTrailer sway controlin the
Drivingchapter for more information.
FOR 4X4 LOW STOP VEHICLE (if equipped)— Displayed when
4X4 LOW is selected while the vehicle is moving. For more information,
refer toUsing the Control Trac 4WD systemin theDrivingchapter.
FOR 4X4 LOW SHIFT TO N (if equipped)— Displayed when 4X4
LOW is selected and the vehicle is stopped. For more information, refer
toUsing the Control Trac 4WD systemin theDrivingchapter.
TO EXIT 4X4 LOW STOP VEHICLE (if equipped)— Displayed
when 2WD is selected while the vehicle is operating in 4X4 LOW. For
more information, refer toUsing the Control Trac 4WD systemin the
Drivingchapter.
TO EXIT 4X4 LOW SHIFT TO N (if equipped)— Displayed when
2WD is selected while the vehicle has been stopped in 4X4 LOW. For
more information, refer toUsing the Control Trac 4WD systemin the
Drivingchapter.
Instrument Cluster
27
2010 Mountaineer(mnt)
Owners Guide(own2002), 1st Printing
USA(fus)
Page 117 of 390

POWER ADJUSTABLE FOOT PEDALS (IF EQUIPPED)
The accelerator and brake pedal
should only be adjusted when the
vehicle is stopped and the gearshift
lever is in the P (Park) position.
Press and hold the rocker control to
adjust accelerator and brake pedal
toward you or away from you.
WARNING:Never adjust the accelerator and brake pedal with
feet on the pedals while the vehicle is moving.
POWER DEPLOYABLE RUNNING BOARDS (IF EQUIPPED)
Deployable running boards (DRB) automatically move when the doors
are opened to assist entering and exiting the vehicle.
Automatic power deploy:
•The running boards will extend
down and out when the doors are
opened.
Automatic power stow:
•The running boards will return to
the stowed position when the
doors are closed. There will be a
two second delay before the
running boards move in to the
stowed position.
Manual power deploy:
To manually operate the running boards, refer toMessage centerin the
Instrument Clusterchapter.
•This feature can manually set the running boards in the deployed
(OUT) position for access to the roof.
•When running boards are manually set in the deployed position, the
boards will return to the stowed position and enter automatic mode
when the vehicle speed exceeds 5 mph (8 km/h).
Enable/disable:
To enable/disable the power running board feature, refer toMessage
centerin theInstrument Clusterchapter.
Driver Controls
117
2010 Mountaineer(mnt)
Owners Guide(own2002), 1st Printing
USA(fus)
Page 119 of 390

Setting speed control
The controls for using your speed
control are located on the steering
wheel for your convenience.
1. Press the ON control and release
it.
2. Accelerate to the desired speed.
3. Press the SET + control and
release it.
4. Take your foot off the accelerator
pedal.
5. The indicator light
on the
instrument cluster will turn on.
Note:
•Vehicle speed may vary momentarily when driving up and down a
steep hill.
•If the vehicle speed increases above the set speed on a downhill, you
may want to apply the brakes to reduce the speed.
•If the vehicle speed decreases more than 10 mph (16 km/h) below
your set speed on an uphill, your speed control will disengage.
Driver Controls
119
2010 Mountaineer(mnt)
Owners Guide(own2002), 1st Printing
USA(fus)
Page 143 of 390

Keyless entry keypad procedure
1. Turn the ignition to the off position.
2. Close all doors, the liftgate and liftgate window.
3. Enter 5–digit entry code
4. Press and hold the 3•4. While holding the 3•4pressthe7•8.
5. Release the 7•8.
6. Release the 3•4.
The user should receive a horn chirp to indicate the system has been
disabled or a chirp followed by a honk to indicate the system has been
enabled.
Message center procedure
For information on activating/deactivating the autolock feature using the
vehicle’s message center (if equipped), refer toMessage center
information in theInstrument clusterchapter.
Autounlock
The autounlock feature will unlock all the doors when:
•the ignition is in the on position, all the doors are closed, and the
vehicle has been in motion at a speed greater than 12 mph (20 km/h);
•the vehicle has then come to a stop and the ignition is turned to the
off or accessory position; and
•the driver door is opened within 10 minutes of the ignition being
transitioned to the off or accessory position.
Note:The doors will not autounlock if the vehicle has been
electronically locked before the driver door is opened.
Deactivating/activating autounlock
Your vehicle comes with the autounlock feature activated. There are four
methods to enable/disable this feature:
•Through your authorized dealer, or
•Performing the power door lock control procedure, or
•Performing the keyless entry keypad (if equipped) procedure, or
•Performing the message center (if equipped) procedure.
Before following the activation or deactivation procedures, make sure
that the anti-theft system is not armed, ignition is in the off position, and
all vehicle doors, liftgate and liftgate window are closed.
Locks and Security
143
2010 Mountaineer(mnt)
Owners Guide(own2002), 1st Printing
USA(fus)