service Mercury Sable 1997 s User Guide
[x] Cancel search | Manufacturer: MERCURY, Model Year: 1997, Model line: Sable, Model: Mercury Sable 1997Pages: 167, PDF Size: 1.59 MB
Page 81 of 167
BRAKES
Your brakes are self-adjusting. Refer to the ªService
Guideº for maintenance scheduling.
Anti-lock brake system (ABS) (if equipped)
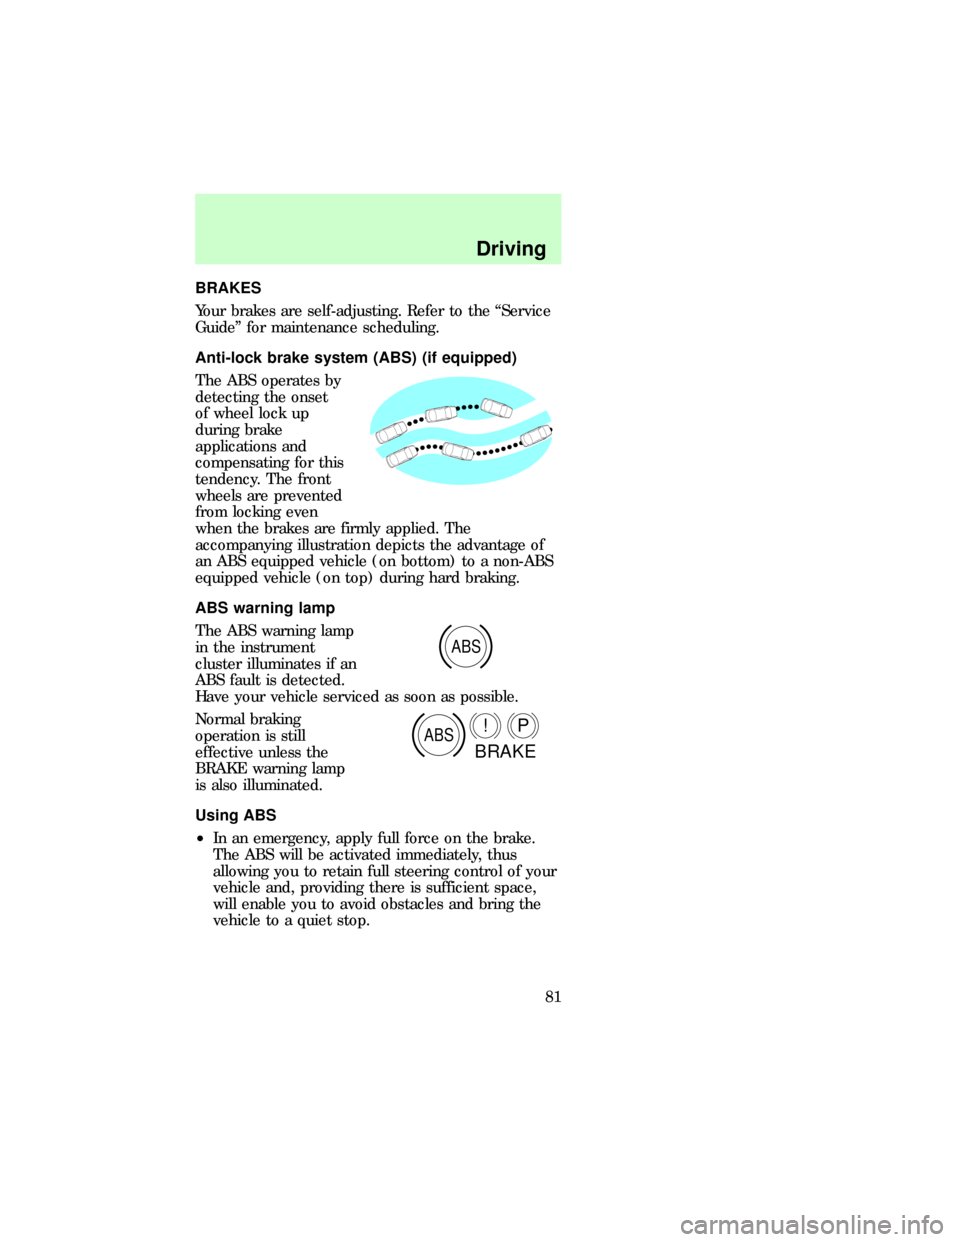
The ABS operates by
detecting the onset
of wheel lock up
during brake
applications and
compensating for this
tendency. The front
wheels are prevented
from locking even
when the brakes are firmly applied. The
accompanying illustration depicts the advantage of
an ABS equipped vehicle (on bottom) to a non-ABS
equipped vehicle (on top) during hard braking.
ABS warning lamp
The ABS warning lamp
in the instrument
cluster illuminates if an
ABS fault is detected.
Have your vehicle serviced as soon as possible.
Normal braking
operation is still
effective unless the
BRAKE warning lamp
is also illuminated.
Using ABS
²In an emergency, apply full force on the brake.
The ABS will be activated immediately, thus
allowing you to retain full steering control of your
vehicle and, providing there is sufficient space,
will enable you to avoid obstacles and bring the
vehicle to a quiet stop.
ABS
ABSP!
BRAKE
com_brakes.01
com_abs.01
dno_ABS-warning-light
com_using_abs.01
Driving
81
Page 94 of 167

Driving while you tow
Do not drive faster than 72 km/h (45 mph) with any
weight on the trailer while towing on a hot day or in
hilly country.
Cruise control may shut off if you are towing on
long, steep grades.
When towing a trailer:
²Use 2 (Second) (if equipped) or 1 (First) when
towing up or down steep hills. This will eliminate
excessive downshifting and upshifting for
optimum fuel economy and transaxle cooling.
²Anticipate stops and brake gradually.
Servicing after towing
If you tow a trailer for long distances, your vehicle
will require more frequent service intervals. Refer to
theService Guidefor more information.
Trailer towing tips
²Practice turning, stopping and backing up in an
area before starting on a trip to get the feel of the
vehicle trailer combination. When turning, drive
slightly beyond the normal turning point so the
trailer wheels will clear curbs and other obstacles.
²Allow more room for stopping with a trailer
attached.
²The trailer tongue weight should be 10±15% of
the loaded trailer weight.
²After you have traveled 80 km (50 miles),
thoroughly check your hitch, electrical
connections and trailer wheel lug nuts.
²When stopped in traffic for long periods of time in
hot weather, place the gearshift in P (Park) and
increase idle speed. This aids engine cooling and
air conditioner efficiency.
²Vehicles with trailers should not be parked on a
grade. If you must park on a grade, place wheel
chocks under the trailer's wheels.
dno_towing-tips
com_fuel_consumption.01
Driving
94
Page 97 of 167

If you have a sedan,
the fuel pump shut-off
switch is located on
the right side of the
trunk behind the trunk
liner.
If you have a wagon,
the switch is located
behind the service
panel on the right side
of the cargo area.
FUSES AND RELAYS
Fuses
If electrical
components in the
vehicle are not
working, a fuse may
have blown. Blown fuses are identified by a broken
wire. Check the appropriate fuses before replacing
any electrical components.
Always replace a fuse with one that has the
specified amperage rating. Using a fuse with
a higher amperage rating can cause severe wire
damage and could start a fire.
15
dno_fuses-and-relays
dno_fuse
dno_fuse-amp-rating
Roadside emergencies
97
Page 112 of 167
REMOVING THE JUMPER CABLES
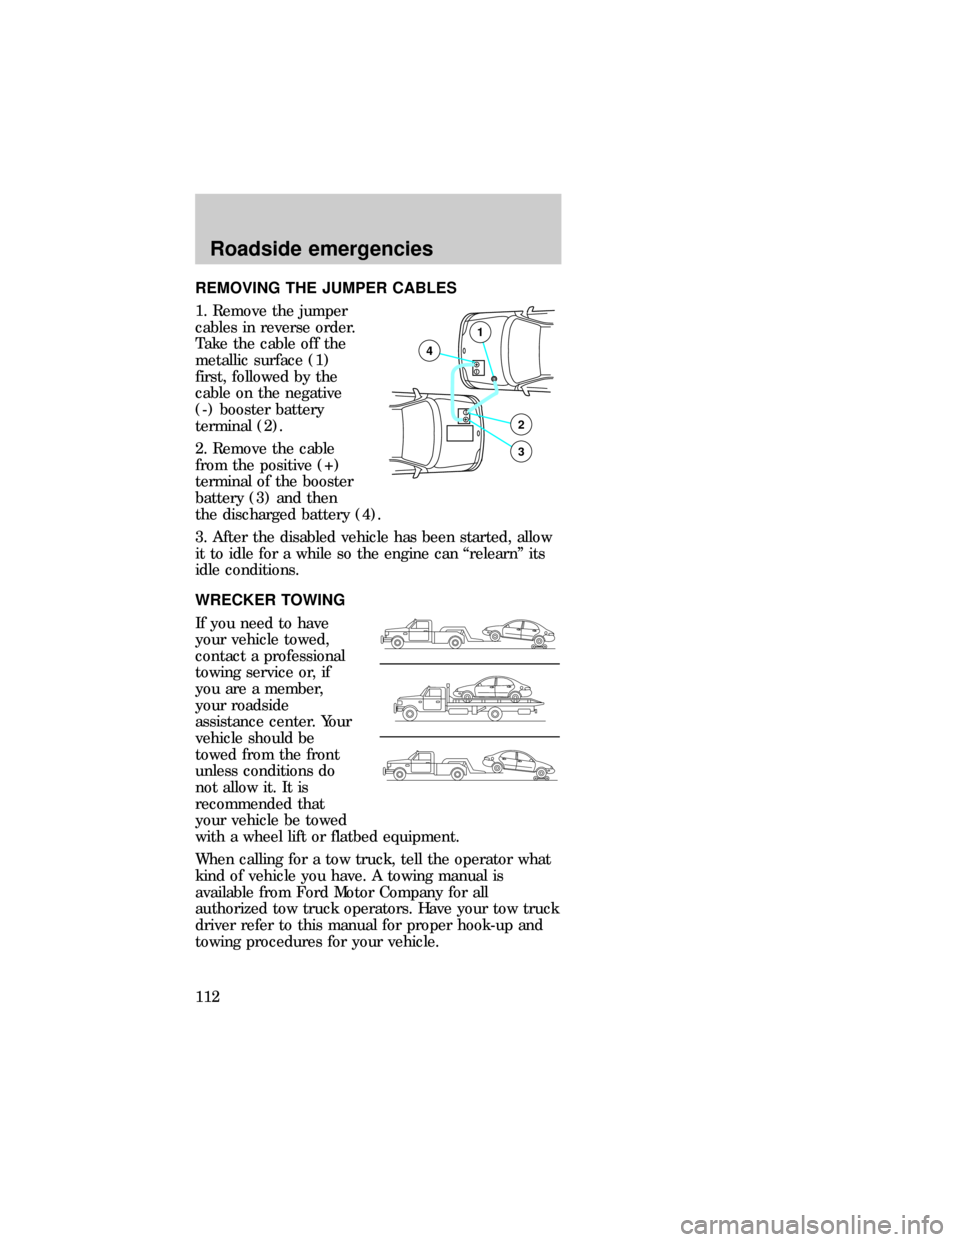
1. Remove the jumper
cables in reverse order.
Take the cable off the
metallic surface (1)
first, followed by the
cable on the negative
(-) booster battery
terminal (2).
2. Remove the cable
from the positive (+)
terminal of the booster
battery (3) and then
the discharged battery (4).
3. After the disabled vehicle has been started, allow
it to idle for a while so the engine can ªrelearnº its
idle conditions.
WRECKER TOWING
If you need to have
your vehicle towed,
contact a professional
towing service or, if
you are a member,
your roadside
assistance center. Your
vehicle should be
towed from the front
unless conditions do
not allow it. It is
recommended that
your vehicle be towed
with a wheel lift or flatbed equipment.
When calling for a tow truck, tell the operator what
kind of vehicle you have. A towing manual is
available from Ford Motor Company for all
authorized tow truck operators. Have your tow truck
driver refer to this manual for proper hook-up and
towing procedures for your vehicle.
+–
+–2
3
4
1
dno_towing
dno_towing
Roadside emergencies
112
Page 114 of 167
SERVICE RECOMMENDATIONS
To help you service your vehicle:
²We highlight do-it-yourself items in the engine
compartment for easy location.
²As possible, we design parts that can be replaced
without tools.
²We provide you with a ªService Guideº which
makes tracking routine service for your vehicle
easy.
If your vehicle requires professional service, your
dealership can provide necessary parts and service.
Check your ªWarranty Information Bookletº to find
out which parts and services are covered.
Use only recommended fuels, lubricants, fluids and
service parts conforming to specifications. Motorcraft
parts are designed and built to provide the best
performance in your vehicle.
Precautions when servicing your vehicle
Be especially careful when inspecting or servicing
your vehicle. Here are some general precautions for
your safety:
²Do not work on a hot engine.
The cooling fan is automatic and may come
on at any time. Always disconnect the
negative terminal of the battery before working
near the fan.
²If you must work with the engine running, avoid
wearing loose clothing or jewelry that could get
caught in moving parts. Take precautions with
long hair.
²Do not work on a vehicle with the engine running
in an enclosed space, unless you are sure you
have enough ventilation.
com_service_recommendations.01
com_precautions_servicing.01
Maintenance and care
114
Page 118 of 167

9. Power steering fluid reservoir
CHECKING AND ADDING ENGINE OIL
Checking the engine oil
Check the engine oil each time you fuel your
vehicle.
To check the oil:
1. Make sure the vehicle is on level ground. If the
engine is warm, turn the engine off and wait a few
minutes for the oil to drain into the oil pan.
2. Set the parking brake and ensure the gearshift is
securely latched in P (Park).
3. Open the hood. Protect yourself from engine heat.
4. Locate and carefully
remove the engine oil
dipstick.
5. Wipe the dipstick clean. Insert the dipstick fully,
then remove it again. The oil level should be in the
range shown on the dipstick.
6. If the oil level is below the MIN line or the ADD 1
QUART line, add oil as necessary. If the oil level is
beyond the MAX or FULL line, engine damage or
high engine oil consumption may occur and some oil
must be removed from the engine by a service
technician.
7. Put the dipstick back in and ensure it is fully
seated.
Adding engine oil
1. Check the engine oil. For instructions, refer to
Checking the engine oilin this chapter.
ADD 1 QTFULL
dno_engine-oils
dno_check-oil
dno_add-oil
Maintenance and care
118
Page 119 of 167
2. If the fluid level is not within the normal range,
add only certified engine oil of the preferred
viscosity. Add engine oil through the oil filler cap.
Remove the filler cap and use a funnel to pour oil in
the opening.
3. Recheck the oil level. Make sure the oil level is
not above the MAX or FULL mark on the dipstick.
ENGINE OIL RECOMMENDATIONS
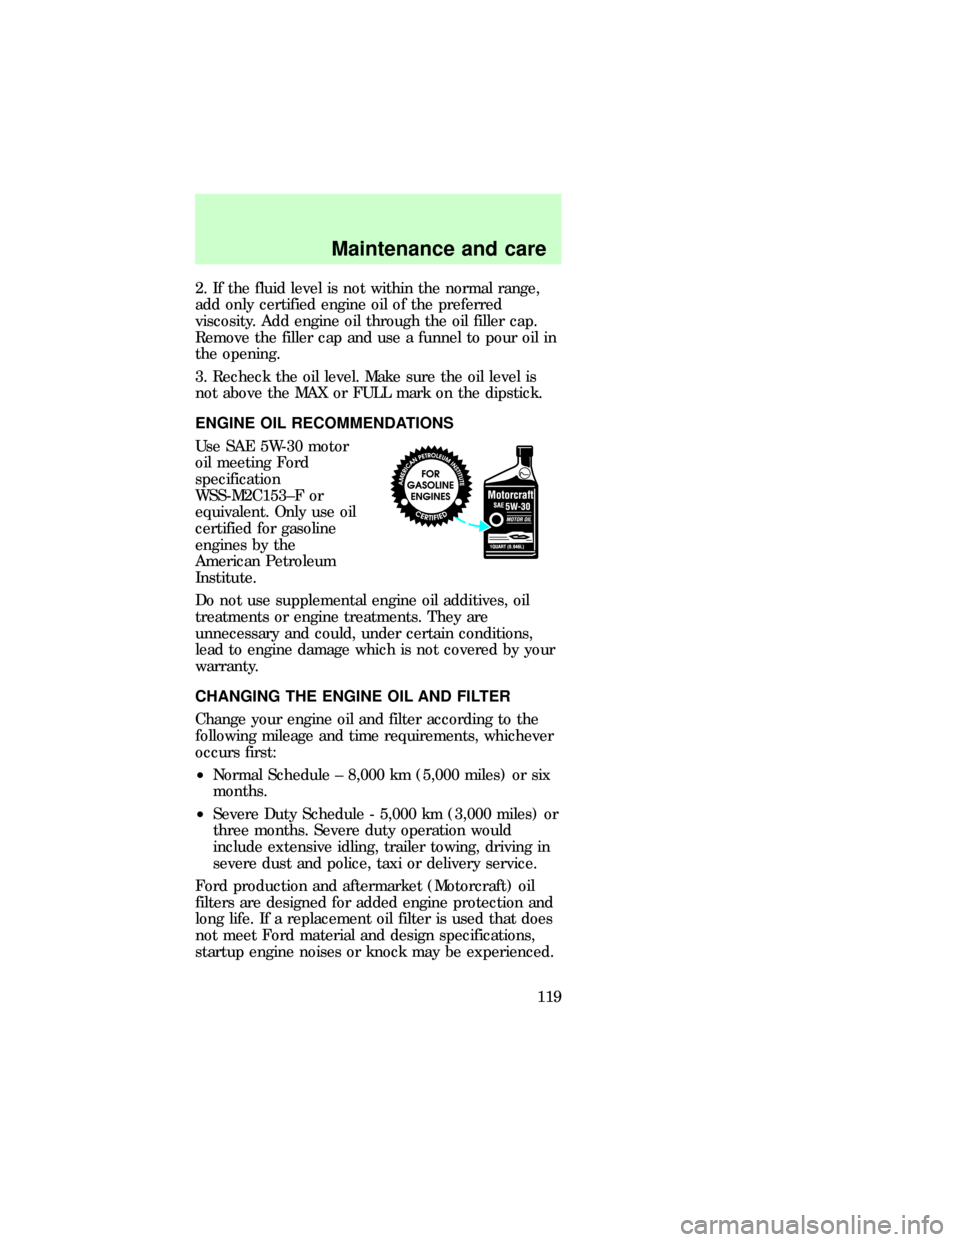
Use SAE 5W-30 motor
oil meeting Ford
specification
WSS-M2C153±F or
equivalent. Only use oil
certified for gasoline
engines by the
American Petroleum
Institute.
Do not use supplemental engine oil additives, oil
treatments or engine treatments. They are
unnecessary and could, under certain conditions,
lead to engine damage which is not covered by your
warranty.
CHANGING THE ENGINE OIL AND FILTER
Change your engine oil and filter according to the
following mileage and time requirements, whichever
occurs first:
²Normal Schedule ± 8,000 km (5,000 miles) or six
months.
²Severe Duty Schedule - 5,000 km (3,000 miles) or
three months. Severe duty operation would
include extensive idling, trailer towing, driving in
severe dust and police, taxi or delivery service.
Ford production and aftermarket (Motorcraft) oil
filters are designed for added engine protection and
long life. If a replacement oil filter is used that does
not meet Ford material and design specifications,
startup engine noises or knock may be experienced.
dno_oil-recommendation
dno_oil-and-filter-change
Maintenance and care
119
Page 125 of 167
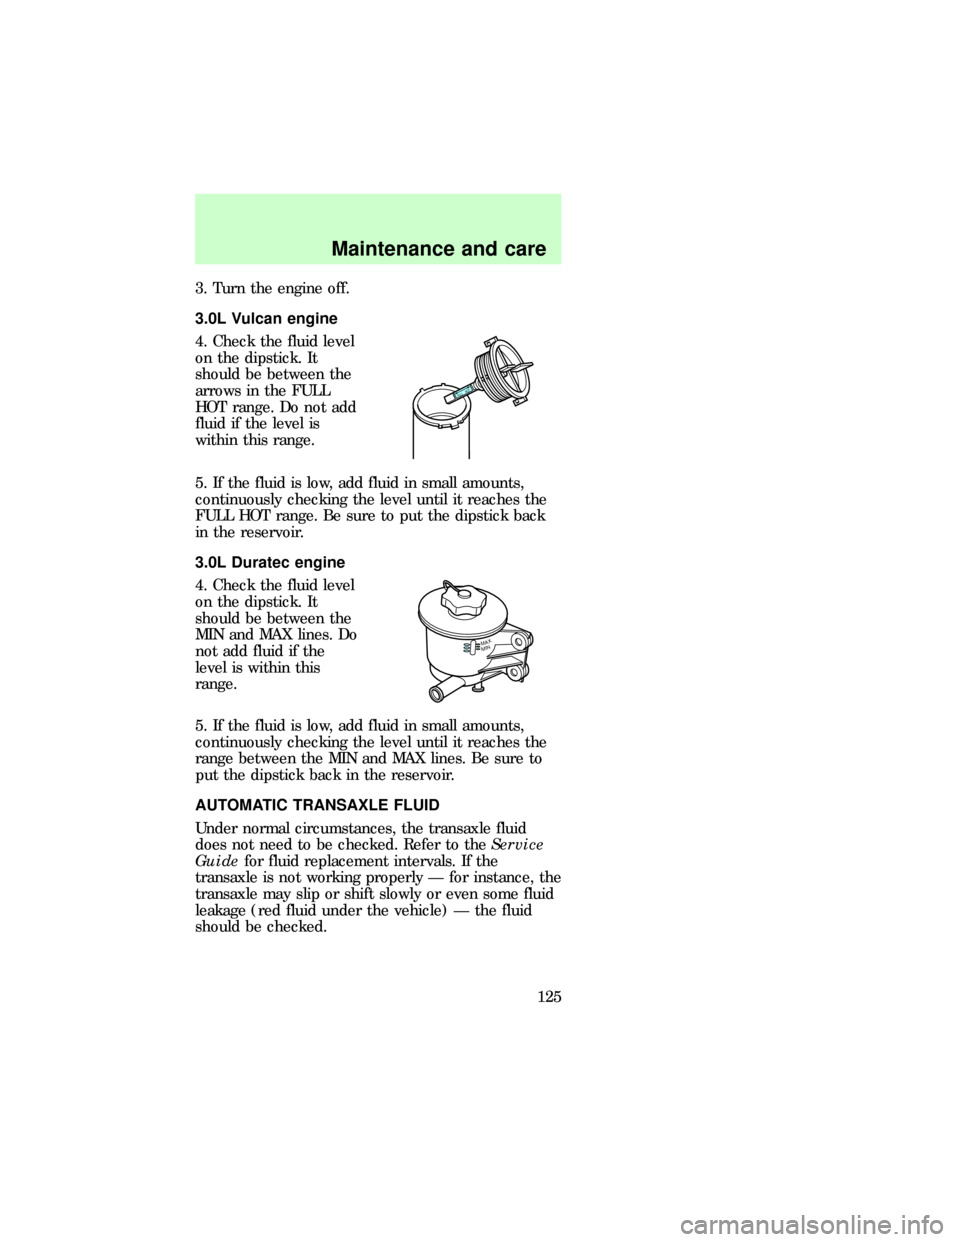
3. Turn the engine off.
3.0L Vulcan engine
4. Check the fluid level
on the dipstick. It
should be between the
arrows in the FULL
HOT range. Do not add
fluid if the level is
within this range.
5. If the fluid is low, add fluid in small amounts,
continuously checking the level until it reaches the
FULL HOT range. Be sure to put the dipstick back
in the reservoir.
3.0L Duratec engine
4. Check the fluid level
on the dipstick. It
should be between the
MIN and MAX lines. Do
not add fluid if the
level is within this
range.
5. If the fluid is low, add fluid in small amounts,
continuously checking the level until it reaches the
range between the MIN and MAX lines. Be sure to
put the dipstick back in the reservoir.
AUTOMATIC TRANSAXLE FLUID
Under normal circumstances, the transaxle fluid
does not need to be checked. Refer to theService
Guidefor fluid replacement intervals. If the
transaxle is not working properly Ð for instance, the
transaxle may slip or shift slowly or even some fluid
leakage (red fluid under the vehicle) Ð the fluid
should be checked.
FULL HOT
MINMAX
dno_steers
sab_steer
dno_transaxle-fluids
dno_checking-trans
Maintenance and care
125
Page 131 of 167

one and one-half (1 1/2) times as well on the
government course as a tire grade 100. The relative
performance of tires depends upon the actual
conditions of their use, however, and may depart
significantly from the norm due to variations in
driving habits, service practices, and differences in
road characteristics and climate.
Traction A B C
The traction grades, from highest to lowest are A, B,
and C, and they represent the tire's ability to stop
on wet pavement as measured under test surfaces of
asphalt and concrete. A tire marked C may have
poor traction performance. Warning: The traction
grade assigned to this tire is based on braking
(straightahead) traction tests and does not include
cornering (turning) traction.
Temperature A B C
The temperature grades are A (the highest), B, and
C, representing the tire's resistance to the
generation of heat and its ability to dissipate heat
when tested under controlled conditions on a
specified indoor laboratory test wheel. Sustained
high temperature can cause the material of the tire
to degenerate and reduce tire life, and excessive
temperature can lead to sudden tire failure. The
grade C corresponds to a level of performance which
all passenger car tires must meet under the Federal
Motor Vehicle Safety Standard No. 109. Grades B
and A represent higher levels of performance on the
laboratory test wheel than the minimum required by
law.
com_traction_abc.01
com_temperature_abc.01
Maintenance and care
131
Page 132 of 167

The temperature grade for this tire is
established for a tire that is properly inflated
and not overloaded. Excessive speed,
underinflation, or excessive loading, either
separately or in combination, can cause heat
buildup and possible tire failure.
SERVICING YOUR TIRES
Checking the tire pressure
²Use an accurate tire pressure gauge.
²Check the tire pressure when tires are cold, after
the vehicle has been parked for at least one hour
or has been driven less than 5 km (3 miles).
²Adjust tire pressure to recommended
specifications found on the Safety Compliance
Certification Label.
Improperly inflated tires can affect vehicle
handling and can fail suddenly, possibly
resulting in loss of vehicle control.
Tire rotation
Because your vehicle's tires perform different jobs,
they often wear differently. To make sure your tires
wear evenly and last longer, rotate them as indicated
in theService Guide. If you notice that the tires
wear unevenly, have them checked.
com_service.01
dno_checking-tires
dno_rotate-tires
dno_replace-tires
Maintenance and care
132