key Mercury Sable 1997 s Owner's Guide
[x] Cancel search | Manufacturer: MERCURY, Model Year: 1997, Model line: Sable, Model: Mercury Sable 1997Pages: 167, PDF Size: 1.59 MB
Page 56 of 167

To attach the shoulder
belt to the lap belt, pull
the shoulder belt out
from the retractor in
the seatback and insert
into the lap belt
connecting pin into the
wide end of the key
slot on the shoulder
belt. Pull the
connecting pin into the
narrow end of the key
slot until you hear a
snap and feel it latch.
Make sure the shoulder
belt is securely
fastened to the lap belt
by pulling up on the shoulder belt.
Lap belts
The lap belts in the center front seating position (if
equipped) and center rear seating position (wagon)
do not adjust automatically. You must adjust them to
fit snugly and low as possible around your hips. Do
not wear the lap belt around your waist.
Make sure you insert the tongue into the correct
buckle. If you need to lengthen the belt, turn the
tongue at a right angle to the belt and pull across
your lap until it reaches the buckle. If you need to
tighten the belt, pull the loose end of the belt
through the tongue until it is snugly across the hips.
Shorten and fasten the belt when not in use.
LAP BELTS
The lap belt in the center rear seating position
(wagon) does not adjust automatically. You must
adjust it to fit snugly and low as possible around
your hips. Do not wear the lap belt around your
waist.
dno_lapbelts
dno_lapbelts.01
Seating and safety restraints
56
Page 59 of 167

safety belt assembly by adding a safety belt
extension assembly (part number 611C22). Safety
belt extension assemblies can be obtained from your
dealer at no cost. This assembly is not for use in the
wagon's rear-facing seat.
Use only extensions manufactured by the same
supplier as the safety belt. Manufacturer
identification is located at the end of the webbing on
the label. Also, use the safety belt extension only if
the safety belt is too short for you when fully
extended. Do not use extensions to change the fit of
the shoulder belt across the torso.
Safety belt warning light and indicator chime
The seat belt warning light illuminates in the
instrument cluster and a chime sounds to remind
the occupants to fasten their safety belts.
Conditions of operation
If... Then...
The driver's safety
belt is not buckled
before the ignition
key is turned to ON...The safety belt indicator
illuminates for one to two
minutes and the warning
chime sounds for four to
eight seconds.
The driver's side
safety belt is buckled
while the indicator
light is illuminated
and the warning
chime is sounding...The safety belt indicator
light and warning chime
turn off.
The driver's safety
belt is buckled before
the ignition key is
turned to ON...The safety belt warning
light and indicator chime
remain off.
dno_warning-light-and-chime
dno_operation
Seating and safety restraints
59
Page 76 of 167
PREPARING TO START THE VEHICLE
Engine starting is controlled by the spark ignition
system. This system meets all Canadian
Interference-Causing Equipment standard
requirements regulating the impulse electrical field
strength of radio noise.
When starting a fuel-injected engine, avoid pressing
the accelerator before or during starting. Only use
the accelerator when you have difficulty starting the
engine. For more information on starting the vehicle,
refer toStarting the vehiclein this chapter.
Before starting the vehicle:
1. Make sure all vehicle occupants have buckled
their safety belts. For more information on safety
belts and their proper usage, refer to theSeating
and safety restraintschapter.
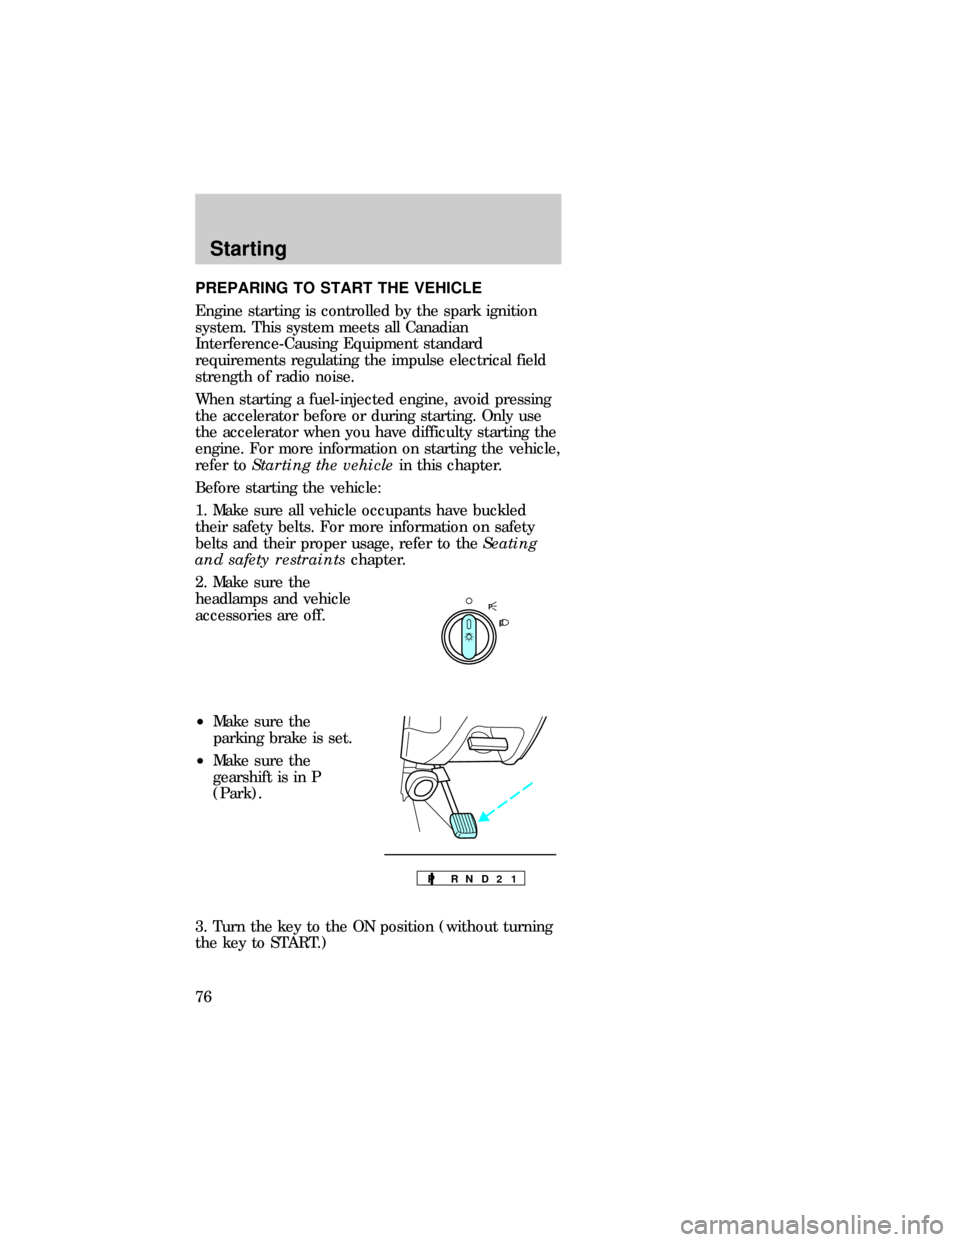
2. Make sure the
headlamps and vehicle
accessories are off.
²Make sure the
parking brake is set.
²Make sure the
gearshift is in P
(Park).
3. Turn the key to the ON position (without turning
the key to START.)
P
P R N D 2 1
dno_preparing_start
Starting
76
Page 78 of 167
Do not park, idle, or drive your vehicle in
dry grass or other dry ground cover. The
emission system heats up the engine compartment
and exhaust system, which can start a fire.
Do not start your vehicle in a closed garage
or in other enclosed areas. Exhaust fumes
can be toxic. Always open the garage door before
you start the engine. SeeGuarding against
exhaust fumesin this chapter for more
instructions.
If you smell exhaust fumes inside your
vehicle, have your dealer inspect your
vehicle immediately. Do not drive if you smell
exhaust fumes.
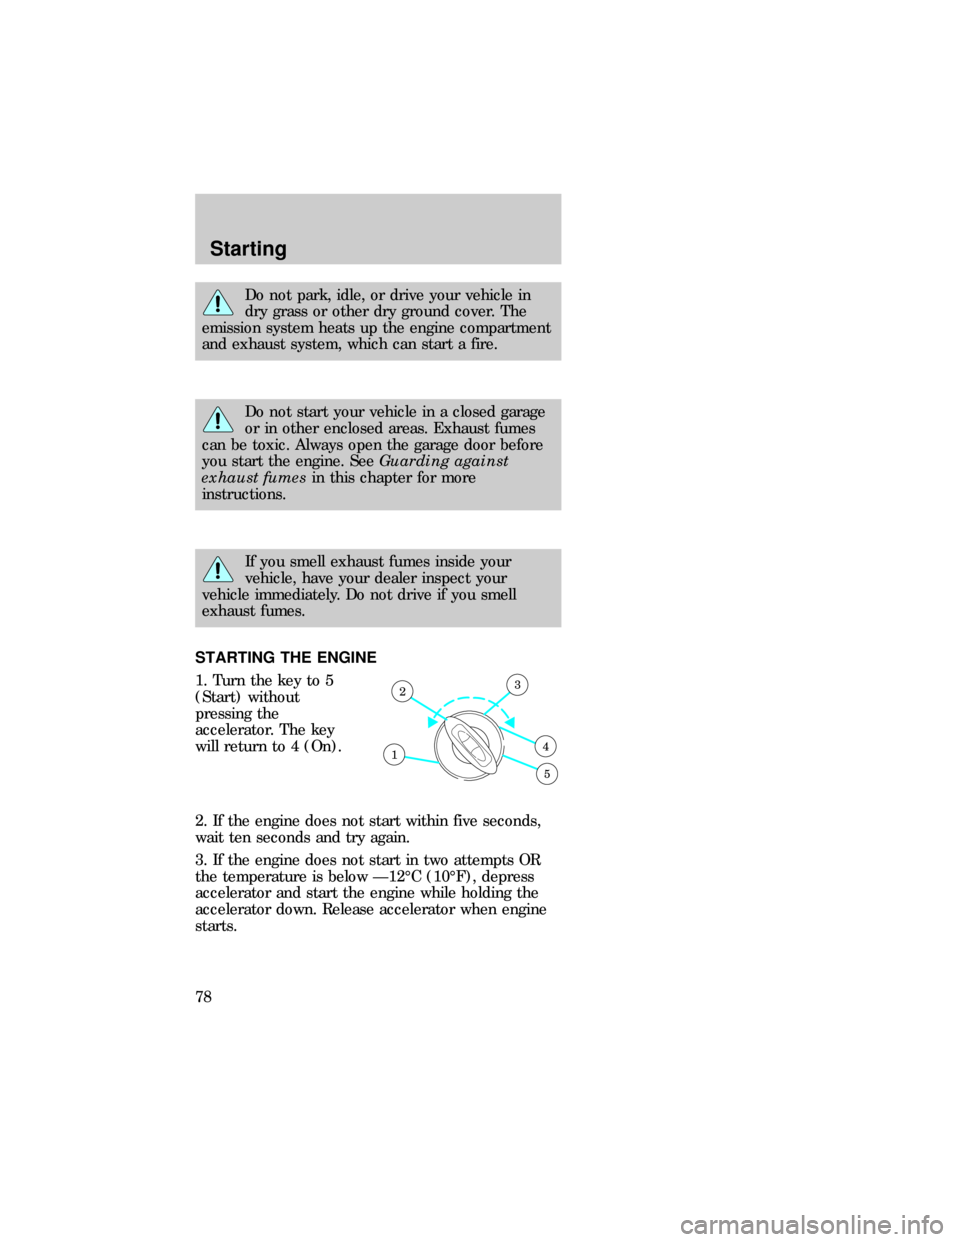
STARTING THE ENGINE
1. Turn the key to 5
(Start) without
pressing the
accelerator. The key
will return to 4 (On).
2. If the engine does not start within five seconds,
wait ten seconds and try again.
3. If the engine does not start in two attempts OR
the temperature is below Ð12ÉC (10ÉF), depress
accelerator and start the engine while holding the
accelerator down. Release accelerator when engine
starts.
1
23
4
5
com_starting_vehicle.01
Starting
78
Page 83 of 167

Pull release handle
toward you to release
parking brake. Driving
with the parking brake
on will cause the
brakes to wear out
quickly and reduce fuel
economy.
TRANSAXLE
Brake-shift interlock
This vehicle is equipped with a brake-shift interlock
feature that prevents the gearshift from being moved
from P (Park) unless the brake pedal is pressed.
If you cannot move the gearshift out of P (Park)
with the brake pedal depressed:
1. Apply the parking brake, turn ignition key to
LOCK, then remove the key.
2. Insert the key and turn it to OFF. Apply the brake
pedal and shift to N (Neutral).
3. Start the vehicle.
If it is necessary to use the above procedure to
move the gearshift, it is possible that a fuse has
blown and the vehicle's brake lamps may not be
operating properly. Refer toFuses and relaysin the
Roadside emergencieschapter.
Do not drive your vehicle until you verify
that the brakelamps are working.
If your vehicle gets stuck in mud or snow it may be
rocked out by shifting from forward and reverse
gears in a steady pattern. Press lightly on the
dno_transaxle
dno_bsi
Driving
83
Page 96 of 167
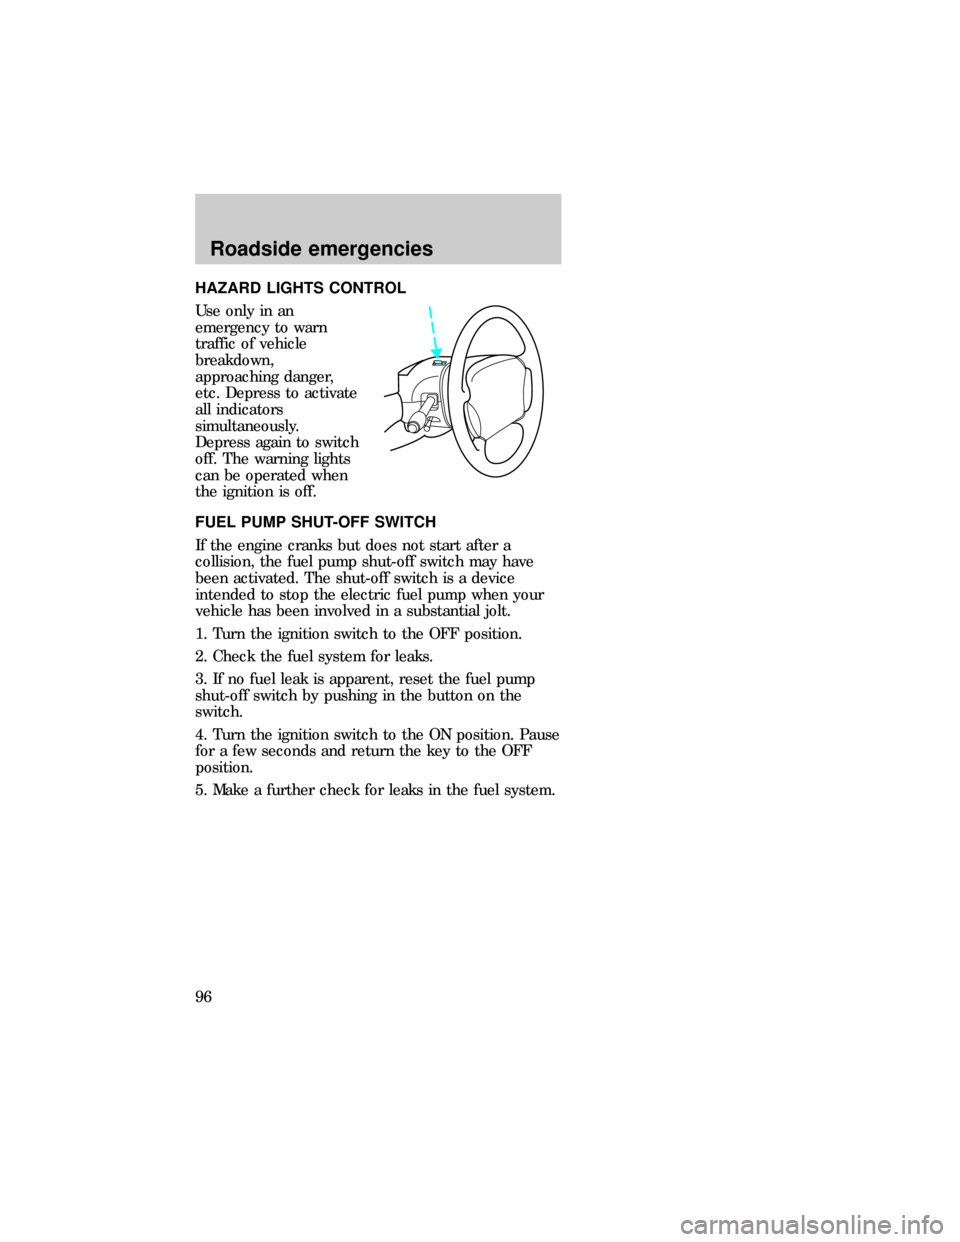
HAZARD LIGHTS CONTROL
Use only in an
emergency to warn
traffic of vehicle
breakdown,
approaching danger,
etc. Depress to activate
all indicators
simultaneously.
Depress again to switch
off. The warning lights
can be operated when
the ignition is off.
FUEL PUMP SHUT-OFF SWITCH
If the engine cranks but does not start after a
collision, the fuel pump shut-off switch may have
been activated. The shut-off switch is a device
intended to stop the electric fuel pump when your
vehicle has been involved in a substantial jolt.
1. Turn the ignition switch to the OFF position.
2. Check the fuel system for leaks.
3. If no fuel leak is apparent, reset the fuel pump
shut-off switch by pushing in the button on the
switch.
4. Turn the ignition switch to the ON position. Pause
for a few seconds and return the key to the OFF
position.
5. Make a further check for leaks in the fuel system.com_hazard_switch.01
dno_fuel-shut-off
Roadside emergencies
96
Page 109 of 167

2. Remove the center
bolt on the wheel cover
with the lug wrench
tip.
3. To remove the wheel
cover, pry it loose by
inserting the tapered
end of the lug wrench
between the wheel
cover and wheel.
To replace the wheel cover:
1. One of the windows on the wheel cover is
identified with a valve stem logo on the back side of
the wheel cover. Install the wheel over the wheel
with the window at the valve stem.
2. Hold the wheel cover in this position and press
the cover onto the wheel with the palm of your
hand. Do not force or hammer the cover.
3. Attach the bolt to the pedestal through the center
hole on the cover with the lug wrench.
4. Align the legs of the center ornament with the
slots of the wheel cover. Reinstall the ornament by
pressing with the palm of your hand. Do not
hammer or force the cover.
Anti-theft lug nuts (if equipped)
If your vehicle is
equipped with this
feature, one of the lug
nuts on each wheel
must be removed and replaced with a special key.
The key and registration card are attached to the lug
wrench and stored with the spare tire. If you lose
dno_lug-nuts
Roadside emergencies
109
Page 110 of 167
the key, send the registration card to the
manufacturer (not the dealer) to get a replacement
key. If the lug wrench/lug nut key assembly is lost,
see your nearest Ford or Lincoln/Mercury dealer
who has access to the master set of keys.Do not
use an impact wrench with the anti-theft key.
JUMP STARTING YOUR VEHICLE
The gases around the battery can explode if
exposed to flames, sparks, or lit cigarettes.
An explosion could result in injury or vehicle
damage.
Do not push-start your vehicle. You could
damage the catalytic converter. For further
information, seeJumper Cablesin the Index.
Batteries contain sulfuric acid which burns
skin, eyes, and clothing.
CONNECTING THE JUMPER CABLES
1. Position the vehicles so that they do not touch
one another.
2. Switch off the engine. Switch off any unnecessary
electrical equipment.
com_jump-starting.01
com_connecting_cables.01
Roadside emergencies
110
Page 113 of 167

TOWING YOUR VEHICLE BEHIND ANOTHER
VEHICLE
At times, you may want to tow your vehicle behind
another vehicle, such as a recreational vehicle, car
or a truck.
Before you have your vehicle towed:
²Release the parking brake.
²Move the gearshift to N (Neutral).
²Turn the key in the ignition to OFF.
²Unlock the steering wheel.
Do not tow your vehicle at a speed faster than 56
km/h (35 mph) or for a distance greater than 80 km
(50 miles), unless the drive wheels are placed on
dollies.
Never use a tow bar that attaches to the
bumper when you tow your vehicle. This
could damage the bumper and cause an accident.
Roadside emergencies
113
Page 115 of 167
²Keep all lit cigarettes, open flames and other lit
material away from the battery and all fuel related
parts.
If you disconnect the battery, the engine must
ªrelearnº its idle conditions before your vehicle will
drive properly, as explained inBatteryin this
chapter.
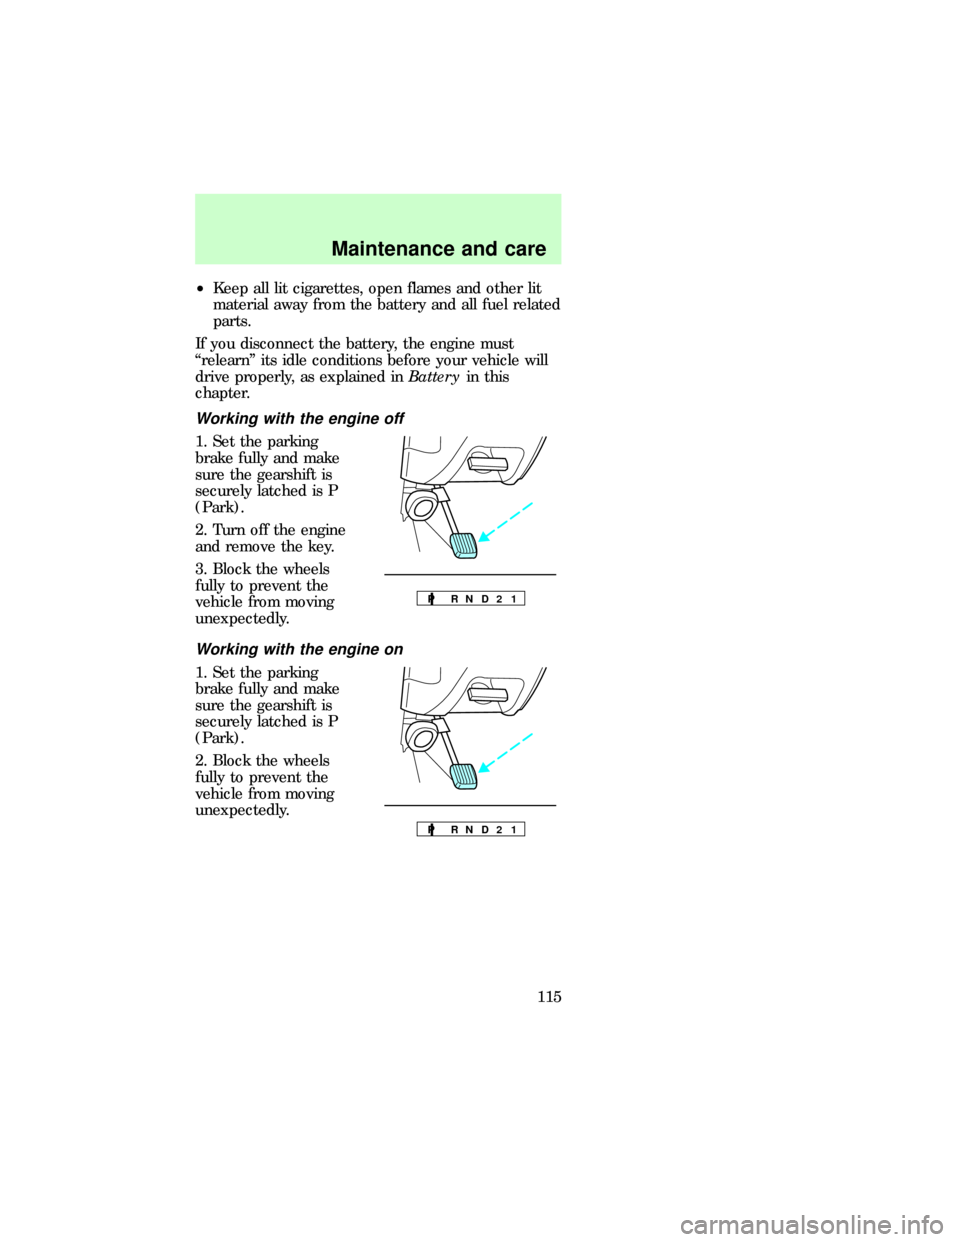
Working with the engine off
1. Set the parking
brake fully and make
sure the gearshift is
securely latched is P
(Park).
2. Turn off the engine
and remove the key.
3. Block the wheels
fully to prevent the
vehicle from moving
unexpectedly.
Working with the engine on
1. Set the parking
brake fully and make
sure the gearshift is
securely latched is P
(Park).
2. Block the wheels
fully to prevent the
vehicle from moving
unexpectedly.
P R N D 2 1
P R N D 2 1
dno_working-off
dno_working-on
dno_open-hood
Maintenance and care
115