wheel Mercury Sable 1997 Owner's Manuals
[x] Cancel search | Manufacturer: MERCURY, Model Year: 1997, Model line: Sable, Model: Mercury Sable 1997Pages: 167, PDF Size: 1.59 MB
Page 13 of 167
TURNING ON THE INTERIOR AND EXTERIOR
LAMPS
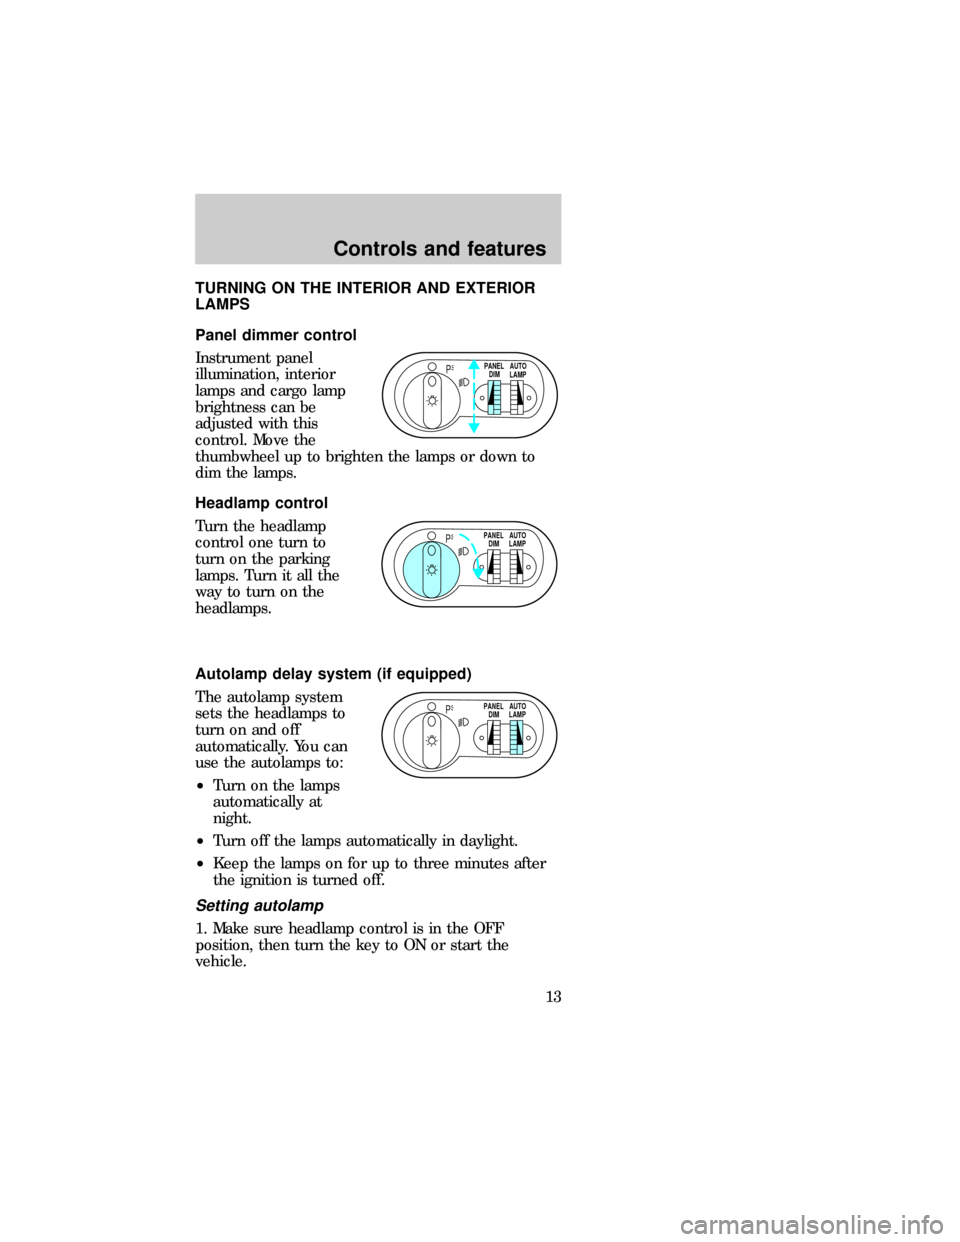
Panel dimmer control
Instrument panel
illumination, interior
lamps and cargo lamp
brightness can be
adjusted with this
control. Move the
thumbwheel up to brighten the lamps or down to
dim the lamps.
Headlamp control
Turn the headlamp
control one turn to
turn on the parking
lamps. Turn it all the
way to turn on the
headlamps.
Autolamp delay system (if equipped)
The autolamp system
sets the headlamps to
turn on and off
automatically. You can
use the autolamps to:
²Turn on the lamps
automatically at
night.
²Turn off the lamps automatically in daylight.
²Keep the lamps on for up to three minutes after
the ignition is turned off.
Setting autolamp
1. Make sure headlamp control is in the OFF
position, then turn the key to ON or start the
vehicle.
PPANEL
DIMAUTO
LAMP
PPANEL
DIMAUTO
LAMP
PPANEL
DIMAUTO
LAMP
dno_interior-exterior-lamps
dno_dimmer-switch
dno_headlamp-switch
dno_autolamps
Controls and features
13
Page 14 of 167
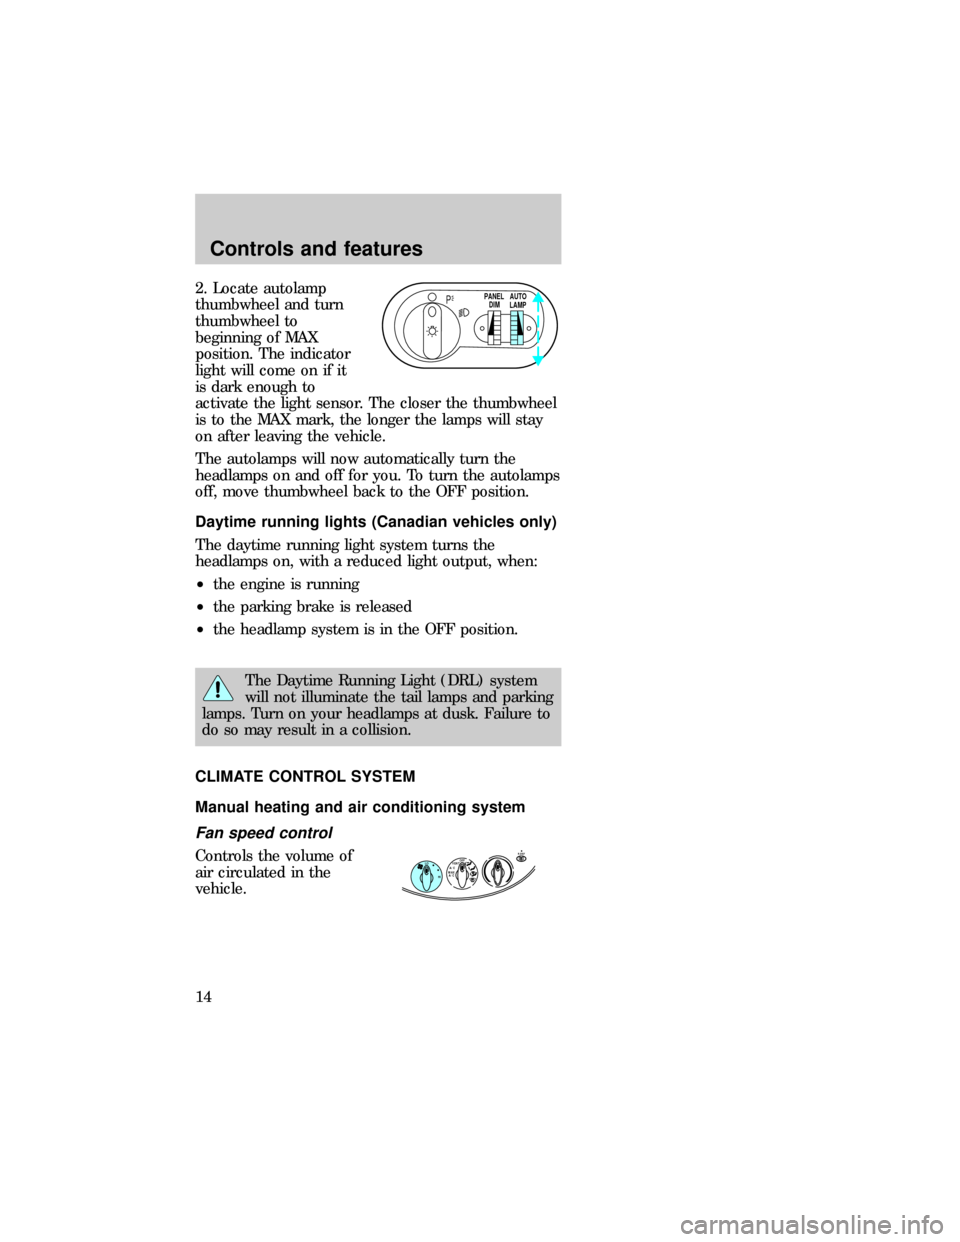
2. Locate autolamp
thumbwheel and turn
thumbwheel to
beginning of MAX
position. The indicator
light will come on if it
is dark enough to
activate the light sensor. The closer the thumbwheel
is to the MAX mark, the longer the lamps will stay
on after leaving the vehicle.
The autolamps will now automatically turn the
headlamps on and off for you. To turn the autolamps
off, move thumbwheel back to the OFF position.
Daytime running lights (Canadian vehicles only)
The daytime running light system turns the
headlamps on, with a reduced light output, when:
²the engine is running
²the parking brake is released
²the headlamp system is in the OFF position.
The Daytime Running Light (DRL) system
will not illuminate the tail lamps and parking
lamps. Turn on your headlamps at dusk. Failure to
do so may result in a collision.
CLIMATE CONTROL SYSTEM
Manual heating and air conditioning system
Fan speed control
Controls the volume of
air circulated in the
vehicle.
PPANEL
DIMAUTO
LAMP
R-DEFLO
HIOFF
A/C
MAX
A/CVENT
dno_drl
dno_climate-control-system
dno_manual-air-conditioning
Controls and features
14
Page 21 of 167
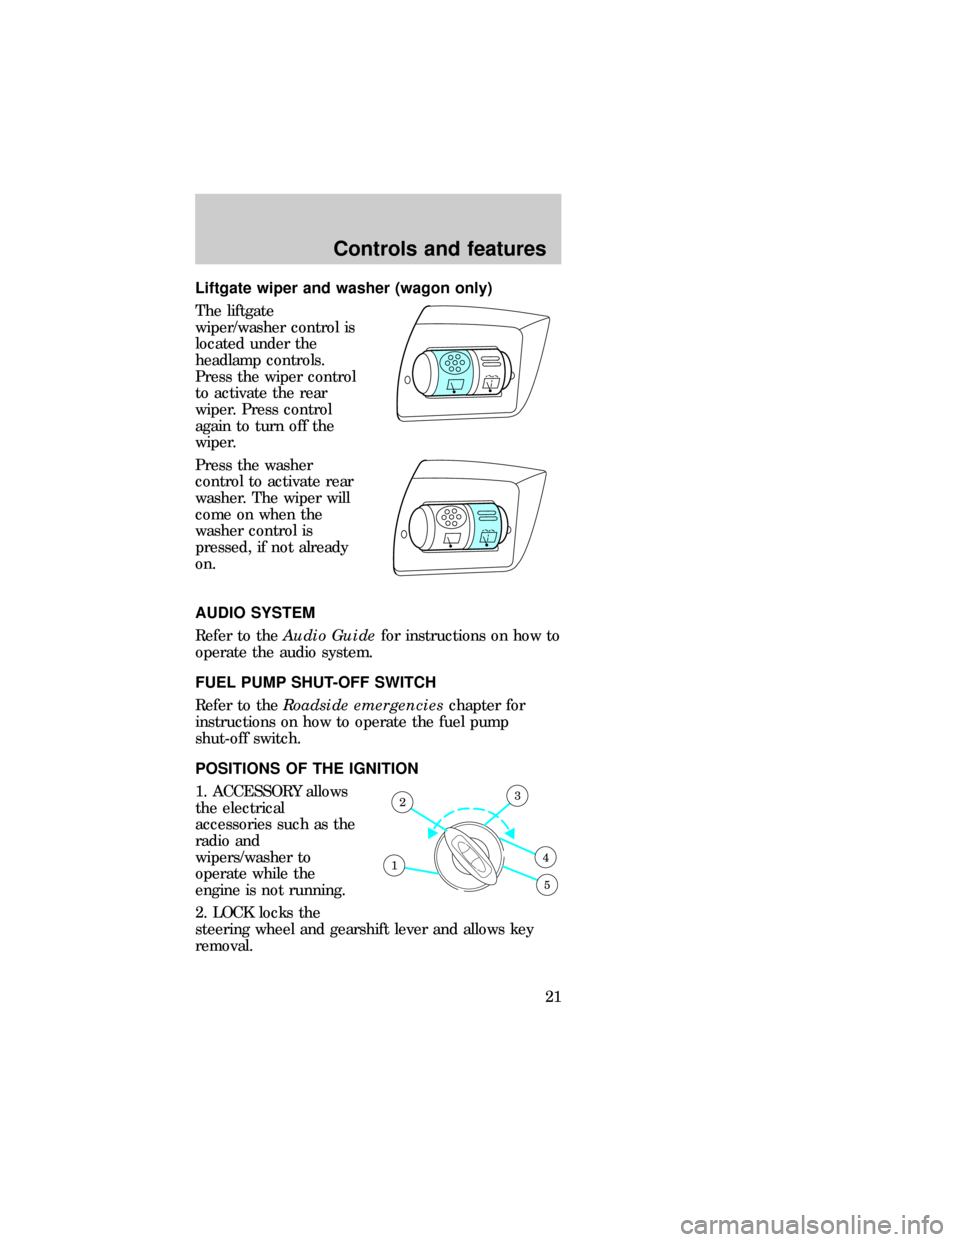
Liftgate wiper and washer (wagon only)
The liftgate
wiper/washer control is
located under the
headlamp controls.
Press the wiper control
to activate the rear
wiper. Press control
again to turn off the
wiper.
Press the washer
control to activate rear
washer. The wiper will
come on when the
washer control is
pressed, if not already
on.
AUDIO SYSTEM
Refer to theAudio Guidefor instructions on how to
operate the audio system.
FUEL PUMP SHUT-OFF SWITCH
Refer to theRoadside emergencieschapter for
instructions on how to operate the fuel pump
shut-off switch.
POSITIONS OF THE IGNITION
1. ACCESSORY allows
the electrical
accessories such as the
radio and
wipers/washer to
operate while the
engine is not running.
2. LOCK locks the
steering wheel and gearshift lever and allows key
removal.
1
23
4
5
dno_audio
dno_shut-off-switch
dno_steering-controls
Controls and features
21
Page 22 of 167

3. OFF shuts off the ignition and accessories and
allows the gearshift and steering wheel to move.
4. ON tests the warning lights. The key must remain
here when the engine is running.
5. START cranks the engine. The key must return to
ON when running.
CRUISE CONTROL
To turn cruise control on
Press ON.
Vehicle speed cannot
be controlled until the
vehicle is travelling at
or above 48 km/h (30
mph).
Do not use the cruise control in heavy traffic or
winding, slippery or unpaved roads.
Do not shift into N (Neutral) while the cruise
control is on.
To turn cruise control off
Press OFF or turn off
the vehicle ignition.
Once cruise control is switched off, the previously
programmed set speed will be erased.
ON
OFF
COASTRESUMESET
ACCEL
ON
OFF
COASTRESUMESET
ACCEL
dno_cruise
dno_turning-cruise-on
dno_turning-cruise-off
dno_setting-a-speed
Controls and features
22
Page 27 of 167
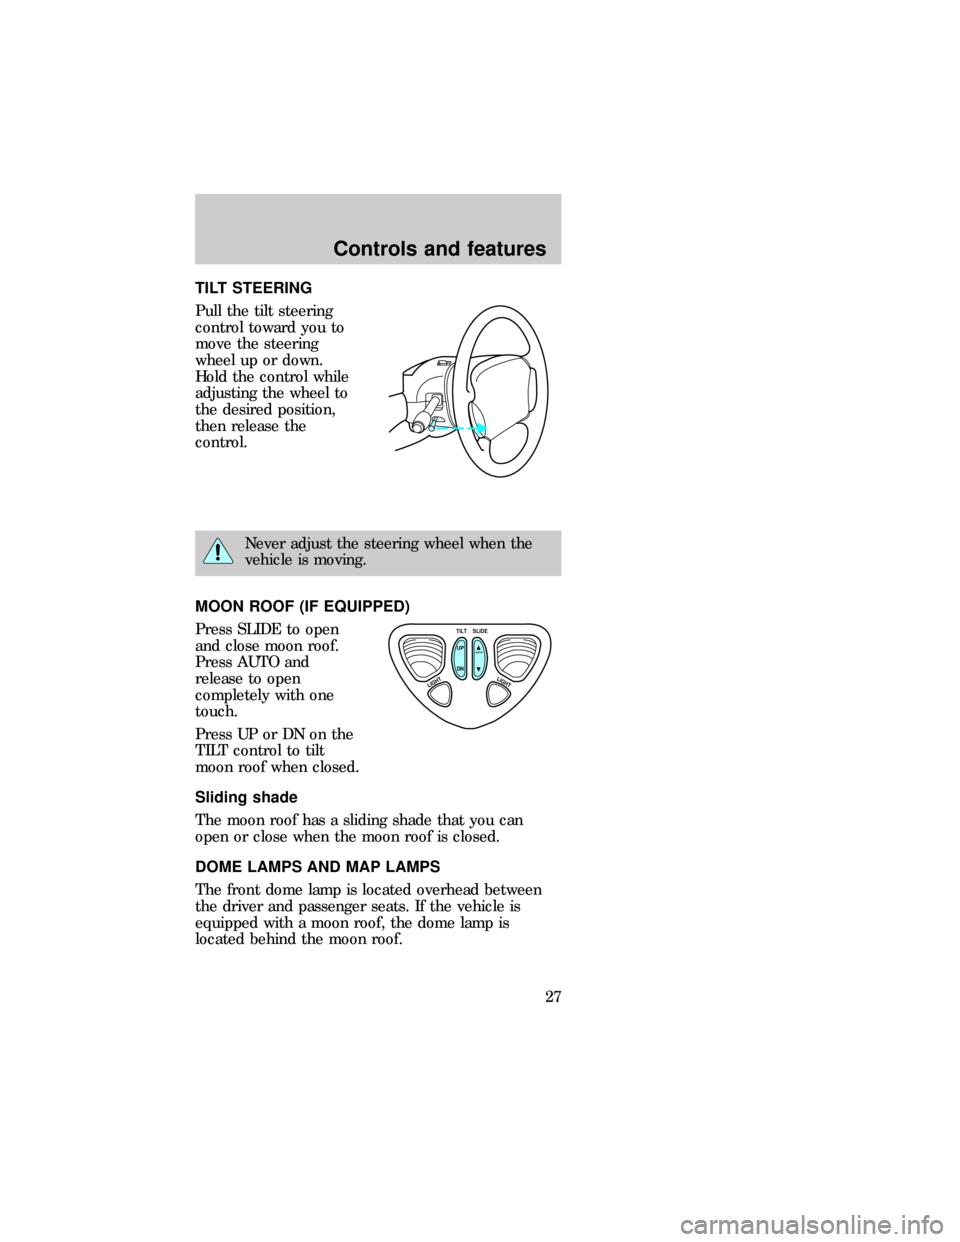
TILT STEERING
Pull the tilt steering
control toward you to
move the steering
wheel up or down.
Hold the control while
adjusting the wheel to
the desired position,
then release the
control.
Never adjust the steering wheel when the
vehicle is moving.
MOON ROOF (IF EQUIPPED)
Press SLIDE to open
and close moon roof.
Press AUTO and
release to open
completely with one
touch.
Press UP or DN on the
TILT control to tilt
moon roof when closed.
Sliding shade
The moon roof has a sliding shade that you can
open or close when the moon roof is closed.
DOME LAMPS AND MAP LAMPS
The front dome lamp is located overhead between
the driver and passenger seats. If the vehicle is
equipped with a moon roof, the dome lamp is
located behind the moon roof.
TILT
UP
LIGHTLIGHT
AUTO
DNSLIDE
dno_moonroof
dno_slide-shade
dno_dome-map
Controls and features
27
Page 34 of 167

OPENING THE TRUNK WITH REMOTE
CONTROL (IF EQUIPPED)
Press the remote
release control on the
instrument panel to the
left of the steering
wheel.
LIFTGATE (WAGON ONLY)
You can open the
entire liftgate or just
the liftgate window. To
open the entire liftgate,
press the release
button hidden under
the exterior trim panel
just above the license
plate.
You must lock the liftgate with the key or power
lock control; it does not lock automatically.
The window locks when the liftgate is locked. To
open the window, make sure the liftgate and window
are unlocked, then press the outside lock cylinder.
The window can only be opened from the outside.
To prevent any damage to the liftgate and window,
close them completely before driving.
dno_opening-liftgate
dno_storage-compControls and features
34
Page 81 of 167
BRAKES
Your brakes are self-adjusting. Refer to the ªService
Guideº for maintenance scheduling.
Anti-lock brake system (ABS) (if equipped)
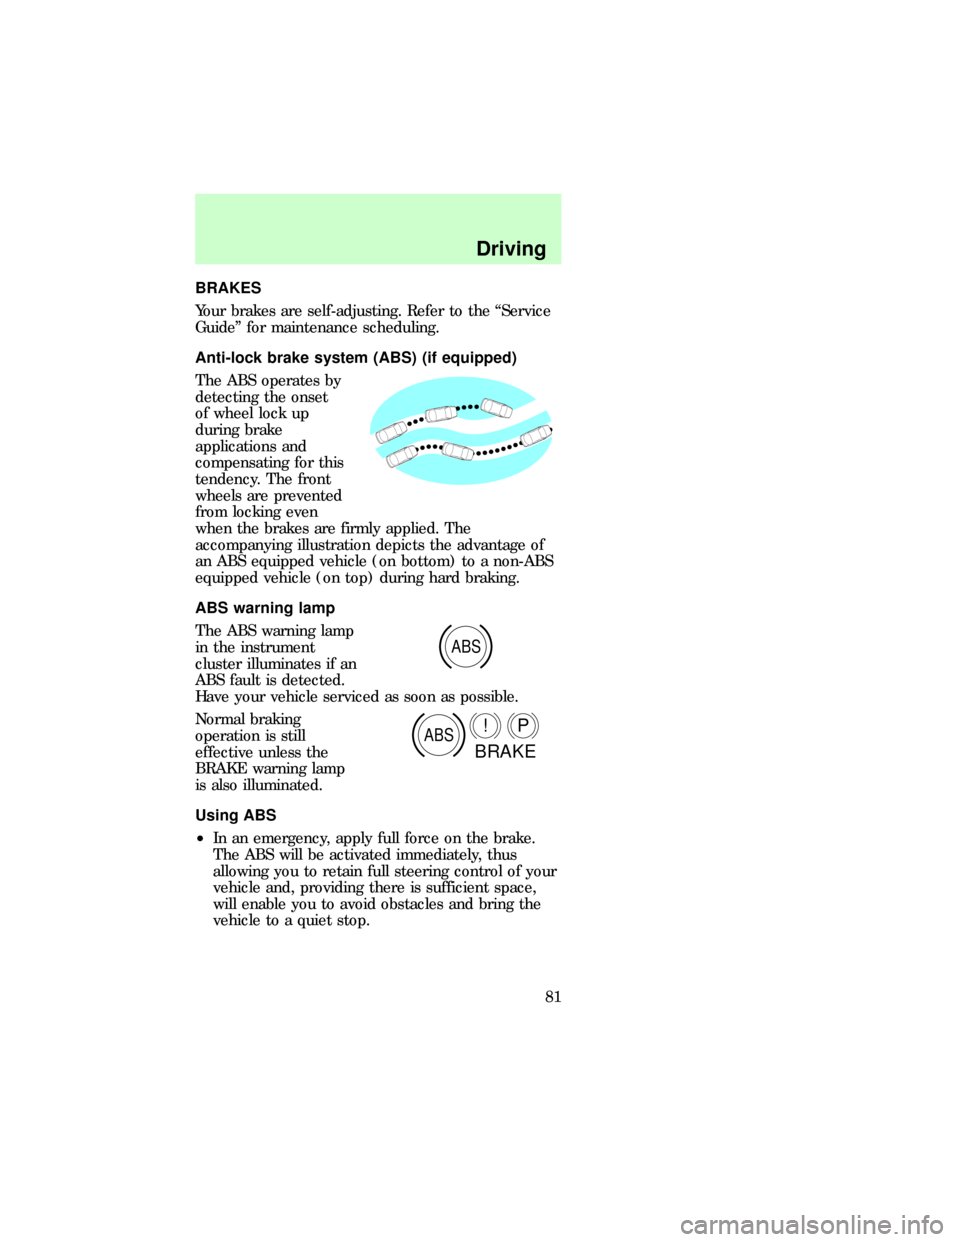
The ABS operates by
detecting the onset
of wheel lock up
during brake
applications and
compensating for this
tendency. The front
wheels are prevented
from locking even
when the brakes are firmly applied. The
accompanying illustration depicts the advantage of
an ABS equipped vehicle (on bottom) to a non-ABS
equipped vehicle (on top) during hard braking.
ABS warning lamp
The ABS warning lamp
in the instrument
cluster illuminates if an
ABS fault is detected.
Have your vehicle serviced as soon as possible.
Normal braking
operation is still
effective unless the
BRAKE warning lamp
is also illuminated.
Using ABS
²In an emergency, apply full force on the brake.
The ABS will be activated immediately, thus
allowing you to retain full steering control of your
vehicle and, providing there is sufficient space,
will enable you to avoid obstacles and bring the
vehicle to a quiet stop.
ABS
ABSP!
BRAKE
com_brakes.01
com_abs.01
dno_ABS-warning-light
com_using_abs.01
Driving
81
Page 86 of 167
Understanding gearshift positions
P (Park)
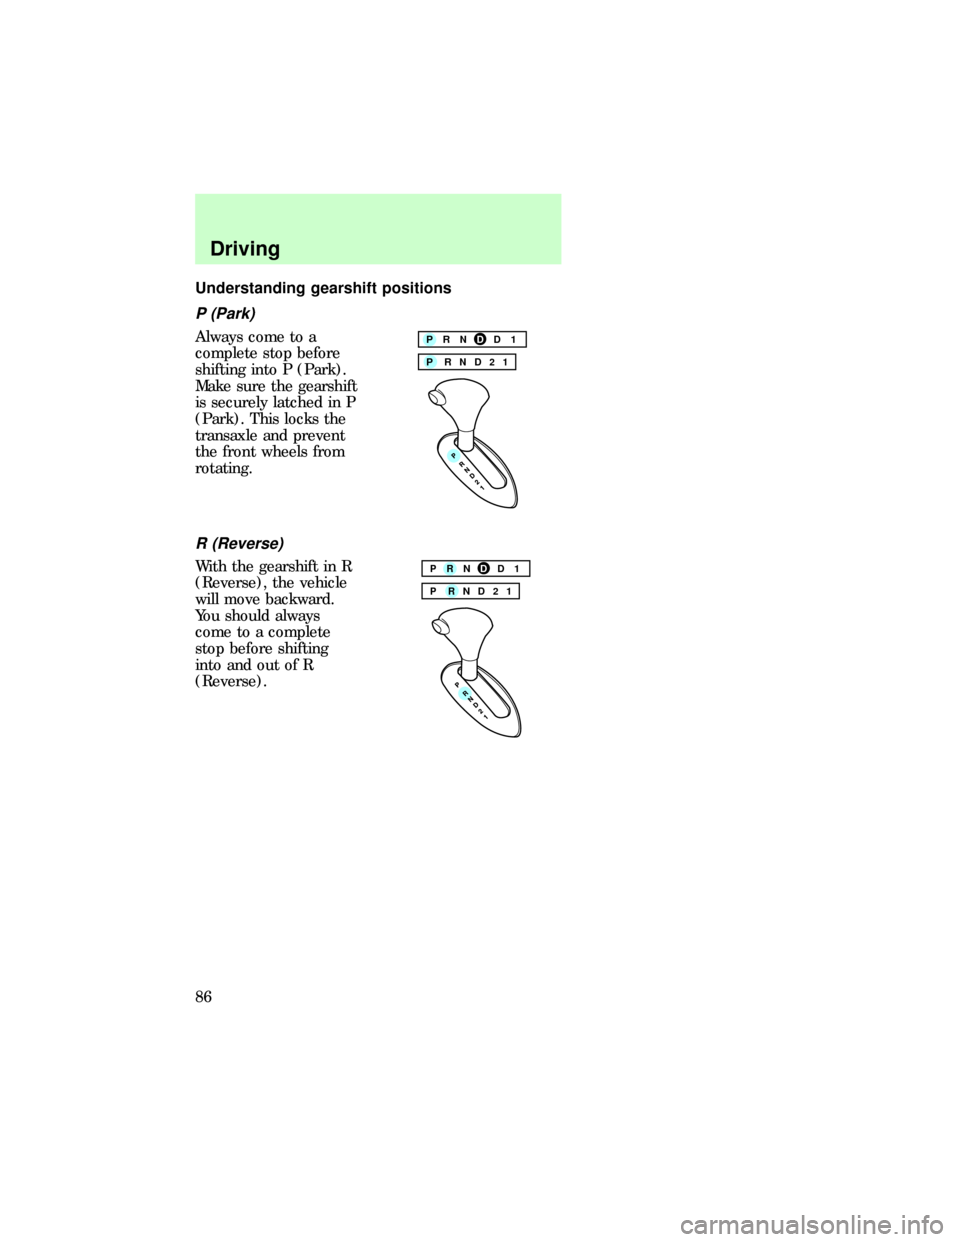
Always come to a
complete stop before
shifting into P (Park).
Make sure the gearshift
is securely latched in P
(Park). This locks the
transaxle and prevent
the front wheels from
rotating.
R (Reverse)
With the gearshift in R
(Reverse), the vehicle
will move backward.
You should always
come to a complete
stop before shifting
into and out of R
(Reverse).
P RND21 PRNDD1
P RND21 PRNDD1
Driving
86
Page 93 of 167
Preparing to tow
Use the proper equipment for towing a trailer, and
make sure it is properly attached to your vehicle.
See your dealer or a reliable trailer dealer if you
require assistance.
Hitches
Your vehicle has a load carrying hitch. This type of
hitch places the tongue load of a trailer on the rear
wheels of your vehicle. You must distribute the load
in your trailer so that 10±15% of the total weight of
the trailer is on the tongue.
Safety chains
Always connect the trailer's safety chains to the
vehicle. To connect the trailer's safety chains, cross
the chains under the trailer tongue and allow slack
for turning corners.
If your use a rental trailer, follow the instructions
that the rental agency gives to you.
Trailer brakes
Electric brakes and manual, automatic or surge-type
brakes are safe if installed properly and adjust them
to the manufacturer's specifications. The trailer
brakes must meet local and Federal regulations.
Do not connect a trailer's hydraulic brake
system directly to your vehicle's brake
system. Your vehicle may not have enough braking
power and your chances of having a collision
greatly increase.
Trailer lamps
Trailer lamps are required on most towed vehicles.
Make sure your trailer lamps conform to local and
Federal regulations. See your dealer or trailer rental
agency for proper instructions and equipment for
hooking up trailer lamps.
dno_driving-while-you-tow
Driving
93
Page 94 of 167

Driving while you tow
Do not drive faster than 72 km/h (45 mph) with any
weight on the trailer while towing on a hot day or in
hilly country.
Cruise control may shut off if you are towing on
long, steep grades.
When towing a trailer:
²Use 2 (Second) (if equipped) or 1 (First) when
towing up or down steep hills. This will eliminate
excessive downshifting and upshifting for
optimum fuel economy and transaxle cooling.
²Anticipate stops and brake gradually.
Servicing after towing
If you tow a trailer for long distances, your vehicle
will require more frequent service intervals. Refer to
theService Guidefor more information.
Trailer towing tips
²Practice turning, stopping and backing up in an
area before starting on a trip to get the feel of the
vehicle trailer combination. When turning, drive
slightly beyond the normal turning point so the
trailer wheels will clear curbs and other obstacles.
²Allow more room for stopping with a trailer
attached.
²The trailer tongue weight should be 10±15% of
the loaded trailer weight.
²After you have traveled 80 km (50 miles),
thoroughly check your hitch, electrical
connections and trailer wheel lug nuts.
²When stopped in traffic for long periods of time in
hot weather, place the gearshift in P (Park) and
increase idle speed. This aids engine cooling and
air conditioner efficiency.
²Vehicles with trailers should not be parked on a
grade. If you must park on a grade, place wheel
chocks under the trailer's wheels.
dno_towing-tips
com_fuel_consumption.01
Driving
94