ECU Mercury Sable 1998 s User Guide
[x] Cancel search | Manufacturer: MERCURY, Model Year: 1998, Model line: Sable, Model: Mercury Sable 1998Pages: 190, PDF Size: 1.29 MB
Page 78 of 190

10. Try to pull the belt out of the retractor to make
sure the retractor is in the automatic locking mode
(you should not be able to pull more belt out). If the
retractor is not locked, unbuckle the belt and repeat
steps two through nine.
Check to make sure the child seat is properly
secured before each use.
Installing a child safety seat in the center rear
seating position with adjustable lap belt
1. Lengthen the lap belt. To lengthen the belt, hold
the tongue so that its bottom is perpendicular to the
direction of webbing while sliding the tongue up the
webbing.
2. Place the child safety seat in the center seating
position.
3. Route the tongue and webbing through the child
seat according to the child seat manufacturer's
instructions.
4. Insert the belt tongue into the proper buckle for
the center seating position until you hear a snap and
feel it latch. Make sure the tongue is securely
fastened to the buckle by pulling on tongue.
5. Push down on the child seat while pulling on the
loose end of the lap belt webbing to tighten the belt.
6. Before placing the child into the child seat,
forcibly tilt the child seat from side to side and in
forward direction to make sure that the seat is held
securely in place. If the child seat moves excessively,
repeat steps 5 through 6, or properly install the
child seat in a different position.
Attaching safety seats with tether straps
Some manufacturers make safety seats that include
a tether strap that goes over the back of the vehicle
seat and attaches to an anchoring point. Other
manufacturers offer the tether strap as an accessory.
Contact the manufacturer of your child safety seat
for information about ordering a tether strap.
Seating and safety restraints
78
Page 79 of 190

Tether anchorage hardware
Attachment holes (at each rear outboard seating
position) have been provided in your vehicle to
attach anchor hardware, if required. Tether
anchorage hardware kits (part number 613D74)
including instructions, may be obtained at no charge
from any Ford or Lincoln-Mercury dealer. All
vehicles built for sale in Canada include a tether
anchor hardware kit.
Be sure to follow the child safety seat
manufacturer's instructions.
Tighten the anchor according to
specifications. Otherwise, the safety seat
may not be properly secured and the child may be
injured in a sudden stop or collision.
If you have a station wagon, tether anchors are
already installed for each of the second row seating
positions.
1. Behind the second
seat, find the plastic
snap-on covers for the
floor anchors.
2. Use a screwdriver or
coin to snap the covers
off the anchor in a
rearward and upward
direction. Remove the
covers completely.
3. Snap the tether strap hook onto the U-shaped
tether anchor.
Seating and safety restraints
79
Page 80 of 190

BUILT-IN CHILD SEATS
Built-in child safety seat (if equipped)
The rear seat may include a built-in child seat. This
child seat conforms to all Federal and local motor
vehicle safety standards. Read the labels located on
the child seat cushion and shoulder belt for
information on the built-in child seat.
Use the built-in child seatonlyif the child is at least
9 months old, weighs 9±27 kg (20±60 lb) and the
child's shoulders (top) are below the shoulder
harness slots in the built-in child seat.
Children not meeting these requirements should be
secured in an approved aftermarket seat. Refer to
Children and infant or child safety seatsin this
chapter.
Built-in child seat retractors
The belts on built-in child seats are equipped with a
retractor that locks when both tongues are latched
into the crotch safety belt buckle. The retractor will
automatically snug the belts around the child. If the
belts do not remain snug, take the vehicle to the
dealer for child seat repair. The belts will not snug
during a collision.
Placing your child in the built-in child seat
Failure to follow all of the instructions on
the use of this child restraint system can
result in your child striking the vehicle's interior
during a sudden stop or crash.
Seating and safety restraints
80
Page 91 of 190

stopping distance. Always leave enough room
between your vehicle and the vehicle in front of
you to stop.
²We recommend that you familiarize yourself with
this braking technique. However, avoid taking any
unnecessary risks.
Parking brake
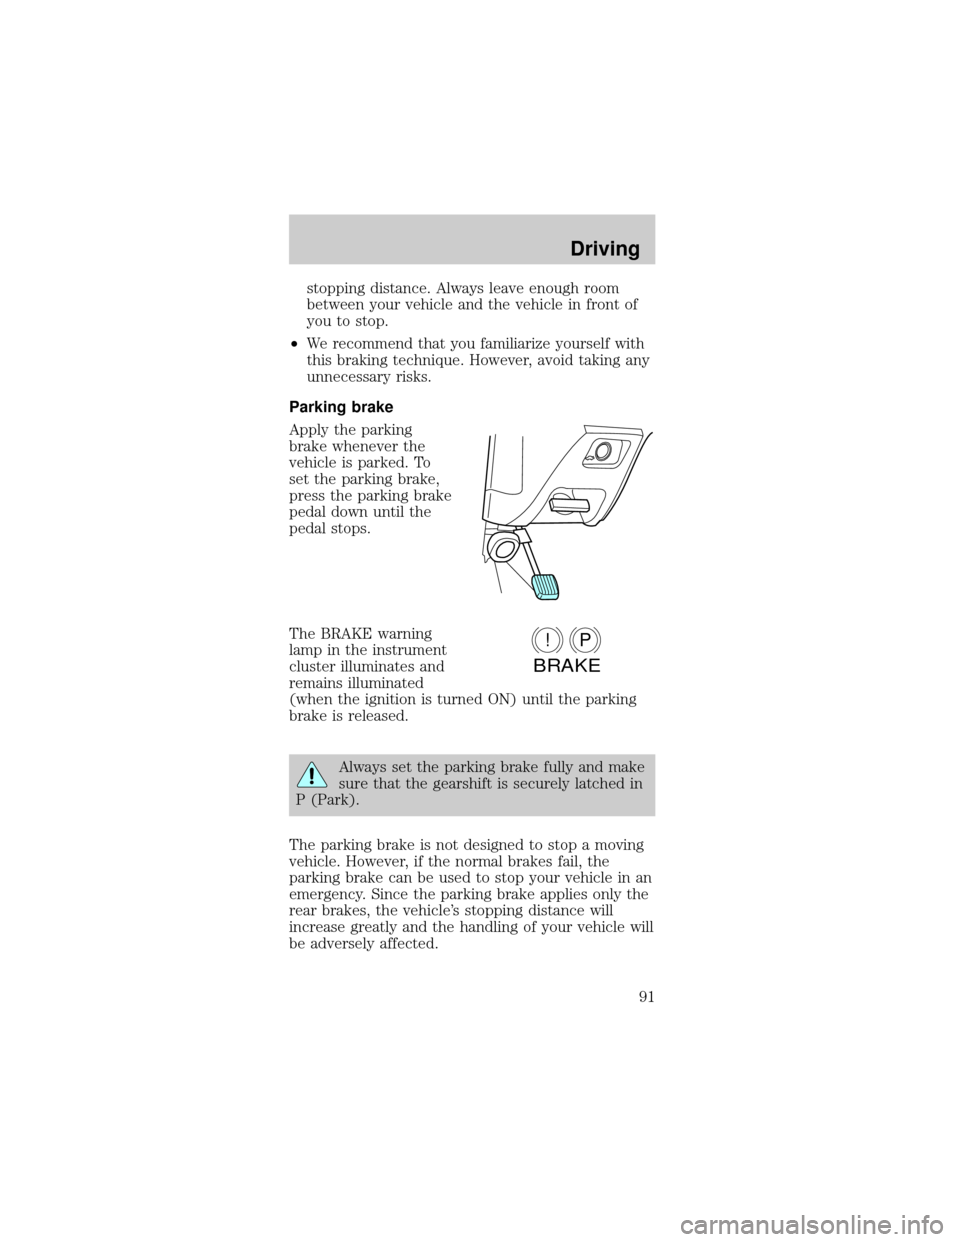
Apply the parking
brake whenever the
vehicle is parked. To
set the parking brake,
press the parking brake
pedal down until the
pedal stops.
The BRAKE warning
lamp in the instrument
cluster illuminates and
remains illuminated
(when the ignition is turned ON) until the parking
brake is released.
Always set the parking brake fully and make
sure that the gearshift is securely latched in
P (Park).
The parking brake is not designed to stop a moving
vehicle. However, if the normal brakes fail, the
parking brake can be used to stop your vehicle in an
emergency. Since the parking brake applies only the
rear brakes, the vehicle's stopping distance will
increase greatly and the handling of your vehicle will
be adversely affected.
P!
BRAKE
Driving
91
Page 96 of 190

Understanding gearshift positions
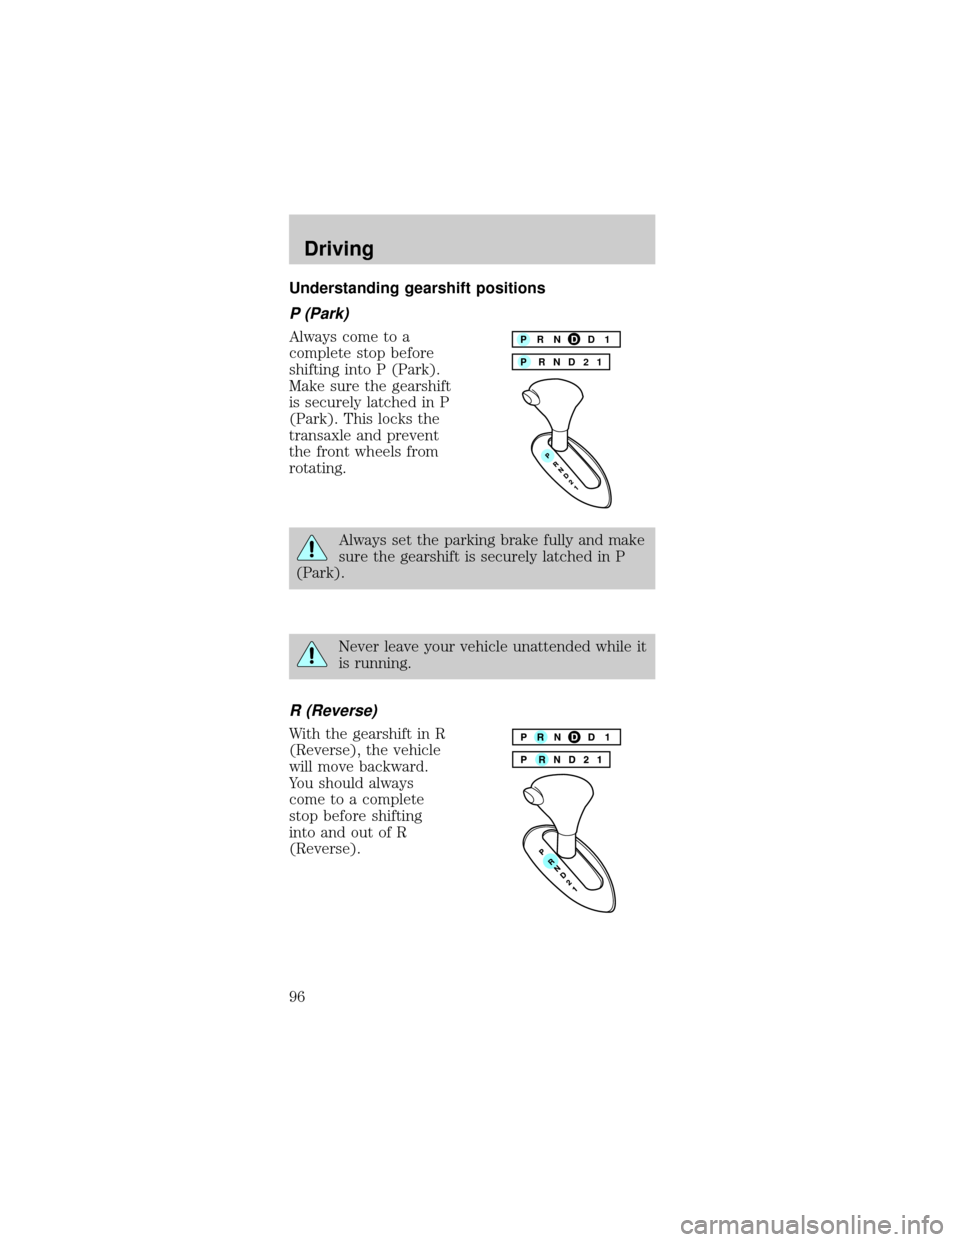
P (Park)
Always come to a
complete stop before
shifting into P (Park).
Make sure the gearshift
is securely latched in P
(Park). This locks the
transaxle and prevent
the front wheels from
rotating.
Always set the parking brake fully and make
sure the gearshift is securely latched in P
(Park).
Never leave your vehicle unattended while it
is running.
R (Reverse)
With the gearshift in R
(Reverse), the vehicle
will move backward.
You should always
come to a complete
stop before shifting
into and out of R
(Reverse).
P RND21 PRNDD1
Driving
96
Page 100 of 190

When parking, do not use the gearshift in
place of the parking brake. Always set the
parking brake fully and make sure that the
gearshift is securely latched in Park (P). Turn off
the ignition whenever you leave your vehicle.
Never leave your vehicle unattended while it is
running. If you do not take these precautions, your
vehicle may move unexpectedly and injure
someone.
VEHICLE LOADING
Before loading a vehicle, familiarize yourself with the
following terms:
²Base Curb Weight: Weight of the vehicle
including any standard equipment, fluids,
lubricants, etc. It does not include passengers or
aftermarket equipment.
²Payload: Combined maximum allowable weight
of cargo, passengers and optional equipment. The
payload equals the gross vehicle weight rating
minus base curb weight.
²GVW (Gross Vehicle Weight): Base curb
weight plus payload weight. The GVW is not a
limit or a specification.
²GVWR (Gross Vehicle Weight Rating):
Maximum total weight of the base vehicle,
passengers, optional equipment and cargo. The
GVWR is specific to each vehicle and is listed on
the Safety Compliance Label on the driver's door
pillar.
²GAWR (Gross Axle Weight Rating): Carrying
capacity for each axle system. The GAWR is
specific to each vehicle and is listed on the Safety
Compliance Label on the driver's door pillar.
²GCWR (Gross Combined Weight Rating):
Maximum combined weight of towing vehicle
Driving
100
Page 107 of 190

Towing your vehicle behind another vehicle
At times, you may want to tow your vehicle behind
another vehicle, such as a recreational vehicle, car
or a truck.
Before you have your vehicle towed:
²Release the parking brake.
²Move the gearshift to N (Neutral).
²Turn the key in the ignition to OFF.
²Unlock the steering wheel.
Do not tow your vehicle at a speed faster than 56
km/h (35 mph) or for a distance greater than 80 km
(50 miles), unless the drive wheels are placed on
dollies.
Never use a tow bar that attaches to the
bumper when you tow your vehicle. This
could damage the bumper and cause an accident.
LUGGAGE RACK (IF EQUIPPED)
The rear crossbar can be adjusted to fit the item
being carried. The front crossbar does not move. Do
not load more than 44 kg (100 lbs.) on the luggage
rack.
To adjust cross-bar position:
1. Loosen the
thumbwheel at both
ends of the cross-bar.
2. Slide the cross-bar
to the desired location.
3. Tighten the thumbwheel at both ends of the
cross-bar.
Use adjustable tie down loops to secure the load.
Driving
107
Page 127 of 190

SERVICE RECOMMENDATIONS
To help you service your vehicle:
²We highlight do-it-yourself items in the engine
compartment for easy location.
²We provide a ªService Guideº which makes
tracking routine service easy.
If your vehicle requires professional service, your
dealership can provide necessary parts and service.
Check your ªWarranty Guideº to find out which parts
and services are covered.
Use only recommended fuels, lubricants, fluids and
service parts conforming to specifications. Motorcraft
parts are designed and built to provide the best
performance in your vehicle.
PRECAUTIONS WHEN SERVICING YOUR
VEHICLE
Be especially careful when inspecting or servicing
your vehicle.
²Do not work on a hot engine.
²When the engine is running, avoid wearing loose
clothing, jewelry or long hair that could get
caught up in moving parts.
²Do not work on a vehicle with the engine running
in an enclosed space, unless you are sure you
have enough ventilation.
²Keep all lit cigarettes, open flames and other lit
material away from the battery and all fuel related
parts.
If you disconnect the battery, the engine must
ªrelearnº its idle conditions before your vehicle will
drive properly, as explained in theBatterysection in
this chapter.
Working with the engine off
1. Set the parking brake, and ensure the gearshift is
securely latched in park.
Maintenance and care
127
Page 128 of 190

2. Turn off the engine and remove the key.
3. Block the wheels to prevent the vehicle from
moving unexpectedly.
Working with the engine on
1. Set the parking brake and ensure the gearshift is
securely latched in P (Park).
2. Block the wheels to prevent the vehicle from
moving unexpectedly.
Do not start your engine with the air cleaner
removed and do not remove it while the
engine is running.
OPENING THE HOOD
1. Inside the vehicle,
pull the hood release
handle located under
the bottom of the
instrument panel.
2. Go to the front of
the vehicle and release
the auxiliary latch that
is located under the
front center of the
hood.
3. Lift the hood until
the lift cylinders hold it open.
Maintenance and care
128
Page 131 of 190

3. Set the parking brake and ensure the gearshift is
securely latched in P.
4. Open the hood. Protect yourself from engine heat.
5. Locate and carefully
remove the engine oil
indicator (dipstick).
6. Wipe the indicator clean. Insert the indicator fully,
then remove it again.
²If the oil level isbetween the ADD and FULL
marks or between the MIN and MAX marks
(depending on application),the oil level is
acceptable.DO NOT ADD OIL.
²If the oil level is
below the ADD or
MIN mark, add
enough oil to raise
the level within the
ADD-FULL or within
the MIN-MAX range.
²Oil levels above the F in FULL or above the MAX
mark, may cause engine damage. Some oil must
be removed from the engine by a service
technician.
7. Put the indicator back in and ensure it is fully
seated.
ADD 1 QTFULL
MAX MIN
Maintenance and care
131