brake light Mercury Sable 1998 Owner's Manuals
[x] Cancel search | Manufacturer: MERCURY, Model Year: 1998, Model line: Sable, Model: Mercury Sable 1998Pages: 190, PDF Size: 1.29 MB
Page 6 of 190

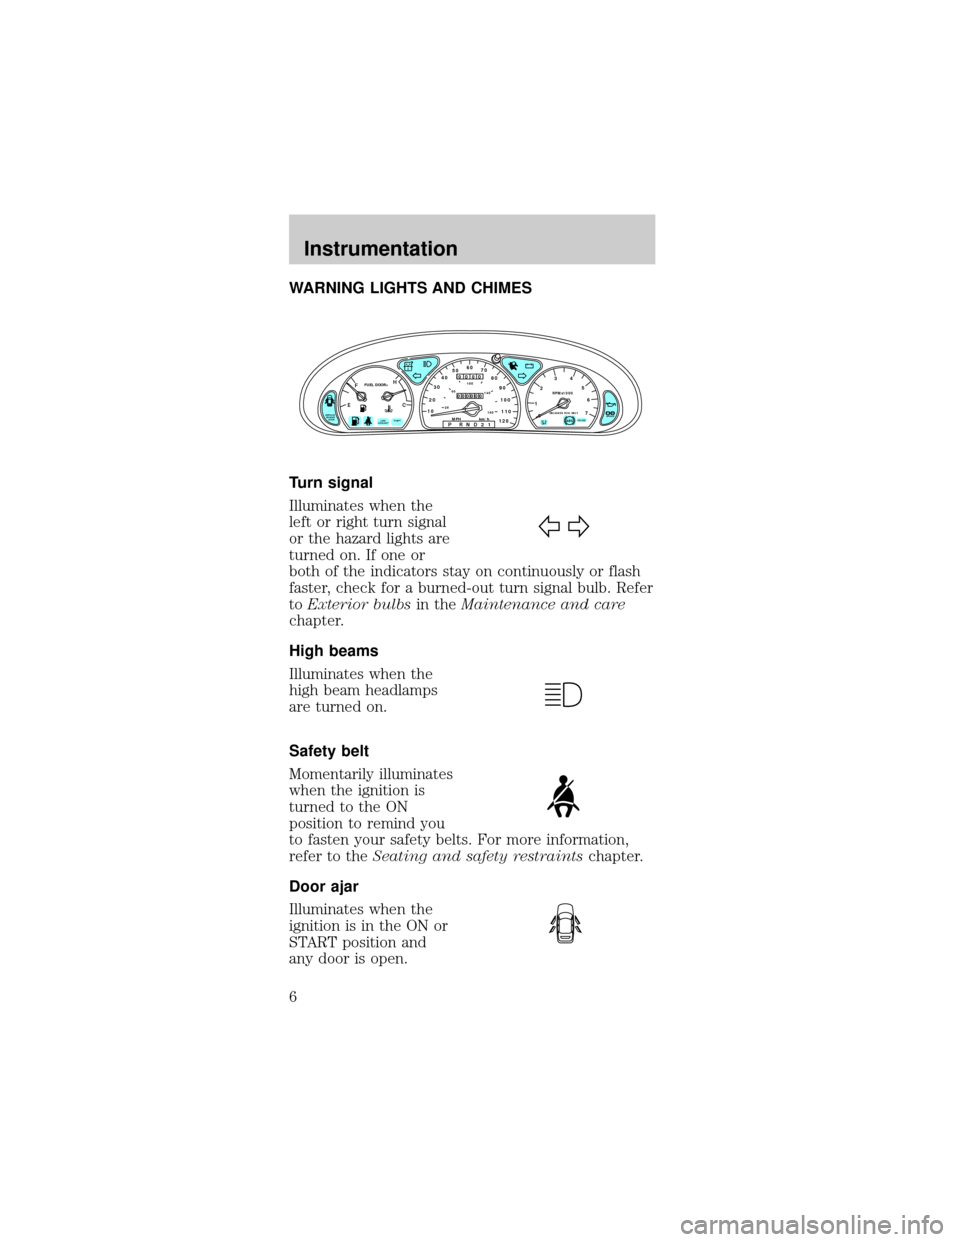
WARNING LIGHTS AND CHIMES
Turn signal
Illuminates when the
left or right turn signal
or the hazard lights are
turned on. If one or
both of the indicators stay on continuously or flash
faster, check for a burned-out turn signal bulb. Refer
toExterior bulbsin theMaintenance and care
chapter.
High beams
Illuminates when the
high beam headlamps
are turned on.
Safety belt
Momentarily illuminates
when the ignition is
turned to the ON
position to remind you
to fasten your safety belts. For more information,
refer to theSeating and safety restraintschapter.
Door ajar
Illuminates when the
ignition is in the ON or
START position and
any door is open.
EFC H
FUEL DOOR>
SERVICE
ENGINE
SOON
THEFT102030405060
70
80
90
100
1202060100
140
180
P R N D 2 1MPH km/h
00
000
00000
P!
BRAKELOW
COOLANT
+ –
110CRUISE
RPMx1000
0 1234
5
6
7ABSUNLEADED FUEL ONLY
O/D
OFF
Instrumentation
6
Page 9 of 190

This lamp will come on when the ignition is first
turned on, but then should turn off. If the lamp
stays on, you should check the coolant level inside
the reservoir. For instructions on adding coolant, see
Engine coolantin theMaintenance and care
chapter.
Anti-theft system (if equipped)
Refer toAnti-theft
systemin theControls
and featureschapter.
O/D off (if equipped)
Illuminates when the
transmission control
switch has been
pushed. When the light
is on, the transmission does not shift into overdrive.
If the light does not come on when the transmission
control switch is depressed or if the light flashes
when you are driving, have your vehicle serviced.
Anti-lock brake system (ABS) (If equipped)
Momentarily illuminates
when the ignition is
turned on and the
engine is off. If the
light does not illuminate momentarily at start up,
remains on or continues to flash, the ABS needs to
be serviced. With the ABS light on, the anti-lock
brake system is disabled and normal braking is still
effective unless the brake warning light also remains
illuminated with parking brake released.
THEFT
O/D
OFF
ABS
Instrumentation
9
Page 10 of 190

Speed control (if equipped)
This light comes on
when either the
SET/ACCEL or
RESUME controls are
pressed. It turns off
when the speed control OFF control is pressed, the
brake is applied or the ignition is turned to the OFF
position.
Brake system warning
Momentarily illuminates
when the ignition is
turned to the ON
position and the engine
is off. If brake warning lamp does not illuminate at
this time, seek service immediately. Also illuminates
when the parking brake is engaged. Illumination
after releasing the parking brake indicates low brake
fluid level and the brake system should be inspected
immediately.
Engine oil pressure
Illuminates when the
oil pressure falls below
the normal range. Stop
the vehicle as soon as
safely possible and switch off the engine
immediately. Check the oil level and add oil if
needed. Refer toEngine oilin theMaintenance
and Carechapter.
This lamp also illuminates when the ignition is
turned to ON and the engine is off.
Charging system
Illuminates when the
ignition is turned to
the ON position and
the engine is off. The
light also illuminates when the battery is not
CRUISE
ON
P!
BRAKE
Instrumentation
10
Page 31 of 190

To disengage speed control
²Depress the brake
pedal.
Disengaging the speed
control will not erase
the previously
programmed set speed.
Pressing OFF will erase
the previously
programmed set speed.
To return to a previously set speed
²Press
RES/RSM/RESUME.
For
RES/RSM/RESUME
to operate, the
vehicle speed must
be faster than 48
km/h (30 mph).
Indicator light
This light comes on when either the SET ACC/SET
ACCEL or RES/RSM/RESUME controls are pressed.
It turns off when the speed control OFF control is
pressed, the brake is applied or the ignition is
turned to the OFF position.
OFF ON
COAST
RESUME
SET
ACCEL
CRUISE
Controls and features
31
Page 51 of 190

Unlocking the doors and releasing the trunk
with the keyless entry system
The driver's door must be unlocked before any
other. If more than five seconds pass between
pressing numbers, enter the code again. The system
has shut down if the keypad light is out. If the
keyless entry system does not work, use the key or
remote entry transmitter(s).
1. To unlock the driver's door, enter one of the two
codes. After pressing the fifth number, the driver's
door unlocks.
2. To unlock the
passenger's door(s) and
liftgate (wagon), press
the 3/4 control within
five seconds of
unlocking the driver's
door.
3. To unlock the trunk
or liftgate (wagon),
enter the five-digit
factory-set code, then
press the 5/6 control
within five seconds.
Autolock
Autolock is a feature that will automatically lock all
doors when:
²all vehicle doors, liftgate and liftgate window are
fully closed
²the ignition key is in the ON position
²you shift into or through R (Reverse)
²the brake pedal is released
The autolock feature repeats when:
²any door is opened and then closed
²the brake pedal is released
123
45678
90
123
45678
90
Controls and features
51
Page 86 of 190

5. Turn the key to 4
(ON) without turning
the key to 5 (START).
Make sure the corresponding lights illuminate
briefly. If a light fails to illuminate, have the vehicle
serviced.
²If the driver's safety belt is fastened, the light
(
) will not illuminate.
STARTING THE ENGINE
1. Turn the key to 5
(START) without
pressing the
accelerator pedal and
release as soon as the
engine starts. The key
will return to 4 (ON).
2. If the temperature is above ±12É C (10É F) and
the engine does not start within five seconds on the
first try, turn the key to OFF, wait ten seconds and
try again.
3. If the temperature is below -12ÉC (10ÉF) and the
engine does not start in fifteen seconds on the first
try, turn the key OFF and wait ten seconds and try
1
23
4
5
CRUISE
RPMx1000
0 1234
5
6
7EFC H
FUEL DOOR>
SERVICE
ENGINE
SOONP!
BRAKEABS
+ –
UNLEADED FUEL ONLY
THEFT LOW
COOLANTO/D
OFF102030405060
70
80
90
100
1202060100
140
180
P R N D 2 1MPH km/h
00
000
00000
110
1
23
4
5
Starting
86
Page 90 of 190

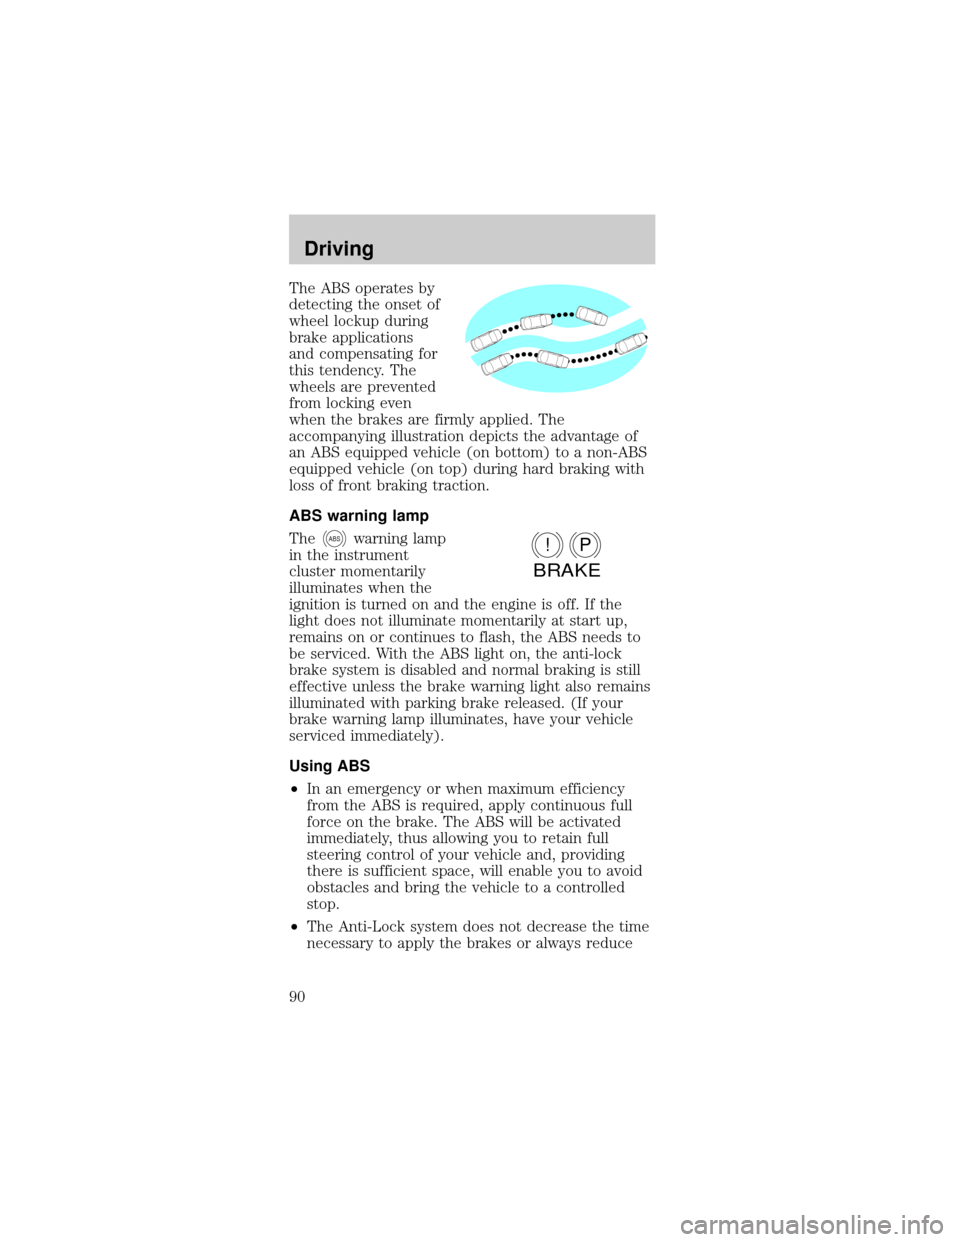
The ABS operates by
detecting the onset of
wheel lockup during
brake applications
and compensating for
this tendency. The
wheels are prevented
from locking even
when the brakes are firmly applied. The
accompanying illustration depicts the advantage of
an ABS equipped vehicle (on bottom) to a non-ABS
equipped vehicle (on top) during hard braking with
loss of front braking traction.
ABS warning lamp
The
ABSwarning lamp
in the instrument
cluster momentarily
illuminates when the
ignition is turned on and the engine is off. If the
light does not illuminate momentarily at start up,
remains on or continues to flash, the ABS needs to
be serviced. With the ABS light on, the anti-lock
brake system is disabled and normal braking is still
effective unless the brake warning light also remains
illuminated with parking brake released. (If your
brake warning lamp illuminates, have your vehicle
serviced immediately).
Using ABS
²In an emergency or when maximum efficiency
from the ABS is required, apply continuous full
force on the brake. The ABS will be activated
immediately, thus allowing you to retain full
steering control of your vehicle and, providing
there is sufficient space, will enable you to avoid
obstacles and bring the vehicle to a controlled
stop.
²The Anti-Lock system does not decrease the time
necessary to apply the brakes or always reduceP!
BRAKE
Driving
90
Page 93 of 190

AUTOMATIC TRANSAXLE OPERATION
Brake-shift interlock
This vehicle is equipped with a brake-shift interlock
feature that prevents the gearshift from being moved
from P (Park) unless the brake pedal is pressed.
If you cannot move the gearshift out of P (Park)
with the brake pedal depressed:
1. Apply the parking brake, turn ignition key to
LOCK, then remove the key.
2. Insert the key and turn it to OFF. Apply the brake
pedal and shift to N (Neutral).
3. Start the vehicle.
If it is necessary to use the above procedure to
move the gearshift, it is possible that a fuse has
blown and the vehicle's brakelamps may not be
operating properly. Refer toFuses and relaysin the
Roadside emergencieschapter.
Do not drive your vehicle until you verify
that the brakelamps are working.
If your vehicle gets stuck in mud or snow it may be
rocked out by shifting from forward and reverse
gears, stopping between shifts, in a steady pattern.
Press lightly on the accelerator in each gear. Do not
rock the vehicle for more than a few minutes,
because it could damage the vehicle.
Always set the parking brake fully and make
sure the gearshift is latched in P (Park).
Turn off the ignition whenever you leave your
vehicle.
Driving
93
Page 102 of 190

DRIVING THROUGH WATER
Do not drive quickly through standing water,
especially if the depth is unknown. Traction or brake
capability may be limited and if the ignition system
gets wet, your engine may stall. Water may also
enter your engine's air intake and severely damage
your engine.
If driving through deep or standing water is
unavoidable, proceed very slowly. Never drive
through water that is higher than the bottom of the
hubs (truck)/wheel rims (car).
Once through the water, always try the brakes. Wet
brakes do not stop the vehicle as effectively as dry
brakes. Drying can be improved by moving your
vehicle slowly while applying light pressure on the
brake pedal.
TRAILER TOWING
Your vehicle is classified as a light duty towing
vehicle. The amount of weight you can safely tow
depends on the type of engine you have in your
vehicle. Your vehicle does not come from the factory
fully equipped to tow. No towing packages are
available through Ford or Mercury/Lincoln dealers.
Do not tow a trailer until your vehicle has been
driven at least 800 km (500 miles). If towing with a
station wagon, inflate the rear tires to 35 psi.
Towing a trailer places an additional load on your
vehicle's engine, transaxle, brakes, tires and
suspension. Inspect these components carefully after
towing.
The amount of weight that you can tow depends on
the type of engine in your vehicle. See the following
charts:
Driving
102
Page 110 of 190

Standard fuse amperage rating and color
Fuse rating Color
5 amp Tan
7.5 amp Brown
10 amp Red
15 amp Light blue
20 amp Yellow
20 amp fuse link Light blue
25 amp Natural
30 amp Light green
30 amp fuse link Pink
40 amp fuse link Green
50 amp fuse link Red
60 amp fuse link Yellow
80 amp fuse link Black
100 amp fuse link Dark blue
Passenger compartment fuse panel
The fuse panel is located below and to the left of
the steering wheel by the brake pedal. Remove the
panel cover to access the fuses.
To remove a fuse use the fuse puller tool provided
on the fuse panel cover.
RELAY
38
RELAY 37
RELAY 35
RELAY 34RELAY
39
RELAY
36
29
25
21
17
13
9
5
130
26
22
18
14
10
6
227
23
19
15
11
7
332 33
28
24
20
16
12
8
4 31
Roadside emergencies
110