instrument cluster Mercury Sable 1998 Owner's Manuals
[x] Cancel search | Manufacturer: MERCURY, Model Year: 1998, Model line: Sable, Model: Mercury Sable 1998Pages: 190, PDF Size: 1.29 MB
Page 4 of 190

EFC HFUEL DOOR>
SERVICE
ENGINE
SOONLOW
COOLANTTHEFT102030405060
70
80
90
100
1202060100
140
180P R N D 2 1MPH km/h0000000000P!
BRAKE
+ –
110CRUISE
RPMx1000
ABSO/D
OFFREAR
LAMP
OUTPREMIUM UNLEADED
FUEL RECOMMENDED0 1234
5
6
78
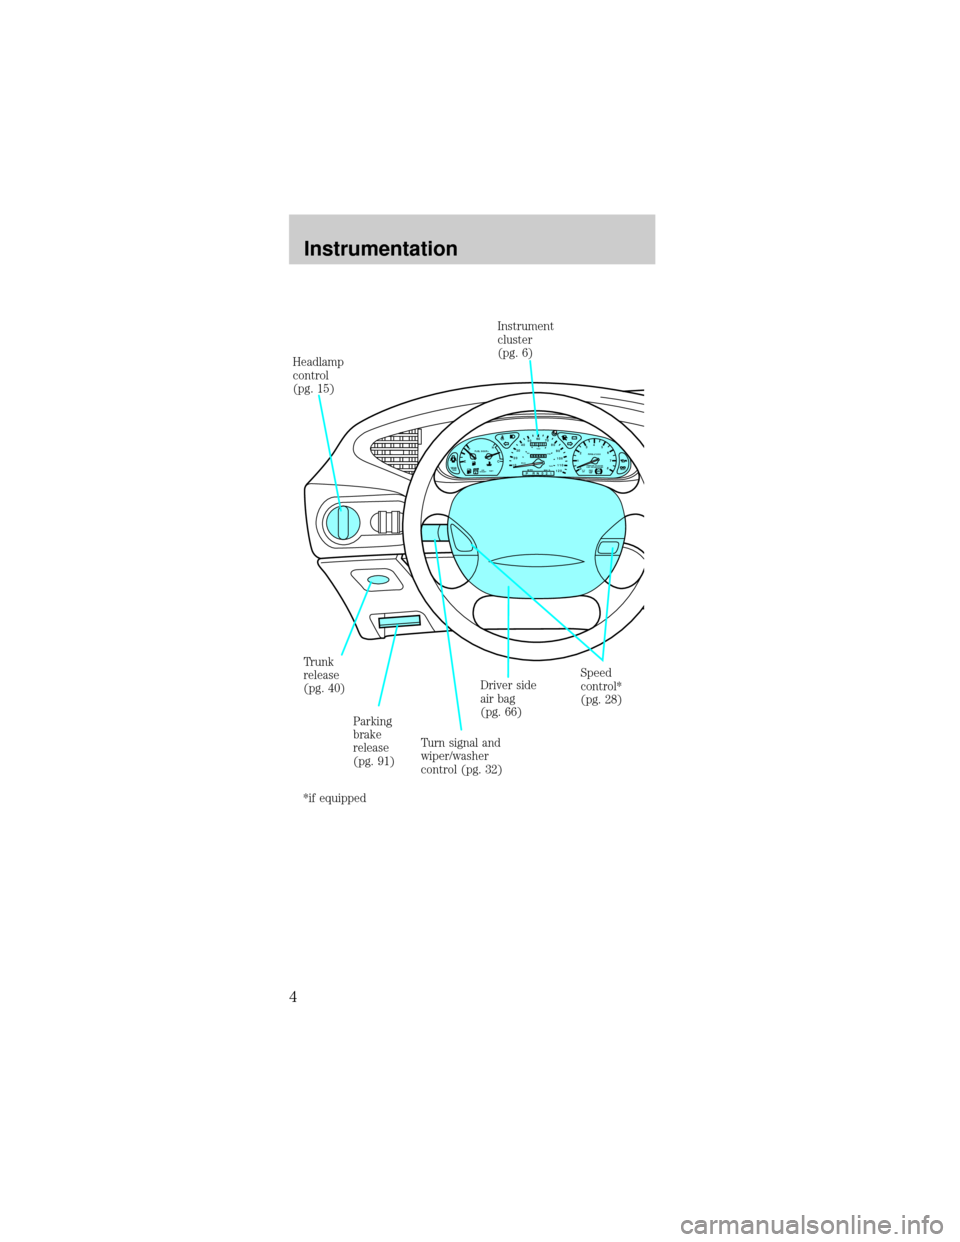
Parking
brake
release
(pg. 91) Headlamp
control
(pg. 15)
Speed
control*
(pg. 28) Driver side
air bag
(pg. 66) Trunk
release
(pg. 40)
Turn signal and
wiper/washer
control (pg. 32)Instrument
cluster
(pg. 6)
*if equipped
Instrumentation
4
Page 47 of 190

PERIMETER ALARM SYSTEM (IF EQUIPPED)
Arming the system
When armed, this system will help protect your
vehicle from unauthorized entry. When unauthorized
entry occurs, the system will flash the headlamps
and/or parking lamps, and the theft indicator lamp
and will chirp the horn.
The system is ready to arm whenever the ignition is
turned OFF. Any of the following actions will prearm
the alarm system:
²Press the remote
entry lock control
(doors opened or
closed).
²Press 7/8 and 9/0
controls on the
keyless entry pad at
the same time to
lock the doors
(doors opened or
closed).
²Open a door and press the power door lock
control to lock the doors.
²Use the door key to lock the doors (doors opened
or closed).
If a door or the liftgate
(wagon) is open, the
system is prearmed
and is waiting for the
door to close or liftgate to close. The THEFT
indicator in the instrument cluster will be lit
continuously when the system is prearmed.
123
45678
90
THEFT
Controls and features
47
Page 65 of 190

Safety belt warning light and indicator chime
The seat belt warning light illuminates in the
instrument cluster and a chime sounds to remind
the occupants to fasten their safety belts.
Conditions of operation
If... Then...
The driver's safety belt
is not buckled before
the ignition switch is
turned to the ON
position...The safety belt warning
light illuminates for one
to two minutes and the
warning chime sounds
for four to eight
seconds.
The driver's safety belt
is buckled while the
indicator light is
illuminated and the
warning chime is
sounding...The safety belt warning
light and warning chime
turn off.
The driver's safety belt
is buckled before the
ignition switch is turned
to the ON position...The safety belt warning
light and indicator chime
remain off.
Seating and safety restraints
65
Page 72 of 190

Determining if the system is operational
The SRS uses a readiness light in the instrument
cluster or a tone to indicate the condition of the
system. Refer to theAir bag readinesssection in
theInstrumentationchapter. Routine maintenance
of the air bag is not required.
A difficulty with the system is indicated by one or
more of the following:
²The readiness light
will either flash or
stay lit.
²The readiness light
will not illuminate immediately after ignition is
turned on.
²A series of five beeps will be heard. The tone
pattern will repeat periodically until the problem
and light are repaired.
If any of these things happen, even intermittently,
have the SRS serviced at your dealership or by a
qualified technician immediately. Unless serviced,
the system may not function properly in the event of
a collision.
Disposal of air bags and air bag equipped
vehicles
For disposal of air bags or air bag equipped vehicles,
see your local dealership or qualified technician. Air
bags MUST BE disposed of by qualified personnel.
SAFETY RESTRAINTS FOR CHILDREN
See the following sections for directions on how to
properly use safety restraints for children. Also see
Air Bag Supplemental Restraint System (SRS)in
this chapter for special instructions about using air
bags.
Important child restraint precautions
You are required by law to use safety restraints for
children in the U.S. and Canada. If small children
Seating and safety restraints
72
Page 90 of 190

The ABS operates by
detecting the onset of
wheel lockup during
brake applications
and compensating for
this tendency. The
wheels are prevented
from locking even
when the brakes are firmly applied. The
accompanying illustration depicts the advantage of
an ABS equipped vehicle (on bottom) to a non-ABS
equipped vehicle (on top) during hard braking with
loss of front braking traction.
ABS warning lamp
The
ABSwarning lamp
in the instrument
cluster momentarily
illuminates when the
ignition is turned on and the engine is off. If the
light does not illuminate momentarily at start up,
remains on or continues to flash, the ABS needs to
be serviced. With the ABS light on, the anti-lock
brake system is disabled and normal braking is still
effective unless the brake warning light also remains
illuminated with parking brake released. (If your
brake warning lamp illuminates, have your vehicle
serviced immediately).
Using ABS
²In an emergency or when maximum efficiency
from the ABS is required, apply continuous full
force on the brake. The ABS will be activated
immediately, thus allowing you to retain full
steering control of your vehicle and, providing
there is sufficient space, will enable you to avoid
obstacles and bring the vehicle to a controlled
stop.
²The Anti-Lock system does not decrease the time
necessary to apply the brakes or always reduceP!
BRAKE
Driving
90
Page 91 of 190

stopping distance. Always leave enough room
between your vehicle and the vehicle in front of
you to stop.
²We recommend that you familiarize yourself with
this braking technique. However, avoid taking any
unnecessary risks.
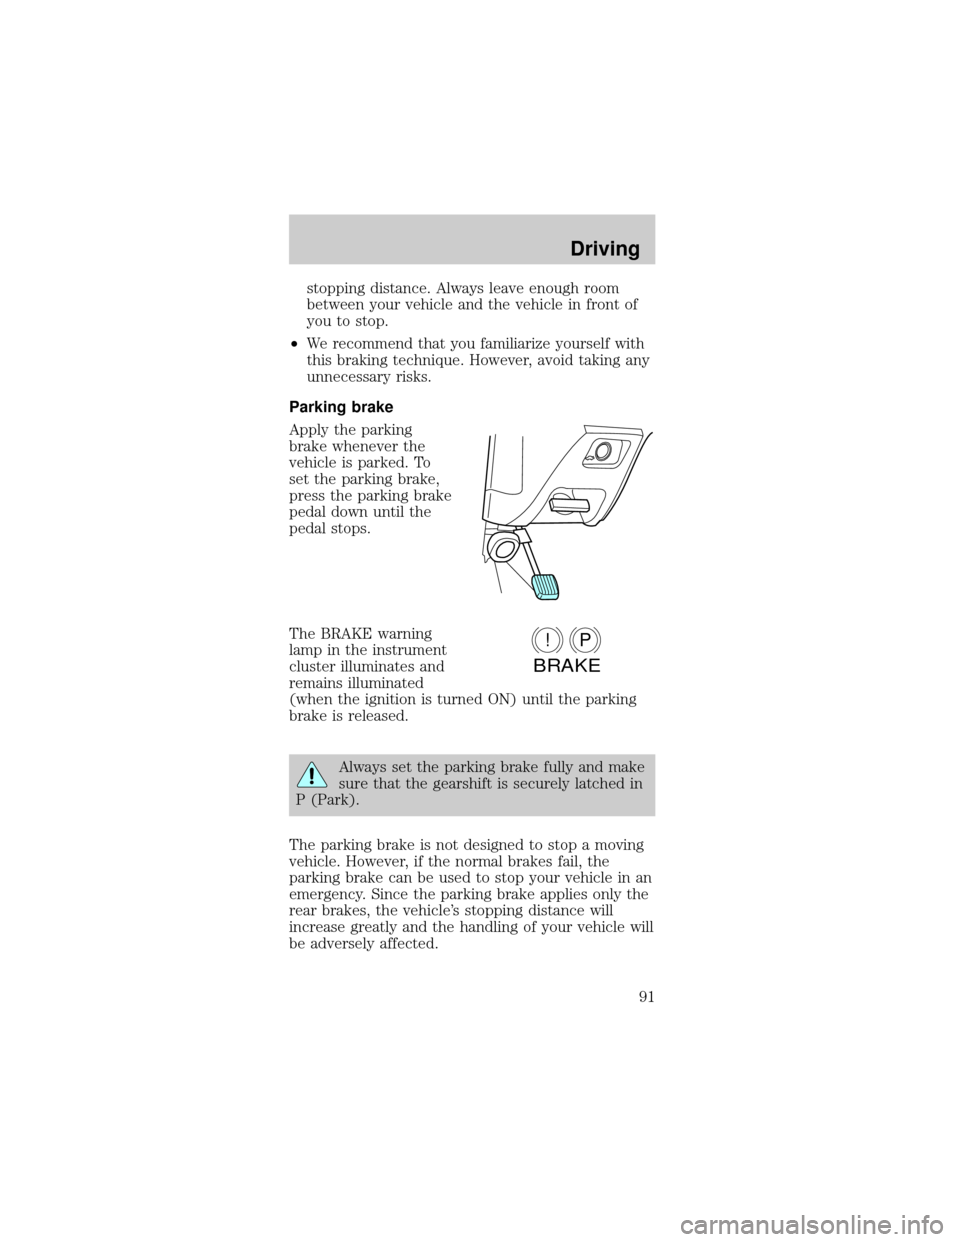
Parking brake
Apply the parking
brake whenever the
vehicle is parked. To
set the parking brake,
press the parking brake
pedal down until the
pedal stops.
The BRAKE warning
lamp in the instrument
cluster illuminates and
remains illuminated
(when the ignition is turned ON) until the parking
brake is released.
Always set the parking brake fully and make
sure that the gearshift is securely latched in
P (Park).
The parking brake is not designed to stop a moving
vehicle. However, if the normal brakes fail, the
parking brake can be used to stop your vehicle in an
emergency. Since the parking brake applies only the
rear brakes, the vehicle's stopping distance will
increase greatly and the handling of your vehicle will
be adversely affected.
P!
BRAKE
Driving
91
Page 98 of 190

If the O/D OFF indicator light (if equipped) is
flashing on and off when the vehicle is started or
does not come on when the O/D OFF switch is
pressed, it means there is a malfunction in your
transaxle's electronic system. Contact your dealer as
soon as possible or damage to the transaxle may
occur.
Each time the vehicle is started, the transaxle will
automatically return to normal overdrive mode.
When to use D (Drive) or press the O/D OFF
switch (if equipped)
You will notice that
there is only one drive
position on your
gearshift indicator
(instead of Drive and
Overdrive). However,
you will find a control
labeled O/D located on
the gearshift lever.
Push in the switch and
the O/D OFF light in
the instrument cluster
will illuminate. With
the O/D OFF light
illuminated, the
transaxle will operate
in first, second and
third gears and will not shift into fourth gear.
Operating in D (O/D OFF) provides more engine
braking than Overdrive for descending hills or city
driving.
To return the transaxle to the normal Overdrive
operation, press the O/D OFF control again. Use this
control to select Overdrive or D (O/D OFF)
whenever you drive your vehicle.
Driving
98
Page 111 of 190

The fuses are coded as follows.
Fuse/
Relay
LocationFuse
Amp
RatingDescription
1 Ð Not Used
2 5A Instrument Illumination
3 10A Left Low Beam Headlamp
4 10A Right Low Beam Headlamp
5 5A Brake Shift Interlock, Rear
Defrost
6 15A MLPS Switch, Backup Lamps,
Speed Control
7 10A MLPS Switch, Starter Relay
8 5A Power Antenna, RCU, GEM
9 10A ABS
10 20A PCM Relay, Ignition Coil,
PATS, Radio
11 5A Instrument Cluster
12 5A Instrument Cluster, Autolamps,
Transmission Control Switch,
ICP, GEM
13 5A Air Bag, Blower Motor, EATC
14 5A Air Suspension
15 10A Multi-Function Switch (Turn
Signal)
16 Ð Not Used
17 30A Front Wiper/Washer
18 5A Headlamp Switch
19 15A Rear Wiper/Washer
20 5A ICP, RAP, Phone
21 20A Cigar Lighter
22 5A Power Mirrors, Power
Antenna, Decklid Lamps,
Autolamp
Roadside emergencies
111
Page 112 of 190

Fuse/
Relay
LocationFuse
Amp
RatingDescription
23 5A GEM, RAP, PATS
24 5A ICP, RCC, Speedometer
25 10A Data Link Connector (DLC)
26 15A Trunklid
27 10A Battery Saver Relay
28 15A Speed Control, Stop Lamp
29 15A Multi-Function Switch, Hazard
30 15A High Beams, Daytime Running
Lamps, Instrument Cluster
31 Ð Not Used
32 10A ICP, Heated Mirrors
33 5A Power Windows, Lock
Illumination
34 Ð Battery Saver Relay
35 Ð Driver Door Unlock Relay
36 Ð Rear Defroster Relay
37 Ð Interior Lamp Relay
38 Ð One Touch Window Down
Relay
39 Ð Accessory Delay Relay
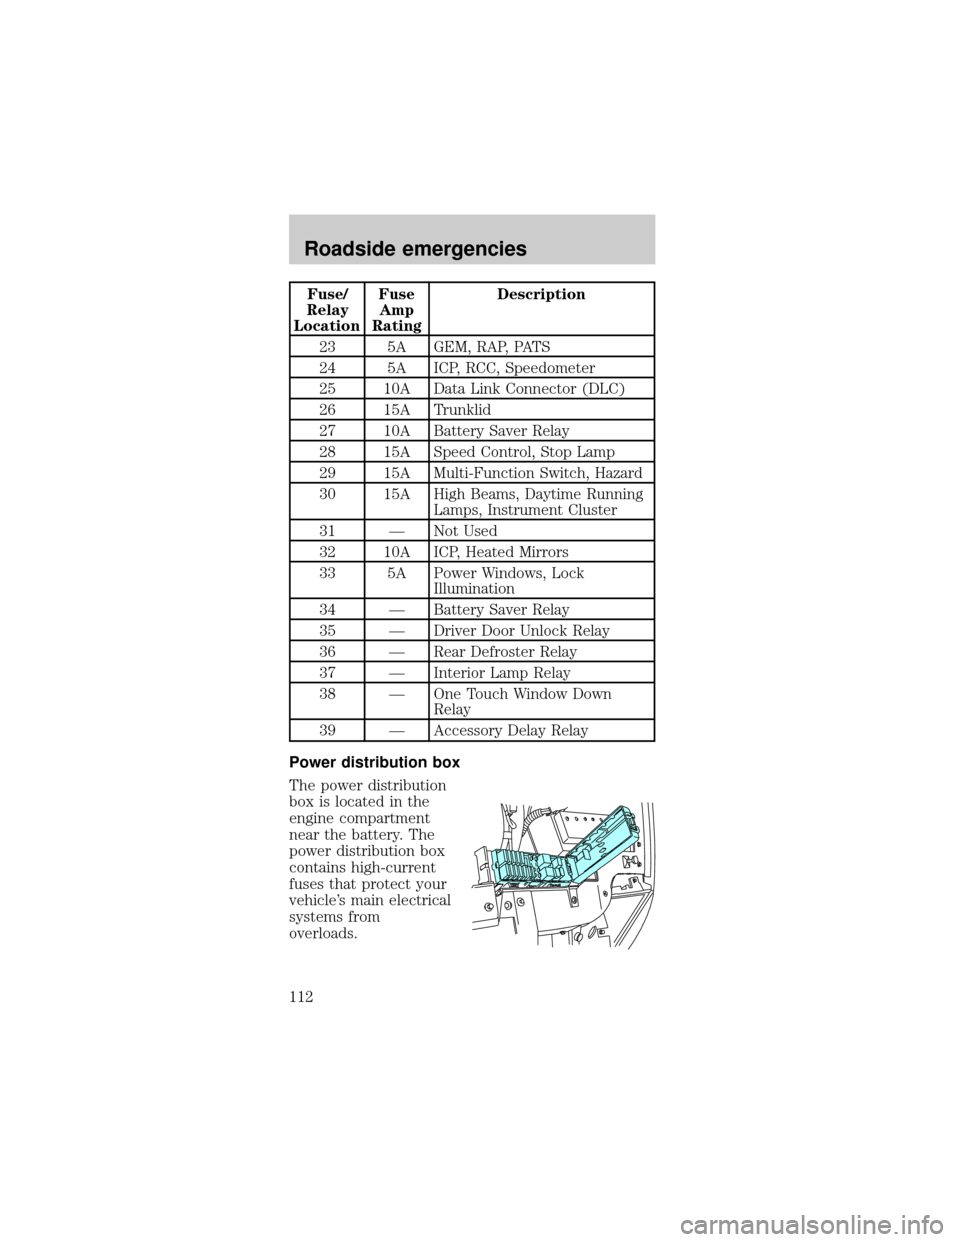
Power distribution box
The power distribution
box is located in the
engine compartment
near the battery. The
power distribution box
contains high-current
fuses that protect your
vehicle's main electrical
systems from
overloads.
Roadside emergencies
112