trunk Mercury Sable 1998 Owner's Manuals
[x] Cancel search | Manufacturer: MERCURY, Model Year: 1998, Model line: Sable, Model: Mercury Sable 1998Pages: 190, PDF Size: 1.29 MB
Page 4 of 190

EFC HFUEL DOOR>
SERVICE
ENGINE
SOONLOW
COOLANTTHEFT102030405060
70
80
90
100
1202060100
140
180P R N D 2 1MPH km/h0000000000P!
BRAKE
+ –
110CRUISE
RPMx1000
ABSO/D
OFFREAR
LAMP
OUTPREMIUM UNLEADED
FUEL RECOMMENDED0 1234
5
6
78
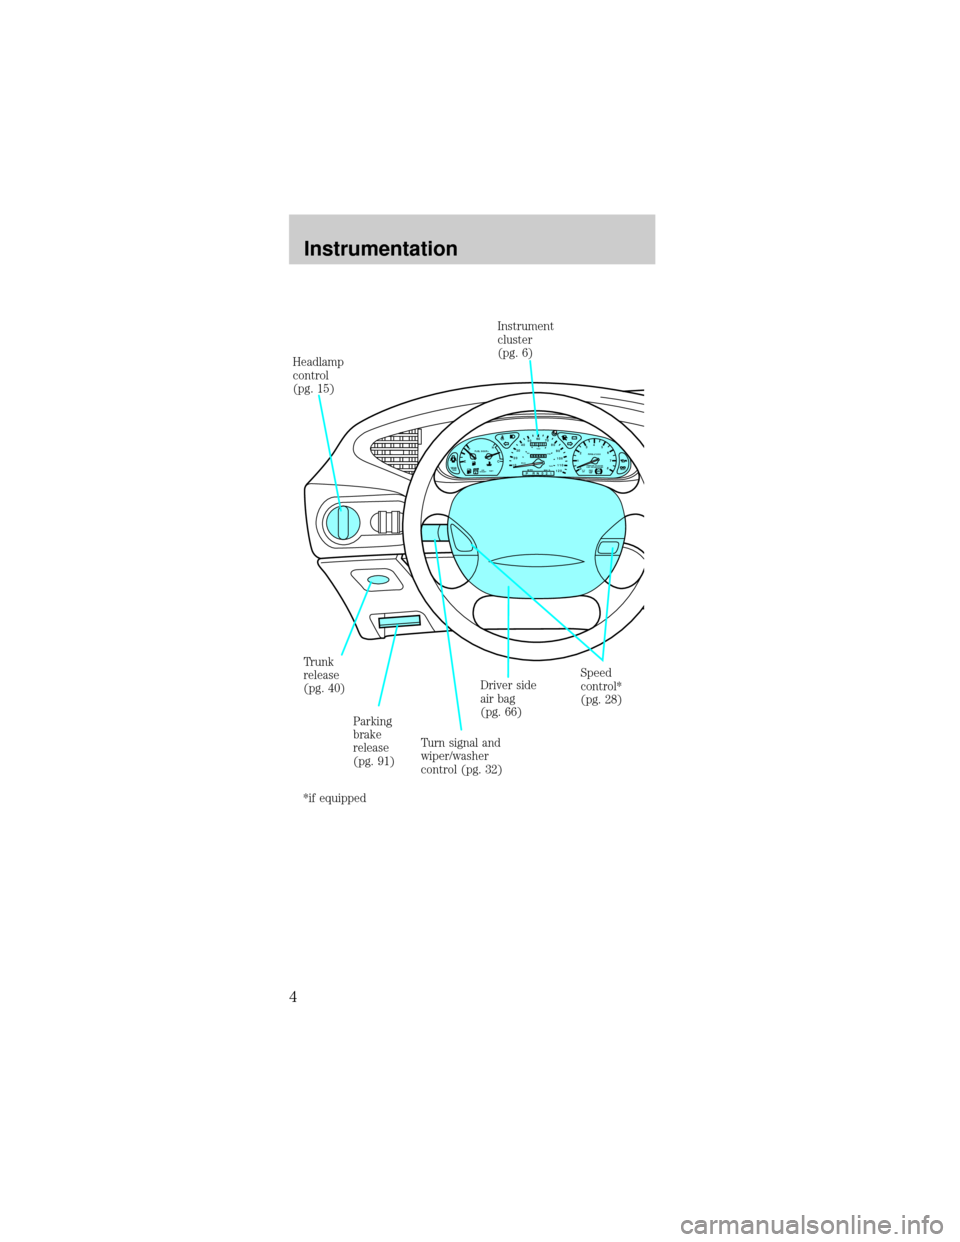
Parking
brake
release
(pg. 91) Headlamp
control
(pg. 15)
Speed
control*
(pg. 28) Driver side
air bag
(pg. 66) Trunk
release
(pg. 40)
Turn signal and
wiper/washer
control (pg. 32)Instrument
cluster
(pg. 6)
*if equipped
Instrumentation
4
Page 40 of 190

TRUNK REMOTE CONTROL
Press the remote trunk
release control on the
instrument panel to the
left of the steering
wheel.
LIFTGATE (WAGON ONLY)
You can open the
entire liftgate or just
the liftgate window. To
open the entire liftgate,
press the release
button hidden under
the exterior trim panel
just above the license
plate.
You must lock the liftgate with the key or power
lock control; it does not lock automatically.
The window locks when the liftgate is locked. To
open the window, make sure the liftgate and window
are unlocked, then press the outside lock cylinder.
The window can only be opened from the outside.
To prevent any damage to the liftgate and window,
close them completely before driving.
Controls and features
40
Page 44 of 190

Locking the doors
Press this control to
lock all doors.
To confirm all doors
are closed and locked,
press the control a
second time within five
seconds. The doors will
lock again, the horn
will chirp and the lamps will flash.
If any of the doors are ajar, the horn will make two
quick chirps, reminding you to properly close all
doors.
Unlocking the liftgate/trunk
Press the control to
unlock the
liftgate/trunk.
Sounding a panic alarm
Press this control to
activate the alarm.
To deactivate the
alarm, press the
control again or turn
the ignition to ACC or
ON.
This device complies
with part 15 of the FCC rules and with RS-210 of
Industry Canada. Operation is subject to the
following two conditions: (1) This device may not
cause harmful interference, and (2) This device
must accept any interference received, including
interference that may cause undesired operation.
Controls and features
44
Page 51 of 190

Unlocking the doors and releasing the trunk
with the keyless entry system
The driver's door must be unlocked before any
other. If more than five seconds pass between
pressing numbers, enter the code again. The system
has shut down if the keypad light is out. If the
keyless entry system does not work, use the key or
remote entry transmitter(s).
1. To unlock the driver's door, enter one of the two
codes. After pressing the fifth number, the driver's
door unlocks.
2. To unlock the
passenger's door(s) and
liftgate (wagon), press
the 3/4 control within
five seconds of
unlocking the driver's
door.
3. To unlock the trunk
or liftgate (wagon),
enter the five-digit
factory-set code, then
press the 5/6 control
within five seconds.
Autolock
Autolock is a feature that will automatically lock all
doors when:
²all vehicle doors, liftgate and liftgate window are
fully closed
²the ignition key is in the ON position
²you shift into or through R (Reverse)
²the brake pedal is released
The autolock feature repeats when:
²any door is opened and then closed
²the brake pedal is released
123
45678
90
123
45678
90
Controls and features
51
Page 109 of 190

If your vehicle is a
sedan, the fuel pump
shut-off switch is
located on the right
side of the trunk
behind the trunk liner.
If your vehicle is a
wagon, the fuel pump
shut-off switch is
located behind the
service panel on the
right side of the cargo
area.
FUSES AND RELAYS
Fuses
If electrical
components in the
vehicle are not
working, a fuse may
have blown. Blown
fuses are identified by a broken wire within the fuse.
Check the appropriate fuses before replacing any
electrical components.
Always replace a fuse with one that has the
specified amperage rating. Using a fuse with
a higher amperage rating can cause severe wire
damage and could start a fire.
1515
Roadside emergencies
109
Page 112 of 190

Fuse/
Relay
LocationFuse
Amp
RatingDescription
23 5A GEM, RAP, PATS
24 5A ICP, RCC, Speedometer
25 10A Data Link Connector (DLC)
26 15A Trunklid
27 10A Battery Saver Relay
28 15A Speed Control, Stop Lamp
29 15A Multi-Function Switch, Hazard
30 15A High Beams, Daytime Running
Lamps, Instrument Cluster
31 Ð Not Used
32 10A ICP, Heated Mirrors
33 5A Power Windows, Lock
Illumination
34 Ð Battery Saver Relay
35 Ð Driver Door Unlock Relay
36 Ð Rear Defroster Relay
37 Ð Interior Lamp Relay
38 Ð One Touch Window Down
Relay
39 Ð Accessory Delay Relay
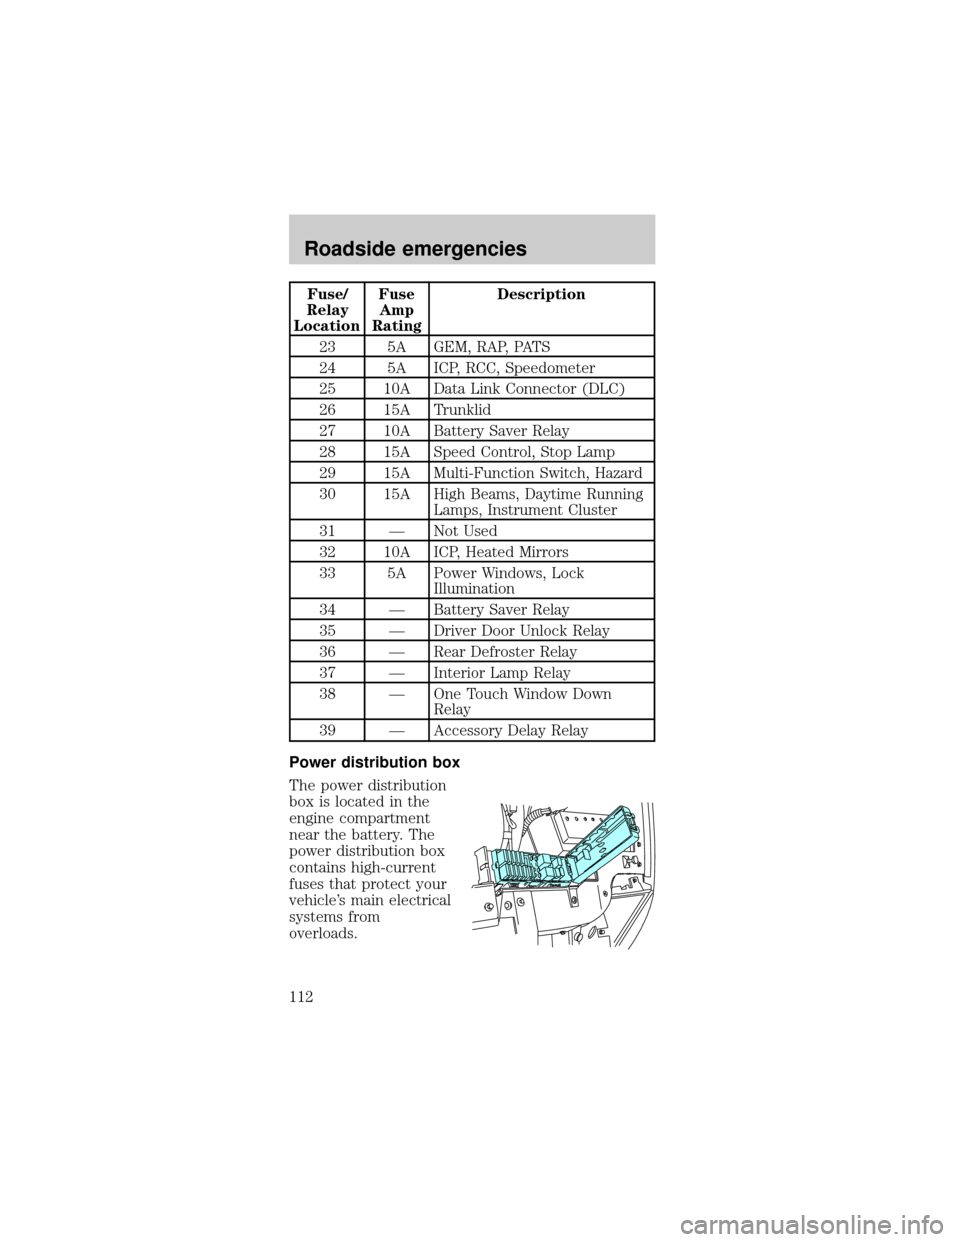
Power distribution box
The power distribution
box is located in the
engine compartment
near the battery. The
power distribution box
contains high-current
fuses that protect your
vehicle's main electrical
systems from
overloads.
Roadside emergencies
112
Page 119 of 190

If the vehicle slips off the jack, you or
someone else could be seriously injured.
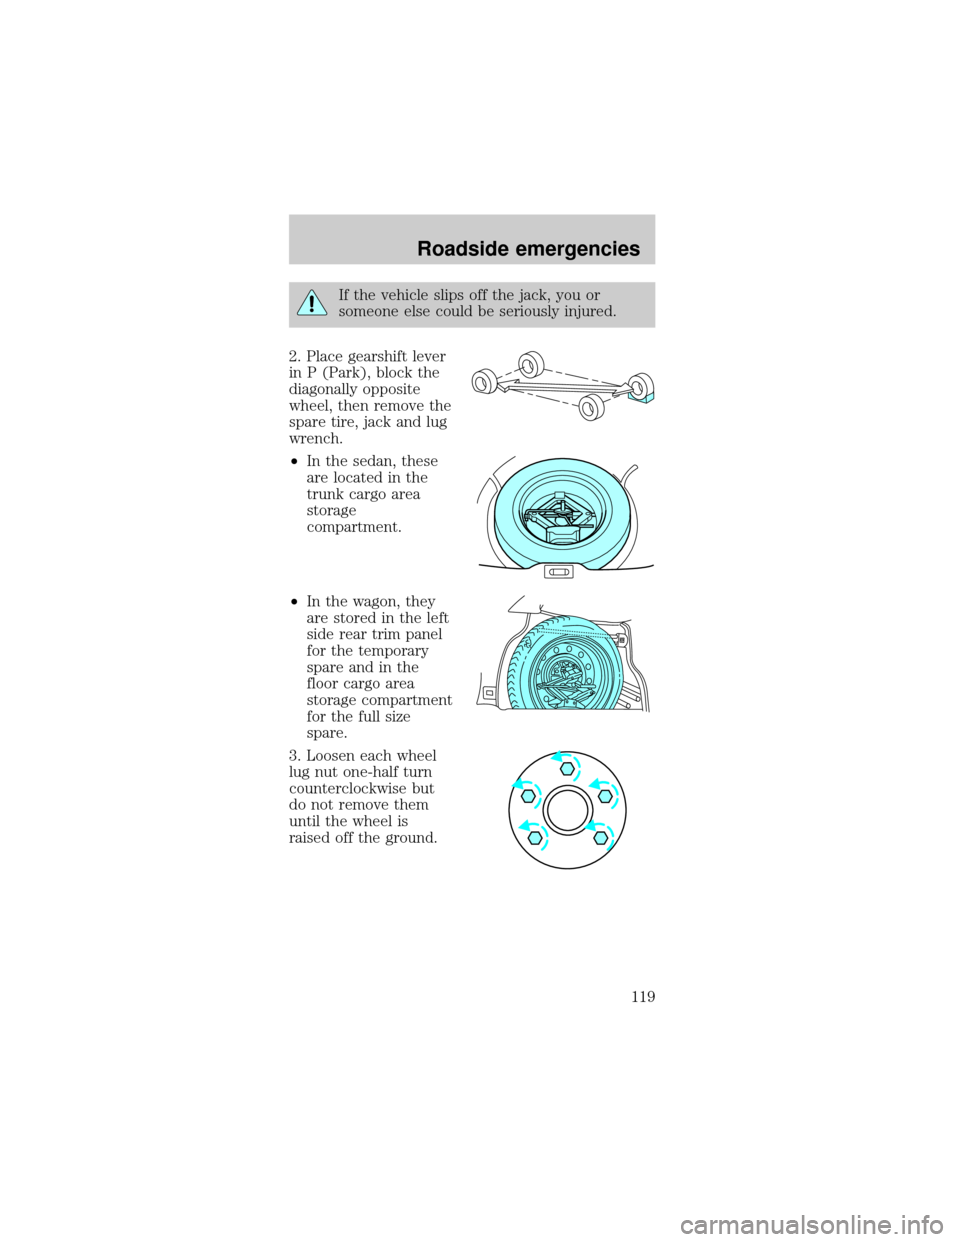
2. Place gearshift lever
in P (Park), block the
diagonally opposite
wheel, then remove the
spare tire, jack and lug
wrench.
²In the sedan, these
are located in the
trunk cargo area
storage
compartment.
²In the wagon, they
are stored in the left
side rear trim panel
for the temporary
spare and in the
floor cargo area
storage compartment
for the full size
spare.
3. Loosen each wheel
lug nut one-half turn
counterclockwise but
do not remove them
until the wheel is
raised off the ground.
Roadside emergencies
119
Page 162 of 190

To install the new bulb:
1. With the flat side of
the bulb's plastic base
facing upward, insert
the glass end of the
bulb into the lamp
assembly. You may
need to turn the bulb left or right to align the
grooves in the plastic base with the tabs in the lamp
assembly. When the grooves are aligned, push the
bulb into the lamp assembly until the plastic base
contacts the rear of the lamp assembly.
2. Install the bulb retaining ring over the plastic base
until it contacts the rear of the socket by rotating
clockwise until you feel a ªstop.º
3. Install the electrical connector into the rear of the
plastic base until it snaps, locking it into position.
4. Turn the headlamps on and make sure they work
properly. If the headlamp was correctly aligned
before you changed the bulb, you should not need to
align it again.
High-mount brakelamp bulbs
The following
procedure is for sedans
only. For wagon, refer
to a qualified
technician.
1. Open trunk.
2. Inside trunk, locate
access hole under the
rear window
3. Remove the bulb
socket by rotating it 45 degrees and pulling it out of
the lamp assembly.
4. Carefully pull bulb straight out of socket and push
in new bulb.
5. To complete installation, follow the removal
procedure in reverse order.
Maintenance and care
162
Page 175 of 190

Fluid Ford Part
NameApplication Capacity
Windshield
washer
fluid -
FrontUltra-Clear
Windshield
Washer
ConcentrateAll 2.7L (90
oz.)
Windshield
washer
fluid -
RearUltra-Clear
Windshield
Washer
ConcentrateWagon 2.1L (70
oz.)
1If your engine coolant is green in color, use Ford
Premium Cooling System Fluid. If your coolant is
orange in color, use Ford Extended Life Engine
Coolant. Refer toLubricant Specifications.
LUBRICANT SPECIFICATIONS
ItemsFord Part
Name or
equivalentFord
Part
NumberFord
Specification
Brake fluid High
Performance
DOT 3
Motor
Vehicle
Brake FluidC6AZ-
19542-ABESA-
M6C25-A and
DOT 3
Door latch,
hood latch,
auxiliary
hood latch,
seat
tracks,
trunk and
liftgate
latchesMulti-
Purpose
GreaseDOAZ-
19584-
AA or
F5AZ-
19G209-
AAESA-
M1C93-B or
ESR-
M1C159-A
Lock
cylindersPenetrating
LubricantE8AZ-
19A501-Bnone
Capacities and specifications
175
Page 184 of 190

Parking brake ............ 91
Power distribution box
(see Fuses) ............. 112
Power door locks ...... 36
Power steering .......... 92
fluid, checking and
adding ............. 138,139
Relays ............... 109,115
Remote entry system 43
illuminated entry .... 45
locking/unlocking
doors ................... 43,44
replacement/additional
transmitters ............. 45
replacing the
batteries .................. 46
Safety restraints ........ 62
cleaning the safety
belts .................. 66,172
extension
assembly .................. 64
for children ........ 72,73
lap belt ............... 61,62
warning light and
chime .................. 11,65
Seat belts (see Safety
restraints) ... 57,58,59,60
Seats .......................... 54
child safety seats .... 74
cleaning .......... 171,172
Servicing your
vehicle ...................... 127
Spark plugs,
specifications ........... 173
Specification chart,
lubricants ................. 175
Speed control ............ 28
Speedometer ............. 12
Starting your
vehicle .............. 84,85,86jump
starting .... 121,122,124
Steering wheel
tilting ....................... 33
Tires .................. 148,150
changing ................ 118
checking the
pressure ................. 150
replacing ................ 151
rotating .................. 151
snow tires an
d chains ................. 152
treadwear .............. 149
Towing
wrecker .................. 126
Transaxle
fluid, refill
capacities ............... 174
Transmission ........... 140
fluid, checking and
adding
(automatic) .... 140,141
Trip odometer ........... 14
Trunk
remote releas
e lever ...................... 40
Vehicle dimensions . 177
Vehicle Identification
Number (VIN) ......... 180
Vehicle loading ........ 100
Ventilating your
vehicle ........................ 88
Warning chimes ........... 6
Washer fluid ............ 134
Wheels
anti-theft lug
nuts ................. 117,118
Windows ............... 35,36
rear wiper/washer ... 32
Index
184