transmission Mercury Sable 1999 Owner's Manuals
[x] Cancel search | Manufacturer: MERCURY, Model Year: 1999, Model line: Sable, Model: Mercury Sable 1999Pages: 216, PDF Size: 1.33 MB
Page 40 of 216

modulation.º Signal modulation is a process radio
stations use to increase their strength/volume
relative to other stations.
²Terrain.Hills, mountains and tall buildings
between your vehicle's antenna and the radio
station signal can cause FM reception problems.
Static can be caused on AM stations by power
lines, electric fences, traffic lights and
thunderstorms. Moving away from an interfering
structure (out of its ªshadowº) returns your
reception to normal.
²Station overload.Weak signals are sometimes
captured by stronger signals when you pass a
broadcast tower. A stronger signal may
temporarily overtake a weaker signal and play
while the weak station frequency is displayed.
The audio system automatically switches to single
channel reception if it will improve the reception of
a station normally received in stereo.
Audio system warranties and service
Refer to the ªWarranty Guideº for audio system
warranty information.
If service is necessary, see your dealer or a qualified
technician.
POSITIONS OF THE IGNITION
1. ACCESSORY, allows
the electrical
accessories such as the
radio to operate while
the engine is not
running.
2. LOCK, locks the
steering wheel,
automatic transmission gearshift lever and allows
key removal.
3. OFF, shuts off the engine and all accessories
without locking the steering wheel.
1
23
4
5
Controls and features
40
Page 105 of 216

AUTOMATIC TRANSAXLE OPERATION
Brake-shift interlock
This vehicle is equipped with a brake-shift interlock
feature that prevents the gearshift from being moved
from P (Park) unless the brake pedal is depressed.
If you cannot move the gearshift out of P (Park)
with the brake pedal depressed:
1. Apply the parking brake, turn ignition key to
LOCK, then remove the key.
2. Insert the key and turn it to OFF. Apply the brake
pedal and shift to N (Neutral).
3. Start the vehicle.
If it is necessary to use the above procedure to
move the gearshift, it is possible that a fuse has
blown or the vehicle's brakelamps are not operating
properly. Refer toFuses and relaysin theRoadside
emergencieschapter.
Do not drive your vehicle until you verify
that the brakelamps are working.
If your vehicle gets stuck in mud or snow it may be
rocked out by shifting from forward and reverse
gears, stopping between shifts, in a steady pattern.
Press lightly on the accelerator in each gear.
Do not rock the vehicle for more than a few
minutes. The transmission and tires may be
damaged or the engine may overheat.
Always set the parking brake fully and make
sure the gearshift is latched in P (Park).
Turn off the ignition whenever you leave your
vehicle.
Driving
105
Page 110 of 216

VEHICLE LOADING
Before loading a vehicle, familiarize yourself with the
following terms:
²Base Curb Weight: Weight of the vehicle
including any standard equipment, fluids,
lubricants, etc. It does not include passengers or
aftermarket equipment.
²Payload: Combined maximum allowable weight
of cargo, passengers and optional equipment. The
payload equals the gross vehicle weight rating
minus base curb weight.
²GVW (Gross Vehicle Weight): Base curb
weight plus payload weight. The GVW is not a
limit or a specification.
²GVWR (Gross Vehicle Weight Rating):
Maximum total weight of the base vehicle,
passengers, optional equipment and cargo. The
GVWR is specific to each vehicle and is listed on the
Safety Compliance Label on the driver's door pillar.
²GAWR (Gross Axle Weight Rating): Carrying
capacity for each axle system. The GAWR is
specific to each vehicle and is listed on the Safety
Compliance Label on the driver's door pillar.
²GCW (Gross Combined Weight): The
combined weight of the towing vehicle (including
passengers and cargo) and the trailer.
²GCWR (Gross Combined Weight Rating):
Maximum combined weight of towing vehicle
(including passengers and cargo) and the trailer.
The GCWR indicates the maximum loaded weight
that the vehicle is designed to tow.
²Maximum Trailer Weight Rating: Maximum
weight of a trailer the vehicle is permitted to tow.
The maximum trailer weight rating is determined
by subtracting the vehicle curb weight for each
engine/transmission combination, any required
option weight for trailer towing and the weight of
the driver from the GCWR for the towing vehicle.
Driving
110
Page 112 of 216

Always ensure that the weight of passengers, cargo
and equipment being carried is within the weight
limitations that have been established for your
vehicle including both Gross Vehicle Weight and
Front and Rear Gross Axle Weight Rating limits.
Under no circumstance should these limitations be
exceeded. Exceeding any vehicle weight rating
limitation could result in serious damage to the
vehicle and/or personal injury.
DRIVING THROUGH WATER
Do not drive quickly through standing water,
especially if the depth is unknown. Traction or brake
capability may be limited and if the ignition system
gets wet, your engine may stall. Water may also
enter your engine's air intake and severely damage
your engine.
If driving through deep or standing water is
unavoidable, proceed very slowly. Never drive
through water that is higher than the bottom of the
hubs.
Once through the water, always try the brakes. Wet
brakes do not stop the vehicle as effectively as dry
brakes. Drying can be improved by moving your
vehicle slowly while applying light pressure on the
brake pedal.
Driving through deep water where the
transmission is submerged may allow water
into the transmission and cause internal
transmission damage.
TRAILER TOWING
Your vehicle is classified as a light duty towing
vehicle. The amount of weight you can safely tow
depends on the type of engine you have in your
vehicle. Your vehicle does not come from the factory
fully equipped to tow. No towing packages are
available through Ford or Mercury/Lincoln dealers.
Do not tow a trailer until your vehicle has been
driven at least 800 km (500 miles). If towing with a
station wagon, inflate the rear tires to 35 psi.
Driving
112
Page 121 of 216

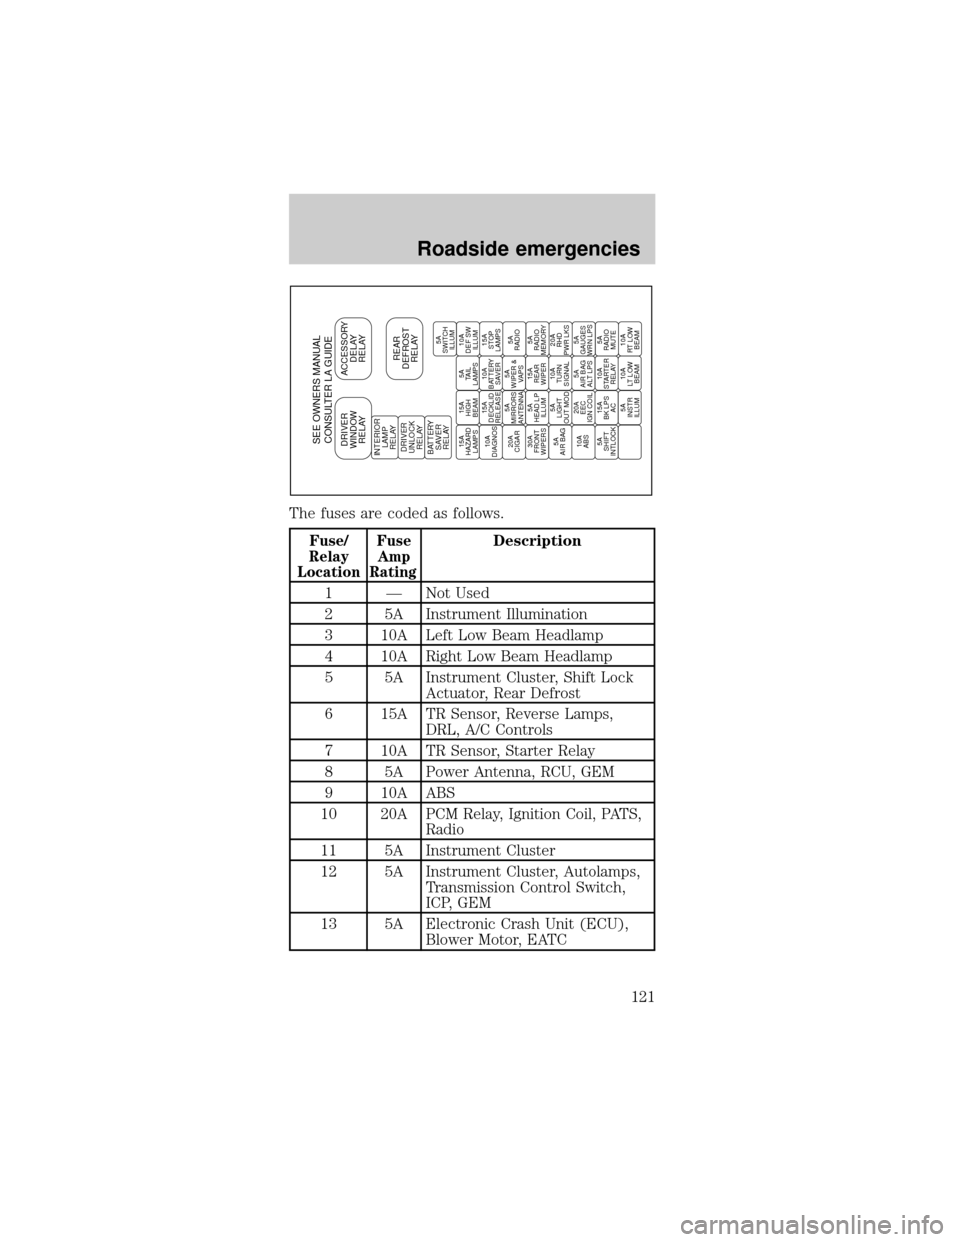
The fuses are coded as follows.
Fuse/
Relay
LocationFuse
Amp
RatingDescription
1 Ð Not Used
2 5A Instrument Illumination
3 10A Left Low Beam Headlamp
4 10A Right Low Beam Headlamp
5 5A Instrument Cluster, Shift Lock
Actuator, Rear Defrost
6 15A TR Sensor, Reverse Lamps,
DRL, A/C Controls
7 10A TR Sensor, Starter Relay
8 5A Power Antenna, RCU, GEM
9 10A ABS
10 20A PCM Relay, Ignition Coil, PATS,
Radio
11 5A Instrument Cluster
12 5A Instrument Cluster, Autolamps,
Transmission Control Switch,
ICP, GEM
13 5A Electronic Crash Unit (ECU),
Blower Motor, EATC
SEE OWNERS MANUAL
CONSULTER LA GUIDEDRIVER
WINDOW
RELAYACCESSORY
DELAY
RELAY
REAR
DEFROST
RELAYINTERIOR
LAMP
RELAY
DRIVER
UNLOCK
RELAY
BATTERY
SAVER
RELAY15A
HAZARD
LAMPS15A
HIGH
BEAM5A
TAIL
LAMPS10A
DEF SW
ILLUM
10A
DIAGNOS15A
DECKLID
RELEASE10A
BATTERY
SAVER15A
STOP
LAMPS
20A
CIGAR5A
MIRRORS
ANTENNA5A
WIPER &
VAPS5A
RADIO
30A
FRONT
WIPERS5A
HEAD LP
ILLUM15A
REAR
WIPER5A
RADIO
MEMORY
5A
AIR BAG5A
LIGHT
OUT MOD10A
TURN
SIGNAL20A
RHD
PWR LKS
10A
ABS20A
EEC
IGN COIL5A
AIR BAG
ALT LPS5A
GAUGES
WRN LPS
5A
SHIFT
INTLOCK15A
BK LPS
AC10A
STARTER
RELAY5A
RADIO
MUTE
5A
INSTR
ILLUM10A
LT LOW
BEAM10A
RT LOW
BEAM5A
SWITCH
ILLUM
Roadside emergencies
121
Page 129 of 216

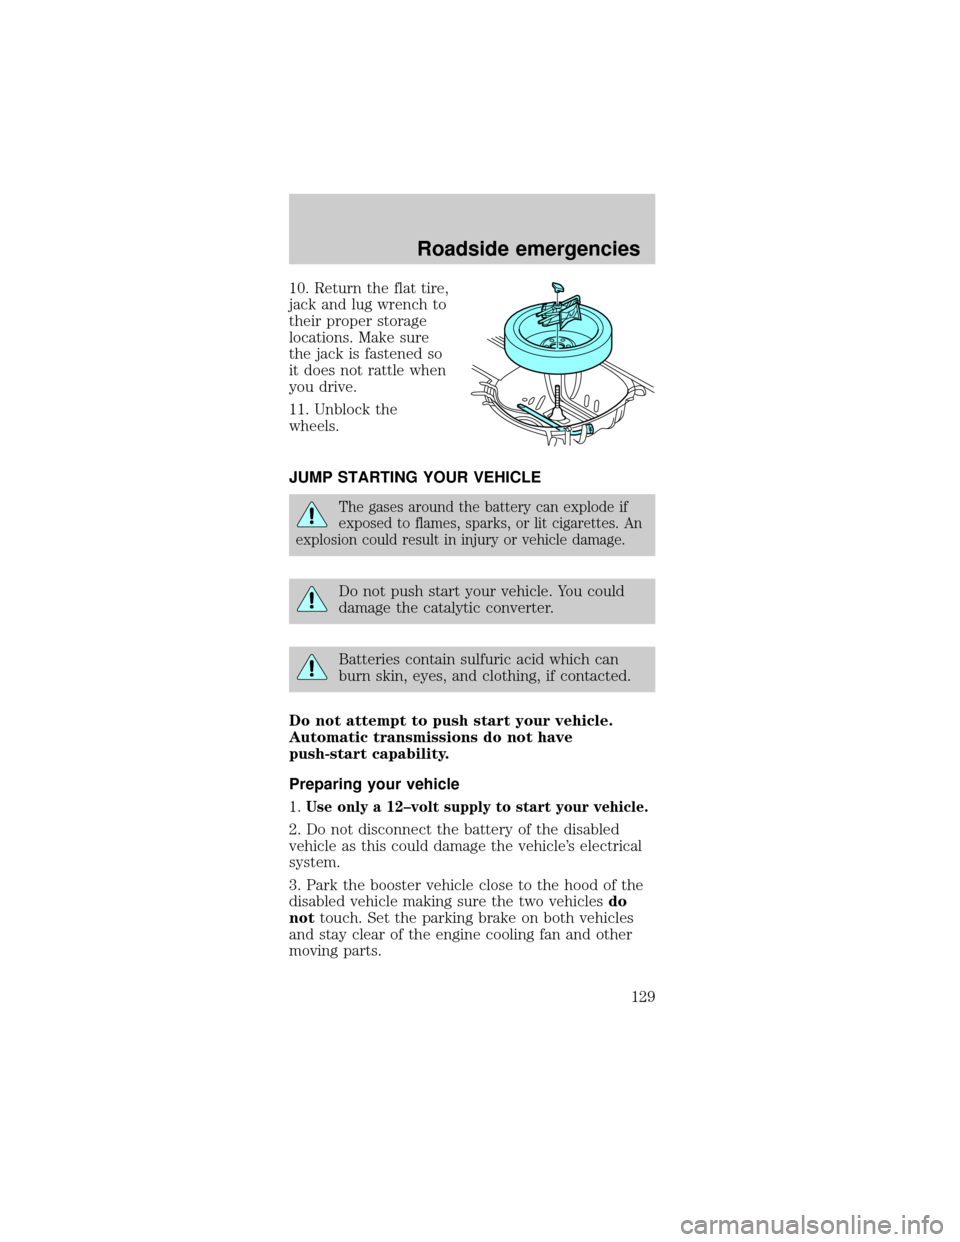
10. Return the flat tire,
jack and lug wrench to
their proper storage
locations. Make sure
the jack is fastened so
it does not rattle when
you drive.
11. Unblock the
wheels.
JUMP STARTING YOUR VEHICLE
The gases around the battery can explode if
exposed to flames, sparks, or lit cigarettes. An
explosion could result in injury or vehicle damage.
Do not push start your vehicle. You could
damage the catalytic converter.
Batteries contain sulfuric acid which can
burn skin, eyes, and clothing, if contacted.
Do not attempt to push start your vehicle.
Automatic transmissions do not have
push-start capability.
Preparing your vehicle
1.
Use only a 12±volt supply to start your vehicle.
2. Do not disconnect the battery of the disabled
vehicle as this could damage the vehicle's electrical
system.
3. Park the booster vehicle close to the hood of the
disabled vehicle making sure the two vehiclesdo
nottouch. Set the parking brake on both vehicles
and stay clear of the engine cooling fan and other
moving parts.
Roadside emergencies
129
Page 137 of 216

IDENTIFYING COMPONENTS IN THE ENGINE
COMPARTMENT
3.0L V6 Vulcan engine
1. Automatic transmission fluid dipstick
2. Brake fluid reservoir
3. Air filter assembly
4. Battery
5. Engine oil filler cap
6. Engine oil dipstick
7. Power steering fluid reservoir
8. Engine coolant reservoir
9. Windshield washer fluid reservoir
12
3
4567
8
9
Maintenance and care
137
Page 138 of 216

3.0L V6 Duratec engine
1. Automatic transmission fluid dipstick
2. Brake fluid reservoir
3. Air filter assembly
4. Battery
5. Engine oil filler cap
6. Engine oil dipstick
7. Engine coolant reservoir
8. Windshield washer fluid reservoir
9. Power steering fluid reservoir
ENGINE OIL
Checking the engine oil
Refer to the Scheduled Maintenance Guide for the
appropriate intervals for checking the engine oil.
1. Make sure the vehicle is on level ground.
2. Turn the engine off and wait a few minutes for
the oil to drain into the oil pan.
8912
3
4
56
7
Maintenance and care
138
Page 147 of 216

3.0L Duratec engine
4. Check the fluid level
in the reservoir. It
should be between the
MIN and MAX lines. Do
not add fluid if the
level is within this
range.
5. If the fluid is low, add fluid in small amounts,
continuously checking the level until it reaches the
range between the MIN and MAX lines. Be sure to
put the cap back on the reservoir.
TRANSMISSION FLUID
Checking automatic transmission fluid
Refer to your Scheduled Maintenance Guide for
scheduled intervals for fluid checks and changes.
Your transaxle does not consume fluid. However, the
fluid level should be checked if the transaxle is not
working properly, i.e., if the transaxle slips or shifts
slowly or if you notice some sign of fluid leakage.
Automatic transmission fluid expands when
warmed. To obtain an accurate fluid check,
drive the vehicle until it is warmed up
(approximately 30 km [20 miles]). If your
vehicle has been operated for an extended
period at high speeds, in city traffic during hot
weather or pulling a trailer, the vehicle should
be turned off for about 30 minutes to allow
fluid to cool before checking.
1. Drive the vehicle 30 km (20 miles) or until it
reaches normal operating temperature.
2. Park the vehicle on a level surface and engage the
parking brake.
MINMAX
Maintenance and care
147
Page 148 of 216

3. With the parking brake engaged and your foot on
the brake pedal, start the engine and move the
gearshift lever through all of the gear ranges. Allow
sufficient time for each gear to engage.
4. Latch the gearshift lever in P (Park) and leave the
engine running.
5. Remove the dipstick, wiping it clean with a clean,
dry lint free rag.
6. Install the dipstick making sure it is fully seated in
the filler tube.
7. Remove the dipstick and inspect the fluid level.
The fluid should be in the designated areas for
normal and room temperature.
Low fluid level
Do not drive the
vehicle if the fluid level
is at the bottom of the
dipstick and the outside temperatures are above
10ÉC (50ÉF).
Correct fluid level
The transmission fluid should be checked at normal
operating temperatures 66ÉC-77ÉC (150ÉF-170ÉF) on
a level surface. The normal operating temperature
can be reached after approximately 30 km
(20 miles) of driving.
The transmission fluid
should be in this range
if at normal operating
temperature (66ÉC-77ÉC [150ÉF-170ÉF]).
High fluid level
Fluid levels above the
safe range may result
in transaxle failure. An
overfill condition of transmission fluid may cause
shift and/or engagement concerns and/or possible
damage.
DON’T ADD IF IN CROSSHATCH AREA--CHECH WHEN HOT-IDLING
DON’T ADD IF IN CROSSHATCH AREA--CHECH WHEN HOT-IDLING
DON’T ADD IF IN CROSSHATCH AREA--CHECH WHEN HOT-IDLING
Maintenance and care
148