lock Mercury Sable 2000 s Service Manual
[x] Cancel search | Manufacturer: MERCURY, Model Year: 2000, Model line: Sable, Model: Mercury Sable 2000Pages: 232, PDF Size: 2.09 MB
Page 115 of 232

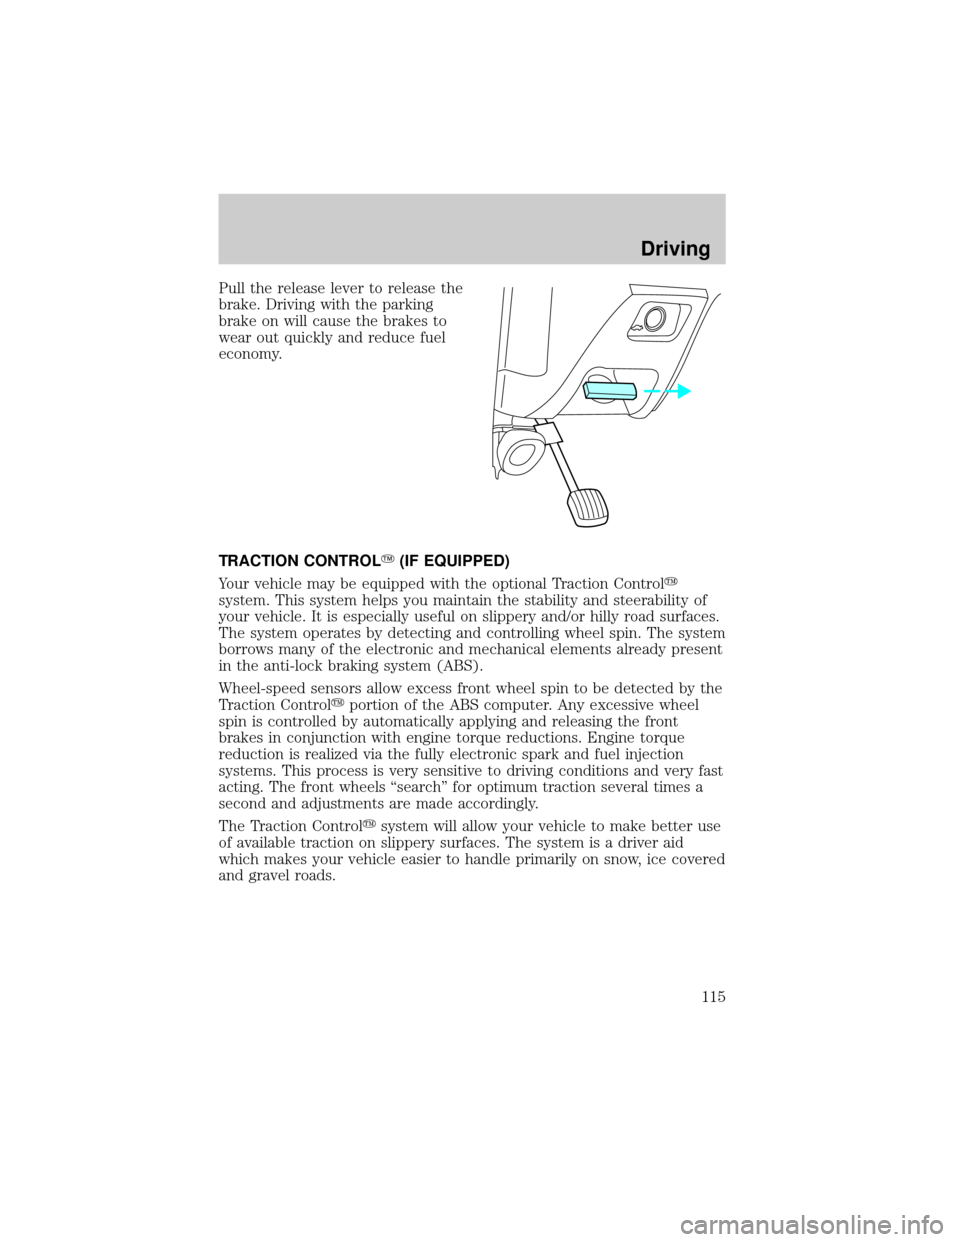
Pull the release lever to release the
brake. Driving with the parking
brake on will cause the brakes to
wear out quickly and reduce fuel
economy.
TRACTION CONTROLY(IF EQUIPPED)
Your vehicle may be equipped with the optional Traction Controly
system. This system helps you maintain the stability and steerability of
your vehicle. It is especially useful on slippery and/or hilly road surfaces.
The system operates by detecting and controlling wheel spin. The system
borrows many of the electronic and mechanical elements already present
in the anti-lock braking system (ABS).
Wheel-speed sensors allow excess front wheel spin to be detected by the
Traction Controlyportion of the ABS computer. Any excessive wheel
spin is controlled by automatically applying and releasing the front
brakes in conjunction with engine torque reductions. Engine torque
reduction is realized via the fully electronic spark and fuel injection
systems. This process is very sensitive to driving conditions and very fast
acting. The front wheels ªsearchº for optimum traction several times a
second and adjustments are made accordingly.
The Traction Controlysystem will allow your vehicle to make better use
of available traction on slippery surfaces. The system is a driver aid
which makes your vehicle easier to handle primarily on snow, ice covered
and gravel roads.
Driving
115
Page 117 of 232

AUTOMATIC TRANSAXLE OPERATION
Brake-shift interlock
This vehicle is equipped with a brake-shift interlock feature that prevents
the gearshift lever from being moved from P (Park) when the ignition is
in the ON position unless brake pedal is depressed.
If you cannot move the gearshift lever out of P (Park) with ignition in
the ON position and the brake pedal depressed:
1. Apply the parking brake, turn ignition key to LOCK, then remove the
key.
2. Insert the key and turn it to OFF. Apply the brake pedal and shift to N
(Neutral).
3. Start the vehicle.
If it is necessary to use the above procedure to move the gearshift lever,
it is possible that a fuse has blown or the vehicle's brakelamps are not
operating properly. Refer toFuses and relaysin theRoadside
emergencieschapter.
Do not drive your vehicle until you verify that the brakelamps
are working.
If your vehicle gets stuck in mud or snow, it may be rocked out by
shifting from forward and reverse gears while stopping between shifts, in
a steady pattern. Press lightly on the accelerator in each gear. If
necessary, try turning the Traction Controlysystem off. This will allow
the wheels to spin, which may help to free your stuck vehicle. For more
information, refer toTraction Controly(if equipped)in this chapter.
Do not rock the vehicle if the engine is not at normal operating
temperature or damage to the transaxle may occur.
Do not rock the vehicle for more than a few minutes or damage
to the transaxle and tires may occur or the engine may overheat.
Always set the parking brake fully and make sure the gearshift is
latched in P (Park). Turn off the ignition whenever you leave
your vehicle.
Driving
117
Page 119 of 232

Understanding gearshift positions
P (Park)
Always come to a complete stop
before shifting into P (Park). Make
sure the gearshift lever is securely
latched in P (Park). This locks the
transaxle and prevent the front
wheels from rotating.
Always set the parking
brake fully and make sure
the gearshift is latched in P
(Park). Turn off the ignition
whenever you leave your vehicle.
R (Reverse)
With the gearshift lever in R
(Reverse), the vehicle will move
backward. You should always come
to a complete stop before shifting
into and out of R (Reverse).
PRNDD1
PRNDD1
Driving
119
Page 120 of 232

N (Neutral)
With the gearshift lever in the N
(Neutral) position, the vehicle can
be started and is free to roll. Hold
the brake pedal down while in this
position.
(Overdrive)
The(Overdrive) position is the
normal driving position for an
automatic overdrive transaxle.
When in the
(Overdrive)
position, the transaxle works the
same way as when in D (Drive).
However, when your vehicle cruises
at a constant speed for any length
of time, the transaxle shifts into a
fourth gear (Overdrive) and allows
the torque converter to lock-up.
Overdrive will increase your fuel
economy when you travel at cruising
speeds.
Overdrive may not be appropriate
for certain terrains. If the transaxle shifts back and forth between third
and fourth gears while you are driving on hilly roads, or if your vehicle
requires additional power for climbing hills, shift into D (Drive).
PRNDD1
PRNDD1
Driving
120
Page 129 of 232

GETTING ROADSIDE ASSISTANCE
To fully assist you should you have a vehicle concern, Ford offers a
complimentary roadside assistance program. This program is separate
from the New Vehicle Limited Warranty. The service is available:
²24±hours, seven days a week
²for the Basic warranty period (Canada) or New Vehicle Limited
Warranty period (U.S.) of three years or 60,000 km (36,000 miles),
whichever comes first on Ford and Mercury vehicles, and four years or
80,000 km (50,000 miles) on Lincoln vehicles
Roadside assistance will cover:
²changing a flat tire
²jump-starts
²lock-out assistance
²fuel delivery
²towing of your disabled vehicle to the nearest Ford dealership, or your
selling dealer if within 25 kms (15.5 miles) of the nearest Ford
Dealership (one tow per disablement). Even non-warranty related
tows, like accidents or getting stuck in the mud or snow, are covered
(some exclusions apply, such as impound towing or repossession).
Using roadside assistance
Complete the roadside assistance identification card and place it in your
wallet for quick reference. In the United States, this card is found in the
Owner Guide portfolio in the glove compartment in Ford vehicles and is
mailed to you if you own a Mercury or Lincoln. In Canada, it is found in
the Roadside Assistance book in the glove compartment.
To receive roadside assistance in the United States for Ford or Mercury
vehicles, call 1-800-241-3673 or if you own a Lincoln vehicle, call
1±800±521±4140. In Canada call 1±800±665±2006.
Should you need to arrange roadside assistance for yourself, Ford will
reimburse a reasonable amount. To obtain information about
reimbursement, call 1-800-241-3673 in the United States for Ford or
Mercury vehicles; or if you own a Lincoln vehicle, call 1±800±521±4140.
Call 1±800±665±2006 in Canada.
Roadside emergencies
129
Page 134 of 232

Fuse/Relay
LocationFuse Amp
RatingPassenger Compartment
Fuse Panel Description
13 20A Cigar Lighter, Auxiliary Power Point
14 Ð Not Used
15 30A Front Wiper Motor
16 15A Flasher and GEM Power, Integrated Control
Panel (ICP) Power, RCC Memory, Cluster
17 15A Stop Lamp, Speed Control Deactivating
Switch
18 Ð Not Used
19 Ð Not Used
20 Ð Not Used
21 Ð Not Used
22 20A Deck Lid Release Solenoid, Lock/Unlock
Relays
23 10A Air Bag Module, PATS Transceiver
24 15A Foglamps, Transit Relay
25 2A PCM Relay
26 10A Mirrors, Power Antenna, Pulse Stretcher
Module, Deck Lid Lamp, Battery Saver
27 10A Gauges and Warning Lamps, Integrated
Control Panel (ICP), FFV Sender, GEM
28 10A Blower Motor Relay Coil, EATC Logic
29 15A Autolamps, Headlamp Switch
30 15A Horns and Horn Switch, OBD II Connector
31 Ð Not Used
32 10A ABS, DRL Relay Coil, Speed Control
Actuator, Traction Control Switch, AC
Heater Selector Switch, Blend Door
Actuator, Brake Shift Interlock
33 Ð Not Used
34 Ð Not Used
35 Ð Not Used
36 15A Turn Signals, Back-up Lamps
Roadside emergencies
134
Page 136 of 232

The high-current fuses are coded as follows.
Fuse/Relay
LocationFuse Amp
RatingPower Distribution Box Description
1 60A** Fuse Junction Panel
2 30A** PCM Relay
3 60A** Fuse Junction Panel
4 Ð Not Used
5 Ð Not Used
6 Ð Not Used
7 40A** Starter Relay, Ignition Switch
8 20A** Transit Relay (Export only)
9 40A** Cooling Fan Relays
10 Ð Not Used
11 20A** Thermactor Relay (FFV only)
12 Ð Not Used
13 40A** Anti-Lock Brake Module Pump Feed
14 Ð Not Used
15 20A* Anti-Lock Brake Module Valve Solenoid
16 20A* Fuel Pump Relay
17 20A* Rear Control Unit, CD Changer, Cell Phone
18 Ð Not Used
19 15A* Right Headlamp
20 Ð Not Used
1
23
4
56
7
8
910
11 12
1314
1516 17
18
19202122
2324
25
29
3026 27 28
31
32
33
Roadside emergencies
136
Page 138 of 232

When driving with the temporary spare tiredo not:
²exceed 80 km/h (50 mph) under any circumstances
²load the vehicle beyond maximum vehicle load rating listed on the
Safety Compliance Label
²tow a trailer
²use tire chains
²drive through an automatic car wash, because of the vehicle's reduced
ground clearance
²try to repair the temporary spare tire or remove it from its wheel
²use the wheel for any other type of vehicle
Tire change procedure
1. Park on a level surface, activate hazard flashers and set parking brake.
When one of the front wheels is off the ground, the transaxle
alone will not prevent the vehicle from moving or slipping off the
jack, even if the vehicle is in P (Park).
To prevent the vehicle from moving when you change a tire, be
sure the parking brake is set, then block (in both directions) the
wheel that is diagonally opposite (other side and end of the vehicle) to
the tire being changed.
If the vehicle slips off the jack, you or someone else could be
seriously injured.
2. Place gearshift lever in P (Park),
turn engine OFF, block the
diagonally opposite wheel, then
remove the spare tire, jack and lug
wrench.
Roadside emergencies
138
Page 140 of 232

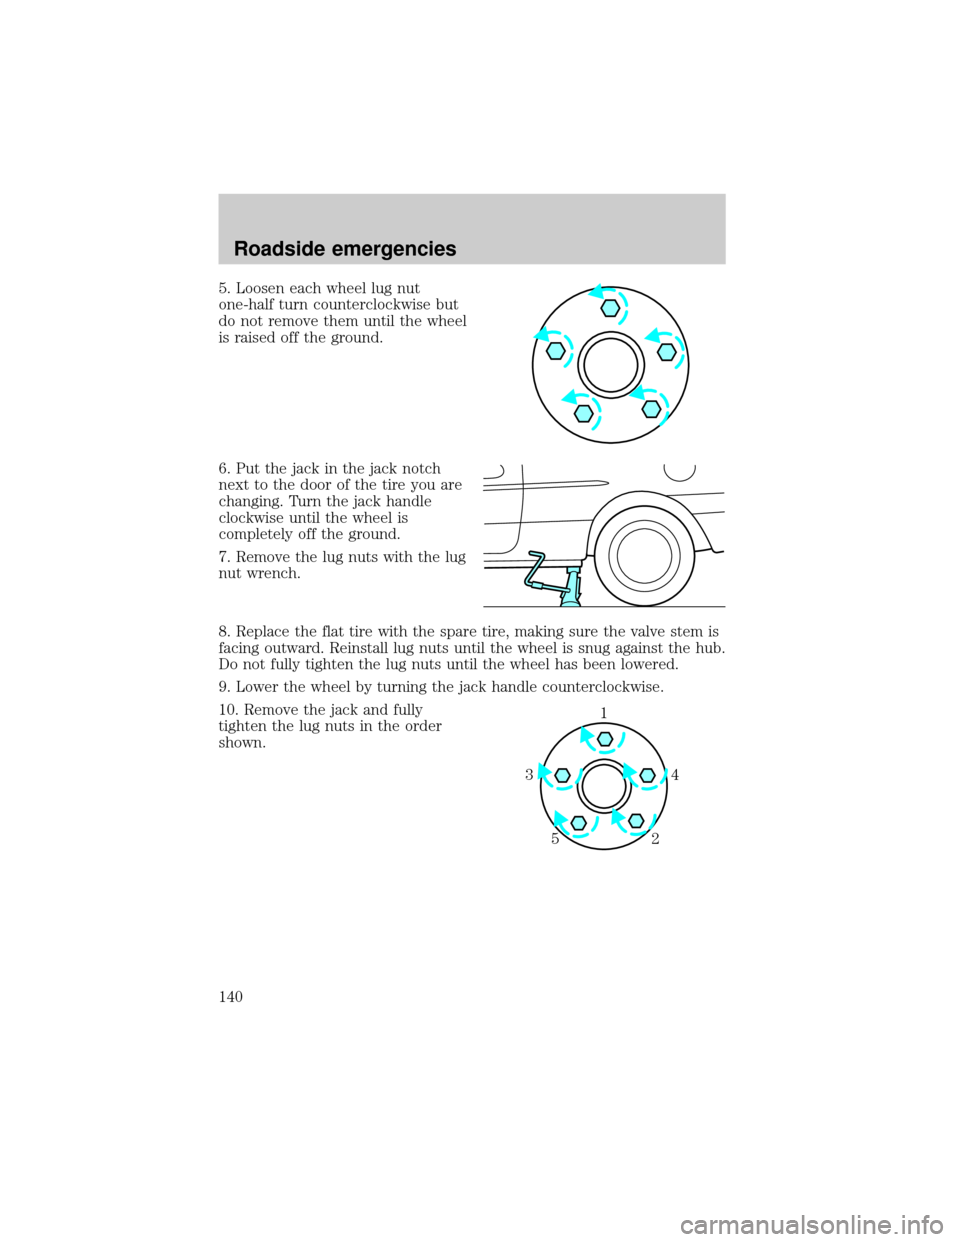
5. Loosen each wheel lug nut
one-half turn counterclockwise but
do not remove them until the wheel
is raised off the ground.
6. Put the jack in the jack notch
next to the door of the tire you are
changing. Turn the jack handle
clockwise until the wheel is
completely off the ground.
7. Remove the lug nuts with the lug
nut wrench.
8. Replace the flat tire with the spare tire, making sure the valve stem is
facing outward. Reinstall lug nuts until the wheel is snug against the hub.
Do not fully tighten the lug nuts until the wheel has been lowered.
9. Lower the wheel by turning the jack handle counterclockwise.
10. Remove the jack and fully
tighten the lug nuts in the order
shown.
1
4 3
2 5
Roadside emergencies
140
Page 141 of 232

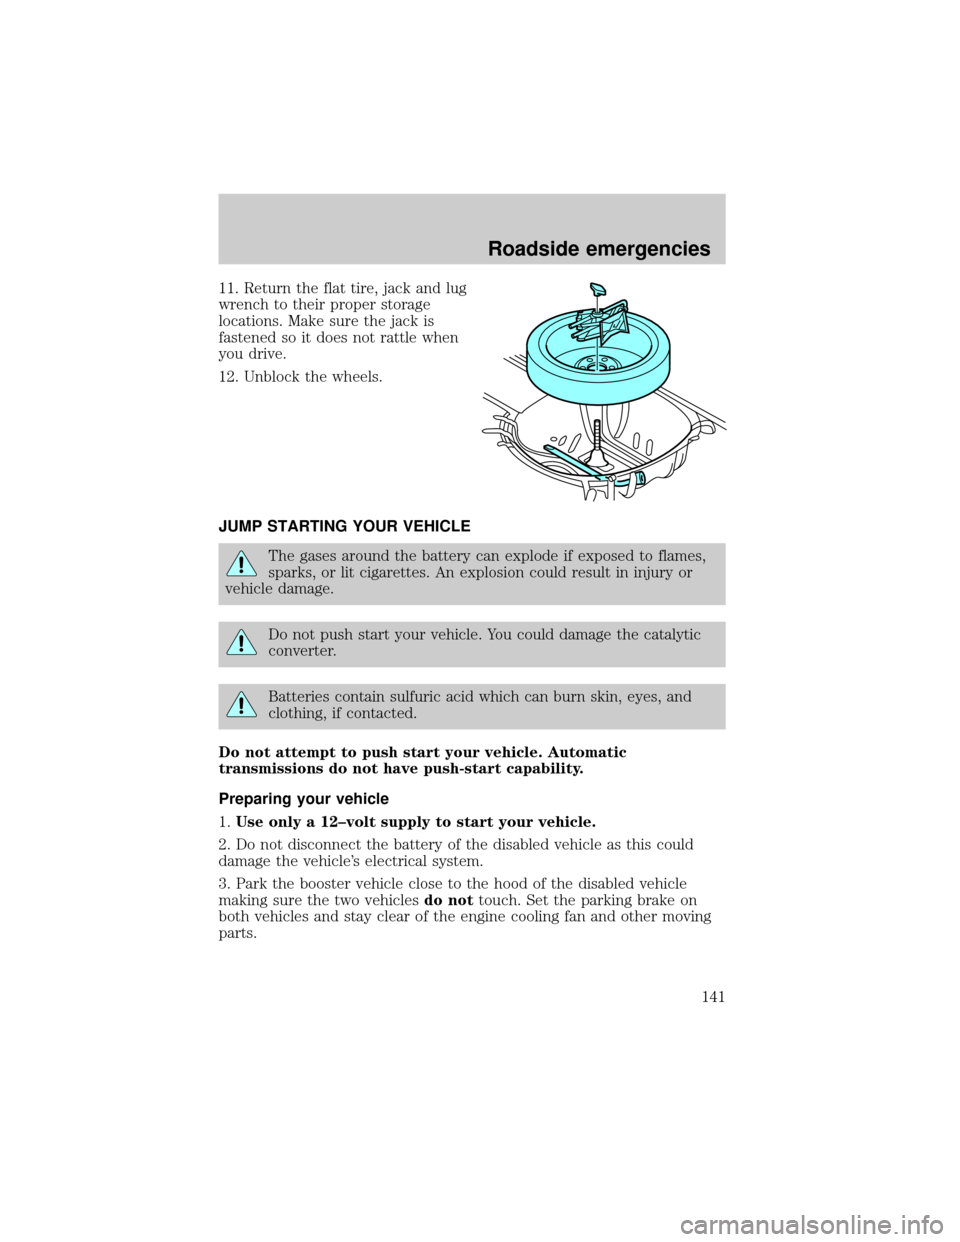
11. Return the flat tire, jack and lug
wrench to their proper storage
locations. Make sure the jack is
fastened so it does not rattle when
you drive.
12. Unblock the wheels.
JUMP STARTING YOUR VEHICLE
The gases around the battery can explode if exposed to flames,
sparks, or lit cigarettes. An explosion could result in injury or
vehicle damage.
Do not push start your vehicle. You could damage the catalytic
converter.
Batteries contain sulfuric acid which can burn skin, eyes, and
clothing, if contacted.
Do not attempt to push start your vehicle. Automatic
transmissions do not have push-start capability.
Preparing your vehicle
1.Use only a 12±volt supply to start your vehicle.
2. Do not disconnect the battery of the disabled vehicle as this could
damage the vehicle's electrical system.
3. Park the booster vehicle close to the hood of the disabled vehicle
making sure the two vehiclesdo nottouch. Set the parking brake on
both vehicles and stay clear of the engine cooling fan and other moving
parts.
Roadside emergencies
141