headlamp Mercury Sable 2000 Owner's Manuals
[x] Cancel search | Manufacturer: MERCURY, Model Year: 2000, Model line: Sable, Model: Mercury Sable 2000Pages: 232, PDF Size: 2.09 MB
Page 6 of 232
A
ONOFF
+ –
0 12204060
80
100
1202060
140
180
P R N D 2 1MPH km/h
000000
0000
EFC H
FUEL DOOR >
THEFT LOW
COOLANT
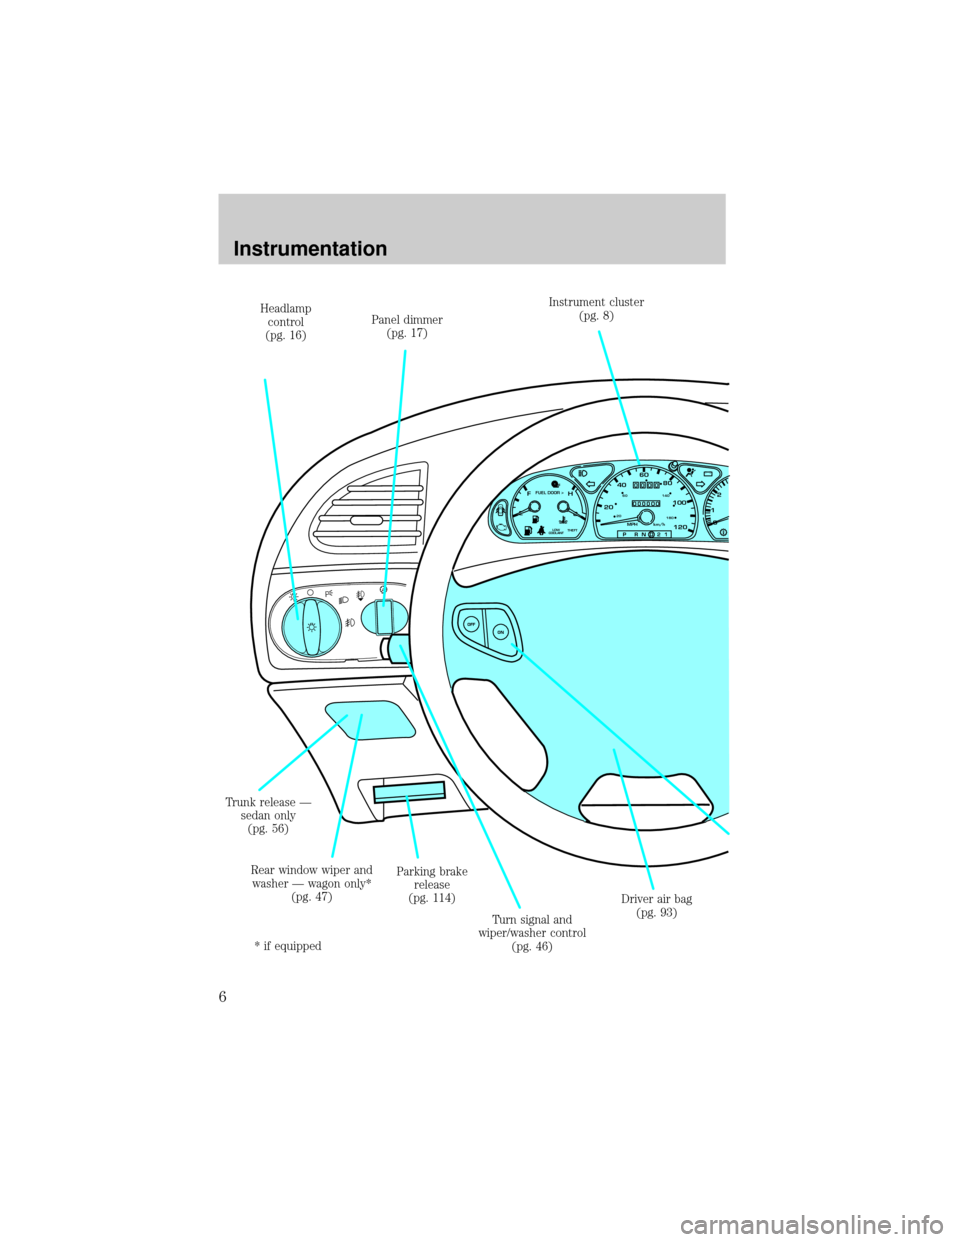
Parking brake
release
(pg. 114) Headlamp
control
(pg. 16)Panel dimmer
(pg. 17)
Driver air bag
(pg. 93) Trunk release Ð
sedan only
(pg. 56)
Rear window wiper and
washer Ð wagon only*
(pg. 47)
Turn signal and
wiper/washer control
(pg. 46)Instrument cluster
(pg. 8)
* if equipped
Instrumentation
6
Page 8 of 232
WARNING LIGHTS AND CHIMES
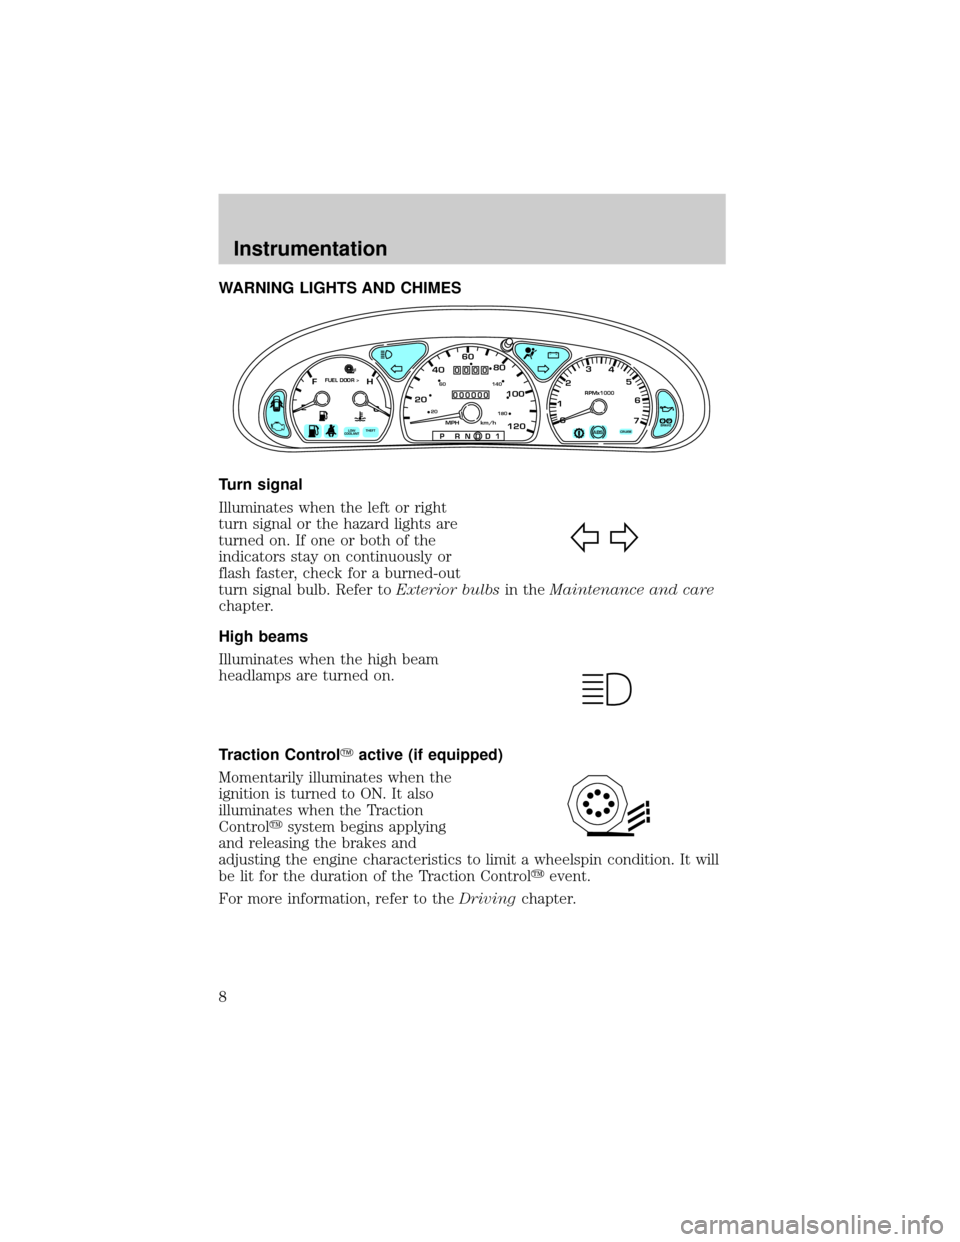
Turn signal
Illuminates when the left or right
turn signal or the hazard lights are
turned on. If one or both of the
indicators stay on continuously or
flash faster, check for a burned-out
turn signal bulb. Refer toExterior bulbsin theMaintenance and care
chapter.
High beams
Illuminates when the high beam
headlamps are turned on.
Traction ControlYactive (if equipped)
Momentarily illuminates when the
ignition is turned to ON. It also
illuminates when the Traction
Controlysystem begins applying
and releasing the brakes and
adjusting the engine characteristics to limit a wheelspin condition. It will
be lit for the duration of the Traction Controlyevent.
For more information, refer to theDrivingchapter.
P!
BRAKE
+ –
CRUISE
RPMx1000
ABS0 123
4
5
6
7
204060
80
100
1202060
140
180
P R N D D 1MPH km/h
000000
0000
EFC H
FUEL DOOR >
THEFTLOW
COOLANT
Instrumentation
8
Page 13 of 232
Safety belt warning chime
Sounds to remind you to fasten your safety belts.
For information on the safety belt warning chime, refer to theSeating
and safety restraintschapter.
Supplemental restraint system (SRS) warning chime
For information on the SRS warning chime, refer to theSeating and
safety restraintschapter.
Key-in-ignition warning chime
Sounds when the key is left in the ignition in the OFF/LOCK or ACC
position and the driver's door is opened.
Headlamps on warning chime
Sounds when the headlamps or parking lamps are on, the ignition is off
(and the key is not in the ignition) and the driver's door is opened.
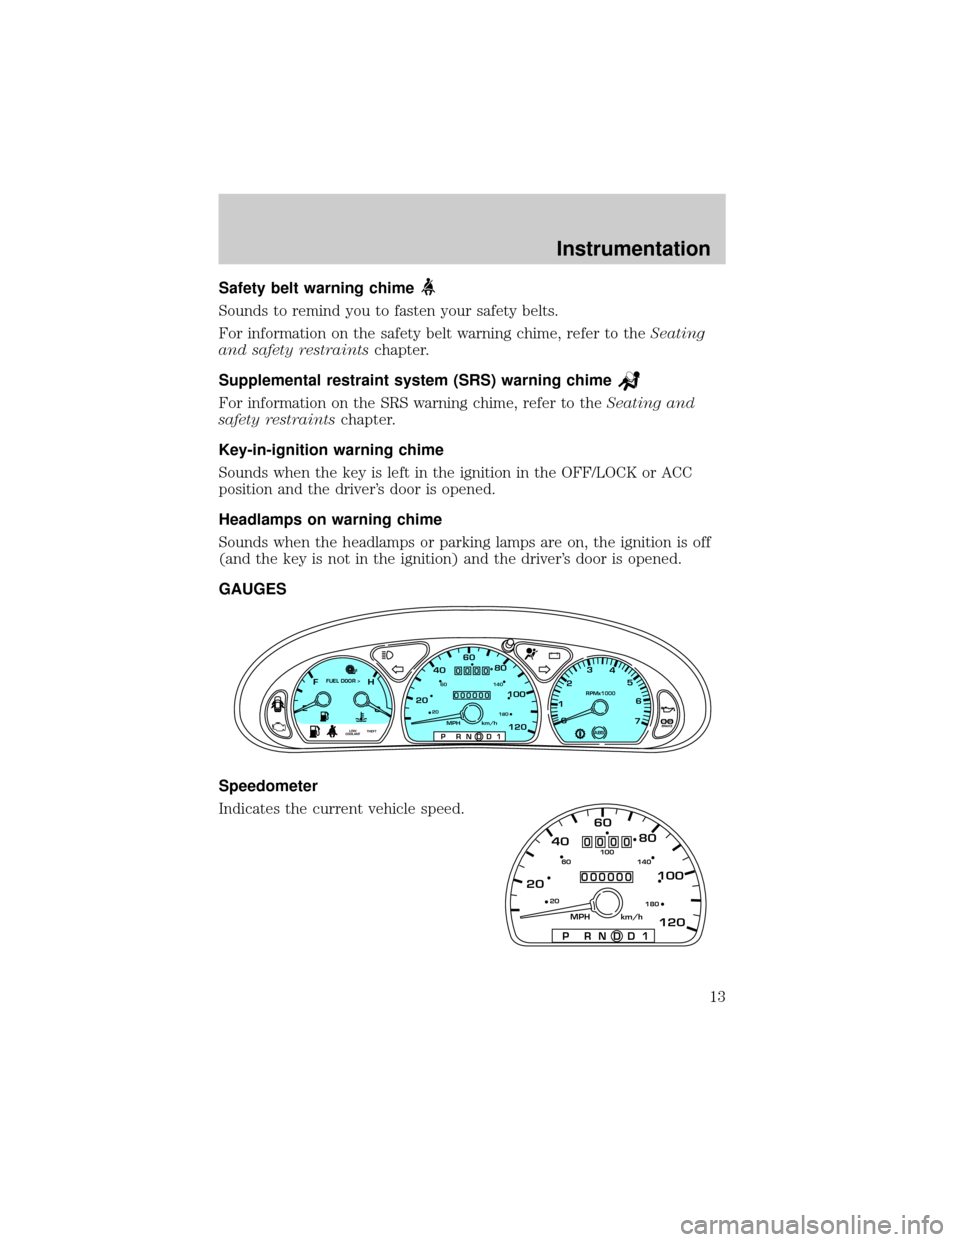
GAUGES
Speedometer
Indicates the current vehicle speed.
P!
BRAKE
+ –
CRUISE
RPMx1000
ABS0 123
4
5
6
7
204060
80
100
1202060
140
180
P R N D D 1MPH km/h
000000
0000
EFC H
FUEL DOOR >
THEFTLOW
COOLANT
204060
80
100
1202060
140 100
180
P R N D D 1
MPH km/h
000000
0000
Instrumentation
13
Page 16 of 232
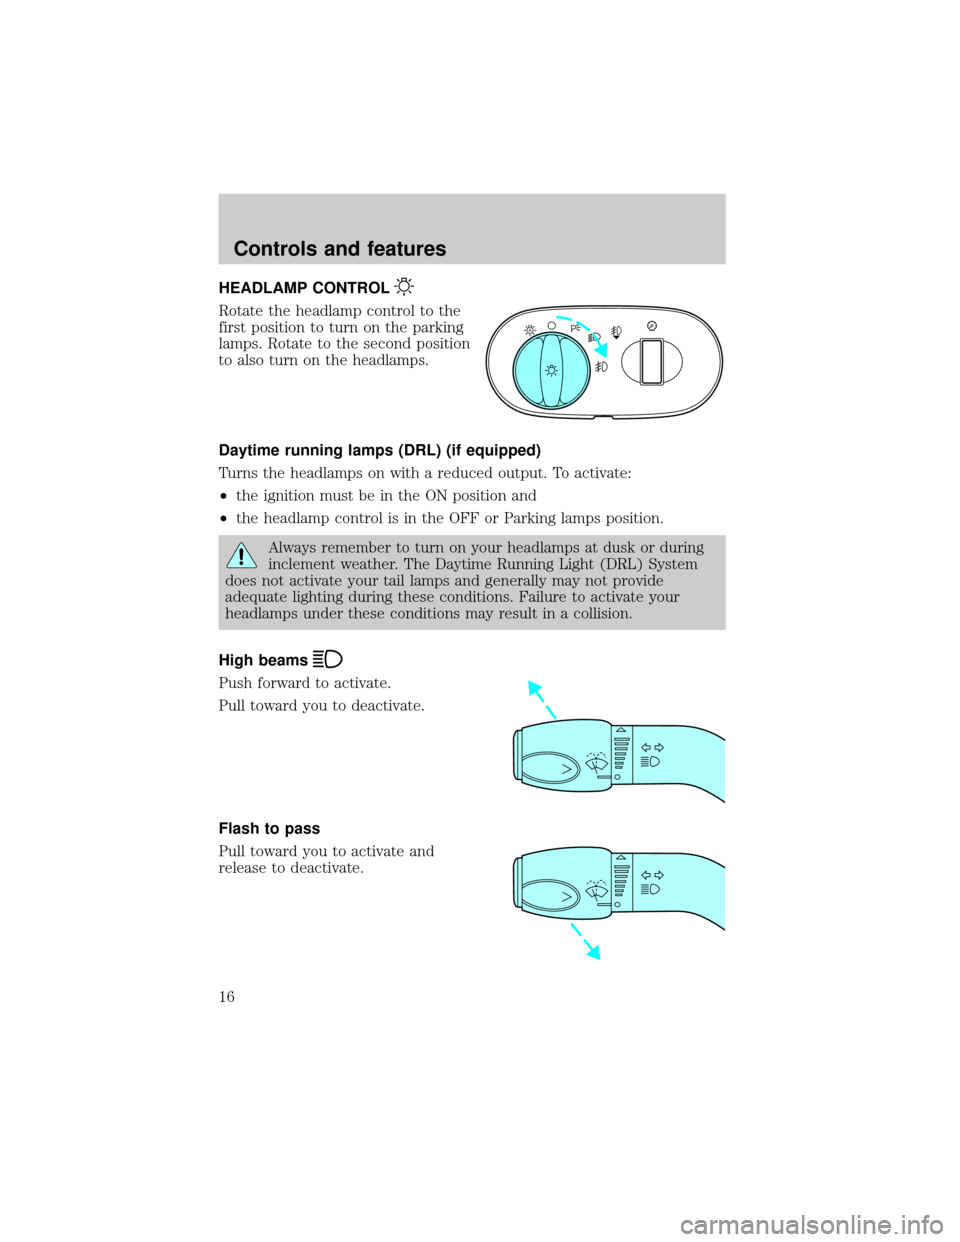
HEADLAMP CONTROL
Rotate the headlamp control to the
first position to turn on the parking
lamps. Rotate to the second position
to also turn on the headlamps.
Daytime running lamps (DRL) (if equipped)
Turns the headlamps on with a reduced output. To activate:
²the ignition must be in the ON position and
²the headlamp control is in the OFF or Parking lamps position.
Always remember to turn on your headlamps at dusk or during
inclement weather. The Daytime Running Light (DRL) System
does not activate your tail lamps and generally may not provide
adequate lighting during these conditions. Failure to activate your
headlamps under these conditions may result in a collision.
High beams
Push forward to activate.
Pull toward you to deactivate.
Flash to pass
Pull toward you to activate and
release to deactivate.
A
Controls and features
16
Page 17 of 232
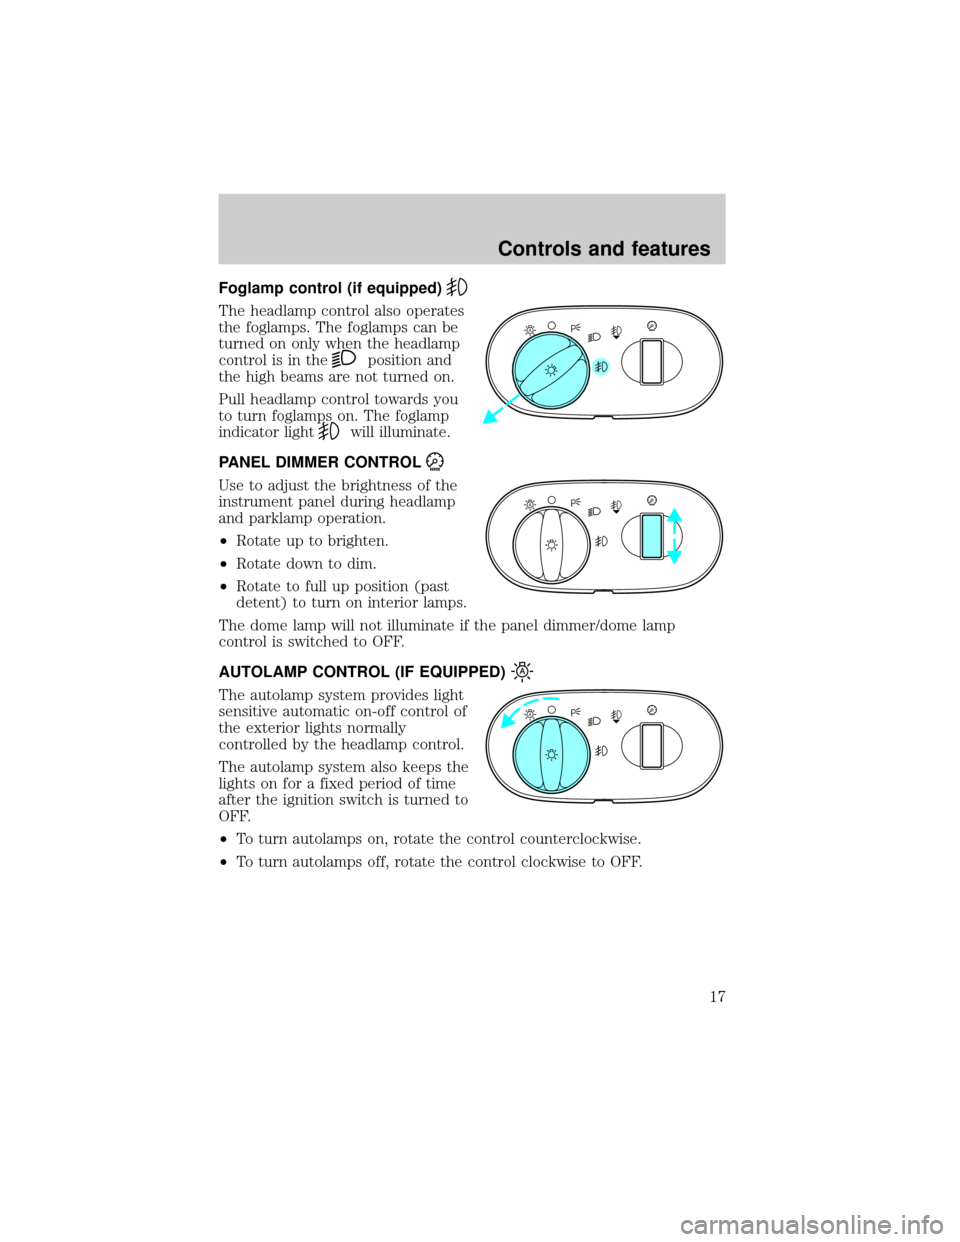
Foglamp control (if equipped)
The headlamp control also operates
the foglamps. The foglamps can be
turned on only when the headlamp
control is in the
position and
the high beams are not turned on.
Pull headlamp control towards you
to turn foglamps on. The foglamp
indicator light
will illuminate.
PANEL DIMMER CONTROL
Use to adjust the brightness of the
instrument panel during headlamp
and parklamp operation.
²Rotate up to brighten.
²Rotate down to dim.
²Rotate to full up position (past
detent) to turn on interior lamps.
The dome lamp will not illuminate if the panel dimmer/dome lamp
control is switched to OFF.
AUTOLAMP CONTROL (IF EQUIPPED)
The autolamp system provides light
sensitive automatic on-off control of
the exterior lights normally
controlled by the headlamp control.
The autolamp system also keeps the
lights on for a fixed period of time
after the ignition switch is turned to
OFF.
²To turn autolamps on, rotate the control counterclockwise.
²To turn autolamps off, rotate the control clockwise to OFF.
A
A
A
Controls and features
17
Page 47 of 232

Push the control on the end of the
stalk to activate washer. Push and
hold for a longer wash cycle. The
washer will automatically shut off
after ten seconds of continuous use.
Mist Function
To operate the Mist function of the
windshield wipers, push and release
the windshield washer control
quickly. The wipers will cycle one or
two times.
Rear window wiper and washer (wagon only)
The rear wiper control is located
under the headlamp controls Press
the wiper control to activate the
rear wiper. Press again to turn off
the wiper.
Press the washer control to activate
the rear washer. The wiper will
come on when the washer control is
pressed, if it is not already on.
HAZARD FLASHER
For information on the hazard flasher control, refer toHazard flasherin
theRoadside emergencieschapter.
Controls and features
47
Page 63 of 232

To replace the battery:
1. Twist a thin coin between the two
halves of the transmitter near the
key ring. DO NOT TAKE THE
FRONT PART OF THE
TRANSMITTER APART.
2. Place the positive (+) side of new
battery in the same orientation.
Refer to the diagram inside the
transmitter unit.
3. Snap the two halves back together.
Replacement of the battery willnotcause the remote transmitter to
become deprogrammed from your vehicle. The remote transmitter should
operate normally after battery replacement.
PERIMETER ALARM SYSTEM (IF EQUIPPED)
The perimeter anti-theft system will help prevent your vehicle from
unauthorized entry.
If there is any potential perimeter anti-theft problem with your vehicle,
ensureALL key fobs(remote entry transmitters) are brought to the
dealership, to aid in troubleshooting.
Arming the system
When armed, this system will help protect your vehicle from
unauthorized entry. When unauthorized entry occurs, the system will
flash the headlamps and/or parking lamps, and will chirp the horn.
The system is ready to arm whenever the ignition is turned OFF. Any of
the following actions will prearm the alarm system:
²Press the remote entry lock
control (doors opened or closed).
Controls and features
63
Page 91 of 232

One time disable
Anytime the safety belt is buckled and then unbuckled during an ignition
ON cycle, Belt Minder will be disabled for that ignition cycle only. The
safety belt needs to be latched for a minimum of 3 seconds before belt
minder is disabled.
Deactivating/activating the belt minder feature
Read steps1-9thoroughly before proceeding with the
deactivation/activation programming procedure.
The Belt Minder feature can be deactivated/activated by performing the
following procedure:
Before following the procedure, make sure that:
²the parking brake is set
²the gearshift is in P (Park) (automatic transmission).
²the ignition switch is in the OFF position
²all vehicle doors are closed
²the driver's safety belt is unbuckled
²the parklamps/headlamps are in OFF position (If vehicle is equipped
with Autolamps, this will not affect the procedure.)
To reduce the risk of injury, do not deactivate/activate the Belt
Minder feature while driving the vehicle.
1. Turn the ignition switch to the RUN (or ON) position. (DO NOT
START THE ENGINE)
2. Wait until the safety belt warning light turns off. (Approximately 1±2
minutes)
²Steps 3±5 must be completed within 60 seconds or the procedure will
have to be repeated.
3. Buckle then unbuckle the safety belt three times, ending with the
safety belt unbuckled. This can be done before or during Belt Minder
warning activation.
4. Turn on the parklamps/headlamps, turn off the parklamps/headlamps.
5. Buckle then unbuckle the safety belt three times, ending with the
safety belt unbuckled.
Seating and safety restraints
91
Page 108 of 232

2. Make sure the headlamps and vehicle accessories are off.
3. Make sure the parking brake is
set.
4. Make sure the gearshift is in P
(Park).
5. Turn the key to 4 (ON) without
turning the key to 5 (START).
If there is difficulty in turning the
key, firmly rotate the steering wheel
left and right until the key turns
freely. This condition may occur
when:
²front wheels are turned
²front wheel is against the curb
²steering wheel is turned when getting in or out of the vehicle
PRNDD1
3
4
1 2
5
Starting
108
Page 134 of 232

Fuse/Relay
LocationFuse Amp
RatingPassenger Compartment
Fuse Panel Description
13 20A Cigar Lighter, Auxiliary Power Point
14 Ð Not Used
15 30A Front Wiper Motor
16 15A Flasher and GEM Power, Integrated Control
Panel (ICP) Power, RCC Memory, Cluster
17 15A Stop Lamp, Speed Control Deactivating
Switch
18 Ð Not Used
19 Ð Not Used
20 Ð Not Used
21 Ð Not Used
22 20A Deck Lid Release Solenoid, Lock/Unlock
Relays
23 10A Air Bag Module, PATS Transceiver
24 15A Foglamps, Transit Relay
25 2A PCM Relay
26 10A Mirrors, Power Antenna, Pulse Stretcher
Module, Deck Lid Lamp, Battery Saver
27 10A Gauges and Warning Lamps, Integrated
Control Panel (ICP), FFV Sender, GEM
28 10A Blower Motor Relay Coil, EATC Logic
29 15A Autolamps, Headlamp Switch
30 15A Horns and Horn Switch, OBD II Connector
31 Ð Not Used
32 10A ABS, DRL Relay Coil, Speed Control
Actuator, Traction Control Switch, AC
Heater Selector Switch, Blend Door
Actuator, Brake Shift Interlock
33 Ð Not Used
34 Ð Not Used
35 Ð Not Used
36 15A Turn Signals, Back-up Lamps
Roadside emergencies
134