check engine Mercury Sable 2001 s User Guide
[x] Cancel search | Manufacturer: MERCURY, Model Year: 2001, Model line: Sable, Model: Mercury Sable 2001Pages: 240, PDF Size: 2.22 MB
Page 133 of 240

²The trailer tongue weight should be 10% of the loaded trailer weight.
²After you have traveled 80 km (50 miles), thoroughly check your
hitch, electrical connections and trailer wheel lug nuts.
²When stopped in traffic for long periods of time in hot weather, place
the gearshift in P (Park) and increase idle speed. This aids engine
cooling and air conditioner efficiency.
²Vehicles with trailers should not be parked on a grade. If you must
park on a grade, place wheel chocks under the trailer's wheels.
Recreational towing
Follow these guidelines for your specific powertrain combination to tow
your vehicle with all four wheels on the ground (such as behind a
recreational vehicle).
These guidelines are designed to ensure that your transmission is not
damaged due to insufficient lubrication.
All Front Wheel Drive (FWD) vehicles
An example of recreational towing is towing your vehicle behind a
Motorhome. The following recreational towing guidelines are designed to
ensure that your transmission is not damaged. It is not recommended to
tow front wheel drive vehicles with the front drive wheels on the ground.
It is recommended to tow your vehicle with the drive wheels on a dolly
or two wheel car hauling trailer.
In case of a roadside emergency with a disabled vehicle (without access
to wheel dollies, car hauling trailer or flatbed transport vehicle) your
vehicle can be flat towed (all wheels on the ground) under the following
conditions:
²Place the transmission in N (Neutral).
²Maximum speed is 56 km/h (35 mph).
²Maximum distance is 80 km (50 miles).
Driving
133
Page 148 of 240

2. Do not disconnect the battery of the disabled vehicle as this could
damage the vehicle's electrical system.
3.
Park the booster vehicle close to the hood of the disabled vehicle
making sure the two vehiclesdo nottouch. Set the parking brake on both
vehicles and stay clear of the engine cooling fan and other moving parts.
4. Check all battery terminals and remove any excessive corrosion before
you attach the battery cables. Ensure that vent caps are tight and level.
5. Turn the heater fan on in both vehicles to protect any electrical
surges. Turn all other accessories off.
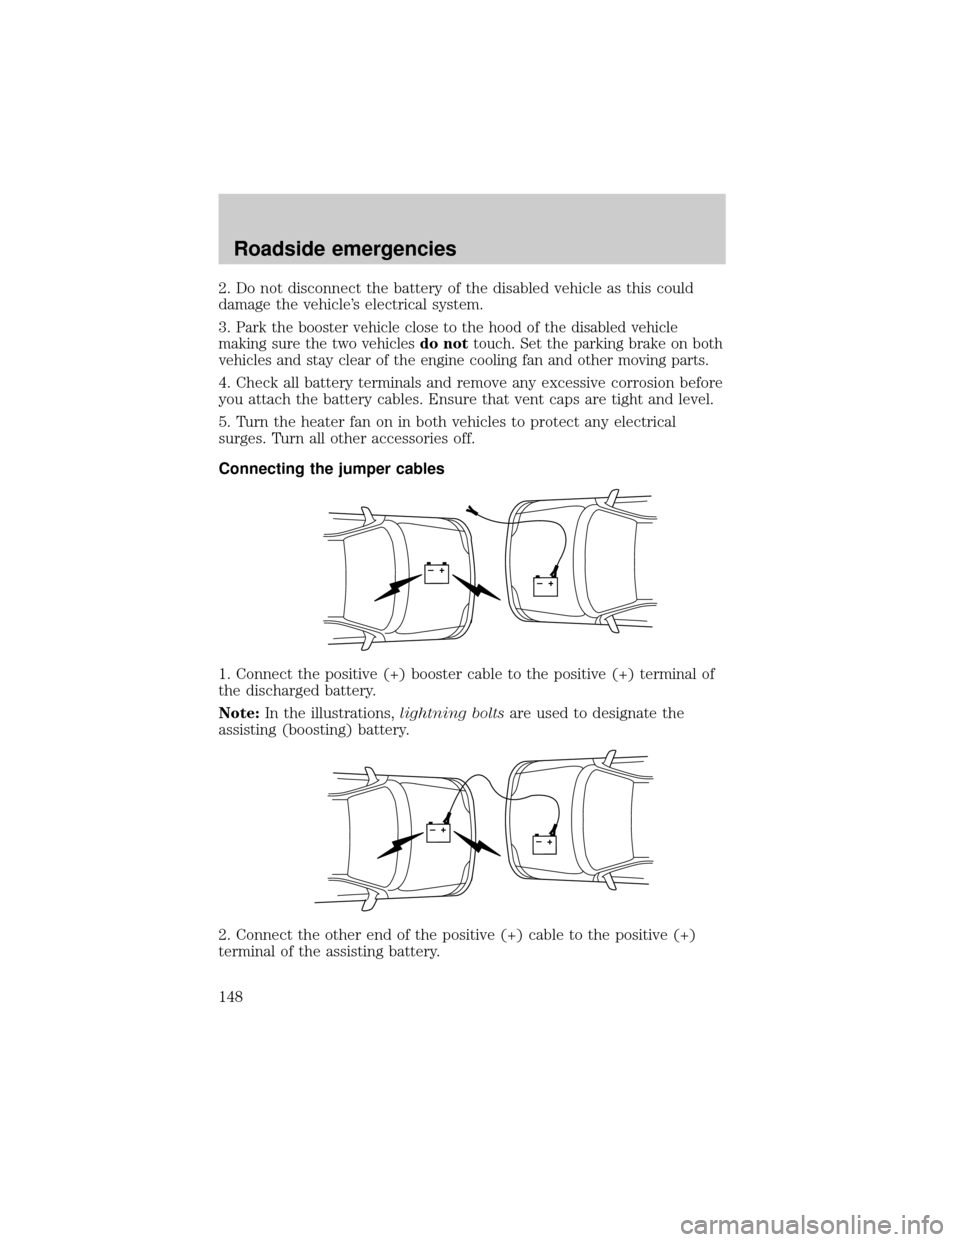
Connecting the jumper cables
1. Connect the positive (+) booster cable to the positive (+) terminal of
the discharged battery.
Note:In the illustrations,lightning boltsare used to designate the
assisting (boosting) battery.
2. Connect the other end of the positive (+) cable to the positive (+)
terminal of the assisting battery.
+–+–
+–+–
Roadside emergencies
148
Page 153 of 240

SERVICE RECOMMENDATIONS
To help you service your vehicle:
²We highlight do-it-yourself items in the engine compartment for easy
location.
²We provide a scheduled maintenance guide which makes tracking
routine service easy.
If your vehicle requires professional service, your dealership can provide
the necessary parts and service. Check your ªWarranty Guideº to find out
which parts and services are covered.
Use only recommended fuels, lubricants, fluids and service parts
conforming to specifications. Motorcraft parts are designed and built to
provide the best performance in your vehicle.
PRECAUTIONS WHEN SERVICING YOUR VEHICLE
Be especially careful when inspecting or servicing your vehicle.
²Do not work on a hot engine.
²When the engine is running, keep loose clothing, jewelry or long hair
away from moving parts.
²Do not work on a vehicle with the engine running in an enclosed
space, unless you are sure you have enough ventilation.
²Keep all lit cigarettes, open flames and other lit material away from
the battery and all fuel related parts.
If you disconnect the battery, the engine must ªrelearnº its idle
conditions before your vehicle will drive properly, as explained in the
Batterysection in this chapter.
Working with the engine off
1. Set the parking brake, and ensure the gearshift is securely latched in
park.
2. Turn off the engine and remove the key.
3. Block the wheels to prevent the vehicle from moving unexpectedly.
Working with the engine on
1. Set the parking brake and ensure the gearshift is securely latched in P
(Park).
2. Block the wheels to prevent the vehicle from moving unexpectedly.
Maintenance and care
153
Page 157 of 240

ENGINE OIL
Checking the engine oil
Refer to the scheduled maintenance guide for the appropriate intervals
for checking the engine oil.
1. Make sure the vehicle is on level ground.
2. Turn the engine off and wait a few minutes for the oil to drain into the
oil pan.
3. Set the parking brake and ensure the gearshift is securely latched in P.
4. Open the hood. Protect yourself from engine heat.
5. Locate and carefully remove the
engine oil indicator (dipstick).
6. Wipe the indicator clean. Insert the indicator fully, then remove it
again.
²If the oil level isbetween the add 1QT and FULL marks or
between the MIN and MAX marks (depending on application),
the oil level is acceptable.DO NOT ADD OIL.
MAX MIN
FULL 1QT
Maintenance and care
157
Page 158 of 240

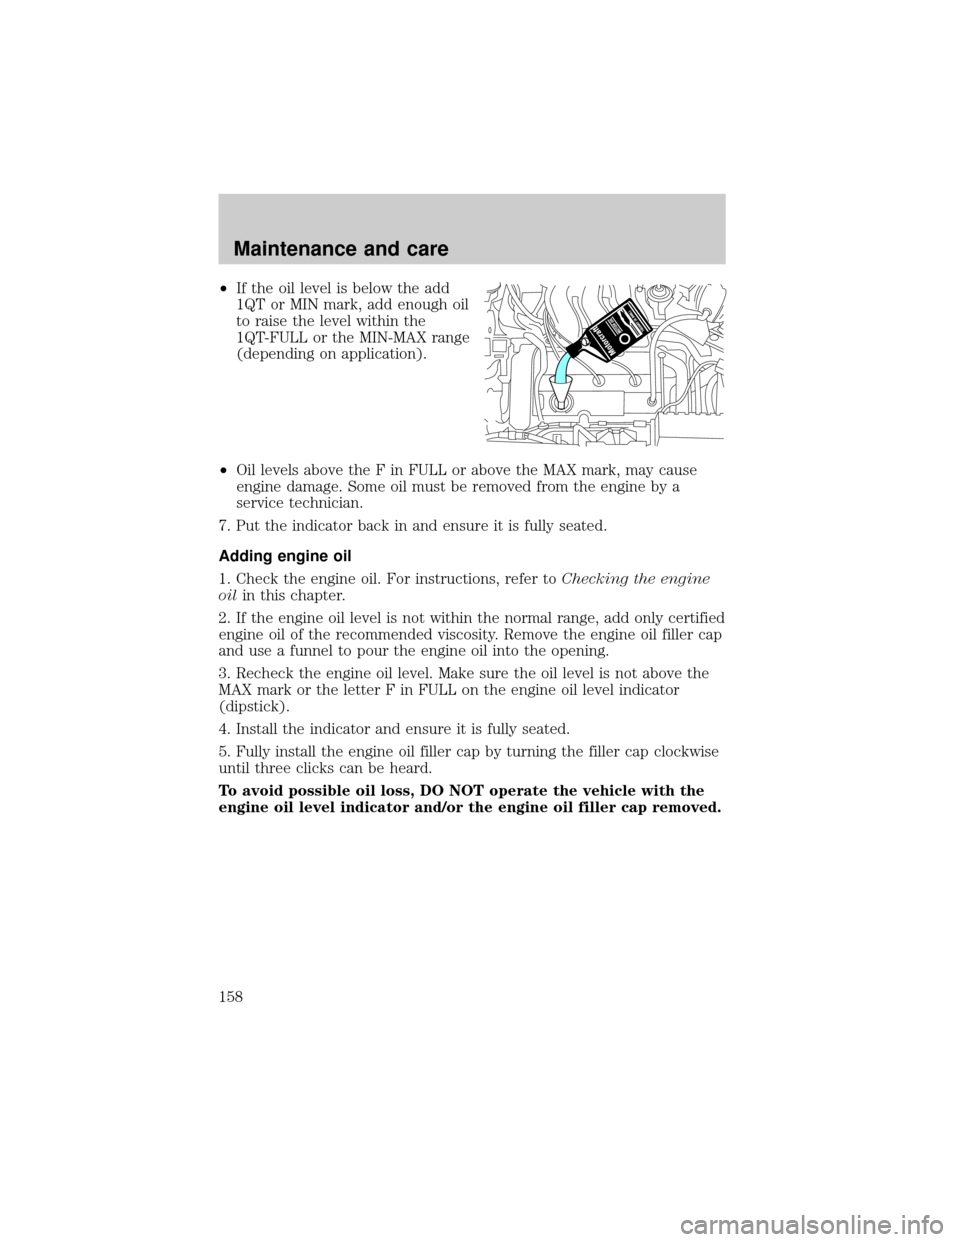
²If the oil level is below the add
1QT or MIN mark, add enough oil
to raise the level within the
1QT-FULL or the MIN-MAX range
(depending on application).
²Oil levels above the F in FULL or above the MAX mark, may cause
engine damage. Some oil must be removed from the engine by a
service technician.
7. Put the indicator back in and ensure it is fully seated.
Adding engine oil
1. Check the engine oil. For instructions, refer toChecking the engine
oilin this chapter.
2. If the engine oil level is not within the normal range, add only certified
engine oil of the recommended viscosity. Remove the engine oil filler cap
and use a funnel to pour the engine oil into the opening.
3. Recheck the engine oil level. Make sure the oil level is not above the
MAX mark or the letter F in FULL on the engine oil level indicator
(dipstick).
4. Install the indicator and ensure it is fully seated.
5. Fully install the engine oil filler cap by turning the filler cap clockwise
until three clicks can be heard.
To avoid possible oil loss, DO NOT operate the vehicle with the
engine oil level indicator and/or the engine oil filler cap removed.
Maintenance and care
158
Page 161 of 240

WINDSHIELD WASHER FLUID
Washer fluid
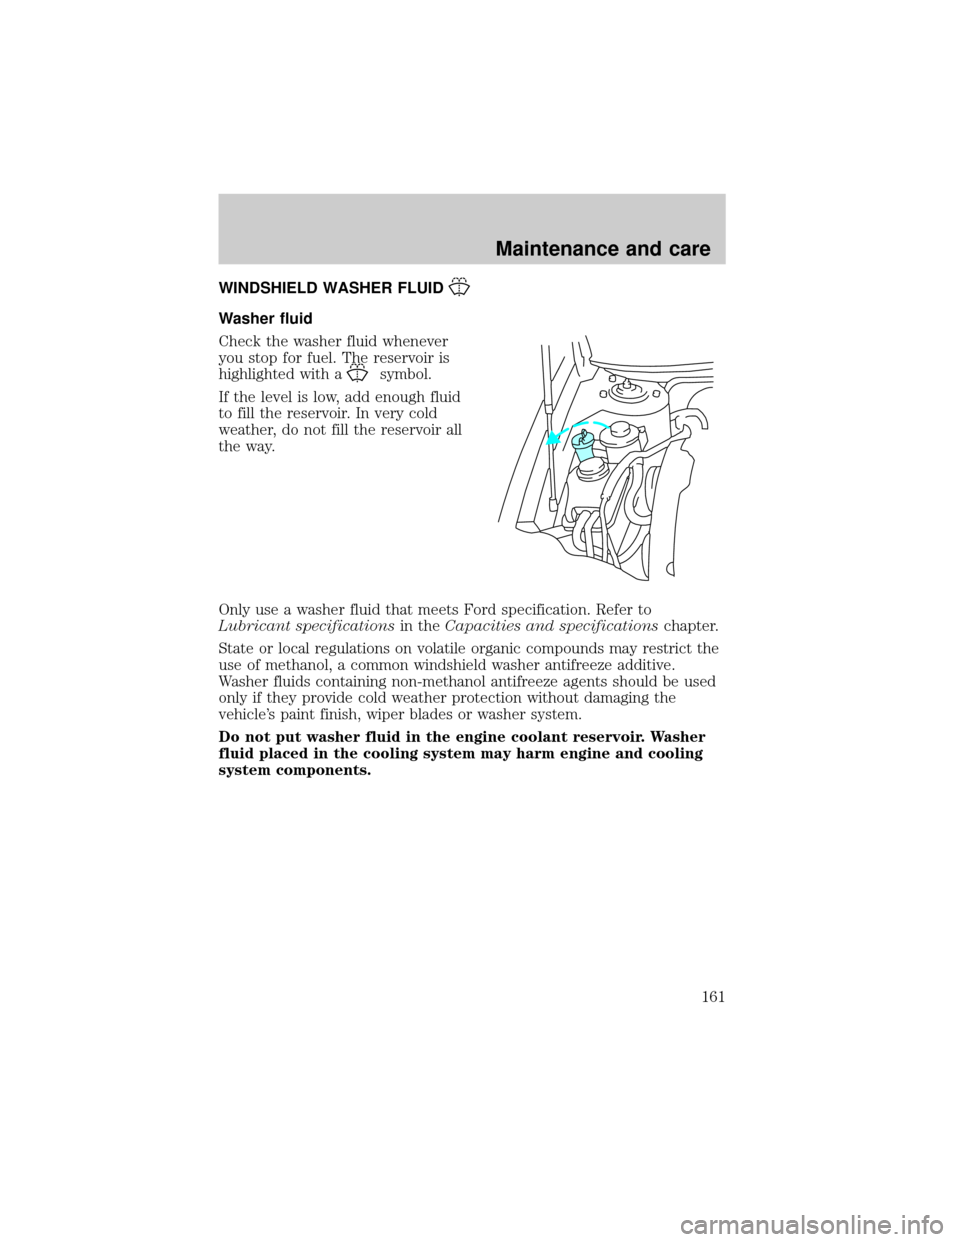
Check the washer fluid whenever
you stop for fuel. The reservoir is
highlighted with a
symbol.
If the level is low, add enough fluid
to fill the reservoir. In very cold
weather, do not fill the reservoir all
the way.
Only use a washer fluid that meets Ford specification. Refer to
Lubricant specificationsin theCapacities and specificationschapter.
State or local regulations on volatile organic compounds may restrict the
use of methanol, a common windshield washer antifreeze additive.
Washer fluids containing non-methanol antifreeze agents should be used
only if they provide cold weather protection without damaging the
vehicle's paint finish, wiper blades or washer system.
Do not put washer fluid in the engine coolant reservoir. Washer
fluid placed in the cooling system may harm engine and cooling
system components.
Maintenance and care
161
Page 162 of 240

Checking and adding washer fluid for the liftgate (if equipped)
The opening for the reservoir is
located on the passenger side under
the tail lamp. Refill this reservoir
with the same fluid you use for your
windshield.
ENGINE COOLANT
Checking engine coolant
Your vehicle was factory-filled with a 50/50 engine coolant and water
concentration. If the concentration of coolant falls below 40% or above
60%, the engine parts could become damaged or not work properly.A
50/50 mixture of coolant and water provides the following:
²freeze protection down to -36É C (-34É F).
²boiling protection up to 129É C (265É F).
²protection against rust and other forms of corrosion.
²enables calibrated gages to function properly.
Maintenance and care
162
Page 163 of 240

When the engine is cold, check the
level of the engine coolant in the
reservoir.
²The engine coolant should be at the ªcold fill levelº or within the ªcold
fill rangeº as listed on the engine coolant reservoir (depending upon
application).
²Refer to the scheduled maintenance guide for service interval
schedules.
²Be sure to read and understandPrecautions when servicing your
vehiclein this chapter.
If the engine coolant has not been checked at the recommended interval,
the engine coolant reservoir may become low or empty. If the reservoir is
low or empty, add engine coolant to the reservoir. Refer toAdding
engine coolantin this chapter.
Automotive fluids are not interchangeable; do not use engine
coolant, antifreeze or windshield washer fluid outside of its
specified function and vehicle location.
Adding engine coolant
Use only Ford Premium Engine Coolant (green in color) or a
premium engine coolant that meets Ford specification
ESE-M97B44±A.
Maintenance and care
163
Page 165 of 240

Check the coolant level in the reservoir before you drive your vehicle the
next few times (with the engine cool). If necessary, add a50/50
mixtureof engine coolant and distilled water to the engine coolant
reservoir until the coolant level is at the ªcold fill levelº or within the
ªcold fill rangeº as listed on the reservoir (depending upon application).
Have your dealer check the engine cooling system for leaks if you have
to add more than 1.0 liter (1.0 quart) of engine coolant per month.
To avoid scalding hot steam or coolant from being released from
the engine cooling system, never remove the pressure relief cap
from the engine coolant reservoir while the engine is running or hot.
Failure to follow this warning may result in damage to the engine's
cooling system and possible severe personal injury.
If you must remove the pressure relief cap from the engine coolant
reservoir, follow these steps to avoid personal injury:
1. Before you remove the cap, turn the engine off and let it cool.
2. When the engine is cool, wrap a thick cloth around the cap. Slowly
turn cap counterclockwise until pressure begins to release.
3. Step back while the pressure releases.
4. When you are sure that all the pressure has been released, use the
cloth to turn it counterclockwise and remove the cap.
Recycled engine coolant
Ford Motor Company recommends the use of a recycled engine coolant
produced by Ford-approved processes.
Not all coolant recycling processes produce coolant which meets Ford
specification WSS-M97B51±A1. Use of a recycled engine coolant which
does not meet the Ford G05 specification may harm engine and cooling
system components.
Always dispose of used automotive fluids in a responsible manner.
Follow your community's regulations and standards for recycling and
disposing of automotive fluids.
Coolant refill capacity
To find out how much fluid your vehicle's cooling system can hold, refer
toRefill capacitiesin theCapacities and specificationschapter.
Maintenance and care
165
Page 167 of 240

CHECKING AND ADDING POWER STEERING FLUID
Check the power steering fluid.
Refer to the scheduled maintenance
guide for the service interval
schedules. If adding fluid is
necessary, use only MERCONtAT F.
1. Start the engine and let it run until it reaches normal operating
temperature (the engine coolant temperature gauge indicator will be
near the center of the normal area between H and C).
2. While the engine idles, turn the steering wheel left and right several
times.
3. Turn the engine off.
Perform steps 4 and 5 following the procedure for your engine.
3.0L V6 Vulcan engine
4. Check the fluid level on the
dipstick. It should be between the
arrows in the FULL HOT range. Do
not add fluid if the level is within
this range.
FULL HOT
Maintenance and care
167