horn Mercury Sable 2001 Owner's Manuals
[x] Cancel search | Manufacturer: MERCURY, Model Year: 2001, Model line: Sable, Model: Mercury Sable 2001Pages: 240, PDF Size: 2.22 MB
Page 64 of 240
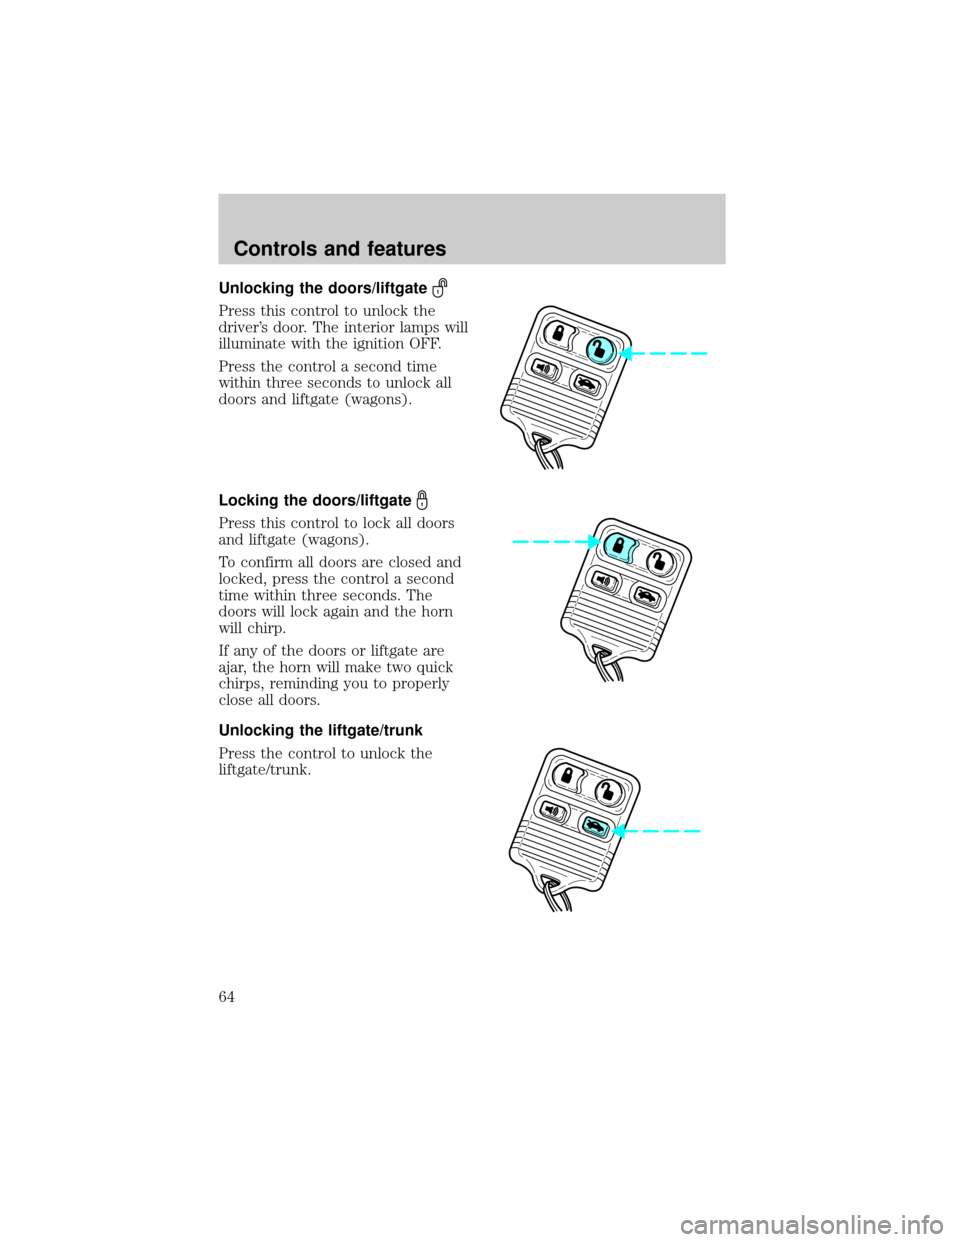
Unlocking the doors/liftgate
Press this control to unlock the
driver's door. The interior lamps will
illuminate with the ignition OFF.
Press the control a second time
within three seconds to unlock all
doors and liftgate (wagons).
Locking the doors/liftgate
Press this control to lock all doors
and liftgate (wagons).
To confirm all doors are closed and
locked, press the control a second
time within three seconds. The
doors will lock again and the horn
will chirp.
If any of the doors or liftgate are
ajar, the horn will make two quick
chirps, reminding you to properly
close all doors.
Unlocking the liftgate/trunk
Press the control to unlock the
liftgate/trunk.
Controls and features
64
Page 67 of 240
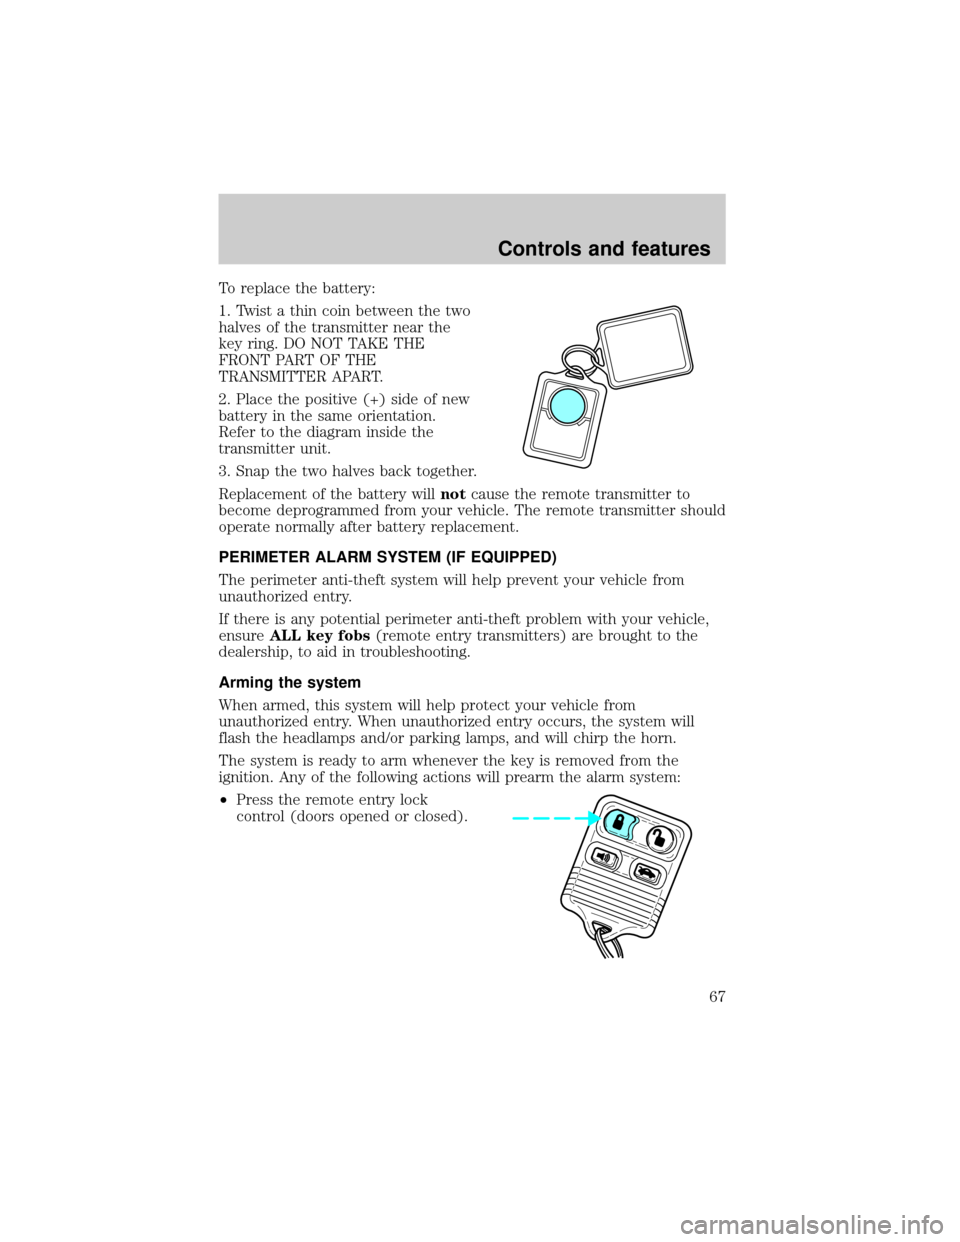
To replace the battery:
1. Twist a thin coin between the two
halves of the transmitter near the
key ring. DO NOT TAKE THE
FRONT PART OF THE
TRANSMITTER APART.
2. Place the positive (+) side of new
battery in the same orientation.
Refer to the diagram inside the
transmitter unit.
3. Snap the two halves back together.
Replacement of the battery willnotcause the remote transmitter to
become deprogrammed from your vehicle. The remote transmitter should
operate normally after battery replacement.
PERIMETER ALARM SYSTEM (IF EQUIPPED)
The perimeter anti-theft system will help prevent your vehicle from
unauthorized entry.
If there is any potential perimeter anti-theft problem with your vehicle,
ensureALL key fobs(remote entry transmitters) are brought to the
dealership, to aid in troubleshooting.
Arming the system
When armed, this system will help protect your vehicle from
unauthorized entry. When unauthorized entry occurs, the system will
flash the headlamps and/or parking lamps, and will chirp the horn.
The system is ready to arm whenever the key is removed from the
ignition. Any of the following actions will prearm the alarm system:
²Press the remote entry lock
control (doors opened or closed).
Controls and features
67
Page 68 of 240
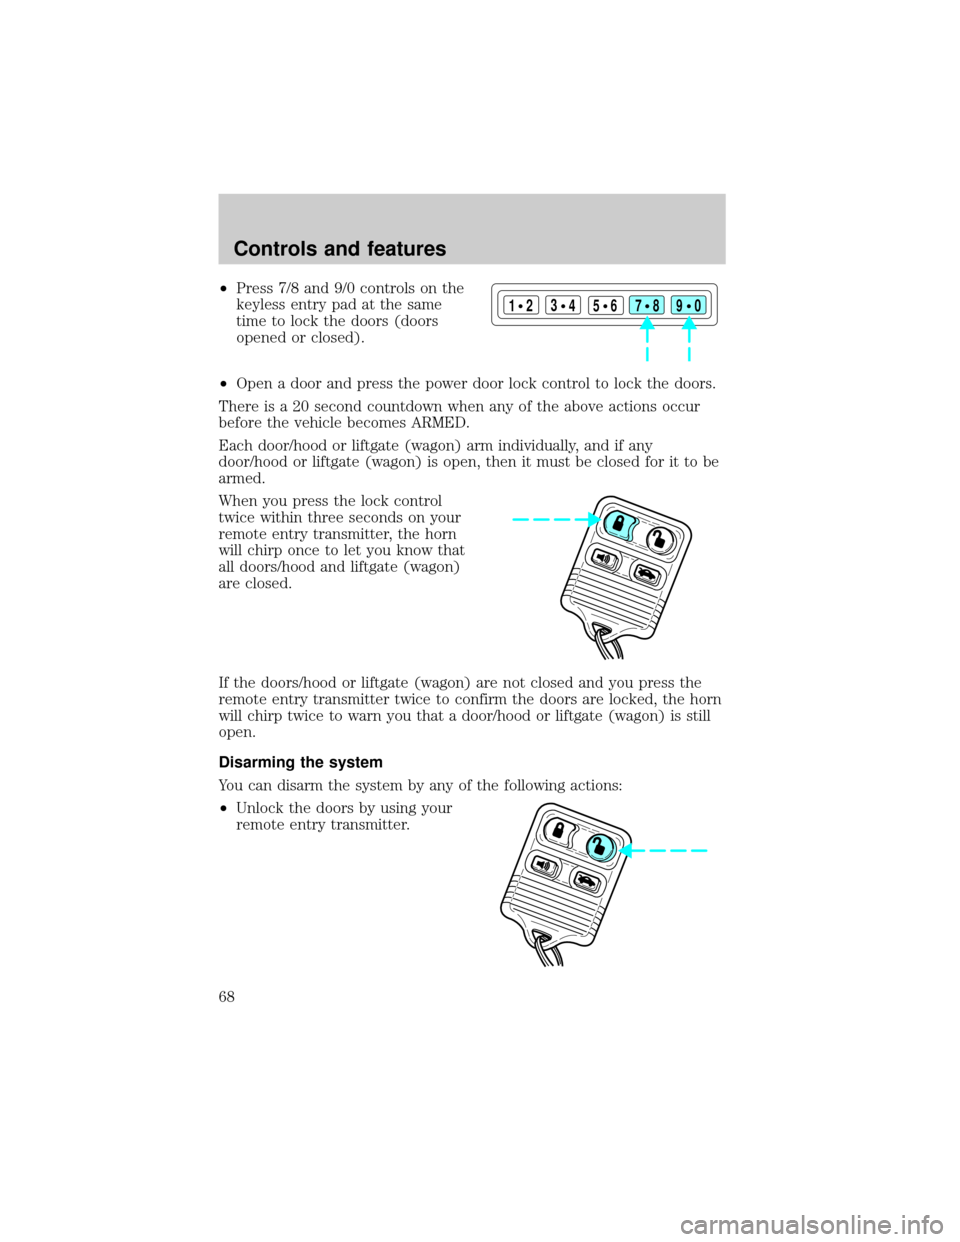
²Press 7/8 and 9/0 controls on the
keyless entry pad at the same
time to lock the doors (doors
opened or closed).
²Open a door and press the power door lock control to lock the doors.
There is a 20 second countdown when any of the above actions occur
before the vehicle becomes ARMED.
Each door/hood or liftgate (wagon) arm individually, and if any
door/hood or liftgate (wagon) is open, then it must be closed for it to be
armed.
When you press the lock control
twice within three seconds on your
remote entry transmitter, the horn
will chirp once to let you know that
all doors/hood and liftgate (wagon)
are closed.
If the doors/hood or liftgate (wagon) are not closed and you press the
remote entry transmitter twice to confirm the doors are locked, the horn
will chirp twice to warn you that a door/hood or liftgate (wagon) is still
open.
Disarming the system
You can disarm the system by any of the following actions:
²Unlock the doors by using your
remote entry transmitter.
123
45678
90
Controls and features
68
Page 69 of 240
²Unlock the doors by using your
keyless entry pad.
²Unlock the doors or liftgate with a key. Turn the key full travel
(toward the front of the vehicle) to make sure the alarm disarms.
²Turn ignition to ON.
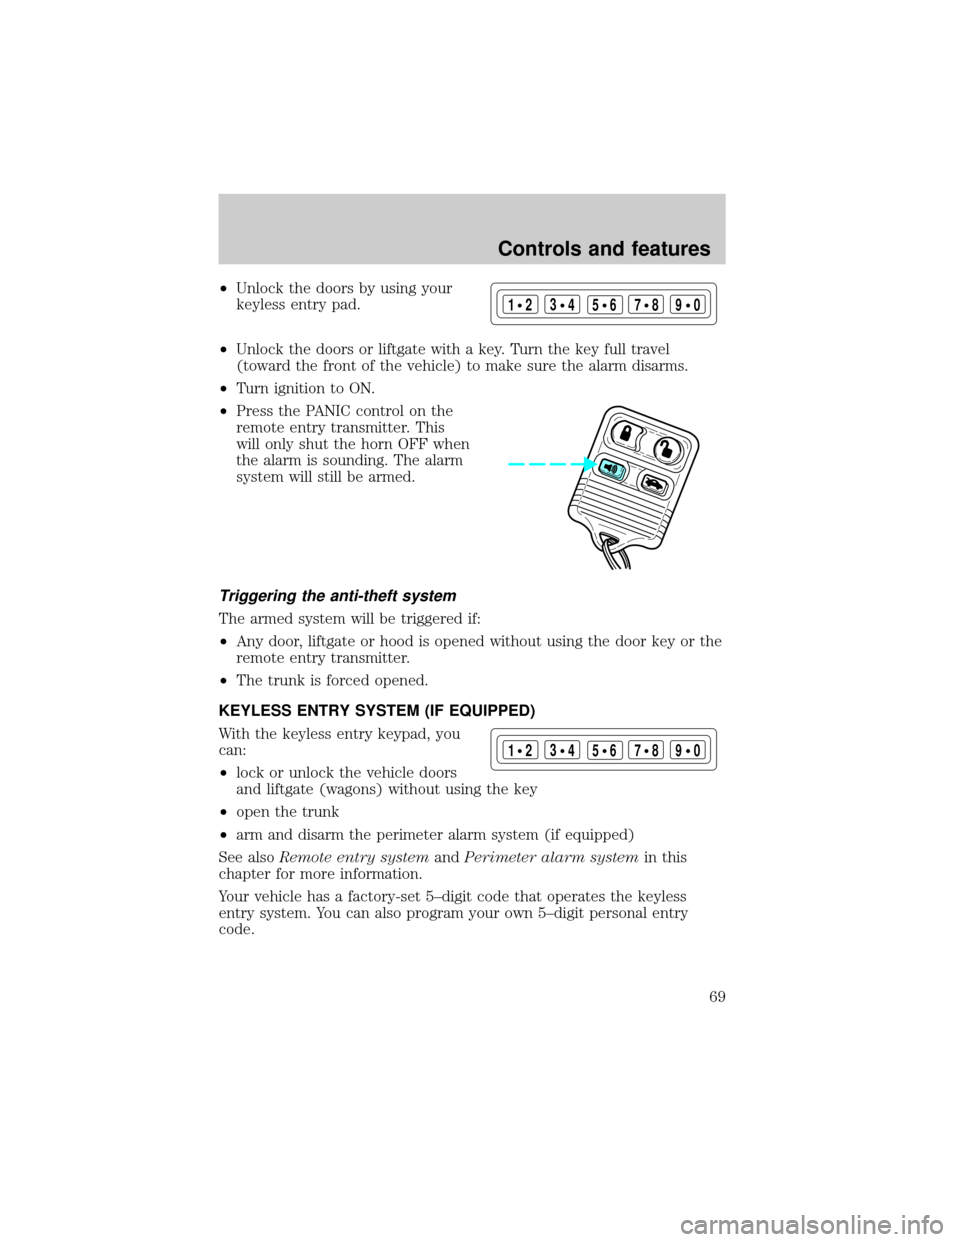
²Press the PANIC control on the
remote entry transmitter. This
will only shut the horn OFF when
the alarm is sounding. The alarm
system will still be armed.
Triggering the anti-theft system
The armed system will be triggered if:
²Any door, liftgate or hood is opened without using the door key or the
remote entry transmitter.
²The trunk is forced opened.
KEYLESS ENTRY SYSTEM (IF EQUIPPED)
With the keyless entry keypad, you
can:
²lock or unlock the vehicle doors
and liftgate (wagons) without using the key
²open the trunk
²arm and disarm the perimeter alarm system (if equipped)
See alsoRemote entry systemandPerimeter alarm systemin this
chapter for more information.
Your vehicle has a factory-set 5±digit code that operates the keyless
entry system. You can also program your own 5±digit personal entry
code.
123
45678
90
123
45678
90
Controls and features
69
Page 72 of 240

Deactivating/activating autolock
There are 2 methods to enable/disable this feature. One through your
dealer and the second with a door lock sequence using the following
instructions:
1. Turn the ignition key to RUN, then press the door UNLOCK control
button 3 times.
2. Turn the ignition key to OFF, then press the door UNLOCK control
button 3 times.
3. Turn the ignition key to RUN, within five seconds press the door
UNLOCK control button 1 time.
The user should receive ahorn chirpto indicate the system has been
altered.
Pressing the power door UNLOCK control button again will toggle the
Autolock/Relock states.
²Turn ignition to OFF to exit.
Deactivating/activating horn chirp
There are 2 methods to enable/disable this feature. One through your
dealer and the second with a door lock sequence using the following
instructions:
1. Turn the ignition key to RUN, then press the door UNLOCK control
button 3 times.
2. Turn the ignition key to OFF, then press the door UNLOCK control
button 3 times.
3. Turn the ignition key to RUN, within five seconds press the door
UNLOCK control button 2 times.
The user should receive twohorn chirpsto indicate the system had
been altered.
Pressing the power door UNLOCK control button two times again will
toggle the Autolock/Relock states.
²Turn ignition to OFF to exit.
Controls and features
72
Page 140 of 240
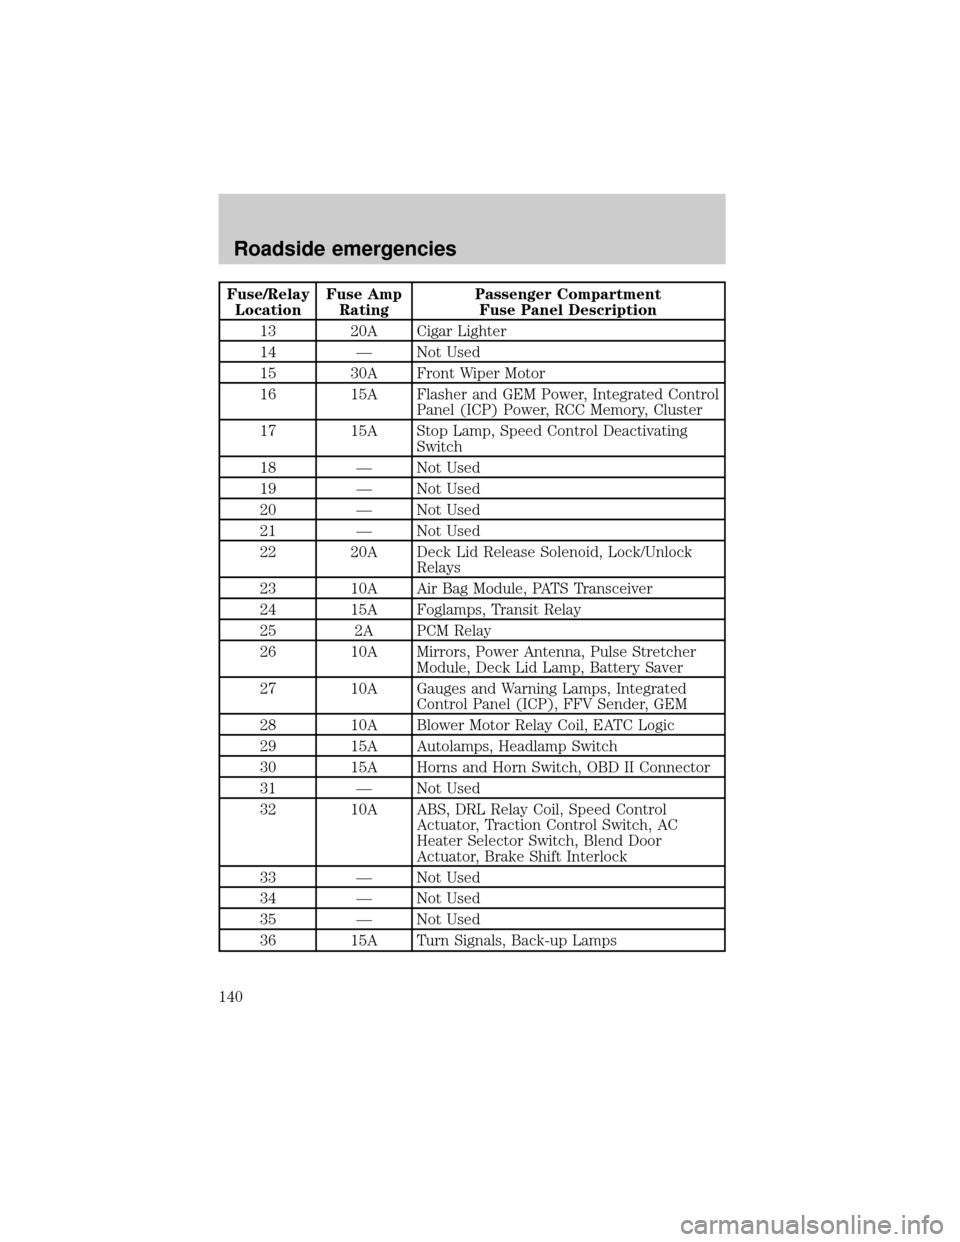
Fuse/Relay
LocationFuse Amp
RatingPassenger Compartment
Fuse Panel Description
13 20A Cigar Lighter
14 Ð Not Used
15 30A Front Wiper Motor
16 15A Flasher and GEM Power, Integrated Control
Panel (ICP) Power, RCC Memory, Cluster
17 15A Stop Lamp, Speed Control Deactivating
Switch
18 Ð Not Used
19 Ð Not Used
20 Ð Not Used
21 Ð Not Used
22 20A Deck Lid Release Solenoid, Lock/Unlock
Relays
23 10A Air Bag Module, PATS Transceiver
24 15A Foglamps, Transit Relay
25 2A PCM Relay
26 10A Mirrors, Power Antenna, Pulse Stretcher
Module, Deck Lid Lamp, Battery Saver
27 10A Gauges and Warning Lamps, Integrated
Control Panel (ICP), FFV Sender, GEM
28 10A Blower Motor Relay Coil, EATC Logic
29 15A Autolamps, Headlamp Switch
30 15A Horns and Horn Switch, OBD II Connector
31 Ð Not Used
32 10A ABS, DRL Relay Coil, Speed Control
Actuator, Traction Control Switch, AC
Heater Selector Switch, Blend Door
Actuator, Brake Shift Interlock
33 Ð Not Used
34 Ð Not Used
35 Ð Not Used
36 15A Turn Signals, Back-up Lamps
Roadside emergencies
140