hood open Mercury Sable 2005 Owner's Manuals
[x] Cancel search | Manufacturer: MERCURY, Model Year: 2005, Model line: Sable, Model: Mercury Sable 2005Pages: 248, PDF Size: 2.46 MB
Page 31 of 248
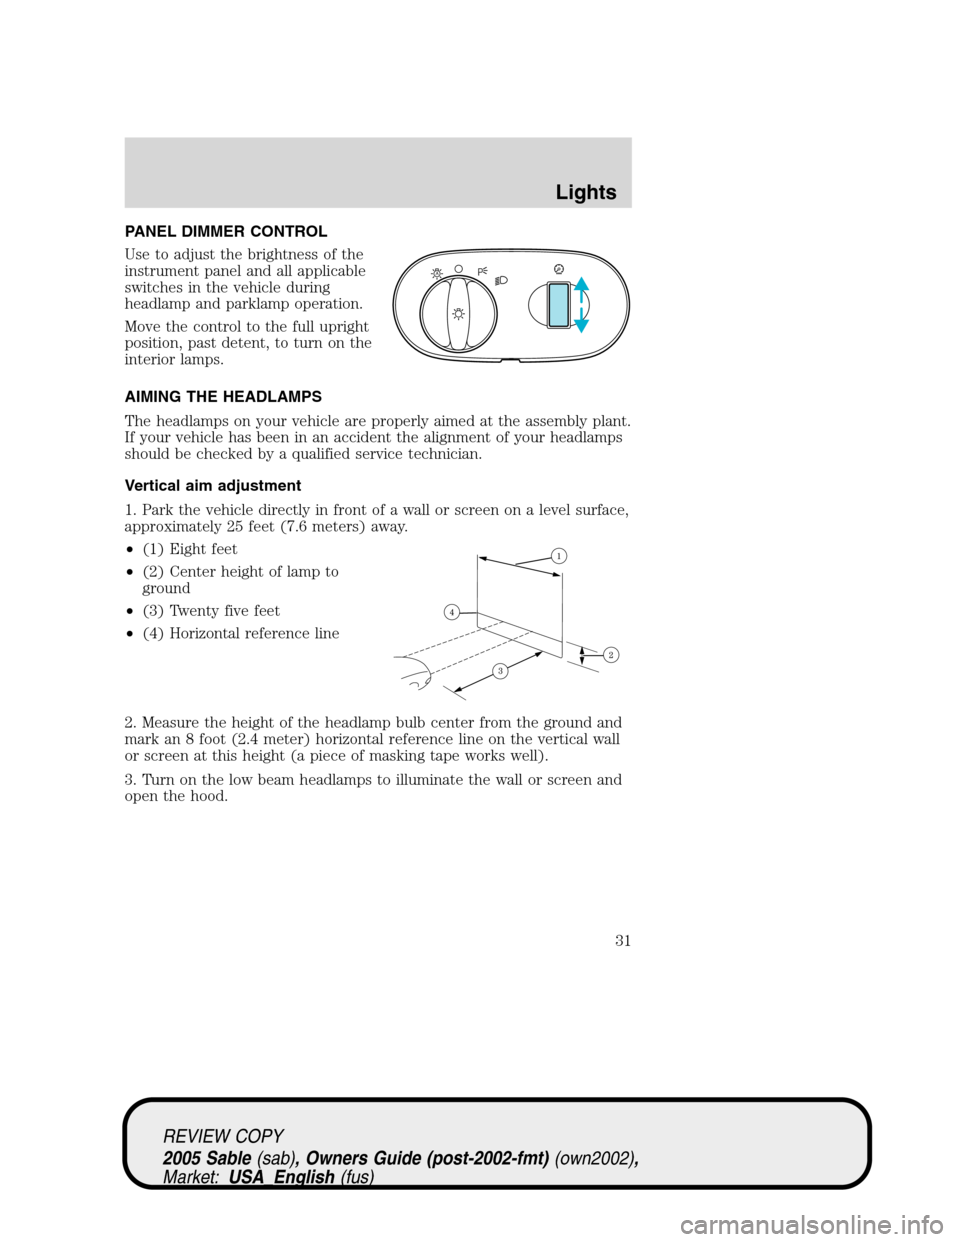
PANEL DIMMER CONTROL
Use to adjust the brightness of the
instrument panel and all applicable
switches in the vehicle during
headlamp and parklamp operation.
Move the control to the full upright
position, past detent, to turn on the
interior lamps.
AIMING THE HEADLAMPS
The headlamps on your vehicle are properly aimed at the assembly plant.
If your vehicle has been in an accident the alignment of your headlamps
should be checked by a qualified service technician.
Vertical aim adjustment
1. Park the vehicle directly in front of a wall or screen on a level surface,
approximately 25 feet (7.6 meters) away.
•(1) Eight feet
•(2) Center height of lamp to
ground
•(3) Twenty five feet
•(4) Horizontal reference line
2. Measure the height of the headlamp bulb center from the ground and
mark an 8 foot (2.4 meter) horizontal reference line on the vertical wall
or screen at this height (a piece of masking tape works well).
3. Turn on the low beam headlamps to illuminate the wall or screen and
open the hood.
A
REVIEW COPY
2005 Sable(sab), Owners Guide (post-2002-fmt)(own2002),
Market:USA_English(fus)
Lights
31
Page 36 of 248
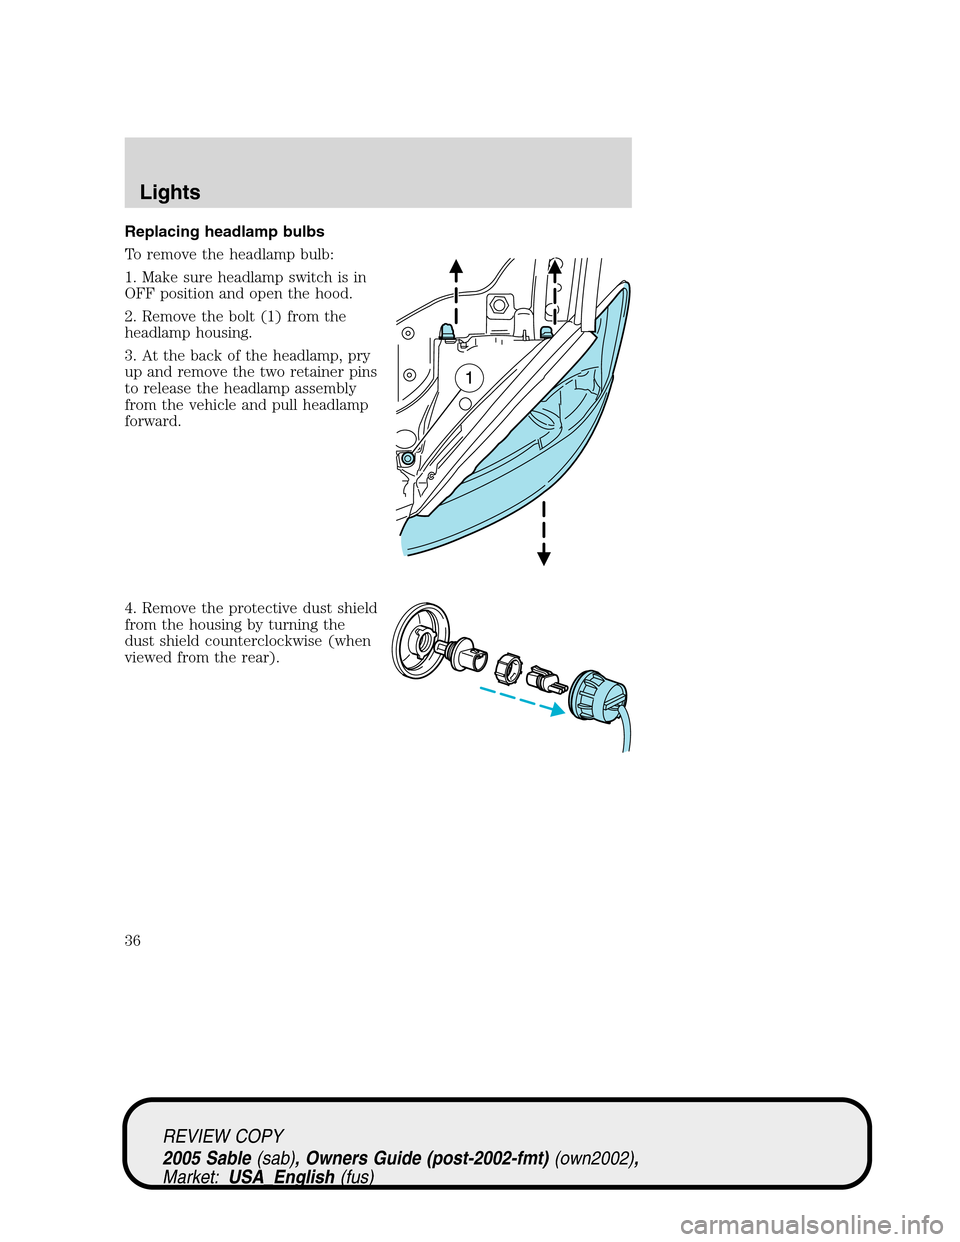
Replacing headlamp bulbs
To remove the headlamp bulb:
1. Make sure headlamp switch is in
OFF position and open the hood.
2. Remove the bolt (1) from the
headlamp housing.
3. At the back of the headlamp, pry
up and remove the two retainer pins
to release the headlamp assembly
from the vehicle and pull headlamp
forward.
4. Remove the protective dust shield
from the housing by turning the
dust shield counterclockwise (when
viewed from the rear).
REVIEW COPY
2005 Sable(sab), Owners Guide (post-2002-fmt)(own2002),
Market:USA_English(fus)
Lights
36
Page 38 of 248
2. Install the bulb retaining ring over the plastic base and lock the ring
by rotating clockwise until it snaps into place.
3. Connect the electrical connector to the bulb.
4. Install the protective dust shield and lock the shield by rotating it
clockwise until it locks into position.
5. Carefully position the headlamp assembly onto the vehicle.
6. Hold the headlamp assembly snugly against the vehicle and install the
retainer pins straight down to lock the lamp into place.
7. Before reinstalling the bolt, make sure the retainer pins are fully
seated, and install bolt on headlamp housing.
8. Turn the headlamps on and make sure they work properly. If the
headlamp was correctly aligned before you changed the bulb, you should
not need to align it again.
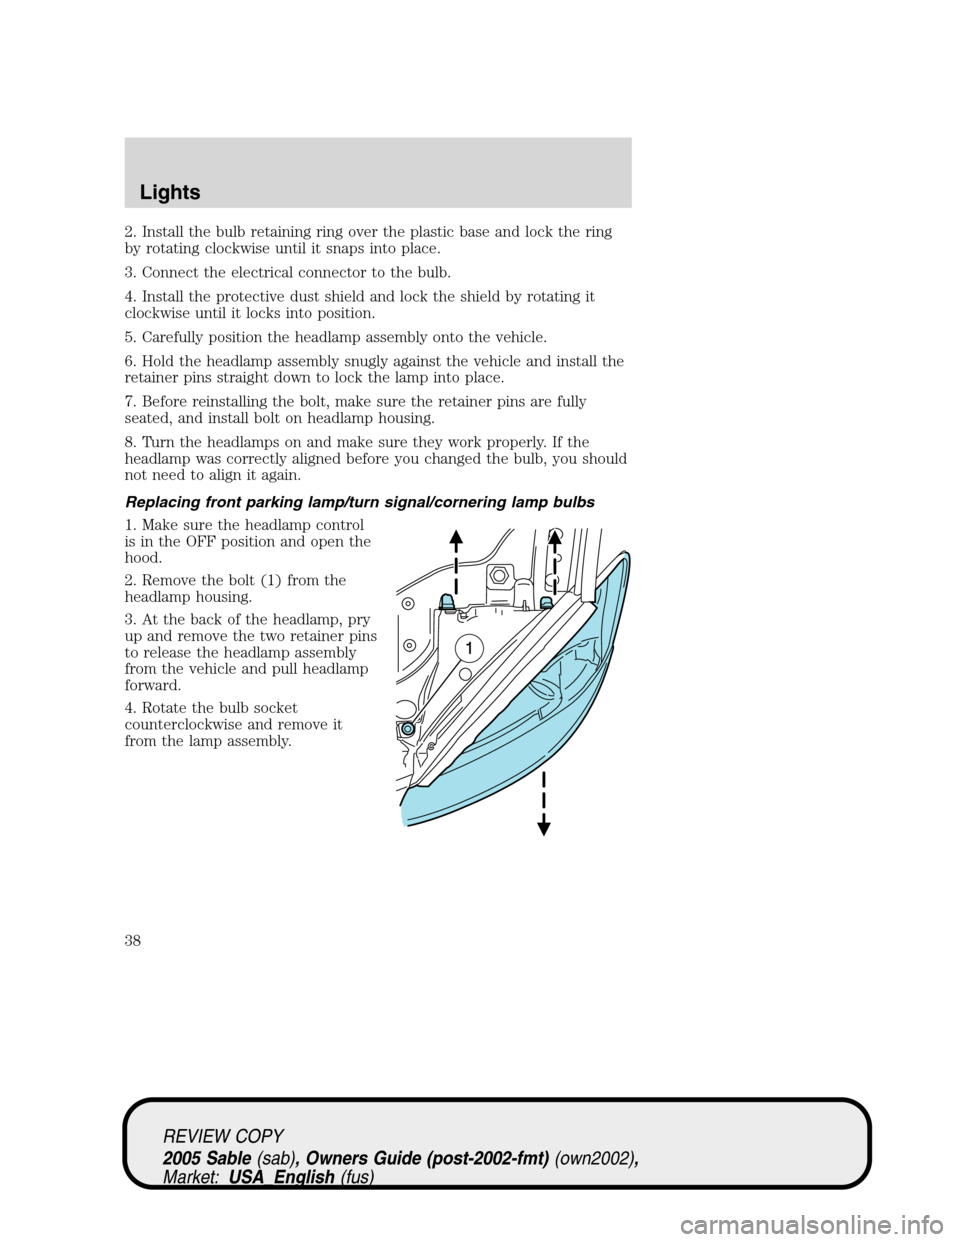
Replacing front parking lamp/turn signal/cornering lamp bulbs
1. Make sure the headlamp control
is in the OFF position and open the
hood.
2. Remove the bolt (1) from the
headlamp housing.
3. At the back of the headlamp, pry
up and remove the two retainer pins
to release the headlamp assembly
from the vehicle and pull headlamp
forward.
4. Rotate the bulb socket
counterclockwise and remove it
from the lamp assembly.
REVIEW COPY
2005 Sable(sab), Owners Guide (post-2002-fmt)(own2002),
Market:USA_English(fus)
Lights
38
Page 85 of 248
9. Your new unprogrammed key is now programmed.
If the key has been successfully programmed it will start the vehicle’s
engine and the theft indicator light will illuminate for three seconds and
then go out. If the key was not successfully programmed, it will not start
your vehicle’s engine and the theft indicator light will flash on and off
rapidly. If failure repeats, bring your vehicle to your dealer to have the
new key(s) programmed.
To program additional new unprogrammed key(s), repeat this procedure
from Step 1 for each additional key.
PERIMETER ALARM SYSTEM (IF EQUIPPED)
The perimeter anti-theft system will warn you in the event of an
unauthorized entry to your vehicle.
If there is any potential perimeter anti-theft problem with your vehicle,
ensureALL remote entry transmittersare taken to the dealership to
aid in troubleshooting.
Arming the system
When armed, this system will respond if unauthorized entry is
attempted. When unauthorized entry occurs, the system will flash the
headlamps and/or parking lamps and will sound the horn.
The system is ready to arm whenever key is removed from the ignition.
Either of the following actions will prearm the alarm system:
•Press the
control on the remote entry transmitter.
•Press the 7•8 and the 9•0 on the keyless entry keypad (if
equipped) at the same time.
•Open a door and press the power door lock control to lock all the
doors.
Note:The hood, each door and the liftgate (wagon) arm individually,
and if any of them are open, they must be closed in order to be armed.
When you press the
control on the remote entry transmitter twice
within three seconds:
•the horn will chirp once to indicate the hood, each door and the
liftgate (wagon) are closed.
•the horn will chirp twice to indicate that either the hood, a door or
the liftgate (wagon) is still open.
REVIEW COPY
2005 Sable(sab), Owners Guide (post-2002-fmt)(own2002),
Market:USA_English(fus)
Locks and Security
85
Page 86 of 248
Disarming the system
You can disarm the system by any of the following actions:
•Unlock the doors by pressing the
control on your remote entry
transmitter.
•Unlock the doors by using the keyless entry pad.
•Unlock the doors with a key. Turn the key full travel (toward the front
of the vehicle) to ensure the alarm disarms.
•Turn the ignition to the 4 (ON) position.
•Press the
control on the remote entry transmitter. This will only
shut the horn off when the alarm is sounding; the alarm system will
still be armed.
Triggering the anti-theft system
The armed system will be triggered if:
•Any door, liftgate (wagon) or the hood is opened without using the
key or the remote entry transmitter.
•The trunk key cylinder is forced.
REVIEW COPY
2005 Sable(sab), Owners Guide (post-2002-fmt)(own2002),
Market:USA_English(fus)
Locks and Security
86
Page 204 of 248
Working with the engine on
1. Set the parking brake and ensure the gearshift is securely latched in P
(Park).
2. Block the wheels to prevent the vehicle from moving unexpectedly.
Note:Do not start your engine with the air cleaner removed and do not
remove it while the engine is running.
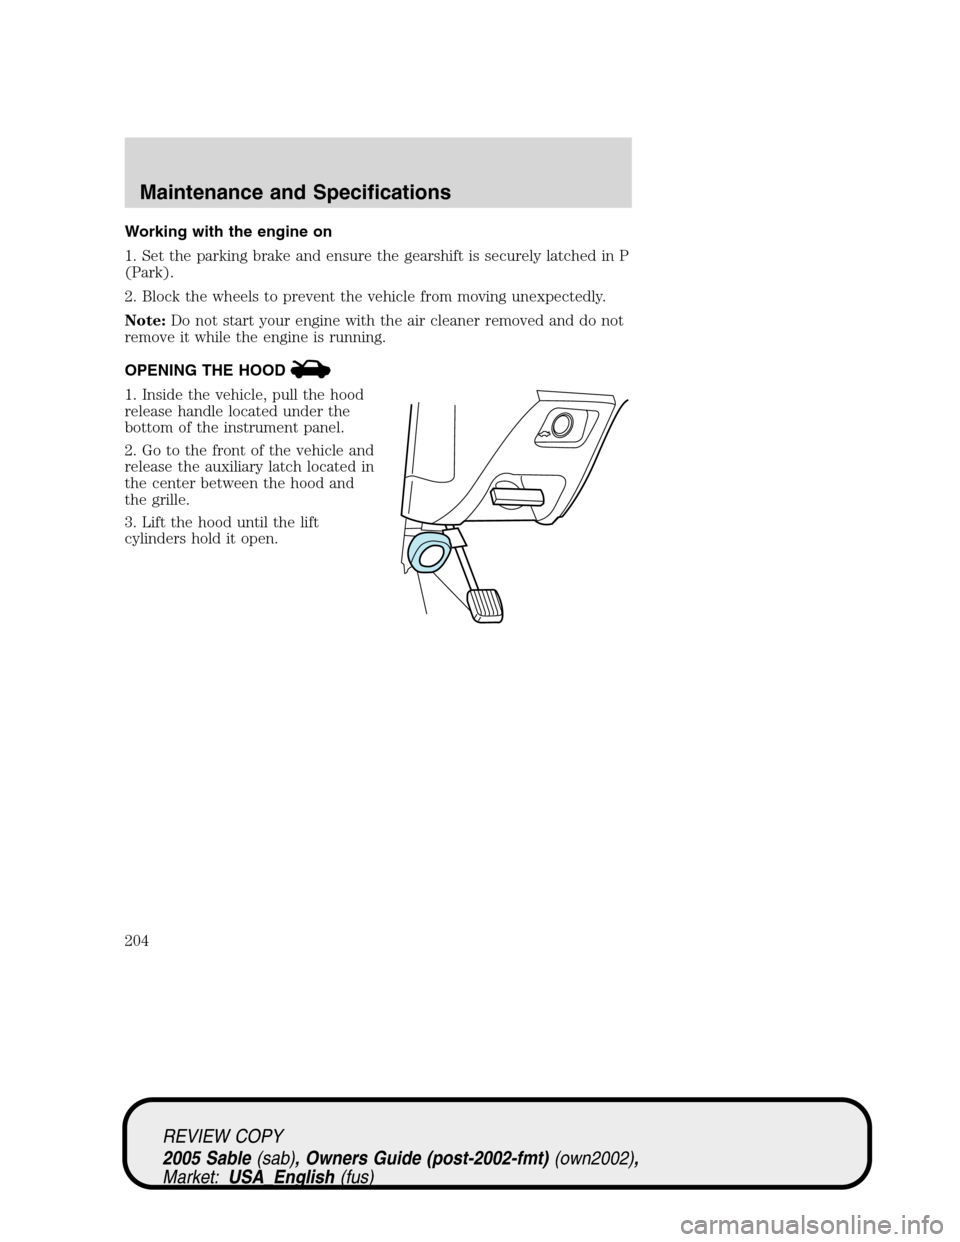
OPENING THE HOOD
1. Inside the vehicle, pull the hood
release handle located under the
bottom of the instrument panel.
2. Go to the front of the vehicle and
release the auxiliary latch located in
the center between the hood and
the grille.
3. Lift the hood until the lift
cylinders hold it open.
REVIEW COPY
2005 Sable(sab), Owners Guide (post-2002-fmt)(own2002),
Market:USA_English(fus)
Maintenance and Specifications
204
Page 208 of 248
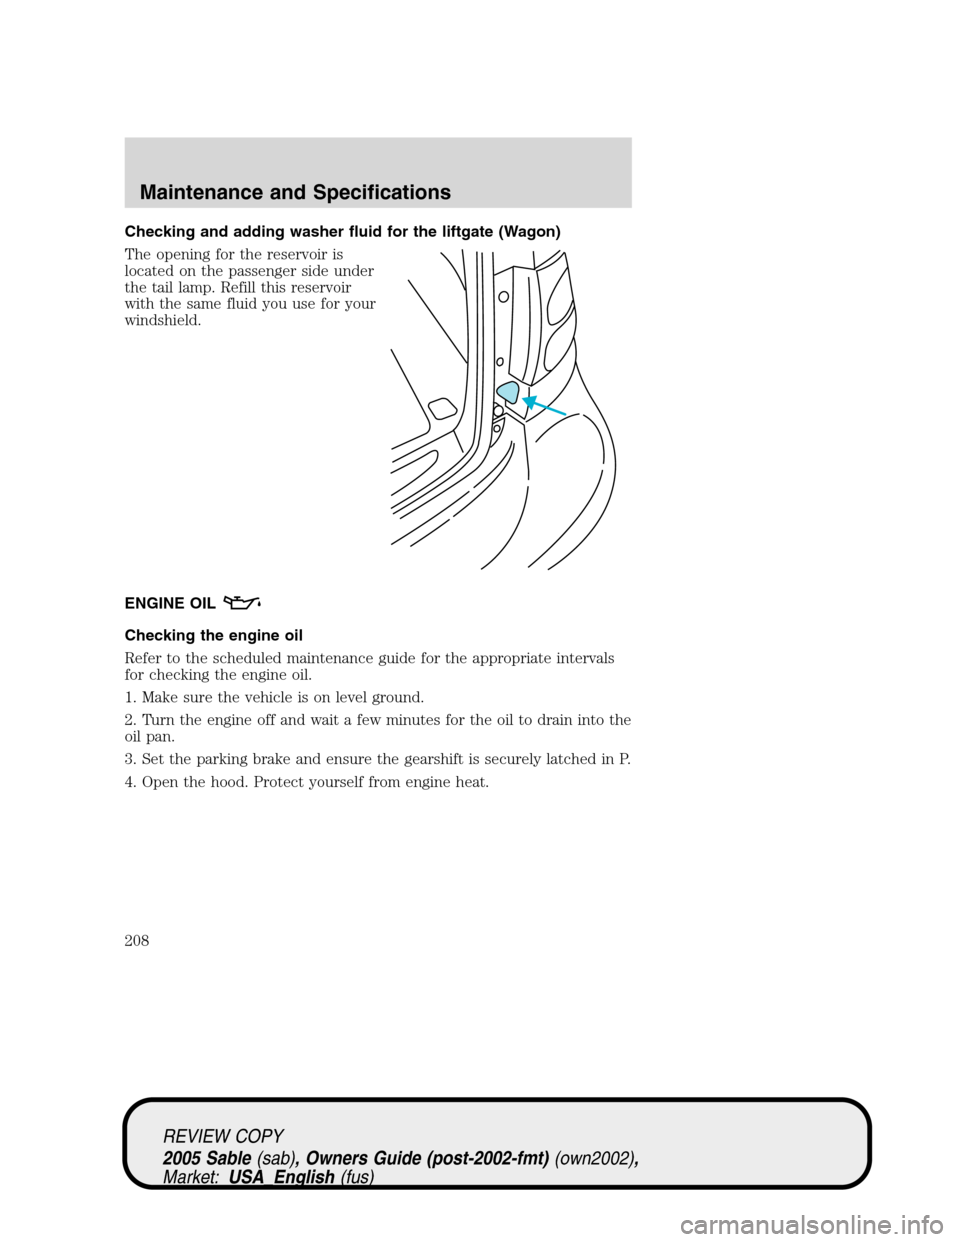
Checking and adding washer fluid for the liftgate (Wagon)
The opening for the reservoir is
located on the passenger side under
the tail lamp. Refill this reservoir
with the same fluid you use for your
windshield.
ENGINE OIL
Checking the engine oil
Refer to the scheduled maintenance guide for the appropriate intervals
for checking the engine oil.
1. Make sure the vehicle is on level ground.
2. Turn the engine off and wait a few minutes for the oil to drain into the
oil pan.
3. Set the parking brake and ensure the gearshift is securely latched in P.
4. Open the hood. Protect yourself from engine heat.
REVIEW COPY
2005 Sable(sab), Owners Guide (post-2002-fmt)(own2002),
Market:USA_English(fus)
Maintenance and Specifications
208
Page 245 of 248
Engine oil ..................................208
checking and adding ..............208
dipstick ....................................208
filter, specifications ........211, 234
recommendations ...................211
refill capacities ........................235
specifications ..................236–237
Exhaust fumes ..........................164
F
Flexible Fuel Vehicle (FFV) ....219
Floor mats ...................................68
Fluid capacities .........................235
Foglamps .....................................29
Fuel ............................................219
calculating fuel
economy ............................59, 225
cap ...........................................221
capacity ...................................235
choosing the right fuel ...........222
comparisons with EPA fuel
economy estimates .................227
detergent in fuel .....................224
filling your vehicle with
fuel ...........................219, 221, 225
filter, specifications ........224, 234
fuel pump shut-off switch .....174
improving fuel economy ........225
octane rating ...................222, 237
quality ......................................223
running out of fuel .................224
safety information relating to
automotive fuels .....................219
Fuel - flex fuel vehicle
(FFV) .................................219, 222
Fuses ..........................................176G
Garage Door Opener (see
Homelink wireless control
system) ........................................53
Gas cap (see Fuel cap) ............221
Gas mileage
(see Fuel economy) .................225
Gauges .........................................13
H
Hazard flashers .........................174
Headlamps ...................................29
aiming ........................................31
autolamp system .......................29
bulb specifications ....................35
daytime running lights .............30
flash to pass ..............................30
high beam .................................30
replacing bulbs .........................36
turning on and off ....................29
Heating
heating and air conditioning
system .................................23, 25
Homelink wireless control
system ..........................................53
Hood ..........................................204
I
Ignition ...............................160, 237
Infant seats (see Safety seats)..121
Inspection/maintenance (I/M)
testing ........................................229
Instrument panel
cleaning ...................................200
cluster ........................................10
lighting up panel and interior...31
REVIEW COPY
2005 Sable(sab), Owners Guide (post-2002-fmt)(own2002),
Market:USA_English(fus)
Index
245